What can be made from leftover building materials: DIY crafts. Docking block house
From old wood you can make a garden path, steps, country furniture, and a firewood shed. See how to use scrap boards for gardening tools.
Many people are familiar with this picture: when you go into a country shed, the shovel tries to fall, and the rake, if you step on it, hits you on the head. Sometimes it's so hard to find the right tool, so it is necessary to make an organizer for your garden equipment. Here is another problem regarding where to put the old tree, or rather, boards, that will be resolved.
Organizer for garden tools made from PVC pipe scraps
It is convenient when each garden tool is in its place. In addition, it’s good when the organizer for it looks beautiful and is made from leftover old material.

If you were making water supply for your dacha, you probably had scraps of PVC pipes left over. These will come in handy for the next idea. For such an organizer, take:
- narrow thick planks;
- self-tapping screws;
- PVC pipes or their trimmings;
- hacksaw;
- screwdriver;
- level;
- wood saw.
Use a hacksaw to cut PVC. miter saw, plastic pipe cutter or special cutter.
Make the markings, helping yourself with a level, draw three horizontal lines on the wall on which the boards will be fixed. Measure the length of the boards and saw them off. Using self-tapping screws, attach two to the wall. The lower one is needed for support so that garden tools do not touch the ground. We secure it with a small block.

On other boards, mark at the same distance. Attach the PVC pipes with the cut side up.
If you have a straight wall in your shed, then look at what other garden crafts are designed to store hand-held garden tools in them.

For such an organizer you will need:
- PVC pipes;
- double-sided mounting tape;
- hacksaw;
- scissors;
- roulette;
- pencil;
- soft cloth.
Using a tape measure and pencil, mark the wall. Cut pieces of mounting tape to the required length. Taking off protective layer on one side, attach it to the PVC, then remove the second protective layer to attach it to the wall.
To ensure that the tape adheres more firmly, avoid contact with dust and dirt during installation, and do not touch the sticky surface with your hands.

After you have secured the PVC pieces to the wall, put your gardening tools in the section for easy storage.
Attach a board painted with wood varnish to the wall, scraps of PVC pipes. This will solve the problem of storing extension cords. And the brushes can be hung on nails nailed to another wooden board.

If you have pallets at your dacha, they can also be used for storage gardening tools, attaching them to the wall.

Boards and small glass jars turn into a storage system for nails, screws and other small metal objects that are needed in the country.

To implement this interesting idea, take:
- a small board;
- nail;
- hammer;
- self-tapping screws;
- screwdriver;
- small jars with screw caps.
- First you need to make holes in the lids. To do this, turn them over and place them on a board. Make three holes at equal distances using a nail and hammer.
- Place the cover on the bottom wooden shelf, attach with self-tapping screws.
- Place all sorts of little things for handicrafts at the dacha in a jar. All you have to do is screw it to the lid.

Shoe organizer made from old wood
Another problem faced at the dacha concerns shoes. There is not always enough space to accommodate rubber boots, flip flops, slippers for all household members. Interesting ideas will help with this.

If you have an old hanger with hooks, don't throw it away. It is enough to paint it, nail it at the required height, after which the problem of storing shoes will be solved.
In the presence of wooden pallet, this can be done this way: cut it into several parts so that each one has a transverse strip. There is no need to make a bottom for such sections. It is enough to coat the shelves with wood varnish and place shoes in them. Teen and adult will hold up well.

If desired, wooden boxes in which fruits and vegetables are stored can be turned into original crafts for the garden, for example, a shoe organizer.

To create this, take:
- wooden boxes;
- impregnation for wood;
- self-tapping screws;
- dostochki
On the small sidewalls, find the middle, attach the blocks here that hold the shelf. Now connect the sections together as shown in the photo. That is, first, they are fixed in pairs, then in rows, moving them slightly in one direction or the other.
And here are some others interesting ideas can be realized using such boxes.

For the first one, you first need to paint them, when dry, place them vertically and horizontally. For the second one, you don’t even need to spend money on paint. These elements are connected to each other using large paper clips.

This staircase can accommodate many pairs of shoes at once. You just need to nail the boards horizontally to the steps. If desired, you can fill the corner space by attaching rectangular shelves here with self-tapping screws.

Beautifully stacked firewood at the dacha
It’s easy to put things in order not only in the barn, but also in country house, but also on the street. Such firewood sheds will not only become a place for firewood, but will also add some zest to the area. Brushwood is good for heating the stove. Make bundles and put them in the woodshed. To make it you will need so little:
- boards;
- self-tapping screws;
- paint for wood.

It is not difficult to create such a building. The basis is four vertical pillars, which can be made from narrow wide boards or bars. They are fastened to horizontal boards, which also serve as the bottom shelf. Make another one in the center. The roof is gable. Don't forget to cover all elements with antiseptic impregnation.
If you have an old rack, you can also place stacked firewood on it. But first you need to paint it with an antiseptic so that wooden elements served as long as possible. Place the firewood burner near the wall, then it will take up little space and precipitation will not get here.

The next firewood racks will decorate old fence, if you place them in front of it.

For one such structure you will need:
- four bars with a cross section of 50 or 40 cm;
- nails;
- self-tapping screws;
- boards of the same width;
- metal ridge;
- impregnation for wood;
- saw;
- roulette.
- Knock down the bars in pairs in the shape of the letter L, attaching them to the cross bar.
- Measure the distance between the two posts and cut boards to that length. Nail them in starting from the bottom. In this case, each upper one should overlap slightly with the lower one.
- Nail two bars horizontally from below, attach boards to them, on which beautifully stacked firewood will lie. Attach the skate.

If you want to decorate the woodshed, then nail a board under the upper “leg” of the pallet. Place film in the resulting box, add soil, and plant flowers or herbs.
A place for beautifully stacked firewood can also become a bench for relaxation, look how easy it is to make one. This idea will also tell you how to save space.

Place the firewood close to street hearth, under the bench. When the weather is dry, put it on decorative pillows, which are so comfortable to sit on.

Sawn birch firewood can be decorated in an original way. Place the thick and thin branches of this tree in the center, around it - fragments of trunks, secure everything with a rope. A couple of flower pots and a lantern will complete the natural picture.
Where to put the old tree?
If you got a plot where several trees grow or, perhaps, there are some that were broken by a storm. So that you don't have to spend money on exporting this natural material, look how many interesting things you can make from it.

To create such a garden path you will need:
- old tree;
- electric or chainsaw;
- antiseptic;
- geotextiles;
- brush;
- crushed stone;
- sand.
Take high-density geotextiles so that they last as long as possible and weeds cannot grow through them.
Saw the wood into round pieces 4–5 cm thick. Cover them with antiseptic on all sides. If you want to give these elements shine, then after the last layer of impregnation has dried, paint them with wood varnish intended for outdoor use.

First place wide logs on the marked and prepared area, and place smaller ones between them. You can help yourself with a wooden or rubber mallet, tapping the workpieces to better adhere them to the surface.
If you have few such elements, arrange them sparser or pour a layer of crushed stone on the soil, and place wooden blocks on top in the form of a pattern.
Using the same technology, secure the second board at the top so that you can rest your back on it when sitting.
If you know how to work with an electric or chainsaw, then you can make such an outdoor chair.

If you are looking for more simple ideas where to put the old tree, then pay attention to these.

The logs need to be treated with wood varnish; they will become flower pots or other room decor items.
An old tree and its branches can turn into such a stylish mirror, for this you will need:
- plywood;
- dye;
- primer;
- tree;
- jigsaw;
- round mirror;
- liquid Nails;
- wood glue.

Place the mirror on the plywood and outline it. Step back 10 cm from this marking on all sides, outline this outer circle, and cut along this marking.
Apply primer to the frame; when dry, paint the area. Glue the mirror in the center, “placing” it on liquid nails. Apply glue to the wooden circles and secure them to the frame. You can pre-coat them with wood varnish, then glue them to the plywood.

That's how many useful things you can make from wood and leftover PVC pipes. If you are interested in ideas on how to make a shoe organizer, watch the following video.
The second story will teach you how to make a bench from a log without a single nail.
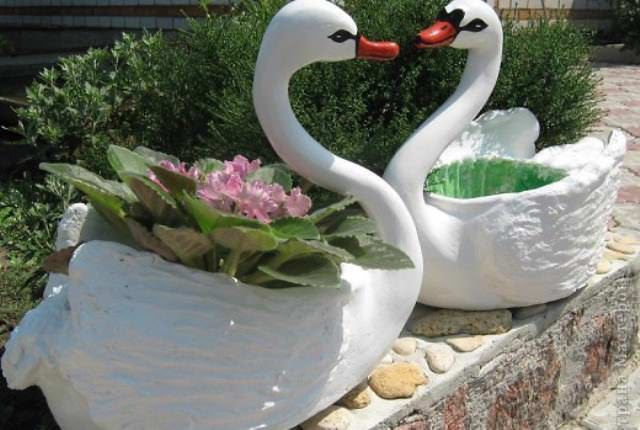
Our country cottage area– forest with four huge hundred-year-old oaks. The outside of the house is decorated with a block house. For flowers, we build various containers from the remains of a block house and trunks of fallen trees, which can be found in abundance behind the fence of a holiday village.


Flowers like to grow in wooden beds more than just in the ground, where trees take all the moisture from them and nutrients and block out the sun. So, we make a form from oak and block house.


We will need:
Materials:
block house trim;
parts of a fallen oak trunk;
self-tapping screws


Tools:
chainsaw; jigsaw;
electric plane; screwdriver;
axe; metal brush.


Flowerbed from a block house
We select suitable-sized pieces of block house for the walls of the “flower girl”. We round the edges of two boards to match the profile of the block house using a jigsaw. We fasten the walls of the box together with self-tapping screws. We polish the end irregularities, remove defects of the block house - in our case this is wane. We make the bottom from scrap materials, for example, from leftover plastic panels. You can also use galvanized iron or any plastic for these purposes. We fasten the plastic panels with self-tapping screws and press washers. We drill small holes in the bottom of the “flower bowl” to allow water to drain. To achieve greater strength and stability, we make two leg strips from the bottom of our flowerbed. To ensure durability and good appearance, we paint the container with an oak-tone impregnation to match the color of the house and other garden structures. Now you can place soil in the “flower pot” and plant any annuals.
And don't forget to do drainage holes in the day.


“Flower girl” made of natural oak
First you need to go into the forest, choose an interesting and suitable aged oak tree and cut a blank from it. Bring or bring a heavy oak ridge to the site. Use an ax to cut off everything unnecessary. Use an iron brush to remove loose layers. Seal the ends with the remains of oak boards.
Now you can fill the flowerbed with soil and plant flowers.
Alexander and Grigory Isakovsky
Photo by Grigory Isakovsky
Country construction, repairs and decoration are processes that take up a lot of free time and finances, and when, after completing useful tasks, you notice a lot of remnants of various materials, it becomes a little disappointing for the money spent. But we won’t be upset, because all the leftovers can be put to good use and there is no need to throw them away..
Never rush to throw away construction waste and leftover building materials. Everything that was not included in the main work can still become useful for the dacha.
Crafts from plasterboard
Truly universal material It may also be useful to you in the form of scraps and broken pieces.
You can make the following from drywall:
- Small vases for dry bouquets, you just need to cut the gypsum board into even pieces and fold it into shape using a mounting profile;
- Various geometric figures for room decoration country house, gazebos and patios;
- There's enough interesting solutions and for miniature pieces of furniture in children's rooms. For example, the same shelves, racks, different decor.
If you can no longer use drywall, give it to the kids, because with any piece of damaged material you can simply draw on asphalt or slabs, using the material like chalk.
What can be made from pieces of tin
This material it is very practical, because, like pieces of stainless steel, it can be bent into any shape. This makes it possible to create the most unusual crafts for the dacha.

- First of all, this original lamps who, using metal scissors or a grinder, acquire fancy shapes;
- Also, from similar material, thin steel or scraps of tin, you can make small country bins and ashtrays;
- If the pieces big size, they can make good containers for flowers, even hanging ones;
- You can also use stainless steel and thin steel for more useful things, for example, putting patches on cracked linoleum, using tin strips to connect flooring joints in a country house, making clamps for bolts and nuts, cutting washers, tightening with pieces of material wooden buildings and fences, install them as a lining when tying up large tree branches so that their bark is not damaged by the rope.
Useful uses of leftover and off-cut boards
Almost anything can be made from wood, within reasonable limits, of course. Naturally, we are talking about garbage residues, because we already create many useful things in the country from solid lumber.
- So, if there is a thin strip left, it can be used for boxes, just like, in principle, a small board with timber;
- Trimmings furniture panels, for example, from a press, will become excellent containers for vertical gardening;
- Larger boards can be sanded and cut into kitchen utensils– boards for chopping and chopping, coasters for hot dishes;
- Naturally, if there are materials good quality, they are always suitable for country furniture– shelves and racks, small stools and chairs, shoe stands, etc.;
- It is worth noting that sawdust also brings benefits in the country, but all our readers know this very well.
You can make a lot of interesting things out of wood, and therefore you shouldn’t throw away any of its remains.

If among the readers there are masters of wood carving, they will find another original application!
Useful scraps of OSB and plywood
Construction waste obtained from these materials will be a godsend for people with imagination.
But whatever you come up with, we have ideas too:
- Birdhouse and - the first thing that comes to mind!
- Further, and even for animals, where the material will serve as the base of the roof;
- OSB and plywood scraps can be turned into quite good boxes for storing food and non-food products, a variety of bulk products;
- An interesting idea is to use pieces of plywood and slabs to create formwork for the construction of small architectural forms;
- Such garbage can also participate in the production of country furniture, along with lumber, which was discussed above;
- If you have a jigsaw, you can always cut original ones from leftover materials garden figures or their fragments.

Using old polyethylene
Besides, old film you can cover anything... the same piles of sand for construction, stacks of bricks or decorative tiles for arranging a summer house, bulk materials, feed. One has only to fold it several times, and even old and shabby polyethylene film will be a good protection against moisture.

Excellent will find application It is also under major construction. The film can be used to cover foundations and only poured areas so that the concrete does not dry out and crack in the sun.
In the issue of film, we deviated a little from the main theme of crafts and leftovers building materials, but now we are returning to it.
Foam insulation: using scraps in the country
Most often, such materials are applicable before New Year holidays, since you can easily cut snowflakes and stars of a wide variety of shapes from them. But they can often be used for standard room decoration.

One side of this material is foil-coated or coated with reflective material. That is, it shines. This makes it possible to create bright shapes that will transfer sunlight to the walls, floor and ceiling. Such crafts look especially interesting when suspended, on a fishing line or thread.
Most often, all thermal insulation work where they are used similar materials, occur with insulation, foil on one side. But if you need a double-sided object, you can cut out two mirrored shapes and glue them together reverse side. Then the star, snowflake or figurine will shine on both sides.
Savvy summer residents find many other uses for penofol, for example, they additionally insulate the sides of greenhouses, make small portable refrigerators with their own hands, simply by sewing the material inside onto the walls of a small box. But the most fun use is sewing children's costumes and their various elements from the material.
DIY garden crafts (video)
Remains of plastic, polycarbonate, acrylic
- First of all, various flashlights come to mind. We have studied with you many lighting options for the garden and dacha area, and therefore it will be easy for you to come up with lanterns and lamps made of plastic and polycarbonate, especially if the scraps of materials are colored;
- Colored plastic and polycarbonate with shades in the decor of the fence look very good. Once we already raised a similar topic and even showed you photos of similar fence decorations;
- From small scraps of acrylic you can make boxes and chests, which can perform both decorative and household functions;
- In addition, these materials can fully participate in the production of garden figures. By combining wood, steel, plastic and other materials, you can make garden gnomes, fairytale castles, and various animals with your own hands.

Remains and broken bricks
We use this type of construction waste perfectly as backfill and materials for leveling holes. But today we propose to think about more useful structures.
- These can be the same fairy-tale castles of a decorative nature, located in the garden, in which the brick will act as the base;
- In addition, small lamp columns can be built from brick;
- The building material will also be used in the production of heavier and more permanent furniture, for example, as a base for benches or even under a table in a new gazebo.

What to make from PVC plastic panels
Wall and ceiling cladding, various buildings outside and inside with plastic - quite popular processes for renovating a dacha. But, due to the low cost of the material, or due to incorrect calculations, we often buy PVC panels with a reserve. Then, when the material remains, we think for a long time about where else it might be useful.
We have already mentioned certain options, but there are more interesting ideas:
- A miniature fence made of PVC panels will last for several years until the material deteriorates due to the influence of atmospheric phenomena;
- The material is also excellent for delineation vegetable beds, flower beds. The result is a multi-colored and very colorful decor;
- If we return to country crafts, then plastic can become the roof of small garden buildings, be used as gutters for collecting rainwater, or even serve as simple but quite attractive shutters for the windows of a country house, if you combine the panels with wooden beams.
Bulk mixtures and use of their residues
This can be either several scoops in a bag or a whole bag of material. Naturally, such material will not go to waste at the dacha - grease, seal cracks, repair garden paths And so on.

But the mixtures can also be used for decorative purposes, for a wide variety of crafts.
- We have already talked about how with the simplest, even homemade forms produce decorative blocks for walls;
- Also, they told you how to make a drinking bowl from cement, quickly and quite simply;
- But you can use your imagination, select special molds and pour out whole figures for the garden, which will easily last up to ten years even under the worst outdoor conditions. You just need to treat the finished crafts with protective paints, which will give them a brighter look.
Remains of ceramic tiles and mosaics
They say that materials of this kind are irreplaceable at the dacha, but mainly in economic plan.
- The remains of the tiles can be used to decorate the base of the house to protect it from external influence;
- The same material can be used to cover a new blind area;
- If there are very few tiles, and they represent a battle, then, like the mosaic, it is worth moving it to the garden. Here you can decorate garden figures with pieces of multi-colored, glossy material with various patterns. For example, you are making a garden gnome... so now you don’t have to paint it, you can decorate it with pieces of tiles. A turtle from the remains of cement in the garden will receive an exclusive shell in the same way. Tiles or mosaics will serve as an unsurpassed finish and a small decorative pond in the country.

We have hundreds more tips in our arsenal, but we simply cannot fit them all into one article. We have mentioned almost all the popular materials used in the garden, and now you just have to focus on the fact that not everything should be immediately thrown into the trash, because any piece or scrap can be useful.
Crafts from building materials and beneficial use construction waste– topics are interesting and popular. Thousands of summer residents across the country every day come up with incredible decor from metal and wood, leftover foam and paint, scraps of polyethylene and dry mixtures. So why don't we try it? We are sure that with our experience the crafts will turn out just as good!
A block house is a wide lining that has a flat back side and a front side that imitates the round shape of a log. Docking of the block house in the corners due to unusual shape siding often becomes a problem. Let's solve it together.
How to sheathe corners with a block house - types of joining corners
How to make corners when installing a block house - this problem should be solved even before purchasing the material, because the chosen method determines whether you will need to buy additional products. It is recommended to install the block house in a horizontal position. In addition to the fact that this way the siding looks more harmonious, it also allows you to get more correct angles. An exception may be narrow version covering material. Today there are four methods of joining a block house in the corners.
- Joining the corners of the siding by sawing all the elements at an angle of 45°. This type docking provides that during operation under the influence environment angles can diverge up to 5 mm. For this reason, pruning must be done very efficiently. When facing interior spaces so that the corner joints are practically invisible, you can use various wood putties and putties.
- Connecting a block house in the corners using internal and external corners. With this type of fastening, the decorative outer corner, after installing the siding, is attached at the junction of the panels. The same is done when constructing an internal corner. The main advantage of this method is the fact that when covering the block house, the corners are closed from the prying eye, and during the process of humidity changes, the natural deformations of the wooden board are almost invisible.
- Joining using planed timber. The method is quite simple to use. The joining of the block house in the corners is carried out using a wooden beam, which is installed exactly in the corner, and to which siding boards are subsequently attached. The timber can be of two types: the first - with an additional artistic idea, and the second - ordinary planed.

- Joining corners using a pre-prepared template. It is carried out by cutting out all the siding boards according to a template, and then adjusting and joining each element to each other. This method is quite labor-intensive, but it looks very organic in the interior. If you use this method, then you need to take into account that the boards of the block house should be shifted in height by ½ board in relation to each other.
Joining a block house in the corners - features of the internal cladding
If a block house is used for interior decoration of a house, before installing the structure, it is recommended to leave it indoors for a couple of days for complete acclimatization. This is done specifically to obtain the desired level of humidity. Depending on the designer’s idea and the interior when finishing interior walls block house boards can be mounted both vertically and horizontally.
When finishing, in order to avoid the material getting wet from condensation, it is necessary to secure a waterproofing layer before installing it on the surface. This material is attached with an overlap of at least 10 cm, the joint is taped with construction tape. Then the sheathing is installed on which the block house will be installed. Siding installation is carried out from above or below - it does not matter.
During the installation of the first board for natural ventilation, and also to maintain a favorable climate inside the walls, you need to leave a gap of 5 cm below and above.
The block house boards can be attached to the sheathing either using stainless steel screws or using staples and construction stapler. When installing a block house in a vertical position, the step of the fastening element is at least 60 cm. The last boards are fastened using expansion wedges. After each inner corner of the block house is perfectly adjusted and hidden behind special decorative elements, and also after the installation of the boards for cladding the facade of the building is completed, paint and varnish coating can be applied.
In this case, you should first apply thin layer varnish or impregnation, and then using an angular grinder Thoroughly sand the surface to completely remove any lint and roughness. Then the surface is covered with several layers of paint and varnish material or treated with a large amount of impregnation.
External corner of a block house - features of exterior decoration
There should be an average distance of 60 cm between the bars. A waterproofing layer is attached between the sheathing. roll material, which is cut into strips whose dimensions are 3–5 cm larger than the width and height of the distance between the bars. The waterproofing is inserted between the bars, with a slight bend. Then a thin layer of vapor barrier is attached, which keeps the insulation layer from getting wet. The film is attached with an overlap of 10 cm. In the corners and along the perimeter of the structure, the layer is glued using special tape or stapled to the sheathing bars using a construction stapler.
After which we begin to assemble the block house. Installation of the board can be started either from the bottom or from the top, but in this case it is important that the groove is directed straight down, otherwise moisture will accumulate in it. When installing the first board, be sure to leave a gap of at least 5 cm between the siding and the bottom or top line of the wall. In order not to damage the block house during installation, it is necessary to tap it and compact the boards without direct impact. For example, through a rag wrapped around a hammer or wooden block. The board should be fastened with a special fastening device to all the sheathing bars without exception.
Proper care of a block house is the basis of durability
It is necessary to take into account whether to sheathe the house outside or inside wooden block-house – this is far from the end of the work. Measures should be taken to further protect it from external factors. And in this process, different things play a decisive role - varnishes, antiseptics, mastics, paints and others. First, the surface is primed, and then a layer of colorless varnish or paint is applied. And only after the first layer of protective substance has completely dried is the block house sanded.
After sanding, apply required amount layers of final coating of paint or varnish. For long-term use of siding, it is better to use only high-quality paints and varnishes. The properties of this coating largely determine the service life of the block house cladding. From time to time, about every six to eight years, it is necessary to renew protective covering.
In this case, it is advisable to apply the same paint or varnish. Otherwise, you will have to remove the old one before applying a new coating.
Block house came to us from Europe. Thanks to the beautiful appearance and good technical specifications gained popularity. The building material is made from wood or materials replicating natural wood.
Let's look at the design features of a façade finished with a block house and describe the sequence of covering the house with wood panels.
Block house siding: design features
Block house is a popular building material used in external and interior decoration walls of the house. The surface, which is covered with a block house, resembles a wall finished natural wood. The elements are made of wood or galvanized steel, coated polymer film, the shape of the elements is double or single “logs”.
Sheathing boards have a convex front wall and a flat back. The ribs are provided with spikes and grooves for joining the elements.

Before you start arranging a house from a block house, you need to understand the structure of a ventilated facade of this type. The design includes the required elements:
- Insulation - protects the insulation from moisture vapor. The vapor barrier layer allows steam to pass towards the wall, preventing it from penetrating to the insulation.
- Sheathing - creates a cavity between the wall of the house and the block house, serves as the basis for fastening the slats. The lathing is made of wooden beams with a cross section of 100*40 mm or 50*40 mm (depending on the type thermal insulation material). This structural element serves as a frame for attaching the block house.
- Thermal insulation layer - polystyrene foam, mineral wool, etc. The thickness of the insulation must be at least 10 cm.
- The wind barrier is mounted on the sheathing beam and additionally protects the insulation from the humidity contained in the air.
- The counter grille provides space between the wind barrier film and the block house. The counter-lattice is made from beams of small cross-section - 20*40 mm. If you neglect this element of the façade structure, the wooden slats of the house block will quickly rot.
- External cladding - block house.
Cladding a house with a block house: photo

Advantages and disadvantages of different types of block house
The main criterion for classifying a block house is the material of manufacture. For finishing works Wood, metal and vinyl panels are more often used.
In the production of wooden block houses, coniferous and deciduous wood species (cedar, pine, Siberian larch and spruce) are used. These types of wood are resistant to rot and will last a long time.
Wooden slats are made using the following technology:
- Logs are sawn using the “square in a circle” method. The result is four blanks.
- The workpieces are placed in a drying chamber.
- Drying lasts about 2 weeks. When drying wood in a natural way, then it will take about 6 months.

A block house made of wood has a number of advantages:
- strength - the surface of the panels can withstand high mechanical/physical stress without losing its original appearance;
- a damaged finishing element can be restored - sanded or replaced;
- the material is light in weight;
- ease of installation;
- environmentally friendly material;
- walls covered with a wooden block house “breathe” - a favorable microclimate of the room is created;
- the block house additionally insulates the house;
- high decorativeness and attractiveness of the wooden facade.
A block house made of wood needs regular cleaning and varnishing - these measures increase the moisture resistance of the material and extend the life of the cladding
Façade finishing is often done metal sheets house block, which has some features:

- the building material is made of steel with a thickness of at least 0.5 mm;
- the steel body of the element is coated with zinc;
- the inside of the metal plate is treated with primer and paint, and a pattern imitating natural wood is applied to the front side of the house block;
- The main advantages of a metal facade are durability and high strength; a block house of this type can withstand temperature fluctuations, is resistant to moisture and does not change its characteristics under the influence of unfavorable climatic conditions;
- metal block house has different shapes- in one or two logs.
Vinyl panels contain protective reinforcing components and additional plasticizers. Vinyl block house has many advantages wood panels, but it is stronger, cheaper and comes in a wide range of colors.
How to choose a material for finishing a house with a block house
Choosing a block house is not an easy task. The boards differ from each other not only in the material they are made of, but also in other parameters. When purchasing slats, it is advisable to be guided by the following tips specialists:

- For facade works It is necessary to use boards with a width of at least 15 cm, it is desirable that all slats have the same dimensions.
- It is better to choose long boards - this will reduce the number of joints. Standard length lamellas - 6 m.
- External siding is made from block house coniferous species tree. Perfect option- larch.
- Boards from northern regions more dense - this property improves other characteristics of the material. The density of wood can be checked by annual rings. The closer they are to each other, the denser the material.
- Not worth buying wooden boards, if they have defects: cracks, rotten knots, mold or bluish spots.
- There must be tarring small sizes: width - about 8 mm, depth - 3 mm.
- The permissible moisture level for wooden boards is 20%. This value must be shown on the building material certificate.
- The packaging of the block house must be intact and without damage.
Rules for installing block house lamellas
Cladding a house with a block house with your own hands must be done in compliance with a number of rules:

- Installation is carried out along guides, and not directly to the wall.
- It is preferable to fix the block house using clasps or metal brackets. To fasten thick house block boards, it is better to use self-tapping screws with an anti-corrosion coating.
- Before installation, it is advisable to keep the wooden boards indoors for several days. This will reduce the moisture content of the material.
- During fastening, the panels are positioned so that the groove is at the bottom and the tenon is at the top. This method reduces the risk of dust/dirt accumulating in the groove and increases the service life of the sheathing.
- A gap must be left between the floor/ceiling surface and the cladding for natural ventilation.
- There should be a small gap between the boards. This measure will prevent deformation of the material in case of moisture and temperature changes.
Finishing the facade of a house with a block house: step-by-step progress of work
Let's look at how to properly cover a house with a block house. Let's look at the installation process using wooden panels as an example.
Tools and materials
In addition to the block house itself, other materials will be needed for work:

Important! It is better not to use polystyrene foam as insulation. This heat insulator does not combine well with wood, as it has low vapor permeability and supports combustion
Required tools:
- level;
- brush;
- hammer;
- sandpaper or sander;
- saw;
- electric drill;
- screwdriver
Preparatory activities
Before you start decorating a wooden house with a block house, you need to carry out preparatory measures.

Cladding a house with a block house
Installation of boards begins from the bottom corner, fastening of panels is horizontal. Fixing a block house using climbers:
- Attach the clamps to the sheathing with self-tapping screws.
- Insert the first panel into the fastener tabs. The location of the board is with the groove down.
- Place the groove of the next panel onto the tenon located below the installed sheathing element.
- The cladding work continues until the entire wall is covered with block house panels.

If the clamps are replaced with self-tapping screws, then before installing the boards it is necessary to prepare recesses for the fasteners. Fixation occurs in increments of 40 cm. Self-tapping screws are screwed in at an angle of 45°.
In order for the finish to have an aesthetic appearance, the screws must be disguised. Remains of wooden panels, ready-made plugs or wooden “paste” are suitable for this.
For registration internal corners“boats” are suitable for external corners special plinths or planed timber 5*5 cm are applied. Experts recommend securing the timber before starting the sheathing - this will allow the panels of the house block to be fixed to the timber and will make the finishing as attractive as possible.

Door and window openings are decorated with platbands. The main function of platbands is to hide cracks and protect against the penetration of cold air, precipitation and debris.
You can choose decorative trims with interesting carved patterns and unusual ornaments. The shape of the platbands can be flat, round or curly. The choice depends on the style and common facade Houses
Decorating a block house inside the house
Installation of a block house inside a house is practically no different from outer skin, but has some nuances:
- boards of small width are used for work;
- external and internal corners are fixed upon completion of installation of the block house.

Important! It is better not to use wooden panels of a block house for finishing the interior walls of wet rooms. Otherwise, the material must be coated with a layer of varnish.
Processing and care of block house panels
To ensure long-term use of the finish wooden houses The block house must be treated with protective coatings: stain, antiseptic, varnish, paint and mastic.
Processing sequence:
- Prime the surface of the block house.
- Apply a layer of varnish or clear paint.
- Every 5-7 years the protective coating must be renewed. It is advisable to reapply the same varnish or paint, otherwise the previous layer will have to be removed with a sander.

Important! To avoid the appearance of white stripes when drying wooden panels, the tenon house block must be varnished before installation
Cladding a block house house: video