Raised beds: pros and cons. How to make and decorate raised beds How to make raised beds step by step
We will send the material to you by e-mail
Working in the garden takes a lot of time and effort, so every summer resident tries to simplify the process of planting and caring for the crop. The main problem is the need to be long time in a bent position, which causes back pain and may start headache. But this can be avoided by organizing raised beds at the dacha with your own hands. Photos and detailed description The device technologies presented in this article will help you decide on the type of beds and the material from which it is best to construct them.
The original high multi-level design will become the highlight of your landscape
Raised vegetable gardens are rapidly gaining popularity; they are used not only for growing vegetables, but also for planting flowers (). Thanks to the use various materials for the construction of borders for a bed (or flower bed), some options have a very attractive appearance, due to which they are increasingly used in open areas vegetable garden However, in order to properly arrange high beds with sides, you need to know some of the features of such organization of space in the garden.

Advice! There is no need to build high beds in the southern regions. The earth in them warms up enough, and with such planting the roots of the plants can burn.
Features of the construction of high beds
First of all, you should follow the recommendations for the size of such beds:
- Height.
Of course, the main thing is that the new bed should be comfortable to work with; arrangement at waist level is considered optimal, but in each specific case everything is individual, so be guided by your feelings.
In addition, the height depends on the degree of soil fertility. So for fertile soil minimum value– 15 cm, for infertile – 30 cm.
- Lenght and width.
The length of the structure can be any (as much as your garden allows), the main thing is to additionally strengthen extended areas with supporting posts. Width is worth paying attention to Special attention. It is advisable to plant no more than two rows of plants in a bed 90-120 cm wide. This way they will receive sufficient quantity sunlight, and you can easily reach everyone.
Next, you need to choose a location to install the raised bed. At the same time, the quality of the soil in a particular area does not have special significance, since it will not participate in ensuring the life of the plant. The main thing is to check whether a sufficient amount of light reaches the this area vegetable garden, it is advisable that Sun rays illuminated the plants for at least 5 hours a day.

In high beds you can grow almost anything: from vegetables to berries. However, too tall plants(for example, corn) should not be planted in them because of the difficulty of subsequent care for them.
Pros and cons of raised beds
Many summer residents continue to use conventional garden beds, despite their inconvenience. Compared to traditional way devices, high structures have the following advantages:
- The soil under such beds can be anything.
Here we are talking about both its quality (fertility, the presence of sand and stones) and the features of the landscape (high beds can be built even on a slope without damaging the crop).

- Easy to install.
When arranging such beds, the use of technically complex tools and materials is not required; improvised means and what remains from the construction site (for example, slate, boards, etc.) will be sufficient.
- Easy to use.
Planting, watering, harvesting - everything will happen easier and faster than with a traditional device. This is especially important when working with low-growing crops; for example, high beds for strawberries will be a salvation for any summer resident, because searching for this berry takes a lot of time.
- The erosion of the soil during watering is eliminated (provided that the sides are properly organized and of sufficient strength and height).
- Fewer weeds.
Due to the lack of direct contact with the rest of the garden. In addition, the soil in raised beds is easier to fertilize and update to achieve maximum quality.
- Increased resistance to disease is characteristic of plants grown in such beds.
- Possibility of earlier boarding.
When the ground has not yet thawed and planting has not even begun in greenhouses, the high beds are already ready, since the working layer of soil is above ground level, which means it warms up much earlier.
- There is no need to tie up plants (for example, cucumbers and tomatoes); you can leave them hanging down.
- Instead of hilling, you can shallowly loosen the soil, which reduces the time and effort spent on caring for the crop.
- The soil is not trampled down by walking, so it remains loose longer, supplying a sufficient amount of oxygen to the root system.
- Attractive appearance.
There are many materials suitable for arranging raised beds, so you can choose perfect option, which will become the highlight of your site.

Nothing is perfect, so beds of this type also have disadvantages:
- Quick soil drying.
Main disadvantage this method development of the territory, due to which it often becomes impractical (especially in elevated areas). The situation can be corrected by frequent watering, The best way– installation of a drip irrigation system (then the soil will be evenly wetted throughout its entire thickness without your participation).
- Installation takes a lot of effort and money.
This drawback is controversial, since the effort spent on arranging such a bed is nothing in comparison with the effort that will be required to cultivate a traditional bed. As for money, investing it can be avoided if you use available materials.
- Soil freezing in winter.
Due to the small volume, the soil freezes faster and more strongly than with traditional planting, which can have a detrimental effect on perennial crops.
Advice! To simplify crop care, install a drip irrigation system in advance. This way the plants will receive the same and sufficient amount nutrients without your participation.
Related article:
This article tells you how to do it in the easiest way at the dacha. Photos and descriptions of the most good ideas, as well as ways of their implementation, should help make your site comfortable and well-groomed.
How to make a raised garden bed with your own hands: types, materials
If you want to make a custom garden bed with your own hands, first you need to understand the types of such structures. Summer residents distinguish beds by design features and method of organizing the edge.
According to the design of the beds there are:
- Tall.

- Multi-level.
The most common case is the construction of a multi-tiered bed for strawberries; this is not difficult to do with your own hands, and the harvesting time will be reduced significantly.

- Vertical.

In addition to the shape of the bed, you need to choose the material of the sides. Usually improvised means are used, but to achieve the best result it is advisable to make a responsible choice. In fact, the sides can be made from anything, but the most famous and convenient are:
- Tree.
You can buy boards for raised beds quite inexpensively, so wood is often used in this case. However, this material has a significant drawback - it often harbors ants and other insects, which affects the quality of the crop. If this happens, the sides need to be replaced.

- Slate.

- Plastic.
Durable and unpretentious material, however, it is worth paying special attention to its quality, especially environmental safety.

- Brick.
Durability and attractive appearance are the main advantages of this material. The disadvantage is the price, but if there are bricks left from the construction site, this solution will be an excellent choice ohm

- Plastic pipes.
They are great for creating vertical beds as they are very easy to install.

What kind of design does a high bed have? To install it, you need to install sides from the selected material, then sequentially lay the following layers:
- Geofabric to prevent the rapid release of nutrients into the soil during watering, as well as to protect against pests and weeds.
- Drainage (this can be crushed stone, brick fragments, and so on).
- Grass and peat.
- Priming.
Related article:
What are their advantages, examples of creative solutions, average prices, consumer reviews, how to properly assemble a bed from panels with your own hands. Read about this and much more in our review.
Making vertical beds with your own hands: photos, technology review
Vertical beds are one of the varieties of high beds, or rather, the extreme level. They are ideal solution for small areas, as they help make the most efficient use of free space.

Vertical beds have the same advantages and disadvantages as simply tall ones, only to a greater extent (for example, even less soil cultivation is required, and the lack of moisture is even more pronounced), but there are other advantages of such arrangement:
- Significant space savings.
Such a structure can even be attached to the wall of a building, the main thing is that it receives enough sunlight.
- Mobility.
Any vertical bed can be equipped with wheels for quick movement to another place. But even without them, some structures have very light weight, so moving them will not take much time and effort.
Vertical beds can be constructed from almost any material, the main thing is that it is durable, strong and environmentally friendly. The highest quality designs that have already been used a large number of summer residents:
- Pyramid bed.
- A bed of plastic pipes.
- Vertical bed made of mesh.
- Using pots.
- From tires.
Not every summer resident is ready to spend time and effort on building a vertical bed for strawberries and other low-growing crops, so many resort to purchasing this design.
How to buy a vertical bed for strawberries and other low-growing crops
Thanks to unique design, vertical beds purchased in specialized stores are very popular. When purchasing, it is important to pay attention to the following points:
- Check whether the construction material complies with environmental and fire safety standards.
- Match the dimensions to the available space.
- Check the possibilities of watering plants (some modern models vertical beds are equipped with channels for efficient watering).
- Find out which plants are suitable for this system(each plant has its own planting depth, it is necessary to resolve this issue before purchasing in order to avoid subsequent problems).
The market offers a large number of both expensive and modern, as well as budget models of vertical beds. However, if you don’t want to spend money, you can make a good system yourself using available materials.

Step-by-step making of a pyramid bed for strawberries with your own hands: dimensions, features
Self-construction of a pyramidal bed for strawberries is a rather complex and lengthy process. First you need to stock up on the following tools and materials:
- Wooden boards cut according to drawings.
They must be coated with drying oil and varnish to increase service life. In this case, it is prohibited to use chemicals, which are quickly absorbed into the ground and affect the safety and taste of the berries.
- Nails.
Selected depending on the thickness of the wood used.
- Hand tools (hammer, plane).
- Plastic pipe with holes along its entire length.
- Soil and humus to fill the frame.
- Net.
First of all, we prepare the base for the pyramid and lay the mesh on it. Then we install the lower tier of the structure on it and fill it with soil (about 150 mm).Now you need to install a plastic pipe in the center for watering, while tightly closing the bottom hole. Next, humus is laid.
All layers are repeated in the above order until the desired height is achieved. At the same time, it is important to reduce the size of each subsequent bed frame with a pyramidal structure to maximize illumination of the lower layers, as well as ensure optimal load on them.

Step-by-step production of vertical beds from plastic pipes for strawberries, greens or flowers
Among vertical beds, structures made of plastic pipes are very popular due to their low cost and ease of installation and maintenance. When making vertical beds from plastic pipes, one or two pipes can be used. Let's consider the first option.
Need to take sewer pipe 2.5 m long and, say, 110 mm in diameter. During installation, a third of the pipe is buried in the ground to ensure the stability of the structure; in the rest, holes with a diameter of 3-4 cm must be made for planting plants in them.
After the pipe is securely fastened, we pour pre-prepared soil into the holes. At the same time, it is not necessary to buy a specialized mixture; if the site has fertile soil, you can use it. Strawberry seeds (or other plants) can be mixed directly with the soil or added later to the existing holes (which is the best option).The system is watered from above, and the water does not flow to the plants evenly, so it is better to make a two-pipe system.

Features of installing double-pipe beds made of pvc pipes with your own hands consists of inserting a pipe of a smaller diameter into a larger one. Watering will be carried out through a narrow pipeline, in which small holes need to be made to distribute water. In this case, the space between the pipes is filled with soil.

The main advantage of such systems is the ability to pull them out of the ground, lay them down and cover them winter period(which is especially important for strawberries).
Using construction mesh to create vertical beds with your own hands
There are two ways to use metal mesh to create raised beds:
- As a supporting structure.
In this case, it is necessary to use a thick, reliable mesh that will be able to withstand a decent weight. In this case, the mesh is stretched between support pillars(or the corners of the house), sinks a little into the ground and is securely fastened. Now you can insert pots or bottles with plants into it. This option Great for growing seedlings or other plants that will later need to be replanted.
- Mesh + polyethylene.
First, the mesh is stretched, then it is attached to it. polyethylene film, and between them soil with humus is poured. This design is suitable for growing greens, onions and other small plants. It is not durable, so the best way to attach it is to the wall of the house. But even then it will not last more than 3-4 years.

In this case, a vertical bed is added to the usual one (for cucumbers, grapes, and so on). This method is much more convenient than the standard tying to sticks.
How to make a vertical bed for strawberries or other low-growing plants from a flower pot with your own hands?
A bed made from flowerpots can decorate your landscape, since this design is original solution, moreover, opening up opportunities for the manifestation of imagination. To create such a vertical bed you need:
- Several flowerpots.
It is not necessary to look for pots of the same size; different ones will also be an interesting solution.
- Beam or pipe.
For fastening and ensuring the stability of the structure.
- Soil and seedlings.
- Paint (optional).
If you are using ceramic pots, which are quite heavy, you may not need to use a pipe to stabilize the structure. The main thing is to reduce the size of the pots as you move up and not make the structure too tall.

If you have lightweight plastic pots, you need to thread a pipe (or beam) through the water hole, which will become the basis for the system. Flowerpots can be placed randomly, painted in different colors, decorated - it all depends only on your imagination.
Important! For the stability of the structure, it is necessary to deepen the pipe (or beam) into the ground. Otherwise, the pots will be secured only to each other, which will not prevent the structure from tipping over under external influence.
Making your own vertical bed from tires for strawberries: photos, features
Making a bed or flower bed from tires is a fairly well-known method. However, most summer residents use tires only to enclose a flower bed, that is, creating only one level.
There are several ways to use car tires to create vertical beds:
- Installation of several tires in a checkerboard pattern.
You can also color them different colors, thereby creating a sunny mood in any weather.
- Installation of tires of different diameters in the form of a pyramid.
You can also cut slots in the tires, then vegetation will be not only on horizontal surfaces, but throughout the entire volume of the structure.

- Creating a raised bed using several tires.
Article
We sowed or planted most of the plants in the spring and it seems that in the middle of summer we can already relax. But experienced gardeners know that July is the time to plant vegetables to obtain a late harvest and the possibility of longer storage. This also applies to potatoes. It is better to use the early summer potato harvest quickly; it is not suitable for long-term storage. But the second harvest of potatoes is exactly what is needed for winter and spring use.
Astrakhan tomatoes ripen remarkably well lying on the ground, but this experience should not be repeated in the Moscow region. Our tomatoes need support, support, garter. My neighbors use all sorts of stakes, tie-downs, loops, ready-made plant supports and mesh fencing. Each method of fixing a plant in a vertical position has its own advantages and “ side effects" I'll tell you how I place tomato bushes on trellises and what comes out of it.
Bulgur with pumpkin is an every day dish that can be easily prepared in half an hour. Bulgur is boiled separately, the cooking time depends on the size of the grains - whole and coarse grinding takes about 20 minutes, fine grinding literally a few minutes, sometimes the cereal is simply poured with boiling water, like couscous. While the cereal is cooking, prepare the pumpkin in sour cream sauce, and then combine the ingredients. If you replace melted butter with vegetable oil and sour cream with soy cream, then it can be included in the Lenten menu.
Flies are a sign of unsanitary conditions and vectors infectious diseases, dangerous for both people and animals. People are constantly looking for ways to get rid of unpleasant insects. In this article we will talk about the Zlobny TED brand, which specializes in fly repellents and knows a lot about them. The manufacturer has developed a specialized line of products to get rid of flying insects anywhere quickly, safely and at no extra cost.
The summer months are the time for hydrangeas to bloom. This beautiful deciduous shrub produces luxuriously fragrant flowers from June to September. Florists readily use large inflorescences for wedding decorations and bouquets. To admire the beauty flowering bush hydrangeas in your garden, you should take care of the proper conditions for it. Unfortunately, some hydrangeas do not bloom year after year, despite the care and efforts of gardeners. We will explain why this happens in the article.
Every summer resident knows that plants need nitrogen, phosphorus and potassium for full development. These are the three main macronutrients, the deficiency of which significantly affects appearance and plant yield, and in advanced cases may lead to their death. But not everyone understands the importance of other macro- and microelements for plant health. And they are important not only in themselves, but also for the effective absorption of nitrogen, phosphorus and potassium.
Garden strawberries, or strawberries, as we used to call them, are one of the early aromatic berries that summer generously gifts us with. How happy we are about this harvest! In order for the “berry boom” to repeat every year, we need to take care of the berry bushes in the summer (after the end of fruiting). Bookmark flower buds, from which ovaries will form in the spring, and berries in the summer, begins approximately 30 days after the end of fruiting.
Spicy pickled watermelon is a savory appetizer for fatty meat. Watermelons and watermelon rinds have been pickled since time immemorial, but this process is labor-intensive and time-consuming. According to my recipe, you can simply prepare pickled watermelon in 10 minutes, and by the evening the spicy appetizer will be ready. Watermelon marinated with spices and chili can be stored in the refrigerator for several days. Be sure to keep the jar in the refrigerator, not only for the sake of safety - for chilled This appetizer is to die for!
Among the variety of species and hybrids of philodendrons, there are many plants, both gigantic and compact. But not a single species competes in unpretentiousness with the main modest one - the blushing philodendron. True, his modesty does not concern the appearance of the plant. Blushing stems and cuttings, huge leaves, long shoots, forming, although very large, but also a strikingly elegant silhouette, look very elegant. Philodendron blushing requires only one thing - at least minimal care.
Thick chickpea soup with vegetables and egg is a simple recipe for a hearty first course, inspired by oriental cuisine. Similar thick soups are prepared in India, Morocco, and other countries South-East Asia. The tone is set by spices and seasonings - garlic, chili, ginger and a bouquet of spicy spices, which can be assembled to your taste. It is better to fry vegetables and spices in clarified butter (ghee) or mix olive and butter in a pan; this, of course, is not the same, but it tastes similar.
Plum - well, who isn’t familiar with it?! She is loved by many gardeners. And all because it has an impressive list of varieties, it’s surprising excellent harvests, pleases with its diversity in terms of ripening and a huge selection of color, shape and taste of fruits. Yes, in some places it feels better, in others it feels worse, but almost no summer resident gives up the pleasure of growing it on his plot. Today it can be found not only in the south, in middle lane, but also in the Urals and Siberia.
Many ornamental and fruit crops, except drought-resistant ones, suffer from the scorching sun, and conifers in the winter-spring period suffer from sunlight, enhanced by reflection from the snow. In this article we will tell you about a unique preparation for protecting plants from sunburn and drought - Sunshet Agrosuccess. The problem is relevant for most regions of Russia. In February and early March, the sun's rays become more active, and the plants are not yet ready for new conditions.
“Every vegetable has its time,” and every plant has its optimal time for landing. Anyone who has dealt with planting is well aware that the hot season for planting is spring and autumn. This is due to several factors: in the spring the plants have not yet begun to grow rapidly, there is no sweltering heat and precipitation often falls. However, no matter how hard we try, circumstances often develop such that planting has to be carried out in the midst of summer.
Chili con carne translated from Spanish- chili with meat. This is a Texas and Mexican dish whose main ingredients are chili peppers and shredded beef. In addition to the main products there are onions, carrots, tomatoes, and beans. This red lentil chili recipe is delicious! The dish is fiery, scalding, very filling and amazingly tasty! You can make a big pot, put it in containers and freeze - you'll have a delicious dinner for a whole week.
Cucumber is one of my favorites garden crops our summer residents. However, not all and not always gardeners manage to really get good harvest. And although growing cucumbers requires regular attention and care, there is little secret, which will significantly increase their productivity. We are talking about pinching cucumbers. Why, how and when to pinch cucumbers, we will tell you in the article. An important point agricultural technology of cucumbers is their formation, or type of growth.
Read in the article
Why use raised beds at the dacha with your own hands: photos of finished structures
High beds not only decorate the area, but also reduce soil moisture, so in an area with close flow groundwater such designs are simply necessary. They are often erected for ease of plant care.
It’s easy to create high beds, just decide on the size and height of the structure, and also choose the material of manufacture:
- Wooden models. The most common option, however, do not forget about the need to treat the wood against the formation of mold and fungi.

- Plastic structures. The material is inexpensive and easy to care for. It is environmentally friendly and does not require special processing.

- Galvanized metal. The strength and durability of the material attracts a lot of attention to it. When choosing galvanized material for building high beds, do not forget that the material heats up quickly in the sun, so it is suitable for shady areas.

- or . They are used in the garden by craftsmen who work well with stone. Creating such a ridge is not easy, since you need to know all the features of the masonry, and they are not cheap solutions.

- Available materials.“Homemade products” can be turned into almost any available means. You can find options made of plastic or glass bottles, multi-story structures made from used tires and much more.

It is worth choosing a fencing model and material for work based on the climate, material capabilities and requirements for the final appearance.
Pros and cons of raised beds in a summer cottage
Raised beds for strawberries and other crops have a whole range of advantages:
- you can arrange a vegetable garden even in uncultivated areas;
- no need, just loosen the soil inside the structure;

- Weeds grow less and are easier to weed;
- between the ridges they make neat paths along which it is convenient to walk even in bad weather;
- the speed of crop ripening increases, as the soil warms up faster;
- When properly arranged, high beds with sides have a layer;
- it is easier to insulate structures for the winter.
It is not difficult to assemble such models. Decide in advance on the location, height and material of the fence for raised beds. Here are some interesting photographic examples of garden design using such structures:
1 of 4
Ways to make a raised garden bed with your own hands
When creating an elevated one, you need to decide on several parameters:
- Dimensions. You need to calculate the quantity in advance required material, and this can only be done after creating drawings with exact dimensions.
- Form. Create square, rectangular, round or multi-level structures for planting useful crops.

- Material of manufacture. The most common and affordable are wood, galvanized and, of course, plastic. Stone ones will be more expensive, but they will last until you get tired of them.
There are options for high and without fences, but they will not protect the ground from spreading due to heavy rains or melting snow. Therefore, it is better and more reliable to buy boards for high beds or other available material.

To choose a bed model, decide on the type of plants to plant. For example, create a multi-tiered strawberry bed with your own hands. Here is a video example of its assembly:
Features of raised beds: photo examples of structures made of various materials
It is not difficult to create fences for raised beds on the site. Having chosen the dimensions and location, carefully read the advantages and disadvantages of all options:
| Material with photo example | Advantages | Flaws |
Wooden structures  Purchased options Purchased options |
|
|
Metal version  Greenhouse arrangement Greenhouse arrangement |
|
|
and panels  Application plastic panels in the garden Application plastic panels in the garden |
|
|
Concrete or brick fences  An interesting option for arranging a flower bed An interesting option for arranging a flower bed |
|
|
Homemade beds from scrap materials  Application of plastic bottles Application of plastic bottles |
|
|
Of the listed options, a high bed made of plastic panels is popular. It is easy to install, and the variety model range allows you to find best option for any . Here are some photographic examples of such structures:
1 of 4
It's easy to make a raised bed out of slate with your own hands. To do this, just follow a few simple steps:
- Purchase sheets or take pieces of material left over from the roofing.
- Dig a small trench around the perimeter of the future bed, half the height of the fence.
- Install the slate sheets vertically and cover them tightly with soil.

Additionally, you can use metal or plastic pegs to strengthen the structure. And also do not forget about safety precautions and work with the material with gloves.
Design of raised beds from Igor Lyadov: photos of interesting options

Creating a “smart bed” using this technology implies the following dimensions: width from 60 to 100 cm, and length is not of fundamental importance. The gardener advises that the structures should be placed from north to south, leaving a passage between the ridges of 60 to 80 cm. The box should be updated once every 5-7 years.
The creation technology itself comes down to several points:
| Illustration | Sequence of design creation |
 | In a heavily overgrown area, it is worth it, but do not burn it, but fold it. Make sure that the surface is level for the future ridge. |
 | Put together a box from boards or other material, fastening it with self-tapping screws. Cover the bottom completely with open cardboard boxes. Then, pour thin layer sand. |
 | The next layer will be made up of fallen leaves, grass clippings and other plant debris. Before filling all the elements, it is better to use water-repellent paint. |
 | Add humus, manure and compost according to the gardener's recipe. And 10 cm of soil. |
Below is a video on creating a garden bed from Igor Lyadov:
DIY raised bed: how to make a wooden structure
Using wood they create unique design beds on summer cottage, photos of several options are shown below:
1 of 4
To make a bed from boards with your own hands according to a photo or a prepared drawing, you need to assemble:
- the material itself for work of the required length;
- antiseptic to protect against rot and mold;
- on wood;
- and nails;
- pegs to strengthen the structure.

The area for planting is prepared in advance. It is better to make markings using pegs and ropes to get an even shape and the same height of the structure on all sides. Step-by-step instructions for assembling the box are given in the video instructions below:
Features of do-it-yourself vertical beds: photos of interesting options
Not only warm, high beds, but also vertical multi-level structures are popular among professional gardeners and simply those who like to “dig in the ground.” This planting option has a number of advantages:

- it is more convenient to cultivate the soil around the plants, since there is no need to bend low;
- less chance of spreading fungal diseases: there is no contact with the rest of the soil;
- you can bring the structure into the house during cold weather or other bad weather;
- you can decorate the wall of any building;
- there is plenty of free space left for planting other crops.

However, there are also disadvantages in choosing vertical bed models:
- a small amount of fertile soil leads to the need for fertilizing;
- the soil dries out faster, so it is needed more often;
- Not all crops are recommended to be planted in vertical structures.
Raise beds with strawberries or cucumbers from the ground, as these plants are considered unpretentious to care for. And warmth and constant watering have a beneficial effect on the level of yield.
Here are some interesting and unusual vertical beds:
1 of 4
Where to buy a vertical bed for strawberries: several models with descriptions and photos
Vertical beds vary in design. On sale in online stores and specialized departments of shopping centers there are pyramids, suspended structures, multi-level and other unique ideas. Here are some photo examples:
1 of 4
The cost of the models varies depending on the material of manufacture, the amount of area for planting and the complexity of the structure itself. Below are a few options that are available for purchase in stores:
| Title with photo | Short description | Cost, rub. |
 Openwork Openwork | The package includes 3 pots, 13 cm high, 37 cm in diameter and 3.5 liters in volume. | 1200 |
 Pockets for green walls Pockets for green walls | Thick waterproof material. The set includes 36 pockets. | 1450 |
 Pyramid Pyramid | The height of the structure is 150 cm, length – 127 cm, width 100 cm. Material – plastic. | 4700 |
Maria, Kaluga:“I bought the Openwork structure at first for the balcony, but then I appreciated all its charm in the garden. I plant strawberries and greens, they grow beautifully without taking up much space.”
Olga, Moscow:“I decided to decorate the wall of a house in the village with fresh flowers, but I was afraid to plant them. I found this great option. I put pots or bags with soil and flowers in pockets for green walls, it looks great.”
Dmitry, Saratov:“I like to live at the dacha in the summer, so I spend a lot of time in the garden. I decided to make myself a bed for strawberries, and I couldn’t think of anything better than making it vertical. I found the “Pyramid” model, quickly assembled it, and now I get a high yield every year.”
You can not only buy finished design for vertical planting of plants and flowers, but also to do it yourself. Several productive and simple ways will be given below.
Optimal dimensions of a pyramid bed for strawberries with your own hands: video assembly instructions
Beds with a pyramidal design are becoming increasingly popular among gardeners. They reduce the occupied area and provide high yields of certain plant varieties. For example, such models are often used for planting juicy strawberries.

You can make pyramidal beds custom size and from scrap materials. Dimensions are determined only by your preferences. For example, if the space allows, you can build a multi-level flower bed with a large base. At small space For planting or growing strawberries, you can mount a tall model with a small base.
Here are a few interesting options DIY country pyramids:
1 of 4
Step-by-step video instructions for creating a wooden pyramid:
How to make vertical strawberry beds from plastic pipes
Any summer resident who knows how to use a tool can create a vertical garden bed on his property. There are quite a few advantages to this planting method:

- ease of use and ease of harvesting;
- there is no need to frequently dig up and fertilize the soil;
- in addition to the high yield, such structures look beautiful on any site;
- the root system is not harmed by rodents, and the soil quickly warms up in the sun, increasing productivity.
The only disadvantages include the need for frequent watering.

To make a bed from PVC pipes with your own hands, prepare:
- thick PVC pipes with a diameter of 15 cm;
- thin pipes and plugs;
- chisel, drill and;
- a large piece of burlap;
- reinforced tape and a roll of synthetic twine;
- soil for plants.
To assemble a vertical bed, follow these instructions:
| Illustration | Sequencing |
 | Select suitable height beds and cut the required piece of pipe. From a thin piece, cut out a piece 10 cm less than the height of the structure. It is necessary for uniform watering. |
 | On top of a small PVC pipe, 2/3 of the entire height, make several holes at the same distance. Water will flow through them to the top layer of soil. Install a plug at the bottom. |
 | Take a hole saw and make holes in big pipe for plants. The diameter of the nest should be 15 cm, and the distance between the “holes” should be 20-25 cm. Place a plug at the bottom of the pipe and secure the structure vertically. |
To get a high-quality harvest, it is necessary to put a lot of effort into arranging the site and growing various crops. An alternative to painstaking garden care are raised beds - not very large elevations designed for cultivating vegetables and herbs.
In order to build raised beds with your own hands, you do not need specific equipment or any special skills. Structures along the entire perimeter are fenced with hand-made walls, because of this the overall ground level becomes higher than usual garden plot. Such a device has its own characteristics, namely: the elevation is made in several layers, which contributes to quality fertilizer soil, protection of the root system, good growth of crops.
The entire structure of the high bed consists of 6 layers:
- Lower protective layer made of metal mesh.
- Wood chocks.
- A mound of branches and bark.
- Part of the active layer made from paper scraps.
- A nutrient layer of fallen leaves and grass cuttings.
- The directly fertile part of the soil.
Using metal mesh protect root system, thereby preventing the penetration of pests. The upper part of the structure is filled fertile soil, where various crops are planted, which subsequently take root in another layer of foliage with grass, where vegetables and herbs are fed. Bark, logs, and paper scraps are used as semi-protective components necessary for filtering moisture and metabolism.
All of the above layers of high beds are enclosed with a special frame made of brick, wood or plastic.
Gallery: raised beds (25 photos)


Advantages and disadvantages
When compared with ordinary garden structures intended for growing vegetables and herbs, bulk beds There is a number of significant advantages:
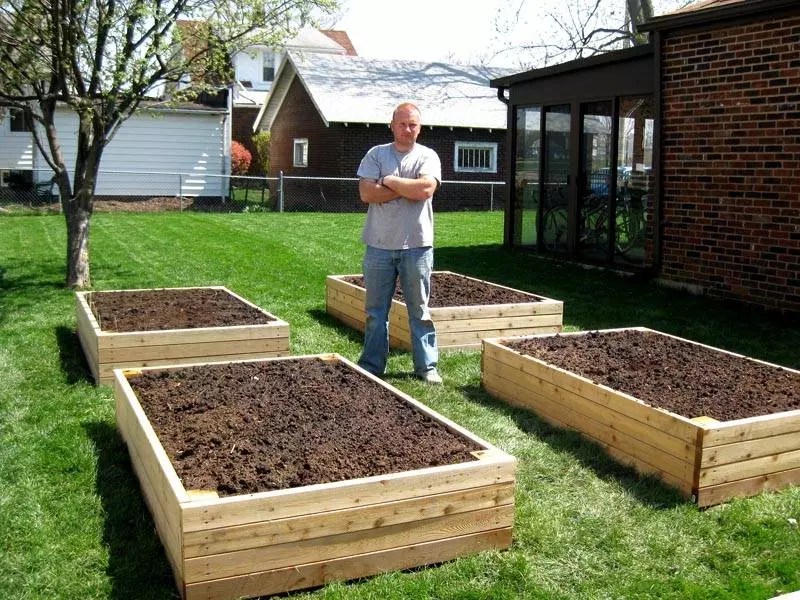
You will be surprised by your past doubts about whether to make raised beds at your dacha... Your back will thank you - you will simply bend down slightly to care for the bed. Your knees will thank you - you can simply sit on the edge of the bed and tend to your garden.
Your plants will thank you - there is no more competition from weeds or nearby fruit trees. Your land will be grateful to you - you do not trample it and ennoble it with humus. Your garden with raised beds can look beautiful, be comfortable and reward you with a bountiful harvest.
How to make raised beds with your own hands.
1. First we must mark out the space for the beds. The usual width of the bed is 1.2 m, the length can be any. We mark rectangles of the required size on the ground with sand.
2. We assemble high beds. The raised bed has no bottom and consists of posts with grooves on all four sides and boards with corresponding grooves. You can buy ready-made fences for garden beds or make them yourself. For fencing, it is better to take hardwood, because... Conifers secrete resin, which can have an unnecessary effect on soil composition. We check the horizontal installation of the garden box with a level.
3. Extend the high beds. Because The design of our beds is modular; we can extend our bed on either side with another module.
4. How to protect a high bed from rodents. Even if you have not encountered moles and other underground garden pests in your summer cottage, it is better to take steps to protect your garden right now than to unsuccessfully fight these rodents later. We place a metal mesh at the bottom of each box so that it extends slightly over the edges of the fences.
5. How to protect the soil in a high bed from washing out into the main soil. To do this, we use regular packing cardboard in two layers so that it covers the entire bottom of our garden box. If whole pieces if there is not enough, we use scraps of cardboard and staple them to the main piece so that the cardboard at the bottom of the box does not move when pouring soil.
6. The soil for high beds should be light, crumbly and “fluffy”. You can easily check its quality by poking your finger into the ground - if it sinks to the third joint, this is normal. To improve the soil composition, you can add peat or compost. We pour the soil into the garden box, check its horizontal level, and water it to compact it a little. During the season we will need to add a little soil.
7. Irrigation system for high beds. It is planned to attach a garden hose with watering nozzles along the contour of the raised beds: we need 90 and 180 degree dividers.
8. Trellis for high beds. Because The soil in the high bed is loose, so it will not be possible to install a trellis in it, so we fix the trellis from PVC pipes into the ground next to the garden box. We stretch nets onto the trellises for climbing plants - cucumbers and beans. For tomatoes we install light supports made of steel rod.
What you need to know when building a raised bed.
1. Try to protect high beds from strong winds and heat by creating partial shade with trellises of flowers or tall shrubs.
2. The long side of the bed should face south - this way the plants will be evenly illuminated, otherwise taller plants will shade others.
3. The planting density on a high bed is twice as high as on a regular one. This is how plants fight weeds and create a humid microclimate for the foliage.
4. High beds with sides will allow elderly people or people with back problems to easily care for their gardens.
5. High bed - warm bed. Such a bed warms up faster in the spring and if you make a mini greenhouse based on it, it will surprise you with an early and generous harvest.
6. Divide a long, high bed into square segments with cross braces to reduce soil pressure on the side walls of the bed.
Fences for raised beds.
1. Most often, wooden fences are used for clear beds. There are a few points here - do not use used wood, especially sleepers, which may contain harmful chemicals. Do not treat fresh wood with protection products unless you are sure that they are completely environmentally safe.
2. Wattle fence as a fence for a high bed. For all its environmental friendliness, such a fence has three significant shortcomings- the soil in the bed dries quickly from the wind, proper thermal insulation of the bed is not provided, the soil can spill out through the cracks. Everything can be fixed - use a layer of double cardboard along the inner perimeter of the fence. Eco-friendly, air gap between the sheets serves as thermal insulation, the earth no longer spills out.
3. As a fence for a high bed, you can use a metal profile, including from old roof or a fence.
5. You can make fences for a high bed with your own hands from brick or concrete. This is very good option, but you need to take into account that concrete will affect the acidity of the soil in the garden bed for 2-3 years.
6. The best fences for high beds - plastic. They do not release anything of their own into the soil, excellent thermal insulation, long term services and the ability to set any shape of the bed, in contrast to the standard rectangular beds with wooden fences.
7. Fences for high beds made from scrap materials. You can make the sides of the beds from bottles laid like bricks on concrete mortar.
Why are raised beds needed?
High beds allow you to increase the area for a vegetable garden because... awkward slopes or poor or clogged soil can be used. Raised beds provide an eco-friendly way to control weeds and soil erosion.
Such beds warm up faster and produce more early harvest. They allow you to more economically use moisture for irrigation.
Various types of raised beds.
In addition to the traditional raised bed with high sides, there are several other types of raised beds.
1. Circular high bed. It consists of a round frame in which there is a path to the center of the bed. This form of high bed is also called a “keyhole”.
Branches, roots, paper, and compost are placed at the bottom of the bed. There is a tunnel in the middle of the bed for fresh organic waste and water.
To irrigate raised raised beds, an irrigation irrigation system is used, when water comes from a ditch between the beds - a good option for vegetable gardens that are flooded in the spring, or you can use drip irrigation, when water enters the garden bed from mini terraces.
The paths between the beds are covered with straw or large sawdust. Never step on the ground in a high bed - this will compact it and make it more difficult for the plants to receive moisture and nutrients.
Do not spare space for paths between high beds - this way you can always go there with garden wheelbarrow both for harvesting and with a new portion of humus. Spare your back - use a wheelbarrow.
If your raised beds are located next to fruit trees, perhaps before laying out the beds you will need to install a root barrier - dig a trench, cut off the root on the approach to the beds, install a metal sheet into a trench, which will prevent the root from growing in this direction and cover the trench with soil.
Learn more about raised beds through your own experience. This topic contains many interesting finds, experiments and new discoveries for every gardener.