How to clean soot from a stove pipe. Do-it-yourself oven repair and cleaning: step-by-step instructions and possible nuances
It is difficult to overestimate the importance of a chimney for optimal operation of a heating unit. The main task of this device is to remove combustion products from the furnace into the atmosphere. At the same time, the following tasks must be solved:
- Obtaining a uniform thermal regime in the house throughout the day.
- Optimal fuel combustion mode taking into account its economical consumption.
- High-quality removal of combustion products from the furnace and preventing them from entering the residential area of the building.
The solution to this triune problem is ensured by the correct design solution of the thermal unit itself and its high-quality maintenance during operation.
The chimney plays an important role in this case. The effectiveness of this device is determined by several important factors:
- Correct selection of the cross-section and dimensions of the chimney. For square or rectangular pipes, flow flue gases, which rises upward in a spiral, forms stagnant zones in the corners. They are the first to form soot deposits. The size of the channel must be one and a half times larger than the combustion hole in the furnace, the minimum dimensions of a square smoke channel are 140x140 millimeters, and the cross-sectional area of a round one must be no less than a square one in the indicated dimensions. The total length of the smoke channel is required to be more than 5 meters. The length of the horizontal section is allowed no more than one meter.
To improve draft in a square or square smoke channel rectangular section Often liners are installed, which to some extent reduce the formation of soot.

- The material from which the chimney is constructed. In this case, two factors are important - the quality of the internal surface of the smoke channel and the thermal conductivity of the material from which it is made. In the first case, the influence of irregularities, in addition to reducing the flow speed, affects the ability to deposit soot. The high thermal conductivity of the pipe material contributes to the rapid cooling of furnace gases, and consequently to increased condensation and deposition of soot on the wall.


- The level of heat losses during operation. Insufficient draft in the chimney negatively affects the degree of fuel combustion, which leads to increased clogging of the smoke channel. And the ignition of soot in a chimney is often tantamount to a natural disaster.

The combination and interaction of the above factors determines the success of the smoke exhaust system.
We deliberately omit a number of rules and important factors chimney devices, concentrating the reader’s attention specifically on the causes and consequences of the formation of soot deposits.
What is soot and how is it formed
Soot is a product of fuel combustion. It is contained in flue gases in the form of fine, unburned particles. In addition to it, they contain water vapor from the moisture contained in the fuel, carbon monoxide (CO2) and other products of active oxidation of the fuel. At high temperatures it occurs chemical reaction, as a result of which pairs of hydrochloric and carbonic acids are formed.
Hot smoke condenses on the inner surface as an oily, foul-smelling liquid. Solid unburnt substances enter it, as a result of which, over time, the condensate turns into a tarry sediment. If a number of rules for using a heating unit are not followed, this sediment accumulates quite quickly, reducing the cross-section of the chimney until it closes completely.
It should be noted that condensation requires certain conditions. One of them is the temperature at which it starts. There is even a term for this – “dew point”. Obviously, when the chimney warms up, it will spread higher along the smoke exhaust channel.
A situation may arise when the “dew point” is outside the chimney, and condensation occurs in open space. This suggests the conclusion that it is impossible to avoid the formation of soot on the walls of the chimney. But right arranged system removal of furnace gases significantly increases the frequency of cleaning.
About chimney pipe prevention
In the process of development, heating systems became more and more advanced. Some techniques have been experimentally developed to significantly reduce soot formation, such as:
- Chimney insulation. This is done in the following ways: by plastering the surface brick pipes; covering the outer surface with various roll or slab insulation, followed by installing protection from foil film, metal sheet and other materials; the use of special insulated blocks with ceramic pipes for the installation of a chimney; protective devices to cover the chimney outlet from debris and bird nesting; the use of two-layer “sandwich pipes” made of metal with a layer of insulation.

The purpose of all these measures is to create conditions for rapid heating of the smoke channel, as a result of which the dew point in the process rises higher, until it exits into the environment.

- The largest amount of soot is formed at the bends of the chimney, so no more than one elbow should be used in the design if it is absolutely necessary to change its direction.
- When installing a chimney, it is mandatory to scrape the inner surface in order to reduce the number of irregularities that contribute to the deposition of soot.
- Use of chemical or biological methods for cleaning the internal surface during combustion chimneys.
Chemical cleaning methods
How to heat the stove to clean the chimney? These substances include the following:
- Naphthalene. It is added to the surface of the fuel in a well-heated furnace. At the same time, naphthalene evaporates, and its vapors destroy the entire layer of soot deposits. It is carried out in the form of flakes into the atmosphere. The disadvantage of this method is the unpleasant odor of this drug that remains in the room. Therefore, it is not used for cleaning pipes where an open source of fire is used (for example, a fireplace).

- A blue mixture made with your own hands from simple and affordable ingredients. Let's take a look at the composition:
- 1/5 copper sulfate;
- 1/7 saltpeter;
- 1/2 medium fraction coke.
The mixture is added to a well-heated firebox. The evaporation products, as in the first case, destroy the layer of soot that goes out with the flue gases. The amount of mixture added for one cleaning is about 20 grams, the frequency of use is 1-2 times a month. The firebox door must be closed tightly after adding the mixture.
- To combat soot deposits, aspen firewood is used, which is added to the maximum heated firebox in the amount of 1-2 medium-sized logs. The combustion temperature of such firewood is higher than that of commonly used fuel, and minor soot deposits burn directly during combustion. If there are significant deposits, this method is not used so as not to provoke a fire. It is recommended to do this regularly, a couple of times every 7 days.

- Walnut shell. Its combustion also occurs at a significant temperature and the principle of operation is the same in the previous case. A single dose of shells should be no more than three liters.

- Rock salt. It is added to the firebox when igniting the stove in the amount of 1-2 spoons. The evaporation from it softens the layer of soot in the pipe, which peels off from the walls and falls into the storage tank.
- Potato peelings. They are used by adding to the firebox in quantities of up to 5 kilograms in dry form. Starch vapor effectively softens the soot, and it literally falls off the pipe walls in pieces. The product is used as it accumulates.
You can also use starch to clean the chimney in the amount of one spoon per firebox.
- Chemicals for protecting chimneys. They are produced by industry specifically to protect chimneys from soot and soot. Release forms vary from imitation firewood or briquettes to powder or liquid formulations. Let's point out some of the most popular ones:
- “Log is a chimney sweep.” Produced in the form of small briquettes. Its composition includes ammonium sulfate, phosphorus oxide, coal wax, and other chemically active components may also be present. During the heating season, it is enough to use 1-2 logs to maintain the chimney in good condition. The product eliminates the formation of soot during combustion, and old soot loosened and removed from the walls. Release form: briquettes for chimney cleaning. Not to be confused with the cleaner log, which is also an effective cleaner.

- “Komichek” is a powdery substance, containing 5 sachets of 15 grams in one package. The basis is copper chloride, which promotes flameless combustion of soot and soot at low temperatures without flame. It is recommended to use when the carbon layer thickness is no more than 2 millimeters. When using the product, you must thoroughly ventilate the room.

- Anti-carbon chemical composition – (PCC). The product is burned directly in the bags in the firebox. You will need about 200 gr. for 1 t. firewood.
Carbon removers are presented in a wide range of stores, and you can always choose suitable option for any situation.
When using purchased chimney preventatives, you must strictly follow the manufacturer’s recommendations, especially regarding safety requirements.
Mechanical methods for removing soot
This is, as a rule, a radical intervention and is performed at least once a year at the beginning heating season. This is caused by the need not only to remove the soot layer, but also debris caused by the wind. And sometimes you have to get out bird nests that appeared during the period of inactivity of the heating unit.
Mechanical cleaning is done from above the pipe using various instruments and devices, both manually and using drives from an electric drill or chainsaw.
If the lumen of the pipe is heavily clogged with soot, the initial punching should be done with a clean core to collapse the soot, and then continue with brushes and brushes until the walls are clean.
Before starting work, it is advisable to heat the oven with potato peelings or starch to soften the soot. After the furnace has cooled, its surface must be covered with a wet cloth to prevent soot from entering the room if it collapses; if this happens, cleaning the room will take more than one month. You also need to close the firebox and ash door tightly, and open the damper completely.
The work must be carried out using a roofing ladder, and if necessary, install a fence. Do not take strong medications before going to altitude. Drinking alcohol is strictly prohibited. Otherwise, the chimney sweep risks his health.
All work must be carried out in dry, windless weather during daylight hours.
Watch the video - an easy way to clean
When performing chimney cleaning work, the following materials and tools are used:
- Brush for cleaning the chimney lumen. It can be made of plastic or metal 1.5-2 times the size of the channel.
- A flexible cable with a handle for rotation (similar to a plumber's), as well as a fairly strong rope.
- A stiff brush with synthetic bristles on a long handle. It is necessary to provide for its additional extension, because we remember that the length of the chimney is at least 5 meters.
- The weight is metal, in the classic design in the form of a ball. It is attached to a rope below the brush. The size of the ball is selected to be no more than half the size of the chimney opening.
- Metal scraper for removing stubborn soot stains.
Cleaning work must be carried out in the following order:
- Cleaning begins with the use of a brush weight. The initial piercing of the internal lumen is performed. When performing this operation, the device must not be rocked, so as not to damage the walls of the chimney.
- If there is a thick layer of soot, it is better to first work with a metal scraper to remove protrusions and soot stains.
- Finish cleaning should be done with a stiff bristled brush.
- Next, stoves with open fireboxes are cleaned from below, removing soot through the combustion space. The walls are cleaned with a long-hair brush, and finally the chimney is cleaned with a vacuum cleaner.
- Currently, a vacuum chimney cleaner has appeared on the market. Its advantage lies in high-quality cleaning. For the price, this is a tool for professionals.

 If, for some reason, you do not have a brush at your disposal the right size, it can be made locally from a plastic bottle. To do this, its walls are cut vertically into strips 15-20 millimeters wide so that they bend vertically. This homemade tool works no worse than a standard one.
When cleaning a chimney with a chainsaw, it is used as a drive for a traditional tool.
Features of cleaning stainless steel pipes
Such chimneys are characterized by high quality internal surfaces. This property allows condensate to flow freely down into the condensate collector, from where it is periodically drained and disposed of. The absence of condensation prevents the formation of soot. But carbon deposits, for various reasons, still form and need to be cleaned. This is done as follows:
- Through the hole in the tee, a round brush on a flexible shaft is inserted into the pipes. Carbon deposits are cleaned by rotating the brush from an electric drill. As you move, the drive shaft increases in length to clean the entire length of the pipe.
- If the carbon deposits are persistent, cleaning can be done by burning them out using a blowtorch. To do this, it is necessary to dismantle the chimney and burn it out. At a temperature of 800-900 degrees, sufficient for the intended purpose, even tarnished colors will not appear on a high-quality stainless pipe.
- After cleaning is completed, it is advisable to insulate the chimney riser in order to move the dew point outside the chimney.
The described option is only suitable for austenitic stainless steel. If you were sold pipes made of ferritic or semi-ferritic steel, they most likely will not have the required performance qualities. Determining compliance is simple - normal stainless steel is not magnetic.
Watch the video
The need to clean the inner surface of sandwich pipes does not arise often - condensate flows out of them regularly. But if you suddenly need to carry out this procedure, then you need to use an elongated cylindrical brush on a flexible drive cable that receives rotation from an electric motor.
You can also disassemble the chimney and clean each pipe separately.
Cleaning the chimney from tar deposits
Some fuels form viscous components from condensate and low-flammability creosote components. They are very difficult to fight and difficult to clean.
To reduce the likelihood of the formation of such precipitation, the chemical preparation “Hansa”, which is a crystalline substance, is used. It has a complex composition, one part of which promotes the decomposition of wood into resin and water vapor, and the second part decomposes the resin into flammable components, which burn here. Previously deposited tar stains on the walls of the chimney also decompose into small crystals and fall into the firebox.
"Hansa" is loaded into a burning firebox. At the beginning of the heating season it should be used daily, then periodically. Details on the packaging.
Cleaning a curved chimney from soot
Installing a chimney with a bend is the last solution worth turning to. This is mainly due to the design features of the house. Cleaning a pipe elbow is not difficult if you have taken care in advance of installing inspection hatches during installation.
Watch the video
Through them, the pipe can be cleaned without much difficulty. However, it is not advisable to install more than two bends on one chimney. It is mandatory to install a cleaning hatch.
Cleaning the chimney of a gas boiler or water heater
The reason for performing such an operation will be a decrease in traction. This poses a considerable danger, especially when it comes to fitting into an apartment building. In such a situation, not only the residents of one apartment are at risk.
Watch the video
The pipe will not determine the reduction in thrust. The signal may be the “popping” of the igniter. Cleaning the chimney of a gas water heater is similar to cleaning a conventional stove duct.
 As a result of the long-term use of heating stoves, gas boilers, etc., a number of rules have naturally developed aimed at the efficient use of heating devices. The main ones are:
- It is not recommended to use resinous wood, such as pine, spruce and others, as well as raw wood for heating the stove. In this case, intensive formation of soot and resins is observed.
- The stove must not be heated with scraps of composite materials, including plywood, chipboard, OSB, hardboard and other similar materials. The composite materials used in their manufacture actively clog the chimney with difficult-to-remove sediments on the walls.
- When using coal as fuel (for most designs wood stoves it fits) you need to choose the right variety. One of the best is anthracite of the “nut” fraction, which does not emit a large amount of soot components. Metallurgical coke is a good fuel. It is produced from high-grade anthracite by burning in coke oven batteries. At the same time, all harmful elements burn out, so the coal burns evenly and hotly. Disadvantage: difficult combustion. Therefore, it is better to use a mixture of coke and anthracite. The cheapest and most “harmful” of the fuels of this class are types of gas coal (“goryuchka”). They burn out faster and release a large amount of planting components. Briquetted coal burns well and emits little soot
- In solid fuel stoves, it is strictly not recommended to use household waste as fuel, especially plastic. When heated with garbage, a guarantee of rapid formation of soot deposits on the walls of the pipe.
- When installing a chimney duct, you must strictly fulfill the requirements to ensure maximum draft. This primarily applies to the rules for installing pipes in height.
Watch the video
and performance characteristics. Now knowing what to use to clean the chimney, it is easy to keep it in working order at least during the heating season. But cleaning at the beginning of the heating season is still a real and inevitable necessity. However, good luck to you!
It is still too early to write off stove heating - it is still actively used to this day great amount people all over the world, in cities and in rural areas, in poor regions and in well-off and prosperous countries. Moreover, to some extent we can say that home autonomous heating structures are experiencing a “rebirth”, since both stoves and fireplaces are rapidly becoming fashionable, and few suburban construction of a modern mansion can do without them.
Getting your hands on something you want or a fireplace is not everything. Such structures are always objects of increased danger, and therefore it is extremely important to be able to operate them correctly. The owners become familiar with this fairly quickly with the procedure for firing stoves in everyday use, with the types of firewood needed for them. But what’s surprising is that a negligible number of owners know how to clean a chimney with their own hands, and even fewer have done it practically.
This situation cannot be called normal. The safe operation of stoves and fireplaces in residential premises depends to a good extent on the serviceability and correct operation of the chimney system. Forgetting about this, careless owners expose their life and health to extremely high dangers and own, And their loved ones, risk the safety of their housing and acquired property.
A little theory and history
What causes clogged chimneys?
Why do build-ups form on the pipe walls that require regular cleaning?
The first factor is due to the most banal reasons - the burning of wood itself. This is a rather complex physical and chemical process consisting of several stages. Depending on the type of stoves (fireplaces, boilers), on the location and configuration of internal channels for removing combustion products, on the design, on the type of firewood used and its quality (or other fuel), both the quantity and completeness of combustion stages (flame phase or smoldering phase), which can change from one to another several times.

- So, in smoldering mode they mostly burn T solid components - coals. In this case, gaseous products may have too low a concentration - this happens at the beginning of the fire until they reach optimal temperatures, and the process of releasing combustible pyrolysis gases has not yet been fully launched. These gaseous combustion products quickly condense, so combustion at this stage is accompanied by the release of thick white smoke.
— In active flame combustion mode, pyrolysis gases become the main source of heat. As the temperature rises, the color of the flame changes (to close to bright white), and the smoke becomes almost invisible. But gradually their concentration decreases, and with one addition of firewood, the violent flame is soon replaced by a smoldering stage, for the reason that the gases have already escaped and the amount of combustible substances is becoming less and less.
Be that as it may, a lot of combustion products go into the chimney in any case. Mainly, with incomplete combustion, they become soot (small carbon particles), complex organic compounds, resins, and carbon monoxide (carbon monoxide). Almost all of these products are flammable, and under certain conditions can even form explosive mixtures.
At the stage of complete combustion, the organic content in the smoke decreases sharply, and the main products at the inlet become water vapor, carbon dioxide and sulfur dioxide gases.
- From the point of view of clogging of chimney pipes, the greatest problems are caused by smoke that is maximally saturated with incompletely burnt carbon residues (ash) and heavy resins. Therefore, it is very important to know how to choose the optimal ones - not every wood is suitable for these purposes, both in its specific heat transfer and in its biochemical composition, that is, in the concentration of heavy resinous substances. Firewood made from coniferous trees and timber is always characterized by increased resin content. By the way, not only this feature makes them undesirable for use in everyday life - just look at the table to see how much they are inferior in both density and heat transfer to firewood from deciduous trees.
| Wood species | Density limit wood (kg/dm³) | Average density accepted for calculations (kg/dm³) | Working volumetric calorific value of wood (kcal/dm³) |
|---|---|---|---|
| Oak | 0,690-1,03 | 0.81 | 3240 |
| Ash | 0,520-0,950 | 0.75 | 3000 |
| Rowan (tree) | 0,690-0,890 | 0.73 | 2920 |
| Apple tree | 0,660-0,840 | 0.72 | 2880 |
| Beech | 0,620-0,820 | 0.68 | 2720 |
| Acacia | 0,580-0,850 | 0.67 | 2680 |
| Elm | 0,560-0,820 | 0.66 | 2640 |
| Larch | 0,470-0,560 | 0.66 | 2640 |
| Maple | 0,470-0,560 | 0.65 | 2600 |
| Birch | 0,510-0,770 | 0.65 | 2600 |
| Pear | 0,610-0,730 | 0.65 | 2600 |
| Chestnut | 0,600-0,720 | 0.65 | 2600 |
| Cedar | 0,560-0,580 | 0.57 | 2280 |
| Pine | 0,310-0,760 | 0.52 | 2080 |
| Linden | 0,440-0,800 | 0.51 | 2040 |
| Alder | 0,470-0,580 | 0.5 | 2000 |
| Aspen | 0,460-0,550 | 0.47 | 1880 |
| Willow | 0,490-0,590 | 0.46 | 1840 |
| Spruce | 0,370-0,750 | 0.45 | 1800 |
| Willow | 0,420-0,500 | 0.45 | 1800 |
| Hazelnut | 0,420-0,450 | 0.43 | 1720 |
| Fir | 0,350-0,600 | 0.41 | 1640 |
| Poplar | 0,390-0,590 | 0.4 | 1600 |
Resinous substances fall with smoke onto the internal surfaces of the pipe, becoming an excellent “adhesive substrate” for the adhesion of soot deposits.
- But that's not all. Regular use of freshly cut, damp or improperly stored firewood is fraught with considerable danger. Increased humidity of wood is the cause of abundant condensation on the walls of the pipe, which also “fits” very well. rising up tiny soot particles.
 Damp firewood, and even coniferous wood - you can’t think of anything worse for a stove!
 - Everything would be fine, but nowadays many homeowners also consider the stove as a “universal waste disposer.” This means that a large number household waste goes into the furnace. It turns out that a huge amount of polymers, food waste, and other substances pass through the oven, which, when burned, produce whole “bouquets” of a variety of fats, resins, esters, and non-combustible solid particles, which very quickly lead to the lumen of the pipe becoming overgrown.

- A factor stimulating frequent chimney blockages may be poor quality work performed by the stove maker. Narrowing of the pipe channel, too many turns or incorrect angle, mortar residues on the inner surface of the wall - etc. - all this provokes the build-up of soot waste in such places. In addition, poor thermal insulation of the chimney or ill-conceived pipe wall thickness that does not correspond to the order scheme can lead to excessively abundant formation of condensate - and this is another step towards an emergency situation.
- We cannot exclude the possibility that some birds decided to build nests in the pipe, which was not protected from above by a cap, in the summer, when the stove was not in use. In addition, random debris, such as dead leaves, can get into the pipe. From such little things, it would seem, sometimes it becomes quite difficult to grow punchable plugs.
- Soot accumulating on the walls may, under the influence of any external reasons the whole piece will peel off and fall down. If the fragment is large enough, it often happens that it stands askew in the cavity of the pipe, and then a full-fledged blockage quickly grows on the basis of this “jumper.”
The dangers of clogged chimney pipes
There are many reasons, but no matter which of them causes the blockage, it poses many very serious threats:
- Tapered the gaps in the chimney sharply reduce draft, and therefore the reverse movement of smoke is very likely - into the room, from the combustion chamber. In addition to the fact that smoke itself is unpleasant, the threat of carbon monoxide poisoning increases sharply.
- Low draft leads to an increase in the volume of condensation on the internal surfaces of the pipe, that is, further clogging of the chimney can occur even faster, like an avalanche.

- A thick layer of soot is quite strong thermal insulator, which prevents the furnace channels from heating to the desired temperature. This situation always, without exception, leads to a drop in the efficiency of the heating device and to excessive consumption of the fuel used.
- Soot is unburned solid residue, but this does not mean that it is non-flammable. On the contrary, a thick layer of soot deposits under certain conditions can easily be ignited by a flame, for example, from sparks rising with the flow of gases. This leads not only to the burning of the pipe walls, but also to the vulnerability of the entire house. This situation is one of the main causes of fires in buildings equipped with stoves.
 An eerie picture - a sheaf of red-hot sparks from a chimney
 - A chimney overgrown with soot becomes a real fire hazard for neighboring buildings - from such an uncleaned chimney very often “fiery tails” fly out - sheaves of hot solid soot particles.
Such situations are described without any exaggeration. All these troubles can occur in combination, almost simultaneously, and the consequences are sometimes the most tragic. That’s why you should never forget about regular inspections and cleanings.
How often should cleaning be carried out?
Cleaning a pipe that is heavily overgrown with soot deposits is extremely difficult task. It is best not to let this happen, but to carry out regular inspections and preventative cleanings of the chimney.
| Name of preventive measure and type of equipment | Frequency of work |
|---|---|
| Preventive inspections of the condition of the chimney and smoke exhaust channels of stoves | |
| Checking any equipment | Immediately after installation, before commissioning, or after any repair work has been carried out |
| Checking any equipment operating on a seasonal basis | Immediately before the start of the heating season |
| Checking chimney systems gas ovens and boilers | At least twice a year during the first two years of operation, then at least once a year. |
| Checking brick chimneys - regardless of the type of stove or boiler | |
| Checking asbestos-cement, heat-resistant concrete or ceramic chimneys | At least once a year |
| Chimneys of heating and heating-cooking stoves | At least three times a year - before the start of the heating season, during it, and at the end |
| Cleaning of chimney channels in pipes - as deficiencies are identified during inspections, and in addition, during the period of active operation: | |
| In heating and heating-cooking furnaces | At least once every three months |
| In continuous furnaces | At least once every two months |
| In constantly used kitchen ovens | At least once a month |
| In regions characterized by harsh winters with low temperatures, chimney caps are checked at least twice a month to prevent ice from freezing and causing blockages. |
The fact that this needs to be done is probably already clear to everyone. But who will do this?
Where can I find a chimney sweep?
But this is a problem in our time, and a considerable one. There are not many chimney sweeps left - professionals, in the understanding that has been put into this concept for several centuries.
By the way, the need for the emergence of such specialization in the Middle Ages is directly related to massive urban fires, which from time to time shook many densely populated European cities and literally destroyed them to the ground. There is an awareness of the direct relationship between the risk of fires and the condition of chimneys, and an understanding of the importance of qualified maintenance of stoves and pipes. And already in the 17th ÷ 18th centuries, first in the German principalities, and then in other countries of Northern Europe, guilds (workshops) of specialists - chimney sweeps - appeared. And in Denmark, for example, this was even carried out by royal decree, which once again proves the importance attached to their work.
By the way, this is one of those professions with which the largest number of all kinds of superstitions, signs and prejudices, urban legends and amazing, unlikely stories are associated.

On the one hand, chimney sweeps, always smeared from head to toe with soot, seemed to be outcasts who were even forbidden to move on the sidewalks for the “clean public.” But on the other hand, all representatives of this profession have always been distinguished by a rather elegant appearance - a fitted short jacket with necessarily shiny buttons and a wide leather belt, and the obligatory headdress - a top hat. They say that, perhaps, the tradition of wearing a top hat came not only from the desire to look “impressive” - it’s just that this voluminous, high headdress contained a lot of equipment and accessories necessary for work. In addition, it could serve as a good shock absorber when, for example, a brick falls on your head.
The activities of chimney sweeps sometimes evoked some mystical feelings - they were often credited with being close to " evil spirits", they frightened naughty children, they often appeared in folklore works - legends, songs, ballads, etc. Feature– very often the plot was based on the fact that under the soot-smeared mask of a chimney sweep there was hiding some kind of exile or a once-lost child of “blue blood”.
Despite all the wariness towards representatives of this profession, they were rather treated with great respect. And in many countries it is still believed that touching a chimney sweep and getting your finger dirty with soot is a sure sign of quick success.

In many cities of Central and Northern Europe, monuments to chimney sweeps have been erected. These specialists are in great demand there even now. There are even special schools, studies in which, by the way, take several years and include, in addition to narrow technological areas, many special related disciplines, including mathematics, physics, fundamentals of architecture, ecology and even economics.
True, the “weapons” of a modern chimney sweep are much richer than before. And most importantly, devices have appeared that allow telemetric inspection of pipe channels in order to quickly find the main areas of contamination and remotely control the process of their cleaning.

Where can I find a good specialist in our area?
- Well, firstly, you can search in regional periodicals in the sections of advertisements for the provision of services. By the way, competent specialists– chimney sweeps are highly valued and surely their names and contacts should be known locally.
- Secondly, in many cities, regional centers and etc.. Specialized companies have been created and are operating - enterprises engaged in servicing furnace and boiler equipment. Surely, one of the types of services provided is inspection, repair and cleaning of chimneys.
- And thirdly, if all this is not available in local conditions, or if there is simply no desire to involve someone from the outside, you will have to learn the basic cleaning techniques yourself.
Mechanical manual cleaning of chimneys
For a long time, the main method of servicing chimneys was their mechanical cleaning, and, therefore, the main tools of chimney sweeps were brushes, pipe cleaners, heavy cannonballs on cables, scrapers, brooms and other devices. What is characteristic is that all these tools and technological methods of working with them have not undergone any significant fundamental changes to this day.
Roof side cleaning
Cleaning tool
So, to clean the chimney channel from above, from the roof side, it is usually used rope(rope) on which they are attached (tied or buckled up carabiners) hard brushes for cleaning the walls from soot and a massive weighting agent - traditionally a cast iron core with an eye was used for this.
 The classic chimney sweep tool is a rope with a core and a brush
 The heavy load (the core) serves a dual function. Under the influence of its gravity, the brush-ruff (one or even several) moves in the chimney channel from top to bottom. But in case of severe blockages, the chimney sweep first breaks through the channel with the core, using it as a percussion tool. Only after the passage of the canal has been achieved, brushes can be used.
The round shape of the core is very convenient in that it minimizes the risk of it jamming in any tight, soot-covered areas of the chimney. However, this is not a dogma at all, and the craftsmen in the manufacture homemade instrument use other available loads. The main thing is that the suspended object is well centered so that it does not get skewed anywhere.

Brushes are attached above the core, in one or two tiers.
Modern brushes can be made of plastic or have long metal bristles. (It is strictly forbidden to use metal brushes on chimneys mounted on stainless steel pipes). They differ in shape: most of them are round, but you can find special brushes for rectangular chimneys.

The brushes are equipped with rings at the top and bottom for assembling them into general design– for attaching a cable or other circuit elements – additional brushes and a core.

There are models of long brushes designed for quick and high-quality cleaning straight cylindrical chimneys. Plastic or metal pile in such products can be arranged in a spiral.
If desired, you can find ready-made “chimney sweep kits” in specialized stores. They are equipped for a certain diameter of the chimney and include all the elements necessary for cleaning the top - a rope (cable), a weight, a set of brushes and carabiners.

If you assemble such a device yourself, then the brush can be purchased at the store. But, apparently, there are situations when buying it for some reason is not possible at the moment. If the chimney needs urgent cleaning, but there is no brush, you can make it yourself, using old plastic bottles as a starting material.
| Miniature | Description of the work process |
|---|---|
 | An ordinary plastic bottle is taken and cut in two so that the upper part is about 150 mm in height. Cuts are made on the walls in increments of approximately 15 mm. The length of the cuts depends on the diameter of the chimney to be cleaned. You need to orient yourself so that with the petals bent, the diameter of the resulting brush is 30 - 40 mm larger than the size of the chimney. |
 | A hole is drilled in the cork (in the center) through which the rope will pass. |
 | After the petals are cut and bent, the plug is drilled and screwed into place, you get something like this homemade brush. It is necessary to make two such brushes - they will be located symmetrically, towards each other. |
 | Any massive object can be used as a load (in this case, an old bronze door knob). The weight of the load must ensure that the brush passes down through the chimney channel. |
 | A strong cord is securely tied to the load and then threaded through the hole in the plugs of both brushes. |
 | In order for the lower and upper brushes with the “pile” directed towards each other to be located at a distance from each other (from 150 to 200 mm), a glass of the appropriate height must be inserted inside this prefabricated brush. To do this, a cylinder is cut out of the remaining part of the bottle, cut lengthwise, and installed between the brushes. It is given a diameter approximately half that of the brushes, after which it is fixed with a regular office stapler. Then all that remains is to tie a fixing knot over the top brush plug - and the tool is almost ready for use! |
This approach, by the way, is quite justified in country houses, where the stove is fired not so often, and buying professional tool or calling a specialist is simply unprofitable. And a homemade brush can cope with a one-time task no worse than a factory one. And there is no need to store it - you can always cut out a new one in a few minutes.
Video: another option for making a homemade “ruff”
How to clean
- Before starting cleaning, be sure to close all inspection hatches on the chimney. It is necessary to take some measures that will prevent the cleaned soot from falling out of the stove or fireplace onto the floor and onto interior items in the premises. For example, the hearth or combustion chamber is additionally covered with a wet cloth.
- Cleaning from the roof side must be carried out with obligatory observance special measures precautions, especially if the roof has a steep slope. Fall insurance is provided. Your feet must wear closed shoes with non-slip soles. Be sure to wear safety glasses to protect your eyes from soot or other particles. Hands are protected with gloves. It would probably be advisable to cover your face and hair, since soot is quite difficult to wash off. Such work should not be carried out during rain or strong wind. Naturally, starting such operations in a not entirely sober state, tired, or under the influence of certain medications is strictly prohibited.

- Cleaning begins by removing the umbrella (or other pipe head). Inspect the entire visible part of the canal and, if necessary, use a scraper, broom, or other available tools to clear it of debris and deposits.
- Next, a test pass is made with the core. If you come across large deposits, then the load should help deal with them - chip them off so that they fall down.
- After the load has shown the passage of the channel to the required depth, brushes are installed above the core, and the process of cleaning the walls from soot begins. The principle is simple, the work is quite tedious and dirty. The bottom of the brush moves under the weight of the load, and up when pulled by a rope. Slowly, in small sections, the walls are cleaned from the top and to the full possible depth.
- From time to time, inspection chambers on the chimney are checked - they are cleaned of soot that has fallen from above. They will be completely cleaned upon completion of work.

Instead of a cable with a load, long flexible shafts with a brush screwed onto them or prefabricated rods are increasingly used in our time. These tools are more versatile, as they allow you to clean chimneys from below, from the side of the stove (fireplace). Let's look at them below.
Cleaning the chimney from the stove side
A tool with a load is effective only until the first serious turn - even at an angle of 45 ° the passage will be problematic, and with a rectangular one it is guaranteed to stall.
To carry out cleanings, if the design of the furnace is well thought out, there must be special vents and hatches that allow cleaning tools to be inserted into the pipe cavity without resorting to disassembling it. But here gravity no longer becomes an assistant, but quite the opposite. And in order to push the brush inside the chimney, it must be placed on a rigid and at the same time flexible support.

For small areas, up to 3 - 5 meters, you can purchase a special set in the store - one or more brushes and a flexible fiberglass rod with a handle at the end.
This device is quite multifunctional. It is used, changing only brushes of different diameters, for cleaning ventilation systems, small areas of chimneys, and sewers.

A more professional approach is a special tool in which a flexible shaft of a much larger diameter is wound onto a drum. The size of the areas being cleaned is, of course, much larger. Markings are usually applied to the flexible shaft, which allows you to accurately monitor the depth of the brush entry into the pipe.
Finally, these can be prefabricated rods that are screwed to one another as the brush moves deeper into the chimney.

You can find similar sets on sale, equipped with the required number of rods made of fiberglass, and brushes of the required diameter - plastic and metal.

The rods are usually 1 m long each, equipped with threaded adapters for mutual installation with each other or for installing a brush. As a rule, there are 10 such parts in a set.
The table below shows an example of cleaning an external chimney using this kit:
| Miniature | Description of the work process |
|---|---|
 | A correctly assembled external chimney at its lowest point must have a plug with a condensate collector, a tap for draining it, for inspection. This is the most convenient place for cleaning. |
| The plug is completely removed to open the passage into the cavity of the chimney pipe. The removed part can be immediately cleaned of dirt, fallen soot, and other foreign objects. | |
 | Since the stainless steel pipe will be cleaned, we put the metal brush included in the kit aside - it cannot be used in this case. |
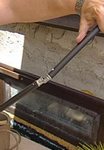
 | A cleaning brush is screwed onto one of the rods included in the kit. |
 | The same operation - against the background of an open entrance to the chimney. |
 | The brush is inserted into the pipe cavity and cleaning begins. Performing translational frictional movements up and down, the brush is gradually moved upward along the chimney channel. It is forbidden to make rotational (around an axis) movements, so as not to accidentally unscrew the assembled tool. |
 | As necessary, during the work, the total length of the central rod is increased - new rods are screwed on. |
 | And this miniature demonstrates the extreme flexibility of fiberglass rods. Thus, curved sections of the chimney are also amenable to a similar cleaning method (of course, up to a certain limit, but it will most likely be possible to cope with an angle of 45 - 60 degrees). |
In a similar way, any areas of the chimney where it is possible to introduce a brush are cleaned. This can be done when cleaning from the roof, from inspection hatches or directly from the firebox (a typical example is a regular fireplace). Removing the brush from the pipe is done in the reverse order, with sequential dismantling of the sections.
The soot cleared from the surface of the walls is collected and removed - sometimes it is connected to this stage. After a certain pause, 30 - 40 minutes, necessary for the cleaned soot to completely settle, all inspection hatches and valves are checked. After cleaning, you may need to carry out minor repairs to the chimney - for example, repairing cracks or other defects in the external surface. The pipe head must be reinstalled.
By the way, it’s easy to make a set of such rods yourself, using polypropylene pipes. Their flexibility, of course, is not as high as that of carbon fiber, but it may be quite sufficient for certain straight chimneys.

If there is, then making such a set of rods will take literally a few minutes. It is necessary to cut the pipe (Ø 20 mm) into equal sections (for example, 1 meter), and weld ordinary pipes along the edges of each threaded fittings by ½ inch. It is clear that the “father” is welded on one end, and the “mother” on the other.
Chemical cleaning of chimneys
Mechanical cleaning of chimneys is very radical way, giving good results. But this event is quite difficult and very dirty. Is it possible to simplify this cleaning? It turns out that it is possible if you regularly carry out preventive work using special chemical agents.
The principle of their physical and chemical action may be different, but is aimed at common goals - removing already formed soot deposits from the inner wall of the pipe and creating conditions for the longest possible prevention of new soot deposits. Let's take a closer look at a few of these tools:
"Smoke"
Products are manufactured under this brand Russian company"Ecolais". The range is represented by three different products:
Special box "Smoke"
The principle of operation of such a cleaner in the form of a cardboard box is extremely simple. It is simply installed in the combustion chamber (in a fireplace or stove) and set on fire. The entire cleaning process takes about an hour and a half. The chemicals included in the preparation in the box actively clean soot deposits, transform the resinous components, making them brittle and self-settling. As a result, the growths either crumble down or come out, carried away by the smoke.
 Cleaner “Smoke” in the form of a box
 By the way, the active effect of such cleaning is not at all limited only by the time of burning the bag - it lasts for two weeks, and the pronounced effect will be noticeable for at least three months.
Log "Smoke"
If the remedy described above is purely preventive, then a cleaner in the form of a log will also add an aesthetic component to the process.
 More aesthetically pleasing is to use a “Smoke” log
 This purifier is designed in the form of an ordinary log that can be used to heat a stove. By the way, the metal salts included in its chemical composition give a very interesting visual effect - a beautiful turquoise flame.
Otherwise, the principle of operation remains the same.
Cleaner for pellet stoves and boilers “Smoke”
Manufacturers have also provided a cleaner in the form of granules, which helps to cope with the problems of contamination of the internal channels and chimneys of pellet boilers and stoves. This type of fuel has its own specific characteristics, therefore, a special approach is needed to prevent such equipment.

This cleaning agent has been given the characteristic appearance of ordinary ones - this makes it easier to mix with the main fuel. But, by the way, you can also use it in conventional wood-burning stoves.
Typically cleaning is carried out once every two months. For a flight boiler, you need to mix 10 kilograms of cleaner with a ton of natural pellets. If a regular stove is being cleaned, then it will be enough to add a kilogram of granules daily, for 5 days, to the firewood during one of the fireboxes.
Video: cleaning chimneys with Dymovoy brand products
Production of the companyHANSA
Technologists from the West German company HANSA, when developing preventative agents for heating devices, placed the main emphasis on the fight against creosote - resinous substances that, when interacting with water vapor, create that very sticky base on which soot actively settles.
The substances included in the preparations act in two ways. The first are aimed at active catalysis, so that carbon particles burn as completely as possible, leaving virtually no soot. Other substances react with creosote when exposed to high temperatures. At the same time, the resinous structure loses moisture, and therefore its viscosity. The remaining layer becomes fragile, brittle, it begins to crumble and almost completely burns in the flame of the hearth.

You can find several on sale types of similar cleaners that in Russia they are better known under the brand “Chimney Sweep”.
- The top miniature shows the “Chimney Sweep” product, made in the form of a loose mixture. The kit includes a measuring cup with which the dosage is made. The product is used both for cleaning and for preventive purposes, adding, for example, 1 - 2 measuring cups for every 4 - 5 fires of the stove or fireplace. This approach allows you to be sure that soot will not accumulate in the chimney.
- Below is the same product, but already dosed in sachets. The use is no different from the method described above.
- The middle miniature shows a Chimney Sweeper log in a package. In this form, it is placed in a heated combustion chamber, ignited and left until completely burned out. To keep chimneys constantly clean, it is recommended to carry out such preventive maintenance approximately once a month.
Chimney Sweep cleaners are suitable for all types of stoves and chimneys. What is especially important is that they do an excellent job of cleaning the most difficult pipes in this regard - brick, which often have an uneven porous wall surface.
« Kominichek"
This is also a very well-known and widely popular Czech-made chimney cleaning product among Russians.
 Prepackaged sachets of Kominichek
 It is an istallic mixture packaged in 14 gram sachets. Usually one such bag is designed for a kilogram of dry firewood. Chemical reagents convert soot deposits deposited on the pipe walls into a substance that burns even at a not very high temperature. This can be attributed to the advantages of this drug. Disadvantages - its “power” is not enough if the chimney is very neglected and the soot layer on the walls already exceeds 2 mm. And one more limitation - processing with Kominichek, due to the peculiarities of its chemical composition and, as a result, smell, can only be carried out with the combustion chamber door tightly closed. Thus, this cleaner cannot be used in fireplaces with an open hearth.
 There are many other means - there is plenty to choose from
 There are many other cleaners, soot and tar converters, etc., both domestic and foreign. You can try some of them and choose the best option for yourself - both in terms of efficiency, ease of use, and cost.
Video: one of the chemical cleaning products - “The Cheerful Chimney Sweep”
Folk remedies for cleaning chimneys
There are many ways in which our ancestors, with varying degrees of success, fought the phenomenon of chimneys becoming overgrown with soot. Surely, some of these folk methods were taken into account when creating modern chemical cleaners.
Let's remember a few folk "recipes":
- Regular boiling water can be of great help in breaking through very strong old sooty clogs. Several liters of very hot water are poured into the pipe from above immediately before starting to light the stove.

Boiling water will soften it somewhat T hard growths, and the rising hot gaseous combustion products will destroy them, causing the soot to fly out in pieces along with the smoke.
- One of the simplest ways is to add a small amount of ordinary table salt. Sodium chloride vapors appear to have a destructive effect on viscous soot deposits.

True, this method is applicable only as a preventive measure. It will not help deal with old, even small soot growths.
- Unexpectedly, naphthalene also helps in this matter. A standard tablet of this substance, thrown into a melted hearth, becomes an excellent preventive and cleansing agent. The soot begins to flake off and come out along with the smoke.

The method is proven, but, alas, not without its drawbacks. And the main one is that naphthalene has a very persistent odor, which is very difficult to get rid of, and which is not pleasant to everyone.
- Don't throw away potato peelings - they're very effective remedy from the accumulation of soot in the chimney. From time to time it is useful to pour peelings or even just finely chopped raw potatoes into a fully heated oven.
 An old folk method - burning potato peelings in an oven
 Rising vapors with a high starch content soften the structure of sooty growths. Some of them will fall off. And the remaining ones will be much easier to clean mechanically.
- For a long time, a mixture of coal, saltpeter and “blue stone” - copper sulfate - has been actively used to clean chimneys. The composition is made in proportions:
- copper sulfate - 5 parts;
- powdered coal (preferably coke) - 2 parts;
- saltpeter - 7 parts.

You don’t need a lot of this mixture at all - about 20 grams per hundred kilograms of firewood is enough. The composition is poured into the oven preheated to the optimal setting, then the firebox door is closed very tightly. Carrying out such cleaning in open fireplaces is prohibited.
- Finally, one of the most famous cleaning methods is the use of special firewood for this purpose. Thus, it was noticed that the fumes released during the combustion of aspen or alder contribute to the detachment of soot deposits from the walls of the chimney, and very high, but short-term heat allows the residues to escape with smoke or burn in the firebox.
 Alder firewood - usually stands out against the general background with bright colors on the cut
 It is interesting that neither alder nor aspen firewood can in any way be considered a high-quality type of fuel for heating rooms, or the heat transfer from them is small. But having a supply of such wood is still very useful. Occasionally, for preventive purposes, you can finish firing the stove by finally adding a few kilograms of alder or aspen into it. True, in this case it is necessary to ensure that sparks, which often fly out of the chimney during such a procedure, do not cause a fire in neighboring buildings.
So, there are a lot of means for prevention and regular cleaning of the chimney. Maintaining the stove in good and safe condition is the direct responsibility of every homeowner. And it’s up to him to decide whether to call a chimney sweep or do everything himself. The main thing is not to forget to do this, to elevate such events to the rank of priority. And, of course, strictly follow the recommendations for the correct operation of stoves - then you will not have to address cleaning issues so often.
Over time, a brick stove or fireplace with an open firebox becomes covered with soot. If the brick is light, it is very noticeable and spoils the entire appearance. In addition, two or three times a year the chimney of any type of stove must be cleaned of soot inside the pipe. You can learn more about how to clean soot from a brick and what methods of cleaning a chimney exist.
To remove soot from the brickwork of a stove or fireplace, you can use the following methods:
- Washing with a regular damp sponge
- Cleaning the brick surface with a vacuum cleaner, washing with detergents
- Using baking soda and vinegar
- Special products for cleaning brick surfaces.
To clean the outer walls of the fireplace, you will need the following equipment: rubber gloves, a stiff brush, a broom, a vacuum cleaner, a sponge.
 How to clean soot from a brick
 The floor around the fireplace is lined with film so as not to contaminate the floor covering when cleaning. Next, you can prepare a mixture for washing bricks, which consists of salt and regular washing powder. The more contaminated and the larger the surface to be treated, the more ingredients will be needed. The finished solution should look like a thick paste. The brick is moistened with a foam sponge from top to bottom and cleaned of surface contaminants. Then the prepared solution is whipped in water until foam forms and applied to the brick. The product should remain on the wall for at least 15-20 minutes, and the foam should turn black. After this, the solution is washed off with a brush. This method is effective in cases of light contamination. Cleaning stoves from soot embedded in bricks can be done using the following methods:
- The masonry is moistened with water, then vinegar is applied to it for 20-30 minutes, after which it can be cleaned with a sponge and water. When using this method, the room must be well ventilated.
- Using a washing vacuum cleaner after applying a solution of salt and powder to the masonry. This method is not suitable for cleaning old brickwork as it may destroy it.
- Using special detergents designed for cleaning brick surfaces.
How to clean soot from a stove
If you do not carry out preventive cleaning of the chimney before each heating season, or even more often, this will lead to an accumulation of soot and soot up to several tens of centimeters thick inside it. This should not be allowed, since the walls of the pipe begin to wear out, draft deteriorates, and as a result, the chimney opening may catch fire. To avoid this, you need to know several ways to clean soot from a stove chimney. They can be divided into three groups: mechanical cleaning, chemical cleaning and the use of home remedies.
- Mechanical cleaning is suitable for removing a layer of soot more than 5 mm thick.
To do this you will need: a special metal brush, a small weight on a rope, hard wire brushes and a hook, as well as protective equipment for the eyes, hands and respiratory tract. To clean the fireplace, you need to do it from below, and the stove - from above.
 Chimney cleaning
 It is necessary to tightly close the firebox door and other openings leading into the house. If there is debris in the chimney, you need to push it down with a long stick and remove it from the house. The soot is removed with a brush and round wire brushes, and the blockage is pushed through with a weight on a suspension. After this, you need to remove soot from the cleaning holes and from the firebox.
- The chemical cleaning composition is suitable for use if the plaque is of small thickness. Before you clean the stove from soot, the chimney must be cleared of debris. Typically, the chemical method is considered a preventive measure.
This method consists of using chemicals that must be burned in a stove. The most popular are:
- A mixture of equal amounts of saltpeter, copper sulfate and coke, which must be poured in a maximum dosage of 200 g onto smoldering coals. Causes soot to fall off.
- Anti-carbon chemical composition (PCC): an effective composition that is burned in the package. The maximum permissible quantity is indicated in the instructions; it must not be violated.
- Czech remedy “Kominicek”: consists of copper chloride, so when using it it is necessary to ventilate the room. Copes well with small soot deposits.
- “Chimney Sweep Log”, consisting of natural aspen or birch wood impregnated with copper chloride. When burned, it causes tar deposits to peel off.
- Home remedies.
- The most effective, but not suitable for weak chimneys, is aspen firewood. When burned, the soot inside the chimney ignites and white flakes begin to fly out. The structure heats up to 1000 degrees, so it must be strong enough.
- Potato peelings will help remove small deposits. They can also be used as a pre-cleaner before using the mechanical method, as they soften the soot. To do this, you need to prepare 0.5 buckets of dry peelings or finely chopped dry potatoes, which you need to throw on the smoldering coals. The released starch will soften the soot and help in the further fight against its removal.
- As a preventative measure, you can use ordinary salt: every time you light the stove, you need to pour it onto the burning wood. After this, the soot becomes less viscous and settles on the pipe in smaller quantities.
- Naphthalene: one tablet can be thrown into a burning firebox, the effect of such cleaning is similar to aspen firewood. Before use, you must ensure that the pipe is intact on the outside and that there is no debris inside.
- To ensure that soot accumulates in the chimney as little as possible, you can burn one aluminum can every ten kindlings. In this case, the temperature should be such that the can actually burns.
- A method similar to mechanical cleaning is to use a regular (hard) hose, to the end of which a cut plastic bottle or brush is attached.
Thus, with small accumulations of soot inside the chimney, you can get by with preventative measures using home remedies. If the chimney is significantly narrowed due to a thick layer of soot, it is better to use one of the chemical methods, then clean it mechanically.
- Brick stove chimney
- Chimney of a metal stove
- Is it time to clean?
- Burning aspen wood
- Chimney cleaning products
- DIY chimney cleaning
- Cleaning the chimney in the bathhouse
More and more city residents are flocking closer to nature - to their dachas and villages. And more and more often they get lost in everyday situations that are unusual for village life. A typical example is caring for chimneys of country, bathhouse, and village stoves. The main question is: “how to clean a chimney?” First of all, it is necessary to understand the essence of the issue. Chimneys differ in design and material.
Brick stove chimney
 It is no secret for owners of capital brick stoves that pipes are almost never straight-through. Country stoves differ from direct-flow potbelly stoves, the memories of which are still retained by city residents. They represent complex engineering structures- bell-shaped or with several “wells”. Sparks entering the chimney are virtually eliminated. Such a device has two elbows with a horizontal section between them, called a “hog”. "Hog" prevents sparks from flying out into the street through the pipe. The passages are made of red brick, their surface has roughness and the presence of masonry seams - this leads to soot deposits on the walls.
Chimney of a metal stove
 Nowadays there are practically no capital stoves being built - they are expensive, take a long time, and are not justified economically.
Many people rarely use warm heating, spending time outside the city exclusively in the summer and on warm days in autumn and spring. Summer residents usually use metal structures that last a long time. Accordingly, the pipe is made less extensive, using sandwich pipes. More often they are direct-flow, high (at least 5 meters - required by operating technology, otherwise the fuel will not ignite). The smooth surface of the stainless pipe does not seem to be susceptible to soot accumulating on the surface. Alas, another problem awaits the owners - it will be discussed below.
Is it time to clean?
 A natural question arises: “When should I clean the chimney?”
The first bell is the appearance of a specific smell of burning at the moment of heating. Many people accept it as an obligatory fact accompanying the firebox. Wrong! A properly made stove, without cracks in the masonry, with a clean chimney, does not smell. The next warning factor is a decrease in heat transfer. This is due to the fact that due to a decrease in draft, the flow of oxygen, which ensures the combustion process, is reduced. Firewood burns worse, does not burn out completely, and heat transfer decreases accordingly. Be sure to pay attention to the color of the flame. When decreasing
 traction and required quantity oxygen, it turns dark red. Look at the pipe from the street. If you have loaded dry firewood and black smoke comes out of the chimney, this is a sign of contamination of the chimney and is already a very serious hint that it needs to be cleaned. Many people don’t pay attention and continue to heat until one day smoke comes from the firebox into the house.
 It is necessary to clean the chimney pipe in time and observe when burning simple rules. We minimize the formation of soot in the pipe:

Traditional methods of cleaning a chimney
There comes a time when it is necessary to clean. First of all, we’ll tell you how to clean a chimney from soot using folk remedies:
Burning aspen wood
 The most common and in an effective way is burning aspen wood.
Surprisingly, the villagers talk about aspen, chuckling: “Aspen does not burn without gasoline.” Indeed, it is quite difficult to melt aspen, even dry, but then, having flared up, it gives off intense heat that burns out the soot in the chimney. You need to be extremely careful here, as soot in heavily polluted chimneys is explosive. It is said that the Chinese invented gunpowder through observations of chimney explosions. To avoid such consequences, it is better to make it a rule to throw one aspen log into each fire pit - wait until the rest of the firewood has already flared up. Thus, the aspen will burn out the soot gradually and there will be no danger of explosion.
Chimney cleaning with potato peelings
 The second popular method will make it possible to clean the chimney from soot in a less dangerous way. We collect potato peelings, skins or finely chopped potatoes in half a bucket, and pre-heat the stove. The firewood is on fire - throw the cleaning materials into the fire. The starch contained in potatoes evaporates with water, gets to the top, cools, and settles on the soot present. It is much heavier than soot deposits; under its weight, the soot falls down, from where, after the structure has cooled, it is removed through cleaning holes. A properly designed stove must have such holes. After the pipe itself has cooled, mechanical cleaning is necessary.
Chimney cleaning with rock salt
 As a preventive measure, they use rock salt to sprinkle burning firewood, which leads to a reduction in the deposited soot - it is simply nailed down with salt and does not fly out of the combustion chamber. This method greatly reduces soot accumulation in the pipe; unfortunately, it does not completely remove it.
 Chimney cleaning products
Let's look for more modern answers to the question “How to clean a chimney pipe?” Isn't it possible that some kind of modern remedy cleaning? As paradoxical as it may sound, the choice of funds is small. Basically chemical ones - they are added to the firewood and act on approximately the same principle as potato peelings or aspen logs - they raise the combustion temperature, burning out the soot.

Remember no better option, how to clean a pipe using... a chimney sweep.
You can climb onto the roof yourself and clean it the old-fashioned way - using a Christmas tree tied to a rope and lowered to the very bottom, then carefully pulled out by the top. Of course, now there are many devices, but the principle of their operation is not far from the notorious Christmas tree on a rope.
DIY chimney cleaning
It is better to carry out cleaning in a warm, windless, clear weather. The oven must cool completely. The frequency of cleaning depends on the intensity of use, the firewood used, its humidity and quality.
Before starting the classic procedure, first close the cleanout doors, fuel doors, and ash door. Try to place a damp cloth on top - it will cover the existing cracks.
Having carefully climbed onto the roof, be sure to fasten the safety rope to a reliable roof element. The main tool of a chimney sweep is a brush on a rope with a weight attached.

How to use it is quite clear from the photograph. There are times when the height of the pipe does not allow you to reach its top. This often occurs when using sandwich pipes. The pipe will have to be disassembled for cleaning. Luckily, they don't get clogged that often. The main difficulty is condensate, but it accumulates below in a specially designated place - an easily opened sump. The condensate is drained and disposed of. Can't disassemble the pipe? Clean from below with a device similar to the first device.

This is the same brush, but mounted on a flexible, rigid wire or plastic fiber. This method is somewhat more unpleasant for the chimney sweep, since all the waste will fall down during the cleaning process. Therefore, when using this tool, prepare the area in advance - fence it off with damp cloth, prepare a vacuum cleaner.

Having finished cleaning the vertical part of the pipe, it is necessary to clean the horizontal part. At the beginning of the article we talked about the “hog”. Cleaning doors are never installed on it. This is due to the fact that it is located in the attic outside the area of constant surveillance. Dust accumulates in the attic, and if it gets on a hot cast iron door, it can cause a fire. When laying a “hog”, a couple of bricks are left protruding outward. You can take them and, having carefully beaten off the clay of the solution, pull them out, thereby opening access to the horizontal part of the pipe. Having cleaned the “hogs”, the bricks are inserted back and covered with clay.
Once the cleaning is complete, the “hogs” move on to cleaning the oven itself. It is cleaned through special cleaning doors.
pechnoeremeslo.ru
Why do you need clean smoke exhaust ducts?
Many in childhood saw how their grandfathers and great-grandfathers cleaned the pipe from soot, but not everyone knows why this not very pleasant operation is necessary. Therefore, I will work a little as a lecturer so that you have something to tell your children on long winter evenings, rocking in a rocking chair by the fireplace.
So, when solid fuel burns, in addition to thermal energy and hot gases, soot is formed in the furnace. With currents of rising thermal air, it rises up the chimney and gradually settles on the walls of the chimney.
As the heater operates, the soot layer becomes thicker. And in the end, all this can lead to very unpleasant consequences:
- the channel for removing gases formed during combustion is greatly narrowed, which reduces the draft in the pipe;
- soot adhered to the walls of the chimney damages the surface of the pipe and reduces the service life of the device;
- coefficient useful action stoves (thermal energy production) decreases, that is, to maintain the desired temperature in the room you will have to use more firewood, coal, fuel briquettes or whatever you have;
- the likelihood of ignition of soot deposits inside the stove chimney increases.
Only cleaning the smoke exhaust duct will help you get rid of all the troubles. It is only important to determine exactly when you need to start this not the most pleasant procedure. This is what I will talk about next.
When you can no longer put off this unpleasant task
Basically, based on own experience, I can tell you that if a fireplace or wood-burning stove was built by an experienced craftsman and he met all the requirements, you will need to worry about how to clean the chimney from soot no more than once every few years.
Especially if you use high-quality fuel. For example, if, in addition to firewood, you throw various garbage, plastic bottles, plastic bags and other plastic items into the firebox, you do not need to count on a clean chimney.
I can also advise you not to use damp wood for heating, especially pine or spruce wood.
Birch logs that have been in your woodpile for at least 2 years from the date of harvesting are most suitable for the firebox.
So, I’ll tell you what signs indicate the need for urgent chimney cleaning:
- Smoke color change. A clean chimney produces clean, light and transparent smoke. If soot has accumulated there, it will change its color to a darker one. And the smoke itself will become denser.
- Changing the shade of the open flame in the firebox. If the draft in the pipe is normal and the chimney is clean, the firewood burns with a light orange flame. An orange-colored fire will indicate the need to clean the chimney.
Be that as it may, I advise you to carry out preventive cleaning of the pipe once every 6 months: before the start of the cold season and after it ends. This allows you not only to remove soot in a timely manner, but also to get rid of clogging of the smoke exhaust channel with cobwebs, bird nests, fallen leaves, and so on.
Based on the signs outlined above, you will definitely determine that you need to get to work. But we’ll figure out how to do this below.
Pipe cleaning methods
There are many ways to clean soot from a pipe. You can use both folk remedies and advice, as well as the achievements of the modern chemical industry. Yes, no one has canceled the mechanical method, that is, you can easily work as a chimney sweep.
In my practice, I had to use all available methods, so I can safely talk about each of them in more detail.
Method 1 – Using Grandma’s Remedies
There is no need to philosophize here. Our grandparents have long known that they need to burn in a stove to get rid of soot. I won’t say that these methods are very effective, but they have a right to exist.
Here are a few tools you can use:
- Rock salt. Regular table salt should be poured onto burning wood or coal.
This method is quite common, but not particularly effective. My grandmother often poured salt into the stove, but she did this not so much to get rid of soot deposits in the smoke exhaust duct, but to prevent its accumulation. Therefore, I won’t dwell for long, I’ll tell you about another method.
- Potato skins or potato tubers themselves. The quantity is determined by the size of the firebox in the stove, but, as a rule, about a bucket of such waste was enough for me. They need to be poured into an already burning fire.
The essence of the method is that when organic matter burns, starch is released from potatoes, which tends to soften soot deposits on the chimney. After this, the waste layers fall into the lower part of the pipe, from where they are removed through a specially made hole (it was provided when laying the furnace).
- Firewood from aspen. There's not much to say about the technology itself. You need to chop wood from aspen logs and then light a fire in the stove.
Here's the thing. Aspen firewood burns at a very high temperature, so hot gases enter the chimney, which burns soot deposits. This method is quite dangerous, so I advise you to take some precautions:
- make sure that the chimney material can withstand high temperatures;
- check that soot deposits in the channel are not so large as to ignite.
But in principle, no one is stopping you from buying special chemicals for cleaning soot from stoves. Their price is low, and their effectiveness is proven by practical experience. At least mine. Therefore, the story about them will go further.
Method 2 – Call on science to help
Modern industry produces a lot of products specifically designed for removing soot from the chimney. They can be supplied as:
- powders;
- liquids;
- fuel briquettes.
They are added to the firebox during fuel combustion. The chemical elements contained in the preparations do not cause harm to human health, but have a destructive effect on soot deposits, causing it to collapse into the lower part of the chimney.
Supplements should be used as deposits accumulate or from time to time, as a preventive measure.
I have described the most popular means for cleaning chimneys from soot in the table, which I suggest you familiarize yourself with.
| Name | Description |
| Anti-carbon chemical composition | A special loose powder that must be poured directly onto the firewood while it is burning. This is very effective remedy, which allows you to quickly get rid of carbon deposits in the smoke exhaust channel. It can also be used for prevention. In this case, the powder consumption is 200 g for every ton of fuel. |
| Kominichek | Soot remover made in Czech Republic. It is also supplied in powder form, which contains a catalyst that allows the soot to burn out at a safely low temperature. However, the powder is only suitable for removing a not too thick layer of carbon deposits. |
| Log chimney sweep | The most popular method in our country for cleaning chimneys from soot. It can be used to clean pipes of furnaces and boilers operating not only on solid, but also on liquid fuel. Effectively removes soot accumulation and can be used for prevention. In my case, to keep the chimney of the fireplace in the country clean, one log is enough, which I burn every month. |
Considering that most likely you will also use the Chimney Sweep Log, I’ll tell you how to clean soot in a chimney using it:
- First of all, you need to make sure that the smoke exhaust channel is not completely clogged with soot, debris or foreign objects.
- You can burn the fuel briquette either with the main fuel or completely independently.
- To achieve maximum efficiency, I burn wood in the fireplace, then place the briquette on the hot charcoal(like shish kebab, but not on skewers).
- Before use, you need to remove the packaging of the log, but not the wrapper itself in which the substance is wrapped.
- Usually the log ignites on its own, but if for some reason this does not happen, light the wrapper on both sides yourself.
The soot-eating chemical itself continues to act for about 14 days. During this entire time, lumps of soot may collapse from the chimney into the firebox or to the bottom of the smoke exhaust channel. It needs to be constantly removed from there.
In conclusion of this particular section, I would like to mention one feature that not everyone knows about. When burned, the “chimney sweeper log” produces gases with a temperature of over 1000 degrees Celsius, which can melt a steel chimney pipe. Therefore, the substance can be used in furnaces with stone and ceramic pipes.
Method 3 – we climb the pipe ourselves
I think you are all familiar with the folk wisdom that you can only do a good job with your own hands. This is exactly what I was guided by when I started cleaning the pipes at a bathhouse in the village. In this case, you get rid of not only soot accumulation, but also debris in the channel.
At the end of the work, you will see for yourself how efficiently and smoke-free the stove will operate. I won’t tell you how I took a steam bath in the bathhouse, otherwise you’ll become jealous.
I will only tell you about the scheme of work when cleaning a chimney from internal soot accumulations. The sequence of actions is as follows:
- First, we close the holes in the chimneys, which are specially designed for cleaning the stoves from soot accumulation, with doors or bricks. If this is not done, you will then be tortured to wash the interior of the bathhouse (or whatever you have there) from the black unpleasant coating.
If you are cleaning a fireplace with an open firebox, I advise you to curtain it with a damp cloth to, again, avoid a day of cleaning the living room.
- Then we pretend to be Carlson and go up to the roof. Since you don’t have a motor, I advise you to come up with something as insurance so as not to fall down in the midst of the process. Believe me, no one wants to take you to the traumatology department.
By the way, if it is raining, it is also better to avoid climbing onto the roof. You will either be struck by lightning or slip on the roof. You and your loved ones are unlikely to like both.
- First of all, you need to inspect the pipe from above. If soot accumulation does not exceed 2 mm, there is no need to complicate your life. Go to the store, buy some pipe cleaner and fire it up in the oven. This will be more than enough.
You also need to see if a foreign object is blocking the pipe. This can often be a bird's nest or fallen leaves. In this case, the plug must either be pulled up or pushed down to be removed through the door.
- If, as in my case, there is a lot of soot, we clean it with a special scraper. Then it can be replaced with a special brush, which is sold in a specialized store.
To achieve maximum efficiency, I recommend measuring the diameter of the pipe in advance and purchasing a tool whose diameter is slightly larger than the dimensions of the smoke exhaust duct. You will get a kind of brush, similar to the one your mother used to wash milk bottles when she was a child.
- One more thing. During my work, it turned out that some kind of plug formed inside the pipe, which interfered with cleaning. In this case, you need to use a special weight on a chain, which will break through the blockage and bring it down.
In this case, I do not recommend using a sports weight with a handle. Its center of gravity is shifted, so it may get stuck inside the pipe channel and you will not be able to pull it out. You will have to partially disassemble the smoke duct.
- If you are cleaning not a stove, but a fireplace, you can partially free the smoke channel from soot by working from bottom to top. For this purpose, special brushes with a long and durable handle are sold. It grows in length, so you can reach very deep inside the pipe.
- At the end of the cleaning, you need to remove the fallen soot from the firebox and from the pipe through doors specially provided for this purpose. Don’t forget to clean the vent, there is also a lot of soot that falls there and needs to be removed.
At this point, cleaning the chimney could be considered complete. if not for one important stage– quality control of work. You can safely entrust it to your significant other, unless, of course, she is afraid to climb onto the roof.
Work quality control
At the end of the work, it is necessary to check the quality of the work performed and, most importantly, the condition of the chimney itself. This can be done visually, but it is better to rent a special endoscope camera, with which you can see the pipe along its entire length.
If cracks or defects in the surface of the chimney are found within direct reach, they must be eliminated. You can do this as follows:
- dilute clean clay with water and coat cracks and crevices with it;
- after this layer has dried, you need to make a clay-sand solution and carefully wipe over all other defects with it;
- The last stage is whitewashing the treated areas with lime or painting with water-based emulsion.
If in some places you were unable to clean the chimney, you will have to resort to partial disassembly of the stove, since soot residues in the smoke exhaust channel can cause serious trouble.
obustroeno.com
The need for chimney cleaning
First of all, this need arises if the chimney is clogged with soot. This is fraught with the fact that combustion products cannot freely come to the surface, thereby they will poison the air in the house or bathhouse.
Despite the fact that the service life of a stove chimney is more than 10 years, the service life of a dirty chimney is significantly reduced. All accumulated debris and a compressed “coat” of soot reduces the clearance, which significantly prevents not only the release of combustion products, but also makes it difficult to warm up the walls.
In this case, the efficiency and the draft itself drop, and this, in turn, can lead to increased costs for heating and water heating. In addition, soot is very dangerous: it can spontaneously ignite, and its combustion will occur at a very high temperature - more than a thousand degrees. As a result of all these factors, the walls of the chimney will begin to collapse, cracks will appear through which sparks can enter the living space. This may lead to a fire in the room.

In addition to the above factors for the need to periodically clean the pipe from soot, there are a number of points that are worth paying attention to:
- Furnace channels can become clogged when using household waste as a firebox: bags, plastic bottles, films, rags. This type of debris creates a lot of soot.
- During seasonal operation of stove heating and a furnace in a bathhouse, the chimney can become clogged with cobwebs, and birds can build nests in it - these factors also affect the entry of combustion products into the room.
In order to prevent such phenomena, it is necessary to regularly check and clean the chimney and clean the stove from soot. It is enough to perform preventative cleaning twice a year. But you should not rely on these recommendations, since the regularity of chimney maintenance will depend on the design of the stove itself, on the quality of materials and the fuel itself.
How to clean the oven
The stove does not become overgrown with soot as quickly and heavily as the chimney itself. This is due to the fact that when wood or coal burns in a bunker, there is constant movement, so soot does not have time to accumulate. When it becomes necessary to light the stove, firewood or coal is placed in it, they are periodically turned over using a long metal rod or poker, then the ash is removed from the stove. All these actions are aimed at keeping the oven clean.
Occasionally, in addition to standard cleaning of the stove from soot, there is a need for deeper preventive cleaning: treating the grate, cleaning the internal walls, as well as the entrance and exit to the chimney itself. All these preventive measures should only be performed after the chimney has been cleaned. Otherwise, a lot of debris may end up in the oven.
How to clean a chimney
Currently, there are several methods for cleaning soot from chimneys. Soot cleaning is carried out using the method that our grandmothers used. They poured dry potato peelings into the hot oven. It was believed that one bucket a day would be enough to neutralize soot. The starch found in dry potato skins, when heated, can decompose soot, which will fall off the walls of the pipe directly into the oven itself. It is necessary to carry out such actions within three days, so a lot of potato peelings need to be dried.
This method of cleaning a chimney is currently considered not the most effective, since it is advisable to also use physical cleaning. This can be done using a metal brush.

Classic cleaning
It involves getting rid of accumulated soot using a special structure - a brush with a load. This device is a metal brush with a rope, at the end of which a wire or cord with a weight is attached. Any heavy metal object can act as a load: a weight, a bearing or a piece of metal. The weight of the load must be at least three kilograms, and the length of the rope is equal to the length of the chimney pipe plus a little more so that the end of the device reaches the stove, cleaning the channels well.

To clean the chimney from soot yourself, you need to lower a metal brush into the chimney and clean the walls with rotational movements. This must be done as carefully as possible. To prevent falling from a height, it is advisable to tie a rope around your torso and tie it to a skate or smoker. You can also take a stable position on the roof and lower the brush into the chimney. Just 30 minutes is enough for the chimney to be cleared of soot. But, if it is very clogged, then you will have to be a coward for much longer. At the moment when the brush rises and falls, it scrapes accumulated debris and soot from the walls of the chimney. All debris and dirt fall down into the oven.
After the pipe is cleaned, you need to return to the room and carefully remove debris and soot from the stove, clean the windows (views) and the walls of the stove.
This method of removing soot is considered the most common and effective.
High temperature cleaning
There is another way by which you can also clean soot from stoves and chimneys yourself - high-temperature cleaning.
Its features:
- A very dangerous method. Because you have to work at high temperatures.
- Suitable for very heavy contamination, when stoves and chimneys have not been cleaned for several years in a row.
In order to clean the chimney and stove, it is necessary to prepare aspen firewood. The logs are placed in the stove and set on fire. When the fire engulfs all the wood, you need to open the dampers, thereby causing the stove to “burn out.” This will ensure that the furnace is blown through with hot smoke.

This method is considered effective only for high-quality stoves. If your oven is old, after such cleaning, cracks may form inside, and this is unsafe.
Chemical method
For preventive purposes cleaning chimneys and stoves, country houses and baths, special soot cleaning products are widely used. Chemicals help remove thin layer accumulated soot.
There is a wide selection of chemical products on sale, which can be sold either with or without a set of brushes. The following products received a good recommendation: “Kominchek”, “Chimney Sweep”, “Log”, “Anti-carbon chemical composition”. All these products can be used for chimneys that are not equipped with smoke circulation. Otherwise, on the contrary, soot can severely clog all channels.
“Log Chimney Sweeper” powder is especially popular among summer residents. It consists of salt mixtures, which, entering into a catalytic reaction, cause complete disintegration of soot. This product is added to the firebox along with firewood. The duration of the log is about half a month.


This figure shows diagrams of chimneys that can be cleaned using chemicals.
Important: you need to be extremely careful when working with chemicals. Wear gloves. You also need to know that chemicals leave behind an unpleasant odor, so staying indoors for five days after cleaning is undesirable. Immediately after treating the chimney and stove with chemical components, you need to ventilate the room.
The concept of cleaning the chimney and stove means removing soot, but do not forget about other parts of the stove. They can be washed with soapy water without alcohol and then wiped soft cloth or an old towel.
If lime deposits have formed on the stove or chimney, they can be removed with a 10 percent vinegar solution. After completion of work, all surfaces are thoroughly rinsed clean water and left until completely dry.
Cleaning the furnace from soot by calcination can be seen in this video:
recn.ru
Reasons for repair
The furnace needs work to eliminate defects in the following cases:
- Cracks appeared in the plaster applied over the bricks and in the area of masonry joints. The fact is that certain areas of the stove always have to work hard, since they are exposed to the high temperature that occurs during the burning of wood. All materials that are heated or cooled change in volume and, consequently, crack.
- Plumes of smoke do not go into the chimney, but into the room, which is due to poor draft. Because of this, not only the stove deteriorates, but also people’s health. The draft, on which the heat supply depends, may disappear as a result of overcooling of the smoke exhaust pipe. This means that the chimney is clogged with soot;
- Combustion products are poorly discharged into the chimney, and a certain area of the furnace remains unheated. This problem occurs due to the formation of cracks in the chimney or stove walls, which disrupt the combustion process and lower the temperature.
It happens that the defects of the stove are not visible, but the house smokes. Certain violations can lead to this:
- incorrect location of the chimney or stove nozzles, which is caused by poor quality workmanship or burnout as a result of long-term operation;
- fragments of bricks or pieces of clay mortar getting into the smoke riser, creating a blockage;
- incorrect connection of the steel pipe to the chimney;
- blowing out the final section of the chimney with heavy winds;
- dampness in the room or warm temperature outside, the influence of which can be eliminated by opening the direct stroke valve.
Do-it-yourself stove repair: types of work to eliminate defects
Repairs aimed at eliminating the causes of damage to the stove can be divided into 3 groups:
- current, which is a regular check of the furnace’s performance, that is, cleaning it, filling up cracks and attaching fallen bricks;
- partial, involving the replacement of some elements of the stove structure, repair of the chimney and cleaning of the channels;
- capital, implying that individual sections of the furnace need to be dismantled or reconstructed.
Dropped Bricks
Before covering with plaster and carrying out other repair work, it is necessary to inspect the structure, because bricks could fall out of it. If you do not put them in their place, the oven will malfunction.
To detect fallen bricks, you need to do the following:
- examine the channels through which smoke escapes;
- having found a brick protruding a few mm, pull it out, first scraping off the mortar around it;
- prepare a new one clay mortar and use it to place the brick in place.
As soon as the heating season ends, it is recommended to overhaul the furnace in which the bricks fell out. It will not be possible to postpone this task for another year, since next winter the collapsing stove will most likely not be able to work.
It happens that some bricks crack so badly that they are no longer suitable for reuse. To replace them with new ones, you need to find the following materials and tools:
- new bricks;
- chisel (to easily remove damaged bricks);
- a brush that removes old mortar;
- a sprayer filled with water and necessary to moisten the material before placing it in the masonry;
- brush;
- the raw materials from which the solution is made, that is, purified sand, cement and clay;
- a trowel, a spreading compound that holds the bricks together;
- sieve for sifting sand;
- hammer;
- fireclay powder (optional);
- a wooden trowel, the function of which is to level a new layer of plaster.
Repairing a stove with severely cracked bricks is carried out in several steps:
- removal of the damaged element;
- cleaning the area from under the brick with a brush;
- wetting the new masonry element with water;
- brick installation;
- applying a solution, into which it is recommended to add a little water to avoid the formation of cracks in it;
- plastering (after the solution has completely hardened).
How to seal cracks
If cracks are found in a structure, which tend to gradually increase and lead to the collapse of some areas, then the first step is to determine the cause of their appearance. Most often, cracks form next to a door that is installed incorrectly and therefore contributes to overheating of the brickwork.
Since it will not be possible to dismantle the oven door, because it is installed in the compartment for storing firewood during the bricklaying process, proceed as follows: the clay-based solution that was applied around the perimeter of the door is removed, and then the seams are closed with a freshly prepared composition. Thanks to this, new cracks will not appear on the stove, and the soot that forms along with the cracks around the door will disappear.
Plaster coating
Sometimes the oven is not treated with a special finishing compound, which cannot but affect its operation. Over time, an unplastered brick structure for heating a room becomes covered with many cracks through which smoke can pass. To return the stove to its proper appearance, it must be treated with a special composition only after creating a preliminary screed of the structure.
Repair work aimed at eliminating defects that appeared due to the lack of a layer of plaster implies the following:
- Channels are created in the furnace that are horizontal and 1.5–2 cm deep. These grooves must surround the entire structure so that it is possible to create a strong frame;
- Steel wire is laid in the channels. Then it is tensioned, for which a simple thick nail or metal rod is used;
- The reinforced structure is covered with plaster.
The repairs done are a guarantee that the cracks that have formed will not become wider. A stove with reinforcement and plaster serves the owner of the house much longer.
Strengthening or replacing parts
If it is noticed that the oven door has become loose, then the masonry around it will have to be dismantled. Once this is done, the door is secured in place using steel wire. And if it is necessary to replace the grates, you need to know one thing: the cast-iron grate for fuel is installed at a distance of 5 mm from the brickwork. The gaps left should be filled with sand.
Sheets may need to be replaced before firing. Typically, this need arises when holes or rust stains appear on these parts. The operation of replacing pre-furnace sheets is carried out as follows: the old material is removed, the nails are removed, a fragment of felt treated with a liquid clay solution is placed under the bottom, and a new sheet is nailed on top.
If the firebox lining breaks or the chimney is damaged, repair work will be more difficult. When replacing the lining in the firebox, you need to keep in mind that the new lining must be made from old bricks, since the coefficient of expansion of the stove from heat must remain the same. Taking this rule into account, bricks are also placed in the chimney area.
Connecting a new stove to an old chimney
If the pipe is in good condition, then, when starting to build a new stove, you can get by with the old chimney. To do brickwork without touching the chimney, you need to do the following:
- Use a hammer drill and a chisel to make 2 holes in the pipe in the attic, stretching a steel channel through them, which is pressed to the chimney with wedges almost at floor level;
- Create additional support by fixing in the original position 3 rows of masonry passing through the ceilings between the 1st floor and the attic;
- Use wooden blocks with a cross-section of 100 x 50 mm as support posts, because the weight of the masonry is relatively small - no more than 60 kg;
- Dismantle several rows of chimney masonry under the ceiling, place a beam under the pipe and support it with racks, well fixed and located so as not to interfere with further work - dismantling the stove down to the foundation.
Improving performance
To ensure that the stove always provides good heat, you need to follow some recommendations:
- ensure that soot does not accumulate inside the furnace, that is, clean the structure once a month;
- keep control of the dampers, which should be closed tightly;
- do not leave the door open, as this may cause heat to escape;
- clean areas that provide traction from soot and ash every year;
- sometimes load aspen or alder firewood, as they help burn out soot deposits;
- avoid overheating the walls of the stove, which often leads to heat escaping outside the house;
- Do not throw garbage like polyethylene into the firebox along with firewood, which increases the amount of soot.
Video: repairing a brick stove with your own hands - cleaning and lining
How to clean soot from the stove yourself
It is recommended to clean the chimney, grate and stove wells in the summer. Any parts can be cleaned either manually or by special means. It all depends on how badly the oven is clogged. When getting down to business, you need to fully open the damper and close the vent and firebox doors tightly.
Removing carbon black from the chimney
To clear soot from a chimney, you can use folk remedies, such as rock salt. It is thrown into the firebox when the wood is already burning in it. Salt will help push soot out of the chimney, but it is unlikely to clean the chimney perfectly. Instead, if you want to achieve a better result, it is better to use potato skins.
A bucket of cleaning material is usually enough to remove soot from a chimney. The potato skins need to be poured directly into the fire. The starch, which rises along with the evaporated vapors, softens the soot, as a result of which it comes out of the chimney on its own.
And yet, it is much better to clean the chimney with special chemicals in the form of powders, liquids or briquettes. They are also placed in the firebox during the burning of wood. When burned, the chemicals destroy the soot deposited on the walls of the pipe and do not cause harm to humans. Typically, an anti-carbon chemical composition is used as a chimney cleaning agent.
Soot can be removed from the chimney mechanically. To do this you need to perform certain actions:
- climb onto the roof using a ladder;
- inspect the walls of the pipe and decide whether they need to be cleaned, because it is advisable to do this only if the thickness of the deposits is at least 2 mm;
- check if there is any debris in the chimney, which must be removed with a stick;
- remove soot from the top of the pipe using a scraper;
- in the middle and bottom of the chimney, remove soot using a large-diameter brush.
Well cleaning
Wells, that is, chimneys in the furnace cavity, are supposed to be cleaned every 3 years. These structural elements are usually located on three sides ovens, but not in the place where the stove is installed. The wells are located next to the bricks, which lie on edge and act as a kind of doors.
Cleaning of chimneys in the furnace cavity is carried out in several stages:
- plaster is removed from the area where the wells are located;
- the halves of the bricks are removed;
- wells are cleaned of light gray ash using a scoop;
- the removed bricks are returned to their place and covered with mortar, which dries quickly.
ultra-term.ru
When and why is stove repair necessary?
Most often, stove repair is required when the draft suddenly deteriorates. The following signs may also indicate the need for repairs:
- formation of cracks in the masonry;
- smoking the stove;
- loosening of the combustion door;
- burnout of the grate;
- cracking of seams in masonry;
- poor fuel combustion;
- leak at the junction of the roof and the chimney;
- damage to oven appliances.
It is worth remembering that a stove is not just a technical structure in a private home. The design must comply with sanitary standards and fire safety requirements. If you do not pay enough attention to maintaining the stove, a fire hazard or carbon monoxide poisoning of the residents of the house may occur.
Stove repair is essential to human health and property. If it is necessary, then do not delay. Particular attention should be paid to maintenance before the start of the heating season. If you do not have experience in repairing furnaces, it is recommended to entrust this task to a qualified specialist.
In some cases, the cost of repair work may make it impractical to carry out the repair, so it is important to identify the damage first.
Types of repairs
Repairs can be divided into 3 types: initial, medium and major.
Tools and materials needed for work:
- brick in the required quantity;
- special hammer;
- pick;
- building level;
- Master OK;
- plumb line;
- container for preparing construction mixture;
- roulette.
Some repair stages can be done with your own hands with the proper approach.
Initial structural repairs
It happens that the stove cannot be lit due to lack of draft. The problem may occur for the following reasons:
- long break in operation;
- lack of air supply that can support operation;
- presence of cooled air in the chimney;
- strong gusts of wind outside;
- chimney clogged with soot.
To solve the problem, for ignition you need to take not paper, but a piece of rubber or a small amount of dry fuel. The use of kerosene and other flammable liquids is not allowed.
The quality of draft is primarily affected by the correct construction of the chimney. If the stove initially functioned normally, but after a while it began to heat poorly, this indicates that the smoke exhaust channels are clogged.
One of the most common repair jobs is chimney cleaning. If excess soot is observed, the problem must be addressed immediately. First of all, you should try to burn off the soot using improvised means. For this:
- First of all, pour a small amount of coarse salt into the hot stove.
- Then quickly close the damper. If this is not done, the structure will begin to crack, as soot will fly out through the chimney.
If these steps do not help, you need to use another method. The presence of soot can be identified by how long ago the stove was lit. It is worth remembering that the structure must be cleaned at least once a year, preferably in the summer.
You can try to get the soot out of the special door. If there is no such part, then you will need to disassemble the chimney masonry.
How to find a knockout brick
In some cases, craftsmen leave knockout bricks that are not fixed with the building mixture. If a private house was purchased together with the stove and it is not known where such bricks are located, you will need to perform the following steps:
- First of all, you need to carefully inspect the stove.
- The main emphasis should be on the places where the chimney channels pass. Knockout parts are most often mounted with a slight offset outward in relation to the main masonry.
- When the brick is found, you need to remove it by removing the plaster in this place. This way you can provide access to the channel.
- Next, you need to pull out the stuck stone and clean out the soot, mount the knockout brick in place and coat it with the mixture.
If you managed to remove a stuck stone from a chimney, you should try to mark the place from which it fell. If repairs are made in winter time, then the stove can be used until spring. However, with warming, it is necessary to carry out major work to repair the stove. A fallen stone is the main sign of the beginning of destruction.
How to replace brickwork
If the structure begins to smoke heavily, the brickwork is damaged. This may lead to the formation of gaps that will have to be sealed yourself. To do this, you need to prepare a mixture of clay, sand, asbestos fiber and salt. Fiber will be needed for elasticity.
The mixture should have a medium viscosity, since a thick mixture will crack, and a thin mixture will not be able to provide the necessary strength. If it is not possible to prepare the solution yourself, you can buy a ready-made oven mixture at a construction supermarket. Before use, it is important to read the instructions. With the ready-made solution, it will be possible to complete repair work faster.
In some cases, it becomes necessary to replace burnt bricks.
Replacement instructions:
- First of all, the places of old bricks need to be cleaned of clay and dust.
- Next, moisten the surface with water.
- Place a clay cake, which must be prepared in advance.
- Dip new bricks in water and coat both sides with a clay mixture. This is necessary for reliable fixation of the seams.
- Place the bricks in place of the fallen elements.
The mixture used is the same as when sealing gaps.
Average stove repair
The process consists of repairing and strengthening structural parts.
Repairing cracks and replacing the door
- The firebox doors are mounted together with the bricks during the laying process, so there is no need to remove them when performing repairs. It is enough to scrape the mixture around the door down to the brick and seal the gaps with a mixture of cement and clay.
- To strengthen a loose firebox door, you first need to dismantle the brickwork nearby, and then secure the part with steel wire.
- To make the solution, mix 2 parts clay, 9 parts sand and 1 part cement. The components should be mixed well and diluted with water to the consistency of sour cream. This mixture can be used to cover the seams around the firebox door.
- The same mixture can be used to seal cracks in the structure. If the stove is plastered, the crack must be cleared down to the brick and covered.
It will not be difficult for a stove maker with extensive experience to make a mixture that will be securely fixed at the joints. However, for a beginner it might be big problem. Various methods identifying the fat content of clay and the quality of sand in most cases does not give the desired result. Using a heat-resistant sealant will not completely solve the problem. After a certain time, cracks may appear again, and therefore repeated repairs will be necessary.
To solve the problem, it is recommended to use fireclay mortar. This product is a finely ground fireproof mixture containing fireclay and special clay. Seams made from fireclay mortar can withstand temperatures of more than 1700 °C. The mixture will need to be diluted with water. If necessary, you can add a small amount of Portland cement.
Video: door replacement process
How to strengthen the frame and replace the grates
Sometimes the number of gaps is so large that the oven can collapse at any moment. Covering up won't help in this case. The ideal option is to completely replace the brickwork. However, if the stove is functioning properly, and there is no time to carry out relocation, repairs can be done in this way:
- The first step is to tie the frame structure with metal wire.
- Make horizontal openings 16–18 mm deep in the masonry. The grooves should cover the entire stove so that the mounted wire tightens the frame structure.
- When the wire is laid in the grooves and fixed by twisting, it must be tensioned. This can be done by carefully twisting the loops of wire in one direction using a thick nail. It is important to monitor the tension of the wire so that it does not break.
- Next, plaster the stove.
When replacing grates, it is important to take into account that they should not be located close to the stone laying, but at a distance of 5 mm.
The gap must be filled with sand.
If the pre-furnace sheets are rusty or have holes in them, they will have to be replaced. Such elements cannot be repaired. Replacement instructions:
- Dismantle the old sheet.
- Pull out the nails.
- Soak a piece of felt in a liquid clay mixture.
- Place under fasteners felt.
- Nail a new sheet at the top.
From time to time the stove needs to be whitewashed with lime mortar.
Lime has properties that perfectly protect against bacteria.
Video: preparing lime whitewash
Replacement of lining and tiles
A structure that needs a major overhaul is:
- the lining of the fuel chamber is broken;
- chimney pipe is damaged;
- the brick “under” requires re-laying.
In the process of replacing the lining, it is important to take into account the fact that the outdated and updated masonry must be made of the same brick so that the thermal expansion rate is identical. The same method is used to replace bricks in the chimney structure.
Particular attention should be paid to repairing a tiled stove.
- The tile must be carefully dismantled.
- Clean the installation site.
- Prepare a mixture of clay and crushed stone.
- Place the new element on the prepared solution, making adjustments.
- If the masonry turns out to be uneven, it can be leveled by hand.
All repair work in this category can be done with your own hands, even if you do not have the appropriate skills.
How to carry out a major renovation
Major repair work may include restoring full functionality, replacing or upgrading parts that have failed. You can do this work yourself.
To repair a chimney, you need to plaster the outside of the masonry.
If the masonry is damaged, it will need to be sorted out.
Video: chimney repair and plastering
When completely replacing the lining, it is not allowed to disassemble the main brickwork of the stove. Sequence of actions for replacing the coating:
- Disassemble the wall of the structure from the bottom of the ash pan to the height of the fuel chamber; the ribs of the stove should not be touched.
- Remove the crushed stone that appeared from the dismantling of the previous lining.
- Lay out new lining.
There is no need to tie the finishing layer with the brickwork of the walls. The optimal thickness of the seams is a maximum of 2 mm.
In most cases, repairing a brick structure involves restoring the collapsed vault. During the process of heating and cooling, this element expands and contracts, the mixture spills out of the seams and some bricks may settle or fall out.
The oven floor is subject to destruction due to the influence of elevated temperatures. After some time, cavities may form in the brick, which will interfere with placing the dishes. It is quite difficult to repair a vault with your own hands, but almost every stove owner can repair it on their own. To do this, you need to replace the burnt bricks. If the material is in good condition, it can be turned upside down. At the end, whitewashing can be done to strengthen the structure.
In some cases, it becomes necessary to switch the stove to another fuel. Each master has his own methods, but there is the most popular of them:
- Line the walls of the fuel chamber with refractory bricks. A fireproof mixture should be used for fixation.
- Make small slopes around the sides of the chamber so that the coal can roll down during the combustion process, and the grates can be closed with hot coal. It is important to use only high-quality masonry material.
A sauna stove is repaired in the same way as an ordinary one. The only difference is that preventive measures should be carried out more often, since the temperature of the bath structure is much higher than usual. It is important to use refractory bricks and a special mixture when laying. Do not use a stove with a broken cooking surface. If this element fails, it must be replaced immediately.
How to disassemble the stove with your own hands
First of all, you need to inspect the product and the ceiling near the chimney. The pipe can be made of iron or brick. The necessary dismantling actions will depend on the characteristics of the furnace device.
Previously, the Russian stove was often used to fix the load-bearing parts of the ceiling. The stove can be disassembled only when it is clear that there is no support for the chimney structure, and the ceiling and roof will not collapse. When completely dismantling a Russian stove, you first need to find out whether its body is supported by any important element. First you need to dismantle the floor base around the stove and inspect the foundation.
In some cases, it is possible to remove the lower part from the support and dismantle it without damage; in this case, there is no need to disassemble the structure. However, in this case, additional labor will not be superfluous, since the work is complex.
It is important to prepare the room in advance for disassembling the stove. Furniture and decorative items should be covered with film, since the soot accumulated on the inner base of the stove will be difficult to remove from the surface.
To disassemble the stove, you should prepare the following tools:
- sledgehammer;
- pick;
- respirator;
- gloves;
- steel wedges;
- perforator;
- chisel.
The structure is disassembled from top to bottom. First you need to dismantle the section of the roof near the chimney, after which you can begin dismantling the brick. A metal chimney is dismantled by loosening it from side to side. The brick pipe is disassembled sequentially. You need to start with the chimney, and then move into the house. If the masonry was done using a solution of sand and clay, then the tools you will need are a hammer and a chisel. It is most convenient to disassemble the masonry in horizontal rows in a circle.
Difficulties may arise when disassembling a stove whose bricks were laid on a cement mortar. In this case, a hammer drill is needed. If used correctly, time costs can be reduced. The hammer blade should be directed along the seam between the bricks. To preserve the material for reuse, you need to try to avoid significant chipping.
Using a crowbar it is quite difficult to carefully dismantle the masonry horizontally. Impacts of the crowbar can cause damage to a large number of bricks, since it is difficult to hit the seam accurately.
To dismantle brickwork that was laid on a durable cement mortar, use wedges made of steel or plastic.
Sequencing:
- In several places in the extreme part of the masonry, drive the blades into the seams horizontally.
- If the masonry is strong, then the blades will need to be hammered into the seams vertically.
- Using a hammer drill or crowbar, disassemble the masonry. If the work is carried out in the attic, then the sledgehammer should be used carefully so as not to damage the walls and beams.
- The bricks must be separated and dismantled in rows from top to bottom.
- Fill the recesses in the ceiling with bricks.
- When the chimney is disassembled, carry out the work gradually in a circle.
- Remove the hob, doors and grates as they become free.
The final stage is dismantling the lower part and base of the stove.
If the structure is made in such a way that the foundation can be removed from the supporting parts and carried away, then this should be used. Helpers will be needed to complete the work. If the stove base is still needed, for example, to build a fireplace, then there is no need to dismantle it. Holes in the floor must be patched with wooden planks.
Video: process of dismantling the stove
How to disassemble a stove without dismantling the chimney
It is better to entrust such work to specialists. If mistakes are made, smoke may enter the house after assembling the stove. If you want to dismantle the stove yourself without touching the chimney, it is important to adhere to the following instructions:
- Secure the bottom of the chimney. To do this, you need to place a strong and stable metal support element under it. In most cases, corners are used.
- Make a groove around the perimeter of the pipe that passes through the masonry seam, and place one of the corner shelves there.
- Secure the structure at the corners with tacks.
- Install fasteners at the bottom, resting them on the floor.
- After this, disassemble the required section of the product.
- Install a new stove with its pipe leading into the old chimney device.
- Lay brick for fastening new design and the old chimney.
- Using a grinder, cut off the tacks and fixture from the corner around the perimeter of the pipe.
- Dismantle the racks.
- The places where the new stove is fixed to the chimney and all the old masonry should be whitewashed.
- When the whitewash has dried, perform a test fire.
- If the masonry was damaged during the repair process, soot will be visible where gaps appear. These places should be reinforced with a clay mixture. Old masonry joints must first be cleaned.
In order not to disturb the masonry of the chimney, it is important to ensure that there are no deformations or subsidence.
It must be remembered that using unsuitable fuel to fire the stove is not allowed. If you burn household waste in it, it may have a negative impact on its functioning.
How to clean the stove from soot
Soot does not accumulate in a stove as quickly as in a chimney. This is due to the fact that when the fuel burns out in the bunker, there is continuous movement, so soot does not have time to accumulate. When there is a need to light the stove, firewood is placed in it. From time to time they are turned over using a long metal rod or poker. After this, the ash is cleared from the stove. Such actions are necessary in order to keep the structure clean.
In addition to minimal cleaning of the stove from soot, there may be a need for thorough preventative cleaning. This includes:
- grate processing;
- cleaning the walls inside the structure;
- cleaning the entrance and exit to the chimney device.
These preventive measures are carried out only after cleaning the chimney.
Instructions for cleaning the chimney
Today, there are several options for cleaning soot from chimneys:
- standard cleaning;
- high temperature cleaning;
- chemical method.
Chemical method
Chemicals are used for preventative cleaning. They help remove a thin layer of soot. Products that can be found on sale may come with or without brushes. The most popular are:
- "Kominchek";
- "Chimney Sweep";
- "Composition against soot."
The substances can be used in a chimney that is not equipped with a smoke circulation system. Stove makers most often recommend the “Log Chimney Sweep” composition, which contains salt mixtures. They enter into a catalytic reaction, which can cause the soot to decompose. The powder should be added to the firebox along with the fuel. The product works for approximately 30 days.
Gloves must be used when working with powders. It is not recommended to visit the house for 5 days after cleaning, as an unpleasant odor will remain. After treatment, the building requires mandatory ventilation.
High temperature cleaning
Another method that can be used to clean soot from a stove and chimney is high-temperature cleaning. Features of this method:
- is dangerous because it is necessary to work at elevated temperatures;
- suitable for significant contamination when the stove and chimney have not been cleaned for many years.
Sequencing:
- First of all, you will need to prepare aspen firewood.
- The logs need to be placed in the oven and set on fire.
- When the fire has consumed all the fuel, open the dampers to let the stove burn out. This method can ensure that the pipes are blown with hot smoke.
The method is effective only for high-quality stoves. If the device is old, cracks may appear inside after cleaning.
Classic cleaning method
You can get rid of soot using a brush with a weight.
The tool is a metal brush with a rope, at the end of which there is a wire or rope with a weight. Any iron object can be used as a weight: a weight, a piece of metal or a bearing. The weight of the part must be at least 3 kg. The length of the rope should slightly exceed the length of the chimney pipe. The outermost part of the brush should reach the stove so that it is possible to thoroughly clean the channels. To clean, you will need to lower the brush into the chimney device and clean the walls with rotational movements.
This must be done with caution. To avoid falling from a height, it is recommended to tie a rope around your torso and tie it to the roof. If the chimney is not very clogged, the cleaning process will take approximately 30 minutes. When rotating, the brush will scrape debris and soot from the pipe walls. Once the pipe is cleaned, you will need to remove debris from the stove. You should also clean the view and walls of the firebox.
Video: instructions for cleaning the chimney
Cleaning the well and coil from soot
Wells need to be cleaned at least once every 3 years. They are located on three sides of the stove, except for the one where the hob is installed. At the entrance to the well, half of the brick lies edge-on.
- You will need to find voids by tapping the structure with a trowel or spatula.
- Next, remove the plaster and take out the part of the brick that is the door to the well.
- Ash often settles in wells, which needs to be removed with a scoop or deep shovel.
- After cleaning the wells, they need to be covered with bricks and covered with a quick-hardening mortar. Plaster or a mixture of clay, lime and water is suitable.
A lot of ash accumulates in wells. It should not be thrown away, as ash is a good fertilizer for the garden.
The grates can be cleaned with household chemicals for washing various products.
To clean the coil, a mechanical or steam-air method is used. With your own hands this work difficult to accomplish. The steam-air method involves burning fuel in a closed coil by supplying steam or air and heating the structure to the temperature required for burning. Mechanical cleaning is a labor-intensive operation that is performed exclusively by specialists.
How to clean the oven using folk remedies
The most simple option is the use of table salt. In this way, it will not be possible to clean a thick layer of soot, so the method is most often used for prevention. To clean, salt must be added to the firewood and allowed to burn.
Another way is to use potato peelings. The released starch will begin to interact with the soot, after which it will break down. The consumption of raw materials depends on the size of the stove; on average, 1 bucket is used.
Residents of private houses heat stoves and fireplaces during the cold season. During operation heating devices Soot accumulates in chimneys. This makes it difficult for smoke to escape, creating a risk of fire in the room and intoxication of the people living in it.
From burning and black soot in the chimney, you need to know how to clean chimneys in the stove using folk remedies. Many people think about solving the problem when smoke is already coming into the room.
The need to clean the chimney
In winter, stoves and fireplaces are lit almost continuously. Over time, cravings get worse. Soot settles on the walls of the chimney. It narrows the existing opening and does not allow smoke to fully pass through and enter the room.
Due to the high temperature in the chimney, accumulated soot can catch fire. This leads to its destruction. Sparks flying from the pipe become a source of fire. Or lead to carbon monoxide poisoning. The owners have a question about how to clean the chimney pipe.
The condition of the pipe must be inspected at least twice a year. Before the start of the heating season and after it.
When to clean
Whether the chimney needs cleaning can be determined by eye. First of all, pay attention to the color of the smoke. If the stove is intact and the chimney is clean, then the clouds of smoke will be light gray or white. Dense black smoke signals the need for preventive measures: soot has accumulated in the chimney.
The color of the flame in the firebox also matters. If the light orange tint changes to dark orange, the structure needs to be cleaned.
Soot deposits
Smoke contains mechanical particles. They stain the surface of the canal. Soot accumulates in the pipe and a black coating appears. Deposits harden as a result of saturation with water vapor. The pipe is clogged. Channel bends, transitions, and the surfaces of brick pipes are covered with a layer of soot.
The volume of deposits depends on various factors:
- The stove or fireplace is not installed correctly.
- The technology for laying the product components is broken.
- Construction materials are of poor quality. Cracks appear on the surface of the chimney.
- The chimney system is cluttered with debris.
- There is no umbrella on the pipe. Depending on the humidity, type of fuel and features of the fireplace, the rate of deposit accumulation depends.
Traditional methods of cleansing
The quality of operation of a stove or fireplace is affected by the layer of soot on the walls of the chimney pipe. The fumes enter the living space, and the soot deposited on the chimney ignites. Troubles can be avoided if you do not forget to clean the chimneys of stoves and fireplaces from soot.
DIY cleaning methods:

 If the soot does not come off well, you can tap the chimney wall with a stick. But it is not always possible to clean the chimney efficiently using potato peelings. This is only a means to help soften the soot so that it lags behind the pipe walls. After peeling potatoes, it is advisable to carry out mechanical peeling.
A good way is to burn aspen wood in a stove. But it's not entirely safe. The soot catches fire and flakes out of the chimney. They cover the roof and area around the building. Therefore, you first need to make sure whether the roof can withstand such a load and inspect the condition of the chimney pipe.
If there is a lot of soot in the pipe, it is better to use another, safer method.
Tools and materials
First you need to prepare your tools. In order to clean the chimney, you will need:

The core is used not only to remove blockages. To make cleaning effective, you can use it to make the brush and brush heavier.
The length of the device can be changed by connecting the elements using carabiners and a cable.
Mechanical cleaning
This method is also popular. In the old days, chimney sweeps used cannonballs secured by cable. They broke through dense soot growths. Ruffs were also used different shapes, scrapers.
Cleaning process:

Sometimes the pipe is high and you can’t get to it from the roof. Then clean from below.
If the chimney is metal and there is a cleaning glass, it is unscrewed and a brush on a bendable rod is inserted into the pipe. If it is not there, clean it through the cleaning hole.
Cleaning the chimney through the firebox is time-consuming and inconvenient. Cleaning metal pipe using a brush is not effective. Soot remains on the walls. In this case, the brush is replaced with a rag.
Homemade brush
 From polypropylene pipes make a brush for cleaning. The pipes are cut one and a half meters long. Threaded fittings are placed at their ends. A metal brush for an angle grinder is attached to one of the fittings. The wire is fluffed onto the brushes using pliers or pliers. This creates a telescopic cleaning rod for the chimney.
Small mechanization can be used. The method consists in placing an attachment on the impeller of the chainsaw, which allows for forced ventilation of the pipe.
This method is extreme, it can be used in agreement with neighbors
Special store preparations
There are various cleaners sold in stores. You can buy them in the form of powder, logs or briquettes. Please read the instructions before purchasing. Preparations can be for fireplaces, sauna or closed heating stoves.
Popular means:

Work safety
Work on cleaning the chimney from soot requires compliance with safety precautions in order to avoid accidents.
Safe chimney cleaning:
- Do not remove soot in damp weather, with high humidity, or in strong winds.
- You cannot climb onto the roof without a safety belt. You can tie the belt with a strong rope.
- It is prohibited to take alcohol or drugs that slow down the reaction before work. The measures taken will help avoid risks when cleaning the chimney.
Professional chimney sweeps know how to clean soot from a chimney pipe. You can use their advice. They will help increase the life of the fireplace.
Undesirable:

Cleaning the chimney of a sauna stove
The Russian bathhouse is always associated with wet steam and a stove. There is a chimney there that needs to be cleaned periodically.
If you don’t do this, the sauna will heat poorly and there will be no traction. A fire may occur.
Causes of clogged chimney of a sauna stove:
- Condensate.
- Soot and soot.
- Trapped foreign objects.
 To quickly and easily clean the chimney with your own hands, you can use special briquettes with chemicals. When burned, they destroy the soot. The briquettes are burned in a furnace and within a day the dirt will fall into the firebox itself. But it is not recommended to use such preparations for cleaning bath pipes.
You can use a special brush or ruff. They are hung on a weight and lowered into the pipe.
Sometimes the smoke comes back when lighting. There is probably a foreign object in the chimney. It could be a masonry brick or a bird's nest that fell from nearby trees.
It is more difficult to get rid of such a blockage. You can take a stick or long pole and try to push the object inside. At the end of the stick, a hook is made from a nail to hook the object. Heating the stove with aspen wood gives good results.
On bath pipe It is advisable to make a removable visor. Snow and rainwater will be prevented from entering the chimney.
Attention, TODAY only!