How to properly paint the walls in an apartment. How to properly paint the walls in an apartment Unusual wall painting
Originally and stylishly decorated walls - key element interior They can be decorated with paintings or photos, or you can go further and create unique drawings with your own hands. And this does not require expensive materials or artistic skills.
By painting walls you can add expressiveness, originality and comfort to your interior.
The main stage of drawing, oddly enough, is the choice of work technique and sketch. If you don’t have any special abilities or skills, it’s better to turn to a professional or choose a simple master class. If you have the makings of an artist, you can start experimenting.
When choosing a picture, you must first of all take into account its relevance and relevance. Large, bright images can become boring over time, and a portrait of a children's cartoon character is unlikely to please a teenager. So, the direction for creativity has been chosen, we can move on.
Materials, tools, preparatory stage
It is very important to pay attention to preparatory stage. And it lies not only in correct processing surfaces. Before starting work, all materials and tools should be at hand, since paints dry quite quickly, and an unplanned break can lead to disruption of the process.
Before applying the image, the wall must be leveled. The next step primer will be applied.

To paint the walls you will need a set of brushes different sizes and forms.
If necessary, the surface can be painted, having previously selected a tone that will ideally highlight the pattern.
Also, depending on the chosen technology, you will need:
- stepladder or table;
- acrylic paints;
- brushes, sponges and rollers;
- mixing containers;
- pencil;
- stencil and double-sided tape;
- clean cloth;
- acrylic varnish in an aerosol can.
Of course, stencils are needed only if you plan to paint the wall with your own hands using them. It is also worth purchasing white paint, even if it is not involved in the composition, it can be used to smooth out any overly bright tone or add accents. It is better to take brushes with natural bristles.
To transfer the outline of the drawing, it is better to use a soft pencil, for example, a simple, moderately hard one. Wide lines will be more difficult to paint over or remove.
An erroneously applied stroke can always be removed using a regular eraser.
After graduation preparatory work You can move on to the main part of creating a masterpiece.
Return to contents
Drawing with a stencil
This is one of the most simple techniques drawing on the walls. It's easier to just apply vinyl sticker. But the result of the work looks impressive, of course, if the shades are chosen correctly and the work is done carefully (Fig. 1).

Figure 1. To work with a stencil, you don’t need to be able to draw, just accuracy and patience.
The finished stencil can be purchased at a specialized craft supply store. If you don’t find a satisfying image there, you can make a template yourself.
To do this you need to find a suitable image. It is important that the lines are not too thin, otherwise the base will be difficult to cut and even more difficult to apply the paint evenly. The drawing should be transferred to thick paper or cardboard. The easiest way to do this is by dividing into squares and gradually transferring the details of the image.
After the template is ready, it needs to be fixed to the prepared wall. You can do this using double sided tape. It is most convenient to paint free spaces with a roller or sponge. When applying paint with a brush, it may flow under the cardboard, which means that the accuracy of the lines will be compromised.
After all areas have been painted, working part The walls should be left until completely dry. It is important not to try to remove the stencil right away, as this may lead to smearing of the design.
After a day, you can remove the cardboard template and cover the part of the wall with the pattern with varnish. This will allow you to fix the picture, preserve the brightness of the colors and their texture.
Return to contents
Simple wall painting
If using a template is not to your liking, you can effectively paint the wall with your own hands. There are techniques that are simple to implement, but look extremely impressive in the interior.
For example, you can use the same stencil, but small size and move it. These can be the outlines of flowers, silhouettes of strange plants or street lamps. All you need to do is mix the stencil and paint over the free space without worrying too much about accuracy.
To apply paint, it is better to use a miniature roller or sponge. The secret of effectiveness and simplicity of execution is banal. The drawing will need to be improved.
Blemishes that are too large or conspicuous should be removed immediately. To do this, just wet the sponge warm water and remove the smeared paint with one confident movement.
After drying, you need to place accents using white and black (dark gray) paint. Using light strokes, outline the boundaries of the petals, indicate highlights on the surface, and maybe depict a drop of dew.
A special advantage of the technique is that any defect, be it slightly smudged paint or an asymmetrical distance between fragments of the drawing, can always be corrected.
And, of course, the result should be secured with a layer of acrylic varnish.
Wall decoration is one of the most important stages renovations in the apartment, because they are the ones that immediately catch your eye. I want the home to have an atmosphere of comfort and beauty, and at the same time, so that the repair costs do not exceed the budget. One of the most simple solutions finishing - painting the walls. Anyone can do the work themselves, but still, it’s worth knowing a few rules of technology. We will look at how to paint walls correctly in this article.
The paint can be used for decorative finishing and for surface protection. They differ in their composition:
- Emulsion
- Alkyd
- Adhesive
- Silicate
- Polyurethane
Emulsion paints some of the best. They are distinguished by high characteristics: their consumption is minimized, they are harmless and odorless, and dry quickly. But they can only be used in heated rooms. There are several types:
Acrylic. They are pricey, but they are worth every penny spent. Acrylic paints durable, not afraid of light. However, they are not used in rooms with high humidity, despite the fact that they repel water, they are still afraid of it. 
Latex. The most expensive. Due to the latex content, the paint dries very quickly. It can be applied to wallpaper or bare walls. Masks minor surface imperfections. But this type is less resistant to light.
Water-based. Dries almost instantly. Very durable, camouflage small cracks and have a huge variety of choices. They are not afraid of water, but if washed too often, the coating may lose its appearance.
Water-dispersed. The main advantage is moisture resistance. Can be used for coating in damp areas. Most often they are produced in white, which means they will have to be diluted with color. They are afraid of cold rooms. 
Silicone. Due to the silicone content, this type of paint is the most elastic. They can be applied to cracks, to any coating, even with old decoration. The downside is that it takes a long time to dry.
Alkyd paints There are two types: oil and enamel. The paint will emit an odor for some time after application. They cannot be washed and they support combustion. They are rarely used indoors living rooms because of harmfulness.
Oily alkyd paints
They emit a toxic substance during operation, but are very cheap. They take a very long time to dry. Enamel ones dry much faster and will not fade during use. 
Adhesive paints afraid of water. They are more suitable for ceilings than for walls, because they are not recommended to be washed frequently and can fade in the sun. But they are much cheaper than many other types.
Silicate paints They will last for many years, but they contain alkali, which increases the risk of damage during operation. Not suitable for all types of surfaces and do not come into contact with other types of paints.
Polyurethane paints rarely used due to their cost. But they are worth the money. Not afraid of light, temperature changes and chemicals. They will last a very long time. They are most often used to paint a bathtub or kitchen, since such a coating can withstand all conditions. 
In addition to composition, paints are also distinguished by texture. There are relief ones - the surface will not be smooth, but with roughness. Decorative ones create imitation natural materials. Matte paints difficult to clean, so they are used in living rooms or bedrooms. The glossy surface is suitable for finishing the bathroom and kitchen, as it is easy to clean.
What paint to paint the walls
The paint must have the following characteristics:
- Safety
- Durability
- Easy to care for
- Wear resistance
What paint is best to paint walls? Safety is the first criterion when choosing paint. A wide selection of compositions allows you not to stop your gaze on just one specific form. Don't be afraid to ask for quality certificates. Always check the composition, it should not contain toxic substances above permissible norm. Some substances can be harmful not only during operation, but even after drying. Don't skimp on yourself and buy quality products. 
According to its characteristics, the paint must have high characteristics so that its service life is not short. One of the most important conditions— resistance to mechanical damage. Of course, when strong impact no species can withstand it, but it should not endure much damage. Otherwise it will start to crumble. Paint should not be afraid of light. Then it will not fade or fade and will serve you for many years.
Choose waterproof paints. At first glance, this condition seems decisive only when painting walls in damp rooms. But if the paint does not like water, then it is not recommended to wash it. And to do only dry cleaning is just to drive away dust. You will have to clean such a surface carefully, and if stains appear, you are unlikely to remove them. Besides moisture-resistant types have higher characteristics, so it is better to buy them.
If you are wondering how to paint the walls in a room with your own hands, then another selection criterion is drying time. The paint is applied in several layers; if it dries for a long time, the repair may take longer. Therefore, purchase paints that dry quickly enough.
 woman paint on wall
 The more expensive the paint, the better it is. But not everyone is ready to spend money. In fact, by purchasing cheap paints, you may not save money, the point here is in expense. Manufacturers indicate how much paint is required. Poor quality and cheap quickly absorbs into the walls, and sometimes you even need to apply it in three or four layers before it acquires the right type. Therefore, pay attention to the manufacturers' instructions on material consumption.
Required Tools
Painting does not require a huge range of tools. All you need is a paint tray, a brush and a roller. The brush is used to penetrate hard to reach places, so take one wide and one narrow.  A short-nap roller is used when painting smooth walls. Medium-length pile is suitable for textured and rough, matte coatings. If you have textured walls- it’s a long pile.
Preparing the wall surface
How to paint the walls in an apartment correctly? Before you start working directly, you should carefully prepare the walls. The accuracy and beauty of the paint application will depend on how carefully you treat the walls. The preparation process consists of several stages:
- Preparing the room
- Surface cleaning
- Removing cracks and irregularities
- Primer
Working with paint is dirty; if you accidentally swing a brush or roller, the stains can spread throughout the room. Therefore, block off the entire space with film. Turn off the electricity, just in case you accidentally touch an outlet, you will be safe. The joints between the floor and walls can be sealed with masking tape. Do the same with the sockets. 
The surface of the walls must be thoroughly washed. Remove any existing stains, mildew or mold. You can use vinegar or ammonia. Also get rid of the old coating, if any. If you bought paint that can be applied to other types of finishes, then make sure that the old layer adheres well, does not fall off anywhere, or peel off. Otherwise, you need to get rid of these shortcomings. Old paint from walls can be removed with a special compound that is sold at a hardware store. If you previously had wallpaper, remove it with a spatula and warm soapy water.

Primer required type work, you can’t skip it. It will protect your walls from the formation of fungus and mold. It will make the surface smoother, so your paint will not be absorbed into the base coating, and this will significantly save consumption. It is best to apply two layers. If your base coat is made of concrete, you can apply all three layers. Concrete is very absorbent, so let it absorb the primer rather than the paint. After priming, get rid of large cracks and holes. 
DIY wall painting
If you have White paint and color, then first you need to dilute them. Try diluting in a small container to the desired color. Remember the proportions and transfer them to the bucket.
How to paint walls yourself:
One surface should be painted at once. Under no circumstances leave it on long term a wall painted only halfway, this will lead to the fact that the border at the junction will be visible to the naked eye. 
Using a roller, paint the entire surface from top to bottom. You cannot work from below, as smudges will subsequently form, which you will not be able to get rid of later.
After covering the surface, use a brush to paint hard-to-reach places and corners. After applying the first layer, you need to wait until it dries completely. The drying time is indicated on the packaging, but it’s better to check with your hand somewhere in the corner to see if the surface is sticky. Then proceed to the next layer. During the drying process, ensure compliance with the temperature conditions specified in the instructions. It is better to avoid direct exposure to light during the drying period.
Painting walls is easier, cheaper and more reliable than wallpapering, not to mention other finishing methods. However, not everyone wants to live among boring monochromatic walls. Paint accent wall in a contrasting tone - the simplest technique, but it’s also more fun. We’ll go even further: with the help of this collection of ideas and master classes, you can make your own painted walls a real interior feature!
Stripes
An easy-to-implement solution that will make the interior more dynamic. The stripes can be the same or different colors, different widths, contrasting shades, or only slightly different in tone (this, by the way, is the latest trend, it makes the room unusually elegant and delicate) - as your imagination tells you. Horizontal stripes will visually expand the space, and vertical stripes will raise the ceiling. Making them is quite simple: choose masking tape of the desired width, stick it on the base color of paint and cover it with a different color on top. When you peel off the tape, the wall will be striped.

![]()


Zigzags (chevron)
Making zigzags is more difficult - you will need to first draw the wall using a ruler. Link to the tutorial.


![]()
Herringbone pattern


Cobweb
To get a geometric pattern, you can make not only symmetrical patterns, but also stylish and unexpected compositions. For example, cover a wall with a pattern that looks like a cobweb or a mesh of polygons. To create them you will need the same tape and technique as when coloring stripes. These designs are now at the height of fashion. Master class among the images below.


Geometry
Geometric shapes are trending right now. They can be created based on the web, the emphasis just shifts to internal forms, not lines. There may be no edging at all.


For small ones geometric shapes, painted on the walls, or complex patterns, it will be more convenient to use stencils. We have written a lot about this.
Ombre
A color that gradually fades and blurs or gradually flows into another - interesting solution for wall decoration. Ombre can be with soft transitions, or it can be striped (each strip is a different color tone) or even in the form of waves. Link to master class.


The effect of an underpainted wall
This technique is an opportunity to highlight any area with color with careless grace. When painting, the border between two or more colors is torn using a dried roller or brush, leaving the impression of incompleteness. The method is suitable for creative interiors and loft style.


Partial painting
You can paint only part of the wall: the bottom, the top, or a wide horizontal stripe. It looks interesting if you paint not only the wall, but also the door or other objects that come across the way.


Focus on the zone
Painting a small section of the wall serves as a great accent and helps with zoning. With the current trend toward minimalism, this is a great decorative touch that doesn't take up space in the room. Accents can be, for example, a circle around a shelf, triangles behind the dining area, a vertical wide strip behind the cabinet. This technique was actively used for transformation.


Stamps
Another way to apply a pattern to a wall is by imprinting. In this way, the wall can be made, for example, with polka dots or a heart, or filled with a more complex pattern. Stamps of the desired shape can be made independently or to order, and for some cases a regular bowl or cardboard base will do. toilet paper. Link to master class.


Surely you will be interested in learning about ways to transfer any drawing you like to the wall:.
Photos: popsugar.com, getcreativejuice.com, decoist.com, projectnursery.com, topinspired.com, thriftyandchic.com, creativedig.com, californiahomedesign.com, remodelaholic.com
What to do if there is an empty wall in the house and how to decorate it and what decoration to hang on the wall - read the article!
Here we have collected the basic methods on how to decorate a wall on a budget with your own hands! FROM the most basic ideas that even a child can repeat, to more complex ones, such as painting walls - you choose any one!

We hang a large mirror on the wall!
Mirrors not only look beautiful on the wall and give you the opportunity to admire yourself, but also visually increase the size of the room. We have adopted mostly standard mirrors and for everyone they are basically located in approximately the same place: the bathroom and the corridor.
Designer mirrors They are very expensive, just last week I was convinced of this at a hardware store. But even an ordinary mirror can be transformed and decorated in this way that neither him nor the walls will be recognizable.


Figured mirrors on the wall are at the peak of popularity

The feather mirror is a great accent on the wall!
Decorating the wall with wallpaper
Ideal design option empty wall for those who, for example, have old wallpaper on the wall or need to cover or disguise something.
- We buy a roll of wallpaper in a contrasting color or take scraps of old wallpaper.
- We lay out the collage on the floor first so that we can understand what will happen in the end.
- And glue it to the top of the old wallpaper with wallpaper glue.

Wallpaper accent wall
ATTENTION: You can glue over old ones only if they stick well!
Paint with patterns and drawings
The most expensive, but very beautiful method to transform and decorate an empty wall in an apartment is to apply a pattern with paint under a stencil or masking tape. The advantage of this method is that it is durable and can be applied to any room: bathroom, kitchen and bedroom.


Colored tape or self-adhesive paper
If you don’t want to spend a lot of time fiddling with paint, a simple way to decorate a wall is with colored tape or self-adhesive paper. We cut out crosses, circles or hearts - now it’s like this minimalist and geometric print on the wall is in fashion and it looks very stylish!

Small crosses on the wall

Decoration with adhesive tape

wall decoration with children's adhesive tape
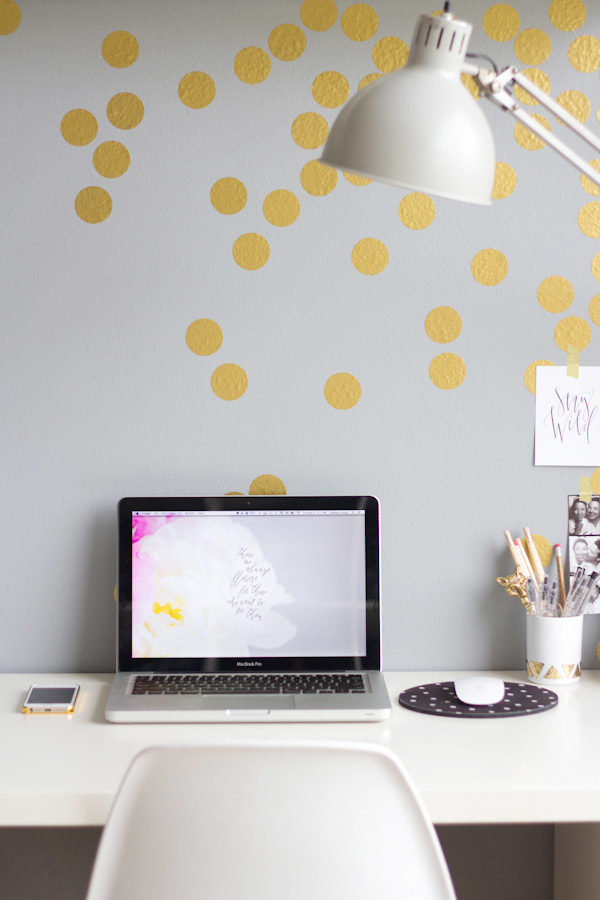
Decoration above the desktop with gold self-adhesive circles

Fabric panel
Such fabric paintings are an excellent wall decoration for both the bedroom and living room. They will look great at the head of the bed or near the TV.
The principle of creating panels from fabric:
- Required wooden subframe, its cost is about 1-2 dollars. And you can order it at any framing workshop.
- Choose any piece of fabric that matches the color. Can be used, for example, from an old dress or curtains.
- Using a wood stapler or furniture stapler pull it onto the subframe. This process will take no more than 10-20 minutes.


Branches
Create a corner in your home wildlife. Place the branches in frames and attach them to the wall. The photo shows options on how this can be done, you can use them, or your own on this basis. You can use both processed and rough branches.


Vertical mini garden
Green up your home without crowding your tables and window sills. Small, lightweight pots or vases, made in the same style and attached to the wall as a display, will help you do this. You can buy pots in a store, or make your own from wood or cans.

How - in this master class!


Shelves
This method will help not only decorate the wall, but also make it more functional, place those important things that you would like to have quick access to or just admire: books, flowerpots, souvenirs. Make (or buy) a shelf of an original shape and it will not just be furniture, but a real element of apartment decor.


Paper crafts
Paper is inexpensive, can come in a variety of colors and thicknesses, and you can do just about anything with it. Since the field for action is really wide, let’s break this point into sub-points:

Cut out figures
Butterflies, hearts, flowers and the like - for all this you only need scissors, paper and a little free time. You can cut it out using a ready-made stencil or draw it yourself; the figures can be flat or curved, creating volume.


Paper crafts with 3D effect
Here you already need to show painstakingness and endurance, but the result is worth it.

Stickers
Ordinary white stickers, folded several times, turn into original wall decor. Colored stickers look great even if you just hang them in smooth color transitions; you can also use the simplest origami techniques.


Paper panel
You can cut the paper into small pieces, rounded on one side, and hang them so that each one overlaps the previous one a little, thus creating a panel. At the end, you can spray paint it all or leave it in its original color.


Paper cupcake baskets
Thanks to their shape, size and reliefs on the sides, they are suitable not only for baking, but also for decoration: they can easily be formed into flowers or simply an interesting abstraction.


Other photo wall decoration ideas
Even things like wine corks, pencils, pebbles, spoons and other “ordinary” things can appear in a completely new light. Take a closer look at the things around you, turn on your imagination and think about how else they can be used, besides the usual functions, and you will undoubtedly see many different options for decorating an empty wall that you had never even thought about before.


2 ratings, average: 3,50
out of 5)
For those owners of houses or apartments who want to make their home exclusive, unlike many other standard interiors, there are many ways to transform it. When purchasing, a person can never be completely sure that when he comes to visit his friends, he will not see exactly the same ones on their wall. Therefore, it makes sense to turn to one of the techniques for applying wall drawings.
Drawings on the wall in an apartment can be made with your own hands in different ways, however, in order to choose an option that is affordable, you need to know how they are reproduced. Painting a wall is a rather complex undertaking, and not everyone has a predisposition to this, without exaggeration, art. Therefore, technological techniques have been developed that do not require drawing talent - only accuracy, consistency and accuracy are required.
Very important point When creating a pattern of any type on a wall, the ideal smoothness of the wall is important, otherwise it will be impossible to achieve the desired aesthetic effect. On the contrary, when paint is applied to the surface, all its flaws will appear. That is why work must begin with careful preparatory measures.
There are two ways - using drywall (“dry plaster”) and applying regular wet plaster.
- The first method is much simpler than the second, and therefore is accessible to anyone, even an inexperienced builder.
- The second method of leveling walls requires some experience, and it is not a fact that you will be able to put the surface in order the first time.
Therefore, it is better to use plasterboard for the walls of an apartment, especially since leveling the walls with its help can be done in two different ways.
Leveling the wall with plasterboard
Drywall can be fixed to the wall by gluing on gypsum mortar or mechanically securing it to a metal frame.
Walls in apartments are quite often uneven, but usually do not have excessive large differences, such as, for example, surfaces in an old private house. Therefore, to put them in order, you can use the method of gluing leveling drywall.
Gluing drywall
To work, you will need sheets of drywall and gypsum-based mounting adhesive.
The alignment process is carried out in the following order:
- A building level or plumb line is used to check the evenness of the wall in order to determine where to apply more thick layer glue solution.
- Next, the wall primed composition deep penetration and dries.
- Drywall sheets, if necessary, in the required size.
- After this, the solution is mixed in strict accordance with the instructions included with it.
- Glue is applied to a sheet of drywall in a dotted manner - in the form of slides.

- After this, the sheet is installed against the wall and pressed tightly. The horizontal position of its installation is controlled by the building level.

- The entire wall is leveled in the same way. To maintain a uniform plane, it is recommended to tighten the control cords from above.
- After all the sheets are glued and securely fixed with a hardened solution, the joints between them are glued with sickle tape and then sealed, at the beginning of the starting, and then a fine finish. After it dries, they are thoroughly cleaned.
Fastening drywall to the frame.
This leveling method can be used to level the wall, and if it is necessary to insulate it or soundproof.
Actually, the wall leveling itself is done not with sheets of drywall, but metal frame from galvanized profiles. It is this that is leveled and fixed to the wall.

After this, between the frame guides, if planned, one of the h vuko - and heat-insulating materials.
The next step is to cover the frame with sheets of plasterboard, which is secured using self-tapping screws. The heads of the screws are recessed into the sheets by 1 ÷ 1.5 mm.
The joints between the sheets are sealed in the same way as when gluing them to the wall. But besides this it is necessary putty and holes in the places where the screws are screwed in, otherwise they will appear later as rusty spots.
With any method of installing gypsum boards, after completing the main work, the entire surface must be puttied. The solution is applied with a wide spatula in a thin layer.
Then the wall is thoroughly cleaned grinder or by hand grouting until perfectly even and smooth.
The last step before applying the drawings, regardless of the chosen technique, is to prime the wall well - it is best to do this in two layers.
Only after the soil has completely dried can you proceed to decorative design wall surface.
If you have experience plastering works, then you can refuse to use drywall by using “classical” technology.
The traditional way to correct wall defects
One of the visitors to our portal shares his experience.
Existing techniques for applying drawings to walls
There are a lot of ways to transfer a drawing to a wall, but not all of them are available for reproduction if you lack experience and talent in this art. Therefore, it is worth considering the most popular technologies, so that you can decide which of them is most suitable for independent execution by a novice master.
Painting on the wall with paint
This method is used by experienced artists when applying a pattern on the wall that does not have clear contours and lines. To do this kind of work, you need to have good spatial imagination and already imagine in advance the picture that should be the result.

Immediately applying a colorful drawing is the lot of professional artists
First of all, you need to decide on the base color, which will be present in most elements of the painting. It is the base color that is used to create the so-called “skeleton of the drawing”, that is, key, supporting parts.
For example, it is supposed to depict a landscape on the wall, the center of the composition of which will be a tree, and auxiliary elements will be located around it. In this case, the base paint, diluted to transparency, reproduces the contours of the central and largest elements of the picture. Brown or green paint is well suited for applying a landscape scheme, since they are necessarily present in any paintings with a natural theme.
This stage is a kind of marking and will become the basis for further work. Since the paint used is basic and translucent, it can always be covered with a thicker layer when performing further actions and recording small details.
It is this method that is the most difficult, and, without experience and talent, it is better not to undertake it, since in order to correct the result of a failed experiment, you will have to completely repaint the surface of the wall.
To mark a pattern with this approach, you only need paint, a brush and a container for paint thinner.
Video: painting on the wall - from sketches to drawing details
Drawing with a pencil
This method of drawing a picture on the wall is also not easy. The point of all her work is to transfer the image from a small sketch to a plane on a large scale and without distortion. The difficulty of transferring lies in maintaining the exact proportions of the elements of the future picture, and, of course, their shape and direction of movement.

The first thing to do is to determine the area on the wall where the painting will be placed - it can be marked with dots or crosses. Then, inside the selected plane, the selected drawing is reproduced using a pencil.
To apply an image using this method, you need to prepare a simple pencil, an eraser and a soft cloth.
Transferring a pattern across squares
Transferring an image from your own sketch, photograph or printed picture to the wall by dividing it into squares seems to be a simpler and more accessible option than the two methods described above. This approach to drawing is accessible even to those who do not have artistic talent, but are ready for quite long, painstaking and precise work.

The process is carried out as follows:
- The prepared sketch is drawn into squares, usually having a size with a multiple of 10, for example, 40x40 or 50x50 mm. Round numbers are taken in order to simplify their conversion into proportions when transferred to the wall.
- Next, an area is determined on the wall that is proportional to the drawn pattern. Let's say the sketch size is 200x250 mm. If we apply a proportion of 1:10, then it will require an area of 2000x2500 mm on the wall. If you need the image to be smaller in size, then you can transfer it in a ratio of 1:5, in which case it will occupy an area of 1000x1250 mm on the wall.
- The area on the wall reserved for the drawing is also divided into squares, in the same proportion as the entire image. The point of dividing the drawing into separate sections is to accurately transfer the image from a small sheet to large area walls. They transfer it, focusing on each of the squares, which contains part of the overall image. The drawn lines will become excellent strongholds.
- Next, from each square in the sketch, part of the image is transferred to the corresponding square on the wall. It is very important here to ensure that the line from one square has the desired continuation in the lower or another adjacent square. Only then will the image be transferred accurately and become a full-fledged likeness of the small drawing.
This method of drawing a drawing will require quite a lot of tools - a simple pencil, an eraser, rulers of different lengths, a construction corner and a level (plumb line) for drawing straight horizontal and vertical lines.
Transferring a drawing to the wall using a shadow
Transferring a drawing to a wall using a shadow is not often practiced in wall painting, although this method is quite simple to perform. The main thing is to create the necessary lighting and install it so that the shadow of the selected object clearly falls on the wall where the painting will be done. Thus, a lacy or geometric pattern, tree branches that can turn into trunks in the shadow, a silhouette of a person or just the profile of his face, and much more can be transferred to the surface.

An original technique - transferring the contours of the future drawing along the cast shadow
The advantage of this method is that the shadow on the wall itself can magnify objects.
For example, it is planned to depict a landscape with a house on the wall. To do this, you can cut out a small house from cardboard and install it against the light at such a distance from the wall that the desired size is displayed on it.
In addition, the shadow can also become an assistant in composing the composition of the landscape, since some objects can be rearranged and the most suitable ones can be found. the best display on the wall using a shadow until it is reached complete harmony distribution of elements.
Having fixed the object in the desired position, trace its shadow on the wall with a simple pencil. The only thing that will have to be completed after completing the image layout is the small details. By using this method of pattern transfer, you can create a 100% exclusive panel for the room.
To transfer a drawing to the wall in this way, you will need a projector or a powerful lamp, a simple pencil and an eraser.
Stencil technique
A very simple way to transfer a drawing to the wall is a stencil. Its only disadvantage is that it will be difficult to make blanks for large elements that will be present in the drawing, and the image will be quite monotonous, since using a stencil it is impossible to recreate full-fledged paintings with many details.

“Cat pack” depicted using stencil method
Otherwise, the advantages of this method are undeniable - it gives clear lines of the image, and it is enough to make one or two templates to completely decorate the entire designated area for decoration with the desired ornament.
This approach is perfect for decorating a wall with an ornamental belt or if you plan to display one or more individual objects or plant compositions.
You can make a stencil yourself by first printing the image on a printer, then gluing it onto cardboard and cutting out the design with a sharp knife. You can find ready-made samples in any art or even construction store, but in this case they will not be exclusive.

Before applying color, for the stencil element, you must determine the area where the selected pattern is located on the wall, then attach the template to it and trace the image with a pencil. Then, you should step aside and look from afar to see if the place has been chosen correctly. If you plan to make an ornamental border on the wall, then before starting work, you need to mark the line along which it will go.
When choosing this method, drawing and self-made stencil, you need to prepare a sharp one from the tools stationery knife, eraser and simple pencil.
Painting a design through a stencil
The stencil is used not only for drawing the contours of the design - very often it is used immediately to reproduce the required image. For such a design, you usually only need one or two paints, which are used for printing. The main work of applying paint is carried out using a sponge or a paint brush, but soft watercolor brushes will also be needed to adjust the contour of the shape. different thicknesses. If you need to do the work quickly, then instead of a sponge, use a can of paint of the selected color.

So that the adjustment work is as less as possible, you need to observe two very important rules- this is to press the stencil as tightly as possible to the wall, and while applying paint, make sure that it does not move from the designated place until the entire template is filled with color. To keep the stencil well in one place, you can fix it on the wall with masking tape, which will not damage the base finish of the wall.

It should be noted that instead of paint, putty can be used for application through a stencil, which is applied using a spatula. In this case it is achieved interesting effect– the drawing will turn out to be voluminous, protruding from the wall by approximately 1÷1.5 mm.
Applying a relief pattern
A three-dimensional image can be applied to a pre-made pencil drawing, but many experienced craftsmen they do it without preliminary marking.

One of the most complex techniques is exclusive plaster bas-reliefs
The work is done with a gypsum mixture, from which elements of various compositions are quickly formed - these can be landscapes, figures of birds and animals, as well as three-dimensional plant patterns.
Such reliefs can be later covered with paint, or they can remain in their natural form, and most often the latter option is chosen.
Read practical guide, in our new article.
“Revitalizing” a drawing with color and shape
Having figured out how the base of the picture is applied to the wall, you can move on to the next, most interesting stage work. It is necessary to “breathe life into the created outlines”, to give them that appearance, which will decorate not only a specific wall, but the entire room.
Applying paint with a roller
The simplest of all existing methods applying paint is to use a special roller with a textured pattern. This tool consists of cylinder-rollers rotating in opposite directions. The surface of one of them is made of foam rubber - it takes paint from the container. The second roller is made of rubber, and a relief pattern is applied to it. When rotated, the paint from the sponge falls onto the relief of the adjacent roller, and from it is imprinted on the surface of the wall.

A technology accessible to everyone - applying patterns with a special relief roller
On sale you can find roller attachments with different designs, from which you can choose the one that suits your specific room. The advantage of this method of decorating walls is that the work is done in one step, that is, the image is applied immediately with paint and does not require additional adjustments. The disadvantage is obvious - everything turns out too monotonous, and the factory production of rollers practically eliminates the possibility of exclusivity of the applied pattern.
Painting a pencil drawing
Reviving a drawing with paints occurs in the same way for both ordinary and relief drawings. To work you will need paints water based and brushes, water containers and a palette for mixing different colors.
- The first layer of paint applied to the drawing should be “transparent”, since its function is to distribute color throughout the future fresco painting.

- Without drawing small elements, color spots are applied to the drawing, which should fill the entire canvas. For example, by mixing paints and achieving natural shades, the sky becomes covered blue, field – yellow-green, tree trunks – transparent brown tone. You should not take saturated colors - they can be achieved later by applying subsequent layers, which will form the “volume” of the various details of the picture.
- We must not forget that distant elements should not be visible as clearly as those in the foreground. Taking this into account, you can emphasize the depth of space in the image. There is no need to rush to paint the foreground of the landscape right away - artists usually work on it last.
- When the entire area of the painting is covered with color, you need to move to the opposite wall to better see the distribution of colors.

- After completing the first stage of work, you can pick up thinner brushes and begin to describe all the details in more detail, trying to give shape to volumetric elements using color and shadows. At the same time, do not forget to observe the laws of perspective, that is, the further the depicted trees and houses are removed from the bottom edge of the picture, the less clarity they should have.
- The foreground of the picture is written out more clearly, but the objects located on it should also have volume, which is created by different shades of paint. After completing work on the first plan, you can further darken some areas of the painting, which will add depth to the space and make the image more voluminous.
Color coating of a three-dimensional or single pattern
If there is a relief, volumetric or regular pattern on the wall without surroundings additional elements, then the work to transform it is carried out approximately according to the same scheme as painting a multifaceted picture. This category of images includes elements such as a large-sized flower, a flowering tree branch, or a composition of several plants.

If you break down the painting of such a picture step by step, then the work will consist of the following stages.
- Each of the design elements is completely covered in the right color. The first layer should be transparent, but the paint should not extend beyond the lines of the contour applied to the wall. If we look at what is presented in illustration image, then the leaves on it are covered with pale green, the petals of the buds are covered with transparent red and yellow.
- After the first stage of work, the painting will acquire color, but will look flat.
Therefore, subsequent layers of paint should work to create volume in the petals, leaves and stems. To do this, more saturated tones are added to the base colors already applied to the image, which can make the picture more picturesque. For example, a little brown or even black paint is added to the red color, and the resulting color is applied in the shadow areas of the buds. To obtain a more saturated yellow color, red and brown shades can be added. All paints must be mixed on a palette that will allow you to see the transitions of color and tone.

- To create a leaf color that is in harmony with all other elements of the composition, in this case you will have to mix three colors on the palette - yellow, brown and green. They can be mixed in different proportions to suit different areas of the image.
- When each of the elements takes shape, it is necessary to emphasize the depth of the volume. To do this, add more paint to the base color in shades close to it, as well as a little black. The finished color is applied to the shadow areas of the buds and leaves, which will give them more noticeable volume and, as it were, visually “tear” them away from the wall.
Step-by-step creation of a three-dimensional pattern on the wall

This photo shows a room whose back wall is decorated with a voluminous floral pattern, made by hand from start to finish. To make sure that this design option is available for production to any apartment owner who wants to transform yours housing drawings on the walls, you need to consider in detail the sequence and technique of performing the work.
To reproduce this decor you will need some materials and tools:
- Material for creating a stencil – cardboard or having a high density insulation material. You will need a sheet measuring approximately 1000×500 mm.
- Gypsum putty for creating relief.
- Primer for covering the wall before starting work and after creating a relief pattern.
- selected color. If volumetric parts will also be painted, you will need to choose two colors that will be in harmony with each other.
- Construction or stationery sharp knife.
- Spatula and stack.
- Soft narrow and wide brushes.
- Scraper.
- Fine-grit sandpaper.
- Spray.
- Oil marker with gold or silver paint to highlight the relief.
The process of transforming a wall using this technology is carried out in the following order:
- Work begins with the manufacture of a stencil, which will serve to create a thin three-dimensional pattern or even a relief that protrudes significantly from the wall. The material for making the template must have such a thickness that it is planned to “raise” the relief parts from the wall. It is best for these purposes to use dense or even hard material that adheres well to any surface. However, at the same time, the base for the template should stay enough light, so that it can be glued to the wall using masking tape. Some use dense roll insulation(polyethylene foam) of the required thickness.
The selected pattern is clearly applied to the panel prepared for the template, and then cut along the contour with a sharp knife. The work must be carried out on a hard surface that you won’t mind damaging, for example, you can put a sheet of thick plywood on the table.

- The next step is to fix the stencil with tape on a primed and well-dried wall,
- Next, a gypsum-based plaster mixture is mixed. Here you need to remember that gypsum quickly sets and hardens, so knead a large number of the solution is not worth it.
- The next step is to apply a stencil on top of the cut out drawings using a spatula. gypsum mixture and is compared with the surface of the template.

Since the plaster hardens quickly, the stencil can be carefully removed from the wall after 10-15 minutes, because for further work it is necessary that the relief pattern remains slightly damp.

After removing the stencil, the relief design remaining on the wall will not have a complete look. It can rather be called a blank, so you will have to work on it more.
- To do this, take the stack in hand, mix the solution and adjust each of the elements. On some of them, excess plaster is trimmed, and in other places, on the contrary, a small part of the solution is added, from which the missing elements of the design are formed.

Small details are first corrected using a stack...
- Next, the stage of additional refining of the relief details is carried out using a brush and water. Wetting the brush, use it to level the surface of the relief as much as possible, trying to round off its sharp sharp edges.

... and then finally leveled and smoothed with a damp brush
The solution smeared around the design must be carefully cleaned off or wiped off with a soft damp cloth.
- After this, it is best to prime the entire wall and let it dry.
- Next, everything decorative elements need to be coated with paint to match their color with the general background of the wall. This operation is carried out with a soft brush, and during the work you need to ensure that there are no stripes or stains left on the surface from the bristles of the brush.
- Painted relief must be carefully cleaned sandpaper with fine grain. Sandpaper is used not only on the surface of the elements, but also on all the recesses, removing excess solution from them, highlighting the shape of flower petals and giving beautiful volume to leaves and curls.

- After this, it is best to coat the wall again with a primer.

- The next stage is to completely cover the entire wall with paint, which will even out the entire surface. You may have to paint the wall two or even three times - the number of cycles will depend on the quality of the paint and texture finishing material walls. Some plaster mixtures They absorb the painting material well, and it can dry out in spots - some areas of the wall will be matte, others glossy. To avoid such unevenness, the surface is primed before applying paint.

Now all that remains is to “raise” the necessary details of the relief pattern with some contrasting shade
- The final stage of the work will be to highlight the relief elements on the wall in a darker or in a light tone base paint. Instead, another decorative option can be used, for example, as shown in this photo. Here the master decided to use gilding of the floral pattern, which gave the wall style and a peculiar chic.