How to strengthen your home antenna with your own hands. How to make a DIY antenna for a TV: simple ideas
Humanity lives in the digital age. Television is switching to digital signal transmission. The peculiarity of digital broadcasting is that it is conducted in the decimeter range.
Transmitting stations have low power of the transmitted encoded signal. Therefore, to receive the signal and display the image on televisions that are remote from the station, a receiving digital antenna is required. If you don’t know how to make an antenna for a TV, then the answer is simple: you can assemble it with your own hands from scrap materials in literally one hour.
Types of receiving antennas
To reliably receive a signal from a television tower, there are many different television antennas. They differ in shape and range of receiving frequencies.
Antennas can be divided into several main types:

Currently, the vast majority of television signals are transmitted using digital coding. Broadcasting is carried out in the UHF range. The format of such transmission is called DVB - T2.
Theoretically, this signal can be received on some old universal antennas, which is what marketers took advantage of, calling them DVB - T. In order to distinguish the new narrow-profile decimeter antennas from the old classic ones, the number “2” was added at the end of the abbreviation.
Digital TV Basics
Television transmitters transmit digital signals over relatively short distances. The transmission range does not exceed sixty kilometers and is limited by the line of sight of the emitter from the television tower.
For these distances, a low-power signal is sufficient. But the design of signal-receiving antennas must meet certain requirements:

The digital signal has its own unique feature. You can either catch him or you can't. He has no middle position.
If a digital signal is one and a half decibels higher than noise, then its reception is always high-quality. The signal may disappear if the cable is damaged or the phase is distorted in the transmitted section. In this case, even if the signal is strong, the image breaks up into small squares.
In order to catch UHF broadcasts, an appropriate antenna is required. According to theory, any antenna will do, but in practice there are nuances.
There are several types of antennas for DMV reception offered by manufacturers:

It’s not at all difficult to make your own antenna for digital TV.
Assembling antennas at home
The shape of the bends should be as smooth as possible. Basic phase distortion appear due to dips and sudden emissions.
Homemade digital antennas are frequency independent. They do not have the best characteristics, but are easy to assemble and require little time and money for construction. Suitable for working in noise-free air at a short distance to the repeater.
Reception of signal to beer cans
You can construct a simple all-wave antenna from ordinary beer cans. Of course, it is inferior to industrial designs and is not always able to provide a stable signal, but it serves its purpose well. This device receives at least fifteen channels as a minimum.
To assemble this structure, you will need:

 After washing and drying the metal cans, DVB - T2, you can begin to assemble the antenna.
Carefully, so as not to deform, pierce the hole in the upper parts of both cans. A screwdriver is suitable for this procedure. With its help, self-tapping screws are screwed into the prepared holes.
Then take one end of the cable RK75 and at a distance of ten to twelve centimeters, using a knife, it is cleared from the upper shell. In this case, the copper braid should not be damaged. The braid is twisted into a pigtail. The aluminum screen is removed.
Then the polyethylene shell is cut off by six to seven centimeters and the central core is exposed.
The resulting pigtail and central core are screwed to the self-tapping screws. If you have a soldering iron and the skills to use it, then it is best to solder parts of the wire to the cans.
The cans are secured sequentially, using tape, along a plywood board or other base that is at hand. The distance between the banks should be seven and a half centimeters.
To complete the work, a plug is attached to the second end of the cable.
To do this, the end of the cable is stripped and the central core is passed through the hole in one of the plug halves. The cable braid is attached to the plug body. One half is screwed onto the other and as a result we get a plug , ready to go.
All that remains is to connect it to the antenna input of the TV and place the antenna in the right place where the quality of the received signal will be good.
If the created structure is placed outdoors in the open air, it is necessary to protect the device from moisture and dampness. For these purposes, you can use plastic bottles in which the bottom and necks are cut off. The metal parts of the antenna are located inside them.
The resulting model is easy to “customize” by rotating it in space and simply moving around the apartment, balcony or summer cottage.
Zigzag antenna Kharchenko
This zigzag broadband design was invented by engineer K.P. Kharchenko in 1961. It was perfect for receiving a digital signal and received wide, well-deserved recognition. People call it the “eight” and the complete assembly looks like two diamonds, located one above the other.
When making a figure eight you will need:
- Copper wire with a diameter of 3-5 millimeters.
- Coaxial antenna cable 3-5 meters long and 75 Ohm resistance.
- Soldering iron with solder.
- Scotch tape or tape.
- Plug.
- Bolts for assembly.
- Base: sheet of plywood or plastic.
 At the first stage, we assemble the antenna frame. We take a wire 109 centimeters long and bend it into a frame. The frame has the shape of two consecutive rhombuses with sides equal to thirteen and a half centimeters. One centimeter will remain. A loop is made from it that holds the wire together. The ends of the frame are soldered to each other and it thus turns into a closed circuit.
After this, the coaxial cable is stripped. The cable screen is rolled into a tight rod and soldered to the frame wire at the point where the diamonds meet. The central cable rod is also soldered in the central part of the frame. The core and braid should not touch each other.
The second end of the cable is connected to the plug. The plug at the soldering points is first wiped with alcohol and treated with sandpaper. The monocore is soldered to the central output of the plug, and the twisted braid is soldered to the side.
If the frame will be used outdoors, the future plywood base can be painted or varnished. Soldering points can be wrapped with tape or tape. But this is not the best option, since the adhesive tape may unravel over time. If you put plastic tubes of a suitable diameter on the wire before soldering, then at the end of the work the tubes are pulled over the soldered areas and reliably protect the frame. After which the frame is installed on the prepared base.
The digital antenna is assembled with your own hands and is ready for use.
If desired, you can assemble an antenna tuned to a specific wavelength. To do this, you need to calculate the length of the square. This is not difficult: the wavelength of the desired signal is divided by four. The result is the desired length of the frame diamond.
The simplest cable antenna
It requires one television cable with a resistance of 75 Ohms. The required cable length is calculated based on the required digital broadcast frequency. Its value in megahertz is divided by 7500 and the resulting amount is rounded.
The resulting value is the required cable length.
 After this, one end of the cable is cleared of external insulation and inserted into the antenna connector of the TV. A mark is made on the cable from two centimeters after the connector.
It is from this mark that the required cable length is measured. Use pliers to pinch off the excess part.
After this, you need to return to the mark on the cable. Only the insulated rod is left in this place, and the outer braid is removed. The cleaned part is bent at an angle of ninety degrees.
All is ready. The TV can be tuned with a new antenna.
Installation safety precautions
For reliable operation of such antennas, it is necessary to place them above the ground at a level of 7-10 meters. Therefore, during installation it is necessary to strictly observe safety regulations:
- Do not install the structure in heavy rain or heavy fog.
- It is not advisable to go upstairs alone, especially in icy, cold, or snowy conditions.
- If it is necessary to climb a shaky structure or high-altitude work is carried out in dangerous places, then a fixed mounting belt is required.
After proper installation, homemade antennas work no worse than factory ones, with significant budget savings.
When relaxing outside the city, sometimes, in addition to enjoying nature and fresh air, you sometimes want to watch your favorite TV series or an important football match. Unlike the city, coverage of villages with a high-quality television signal leaves much to be desired. In this situation, even purchasing an antenna operating in a wide range of decimeter and meter waves does not guarantee high-quality images.
You can try to assemble the antenna yourself, because a country house is the best place for experiments.

The simplest antenna option
As can be seen in the photograph, the antenna is a simple wave receiver. To manufacture, you will need two tubes and a television cable, as well as knowledge of the signal transmission range of the nearest television tower.

Typically, reception is carried out at frequencies from 50 to 230 MHz, forming twelve channels. For each of them, tubes of certain sizes are used. To receive a signal at a frequency of 50 MHz, the distance between the outer edges of the tubes must be in the range of 271-276 cm. On channel 12, the same distance is 66 cm.

Information on the dependence of the length of the blanks on the receiving frequency, as well as circuits of homemade antennas, can be easily found on similar thematic Internet resources.

To make an antenna in makeshift conditions, we present you a list of what you can make an antenna from:
- Two tubes made of steel, aluminum or any other metal alloy with a diameter of 8 to 24 mm. They must be the same in diameter, material and wall thickness.
- Availability of a television broadcasting cable designed for a resistance of 75 Ohms. The length of the wire is cut at the connection point, taking into account a sagging margin of 50 cm.
- Textolite blank or getinax material (at least 5 mm thick).
- Fasteners for installing pipes on a holder.
- A bracket for a future antenna in the form of a metal pipe or corner. When installing the receiver at a low height, you can use a wooden stand.
- Soldering kit, silicone fluid to prevent oxidation and electrical tape.


Assembly principle
The workpiece, selected according to its length, is divided into two equal tubes, which are crimped on one side. The tubes are fixed at a distance of 6-7 cm from each other, and their ends are attached to the textolite blank with clamps. The resulting structure is secured with a rod in a vertical position.

To connect the cable, you need to lay a loop designed for a resistance of 75 ohms. The middle cores of the cable are stripped and twisted with the ends of the tubes flattened, and the braid connection is made using copper wire. The connection of the rest of the loop and the cable going to the output to the television device follows the same principle.


The resulting loop and the remaining length of the cable should be securely fastened to a vertical stand to avoid interference. The required antenna installation height is adjusted locally by monitoring the signal change.

Beer can antenna
It is one of the most popular ideas for homemade television signal receivers. Instead of tubes, if there is no material, you can use simple beer cans.

To make such a television receiver, you will need the following parts:
- two beer cans of 0.5 l each;
- wooden or plastic blank 50 cm long;
- television cable RG-58;
- soldering iron, flux for soldering aluminum and solder;

To make a beer can receiver, follow these instructions:
- A hole 5-6 mm in diameter is drilled through the bottom of the jar, in its center.
- We lay the cable through the hole in the can and bring it out through the neck.
- The can is evenly fixed on the left side of the workpiece in a horizontal position.
- We bring the cable out through the neck to a distance of 5 cm, trim the insulation by 3 cm, remove the wire braid by 1.5 cm and solder it to the surface of the can.
- Solder the outgoing cable to the bottom of the second can.
- Attach the second can to the first at a minimum distance, using tape or other sticky material.

At the other end of the cable, a connector is installed to enter the TV. This antenna option is also suitable for digital broadcasting. If the TV supports a popular format (DVB T2), or there is a set-top box suitable for the old TV, then the signal can be received from the nearest relay tower. In this case, it is necessary to know the location of the repeater, in the direction in which the antenna should be directed to search for a signal.


This circuit is suitable for making an antenna designed to receive meter wave channels. Just use a liter container instead of half-liter jars.

If you don't know how to solder, there is another connection method. Two beer cans are attached at a minimum distance from the workpiece that holds the entire structure. At the end of the cable, carefully remove 3-5 cm of insulation. Twist the wire braid into a bundle and, shaping it into an eyelet, put it on a self-tapping screw.

In the same way, put the eyelet on the self-tapping screw of the second conductor. Then attach the wires, using self-tapping screws, to each can. From the point of view of long-term contact retention, soldering is much better than mechanical fastening. Before soldering, it is advisable to tinning the surface.

Although fastening with self-tapping screws is reliable, if moisture gets on the antenna, the contacts of the homemade device will oxidize, which will lead to signal loss.


Photo instructions on how to make an antenna


Once upon a time, good television antennas were in short supply, and most of those on sale were, to put it mildly, no different in quality and durability. At that time, any craftsman who could make a TV antenna with his own hands was in great demand. But interest in homemade antennas does not fade away even today. There is nothing strange here: the conditions for TV reception have changed dramatically, and manufacturers, believing that there is and will not be anything significantly new in the theory of antennas, most often adapt electronics to long-known designs, without thinking about the fact that the main thing for any antenna is its interaction with a signal on the air.
This is the most popular antenna for a TV - almost anyone can make one with their own hands. The secret of its popularity is the simplicity and availability of materials. You can even make something from tin cans at the dacha or on a picnic. Experienced craftsmen claim that it will take only 10 minutes to make such an antenna for a TV with your own hands, and it receives many more channels than a stationary one.
To make a TV antenna from empty tin cans, you will need:
- antenna cable;
- a couple of tin cans for beer or other low-alcohol drinks;
- self-tapping screws;
- plug;
- insulating or adhesive tape;
- screwdriver;
- stick.
Antenna assembly instructions:
- Tape the cans to the stick with insulating tape at a distance of about 7 cm from each other (although you can select the distance using an empirical method).
- Screw self-tapping screws into the beer container and attach the antenna cable, stripped at both ends, to them. If the can still has opening rings, the cable can be attached to them with self-tapping screws.
- Tie the cable to the stick with tape (this is necessary for the stability of the receiver). Instead of a wooden stick, you can use a hanger - then it will be more convenient to hang the antenna for tuning.
- To prevent the antenna from losing its working properties due to the influence of bad weather, the jars must be closed with a 2-3 liter plastic bottle, having previously cut off the bottom and neck. You need to drill a hole in the center of the bottle through which the cable will be pulled. After connecting, this place must be scalded with boiling water - then the plastic will deform from the high temperature and make the hole hermetically sealed.
The antenna made from empty beer cans is ready, all that remains is to connect it to the TV and configure it. You can improve the design by making the antenna from several sections.
This TV antenna can be used as an indoor antenna.
Simple TV antenna
If you don’t fancy yourself a great master, but still want to try making an antenna for a TV with your own hands, you can make the simplest version of it.

To do this you need to do the following:
- Connect the antenna input to any pre-insulated metal circuit.
- Place the circuit on a stand made of plastic or wood and place it on the TV itself or on the balcony.
- Since you need to connect the antenna to the TV using a plug and cable, you need to cut off about 5 cm of insulation on the cable.
- Divide in half and bend the opened winding.
- Carefully cut off the inner winding and expose the cable core.
- Secure the core with winding in the plug using screws. If your plug does not have room to attach the winding, then you need to cut it off.
- Strip the other edge of the cable, make a ring from the core and secure it to the circuit.
- Wrap the joints with insulation for structural reliability.
To improve the signal on your home antenna, you need to use electronic signal amplifiers.
Powerful homemade antenna
In order for the antenna to work as well as the purchased one, or even better, you need to improve its receiving circuit.

- The first step is to buy a signal amplifier for a television antenna, which connects directly to the antenna, and be sure to wrap the cable at both ends with electrical tape so that there is no interference in the signal.
- In order for the reception to be of high quality, you need to make a screen - this is a metal mesh that is isolated from the TV and placed behind the receiver. You can use a metal mesh from a fence as a screen.
- The reception area should be increased if possible - to do this, you can attach metal rods to the screen, paying attention to the fact that the entire structure is made of the same metal, so that oxidation does not occur over time. The rods must be connected to the screen symmetrically to create the largest possible area.
- In the center of the structure you need to place another amplifier, soldering the contacts to the receiver.
Antennas for this type of TV are not installed in the house; they are usually placed on the roof, turning towards the nearest TV tower.
Antenna made from a minimum of materials
Since making an antenna for a TV at home does not always allow available tools, 2 completely elementary methods have become widespread:

- For the first option you will need the simplest wire. But not aluminum - it is subject to very rapid oxidation. Copper or brass wire works great. Strip the wire from both ends of the insulating material, then attach one end to the battery or pipe, and insert the opposite end into the television connector. You will notice that a signal immediately appears, since the pipe, passing through most of the house and exiting upward, is an amplifier of the desired frequencies. In this way you can “catch” about 5 channels.
- The second option will be available only to those who have a balcony. You need to take the same wire as in the first option, only longer, so that it connects the TV and the balcony area. Strip the wire on both sides, connect one end to the TV, and wind the other to the stretched strings on which the laundry is hung. Such an improvised antenna will not only help increase the number of received channels, but will also improve the image quality by an order of magnitude.
You can make not only simple, but also satellite antennas for your TV with your own hands. This is especially true for those who live far from big cities and cannot buy a parabolic receiver in a store. It is good if the TV tower is located no more than 35 km from the house so that the signal is strong enough. And if there is a tall building nearby, then the task will become even easier.
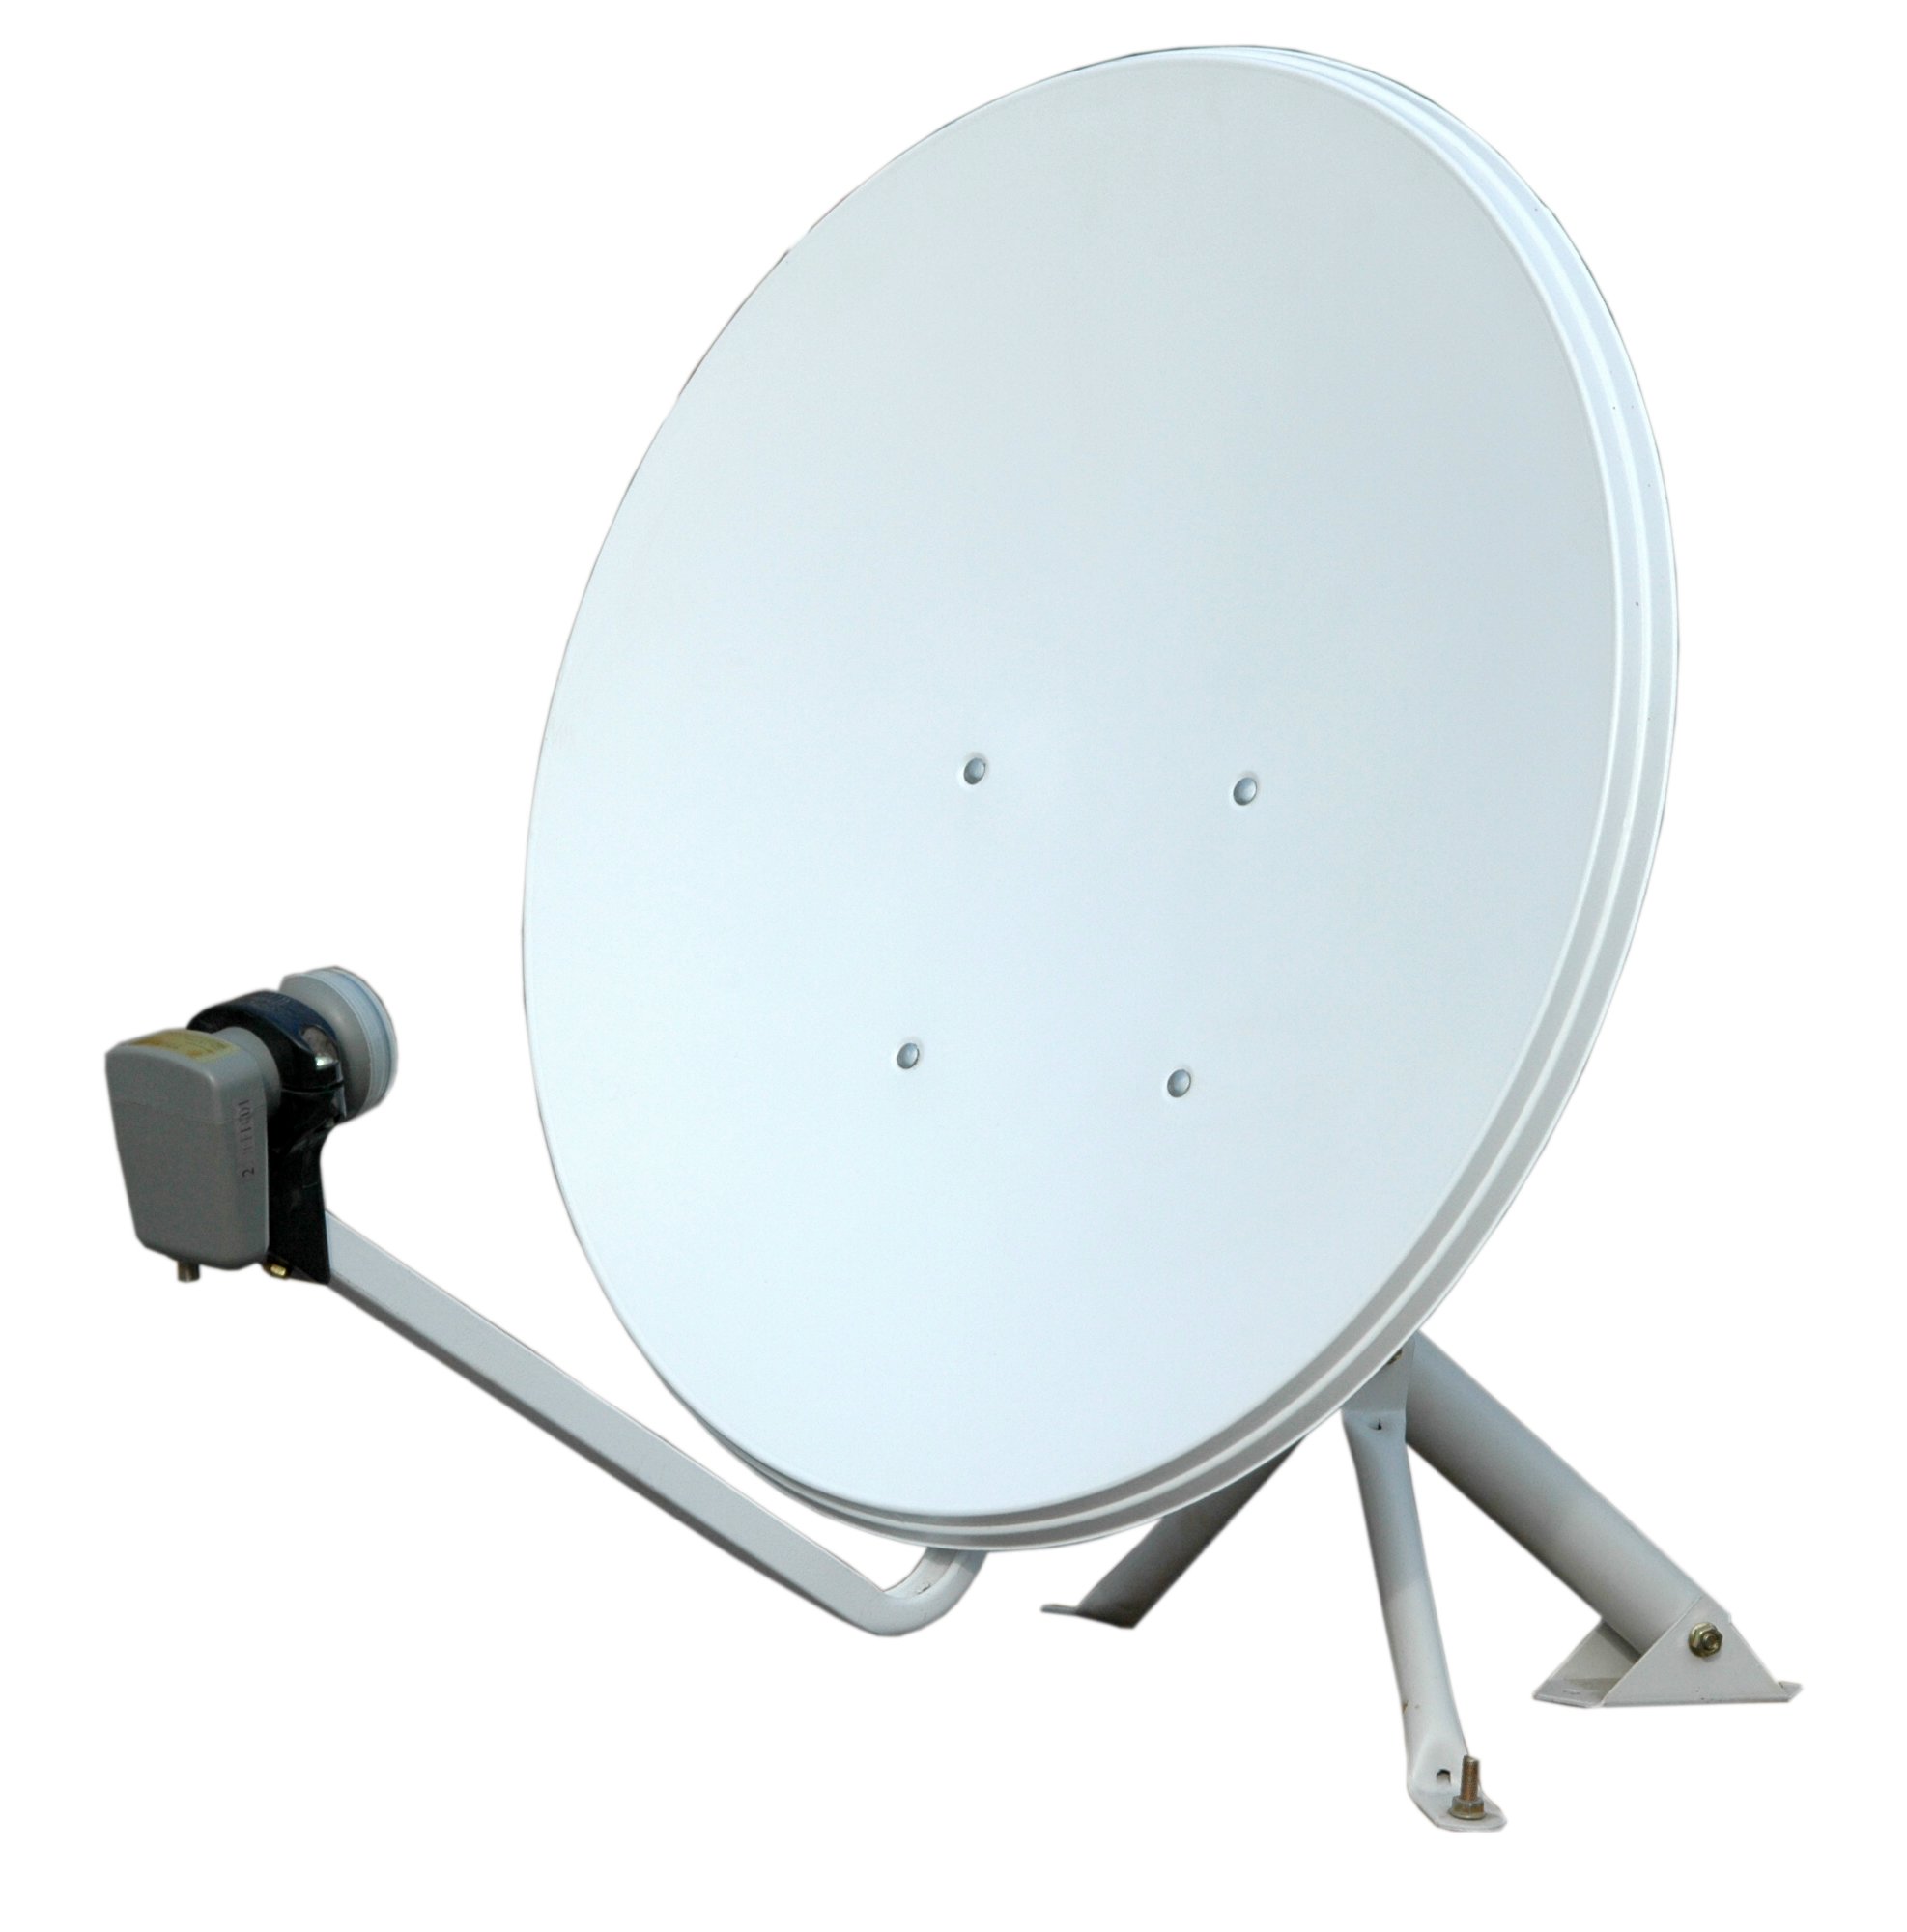
To make a satellite dish for your TV, you will need:
- unnecessary umbrella;
- foil;
- antenna cable (preferably made of copper);
- beer can;
- signal amplifier with power supply.
Antenna assembly instructions:
- Measure the antenna array (umbrella): measure the length between the spokes, take into account the height of the desired segment and the angle at which the spokes are attached.
- Transfer all the calculations to the foil and cut out the parts so that they fit the triangular sector of the umbrella.
- Sew the foil parts to the umbrella fabric with nylon threads - as a result, its entire internal part should be covered with foil.
- Install the signal receiver at the focus of the antenna array. You can either buy an amplifier in a store or make it yourself. In the latter case, it is enough to remove 4 cm of the outer winding from the cable, trim the screen that protects against interference and leave the core (it will transmit the signal).
- Cut an oval out of a beer can, make a hole in the center of the oval, thread a wire into it and solder a contact.
- Cover the joint with plasticine - this way the metal will not rust or oxidize.
- Attach the receiver to the handle of the umbrella using tape, tie the cables with an allowance of 10 cm - this way you can adjust the structure. It is very important to ensure that the receiver does not come into contact with the metal on the umbrella handle, otherwise interference may occur. At the point of contact, you need to stick plasticine or other insulating material.
- Attach the antenna, pointing it at the television tower, and adjust the channels by turning the umbrella in different directions. Place the power supply next to the TV, because the amplifier is powered via a cable.
We hope that experienced craftsmen will also gain some useful information from this article. And for beginners who have not yet felt the air, it is best to start with a “beer” antenna.
DIY home TV antenna was last modified: May 11th, 2016 by MaximB
So, imagine this situation: in the evening you decided to watch your favorite TV program, and suddenly the TV stopped showing - the cable TV was turned off. Or another case: you arrived at the dacha, already prepared for a vacation and discovered that you forgot to buy an antenna for the TV - not a single channel works. What to do in this case? The answer is simple - you need to make an antenna for the TV with your own hands from scrap materials, because most likely the cause of the breakdown is in this device. Next, we will look at the simplest manufacturing options, which will require a minimum of available parts and time.
Idea #1 – Use beer cans!
This version of a homemade television antenna is the simplest and fastest to manufacture. The maximum number of channels that you can catch is 7, but this figure can vary significantly depending on the region, terrain features and distance to the TV tower.
To make a TV antenna from beer cans, you will need the following materials:
- 2 small self-tapping screws, also called “bugs” (not needed if you have a soldering iron);
- 2 prepared beer cans (empty, washed and dried);
- from 3 to 5 meters of television cable (can be taken from a failed device);
- soldering iron and tin (for better fixation of contacts), availability is optional;
- screwdriver;
- wooden trempel (hanger);
- electrical tape or tape.
Finding all the materials in the house will not be a problem, so having prepared them, we immediately get down to business.
In order to make a homemade antenna from cans, you need to complete the following steps:
- We prepare the cable. First, at a distance of 10 cm from the edge, you need to make a shallow circular cut and remove the top layer of insulation. Having opened access to the screen, we collapse it into one bundle. After this, we cut off the middle insulating layer, exposing the copper core of the cable by a few cm. At the second end of the wire there should be a regular antenna plug.
- We prepare the jars. There will also be no difficulties with containers that will act as signal receivers. First you need to choose the optimal dimensions of beer cans. It is better to use liter ones, but if these are not available, containers with a volume of 0.5 and 0.75 liters will also cope well with the task.
- Let's make contacts. At this stage, the twisted cable screen is fixed to one can, and the copper core itself is fixed to the other. Fixation is carried out by bedbugs using a screwdriver or a regular screwdriver. However, it is recommended to fasten the wire not with bugs, but with a soldering iron. The result should look like this:

- We assemble a homemade antenna for a TV. The signal receiver is ready, now we make a supporting structure, which we use as a trempel or a regular hanger. Under no circumstances should it be made of wire or metal. Using electrical tape, we fix the containers to the trempel (as shown in the photo). We draw your attention to the fact that the banks must be strictly on the same straight line, otherwise the homemade product will not work and receive the signal stably.

- Setting up an antenna for the TV. Now you need to experiment with the optimal distance between the cans, as well as where to hang the device and its position so that the homemade product catches many channels. We turn on the TV and determine exactly how the receivers should be located and where is the most suitable place for their work. This completes the technology for creating the device.

As you can see, the whole process is quite simple and does not represent anything complicated. The optimal distance is 75 mm between the ends of the cans, and the best installation location is near a window or on an external mast. In individual cases, the distance between the banks can be made larger or smaller.
Visual video instructions for creating a simple antenna from cans
Idea No. 2 – Use wire
Another equally good option that is advisable to use in the village is a homemade antenna made of copper wire with an amplifier.
All you need for production is:
- amplifier (suitable from an old device, for example, a non-working or disassembled antenna);
- two pieces of wire 180 cm each, it is advisable to choose thick and stiff so that the wind does not damage the device;
- a piece of metal (or wood) plate 15*15 cm;
- electric drill with a set of drills (a welding machine is desirable);
- small bolts;
- hammer;
- iron pipe;
- a television cable of suitable length with a plug (sold in radio stores, not expensive, can be removed from a non-working device).
So, to make your own TV antenna from copper wire, you need to complete the following steps:

Please note that in the photo examples, both the amplifier, the reflector, and the wire are covered with paint. Painting protects the structure from corrosion and other adverse factors, significantly extending the life of a homemade TV antenna.
Idea No. 3 – Home HDTV device
If the first 2 options worked at a frequency of no more than 270 MHz, then the next manufacturing method will allow you to enjoy a higher quality picture, because The signal range can reach up to 490 MHz. The only part that is unlikely to be found among household items is a matching transformer from 300 to 75 Ohms. You will need to buy it in advance at a specialized store, but some plugs already contain this part.
Although, there are instructions on the Internet for making a homemade transformer, you can find and use it, this will significantly improve your skills in assembling homemade antennas.


Materials you will need:
- Scotch
- Cardboard
- Stationery knife
- Foil
- Stapler
- Scissors
- Marker
- Roulette
- Glue (pencil or PVA)
Having prepared all this school kit, let's get down to business!
First you need to draw (or print on a computer) this diagram:


Now, according to the diagram, we cut out all the spare parts, including the necessary pieces of foil:


After this, you need to make a reflector with dimensions of 35 * 32.5 cm (height and width). Cover one side with foil.


In the middle we cut out two identical rectangles, which are necessary in order to completely assemble the signal catcher for a homemade antenna for a TV. The rectangle should be 3.5 cm long, its purpose is to maintain the distance between the reflector and the auxiliary parts.


We glue the parts onto the rectangle, and when the glue sets, we drill holes for the television cable.


We connect the transformer and cable using twists, tape or a soldering iron. A more powerful TV antenna is ready for use! It should also be noted that this homemade version is only suitable for indoor use, because The paper will quickly become wet from being used outdoors.
Assembling a digital antenna from a TV cable and a cardboard box
Another option for a powerful device made at home:
HDTV antenna made from improvised means
Idea No. 4 – Apartment option
There is another way to make a powerful antenna for a TV from improvised materials, which is suitable for both outdoor and indoor use.
To make the device you will need the following materials and tools:
- 4-meter copper wire, cross-section 4 mm2;
- board of arbitrary thickness, 55 cm long and 7 cm wide;
- wood screws;
- ruler or tape measure;
- a simple pencil;
- screwdriver;
- soldering iron;
- antenna plug.
So, first, we transfer the drawing to the workpiece and drill holes in the board: 
Then we transfer the drawing data to the board and drill in the appropriate fastening points. 
Next, the copper wire must be straightened and cut into 8 equal pieces of 37.5 cm each. 
In the middle of each of the 37.5 cm sections, the insulation must be removed (as shown in the picture). To do this, use a sharp knife; a stationery knife is perfect. 
We cut off 2 more pieces of wire 22 cm long and divide them into 3 equal parts, bend them slightly and, again, remove the insulation in these places. 
We bend the prepared wire in exposed areas. We draw your attention to the fact that for those segments that are bent in half, the distance between the ends should be 7.5 cm (the optimal value for receiving a signal from a homemade television antenna). 
Next, we attach the plug to the finished homemade product, and connect the television cable to it. 
 This concludes the manufacturing process. We select a suitable location and direction where signal reception is best, and install the device.
We tried to select the simplest instructions. We hope that now you know how to make a home TV antenna with your own hands! We draw your attention to the fact that today on the Internet you can find many other options in which inventors come up with more and more new manufacturing options, using, for example, copper and aluminum tubes, disks, electrodes... The choice of components for assembly is usually determined only by their availability, so don’t be afraid to experiment and come up with your own original manufacturing methods.
Related materials:
Antenna is a radio device designed to receive and emit electromagnetic waves through the air.
If you live within direct visibility of a television tower, then a simple homemade indoor television antenna, the design of which is presented in this article, is quite suitable for receiving digital television. This antenna is designed to receive television broadcasts in the digital television frequency range (470–790 MHz).
The design of a television antenna is simple and does not require special knowledge to repeat. To make it you will need 70 cm of copper wire with a diameter of 2-3 mm, a piece of double-sided fiberglass sheet, 1.5 m of coaxial television cable with a characteristic impedance of 75 Ohms and an F-plug.
Instructions for making a UHF television antenna
The first thing you need to do is select a piece of copper wire with a diameter of 2-3 mm and a length of 70 cm. For these purposes, a single-core copper wire is well suited for laying electrical wiring. If there are several conductors in the cable, then you need to carefully cut off one conductor along the groove, being careful not to damage the insulation. It is not needed for the antenna to work; the insulation is left only for aesthetic appearance.
An aluminum wire will also work, but then it will have to be connected to the contacts of the matching transformer board using a threaded connection. Please note that the nut should not touch the shielding foil of the transformer; if it does, then you need to lay an insulating washer or trim the foil.

If you use a wire without insulation, you can put a vinyl chloride tube on it for beauty.

Next, the wire needs to be bent into a ring with a diameter of approximately 220 mm. High precision is not needed here. A paint bucket holder or any other round container of suitable size works well for this.
When the antenna ring is ready, you can begin manufacturing the printed circuit board for the matching transformer.

The printed circuit board is made of fiberglass or getinax, foil-coated on both sides, 1.5 mm thick, 25x30 mm in size. The photo shows the appearance of the transformer printed circuit board on both sides.

This photo shows a negative of the antenna circuit board. The width of the current-carrying tracks is 1 mm, the distance between the tracks is 1.5 mm. Antenna board size 25×30 mm.
If it is not possible to make a printed circuit board for the manufacture of an antenna using a chemical method, then it can be made mechanically. To do this, you need to remove unnecessary sections of the foil, leaving only the contact pads, and lay out the current-carrying paths from copper wire with a diameter of 0.3-0.5 mm, gluing it to the board, for example, with “Moment” glue.
To give an aesthetic appearance and increase the mechanical strength of the antenna, the transformer is placed in a plastic box in which holes for the ring and antenna cable are pre-drilled.

When all the parts are prepared, you can begin assembling the antenna. The ends of the ring, pre-tinned with solder, are inserted into the box and bent at a right angle at a distance of 3 mm. Next, the ends are inserted into the printed circuit board of the antenna transformer and soldered with solder using a soldering iron.

The antenna board is placed on the bottom of the box and secured with an M3 screw and nut.
You first need to install a television F-connector on one end of it, and cut the other one and solder its ends onto a printed circuit board. The center core of the cable is soldered directly to the right end of the ring, and the braided shielding is soldered directly to the foil of the antenna board.
For reliable operation of the antenna, you need to solder or attach the cable in the following order. First, the shielding braid is soldered, then you need to pull the cable well to remove the slack, and only then solder the central core. In this case, when moving the antenna to find a place in the room with the maximum signal level and stretch the cable, the central core will not break.

If the cable screen is made of aluminum foil, then it can be pressed to the foil of the board using a metal clamp placed on a screw and secured with a nut. The technology for attaching the screen with a clamp is discussed in the article “How to make a TV crab with your own hands.”
All that remains is to close the box with a lid, insert the connector into the TV and tune the channels to the desired programs. In order to ensure image quality with minimal noise, you need to move the antenna around the room to find a place with the maximum television signal.
How to replace the matching printed circuit board
cable loop
The use of a printed circuit board to match the antenna with a coaxial cable allows you to make the antenna more compact.

If there is no desire or opportunity to make a printed circuit board, then without losing the quality of the antenna’s performance, it can be replaced with a loop, which is also called a U-elbow, which is a section of television cable bent in half, connected to the antenna according to the circuit, as in the photograph below.

To make a matching loop, you need to take a piece of television cable 162 mm long, with which the antenna will be connected to the TV. Cut its ends and solder the central cores to the ends of the ring, the distance between which should be 60 mm. Next, the end of the cable going to the TV is cut and its central core is soldered to either end of the antenna ring, and the shielding wire is connected to the shielding wires of the loop, as shown in the photograph.
When soldering the shielding braid, care must be taken so that the insulation of the central core does not melt and the braid does not come into contact with it.
The photo shows the soldering of a cable to an antenna ring made of aluminum wire with a diameter of 3 mm. Since it is difficult to solder wires to aluminum with soft solder, the ends of the ring were slightly flattened, holes were drilled in them, and brass petals were secured with rivets. The central cores of the cable are soldered securely to the petals.