How to properly install a corrugated sheet on a fence. How to build a fence from corrugated sheets with your own hands: stages of preparation and video example of self-construction of a fence from corrugated sheets
Even if the neighbors are the whitest and fluffiest, any home owner considers it necessary to protect his private life from prying eyes. This is why fences are erected. How to make a fence yourself, without helpers, is described in detail in our article.
A fence is a fundamental part of any suburban area. After all, it’s true: what happens in the yard is private life, which you don’t always want to put on display for strangers. Moreover, the safety of personal property located on the territory of the site, the contents of its adjacent buildings, is becoming an increasingly urgent task. One way or another, fencing a private house, at least on its front side, is very important and necessary.
A little earlier, the configuration of the fence and the material from which it was built were much more commonplace. Today, manufacturers offer many options that even listing them would take a lot of time. And yet the most popular can be considered corrugated sheeting, or corrugated sheet. The full name of this material is profiled metal sheet. The fact is that the price of a set of building materials for such a fence is very low for almost any home owner, and the construction of such a fence is so simple to recreate that making a fence with your own hands from corrugated sheets is within the capabilities of any average landowner.
The advantages of a fence made of metal corrugated sheets are obvious, because during its construction you can do without hiring people, buying or renting construction equipment. Obviously, this is why many owners consider such structures to be frivolous and unreliable fencing for their homes. This prejudice is completely groundless, because products made from corrugated sheets are of decent quality and therefore very popular among the population.
Installation speed. According to this parameter, there is, perhaps, no other prefabricated structure like this. A person who is not experienced in the construction business does not necessarily need to learn anything special and comprehend all the nuances of the construction business. There is no need to have any special construction tools on the farm. You may just need welding equipment, but if you don’t have it and don’t have the skills to handle it, it is quite possible to install it in another way, using commonplace tools and devices that every owner of a private home has.
The fence is continuous. This is not a simple picket fence. The fence completely hides the property of the yard and everything that happens in it from prying eyes. The parameters of the fence - height, width - are chosen by the owner himself. Of course, the dimensions should not be chosen at random, but should be clearly measured - meaning that the fence should have precise limitations. It should be taken into account that even a very low fence made of corrugated sheets can perfectly protect the territory from prying eyes. And it’s very good that profiled sheets can be ordered in lengths, be it short or long – whatever the footage.
Many, barely looking at a fence made of corrugated sheets, think: what kind of protective function can such a simple tin have? If we look deeper, a fence made of corrugated sheets will have such a sharp, cutting upper edge that it will protect against intruders no worse than barbed wire or a more impressive, permanent fence. Anyone can easily cut their hands when trying to climb over. Many people think that such a fence is easy to dismantle. But if a professional attacker wants to penetrate some territory at any cost, he can dismantle any barrier.
The fence is very durable. Of course, provided that all the nuances of its installation and operation are observed, and also if only high-quality materials from trusted manufacturers were used for its construction. Such a fence usually lasts for several decades.
Aesthetics. Having carefully read about how to make a fence from corrugated sheets with your own hands and enthusiastically set to work, you will already see in the process of work how good and laconic it will look. There is nothing superfluous here, everything is smooth and neat. The color is often matched to the roof of the building - fortunately, color options there's no counting here. Such a fence also has a beautiful and neat appearance because the surface of the sheet is covered with special durable protective substances, which tend to preserve the metal in its original form for many years. Thanks to this, the fence does not fade in the sun, does not suffer from precipitation, and requires maintenance minimal care.
Ease of care. If the surface of the fence becomes dirty, it can be easily washed with water from a hose, after first applying a solution of ordinary household liquid to the fence. detergent. By the way, many types of corrugated sheets are coated with special polymer coatings that repel dirt. If contamination does occur, then with the first rain the surface cleans itself.
Noise absorption. Speaking about protection from prying eyes, we cannot say about some sound insulation inherent in corrugated sheets as a fence. Of course, this is not soundproofing in the literal sense of the word, but the good density of the material is quite good at protecting you from street noise, and will also prevent passers-by from eavesdropping on the conversations of the owners of the yard. Thus, a fence made of corrugated sheets provides not only fencing in physical sense, but also protects the owner’s privacy from prying ears.
In order for the choice to be correct, you need to know not only the properties, but also the types of materials for constructing a reliable fence. Let's figure out what corrugated sheeting is.
This is a steel sheet (thickness varies) that has a zinc, aluminum-zinc shell that protects against corrosion. In production, such sheets are rolled through a machine, which gives them a certain profile. The purpose and application of this sample depends on the thickness of the sheet and the shape of the profile.
Corrugated sheeting is divided into several types. When choosing, always take into account the markings with alphabetic characters(they indicate the purpose of the product) and numbers (which indicate the dimensional values of the material). So, let's look at the types of corrugated sheets.
"N". This material is used for load-bearing structures in construction. Such canvases have a pronounced high profile with additional stiffening ribs and longitudinal grooves. Used as a base for walls and roofs, permanent formwork for monolithic installation, containers are made from this profile. It is clear that such corrugated sheeting for a fence in an ordinary residential building is completely unjustified.
Corrugated sheet "NS"- something between the material for load-bearing structures described above and sheets for mounting walls. The wave profile here is already lower - 35+40 mm, the thickness of the material is also smaller. It is used as wall cladding, and also as a loaded element on buildings of not very large size. Can serve as a roof or be mounted in the form of canopies. This type is also widely used for fencing large areas and for construction. This product is truly durable and versatile. But, accordingly, it is quite expensive to build fences from it for a simple private house. The high strength characteristics of such a product will simply remain unclaimed here.
Profiled sheet "WITH". This is a material intended for wall decoration. The profile height here is small, the sheet thickness is insignificant. The price is affordable. It’s just right for fences: the fences will be reliable, durable, and lightweight. For this purpose, it will be enough to choose a metal with a profile height of no higher than 21 mm.
Profile sheets "MP". There is a fairly wide variety on the market. Its popularity and versatility in use are obvious: it is used to install lightweight roofing coverings, outbuildings, and sandwich panels with insulation function. Perfect for building a fence.
If we talk about the types of corrugated sheeting even more, we should tell you how to read their designations. The two-digit number after the letters shows the profile height, after which numbers are written that indicate the usable width of the sheet in millimeters. That is, this is the distance that the sheet occupies after installation, without areas for overlap with the adjacent sheet. Therefore, if you are calculating how many sheets will be needed for a fence, you should focus on this last figure.
Examples of designations for types of corrugated sheeting:
- S8x1150 (A,B) - for cladding walls and building fences;
- MP18x1100 (A,R) - roofing and construction of fences;
- MP18x1100 (B) - wall cladding and fence construction;
- MP20x1100 (A, B) - wall cladding and fence construction;
- MP20x1100 (R) - roofing;
- S21x1000 (A) - roofing, construction of fences;
- S21x1000 (B) - wall cladding and fence construction;
- NS35x1000 (A) - roofing and construction of fences;
- NS35x1000 (B) - construction of fences;
- MP35x1035 (A) - wall cladding and fence construction;
- MP35x1035 (B) - roofing and construction of fences;
- MP40x1000 (A) - wall cladding and fence construction;
- C44x1000 (A) - roofing and construction of fences;
- S44x1000 (B) - wall cladding and fence construction;
- H60x845 (A) - roofing, construction of fences;
- H60x845 (B) - load-bearing structures, permanent formwork, construction of fences;
- H75x750 (A, B) - load-bearing structures; permanent formwork, construction of fences;
- H114x600 (A, B) - load-bearing structures, permanent formwork.
As for the thickness of the sheet, it can also undergo changes, even in the same type of profile. Sometimes this indicator is indicated when labeling a product, as a fractional number. If, for example, it says “0.6”, this means that the sheet steel in this profile has a thickness of 0.6 mm. For the construction of fences around the local area, a sheet with a thickness of 0.45+0.6 mm is usually used. This is quite enough for reliability.
Based on the above, for construction simple fence from corrugated sheeting, the best solution would be to choose sheets marked C (wall) or MP - a universal sheet, the wave height of which is 18+21 mm. Sometimes they are used with a shallower wave height - 8+10 mm, but for reliable fencing such material will still be rather weak, especially considering the climatic conditions in which the building is located. Under the pressure of winds and hurricanes, such a thin fence may not withstand. Well, if you want to choose a profiled sheet with a wave height of more than 30 mm, this is also not worth doing, since this is simply an extra expense without any particular practical benefit for the owners.
It is unlikely that there will be many people who want to make a fence for their site from simple galvanized steel - it will look unaesthetic, too simple and uncomfortable. Instead of habitability, the impression will be created of some kind of temporary unfinished housing, eternal construction. So that the fence gives a feeling not only external protection, but also calm isolation, comfort, it should be mounted from sheets with a polymer coating.
What types of corrugated sheeting are there?
Polyester. The most affordable, where the cost does not mean low quality. This protective and decorative coating is quite resistant to temperature changes, perfectly protects the metal from corrosion, does not collapse under the aggressive influence of sunlight, and does not fade in the sun. Thanks to these qualities, the product remains in its original form for many years. However, polyester still has significant drawback: It can be easily scratched if not handled carefully. Unfortunately, it cannot withstand high abrasive loads.
But if you want to choose polyester, which is fully justified by its price, aesthetics, and protection, then it is best to choose matte finish, not gloss. In this case, the coating turns out to be more resistant to abrasive influences, and minor defects will not be so visible on its surface. It also looks more pleasant due to the fact that it does not produce glare in bright sunshine. Another plus: profiled sheets treated with a matte polymer coating have an interesting textured pattern that will pleasantly fit into the design of your site.
Pural coating. This coating is based on pural - a multipolymer composite that combines the best qualities of polyurethane, acrylic, and polyamide, which are included in it. This is a higher level of quality and durability of a product wearing a coating of this kind.
Corrugated sheeting with a pural coating usually lasts up to 50 years without losing its aesthetic qualities. Resistant resistance to external aggressive environmental factors allows it to remain in a beautiful, original form for a very long time. Such sheets are often used for roofing works. It's also easy for a fence. perfect option. But given the very high cost, which is many times higher than the price of a polyester-coated sheet, using this type is too expensive and impractical.
Plastisol coating. This material is based on polyvinyl chloride. It is valued because it very reliably protects the sheet from various external influences, including the action of abrasives on it. With such a coating, profiled sheets have a very beautiful design. A wide range of design varieties, many color and texture solutions, with the help of which natural materials are often imitated - all this makes corrugated sheets with this coating very popular among designers.
But the plastisol coating still has disadvantages, and they are quite significant. For example, it does not like high temperatures, so it is not recommended for use in hot regions. Regarding resistance to sunlight - there is a tendency to fade on sunny side. Therefore, if you plan to use plastisol on the sunny side, it is better to choose the lightest possible shades, then the loss of color will not be so noticeable.
Plastisol corrugated sheeting is mainly used for roofing work. The construction of a fence from this material is still in doubt due to the disadvantages described above. Although, if we talk about durability and reliability, then this is perhaps the most reliable protector from storms, hail and other natural influences.
PVDF coating. It is a composite composition based on acrylic (approximately 20%) and polyvinyl fluoride (approximately 80%). This is truly a winner in terms of durability and longevity. Resistant to any aggressive external influences. Service life - more than 50 years. Suitable for any climatic conditions, feels great under any operating conditions. It is not destroyed due to chemical influences in areas with unfavorable conditions associated with industrial emissions into the atmosphere.
There is only one drawback - the high price, due to which there is no need to talk about the widespread use of such products. After all, it is much more profitable for an ordinary home owner to buy polyester flooring, which is affordable. Very often, for a fence, sheet footage is purchased with some reserve, so that the damaged areas can later be repaired by replacing them with new components.
Having planned the construction of a fence, you should sketch out a diagram that will help build an even and beautiful fence from corrugated sheets with your own hands, you can see the video in our article. Too much complex designs do not always justify themselves and require greater skill, greater investment and scale of work. The main task of this article is to teach you how to make a regular, neat and durable fence from corrugated sheets with your own hands. For example, a simple fence made of corrugated board according to a scheme without a foundation.
To install such a fence, a common fence is not made for the entire length of the fence. Each support pillar will be dug in separately. If everything is done correctly and accurately, this fencing option turns out to be strong and durable.
A hole is dug or drilled for each pillar in the form of a well. In order for the fence to stand firmly and not deform, it is necessary to make the depth below the freezing level of the ground. For example, if in a given area the ground freezes to a depth of 0.8 m, then the depth of the well should be approximately 1.3 m. It is best to check this parameter with local construction companies, since the specific composition of the soil in a given area plays a significant role in determining the depth of the well.
Installation of support stands. For supports, metal pipes are used - both round and rectangular or square in profile. Easiest to install square cross-section 50x50 or better 60x60, the wall should be 3 mm. If the pipes are round, you need to take a diameter of 50 mm or more.
Concreting a well with a stand. The well is filled with sand and gravel and concreted.
Attaching jumpers to racks. By welding or mechanically Jumpers-logs are attached to the pillars. For 1 post you will need as many jumpers as the fence is high. For example, if the height of the fence is planned to be no more than 2 m, then attach 2 jumpers per post - at the top and bottom. At the same time, 250-300 mm retreat from the edges of the fence. If the fence is higher, then another jumper is needed in the center of each post. If the fence is very high, then the approximate ratio of the distances between the lintels and joists is as follows: lintel per meter of height.
Attaching corrugated sheets to pillars using jumpers. The corrugated sheets are attached using roofing screws with an overlap in one wave. The fasteners are installed one after another where the lower part is adjacent to the cross member.
This scheme is quite simple if you carefully follow the tips for installing such fences.
When deciding on the amount of materials, you must first determine how long the fence will be required. The total length should be calculated, as well as the length of each side. Next, you should think about the height of the fence.
How to determine the number of corrugated sheet elements. This is not so difficult to do: you should divide the perimeter of the fence (the sum of the lengths of all sides) by the usable width of the sheet. Round the resulting figure upward. The length of the sheets depends on the height of the fence, which is planned by the customer. It should be taken into account that the sheets will be attached to support posts with some clearance from the ground surface. This clearance can be approximately 100-150 mm. It should be remembered that the profiled sheets should not rest against the ground.
Determining the number and length of fence posts. The length is calculated based on the depth of immersion in the ground, plus the planned height of the fence. For example, if the depth of the well is 1.2 m, and the planned height of the fence is 1.5 m, then the total length of each 60x60x3 pipe-rack is 2.7 m. During installation, the fence is raised above the ground level, so the upper parts of the racks will be outside can not see.
What should be the distance between the posts? The distance is 2-3 m if it is an area with calm climatic conditions, protected from wind and squalls. In areas where there are often strong winds, support stands are placed at a shorter distance.
If you plan to install a solid fence, then the length of the gaps between the posts may not be the same everywhere. If the fence is installed in sections, that is, each of the spans is filled so that the column is visible, it is better that several whole profiled sheets are placed in one section. In extreme cases, the number of corrugated sheets can be a multiple of half a corrugated sheet. If done differently, a lot of material will be wasted.
The number of racks is calculated for each side of the house, taking into account the distance between them. After which the exact interval in centimeters is calculated so that during the work you can act according to this most accurate marking.
The total number of profile pipes that are best suited for cross-beams is determined simply: the perimeter of the fence is multiplied by the number of cross-beams. As for the cross-sectional dimensions, some clarifications need to be made here.
Most often, pipes of 40x20 mm are taken for such purposes; many purchase such products with a cross-section of 1.5 mm. But then, due to the insufficiently dense cross-section, the installed fence is not very stable and begins to wobble in windy weather. This is because these pipe parameters are not good enough for such an application.
The best load-bearing lintels are made from a pipe with parameters 40x25x2.0, although it is also possible to take 40x20x2.0. The first, although slightly increased in size, has a lateral rigidity of the enclosing structure that is one and a half times greater than the second. In areas with frequent strong gusts of wind, this is especially noticeable.
The logs are connected to the support posts by welding. This fact also favors a pipe with a wall of 2 mm. It is very difficult to weld a one and a half millimeter steel pipe without burning, especially for a novice welder. The “two” will be welded without problems.
Weldless fastening. This is a bolt-on mount. It is used in cases where there is no welding equipment, or the owner is afraid of ruining something with inept welding. Fastening with bolts is carried out as usual; all home craftsmen know this.
Another tip is to buy special “crabs” - fastenings that will simplify the solution of this problem. This bracket is very easy to install. This is done using roofing screws, which are used to fix the corrugated sheet to the cross-beams.
Of course, such fastening is slightly inferior in strength to welding, but in terms of simplicity of execution it is completely justified. The only caveat: if the crossbars are mounted by welding, they can be combined at any points. If the fastening is mechanical, then the profile pipes will have to be redrawn so as to join them exactly on the support pillar.
Profile screws. Definitely needed for attaching corrugated sheets to joists. Their number is calculated depending on the size of the fence and the nuances of its configuration.
For example, if you screw screws into every second wave, then for C20, MP20 you will need 4 screws per crossbar. With two lags - 8 pieces each, with three lags - 12 pieces each.
If you use a high-quality screwdriver, then the self-tapping screws with their countersinking tip-drill fit perfectly into the base without pre-drilling holes. The hexagonal head distributes the rotation, a press washer equipped with a rubber gasket protects the joint from moisture, which can lead to corrosion of the metal in the place where the holes are made in it.
A wide selection of self-tapping screws helps you choose them to match the color of the corrugated sheet. In this case, at the joints of the sheets they become almost invisible. To install fences, it is best to buy self-tapping screws with a diameter of 4.8 mm. The length may vary, but the most optimal is 19 mm. This length allows the self-tapping screw to pass through the metal and one wall of the profile pipe-rack without resting against its other wall.
If installation is carried out using self-tapping screws on “crab” brackets, you should buy them with some reserve.
Cement, sand, gravel (crushed stone). All this is needed in order to fill and concrete the support pillars. When calculating the quantity, you should take into account the number of pillars and the depth of the wells for installation.
Tools. Everything is very simple: a shovel, a drill, a container for mixing concrete, a tape measure, a level, a marking cord. You also need a screwdriver or drill with good speed control and a head of 8. Even better if you have a welding machine. In order to cut metal and clean profile pipes from corrosion before priming, you need a grinder. It should come with a brush with extra bristles.
The work also requires other devices, which will be mentioned below in the description of the fencing installation process.
Let's look in detail, step by step, at how to make a fence from corrugated sheets with your own hands; you can find the video here. This description made by a master who learned from his own experience all the subtleties and tricks of this process, in order not to call on any craftsmen for help. Of course, sometimes you need help, but there are different situations when even such a voluminous work has to be done alone.
Terrain marking. Pegs are installed in places of two extreme points fence A cord is stretched between them - this will be the fence line. Next, you need to remove all obstacles to work in the area of this line - debris, stones, large plants.
We install two foundation pillars, which for now will mark one side of the fence. They must be on a strictly horizontal line with their upper parts. And they should be installed slightly higher than the planned height. This will help make the next steps easier. Later they can be trimmed after the concrete has hardened. These pillars are installed in the same way as other supports.
To prevent the fence from becoming deformed in the future due to winter soil uplift, concreting is carried out at the very bottom of the well. If the ground freezes, then the support will remain in place, since the action of tangential forces will occur above the concreted area. This will give a good guarantee and stability for the entire structure throughout its entire service life.
So, as already mentioned, first two pillars are installed at the borders and connected with a rope. After being carried out preparatory work After cleaning the fence line, the rope can be removed. The designated points are used for drilling wells and installing supports. The diameter of the drill should be 180-200 mm with a pipe diameter of 60x60. This is necessary in order to make a good concrete belt for the post, thereby ensuring a reliable installation. Drill having larger diameter, it is not worth working, as this will require additional physical costs, more concrete solution for the same initial result.
Cleaning of pipes from rust and plaque is carried out before installation - right now it is much easier to do this than after it. After cleaning, the products must be immediately coated with anti-corrosion coatings or painted.
Installation of end posts. They must be positioned strictly vertically. It is necessary to control both the longitudinal and transverse lines. For this it is best to use building level with a magnetic platform that is attracted to the pipe to free the installer's hands. An even more accurate result will be achieved if two levels are used so that two planes can be controlled at once.
After installing the outer supports and trimming them to one horizontal line, an action is carried out that can be called useful trick. The fact is that a string is stretched in the center of the cut posts (this can be a steel wire with a diameter of 1 mm). On the one hand, it is tied to the top of the post to a loop welded to it or inserted into a drilled hole. Be sure to go to the top of the pillar! On the other support, the wire is only inserted into the eye or hole, but not tied, and a counterweight is hung on the threaded end. These can be bricks, or a weight, a blank - an object weighing 15-20 kg.
The result is an ideal layout of the fence, which can be erected along this even line without fear of “mowing” somewhere.
We determine the installation step of the supports. How to do this was described above. Let's say that the calculations resulted in a value of 2.9 m. We measure this distance using a tape measure from the first support. The center point of the new support will help to fix a new plumb line - an object suspended on a string with a hook. This can be a nylon cord or a steel chain with a weight. The plumb line shows exactly where to drill the next well. Moreover, it accurately shows the center of the well.
We are digging a well. Before drilling, you should dig a small hole, the width and depth of a shovel bayonet. Next, we drill the hole with a drill. After deepening the tool by 100-150 mm, the drill is removed and soil is selected from the resulting hole. In order to keep the “workplace” in order and make it convenient to work, it is best to immediately throw the soil into a wheelbarrow and take it away.
We deepen the drill further, but its length is shorter than the planned depth of the well. To do this, we take a piece of steel pipe as an “extension” of the drill. We screw the “extension” into place of the transverse handle. On the other side of the “extension” we screw the handle. Now the length is enough to drill more deep well.
If, when drilling, the tool encounters difficult-to-pass layers, the obstacle should be removed with a sharp reinforcing rod with a diameter of 20 mm. If you encounter clay, you can add a little water to the hole.
Another problem when working with a drill: the tool may inadvertently deviate from the vertical direction. To do this, it is necessary from time to time to lower a plumb line into the hole, which should be located there in the center.
Approaching the planned depth, measurements must be taken from time to time. The depth should not be measured from the ground line with a tape measure - it may be uneven.
Measurements are taken from the same string. It is better to use a laser tape measure, placing it on the string and directing the beam to the bottom. If the depth is insufficient, you need to continue drilling. If by chance it turns out deeper, you can pour a little clay there and trample it thoroughly with the help of a long beam.
As for laser roulette, not everyone may have it. If you don’t have one, you can use a long stick prepared in advance, on which a line is drawn indicating the desired height. The position of the line relative to the string will indicate whether the well depth is sufficient. All these subtleties are necessary to ensure that all the columns fit perfectly along the top horizontal without additional trimming. Which, of course, will greatly simplify further actions.
So, the pipes of the required length are cut, the wells are dug. For closer contact with concrete, small pieces of iron can be welded to the pipe walls at the pouring site.
Installation of pillars and pouring concrete belt. It is best to do this immediately after drilling a well, in order to avoid littering the holes and flooding them with water. We install the pipe in the center. The top runs exactly along the string. Adjust the bottom side for level. Next, the vertical is adjusted along the plane of the fence. We fix the pipe with temporary supports. The solution is prepared at the rate of: M400 cement, sand, fine gravel in a ratio of 1:2:4. It is better to mix it in a trough without a concrete mixer. To fill about 1 m deep you will need about 30 liters of solution, or 3 buckets.
When pouring the solution, make a bayonet - pierce the fill with a reinforcing rod to remove air cavities. The height of concrete poured into the pit is controlled using a rail with a mark that corresponds to the calculated height from the concreting level to the ground surface. After pouring, the stand is left alone for a day. At this time, they are digging another well and installing the next pillar.
After 24 hours, the concrete should set well and you can continue filling the well. It is also worth checking the position of the support once again.
Top part the wells are filled with sand and gravel. When any soil freezes, as a rule, it swells and lifts what is built into it. A loose mixture of sand and gravel (PGS) is not subject to such influences. Pour the mixture 50-70 cm thick, then compact it well using a wooden stick or the handle of a shovel. All this is done until the hole is filled to the very surface of the earth.
The master, who shares here all his secrets on how to make a fence from corrugated sheets with his own hands, step-by-step instructions, recommends filling the inside of the pipe with cement mortar. In this case, the structure will be more resistant to corrosion, and the strength of the fence will increase. Filling a 60x60 pipe will require a solution slightly larger than a bucket - approximately 13 liters. You can fill it using a homemade funnel from a plastic bottle. The funnel is filled with a trowel, and the seal is made with a long reinforcing rod.
Many people probably consider this action unnecessary. But the quality of the fence will undoubtedly improve. Moreover, concrete removes heat, and it will not be so easy to burn a hole in the pipe. You can not concrete the pipes, but simply close the hole on top with special plugs made of metal or plastic. One way or another, the support is ready.
Once all the pillars are installed, you can remove the string and begin installing the lag jumpers. There is one secret that allows you to do this with maximum accuracy. To do this, two simple conductor devices are made from regular boards.
The top of the jig is a groove with a top board in order to put the structure on the pole. At a certain distance, which is dictated by the position of the jumper in relation to the end of the post, a shelf is screwed in for laying the top pipe.
The lower part of the conductor is used to lay the lower jumper. The second conductor is made in the same way; it must be symmetrical to the first. Both conductors are hung on two poles located nearby. Start from the second corner. Fits on the lower shelves horizontal pipe, is leveled. It should reach the corner post.
If the top of the posts is aligned with the string, it is level, and if the jigs are made the same, the jumper will also be in a perfectly horizontal position. The pipe is then lightly welded to the supports. Exactly the same operation with the pipe for the joists is done at the top. After tack welding, the conductors are removed and moved further to other fence supports. And the supplied pipes are welded firmly, forever.
So, the master assembled the frame for the fence without outside help, making everything perfectly even and neat. this work serves as proof that even in such a seemingly labor-intensive task as installing a fence, it is quite possible to cope without a hired work force, saving money. At the end of the installation of the frame, excess slag is removed from the welding areas, and the entire structure is painted.
Installation of corrugated sheets on the frame can also be done without anyone’s help, and also using some devices for ease of work.
First of all, a conductor is made from boards. To do this, take one long board, which will serve as the top part. The support board is used to move along the upper beam; its thickness should be equal to the width of the profile pipe. The second board should rest against the side edge of the profiled sheet, its lower cut will run along the middle of the height of the profile pipe. The thickness of the board corresponds to the height of the profiled sheet. The top plate makes a groove for the sheet, in which the sheet is held until final fixation using self-tapping screws.
The lower part of the jig has a shelf that helps measure the distance of the sheet from the ground. You also need a homemade clothespin with a wedge-shaped cutout - it will serve to temporarily fix the sheets in places where they overlap. A set of boards with wedges of different thicknesses is also prepared, from which you can build an excellent adjustable stand for the side of the sheet, which must be combined with the previous sheet. Such a device will constantly move under the next mounted sheet as work progresses.
We install the planks under the edge of the last sheet, which is already installed on the pillars, so that the sheet rests against them. To do this, insert a wedge between the planks. Using a wedge, this support is adjusted to the desired height. Some craftsmen, instead of a wedge and boards, use a trapezoidal jack, which every motorist has, which is also very convenient.
A conductor is hung along the far cut of the profiled sheet that is being installed. The sheet is inserted into the groove, the lower edge rests against the shelf. The required height position of the sheet is ensured. Advice: it is better to do this work with gloves on, as the edges of the sheet are sharp and you can cut your hands deeply.
If the jig is installed accurately, the waves of two adjacent sheets will exactly coincide. At the bottom, the edge in the overlapping sheets will rest against a support made of planks. Now all that remains is to fasten the sheets on top in places where they overlap using a homemade clothespin. How to do it is described above. This fastening securely holds the sheet; even the wind cannot disturb this position. And the master’s hands are free.
Now you can start marking for installing screws. Take a ruler, preferably a plastic one, you can make it from an unnecessary PVC panel for cladding. It will not scratch the paint of the corrugated sheet; its light weight helps the master to easily manipulate it. To prevent the plastic from sliding on the surface, you can stick a patch or electrical tape on the back side. When installing the ruler, you should focus on the already installed screws and the middle of the profile pipe.
The places where screws need to be screwed in are marked with a marker. All this is done both along the upper and lower lines of the jumper.
After the markings have been made and the sheet is held well in the desired position, you can finally fasten it with self-tapping screws. Special roofing screws secure the sheet without pre-drilling it. To avoid the screw slipping or moving in the wrong direction, or to prevent kinking, it is still better to slightly drill a small hole with a drill with a 3.9 mm drill bit. You should start from the outermost screws, which are already on the pre-installed sheet. First, a hole is drilled, then a self-tapping screw is screwed in. The same is done on the upper jumper pipe.
When the sheet is fixed at the edges, you can already make holes for the remaining fasteners. Then the screws are screwed in along the entire length of the blade. In order not to reach for a new screw every time, there is one more trick. You can tie a magnet from the speaker of some old radio to a ribbon, attach a whole bunch of screws to it and hang it around your neck. Now you can quickly grab screw after screw and screw in one after another without any extra effort.
It is very important to adjust the screwdriver stroke well so that the screws are screwed in well and evenly. Neither weak nor strong tightening will provide good fixation. If you tighten it too much, the screw will go very deep, which can cause the sheet to become deformed; if it is too weak, it will remain sticking out of the sheet, which is also unacceptable. In addition, it is necessary to ensure the correct direction of screwing in the self-tapping screw, which affects not only the strength of the joining of the sheets, but also the very aesthetic appearance of the structure.
By the way, if you still have to drill holes, you can advise purchasing steel rivets instead of self-tapping screws. It is best to use a steel riveter for fastening; it is steel that will provide the fastening with a long life without corrosion. If you use riveters made of some alloys, then in this case it is not necessary to guarantee the anti-corrosion of the fasteners. In addition, such fasteners, unlike self-tapping screws, will certainly not be unscrewed by some “well-wisher”.
Next, the conductor is moved to another place, the stand is removed from the boards in order to move it to another place, where it is already installed new leaf- and so on until completion, until the entire fence is installed. The last sheet is sometimes cut to width, this is done with metal scissors. Urgent advice: do not use a grinder for this - it can ruin the surface, damage the coating, melt under high temperature cut edge, which can lead to corrosion in the future.
A detailed description of how to build a fence from corrugated sheets with your own hands without outside help can provide excellent practical results if:
- learn how to choose the right material for building a fence;
- acquire knowledge about markings and types of corrugated sheets;
- prepare properly for this process: collect the necessary tools, parts, materials, make the recommended devices
- carefully read the article, watch the video and believe that all this is possible
Corrugated fence - optimal solution to protect the territory country house or dachas from prying eyes and unauthorized visits. Fences made of this material last at least 30 years. The metal profile is extremely easy to process, and the simple installation method allows you to install a fence around a house or summer cottage quickly and with your own hands, without involving additional labor. Possessing high performance characteristics and durability measured over decades, the metal profile also performs a decorative function, with the help of which you can refine private territory, making it not only inaccessible to prying eyes, but also homely.
Construction of a metal profile fence: pros and cons
A distinctive feature of metal profiles (profiled sheets, corrugated sheets) is versatility. In addition to the arrangement of roofing slabs and the construction of temporary utility structures (hangars, sheds, garages, etc.), this material is widely used in the construction of fences and enclosures for various purposes.
The metal profile is made from cold-rolled sheet steel, which, using a special technology, is coated with a layer of zinc and a protective polymer film various colors. The thickness of the profiled sheet is 0.4–1.2 cm. At the final stage of production, the sheet, laid in rolls, receives a certain profile (trapezoid or wave) using roll forming equipment (manual or automatic).
Good to know: The steel base and stiffening ribs provide increased resistance of the material to deformation and force, and galvanization and polymer coating reliably protect the corrugated sheet from rust and mechanical wear.
For the construction of fences, profiled wall sheets with a profile height of 8 to 44 mm are used. The final cost of the material is influenced by such parameters as:
- thickness of the steel base;
- availability and quality of galvanization;
- quality of polymer coating;
- profile shape and height.
Advantages of metal profiles
The main advantages of using corrugated sheets in the construction of fences and fences include:
- High performance characteristics.
- Low specific gravity.
- Ease of processing and installation.
- Durability and resistance to aggressive operating factors.
- Relatively low cost of material.
The corrugated sheet is well protected from rust, deformation, damage and climatic factors. The material is produced in a wide range of sizes, which allows it to be used for the construction of fences of any height and length.
Good to know: The lightness of the profiled sheet, as well as its mechanical rigidity, greatly simplifies the installation process. In addition, when building a fence from this material, the requirements for the strength of the supporting frame are reduced.
Disadvantages of wall corrugated sheets
The disadvantages of metal profiles used in the construction of fences and enclosures include:
- Low level of sound insulation (a fence made of corrugated sheets will not be able to protect the internal area from noise coming from the street).
- Low resistance to destructive influences (it is easy to break a fence made of such material, say, with a heavy car, or cut a hole in it using special tool for subsequent penetration into the fenced area).
- Low presentability (corrugated sheeting is significantly inferior in visual appeal to traditional materials used in the construction of fences: wooden and plastic picket fences, metal, brick or stone).
Good to know: Despite the obvious disadvantages, corrugated sheets have no equal in terms of efficiency and are absolutely fire resistant. The material is available in a wide range of colors and a wide range of profile shapes and sizes, which allows you to satisfy almost any aesthetic needs of the buyer.
Photo: types of fences, ideas for implementation on the site
 Profiled sheets as decorative cladding on entrance gates
  Fence made of metal profiles on metal supports: view from the inside
  Decorative design of the profiled sheet in the composition country fence
  Fence made of metal profiles with decorative design: view from the inside
  Fence made of corrugated sheets with decorative design
  A fence made of corrugated sheets on a site with a slope
  Corrugated fence with brick pillars
  Metal profile fence on a concrete foundation
Fence design and preparation for construction
It is necessary to carefully prepare for the construction of a metal profile fence. Errors during the design and installation process are unacceptable, since they entail unplanned costs of time, nerves and money.
So that the construction of the fence is carried out quickly and does not take away unjustifiably a large number of forces and means, at the preparatory stage of construction it is necessary:
- Decide on the type and required characteristics of the metal profile.
- Develop a construction project.
- Calculate the required amount of materials.
- Prepare a set of tools and auxiliary materials necessary for construction.
- Carry out precise marking of the fenced area for construction, taking into account the location of gates, entrance gates, terrain slope, etc.
It is important to remember: After purchasing and delivering the main material to the construction site, it must be carefully stacked and covered to protect it from premature wear and climatic factors before installation work. The location of the stacks should not interfere with the passage, passage or placement of other building materials, elements of building structures, transport, etc.
Which corrugated sheet should I choose?
If the decision to build a fence from a metal profile has been made, all that remains is to choose a material that is suitable in terms of cost and quality. To do this, it is necessary to determine the requirements regarding its protective characteristics, as well as the reliability, durability and resistance of the future fence to wear and damage.
But first it won’t hurt to pre-install:
- conditional life of the fence;
- priority on aesthetics of appearance or operational reliability;
- design features fence and the possibility of replacing its individual elements during operation.
The list of key factors determining the choice of profiled sheet for fence construction includes:
- Brand of material.
- Steel thickness.
- The quality of galvanization of the steel base of the corrugated sheet.
- Type of polymer coating.
- Sheet sizes and profile parameters
- Price-quality ratio.
- Durability and wear resistance.
- Aesthetic preferences of the owner of the fenced area.
Profiled sheet marking
The metal profile has a special marking, which determines its main characteristics and purpose. So, for the construction of a fence, grade C (wall) or NS (universal) material is suitable. The numbers in the marking of the profiled sheet mean:
- profile height in mm;
- usable sheet width;
- thickness of the steel base.
Important to remember: The thicker the steel base and the higher the zinc content in protective layer, the more resistant to corrosion and deformation the corrugated sheet is. However, nowadays galvanizing technology is used less and less in the production of materials. A much more reliable protection against corrosion, damage and wear is a special polymer coating, which, moreover, can be given a color and even texture that matches the purpose of the metal profile.
Polymer coating and price/quality ratio
The polymer can be applied on one or both sides of the sheet, which significantly affects the overall cost of the material. In addition, the price of the metal profile is determined by the type of this polymer coating:
- Polyester (PE) - film thickness is about 25 microns. The coating is used to protect the inner surface of the material. The film has low resistance to mechanical damage and ultraviolet radiation, which is compensated by the low cost of the profiled sheet.
- Matte polyester (PEM) is a 35 micron thick coating characterized by its lack of shine and resistance to direct sunlight.
- Pural is a protective film about 50 microns thick. It is characterized by elasticity, a high degree of anti-corrosion protection and excellent color quality.
- Polyvinyl fluoride (PVF, PVDF, PVF2) is a coating with high strength and elasticity. Meets increased operational requirements, having excellent resistance to ultraviolet radiation, as well as rust and mechanical damage.
- Plastisol (PVC200) is a universal film with a thickness of 200 microns, designed to protect surfaces of any type. It has high decorative qualities and elasticity, providing reliable protection of steel from corrosion.
Important to know: The dependence of price on the type of polymer coating, which largely determines the durability and wear resistance of the material, is obvious. The greatest demand in the construction of fences and fences is metal profiles coated with matte polyester, which has optimal ratio price quality. Material coated with pural is also popular, since the latter provides not only high aesthetic performance of the corrugated sheet, but also increases the service life of the fence.
Profiled sheet parameters
The strength of wall corrugated sheeting depends not so much on the thickness of the steel base (0.1 cm is enough for building a fence), but on the size, shape and thickness of the ribs (waves) of the profile. Therefore, when purchasing, the main attention should be paid to the height of the latter. For the construction of a fence in an area with normal wind loads, a material with an edge whose height does not exceed 21 mm is suitable. Concerning required sizes sheet and amount of material, they are determined based on the required height of the fence, as well as its perimeter. It should be taken into account that the corrugated sheet will be mounted with an overlap.
For the construction of fences and enclosures, four grades of wall corrugated sheeting are used. Their design parameters are given in the table:
Good to know: Wall corrugated sheets are produced in sheets 12 m long, but before sale they are cut into pieces 2–3 m long that are more convenient for transportation and installation.
Correct fence design and calculation of materials, diagram
Before you go to a hardware store to buy materials, you should correctly calculate their quantity, as well as determine the amount of work to manufacture the main elements of the fence structure. This can only be done if there is a detailed project. The latter is easy to develop independently, without involving expensive specialists.
The first and main thing that is necessary for design is the value of the perimeter of the fenced area. If it is not indicated in the cadastral plan, you will have to measure it yourself. For this you will need:
- hammer marks (metal or wooden pegs) into the ground at the corners of the site, as well as at points where the fence changes direction;
- tie the tags with nylon or linen cord;
- calculate the length of the cord between the marks, which will correspond to the perimeter of the area.
The next step is to determine the location and required dimensions of the entrance gates and wickets. It is necessary to place marks on the sides of the latter, measure the distance between them and subtract the resulting value from the total perimeter.
Calculation of the number and sizes of sections
- For example, let’s assume that the plot has a rectangular shape with sides of 20 and 15 m. Let’s take the width of the gate equal to 2.5 m, and set the value for the gate to 1.5 m. In this case, the length of the fence will be equal to: L=(20+15) *2 - (2.5+1.5)=66 m.
- Standard length The profiled sheet is 12 m, so for ease of transportation and installation it will have to be divided into sections. Therefore, at this stage it is necessary to calculate how many segments will fit in one section along the length.
- We will establish that the gate will be located next to the gate on the 20-meter side of the perimeter. In this case, the length of the fence in this area will be equal to: l=20–4=16 m. Thus, we take the number of sections equal to 3 meters: 2 sections will have a 5-meter length, and the size of the remaining one will be 6 m.
- If we take the length of the sections on the opposite side of the perimeter to be 5 m, their number here will be 4.
- It remains to calculate the number of sections on 15-meter segments of the perimeter. The calculation is carried out in a similar way: we take the length of the section to be 5 m. This means that the width of the rectangle will result in only 6 sections - 3 on each side.
- Let's do the math total sections: n=2+4+6+1=12+1. Thus, the fence will have 12 sections 5 m long and one 6 meter section adjacent to the gate.
Calculation of supports
Having the number of sections, we calculate the required number of supports using the formula:
It follows from this that to install the fence you will need: K=13+1=14 supports.
Important to know: It is convenient to use a profile pipe of square (50*50 mm) or round (d=50 mm) cross-section as support posts for a fence made of corrugated sheets. It should be noted that the length of the supports is a composite value. The outer part should be at least 10–15 cm longer than the corrugated sheet. This is necessary to leave a gap of 5–10 cm high at the bottom and a headroom of about 5 cm in the upper part. So, for a fence 2 m high, the height of the supports will be 210–215 cm. For installation in the ground, another 80–120 cm will be required (depending on the type of soil, freezing depth and groundwater level), and if the fence is installed on a strip foundation - 40–50 cm.
Subject to necessary requirements to the structure of the supports, their length will be:
L og =200+15+80=295 cm (when installing supports in the ground);
L op =200+15+40=255 cm (when installed on a foundation).
Calculation of corrugated sheets
Using the height of the fence, as well as the number and length of sections, the required dimensions and number of profiled sheets are determined.
The height of the fence is equal to the length of the section of corrugated sheet. If the fence being designed has a height of 2 m, a standard 12-meter sheet will need to be cut into 6 2-meter pieces. If a profiled sheet of grade C21 is chosen for construction, each 5-meter section will require 5 such sheets and the remaining 6-meter section will require another 6 sections 1 m wide.
As a result, the total number of sections of corrugated sheets 2 m long will be:
N=n 5 *5+n 6 *6=12*5+1*6=66 segments
where n 5 and n 6 are the number of 5- and 6-meter fence sections.
It is important to remember: Installation of the corrugated sheet is carried out with an overlap. This means that each sheet will lose a little length during installation. Thus, when calculating the number and size of sheets relative to the length of the section, the value of the joint size multiplied by 2 should be subtracted from the total length of the sheathing.
Calculation of transverse joists
For fences made of corrugated sheets, a metal profile pipe with a cross-section of 40*20 mm and a length corresponding to the dimensions of each section is used as transverse logs. At the same time, to install a fence 2 m high, you will need no more than 2 tiers of crossbars.
This means that the number of logs for the calculated fence will be:
k=k s *2=13*2=26 lag
where k c is the number of fence sections.
Final result
As a result of the research, it was found that to build a fence around the area in question it is necessary:
- 26 crossbars;
- 14 support pillars;
- 66 sheathing sheets, 2 m long.
Next, all that remains is to re-draw the diagram of the site and apply a projection of the fence on it indicating the number and size of sections, the location of gates and gates and other important data. The construction project can be considered ready.
Necessary tools and auxiliary materials
In order to independently make and install a fence from corrugated sheets, you need to prepare the tools in advance, which you cannot do without during the work process.
This list should include:
- bayonet and shovel;
- concrete mixer (if the fence is installed on a foundation or the supports will be installed on concrete);
- earth drill (for installing support pillars in the ground);
- electric scissors;
- metal scissors;
- electric drill with a set of metal drills;
- screwdriver;
- welding machine;
- circular saw with metal discs;
- construction tape;
- measuring cord;
- building level;
- plumb line
In addition to the basic materials of corrugated sheets and profile pipes for the manufacture of supports and transverse joists for the construction of the fence, auxiliary tools will be needed.
The list of the latter contains:
- sand;
- crushed stone;
- cement;
- primer for metal posts and crossbars;
- paint;
- metal screws or other fasteners for mounting the casing.
It is important to remember: When cutting metal, during the construction of a foundation or installing supports in the ground, as well as when installing crossbars and fixing profiled sheets, it is very important to follow safety precautions. This will avoid injury, as well as material damage and tool breakage. When performing work operations, you should use safety glasses, gloves and protective clothing. And most importantly: you need to prepare a free area for work, where nothing will interfere with the manufacture of fence elements, and supply electricity to it to connect power tools.
How to build a fence from corrugated sheets with your own hands: step-by-step instructions
After marking the territory and preparing materials, it’s time to start construction. The general algorithm of actions is as follows:
- pouring the foundation with installation of vertical supports on it;
- installation of support pillars in the ground;
- installation of transverse joists;
- priming and painting of the metal frame;
- installation of sheathing;
- decorative design of the fence.
Good to know: If the installation of the supporting frame is carried out by welding, the welds must be cleaned. You should also weld appropriately shaped plugs onto the support posts, which will prevent moisture from getting inside the pipe. It is better to make holes in the metal before assembly, although, if you have a powerful drill and a high-quality drill bit, they can be made after. It is advisable to apply primer and paint to the metal frame before installing the sheathing so as not to stain the new profiled sheet.
Laying the foundation for a corrugated fence
If the conditional service life of the fence exceeds 20 years or the nature of the soil or the layout of the site do not allow installation in another way, the fence is installed on a strip reinforced concrete foundation.
The foundation is poured in several stages:
Using a concrete mixer, a concrete solution is made from sand, crushed stone, cement and water, with which the trench is filled to the required level. During the process, you should periodically check the verticality of the support posts or fix it to the formwork with a lock made from waste boards.
It is important to know: The soil will not take moisture away from the concrete if the bottom of the trench is moistened abundantly before pouring. The finished foundation should be allowed to dry for at least 3 days, after which you can begin installing the transverse joists.
Installation of support pillars in the ground
If the fence is planned to be used for no more than 15–20 years, the fence is temporary, or the soil or layout of the site allows installation without pouring the foundation, the support pillars are installed in the soil.
There are several ways to install supports, the choice of which depends on the nature of the soil, the depth of groundwater and the height of the fence:
- driving;
- partial concreting (combined installation);
- butting (installation on a bed of sand and crushed stone);
- full concreting (with reinforcement);
The algorithm for installing fence supports in the soil looks like this:
- Plugs are welded at the upper and lower ends of the supports, which will prevent moisture and soil from entering the pipe.
- The corner supports and pillars along the edges of the gates and gates are installed first. At the same time, it is necessary to carefully monitor compliance vertical level supports
- The installed corner posts are tied with twine or rope to mark the fence line.
- The remaining support posts of the fence are mounted along the perimeter in the same way, observing the vertical level and the line set from the corner supports.
Important to know: To enhance the load-bearing capacity of concrete or partially concreted supports, the hole can be reinforced using thin (d=10 mm) reinforcement.
Installing fence supports on a sloped area
If land plot has a slope, when pouring the foundation or installing support pillars it is necessary to perform a number of additional actions. In particular, with a slight slope, the soil should be simply leveled.
When installing a fence on a foundation on an area with an average slope, the procedure will be as follows:

When installing supports in the ground on a site with a slope, the depth of the holes is adjusted in the same way: the bottom of the hole of the first support of the next level should be at the level of the middle of the hole of the last support of the previous one.
Important to know: The difference in height levels should be the same along the entire length of the fence.
Installation of supporting frame
After installing the support pillars in the ground or on the foundation, the transverse joists are installed. They can be installed by welding or using special “crab” fasteners.
When installing on "crabs" in the supports and transverse joists, it is necessary to make holes of the appropriate diameter for bolted connections.
Installation of crossbars for welding is carried out by one of three ways: the logs are butt-welded on the sides of the support column, or fixed using a holder (a piece of U-shaped profile of the required dimensions) that is pre-welded to the support.
Good to know: The location of the logs and the distance between them depends on the height of the fence. If the latter is 2 m, you need to subtract 40–50 cm from the upper edge of the support - the upper line of the crossbars will be attached at this level. Further down we retreat 100–120 mm and mark the level of installation of the lower logs. Then the distance from the lower cross member to the ground will be: l=200–40–120=40 cm.
Sheathing with metal profiles and finishing, painting the fence
If the installation of the frame is completed, and plugs are welded on top of the supports, you can proceed to the final stage of construction - cladding the fence. To do this, holes for fastening elements are made in the transverse logs with a pitch equal to the pitch of the profiled sheet. Before starting work, it is important not to forget to calculate the location of the joints of the metal profile; its sheets are attached directly to each other, bypassing the crossbars.
After installing the sheathing, the fence can be decorated with decorative elements. For example, by forging or beading along the upper and/or lower edge of the profiled sheet. You can also additionally protect the screw heads and bolted connections with special plastic plugs.
It is important to remember: When joining sheets with an overlap, installation is carried out on the upper wave of the profile. The corrugated sheet is fixed to the crossbars in the center of the lower wave of the profile.
The construction of a fence from corrugated sheets requires thorough preparation and, most importantly, correctly performed calculations. Then, if you do not make gross mistakes during installation, the work will not take much time and effort. For example, to fence an area with a perimeter of 60–70 m, it will take only 3–4 days, of course, provided that you don’t have to dig a lot to level the soil. The result should be a reliable and durable fence that will serve as excellent protection for the site from prying attention and will greatly complicate unauthorized entry into the fenced area.
Many owners of suburban areas are concerned about the safety of their properties. A bunch of modern building materials allows you to choose the material for building a fence according to your taste and cost, but without compromising quality. In this article we will tell you how to make a fence from corrugated sheets with your own hands with posts, and also show photos and videos on installing the fence.
A metal profile fence can be of any height. Typically, for areas far from the city, a height of 3–5 m is chosen. Such a fence not only visually protects from unnecessary witnesses, but also screens out sounds from a federal highway, for example.
Construction from profiled sheets is technologically quite simple and does not require the use of expensive equipment or teams of workers.

Note! Brick can also be used as decorative element, covering them with metal or wooden poles.
Installing logs

Then you can install logs - a transverse profile for fastening the canvases. A profiled beam with a cross section of 40x25 mm or pipes of the appropriate diameter are suitable here. The number of horizontal logs depends on the size of the fence. If it is less than 1.7 m, two rows are enough. They are attached at a distance of 4 cm from the top of the future fence and from the ground. With a higher fence, the number of horizontal lines should be increased to three.
Note! The best way to fix all the metal parts together is welding.

If you are using wooden beam, then the service life of the fence will decrease.

Note! After installation, all steel structure must be primed to protect against rust.
Fastening the metal profile

The last stage is attaching the profiled sheets to the joists. This should be done using metal screws 35 mm long and in increments of 500 mm. Adjacent fragments are fixed with an overlap.
This type of fence does not require special care. You may need to spray paint the canvas from time to time to hide any scratches or corrosion.
From the outside, such a fence looks solid and durable, reliably hiding the house and surrounding area from prying eyes.
Video
Photo


Many construction teams undertake the installation of a fence made of corrugated sheets. The process is not troublesome and fast, and the earnings are significant.
You can eliminate this expense item from the overall estimate for landscaping a dacha or private home by deciding to make a fence from corrugated sheets with your own hands.
The purpose of the fence on the site is to enclose the territory. At the same time, he has another function - representative.
Previously, the main material for constructing fences was wood - an affordable material, but requiring care and protection from destruction; currently, other building materials compete with it: brick, concrete, polycarbonate, mesh, forging, corrugated board.
In terms of the ratio of the parameters “price-installation-durability-appearance”, the leadership belongs to corrugated sheeting, which has led to its wide distribution among users.
Advantages of corrugated fences
- ease of material and installation;
- strength (stiffness);
- corrosion resistance;
- uniform and very slow fading (like paint on a car);
- aesthetic appeal;
- low maintenance requirements;
- long service life;
- relatively low price.
Few building materials have such a list of advantages. But all these properties are fully revealed only when correct installation. This means you need to know how to make a fence from corrugated board correctly. Within the article, we will talk about the nuances of choosing a material, the specifics of its calculation, the types of frames for a fence, we will describe how to attach corrugated sheeting and much more.
Do-it-yourself corrugated fence -
step by step guide from A to Z
Installation of a fence made of corrugated sheets only involves screwing the sheet to the frame; this is a process consisting of several stages. We will describe each of them in detail in the form of step-by-step instructions.
Stage 1. Scheme of a fence made of corrugated sheets - from sketch to drawing
An arbitrary schematic drawing (sketch) is needed in order to visualize the design features of the fence.
There are two types (types) of corrugated fence:
- solid;
- sectional.
 It is the type of fence that determines the material consumption and methods of installing structural elements.
The following is applied to the drawing diagram:
- location of the fence on the site. Helps to take into account the features of the site: topography, plantings, buildings, access roads, location of gates, etc.;
- if the area is uneven (hill, lowland), mark the place where there will be differences in elevation. Manufacturers producing quality material profiled sheets are produced with a length divisible by 50 mm. this allows you to achieve visually the same fence height, despite differences in ground heights.
- dimensions: fence height and length of individual straight sections;
- location of the columns (supports);
Note. At sectional fence The width of the section is determined by the width of the sheet. It must be a multiple of 1, 1.5 or 2 sheets.
A detailed diagram simplifies the calculation of the material.
Stage 2. Materials for corrugated fence
Construction will proceed quickly if the materials necessary for manufacturing are prepared in a timely manner.
What materials are needed for a fence made of corrugated sheets:

1. Corrugated sheeting
When choosing a profiled sheet (corrugated sheet), you need to pay attention to the thickness (0.45-0.5 mm +/- 0.06 mm), wave height, absence of a capillary groove, parameters, coating, color and texture.
The profiled sheet has a high windage, this must be taken into account when planning the frame.
Note. The dimensions of corrugated sheets for fences differ between different manufacturers; this must be taken into account when choosing a material. It is also worth knowing that the warranty period for galvanized corrugated sheeting is 20-30 years, and with polyester coating - up to 50 years (depending on the thickness of the layer).
2. Support posts (pillars)
 Theoretically, any material can be used: wood, stone, metal.
When deciding which poles to use for a fence, keep in mind that the simplest and affordable option- metal pipes.
The parameters of the racks depend on the expected load. Typically, pipes of 60x40x2 mm or 40x40x2 mm are used. For round pipes diameter - 60-100 mm.
 You can use purchased ready-made pipes for the fence (photo) (for any type of soil) or piles (normal soils and loams).
The advantage of ready-made support posts is the presence of a “heel” for installation on a cushion, holes for attaching corrugated sheets and an upper plug that prevents water from entering the post.
3. Transverse joists
 For logs (beams) it makes sense to use square pipes 40x40x2 mm. or 40x20x2 mm. General recommendation- the width of the log is equal to half the width of the support column.
It is unacceptable to use wooden logs, because the wood tends to rot in the place where the sheet is attached. This will not only reduce the service life of the fence, but will also prevent the sheet from being reused. The metal corner is also not suitable for lags; with a thickness of 2 mm, it will not provide adequate resistance to wind load, and manufacturers do not recommend using a thicker one.
Note. A special self-tapping screw for corrugated sheets with a drill is designed for drilling metal with a thickness of no more than 2.5 mm. So the use of a thick-walled profile is fraught with additional drilling efforts.
4. Plate holder (bracket) for corrugated sheeting
 Special fasteners (brackets) are used when assembling the fence frame using a non-welding method, using hardware.
5. Plugs for pillars (supports)
 Plastic plugs perform a protective function to prevent water from getting inside the pipe.
In practice, the pillar is covered with a special cover or plastic bottle. Not very aesthetically pleasing, but certainly cheap, and good as a temporary solution to the problem.
6. Hardware
 Needed for weldless assembly of the fence frame. For this, an M6 bolt or screw (30 and 20 mm) is used. As well as self-tapping screws for attaching corrugated sheets or rivets.
 Professionals advise using a self-tapping screw, because... it is equipped with an additional gasket (neoprene rubber), which allows you to press the corrugated sheet tightly without damaging its surface. Its length is 15-35 mm.
Advice. When using rivets, it is recommended to treat the edges of the holes under them with special paint. This will prevent the rapid appearance of rust at the fastening site and the formation of rusty stains on the corrugated sheet, which are very difficult to eliminate.
 The paint is used to touch up scratches that may appear during installation of the corrugated sheet, as well as to paint over the cut area on the sheet. The consumption is small, one can is usually enough.
8. Decorative end strip for decorating a fence
 A U-shaped strip (fence, cover), which is installed on the upper edge (edge) of the profiled sheet and protects users from possible cuts, and the sheet from rust.
Material prepared for the website www.site
 Note. When purchasing, please note that the edges of the plank must be curved (rolled). Otherwise, they will not only scratch the metal during installation, but will lose their shape (the edges will move away from the sheet) during operation.
Additional materials and tools:
- cement, gravel, sand - for installing support pillars or arranging a foundation;
- level, plumb line, welding machine (and consumables), screwdriver, solution containers, formwork boards (if necessary), shovel or drill, primer and anti-corrosion solution for metal, riveter (if necessary), rope, safety glasses and gloves, grinder (if necessary, cutting profiled sheets).
Stage 3. Calculation of material for a fence made of corrugated sheets
How to determine how much building material is required for production.
1. Calculation of the number of corrugated sheets:
- with a solid fence, the total length of the fence is divided by the useful width of the sheet. Rounding up;
- with sectional If the size of the section (span) is equal to the width of the sheet, the total width of the sheet is used. If you plan to install one and a half or two sheets there, it’s useful.
Note. The sheet can be installed both vertically and horizontally. With horizontal fastening, the height of the fence will be equal to 1, 2 or 3 working widths of the sheet. For vertical - determined by the customer.
Advice. When calculating, do not use such a concept as the total area of the required corrugated sheet. Make calculations in pieces for a given sheet height.
2. Calculation of the number of posts for a corrugated fence
The number of supports depends on the distance between the corrugated fence posts
- with a continuous fence, the total length of the fence is divided by the estimated distance between the posts (posts). Taking into account the windage of the sheet, it is taken equal to 2,000 - 3,000 mm. It is not advisable to increase the distance, since this will lead to an increase in the thickness of the racks or the number of longitudinal joists.
- with sectional The quantity is determined by the estimated number of sections. When installing posts for mounting fence sections, you need to calculate in advance the distance between the posts so that it corresponds to the total (when installing one sheet per section) or useful (1.5-2 sheets) area of the corrugated sheet.
Note. The calculations take into account that support posts(pillars) must be installed at the corners of the fence, as well as at the location where the gate and/or gate is installed. The number of intermediate supports is rounded down. And the difference is compensated by the deviation from the specified distance between the posts.
The size of the post is determined by the height of the fence, taking into account that the posts go deep into the soil by 30% of their length. Thus, with a fence height of 2,000, the height of the support post for a fence made of corrugated board should be 2,600-2,700. For intermediate posts, an installation depth of 25% of the total height of the fence is allowed. Then the length of the rack will be 2,500 mm.
3. Calculation of the number of transverse joists
The quantity depends on the method of installing the fence.
- Craftsmen advise using 2 logs for a fence height of up to 2,000 mm. Moreover, their distance from the edges of the corrugated sheet is 300 mm.
- For a fence height of more than 2,000 mm - 3 logs.
 Thus, the total length of the log is determined by multiplying the total length of the fence by the number of crossbars.
4. Plate holder
The number of plates is equal to the number of support posts multiplied by the number of rows of joists.
5. Pole plug
The number of plugs is equal to the number of support posts. Plus 2-3 spare ones (useful during the operation of the fence).
6. Hardware
When calculating the self-tapping screws, it is taken into account that the fastening is carried out in two extreme waves and through two in the middle of the profiled sheet into each of the transverse logs. Thus, with two transverse logs per sheet, 6 pieces are required, with three - 9 pieces. The number of hardware is rounded up in multiples of the packaging (standard packaging - 250 pcs). Because, during the process of tightening the self-tapping screw, defects may occur.
When fastening with rivets, their consumption increases, since they are fastened along the edges and through the wave.
Standard paint packaging: 50, 100, 200, 500, 900 g. The choice depends on the length of the fence. Usually 50 gr. jars are enough.
8. Decorative end strip
The quantity is equal to the length of the fence divided by the working length of the plank. The standard length of the strip is 2,000 mm, the working length (including overlap) is 1850-1950 mm.
Stage 4. Installing a corrugated fence with your own hands
Installation technology step by step:
1. Site preparation
Clearing the soil surface of anything that will interfere with the installation of sheets and posts.
2. Construction of the foundation and/or installation of support columns
Note. The destruction of the corrugated sheet begins at the point of contact with the ground surface. Pebbles, dirt, and mechanical damage lead to the appearance of defects at the bottom of the sheet. In addition, the uneven terrain of the site often creates difficulties when installing supports. That is why the foundation for a fence made of corrugated sheets is a mandatory stage in constructing a fence.
Which foundation is better for a corrugated fence?
A soil study usually helps to decide on which foundation to install a corrugated sheet fence in a specific area. But since a fence made of corrugated board is a relatively lightweight structure, an ordinary one will be suitable for it. Its optimal depth is 300-400 mm, and the minimum width of the foundation for a fence made of corrugated sheets is determined by the width of the support post (posts).
We will not dwell in detail on how to pour the foundation. But let us note this nuance: the depth of the pit in the place where the base support posts are installed (at the edges of the fence, corners, at the place where the gates are installed) should be 1/3 of their height + 100-150 mm for installing a cushion under the base of the post. For intermediate posts - 1/4 of the height of the support + the height of the pillow. This will eliminate the influence of groundwater and soil freezing on the rack.
Preparing and installing formwork is no different from arranging a strip foundation for a house or gazebo.

 First of all, the basic support posts are installed (along the edges of even sections of the fence), a rope is stretched between them and intermediate posts are installed along it. At the location where the support posts are installed, the soil is removed with a drill and a gravel-sand cushion is poured onto which the posts are installed. In this case, metal pipes should be treated with an anti-corrosion solution.
Users note that it is better to concrete the racks at 100-150 mm. This way they remain stable when reinforcing the formwork and filling it with concrete. If you plan to compact the pillars, then the cushion should be made 200-250 mm high and the posts should be hammered into it. This method is more labor-intensive, but less expensive and reliable.
Advice. The use of a level and plumb line when installing racks is mandatory.
A simpler option would be to install support posts without building a foundation. Installation requirements are similar. The depth is equal to 1/3 or 1/4 of the length of the rack depending on the location of its installation, the thickness of the gravel-sand cushion is 100-150 mm, mandatory treatment with an anti-corrosion solution, checking the level and reliable concreting.
Note. In practice, corrugated fence posts are installed with deviations from the given technology. This is justified in stable soils.
Alternative ways to install racks are shown in the diagram.

3. Installation of logs
The corrugated sheeting is fastened to transverse joists. They are mounted on support posts after they are securely concreted. In this case, you cannot rush the work, because... this may cause the stand to deviate from the vertical.
Cross joists can be welded or screwed to the support posts. Craftsmen recommend using a holder plate (bracket) for these purposes. Thus, the plate is screwed to the support post, and the joists to the plate; this makes the project a little longer and more expensive, but the fastening is considered more reliable.
Three ways to attach joists to support posts (photo)
 - end-to-end in front of the post. The method is ideal for constructing solid fences;
- behind the pillar using a holder (bracket). Suitable for constructing sectional fences;
- on the side of the pillar. The advantage of this method is that the corrugated sheet can be attached not only to the joist, but also to the support column, which makes the structure more stable. But the duration of work and the consumption of self-tapping screws increases. Suitable for constructing sectional fences.
 Note. If the site has a significant slope, the transverse logs are mounted offset, as shown in the photo.
The fully finished frame is coated with anti-corrosion primer and paint.
4. Decorative design of columns
This stage is possible only if a sectional type of corrugated fence is selected. Here, the installed metal support posts can be lined with brick or lined with stone. According to many users, a fence made of corrugated board with brick pillars looks more beautiful and presentable than one with metal posts or even a solid one.
Note. Such decoration of fence supports is thought out at the planning stage. Because the presence of brickwork makes adjustments to the distance between the pillars, and hence the number of sheets mounted in the section.
Of course, you can decide to finish the racks with bricks at any stage, but you should be prepared for the fact that the corrugated sheet will have to be cut to length, and this will lead to waste not only of the sheet, but also of paint, and cutting tool, time and money.
Users agree that this work should be entrusted to masonry masters, because... It is the bricklaying in this case that will determine the aesthetic properties of the fence. If you decide to do the work yourself, you should know:
- It is advisable to use decorative brick High Quality(chips and efflorescence are unacceptable);
- maintain the same thickness of the masonry seam;
- tie every third row with a metal mesh (reinforce);
- completely fill the void between the masonry and the support pipe concrete mortar;
- make a decorative element at the top of the pillar.
5. Installation of corrugated sheets on the fence
To avoid rust, you need to know how to attach corrugated sheets correctly.
To fasten the corrugated sheets to each other and to the joist, rivets or special screws are used. Installation begins based on the sheet configuration. One of the outer waves of the sheet is a covering wave (left or right depends on the manufacturer’s equipment). The first sheet is mounted in such a way that the covering wave of the next one covers the wave of the previous one, and not vice versa. In order not to encounter a situation where a piece of sheet material fails near the gate, installation should begin with these elements.
Advice. To ensure ventilation, you need to make the distance of the sheet along the ground surface 50-100 mm.
The corrugated sheet must be secured at the edges to each of the transverse joists. One fastener is located in the middle of the sheet. If the fence is being built in a windy region, it is advisable to fasten the hardware through two waves.
How to properly attach a corrugated sheet?
To screw a self-tapping screw into corrugated sheeting, you also need to have certain skills. Namely, to know that the self-tapping screw:


- “jumping off” of the self-tapping screw threatens to damage the front surface of the corrugated sheet.
6. Installation of additional elements
In fact, the installation of a fence made of corrugated sheets ends with the steps described above. However, manufacturers, craftsmen and experienced users recommend covering the upper end of the profiled sheet with a special decorative U-shaped strip (end fence strip).
 The overlay will give the fence an aesthetic appearance and prevent damage to users from the sharp edges of the sheet.
The plank is simply placed on the sheet, so when ordering, pay attention to its width.
For corrugated sheets with a wave height of 8 mm, you need a strip 10 mm wide (including rolling) or 8 mm (without rolling).
Please note that the corrugated sheets of most manufacturers are colored only on one side. The unpainted gray side looks towards the house. If you plant trees, shrubs or grapes along the fence, this will hide the unpresentable appearance of the fence.
Stage 5. Cleaning the area after construction of the fence
Cleaning is the logical conclusion of the construction process. Cleaning is necessary in order to avoid injury from scraps of corrugated board, scattered screws and to give the area a well-groomed appearance.
Installing a corrugated fence with your own hands - video
Installation of corrugated fences - price for work and material
| Material | Cost of a corrugated fence
subject to DIY installation |
The cost of installing a corrugated fence
subject to the involvement of hired workers |
|---|---|---|
| Corrugated sheet | 140-680 rub/sq.m. | |
| Pipe 60x60x2 | 110 rub/m.p. | |
| Pipe 40x40x2 | 70 rub/m.p. | |
| Pipe 40x20x2 | 60 rub/m.p. | |
| Plate holder | 80-150 rub/piece. | |
| Pole plug | 1.7-59 RUR/pcs. | |
| Hardware (screw) | 2.5-5.3 RUR/pcs. | |
| 180 rub/piece (cylinder) | ||
| End strip (2,000 mm) | 60-110 rub/piece. | |
| Cement | 175 RUR/50 kg. | |
| Sand | 80 rub/50 kg. | |
| Gravel, fraction 20-40 mm. | 100 rub/40 kg. | |
| Nerzhamet-Grunt - alkyd primer for metal | 210 rub/kg. | |
| Foundation structure | 0 | 5,000 rub. per sq.m. (the cost is affected by the type of soil) |
| Drilling a hole or driving a pile | 0 | From 200 rub/piece. |
| Concreting support pillars | 0 | From 500 rub/piece. |
| Attaching the log | 0 | From 50 rub/m.p. |
| Fastening the corrugated sheet | 0 | From 200 rub/m.p. |
The total costs of constructing a fence made of corrugated sheets are determined based on the need for a particular type of material.
The cost of installing a fence made of corrugated sheets on a turnkey basis (price per meter of work, materials with installation) is shown in the table.

Conclusion
A fence made of corrugated sheets looks great and withstands any temperature changes and all types of atmospheric phenomena. But there are two weak points- windage and poor quality installation. We hope that the information provided here will allow us to take into account and eliminate both of these shortcomings in a timely manner.
418 ViewsWhen arranging the area around the house, the main task is to install a fence. Building a fence is a completely feasible task even with your own hands, especially if you install it from corrugated sheet metal. This practical material, which is quite easy to work with.
Advantages of corrugated sheets
Corrugated sheets are curved metal sheets. When choosing the material from which they plan to make a fence, most owners of individual houses give preference to corrugated sheets, since building a wooden fence, especially with your own hands, is a more labor-intensive process.
The main advantages of this material are as follows:
- Durability. The sheets are covered with a special polymer coating, which makes it possible to operate such a fence for more than 20 years.
- Does not require painting. Corrugated sheeting is sold already painted, while the color range is varied, and you can choose any color that will harmonize with the facade and roofing covering Houses.
- Possibility to install a high fence. Corrugated sheets come in different sizes, so those who want to hide from prying eyes can purchase sheets 3 meters high.
- No maintenance required. Unlike a wooden fence, which requires constant care, painting and treatment with antiseptics, corrugated sheet long years maintains an attractive appearance.
You can build a high fence from corrugated sheets in order to provide sound insulation: since the material copes well with reflecting noise from the outside and inside, the area will be much quieter.


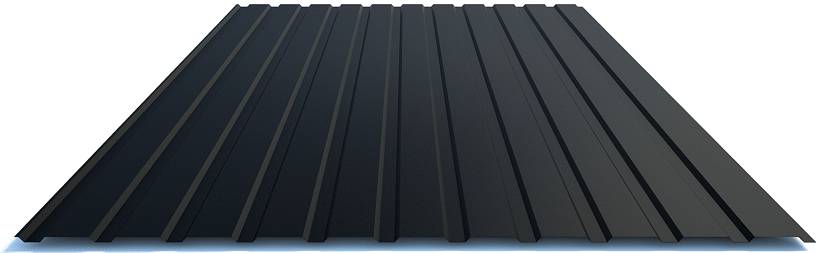
Materials and tools
In order not to be distracted by searching for the right tool during the construction of a corrugated fence, you should prepare everything in advance. Materials and tools for building a fence:
- corrugated sheets;
- support pillars;
- concrete mixture;
- twine and level;
- welding machine;
- drill with a set of drills;
- metal screws;
- primer.
Metal pipes or wood are used to install supports.

Stages of fence construction
In the place where you plan to build, you need to clear the soil of vegetation with your own hands. Next you should take measurements and apply markings. You should immediately determine where the gate will go and at what distance to place the support posts.
Installation of supports
If metal poles will be used as supports, then the cross-section should be taken into account. For square pipes, the optimal size is 50x50 mm, and for round pipes it is better to choose a diameter of about 75 mm.
The pillars must be placed at a distance of at least 3 meters. Under the supports it is necessary to dig holes with a depth of 1 to 1.5 meters. The higher the fence, the deeper they are dug. To simplify the installation process, it is recommended to use a hand drill. At the bottom of the holes under the supports, it is necessary to pour medium-fraction crushed stone, insert a post and fill it with concrete mortar. The mixture can be ordered ready-made or made independently using cement, crushed stone and sand.
Important! When installing supports, their verticality should be controlled using a plumb line. After pouring the concrete mixture, it is necessary for it to harden, and only after that can you begin further construction of the fence. The concrete hardening period can take up to 5 days.
If the soil in the area is mobile, the pillars may shrink, which will lead to the skew of the fence. To avoid this, pour strip foundation:
- A strip box of boards is installed along the pillars, secured with wire.
- Waterproofing is laid along the walls of the box and the concreting mixture is poured.
Even if the soil around the pillars is washed away, the strip foundation will hold the entire structure securely.
Features of installation of pillars depending on the type of soil can be seen in the video:
Installation of logs
Logs are transverse steel profiles onto which corrugated sheets will be attached. It is better to choose a profile with a section of 40x25 mm. For a fence up to 1.7 meters high, 2 joists per section are sufficient. To make a higher fence stable, it is better to install three profiles: at the top, in the middle and at the bottom.
The upper and lower logs should be mounted at a distance of 4–5 centimeters from the edge. You can fasten them with self-tapping screws, but if you have the skills to work with welding machine, then it’s better to weld them.
After installing the pillars and joists, it is recommended that the entire structure be treated with a primer to protect it from corrosion.
Installation of corrugated sheets
Using a level, you need to tighten the rope and secure it to the posts. Sheets of corrugated sheets are attached to metal joists using self-tapping screws. The corrugated sheet is mounted with an overlap, and it is recommended to carry out the work with gloves, since you can get hurt on the sharp corners.
When installing a corrugated fence with your own hands, you cannot avoid accidental scratches, so to give the fence a neat look, it is advisable to stock up on a can of spray paint in advance.
The main stages of fencing installation are presented in the video:
2018-04-13