What is better to lay on the bathroom floor? Finishing the floor in the bathroom
Renovations are in progress. The time has come to repair and tidy up the second most important place in the house after the kitchen. You need to decide how to make the floor in the bathroom so that it is reliable, beautiful, cheap and cheerful. Unlike the bathroom, where the tiles are best choice According to sanitary conditions, in the bathroom you can experiment with the floor to make the room a little more interesting, and the process of visiting brings more positive emotions than just taking water procedures.
Finish options
Despite the slightly higher requirements for bathroom space due to high humidity, large quantity water flowing past the bathroom and shower tray, it is not at all necessary to blindly follow the example of fashion and turn the room into a kind of swimming pool with tiles wherever possible. Before buying tiles for the bathroom floor with your own hands, you should look for more interesting topics for registration.

It is clear that tiles on the bathroom floor are not the only option for decorating and finishing the room. Modern technologies, with proper planning, make it possible to use at least three or four unusual and very interesting options design:
- Wooden floor in the bathroom- unusual and very comfortable. Wood on the walls and floor in the bathroom always looks attractive;
- Sawn natural stone in the form of square tiles, curly rhombuses, triangles or more complex configurations;
- Linoleum like modern version cheaper PVC tiles;
- Self-leveling floors are beautiful and very effective. With rich graphics and 3D photographs.

In addition to the options listed, there are mosaic, typesetting, glass and carpet floors. The first three require remarkable abilities and skill, professional mastery of processing techniques and fitting of ceramic materials.
Important! It is incredibly difficult to complete such a volume of work alone, without the help of a master, and even if you manage to combine mosaics and floor tiles in the bathroom, such work will clearly not reach the heights of professionalism, so it is better to leave such projects to craftsmen and artists.

Simpler carpet floors are very comfortable when walking, but for the bathroom you will need special, waterproof models that cost a lot of money, so they are also rarely chosen for decoration.
An alternative solution for making your bathroom floor beautiful
What remains are wooden floors, linoleum or self-leveling flooring for the bathroom, the most difficult option from natural stone You can also leave it aside. Firstly, to work with natural stone you need equipment, and besides, this is a rather difficult task that requires knowledge and skills. Secondly, it is very difficult to do masonry just as accurate as tiling a bathroom floor. It all depends on the desire, budget and availability of free time; what and how to make a floor in the bathroom with your own hands is up to the owner of the apartment or house to decide.

Is it possible to have wooden floors in the bathroom?
The beauty of a polished wood surface in terms of effectiveness and expressiveness can only be compared with natural onyx, quartzite or jasper; it would be unwise to neglect the opportunity to make a beautiful floor, for example, from panels or specially treated boards.

The installation of a wooden floor in a bathroom is somewhat different from the usual tiled or mosaic version:
- The tiles in the bathroom are laid on top of the waterproofing, the joints are rubbed with a waterproof decorative mixture, most of the water remains on the surface until complete evaporation or cleaning;
- The wooden floor is built according to the raised floor scheme. Wooden panels are laid in the same way as a plank floor, but with an increased gap between the cracks;
- A protective layer of waterproofing is laid under the wooden panels or boards, onto which the bulk of the water flows.
The lower level of the floor can be made in the form of a coating or cement screed treated with a penetrating primer.

Some experts recommend making the bottom insulating layer from simple polyvinyl chloride or ceramic tiles with a glaze coating. The main thing is that the material is highly resistant to detergents and does not allow moisture to pass through the seams. In this case, you can lay the tiles on the floor yourself, most work can be done quite quickly, since special requirements there is no impact on the alignment and accuracy of the lower protective layer. But in any case, before laying tiles on the floor in the bathroom, you will need to do standard waterproofing of the base, the lower edge of the corner sectors of the walls.

To make a wooden floor, it is necessary to make the panels or floorboards waterproof and at the same time resistant to the action of detergents, soaps, shampoos, and disinfectants.
The wood processing procedure is as follows:
- Initially, you will need to select blanks for the bathroom floor required size and width. They are cut out with a small allowance for further shrinkage;
- The board is ground and polished, treated with antiseptic agents, and thoroughly dried without drafts;
- The flooring material is coated with a primer based on epoxy varnish and several layers of protective yacht varnish.
In the same way, you need to make logs that will be directly laid on the tiles on the floor in the bath; larch or oak are best suited for these purposes. Unlike floorboards, logs are not sanded, but only dried and impregnated protective composition, for example, Tikkuril oil or varnish.

The laid logs must be secured to the base of the floor; this can be done with dowels or an overhead strip made of galvanized profile. After assembling the joist supports, it will be necessary to create a ventilation and ventilation system, despite the presence of thin and narrow gaps between the floorboards, this is clearly not enough to effectively remove draining moisture.
The assembly of floorboards must be done using screw or cork fasteners, usually using self-tapping screws screwed into the wood from the end or side edge. For special valuable species wood, fasteners with a chrome or clad coating are used; ordinary black self-tapping screws, even under a layer of protective varnish, rot in a couple of months.
Self-leveling floor
The technology for arranging self-leveling floors is well known and has been tested in practice many times. Today you can buy for the bathroom not only a standard one-color floor, with an imitation of a certain texture, tone, shine and iridescence of the surface. A modern self-leveling floor involves complex photo compositions and graphics, lighting and the combination of several drawings in 3D format.

Methodology for arranging complex graphic drawing allows you to lay a thin multi-layer coating directly on the tiles, on the bathroom floor with your own hands. There will be no need to knock down old tiles or tiles from the cement substrate; it is enough to pour the leveling base directly on the ceramic surface. This method reduces the amount of work, but requires certain conditions:
- The waterproofing of the coating and the old tile itself must be absolutely intact and not require local repairs;
- The joints between the tiles are freed from old grout and silicone, and the outer surface must be made as rough as possible, and the shine and glaze must be reduced.

After thoroughly blowing the bathroom floor with a vacuum cleaner, the base under the self-leveling floor is primed with a special impregnation that improves adhesion to the substrate. If the old tiles were not removed, then priming will need to be done at least twice. Along the contour of the bathroom, a special compensating tape made of foamed polyethylene is laid on the floor. This must be done so that the base of the floor does not depend on the condition of the walls.

The dried floor in the bathroom is poured with a leveling mixture; you should not try to make a base for a 3D floor from a cement-sand screed or plaster mixture; as a rule, they are of little use due to significant shrinkage of the material. After pouring the leveling mixture, you need to quickly punch out the bubbles and, after drying, begin laying the pattern panels.

On last stage a protective layer of modified epoxy or polyurethane resin will have to be poured. While the resin is setting, the bathroom must be tightly closed; it is advisable to seal the ventilation and cracks along the contour of the door so that house dust cannot dull the floor mirror.
Making a bathroom floor with your own hands
Many craftsmen and designers remain committed to the idea that ceramic tiles were, are and will be the best material for arranging the floor in the bathroom. There is no point in arguing with this statement, since appearance floors and walls, the overall appearance of the bathroom depends, first of all, on the desire to figure out how to lay tiles on the floor in the bathroom and, of course, the tile material itself. Even with little experience, laying high-quality Spanish tiles on the bathroom floor with your own hands is much easier than suffering for days and not knowing how to lay tiles on the bathroom floor from Cersanita domestically produced.

Which material to prefer
One of the most pressing issues that have to be resolved when carrying out renovations is what tiles to put on the bathroom floor.
There are several options for tile materials on the market:
- Keramma Marratzi or Fap Ceramiche Bathroom tiles from the giants of world production, both materials have fantastic beauty and the same price. If you plan to lay tiles on the bathroom floor with an ingenious imitation, then you should take a closer look at the products of the Fap company. The average price is 3-4 thousand rubles per square;
- Companies Keramin and Unitil- average price group. The first tile can be used to create a very interesting composition due to the wide selection of collections, colors and textures. The Unitil company is voiced by many experts as one of the best domestic ones, but the geometry of the tiles, with all the wealth of choice, is clearly far from perfect. There will be plenty of problems with how to lay tiles on the bathroom floor with your own hands, so you will have to look for a master or a higher-class tile;
- The third option is products from the Kharkov Golden Tile plant. Excellent compositions and good quality, but you will need to calibrate the purchased tiles according to size and grind the ends according to the template.

Of course, the size of the bathroom floor rarely exceeds more than 10-12 m2 in an average apartment. This means that in order to make a bathroom floor, the material alone will require 20-30 thousand, not to mention waterproofing and screed. But quality tiles on the floor will last as long as Shakhty tiles, the only difference is in design and strength. The only thing I can advise those who like to build with their own hands is to make the floor and walls of the bathroom from material from one manufacturer. Otherwise, as they age, the difference in product quality will be simply alarming.
Preparing to lay tiles
Modern technology for laying tiles on a bathroom floor differs little from the methods used for 20-30 years; only the materials have changed; most of the work, and especially the adjustment of the tiles, will have to be done manually using old tracing paper.

Before laying tiles on the bathroom floor, you will need to do a little preparation:
- Cut and clean from residues and fragments old tiles rough floor;
- Make waterproofing using one of the modern mastic materials. If the bathroom is on the first floor of the house, and the floor is too close to the ground, it is necessary to make adhesive insulation based on rolled materials and films;
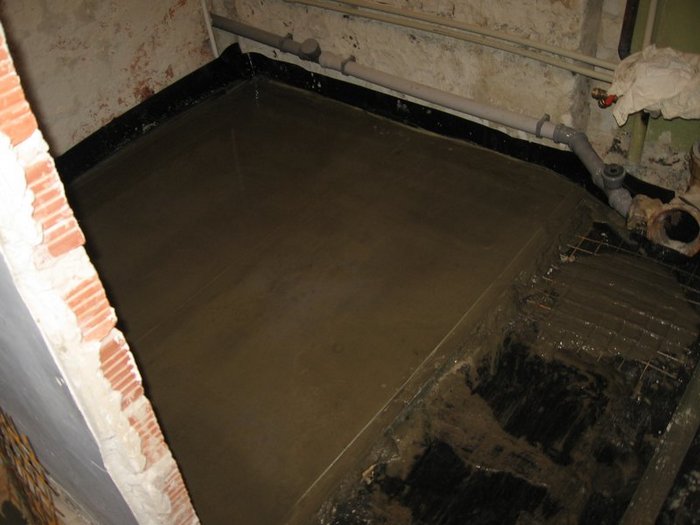
- Screed using cement or self-leveling mortar and apply penetrating waterproofing.

Next, you can begin laying tiles on the floor. Rough cleaning is considered the dirtiest stage of the work; chipping most of the old tiles can be done manually, without a hammer drill. To do this, the coating is first tapped from below with a sharpened chisel or pry bar and removed in “cakes” along with the remains of the cement mortar. You can do it differently - prick the ceramics with a hammer and knock them off the base in parts. In this case, the bathroom cleaning process will take 3-4 days. Sometimes the floor in the bathroom has to be brought to condition using a hammer drill with a wide bayonet and a sander - the smoother the subfloor can be made, the stronger the waterproofing layer will be.
How to make waterproofing and screed
After cleaning and sanding the base cement surface make it as clean as possible, under coating waterproofing It is necessary that there is no hint of dust or broken concrete on the cleaned surface of the bathroom floor.

Regardless of what material will be used to obtain the insulating coating, it must be applied with a flange, that is, the bathroom floor and walls are covered to a height of at least 20 cm. The corners must be taped with PVC tape.
According to the rules for waterproofing, in the bathroom it is necessary to protect not only the floor itself, but also the surface of the walls directly adjacent to the sources of splashes - the washbasin and shower stall. Relying on the fact that tiled bathroom walls will help protect the brick or wooden base, makes no sense. Ceramics are only slightly better at stopping water than concrete.

Before applying a layer of waterproofing with a brush, the concrete surface is primed with deep penetrating solutions. After a day, you can make the first layer of polyurethane waterproofing. After another twelve hours, be sure to make a second layer.
During intermediate drying of the layers, no work must be performed that generates large amounts of dust. You can, of course, make a film awning over the mastic, but this is not always possible to do in the limited space of the bathroom. In addition, a small amount of condensation or dust that gets onto the bathroom floor will make the waterproofing layers porous, which means there is a risk of loss of tightness.

After thoroughly drying the mastic, you can proceed to the cement-sand screed. Sometimes craftsmen recommend making an additional sealing layer based on dry waterproofing. It is diluted with water like a solution and poured like a self-leveling floor. From an efficiency point of view, such isolation is not necessary. If tiles are laid on the bathroom floor, the easiest way to make a screed is from a regular mortar with the addition of a liquid modifier that improves the density of the mixture.
If the thickness of the screed layer is less than 30 mm, then the cement-sand mortar will need to be reinforced with mesh, especially at the entrance to the bathroom and in places where heavy objects are installed, for example, a boiler or washing machine.
The second method of waterproofing a bathroom floor
There is also a second method of installing waterproofing under tiles; it is usually used when it is necessary to insulate the floor in the bathroom. Insulation of the floor in the bathroom can be done in two ways:
- Expanded clay granulate. In this case, ordinary tile adhesive is applied to the prepared floor, after which a layer of fine granulated expanded clay, 4-5 cm thick, is poured. After leveling, the insulation is poured with a small amount of liquid concrete mortar with a 50% addition of the same glue;
- Extruded polystyrene foam. Glue is also applied to the concrete base of the bathroom floor and EPS sheets are laid, but not foam plastic. The joints between the sheets are rubbed with adhesive.

After the insulation has been completed, it is necessary to waterproof the floor. For this purpose, tricky concrete is used. It is quite simple to make - three parts of the dry mixture are added to two parts of ordinary cement mortar to prepare waterproofing. The result is a very viscous lumpy mixture. This mixture is laid on the surface of expanded clay or slab insulation and stretched with a notched trowel, like plaster. After leveling the laid layer using floor markers or a laser level, it is necessary to smooth it out - the surface is lightly rolled with a jelly-like solution of slab adhesive using a roller. The result is a slightly rough subfloor surface with good waterproofing characteristics.

Laying tiles on the bathroom floor
After about a day, you can lay a sheet of plywood on the bathroom floor and begin laying tiles. Initially, we calculate the square footage of the floor in the bathroom and unpack required amount packs. This must be done before starting work in order to select the tiles for the floor by shade and check for defects. The size and geometry of the tiles are checked separately. Since the floor in the bathroom rarely coincides with the multiple size of one tile, you have to look for the most convenient location of the line for laying the cut pieces.

What is worse will go under the bathtub and for scraps, a washbasin and a washing machine; the most even part will be laid out on the front part of the floor at the entrance and in the center of the bathroom. You must immediately make marks on the location of the tiles on the floor with a marker. In a similar way, a pattern of several shades is selected.
Tile adhesive is prepared in 15-20 minutes. Before starting work, in addition, you will need to soak the material in water for about the same time. The more porous and lighter the tile, the longer it needs to be wetted. If this is not done, the ceramic, like a sponge, will take water from the glue and fall off the floor in a couple of hours.

Advice! Use a two-beam laser level to lay tiles; even the simplest Chinese models can simplify the leveling process and make the process of shrinkage of ceramic adhesive visual.
The volume of the adhesive mass should correspond to the amount of ceramics that can be laid in 25-30 minutes. Usually this is 5-6 pieces. The glue is applied to the floor and rubbed with a notched trowel. Then it’s a matter of technique, the dry-wiped ceramics are laid and lightly pressed with rocking movements, excess glue is removed only after the final leveling of the tile plane.
Conclusion
After the tile adhesive has set, this is about 4-5 hours, the excess is carefully wiped off with a damp sponge, most of the mass is wiped out from the seams, but no more than 4-5 mm. A day later, the seams are treated with a penetrating waterproofing solution and rubbed with tinting paste. Simply grouting the bathroom floor with silicone sealant will do nothing; moisture will still penetrate under the base of the ceramic, even through the sealant. Whereas a special solution remains sealed for 5-6 years. This is the main difference from laying ceramics on the floor and walls of the bathroom.
Renovating a bathroom, especially if you do it yourself, is a complex, expensive undertaking that takes a lot of time and effort. The main problem for inexperienced craftsmen is the floor in the bathroom. The microclimate of this irreplaceable room requires the materials used to have increased resistance to moisture, temperature fluctuations, and readiness for serious loads.
The floor covering mainly performs a waterproofing function, protecting the concrete base from destruction due to contact with water. This article will tell you how to choose a material for flooring, level it, and also waterproof it with high quality.
Bathroom microclimate
Flooring is a material used to cover the concrete base of the floor inside the premises being renovated. Its type and performance characteristics depend on the conditions of the place of use. From this point of view, the bathroom is considered a demanding, complex room, where the finishing is affected by a whole range of negative factors.

Increased air humidity, direct or indirect contact with water, temperature changes, and hot steam lead to premature wear and loss of the decorative qualities of the material. When planning repairs, keep in mind that the materials used are affected by the following factors:

Important! If you are planning a renovation, keep in mind that the bathroom floor is exposed to water, temperature fluctuations, steam, and harmful mold microorganisms. All these factors have a negative impact on flooring. Therefore, the cladding is carried out with specially developed materials with water-repellent properties that will last in such difficult conditions at least 10-15 years.
Requirements for floor coverings
When carrying out repairs yourself, it is difficult to do without the help of experienced craftsmen, because choosing a material that will last in the microclimate of the bathroom is quite difficult without professional help. Not every floor covering is suitable for rooms with high humidity; it must have high degree moisture protection, low porosity and absorbency, resistance to stress.

To ensure that the floor in the bathroom does not have to be replaced a couple of years after installation, choose materials that meet the following requirements:
- Moisture resistant. No surface inside the bathroom is safe from contact with water, but the floor is at risk. The coating is exposed to air with high humidity, warm steam, condensation, not to mention situations when emergency leaks occur due to plumbing failure. Therefore, floor covering materials must have a maximum degree of protection against moisture, minimal porosity and absorbency.
- Mechanical strength. When renovating a bathroom, you need to take into account that the floor covering is subject to high mechanical loads, since heavy equipment and plumbing equipment are installed on it. High-quality floor covering material is resistant to point impacts and is not damaged by external influences.
- Low slip coefficient on wet surfaces. An incorrectly selected floor covering can often cause serious injuries due to falls. Therefore, experienced craftsmen recommend paying attention to materials with a textured, rough surface that does not become slippery even when wet.
Note! If you are planning a bathroom renovation in the short term, choose materials for waterproofing and floor coverings with the maximum level of moisture protection. This requirement applies not only to finishing, but also to putty, grout, and screed.
Floor construction
Installation of floor coverings for standard sanitary rooms multi-storey buildings made of panels, brick, and monolithic concrete differs only in decorative finishing material. If in houses of recent construction do-it-yourself bathroom renovation most often consists of replacing the cladding, then in “Stalin”, “Khrushchev” buildings, and even more so in buildings more early years more serious reconstruction is required. The floor in the bathroom of any home consists of several materials that form a “waterproofing cake” of the floor, laid as follows:

Interesting! When renovating a bathroom with their own hands or with the help of professional craftsmen, many homeowners install heated floors. This term refers to a special technology for installing flooring using a thermal cable that connects to the electrical network and heats the surface of the floor covering.
Waterproofing the floor
Having decided to do bathroom renovations with their own hands, homeowners are faced with a difficult task - creating a reliable hydraulic trough. In typical houses, they were carried out using fused materials, which is considered a very effective method of preventing water leaks in interfloor ceilings made of concrete.
The hydraulic trough made of roofing felt wears out over time, cracks and bald spots form on it. Ideally, it requires replacement after 10-15 years, but in modern realities lasts more than 20-30 years. Therefore, if renovation begins in the bathroom, the old decorative coating, waterproofing and even screed are dismantled. The new hydraulic trough is equipped with the following materials:

Important! When applying a waterproofing layer before making a bathroom floor and laying a decorative coating, do not forget that drying is important technological process, which cannot be accelerated or violated. Some types of waterproofing polymerize and harden within 10-14 days.
Types of cladding
To make quality renovations in your bathroom with your own hands, you need to choose the right decorative floor covering. This decision depends appearance finishing, lifespan of the floor and comfort of use in the bathroom. Experienced craftsmen It is recommended to use materials with a high degree of moisture protection with a warm, rough surface that resists slipping for floor coverings. The following options are popular:

Note! Flooring begins with careful preparation of the surface. To ensure an ideal result, the floor is first leveled, puttied, and then coated with a primer that increases adhesion.
Video instruction
Bathroom renovation is one of the most time-consuming tasks. The reason for this lies in the fact that there are communication pipes in the bathroom and constantly high humidity. You will have to overcome more than one obstacle when arranging the floor, and use special moisture-resistant materials. In this article, we will tell you how to make your bathroom floor aesthetically pleasing, strong, durable and protect yourself and your neighbors from flooding.
There are various options for arranging floors in bathrooms. This depends on the subfloor material and many other factors. In almost all apartments of multi-storey buildings in our vast Motherland, the installation of a bathroom floor can look like this:
- Concrete slab ceilings - the initial foundation.
- Rolled or built-up waterproofing.
- The concrete screed is about 5 cm thick - in old Soviet buildings it is not made very well.
- Waterproofing again - at this stage it can be coated or painted.
- Leveling screed - made of cement-sand mixture or modern self-leveling mixture.
- Flooring: various tiles, wood, waterproof laminate, cork flooring, linoleum, self-leveling flooring.
Scheme of a “warm floor” in the bathroom
A relative innovation is the “warm floor” system, which can also be installed in the bathroom. It is installed at the leveling screed stage and will make your stay in the bathroom even more comfortable. The presented scheme for arranging a floor in a bathroom is universal. For its high-quality implementation, it is necessary to responsibly and painstakingly complete the following stages of work.
Preparing the rough surface
If renovations are being done in a residential apartment, the first step is to remove any old flooring. If it was linoleum, then we pry it with a spatula or knife and rip it off. But most often in bathrooms, tiles were laid on the floor, so you can’t do without a hammer drill. We break the tiles and remove all the remains. During the dismantling of tiles or other types of tiles, the screed will most likely be damaged: cracks, splits will appear, and it may even crumble.
Therefore, it is advisable to remove the screed too. The concrete foundation should appear before us in all its glory. We sweep all construction debris out of the bathroom, then vacuum it to get rid of dust particles. At this stage, it is necessary to seal all the cracks and holes that are visible to the naked eye so that they do not increase in the future. To do this, you can use “tile” glue.
If the floor in an apartment is installed “after the builders”, there will be less preparatory work, since nothing needs to be removed. The concrete floor must be cleared of debris, dirt and visible cracks must be sealed.
Before applying waterproofing, the surface should be primed. Therefore, we treat the floor with a primer, thereby improving the adhesion of the waterproofing material to the floor surface.
When choosing a material for waterproofing, you should be guided by the exact stage at which it is applied and what part of the surface we want to isolate.

Waterproofing the floor in the bathroom is carried out with an overlap of 10 cm on the walls
If we have a floor slab in front of us, and not a concrete floor, then first we take roll or welded waterproofing. You can use bitumen mastic and thoroughly treat the entire surface, cracks and joints with the walls, making an overlap of at least 25 cm on them.
You can apply coating or painting waterproofing to the concrete floor. And if you plan to insulate the walls, for example, at the junction of a shower stall or washbasin, then you should choose adhesive waterproofing.
Application of coating waterproofing
- Prepare the mixture. To do this, pour the dry component into a container, fill it with the liquid component and stir. The ratio should be 1:1, knead thoroughly until a homogeneous consistency is obtained.
- Using a roller, apply the mixture to the entire surface of the floor. IN hard to reach places and places of connection with walls and communications, you can use a spatula or brush. Consumption is approximately 2 - 3 kg/m3, but more precise figures are indicated on the packaging.
- We lay waterproofing tape at the joints and joints.
- We form a “trough” that will protect against water seeping through the walls. To do this, in parallel with coating the floor, we apply the mixture to the walls so that its upper edge protrudes above the level of the future floor by 5 - 10 cm.
- Apply the waterproofing mixture in two layers. After applying the first one, we take a break of 4-6 hours. Then apply the next layer and wait for it to dry. We resume all subsequent work after at least 24 hours.
Easy painting method

Painted waterproofing of bathroom floors is short-lived
Painting method lighter than coating. Its significant drawback is its fragility. Average term painting waterproofing service 3 - 5 years.
If you still decide to use this particular method, then apply the solution to the floor and walls with a brush or roller.
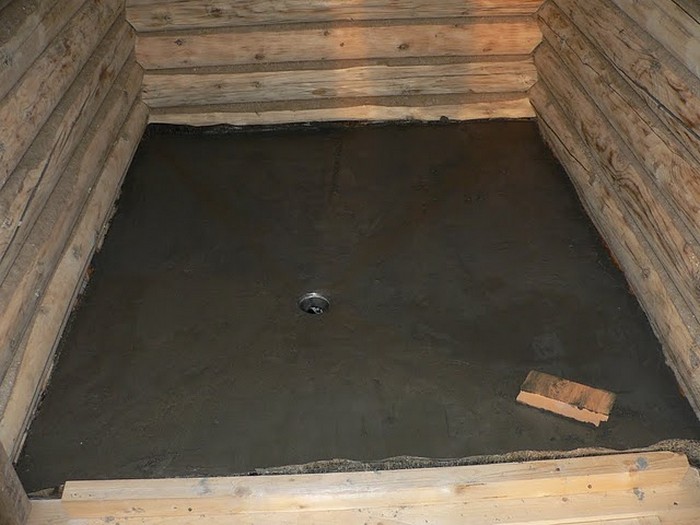
Important! Waterproofing the floor in wooden house will require additional action. To protect the wood from the influence of moisture, thin linoleum is laid on the subfloor with an overlap of 5–10 cm on the walls. This will serve as additional protection.
What to decide before pouring the floor
Since you have decided to make the bathroom floor with your own hands, it is quite possible that you will want to move the toilet to another place, install a drain so as not to flood your neighbors, or install a “warm floor” system. It is at this stage that the decision should be made as to whether such constructive changes will be undertaken.
If you plan move the toilet, it must be connected by a pipe to the sewer. For this pipe to function properly, it must be at an angle. In this case, the overall floor level will rise by at least 10-15 cm, or the toilet will have to be installed on a separate pedestal. Therefore, at this stage we dismantle the old toilet, install it in a new place and connect it to the drain pipe. You don’t have to install the toilet yet, but just install the pipe.
Drain equipment will also raise the floor level by a few centimeters and for the same reason. In addition, the floor will need to be poured with a slope towards the drain so that water from the entire area of the bath flows towards it. We install the drain and mount the outlet pipe. In the future, it will be necessary to ensure that the neck of the drain protrudes above the screed. In the meantime, in order not to clog the pipe, it is worth temporarily plugging it with something, for example, a rag.

Water-heated floor pipes in the bathroom are installed before the floor is poured
Increasingly in bathrooms "warm floor" system is installed. The tiles are very cold to the touch, it is not very pleasant to stand barefoot on them in the morning after a warm, cozy bed. And a “warm floor” can provide a very comfortable feeling. You can install a water or electric floor in the bathroom. The “warm floor” system, consisting of pipes through which warm water passes, is connected directly to the heating pipe, if one is provided in the bathroom. Another way is to connect to pipes with hot water or heated towel rails. Despite the doubts of the masses, electric underfloor heating can also be safely installed in the bathroom. The only drawback of this choice is the high energy costs, but the electric floor is extremely easy to install.
Important! If you want the water to remain in the bathroom in case of flooding and not flood the entire apartment or house, the floor in the bathroom must be made lower than the general level of the rest of the rooms. The second solution to the problem is to equip a high threshold so that the water does not overflow.
Therefore, before pouring the floor in the bathroom, we install all additional communications and determine at what level the floor and threshold should be.
Leveling the floor - screed
Leveling the bathroom floor is a must. Any floor covering, no matter what you choose, requires an almost perfectly flat base, especially if it is tile. A high-quality screed is the key to the durability and strength of the finishing coating. That is why this issue should be approached with full responsibility.

Leveling cement-sand screed flooring in the bathroom is necessary if the base has significant shortcomings or elevation changes
Previously especially large selection there was none, and everyone was screeding the floor cement-sand mixture. Today the market can offer a lot building mixtures based on non-shrinking cements, as well as others self-leveling mixtures. All these options have the right to life.
Screed technologies various materials are not too different and have general structure:
- On the walls we outline the level to which we will fill the screed, taking into account whether we have additional pipes that need to be hidden. To do this, you can use water or laser level.
- We install beacons at a distance of 1 m from each other. You can use wooden blocks metal corners, or you can purchase a plastic T-shaped profile. We fix them with cement mortar. To do this, lay out tubercles of mortar on the floor, to which alabaster has been added. We lay the beacons and, constantly monitoring the horizontal level, press them into the solution. Align the beacons with the marks on the wall.
- Prepare the screed solution. This can be a traditional cement-sand mixture, or self-leveling if the floor has minor unevenness. Mix them in a bucket using a drill. We follow the instructions on the packaging of the self-leveling mixture. We make sure that the amount of water is optimal.
- Fill the mixture to the top edge of the beacons. The self-leveling mixture will fill all empty space without outside intervention, and for leveling cement mixture we use the rule.
- We apply a rule, the length of which is at least 20 cm greater than the distance between the beacons, to the beacon strips. We stretch it towards ourselves, thereby filling the voids, leveling the solution and removing excess that protrudes beyond the beacons.
- To remove air bubbles in the self-leveling mixture, roll over it with a needle roller.
- We wait until the screed dries. The period depends on the brand and composition of the leveling mixture. It is extremely important to follow the instructions and maintain the required microclimate in the room, avoiding drafts.
Important! If you decide to install an electric “warm floor”, then the screed is poured in two stages. Beacons do not need to be installed. Pour the first layer and wait for it to dry completely. We lay thermal insulation and lay out a “warm floor”. Pour in the second portion of the leveling mixture and level it.
Which flooring should you choose?
Any finishing floor covering can be laid on a floor surface leveled with a screed. This will be the final stage of arranging the floor in the bathroom.
Linoleum in the bathroom rarely placed. Rather, it is an economical option or a temporary solution. Laying linoleum is very easy, it does not require additional care, easy to clean, serves as waterproofing, but at the same time quickly “wipes off” and becomes unpresentable.

Natural cork flooring in the bathroom is a good solution for lovers of comfort and warmth
Will provide maximum comfort. The cork is very pleasant, warm to the touch, and it is impossible to slip on it, which cannot be said about tiles. It springs very well, returning to its original state. In addition, it does not absorb foreign odors and water, and is also resistant to the influence of pathogenic flora; fungi simply do not multiply on it. There is a very significant nuance. Only solid cork has the ability to not absorb moisture, and not HDF-based floors. You should choose a cork array 4 - 6 mm thick, glued to the base. Another important advantage of cork flooring is its naturalness, environmental friendliness and hypoallergenicity.

The self-leveling floor in the bathroom can mentally transport you to other lands
We started equipping it relatively recently. Firstly, this floor is easy to install. Actually, last layer The leveling screed can be filled with a self-leveling floor. Secondly, such a floor itself has water-repellent properties, so there is no need for additional waterproofing. Thirdly, the operating temperature of the self-leveling floor allows you to install a “warm floor” system directly into it. And one of the most important advantages of this flooring is the variety of patterns and colors. You can arrange a floor that imitates a natural stone, or use other decorative fillers.
But this technology also has a number of disadvantages:
- It is necessary to prepare a perfectly level base.
- Freshly prepared mixture is extremely toxic and flammable.
- Unnatural coating.
How to make a self-leveling floor in a bathroom
All preparatory work has already been completed: the waterproofing has been completed, the screed has been poured. All that remains is to apply the self-leveling floor mixture:
1. Prepare the mixture. To do this, pour the dry component into water and knead with a drill at intervals of 1-2 minutes until you get a homogeneous consistency.
Important! Please note that to prepare a self-leveling floor mixture, it is the dry component that is poured into the water, and not vice versa, as is the case with other mixtures. The resulting solution begins to harden within half an hour to 40 minutes, so it makes sense to prepare it in portions, and not all at once.
2. Be sure to observe temperature and humidity conditions. The optimal temperature is +15 - +25 °C, humidity no more than 80%.
3. We will pour the mixture in strips. We fill the first strip along the wall, starting from the corner opposite the doorway.
4. Level and adjust the thickness of the layer with a squeegee or spatula.
5. Roll the layer with a needle roller to remove air bubbles.
6. We fill all other strips according to this algorithm: fill, straighten, remove air.
7. The self-leveling floor dries in about 3 days, but you can use it 6 - 12 hours after pouring, by which time it will have acquired sufficient hardness.
Important! The “warm floor” system can be turned on no earlier than after a week.

Bathroom floor tiles - classic traditional version
Bathroom floor tiles“entered” the room with a confident step for a long time and continues to occupy a leading position among bathroom floor coverings. A variety of shapes and materials allows you to satisfy the taste of even the most sophisticated buyer. The disadvantage of tile is its relative fragility. If a tile is cracked, it must be replaced, but while the damaged one is being dismantled, others nearby may also be damaged.

Wooden floors in the bathroom look very nice, but are not very practical
It can only be made of teak or larch, since not every wood can withstand constant changes in humidity levels. The arrangement of such a floor requires careful additional waterproofing. And although wooden floor natural, warm, beautiful, it makes sense to lay it instead moisture resistant laminate.
Laying the flooring will mark the end of the work on arranging the floor in the bathroom. No matter how long this takes painstaking process, this is an irreplaceable experience that should be in the luggage of every efficient owner.
To create a comfortable, beautiful and practical floor in the bathroom, it is necessary to find a balance between the technical capabilities of the design of this section of the floor and the desired finishing coating of the floor, which determines all its consumer qualities.
Here are the main problems that need to be addressed:
- Possibilities for waterproofing.
- Possibility of applying the desired floor covering.
- Ability to do everything necessary work the selected option in a room where people live.
Waterproofing the bathroom floor is required by standards for multi-apartment housing. Even in an individual home, its installation is beneficial - this protective structure will ensure the safety of the underlying premises.
The easiest way to install a bathroom floor is on a monolithic or prefabricated reinforced concrete floor. This design allows you to arrange all the necessary layers from durable and rigid materials based on cement mortars. There is no need to limit yourself in the choice of waterproofing and front layer - on this basis you can do anything.
Many other types of prefabricated and monolithic floors, both ancient and modern. For example - structures on steel or reinforced concrete beams with filling different types, prefabricated structures made of concrete and ceramic elements.
The arrangement of the floor in the bathroom is a little more complicated. wooden beams- this type of construction is preserved in some multi-apartment and individual buildings of old construction. Due to the fact that modern wooden floors are advantageous in some cases and in new construction houses, installing a floor for such a bathroom is still important today.
Natural restrictions for floors on wooden beams and on some other types of floors are associated with the following features:
- the need for very reliable waterproofing wooden and steel beams;
- restrictions on the weight of floor structures related to the load-bearing capacity of the floor;
- the risk of deformation associated with the characteristics of wooden beams and wooden floorings on them.
Independent installation of the floor in the bathroom. Floor structure
When planning a DIY floor installation for your own bathroom, a home craftsman must first of all evaluate the technical capabilities of the device desired finish surfaces. Here's the basic floor design (from bottom to top):
- The floor structure is most often a reinforced concrete slab.
- Leveling screed.
- Waterproofing layer.
- Leveling screed.
- Flooring.
It is necessary to ensure that all the required layers will be placed in the space above the floor structures to the level of the finished floor. This is important both for new houses and for old ones where the bathroom floor is being renovated. In almost all houses, builders have provided the required distance from the ceiling to the finished floor, so for the floor conventional design all the necessary layers can be completed, even taking into account that the bathroom floor must be 20 mm below the finished floor in the living areas.

Perhaps the volume from the slab to the finished floor will not be enough to install water heating or use floor finishing from elements of considerable thickness. In this case, the floor for your own bathroom can be made with certain deviations from conventional solutions in order to save space for the implementation of your plans. Here's what you can do to make the layers of the floor structure thinner:
- use the thinnest screeds from self-leveling mixtures;
- use electric heating instead of water heated floors;
- arrange coating waterproofing together with the lining.
In any case, when thinking about the floor in the bathroom, it is important to carefully measure the available spaces and calculate layer by layer all the structures that you plan to make with your own hands. Received in in writing the list of floor layers indicating their thicknesses will fully correspond to the professional design solution made by a specialist. 
The order of work on installing the floor in the bathroom
The floor for any bathroom begins with a leveling screed - it is needed for reliable waterproofing. If the surface of the monolithic reinforced concrete floor is sufficiently flat, this screed can be omitted, but waterproofing can be installed directly on such a slab.
Pasted waterproofing is carried out with roofing felt glued to bitumen mastic. This technology has proven its reliability for over a hundred years. The corners must be carefully formed - without fractures or air bubbles, and the edges of the roofing material should be brought up to the walls by 50-100mm. In place of the threshold, you can lay a block; over time, it will be replaced by a box threshold, to which you need to glue the corresponding roofing material flap.

If the height of the finished floor relative to the ceiling is large, you can reach this level using sheet extruded polyurethane foam - EPS; this is easier than installing a thick screed. EPS sheets are laid on a layer of waterproofing, and the next layer of screed is made on top of them.
On top of the waterproofing you can arrange plumbing and sewer pipes- the next screed will hide them. The height of this subsequent screed is usually higher than the lower one - it can reach 40-50 mm or more. When making a bathroom floor yourself, it is best to count on the fact that you will not be able to obtain a flat surface of the second thick screed with your own hands with high precision. It is much better to complete this screed with a layer of self-leveling cement-based mixture. On such a flat base it is not difficult to carry out any finishing - it is important to accurately maintain only the level of the surface of this second screed.
After finishing the second screed, it is time to lay the floor covering, for which it must be selected in a timely manner.
Choosing a floor covering for a bathroom
The most common ceramic tile coating is durable, wear-resistant, beautiful, and practical in maintenance and cleaning. Disadvantages include a feeling of cold and a slight risk of slipping. Floor tiles are much stronger than wall tiles and have a less slippery matte surface. It is advantageous to install such floor finishing for a long time.

The floor in the bathroom can be made of natural stone - there are dozens of varieties of marble alone, cut into thin tiles. This is a luxurious finish that requires an informed design decision. Marble and other types of stone are beautiful, durable, and wear-resistant, but, like ceramic tiles, they can feel cold to the touch and sometimes slippery.
The linoleum bathroom floor is a simple, inexpensive, practical design, ideal for use in a limited period of time. The choice of patterns is very wide, this floor is non-slip and even seems warmer than tiles. The advantages of a special waterproof laminate, which can also be used to make bathroom floors, are similar. Laminate feels slightly cooler to the touch than linoleum
A neat bathroom owner can make the floor for his bathroom even from carpet. This is a very pleasant-to-touch coating that only needs to be protected from splashes of water and be prepared for frequent replacement due to accelerated failure from inevitable splashes.
A wooden plank floor for a bathroom embodies all the beauty of an eco-friendly natural flooring, but is technically risky due to the risk of warping and other effects from high humidity.
It is best to make such a floor from mahogany - it does not rot, or from larch or oak, it is advantageous to lay it along the joists - so that the wood is ventilated from below.
As an option, it is possible to use boards that are generously treated with waterproof varnish on all sides.
Modern self-leveling floors for individual bathrooms are now available to everyone. This type of floor is beautiful, very smooth, with a natural stone pattern, and can be easily done with your own hands. The disadvantage - common for many other floors - is the feeling of a cold surface, as well as noticeable odors of a synthetic nature when using it.

An interesting, beautiful and surprisingly warm to the touch floor for a home bathroom made from sheet cork. A recognizable appearance, softness and warmth will make a room with such a coating comfortable and cozy, and its sufficient wear resistance and careful handling will ensure long-term operation.
Floors on wooden beams
When thinking about how to make a bathroom floor using wooden beams, you need to solve two technical problems:
- Do not create excessive load on beams, the load-bearing capacity of which is inferior to many other types of floors
- Ensure that the beams are insulated from moisture and, especially, from direct soaking.
If the beams are powerful enough, then you can build a thin reinforced concrete slab with a thickness of 70, 60 and even 50 mm on top of them, and on it you can make any floor with your own hands, as in a house with reinforced concrete floors.
Quite risky, but quite realistic with careful, jewelry-precise execution, a coating that contains an intermediate flooring, for example, from OSB boards- especially for installing roofing felt waterproofing. It can be covered with plank flooring on joists and even facing with ceramic tiles. The finished floor plane for such a bathroom is suitable for laying laminate, linoleum, carpet, and cork.
The most reliable waterproofing layer for wooden beams is a solid or welded continuous sheet of stainless steel. A home craftsman who manages to order or make such a structure from a stainless steel sheet in the form of a pallet with his own hands can be sure that the beams will neither get wet nor rot.

Correct and balanced decision on floor design
For many home craftsmen, making and installing many structures with their own hands is easier than deciding what to cover the bathroom floor with. For a successful and balanced decision, it is necessary to adhere to some specific and understandable logic of priorities. Here is an example of a methodologically sound sequence of consideration of floor problems for your own bathroom:
- Based on the previously planned type of floor finishing, the composition and thickness of all layers of the floor for the designer bathroom are assigned.
- All existing promising engineering communications and their impact on the implementation of the floor are checked.
- When all technical problems have been resolved, we can begin to refine the front layer. Perhaps thinking about the technical side of the matter will allow us to clarify the design solution. As soon as you are confident in the correct choice of the design of the layers of such a floor and the covering material, you can get to work.
The accuracy and attentiveness of the master allows him to perform many works more carefully than specialists do.
The peculiarities of the processes occurring in the bathroom dictate certain requirements for all structures and finishing materials used in this room. The most troublesome part is installing the floor, since there is a high probability that a small amount of water will systematically enter here. When installing a bathroom floor in a private home or country house, there may be several design options depending on what base, concrete or wood, the flooring is laid on. It is especially important to correctly carry out all the work on the second floor in a private house in order to reliably protect the lower rooms from flooding. If you decide to make the floor yourself, then the photo and video at the end of the article, as well as our recommendations, will help you.
Requirements for bathroom floors

Regardless of what kind of bathroom floor you will make (concrete or wood), you need to know what requirements apply to the surface in this room:
- The entire structure of the bathroom floor must be reliably protected from moisture, since the risk of spilling some amount of water cannot be ruled out. This is especially important if the bathroom is located on the second floor in a private house or in a country house.
- Due to constant high humidity Decoration Materials must have excellent moisture resistance, which guarantees the durability of the coating.
- Since many utilities are laid in the bathroom, they need to be hidden in the floor structure, and the place where they are laid through the floor slabs must be well insulated from moisture. Moreover, this applies equally to concrete and wooden floors.
- The weight of sanitary equipment is considerable; in addition, the floor in the bathroom must withstand vibration loads from the washing machine.
- The level of the finishing coating in this room should be slightly lower than the floor level on the floor. This will prevent water from spilling out of the bathroom when flooded.
- In a private house or country house, it makes sense to make the floor in the bathroom on the first or second floor sloping towards the drain, which goes into the sewer riser. This will save you from many problems if a large amount of water gets on the floor. Please note that this can only be done in country house, cottage or country house, in an apartment in a multi-storey building this is not feasible.
- The floors on the ground floor in a house without a basement must be carefully insulated to increase the comfort of the room. In addition, on any of the floors you can arrange heated floor coverings in the bathroom.
Preparatory work

- First, you need to remove all the furniture from the bathroom and remove the sanitary equipment.
- Next, the old coating is completely dismantled. In this case, it is worth not only removing the old finishing layer, but also dismantling the old screed or other layers down to the wooden or concrete base.
- Next, the surface of the base is cleared of debris and inspected. If there are any cracks, chips, holes or cracks on the concrete surface, they are all carefully sealed with a repair compound. We will describe how to prepare a wooden base further in our article.
- Next, the concrete surface must be primed. For these purposes, it is better to use antiseptic penetrating mixtures that will protect against fungus and mold.
Waterproofing

Primary waterproofing can be done with your own hands using the following materials:
- Roll insulation performed using modern roofing felt on a self-adhesive or mastic base. It is better to choose products with a rubberized layer. Before installation, the floor in the bathroom is covered with bitumen mastic, which is also spread on the lower part of the walls (to a height of 20 cm). After this, strips of roofing felt are laid. In this case, it is necessary to overlap the adjacent strips by 10-15 cm. Ruberoid is also applied to the walls.
- Coating waterproofing. These ready-made compositions applied to the walls of the room using a roller or brush. The joints between the walls and the floor must be sealed with a special sealing tape, which is firmly pressed into the coating compound previously applied to the joints. After this, the entire floor surface and tape are covered. After 6-8 hours, the treatment is repeated. After a day, further work can begin.
Advice: you should not use polyethylene film instead of roofing felt, since over time it may change its characteristics due to contact with concrete.
Screed
After waterproofing the bathroom, you can begin installing the screed. It is quite difficult to understand the sequence of actions from photos on the Internet, especially if you do the work yourself, so we offer a step-by-step guide:
- First you need to determine the height of the screed. Don't forget that the finished floor level should be lower than the rest of the floor. After this, we draw a zero level line on the walls of the room.
- If the height of the screed is within 5-7 cm, then it is better to provide reinforcement. It can be made using a steel rod or a special reinforcing fiberglass mesh. A screed less than 3 cm high will not be very strong.
- To install beacons, you can use a steel plaster profile. The profiles are installed no closer than 30 cm from the walls. The spacing of the beacons between each other is determined by the length of the rule. We fix the beacons on mortar piles so as not to damage the waterproofing. We set all profiles by level.
- After the solution has hardened under the beacons, you can begin screeding. For these purposes you can use cement-sand mortar, prepared in a ratio of 1 to 3 or ready-made dry mixtures.
- We place the solution between the beacons and level it with a rule over their surface.
- After pouring, the screed is covered with plastic film for maturation and periodically moistened with water. After three days, the film can be removed.
- When the screed has completely hardened, you can proceed to laying the selected floor covering.
Wooden floor

In a wooden house or country house, floor beams are usually used, so laying tiles in the bathroom has to be done on a wooden rough base. When doing work with your own hands on preparatory stage it is very important to carefully examine the base and draw conclusions about their bearing capacity and durability. To carry out a more thorough inspection, it is necessary to remove the boardwalk and inspect the logs:
- Rotten or cracked joists must be replaced.
- To prevent floorboards from sagging under the weight of ceramic tiles, the joist pitch should not be more than 50 cm. Otherwise, you will have to install additional elements to decrease the step.
- All beams must be aligned in the same horizontal plane.
- We lay waterproofing material on top of the joists.
- The sub-wood floor also needs to be repaired. We replace dilapidated and cracked boards, and strengthen creaking elements.
Advice: to protect all structural elements from moisture, subfloor boards and joists must be treated with antiseptic and moisture-repellent compounds.
- If the tiles are laid not on a leveling layer of gypsum fiber board or plywood, but directly on boards, then they must be thoroughly cleaned of old paints and varnishes.
- At the preparatory stage it is possible to provide additional insulation floor. To do this, expanded clay, mineral wool or polystyrene foam boards can be laid between the joists.
- To ensure ventilation of the wood floor underneath the flooring (whether you install tiles on GVL sheets, plywood or directly onto the subfloor boards), it is worth setting a gap between the floorboards. We also leave a 1 cm wide ventilation gap along all walls.
Methods of laying on a wooden base

So that you don’t have to look for photos or videos on the Internet about how to lay tiles on a wooden floor, we will describe several methods. Our step-by-step guides will help you do everything yourself.
Laying on boards

- After preparing the boardwalk, it is necessary to apply a thin waterproofing layer. To do this, the surface is treated with latex impregnation. After the composition has been applied to the floor using a wide brush, it is covered with a fine-mesh fiberglass mesh. After the composition has dried, the mesh is additionally attached to the floor with self-tapping screws. This way we will get not only a waterproofing layer, but also a reinforcing layer.
- To improve the adhesion of tile adhesive to the prepared surface, prepare a composition of coarse sand, silicate adhesive and water in a 2:2:1 ratio. This composition needs to be treated with the floor surface. After drying, floor tiles are laid on this rough monolithic surface.
Thin screed
- We carry out the waterproofing stage of the floorboards in the same way as described in the previous method.
- Now we attach a damper tape along the perimeter of the room along the walls. It will protect the thin screed from deformation damage.
- For reinforcement, you can use thin fiberglass or metal mesh. We lay it on the floor.
- We install the beacons on the basis that the height of the screed will be about 30 mm.
- For work, it is better to use ready-made dry mixtures with fiber reinforcement. They are easier to prepare and lay, and the layer will be more durable.
- We treat the mature screed with a primer, after which it is ready for laying the finishing coating.
GVL base

You can find many photos on the Internet that show how to do alignment using GVL. To make it clearer for you, we present the sequence of performing this method:
- The plank base is treated with antiseptic impregnation and covered with waterproofing material. For these purposes, you can use plastic film, glassine or other rolled materials.
- GVL sheets are laid in staggered order. Since they have a tongue-and-groove joint, adjacent sheets are glued together along the locking part and additionally reinforced with self-tapping screws. There is no need to fasten the gypsum boards with self-tapping screws in the center and along the perimeter to the wooden base.
- To make the base under the tiles especially strong, gypsum fiber board sheets can be laid in two layers. In this case, the seams in the layers should not match.
- After this, the surface of the GVL is treated with a primer. After it has dried, you can lay the floor covering.
Laying tiles on plywood, OSB or chipboard

- The rough plank flooring is subjected to antiseptic treatment. After it dries, the floor is covered with waterproofing material. You can use the same materials that were described in the method above.
- Sheets of plywood or other wood products are laid out in space. In this case, you need to leave a gap of 5-10 mm between them. The same distance must be set back with slabs from the walls. This will allow the material to freely expand and contract due to changes in humidity.
- Wood boards are attached to the floor with self-tapping screws in increments of 15-20 cm. They are screwed in along the edges and in the central part of the sheet. The fastener caps are recessed into the thickness of the slab.
- We fill all expansion gaps with mounting foam or sealant. Cut off excess after drying.
- Next we make a waterproofing and reinforcing layer. To do this, we treat the floor with latex impregnation and lay a reinforcing mesh on it. After the composition has dried, we treat the entire surface of the floor with a silicate-sand mixture.
- After the mixture has completely dried, the base for laying floor tiles is completely ready.
Video instructions for installing floor screed in the bathroom.