Universal spanner. Don't even think about throwing away your broken wrench! How to make a ring wrench with your own hands
Hello everyone dear friends! Today we will do something very simple and effective adaptation, which will certainly come in handy for people who do auto repair, plumbing, carpentry, etc. Such a thing may well come in handy in ordinary household life.
This simple contraption is a universal wrench that can unscrew anything. The wrench copes well with any diameter of nuts and bolts, and it also has excellent adhesion to any smooth surfaces such as a water pipe.
Compared to a universal gas wrench, this design has certain advantages. A gas wrench has only two engagement planes, which in turn can deform the part being unscrewed under strong pressure. Our tool has a “soft” grip due to contact along the entire plane of the part being unscrewed.
Test for wooden log. On the left is our universal key, and on the right is the gas key.

Also, due to the specificity of its design, this wrench is endowed with the ability to work as a universal wrench with a ratchet mechanism: preventing parts from scrolling in the desired direction and easily being thrown to the beginning in the opposite position.
To make such a universal key you need only two parts:
- - Square metal profile 25x25, length 300 mm.
- - Motorcycle chain 500 mm long.

Universal key assembly
Assembly is incredibly simple and will take you no more than 5 minutes including preparation.All you need to do is weld one end of the chain to metal profile. It is better to weld on both sides of the chain.
This completes the assembly. The universal key is ready for use.

Using a universal key
Let's pass the second end of the chain into the center of the profile and you will get a ring that just needs to be put on the part that you want to unscrew.
In this tool, the chain is broken and the greater the lever force, the stronger the gripping force of the chain.
The key perfectly hooks both round and faceted objects. It doesn't make much difference to him whether it's a nut or a pipe.
Tests
Test key on a round pipe:

Sample wrench on hex nut:


The result in all cases is simply excellent. The grip is excellent. Doesn't turn anything around.
This miracle also perfectly unscrews plastic and polypropylene pipes, without significant deformation, which is so important when working with soft plastic.

This useful key won't take up much space in your car, garage or home. But it may definitely come in handy when you need it most.
So friends, feel free to make your own universal key. Be sure to watch the video of making and testing a universal key.
Wrote "universal" in the title wrench“and I seriously doubted it. What kind of key is this when we are talking about a real all-powerful master key-opener-twist, which can be made in a couple of minutes from an old and unnecessary bicycle chain. Having this homemade device, you no longer have to Google or Yandex something like “buy a universal wrench.” You will have a truly all-powerful tool at your fingertips if you pick up a rusty chain and decide to put in just a little effort.
So, let's go. First, we’ll tell you how this device is made, and then, using several examples, we’ll show how it can move mountains.
Making a universal wrench: minimum words and maximum photos
For making this fantastic simple tool you will need:
- unnecessary bicycle chain;
- a wooden block of such thickness that you can easily grasp it with your hand;
- a sufficiently long screw with a nut;
- drill with a diameter corresponding to the size of the screw.
From wooden block measure out a piece slightly longer than the width of your palm.
Carefully cut off the measured piece.

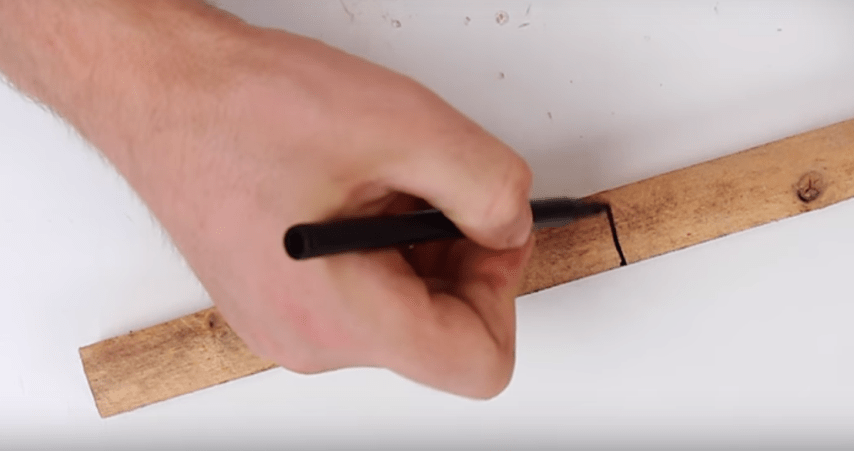
2-3 cm from the edge we mark a place for attaching the chain.

We select a drill with a diameter corresponding to the size of the screw.

Drill out through hole, into which the screw will fit freely and insert it there. Then we take the chain from which our universal wrench will be made, and find a collapsible link in it that allows us to open it.

Use an awl to remove the locking pad, disassemble the collapsible link, and then open the chain.


We put one of the outer links of the open chain on the tail of the screw.

We fix the link with a nut, which we then tighten thoroughly.


And now our universal wrench, which we just intended to buy, is ready. Now let's see how our miracle tool works and how to use it.
How to use a universal wrench and what it can do
The grip size of a homemade key can be selected by placing the chain link that provides required size capture loops.
This is how the loop turned out to be quite large.

If you hook another link onto the tail of the screw, the loop can be smaller.

As for the possibilities, for our instrument they are almost limitless. For example, they can easily open a stubborn cap on a plastic bottle.

With our wrench you can completely easily rip off a completely round old nozzle that has rusted to the country faucet.

A universal wrench made in this way will allow you to unscrew a rusted bolt of any size.

Our tool is capable of unscrewing the seemingly tightly stuck head of an old faucet.

So, we see that a simply made universal wrench is almost omnipotent. Do you like this thing? Do you want to praise us for reminding you of the existence of a homemade product that has been known for a long time, or does this tool seem unnecessary to you and you want to scold us? , write about your impressions, and your opinion will be immortalized on the Internet.
It is not uncommon that when unscrewing nuts, one arm of the wrench bursts under heavy load, and most often such a tool is sent straight to the landfill. I propose to breathe a second life into a broken wrench. As you might have guessed, for our homemade project we will need an open-end wrench with a broken horn.
For production we will need:
- open-end wrench with a broken horn, the size of a 17 mm nut;
- two M8 nuts;
- two M8 bolts, 40 mm long;
- a piece of metal plate 6 mm thick.
Manufacturing
We saw off the remaining horn from our key and level the surface with a grinder.


We also cut off the edges of the key on both sides.


Now we take a piece of metal 6 mm thick, apply it to the key and measure the distance at which to drill holes.


We drill holes for our M8 bolts.

We saw off the corners of the resulting workpiece, rounded the chamfers and polished it.

We thread the bolts into the holes, screw the nuts onto them and align them with the landing cuts on the key.


Now we weld the nuts into place and grind the weld.


How to use the key
After some simple manipulations, we received a good universal key for use. Using this key is very simple.We need to loosen the bolts and adjust right size bolt or nut. It is enough to tighten the clamping bar with the bolts by hand and you can unscrew the nut.


This is a useful tool that can be made from a broken key. Very good decision for those who want to give wrenches a second chance.
I also provide for viewing the video on which the article was written.
Dear site visitors " Labuda blog“From the material presented you will learn how to make a universal key yourself from a bicycle chain, a bolt and three nuts with your own hands. Presented step by step photos assemble the key and off we go..
Many of you have probably encountered such a problem... when the edges on a nut or bolt being turned off are a little knocked off and a regular wrench simply turns without performing its function. This can be solved with the help of a homemade chain wrench that works in compression, that is, the stronger the handle of the key, the stronger the chain will be clamped and thereby unscrew even the most eaten nut or bolt.
To make a universal key you will need a piece of a bicycle chain, two nuts and a bolt. We screw the nuts onto the bolt and weld a piece of chain to them so that we get a grip and weld it to the other side of the nuts. Next, we put the chain on the nut or bolt that needs to be unscrewed and tighten the bolt, thereby tensioning the chain, everything can be unscrewed)
Materials
- bicycle chain
- nut 2 pcs
Tools
- welding inverter
- Angle grinder (grinder)
Step-by-step instructions for assembling a universal key with your own hands.
And so, the necessary parts to assemble the key.

Two nuts are screwed onto the bolt.

We measure the chain, namely how much is needed from nut to nut.

We make a mark in the place where the chain should be riveted.

We clamp the chain in a vice and cut off the rivets using a grinder.


We knock out the rivets.


Then it is tensioned and welded on the other side of the nut.


Scale and excess metal are removed using an angle grinder (grinder)

Then unscrew the bolt and loosen the chain to the required diameter.

We insert the nut and tighten the bolt along the threads, thereby tensioning the chain and clamping the resulting connection.


Let's test the key in action.


We consolidate the material covered by watching the video. Enjoy watching)
Every time I've done an oil change on my van myself, I've had trouble changing the oil filter.
The reason is that to replace it you need to unscrew the cap, on top of which there is a hexagonal protrusion similar to a nut. Unfortunately I don't have a suitable one socket wrench, and for these purposes I used an adjustable or socket wrench, or a combination of both. The whole difficulty lies in the fact that in a limited space it is quite difficult to apply enough force to unscrew the lid.
Therefore, I decided to make a key designed specifically for this task.
What you will need
Tools:- - welding machine for electric arc welding.
- - angle grinder.
- - other tools (file, metal brush, hammer...).
- - a small metal plate 8 mm thick (probably thinner, but not less than 5 mm).
- - metal pipes(20 and 25 mm in diameter, about 40 cm in length each).
Cutting metal strip


The first thing to do is measure the length of the edge of the hexagon for which you need to make a key.
We multiply this size by six (the number of edges), and we get the length of the metal strip that needs to be cut.
The plate should be wider than the height of the bolt for which you are making the key (a couple of millimeters is enough).
When everything has been measured, cut off the strip.
Then you need to make cuts along the lines, going deep to 2/3 of the thickness of the plate.
The result should be a strip of metal that looks like a chocolate bar.
Giving a hexagonal shape


At this stage, it will be more convenient to work if the metal is heated. (I didn't support constant temperature and I couldn’t bend the whole part in one piece).
Clamp the strip in a vice at the level of the previously made recess.
Use a hammer to bend the section protruding from the top of the vice.
Check if the angle fits by trying it on the corresponding nut.
Repeat for each segment.
As my strip cooled, the metal became more difficult to work with. This led to a breakdown over the third segment. In my case, this worked to my advantage, because when I started bending the fourth section, it turned out that its length was not enough and I needed to grind off a little metal so that the nut would fit properly. (I think adding a millimeter to each cut will help avoid running out of length on the inside edge of the key).
So I got a part consisting of two parts, each with three sides. (It may be easier to work with this than with a solid piece curved into a ring, as I originally planned to do).
Check that the workpiece fits properly onto the nut. But not too tight. (If necessary, you can grind off part of the inner surface of the edges)
Welding hexagonal shape


Now all that remains is to weld the part into one. (In my case I used a 2.5mm welding electrode)
After this, you need to try on the nut again, and if everything fits, you can fill the cuts with welding. (3.2 mm electrode).
We try to put it on the nut again, because heat When welding, it can deform the metal.
(This time I additionally tried the blank on the hexagonal protrusion on the filter...)
After this, you can clean up all the excess, making the shape of the part smoother.
We weld the lid


After sanding, place the piece on the sheet of metal from which the strip was made and trace its outline on it.
I chose to draw the line along the inside, adding a couple of millimeters along the edges. But you might want to circle the part by outside, on the contrary, removing an extra couple of millimeters.
Then we weld the resulting top part to a previously manufactured part. (We use 2.5 mm and 3.2 mm electrodes)
Let's check again if everything fits.
Pipe welding


After sanding and brushing, I spray painted the key black.
Now everything is ready.
Application
This socket wrench has a fairly clear purpose.It makes changing the oil filter a pleasure.
But I think the way I made the tool can be applied to any other bolts and nuts that are in hard to reach places.
The manufacturing method is quite simple. The work does not take much time (I did it in 3 hours), and the key is quite cheap, even if you buy all the materials in the store. I think that after this project, I will make more such tools in the future.
I hope you enjoyed it. Thank you for your attention!