How to easily update your kitchen interior without breaking the bank? New kitchen facade with your own hands - ideas for independent work Updating old kitchen furniture.
For those who want to update their kitchen furniture at the lowest cost family budget, an excellent solution would be to replace or restore the cabinet doors of the old set. Exist following methods renovation of kitchen facades:
- pasting with self-adhesive film or photo wallpaper on a laminated base;
- painting;
- decoration with moldings, ceramic tiles or rattan inserts;
- varnishing;
- replacement.
Pasting of facades
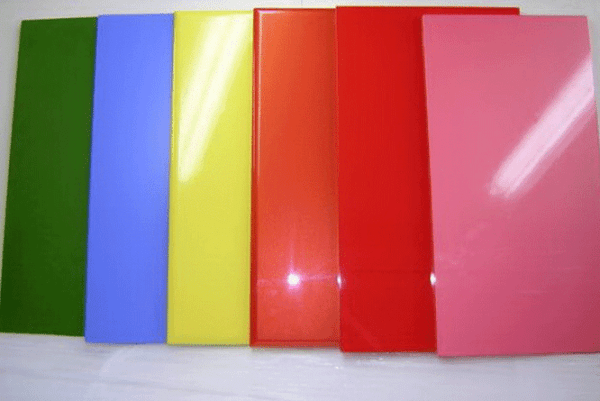
The simplest and most economical way to update a kitchen, in terms of time, money and effort, is to cover the facades with self-adhesive film or photo wallpaper. By using vinyl film, with imitation natural wood, stone, ceramic tiles, marble or using wallpaper, with various images appropriate for the kitchen, you can achieve an excellent result.
In order to update kitchen furniture use: self-adhesive film, knife, scissors, ruler, centimeter, plastic scraper, fittings (handles and hinges), tape measure, square, rubber roller, sponge.
Work order
Step 1. Measure and dismantle the facades.
Step 2. Remove handles and fittings (hinges).
Step 3. Remove all types of contaminants, primarily grease stains, from the parts that are planned to be restored.
Advice ! Irregularities and cracks can be eliminated with fine sandpaper and filled with putty or primer-filler.
Step 4. Cut the film. On its reverse side there is a centimeter grid, which allows you to accurately mark the fragments corresponding to the size of the restored facades. It is necessary to leave a margin of 2 cm for bending. If there is a pattern, it is important to maintain symmetry and matching of the pattern on adjacent elements of the set.
Step 5. Glue the film fragments to the facades. To do this, approximately 2 cm of protective paper is separated from the film. Then the adhesive side of the piece is applied to the surface and glued. Using a scraper, you need to carefully level the glued part, “expelling” all air bubbles. Next, glue the film not completely, but in parts of 5 cm, each time carefully smoothing the glued part from the center to the edges.
Advice ! If small air bubbles have formed, they can be eliminated with a needle; larger bubbles can be eliminated with a knife.
Step 6. Reinstall the restored parts. If necessary, you can change the handles, which will also definitely “refresh” the headset.
In exactly the same way, kitchen facades are covered with photo wallpaper.
Painting of facades
To update a kitchen set, use: primer, brushes, paint, spray gun, screwdriver, plastic film.
Painting procedure
- Dismantle the facades.
- Remove handles and fittings.
- Prepare surfaces for painting - thoroughly wipe and degrease.
- Cover the floor plastic film. Place the parts to be painted on the floor.
Important! The room in which work is carried out must be ideally ventilated.
- Apply primer to the parts. Wait until it dries.
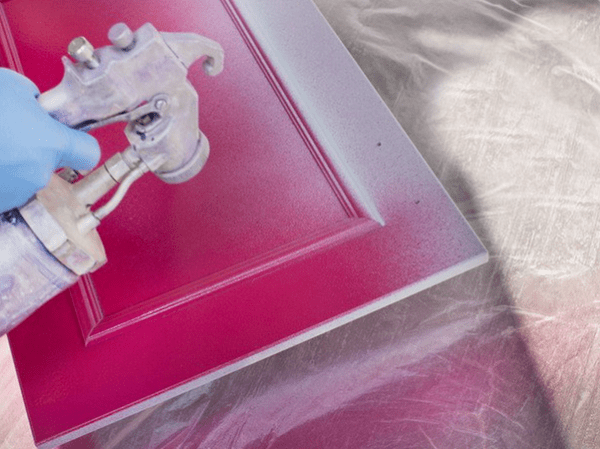
- Using brushes or a spray gun, apply paint in several layers to the surface of the parts. Wait until completely dry.
- Install the facades in their places.
- Screw on the handles.
Decorating facades with moldings and ceramic tile inserts
This method of restoration involves decorating facades with decorative details. You can use ceramic wall tiles or molding individually, or complement the tile pattern with the molding.
For decoration you should use: wood glue, silicone sealant or cement glue, decorative elements(molding, tile), miter saw, spray gun, glossy deck paint, drill, furniture fittings, screwdriver, marker.
The procedure for updating a kitchen set with linings
Step 1. Number the parts and cabinets of the set, remove them, thoroughly clean them with a damp cloth from all dirt, and wipe them dry. Remove handles and fasteners.
Step 2. Prepare the room. If possible, work with paint and varnish coatings It is better to do it in the air. If the kitchen restoration has to be carried out indoors, it is necessary to ensure good ventilation. Cover the floor with film.
Step 3. Mark the locations of the decorative trims.
Step 4: Prepare the overlays or tiles. Cut the molding with a miter saw into pieces of the required length, filing the joints at an angle of 45 degrees.
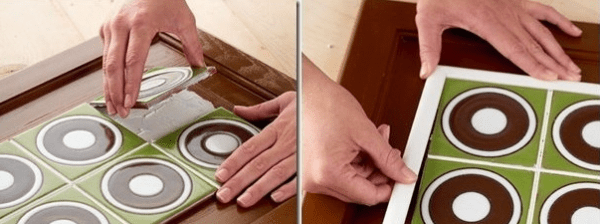
Step 5. Glue the tile or molding according to the markings.
Step 6. Cover the surfaces with a primer using a spray gun.
Attention ! The primer is applied from a distance of 15-20 cm and dries in approximately one hour.
Step 7: Apply deck paint. You can use various stencils to create an original design. To achieve the perfect result, apply another coat of paint.
Step 8. Reinstall the handles and the restored facades themselves.
Decorating facades with rattan inserts
Rattan inserts are used to update the kitchen following materials: rattan cloth, wood pads, brushes, scissors, furniture nails, varnish, sandpaper, hammer.
The procedure for updating a kitchen set
Step 1. Measure the height and width of the facades. Based on the measurement results, purchase rattan fabric in a roll.
Step 2. Soak the canvas for about half an hour. This is necessary so that after drying the canvas is well stretched on the surfaces of the cabinet doors.
Step 3. Match the color of the rattan fabric with decorative wooden overlays. If you cannot find the ideal shade of wood, you can achieve the desired result by applying acrylic varnish. Apply varnish in 4 layers, allowing to dry and sanding sandpaper. The edges of the fragments of wooden planks need to be sawn at an angle of 45 degrees.
Step 4. Spread the rattan fabric on the floor covered with plastic film.
Step 5. Mark the parts on the canvas the right size. Cut with scissors. If desired, the entire façade can be covered with canvas.
Step 6. Attach the leaf parts to the doors with a stapler, making sure that the staples are at the edges. In this case, they will be covered with wooden overlays.
Step 7. Sand the edges with sandpaper. Cover with acrylic varnish.
Step 8. Nail with furniture nails wooden planks so that they hide the brackets that attach the rattan inserts.

Varnishing of wooden facades
One more in a budget way kitchen restoration is varnishing wooden surfaces. For the procedure of updating a kitchen set using varnishing, use: varnish, brush, sandpaper, primer, sponge.
The procedure for varnishing
Step 1. Dismantle the facades and take them outside.
Attention ! Due to the high toxicity of varnishes, similar work must be performed outdoors.
Step 2. Carefully remove old varnish or paint from the parts undergoing restoration using sandpaper.
Step 3. Wash the cleaned surfaces with a damp sponge and allow to dry.
Step 4: Apply primer. Also leave for some time until completely dry.
Step 5. Apply several layers of varnish.
Step 6. After the varnish has dried, return all restored parts to their places.

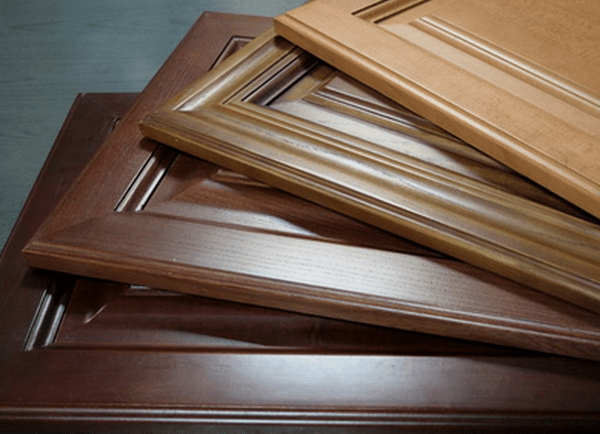
Replacement of facades
The most radical, but at the same time the most expensive way to update a kitchen set is complete replacement all doors with new ones. The cost savings in this case will be no more than 50% of the cost of a new kitchen, if you take into account the costs of measuring, dismantling old facades, delivery and installation of new ones.
The facades are delivered to the buyer without holes for handles and hinges. You can drill holes yourself or contact specialists from furniture showroom who will do such work for a fee.
Facade replacement process
- Dismantle old facades.
- Take exact measurements.
- Buy or order new ones.
- Drill holes for handles and hinges.
- Screw on the hinges.
- Install the facades in place of the dismantled ones.
- Screw on the handles.
- Delete protective film, if available (usually on elements coated with plastic or enamel).
- If the purchased facades are made of acrylic plastic, treat them with a special compound (ordered together with the facades).
Conclusion
In order to determine the most suitable way updating kitchen furniture, you must, first of all, take into account the availability of free time and the possibilities of the family budget.
You can learn more about how to cover kitchen furniture with self-adhesive film in the following video.
Buying a kitchen set is not always advisable due to financial costs. For any person who has minimal skills repair work, the problem of how to update the facades of an old kitchen with your own hands will not arise. This will not only save money on the work of craftsmen, but also create your own personal design, which will decorate your home or apartment. To do this, you should know several methods for transforming an old kitchen and choose the most practical among them. 
Similar articles:
If kitchen set itself is durable, but outside– significant deformations or chips, you can change the doors and countertops, leaving the “skeleton” of the kitchen unchanged. When ordering new facades, it is possible to change styling throughout the kitchen: classic rectangular doors - with smooth shapes protruding at the edges, which will give the room exclusivity and chic. To place an order correctly, you should measure the facades, sides and drawers. This is done with a ruler and a centimeter, placing the elements in a horizontal position.
But the disadvantage of this method is its cost. It is necessary not only to pay for the production of new facades, but also to buy the appropriate Consumables. You will also have to drill the holes for the hinges yourself. To screw in the screws, use a drill with a diameter of 35 mm.
Use of decorative inserts
If the decision has been made to paint the doors or even completely replace them, decorative overlay inserts made from wallpaper, self-adhesive film, ceramic tiles and rattan will help add individuality to the decor. As with gluing and painting, the canvas is laid horizontally and any dirt on the surface is removed.
It should be taken into account that ceramics are fixed to the facade using tile adhesive, and not for paper-based materials.
The peculiarity of installing rattan is that it must first be wetted, then cut and secured to the door facade with framing wooden or plastic strips. The strips that will secure the rattan should be prepared in advance. Pay attention to the edges; they need to be filed at an angle of 45°. To work you will need furniture nails without heads, a hammer and acrylic lacquer. Rattan looks beautiful if you place it not across the entire width, but only in the center of the door facade.
Self-adhesive film as a budget-friendly kitchen conversion
– simple and economical option. For this you will need:
- the film itself;
- centimeter and ruler;
- pointed scissors and a construction knife;
- plastic scraper for smoothing the film.
The doors should be freed from the fittings. Measurements are taken and marks are made on the back of the self-adhesive film on a centimeter grid. Carefully cut required size with a gap of 2 cm. It is necessary to start gluing from the center, gradually applying 5-10 mm to the edges of the facade surface. If it is not possible to level out the formation of unevenness, the folds are trimmed and the air bulges are pierced with a needle.
How to Renew Wood Kitchen Parts
For finishing various surfaces you can use varnishes. This is a simple method for upgrading small parts. From expensive looking Wood kitchen facades are expensive, but they also wear out. You can paint it, but this will significantly change the appearance, especially if it is oak rather than cheap pine material.
To do this, remove the selected parts by unscrewing the screws with a screwdriver, but be sure to mark them. It will be possible to update doors or individual elements of a kitchen set using inserts, if they do not violate the overall design composition. Decor must be used thoughtfully so that it is not tacky.
Moldings, fittings and other decorations for the kitchen facade
Moldings and paint can significantly change the style of a kitchen unit. To do this, use all the tools as when painting a facade. The moldings are cut to the required length with a miter saw. In this case, the edges of the slats can either touch or be of different abstract lengths on each door. To secure it you need wood glue. Then the surface is primed and painted. For both cases, a spray gun is used.
Decoupage has become a popular method for upgrading a kitchen. A drawing, ornament or painting is placed on the facade, secured with varnish.
Thanks to the decoupage technique, you can decorate walls, tiles near the sink, and other surfaces in the kitchen to make the decor holistic and complete.
What do you do with old furniture?
Changes in the house are always for the better. Especially if this happens in the kitchen. It's so nice to prepare breakfasts, lunches and dinners for comfortable kitchen. But how, without spending a lot of money on it?
We'll give you a few useful tips, how to update the interior of your space without renovation.
So, how can you transform your kitchen without ruining your family budget?
Old kitchen furniture facades can be repainted in any color. If you want to get matte facades, use furniture paint, and if varnished, use automotive enamel in cans. Old facades can also be covered with self-adhesive film, especially since the choice of such films is now huge. You can stick a decorative profile on old facades, including if you like this style. You can add new fittings to the new decor, for example, replace handles.
Old facades can also be covered with self-adhesive film. Photo: thinkstockphotos.com An original design move is the contrast of the facades. Do not make all facades the same color. For example, you can recolor a part in Blue colour, and some - in white. You can remove one or two small wall cabinets and replace them hanging shelves. Paint the shelves in the same color as the furniture or in contrast to it. If you have cabinets with glass, glue with inside Velcro doors. Then you can attach rectangles from beautiful fabric, also providing them with Velcro. And you will have bright inserts. Finally, old facades can be further “aged” and then decorated.

You can repaint some of the cabinets White color. Photo: thinkstockphotos.com
An old countertop can be covered with ceramic tiles, and it will simply be unrecognizable. You can repaint the old countertop and attach it on top strained glass. Well, finally, you can replace it modern countertop from composite materials. However, we must remember that the tabletop should always be in harmony with the furniture, in the same style. A change in one entails a change in the other.
An old tabletop can be decorated with a special film. Photo: thinkstockphotos.com The kitchen “apron” is, of course, difficult to change. Well, it is not necessary. To update it, just close it with something. For example, you can make an overlay panel from plexiglass, decorated with reverse side self-adhesive film. You can build a two-layer panel of plexiglass, between the layers of which are grass, painted feathers, etc. This option will do, if your “apron” is very light, and will not distort the color of the panel filling. If the “apron” is without a pattern, individual tiles can be repainted desired color paints for ceramics.
There is a new product on sale - self-adhesive mosaic. Some tiles can be covered with such a mosaic. There is also slate paint. various colors. By painting a few tiles with it, you can turn part of the “apron” into a chalk board.
Railing can help change the kitchen apron. In this case, you need to hang on it not only the “technical” items needed in the kitchen, but also choose the most decorative ones: bright mugs, coasters, cutlery with painted handles, pots with herbs. In addition to the railing, on some tiles you can place separate self-adhesive hooks and also hang beautiful accessories.
If you don't have a certain style in your kitchen, try creating one. This will immediately give the impression of a new kitchen. For example, repaint the facades blue and white or hang wooden ones, cover the tabletop with variegated blue and white tiles, place wicker baskets and galvanized pots with herbs on it, and lay a white tablecloth on the table. Hang tulle curtains in combination with wooden blinds.

Equip your kitchen in such a way that it is pleasant and fun for you to be there. Photo: thinkstockphotos.com New curtains can change the appearance of a window. It is better to use in the kitchen. It happens that a new bright curtain completely transforms the kitchen. But, of course, it needs to be supported with appropriate dishes, tablecloths, and accessories. You can sew a composite curtain from individual lambrequins, it will turn out very stylish. Or you can duplicate an existing roller blind with a homemade “ rain curtain" made of felt flowers on ribbons. The cornice can be decorated with a large beautiful tree branch if you like eco style.

In the kitchen it is better to use short ones roller blinds. Photo: thinkstockphotos.com External view of the table, and this important detail kitchen furnishings will be completely changed by a new tablecloth. Sometimes you can decorate an old one - for example, a white tablecloth can be easily transformed by printing on it pictures of vegetables and fruits cut lengthwise into halves with paint applied to them. A bright panel will complete the transformation of your kitchen. This could be a collage of wallpaper, a large painted dish, or an applique on burlap - the main thing is that the panel matches the style of your new kitchen.
Your repost will change the Internet :)
Long-term use of the kitchen sooner or later makes itself felt: no matter how high-quality the set is, over time it loses its seasoned appearance. And then you have to choose: buy a new set or update the kitchen with minimal costs. Many people opt for the second option, namely updating the facades using a special film.
Kitchen before:


Kitchen in intermediate state: buy new or update facades?

On the right you can see traces of glue - the consequences of an attempt to repair the set.

Options for "new things"
Since the set itself is not yet falling apart, it is necessary to update the facades. This will benefit both appearance, and will protect the material from moisture. There are two options for updating facades:
- Ready-made self-adhesive film
- Individual photo printing on adhesive paper
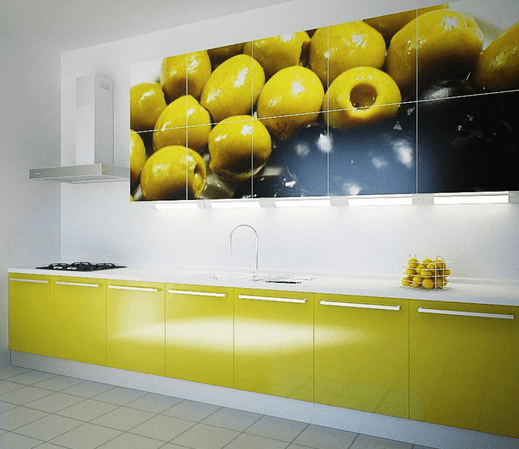
The owner of this kitchen settled on the second option, after which he indulged in thinking about the topic of photo printing. The original version with a separate picture for each door was rejected: general form it will turn out too motley. After some more thought, it was decided to choose a print with nature, “breaking” it with an apron would not affect the perception of the picture.
When searching for a suitable print, the picture should be selected with the maximum resolution - only in this case it will not be blurry.
Let's get started
The kitchen owner took advantage of it quite simple method: I searched for pictures using the word “nature” with a resolution of at least 40 megapixels.

This option turned out to be the most suitable, but with minor amendments: it was decided to remove the huge butterfly. This is roughly what the print should have looked like in the kitchen.

A sketch was made in a photo editing program to visually understand what would be lost from the drawing. The butterfly has been replaced with grass.

With this picture you can safely go to an advertising agency. The print was chosen with lamination so that after updating the facades they could be washed.
It is necessary to print in a slightly enlarged size so that you can paste over the ends and wrap the film inside.

After this, you can proceed directly to pasting the facades:
- Knowing the dimensions of the door, you need to add 1-2 cm on each side for the ends and another 1-2 cm on the turn.
- Cut the image to the required size.
- We degrease the door and remove all irregularities.
- Carefully glue and smooth.
- We make holes for the handles and install them.
Use a hairdryer as in the case of car film it is forbidden: the film is deformed.
The most difficult part is the corners of the door. You can paste them over in two ways, it’s a matter of taste:
- Butt-butt
- overlap
Corners should be pasted over with the utmost care, because self-adhesive film will not stick to superglue.

During the renovation of the kitchen, it was decided to unload the shelf for drying plates from the lids that had accumulated there, hanging them on the back of the doors. To do this, you need to purchase regular hooks and secure them in any convenient way.
To prevent the screws from being visible under the film, the holes for their installation must first be countersinked, i.e. make holes for recessing them.


The final stage of updating the headset was the doors under hob, which were not originally there. The doors were made of 5 mm. plywood. If you really want, you can assemble the entire set of plywood with your own hands.

Defects in the pasting can be removed with a blade, but to do this you need to wait 1-2 weeks: then the film will finally take its place.


The refrigerator can be the heaviest item to cover. Get ready for the fact that the film will have to be removed and pasted repeatedly, fortunately, it allows this. Getting rid of small bubbles is very problematic, so it is better to expel excess air after completing the process using a needle.

Conclusions and prices
Several conclusions based on the results of the façade renovation:
- The film can be washed and rubbed.
- It holds up very well and is very difficult to remove.
- Door corners are the weakest points.
- The film is easily scratched.
The costs for such a kitchen renovation were as follows: about $120 for a self-adhesive print with lamination and about $90 for plywood, hooks and handles. When purchasing regular film, the budget can be reduced significantly.
Do you want something new and fresh in your kitchen interior, but don’t want to undertake a major renovation? Great option– decorate the old kitchen so that the room sparkles with new colors. From this article you will learn how, with small material and labor costs transform the interior beyond recognition. You will only need a little imagination and available materials. Go!
IDEA #1
An option from the “cheap and cheerful” category is to use self-adhesive film. This one is relatively inexpensive material after some simple manipulations it will change the furniture beyond recognition. Available in stores big choice such films: they come in one color or with bright unusual prints; they can imitate any material: marble, tile, wood, etc. Do you see how wide a choice you have? Besides decorative properties, high quality film It is also valued for another thing: it is moisture resistant, not afraid of the effects of temperature and mechanical damage. Thanks to this, it can be glued not only to the facade of the kitchen, but also to the countertop.

Updating an old kitchen this way won't take much time. List necessary tools not that big, not to say tiny. To create beauty you will need the material itself, scissors and a ruler. By the way, some companies apply a grid on the paper on the back of the film, so you can cut perfectly evenly. If you don’t need major changes and you just want to refresh the look of the room, then you can purchase vinyl stickers. They can be glued to any flat surface: kitchen facade, refrigerator, table, apron. Manufacturers offer various topics stickers: these can be delicate flowers or funny images of animals.

IDEA #2
The most obvious DIY option for remodeling an old kitchen is to paint it. New color can donate furniture new life. Rest assured, your guests will think you've purchased a new set! An option for the brave is to combine several colors, then the changes will be dramatic.

IDEA #3
How to restore an old kitchen using other materials, ceramic tiles for example? It's a stereotype that it can only be on the wall. This material will look great on kitchen facade! The tiles can be the same as on the apron - if you don’t know where to put the leftovers after repairs. Then the motives for different surfaces will overlap, and the kitchen will become very harmonious. Otherwise, you can play on contrasts and decorate the doors contrary to general style rooms.
How to pull off this trick? It's simple: remove the doors from their hinges, clean their surface, and paint if necessary. The tiles are attached to the facade using special glue. If the pattern does not seem self-sufficient to you, then you can frame the tiles in a frame made of decorative molding.

IDEA #4
If the methods described above do not suit you, you will still have to damage the integrity of the furniture. We propose to turn an old kitchen into a new one using new doors. Of all the proposals, this option is the most expensive, however, the result will be more noticeable. In any case, it will cost much less than buying a new headset. If your kitchen model is quite popular, then finding its front will not be difficult. If such furniture has gone out of fashion or was not very common at all, then you will have to look for or order doors. Fortunately, there are quite a lot of companies that offer similar services.

You can vary the cost of restoring an old kitchen. Cheap options: doors made of pine, plastic, chipboard. You will have to spend more money on MDF or solid wood. The installation of new doors can be done by specialists from the same company where you ordered them. However, anyone who is familiar with the word “repair” can handle this simple task. Modern furniture As a rule, it is assembled quickly and without unnecessary effort.

And a few more tricks on how to remodel an old kitchen.
Trick #1
Tip for the lazy: you don't have to remodel an old kitchen to make it look new. You can simply take your eyes off old furniture bright accessories. Colored curtains, clocks, dishes - and all eyes are focused on them. However, keep in mind that if the condition of the furniture really requires repair, then such a trick will not always be successful. Another nuance: kitchen cabinets should be neutral in color, otherwise the placement of accents will only make the interior too colorful.

Trick #2
Open shelves will lighten the kitchen interior. They also provide more design opportunities, because in this case the tone will be set by the contents of the shelves. Beautiful dishes, original jars for storing cereals - and now a boring kitchen has turned into an island of brightness. To change the interior, just change a few items. Thanks to this, the room will not have time to bore you.

Trick #3
Buy black or brown paint and paint over one cabinet or part of a door. And now there was a place in the room for notes. Here you can mark a list of products you should buy or favorite recipes. The surface is also suitable for leaving a message to your family. By the way, you can buy special vinyl stickers on which you can write with chalk. Then you won't have to bother with paint.

Trick #4
Who would have thought that simple handles can they change the interior that much? It would seem such a small detail! But their replacement will be noticeable. By the way, long tubular handles are very fashionable now. They will even turn Soviet furniture into a modern set.

Trick #5
If you want to follow this when remodeling your kitchen rustic style, then you can replace the cabinet doors with curtains. This will make the interior more airy. In addition, this will make it easier to get to the dishes.
Trick #6
Moldings are decorative volumetric elements that can turn an ordinary cabinet into an exquisite piece of furniture. It is attached with special glue.
