Vivid chemical experiments. The most spectacular experiments with household chemicals
Chemist is a very interesting and multifaceted profession, uniting under its wing many different specialists: chemical scientists, chemical technologists, analytical chemists, petrochemists, chemistry teachers, pharmacists and many others. We decided to celebrate the upcoming Chemist’s Day 2017 with them, so we selected several interesting and impressive experiments in the field under consideration, which even those who are as far from the profession of a chemist as possible can repeat. The best chemical experiments at home - read, watch and remember!
When is Chemist's Day celebrated?
Before we begin to consider our chemical experiments, let us clarify that traditionally Chemist’s Day is celebrated in the countries of the post-Soviet space at the very end of spring, namely on the last Sunday of May. This means that the date is not fixed: for example, in 2017 Chemist’s Day is celebrated on May 28. And if you work in the field chemical industry, or are studying a specialty in this field, or are otherwise directly related to chemistry on duty, then you have every right to join the celebration on this day.
Chemical experiments at home
Now let's get down to the main thing and begin to perform interesting chemical experiments: it is best to do this together with young children, who will definitely perceive what is happening as a magic trick. Moreover, we tried to select chemical experiments for which reagents can be easily obtained at a pharmacy or store.
Experiment No. 1 - Chemical traffic light
Let's start with a very simple and beautiful experiment, which received this name for good reason, because the liquid participating in the experiment will change its color exactly to the colors of the traffic light - red, yellow and green.
You will need:
- indigo carmine;
- glucose;
- caustic soda;
- water;
- 2 transparent glass containers.
Don't let the names of some ingredients scare you - you can easily buy glucose tablets at a pharmacy, indigo carmine is sold in stores as a food coloring, and you can find caustic soda in a hardware store. It is better to take tall containers, with a wide base and a narrower neck, for example, flasks, to make them easier to shake.


But what is interesting about chemical experiments is that there is an explanation for everything:
- By mixing glucose with caustic soda, i.e. sodium hydroxide, we obtained an alkaline solution of glucose. Then, by mixing it with a solution of indigo carmine, we oxidize the liquid with oxygen, which it was saturated with during pouring from the flask - this is the reason for the appearance of the green color. Next, glucose begins to work as a reducing agent, gradually changing color to yellow. But by shaking the flask, we saturate the liquid with oxygen again, allowing the chemical reaction to go through this circle again.
You will get an idea of how interesting it looks in real life from this short video:
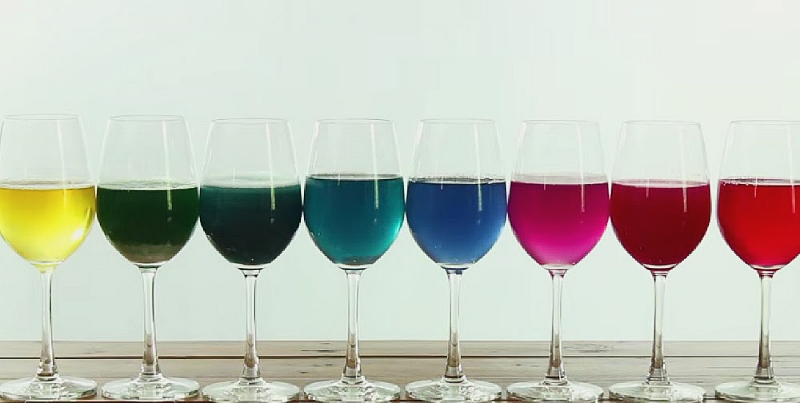
Experiment No. 2 - Universal acidity indicator from cabbage
Children love interesting chemical experiments with colorful liquids, it’s no secret. But we, as adults, responsibly declare that such chemical experiments look very spectacular and interesting. Therefore, we advise you to conduct another “color” experiment at home - a demonstration amazing properties red cabbage. It, like many other vegetables and fruits, contains anthocyanins - natural indicator dyes that change color depending on the pH level - i.e. degree of acidity of the environment. This property of cabbage will be useful to us in order to obtain further multi-colored solutions.
What we need:
- 1/4 red cabbage;
- lemon juice;
- baking soda solution;
- vinegar;
- sugar solution;
- Sprite type drink;
- disinfectant;
- bleach;
- water;
- 8 flasks or glasses.
Many of the substances on this list are quite dangerous, so be careful when performing simple chemical experiments at home, wear gloves and, if possible, safety glasses. And don’t let children get too close - they may knock over the reagents or the final contents of the colored cones and even want to try them, which should not be allowed.

Let's get started:

How do these chemical experiments explain the color changes?
- The fact is that light falls on all objects that we see - and it contains all the colors of the rainbow. Moreover, each color in the spectrum has its own wavelength, and molecules of different shapes, in turn, reflect and absorb these waves. The wave that is reflected from the molecule is the one that we see, and this determines what color we perceive - because other waves are simply absorbed. And depending on what substance we add to the indicator, it begins to reflect only rays of a certain color. Nothing complicated!
For a slightly different version of this chemical experiment, with fewer reagents, see the video:
Experiment No. 3 - Dancing jelly worms
We continue to do chemical experiments at home - and we will conduct the third experiment on everyone’s favorite jelly candies in the form of worms. Even adults will find it funny, and children will be absolutely delighted.
Take the following ingredients:
- a handful of gummy worms;
- vinegar essence;
- ordinary water;
- baking soda;
- glasses - 2 pcs.

When choosing suitable candies, choose smooth, chewy worms without sugar coating. To make them less heavy and easier to move, cut each candy lengthwise into two halves. So, let's begin some interesting chemical experiments:
- Make a solution in one glass warm water and 3 tablespoons of soda.
- Place the worms there and keep them there for about fifteen minutes.
- Fill another deep glass with essence. Now you can slowly drop the jellies into the vinegar, watching how they begin to move up and down, which is in some way similar to a dance:
Why is this happening?
- It's simple: baking soda, in which the worms are soaked for a quarter of an hour - this is sodium bicarbonate, and the essence is an 80% solution acetic acid. When they react, water is formed, carbon dioxide in the form of small bubbles and sodium salt of acetic acid. It is carbon dioxide in the form of bubbles that the worm becomes overgrown with, rises up, and then descends when they burst. But the process still continues, causing the candy to rise on the resulting bubbles and fall until it is completely completed.
And if you are seriously interested in chemistry, and want Chemist’s Day to become yours in the future professional holiday, then you will probably be curious to see next video, which tells in detail about the typical everyday life of chemistry students and their exciting educational and scientific activities:
Take it for yourself and tell your friends!
Read also on our website:
show more
Our presentation of entertaining physics will tell you why in nature there cannot be two identical snowflakes and why an electric locomotive driver backs up before moving, where the largest reserves of water are located, and what invention of Pythagoras helps fight alcoholism.
So complicated but interesting science, like chemistry, always causes an ambiguous reaction among schoolchildren. The children are interested in experiments that result in the production of substances of bright colors, the release of gases, or precipitation. But only a few of them like to write complex equations of chemical processes.
The importance of entertaining experiences
According to modern federal standards, a curriculum subject such as chemistry has been introduced in secondary schools and has not been left without attention.
As part of the study of complex transformations of substances and solving practical problems young chemist in practice he hones his skills and abilities. It is through unusual experiences that a teacher develops an interest in the subject in his students. But in regular lessons it is difficult for a teacher to find sufficient quantity free time for non-standard experiments, but there is simply no time to spend it for children.
To correct this, additional elective and optional courses were invented. By the way, many children who are interested in chemistry in the 8th and 9th grades become doctors, pharmacists, and scientists in the future, because in such classes the young chemist gets the opportunity to independently conduct experiments and draw conclusions from them.

What courses involve fun chemical experiments?
In the old days, chemistry for children was available only from the 8th grade. No special courses or extracurricular activities Children were not offered any chemical education. In fact, there was simply no work with gifted children in chemistry, which had a negative impact on the attitude of schoolchildren to this discipline. The children were afraid and did not understand complex chemical reactions, and made mistakes in writing ionic equations.
In connection with the reform modern system education, the situation has changed. Now in educational institutions are also offered in lower grades. The children are happy to do the tasks that the teacher offers them and learn to draw conclusions.
Chemistry-related electives help high school students gain skills in working with laboratory equipment, and those designed for junior schoolchildren contain vivid, demonstrative chemical experiments. For example, children study the properties of milk and become familiar with the substances that are obtained when it sours.

Experiences related to water
Entertaining chemistry is interesting for children when, during the experiment, they see an unusual result: the release of gas, a bright color, an unusual precipitate. A substance such as water is considered ideal for conducting a variety of entertaining chemical experiments for schoolchildren.
For example, chemistry for 7-year-old children can begin with an introduction to its properties. The teacher tells the children that most of our planet is covered with water. The teacher also informs the students that in a watermelon there is more than 90 percent of it, and in a person it is about 65-70%. After telling schoolchildren how important water is for humans, you can offer them some interesting experiments. At the same time, it is worth emphasizing the “magic” of water in order to intrigue schoolchildren.
By the way, in this case standard set Chemistry for children does not involve any expensive equipment - it is quite possible to limit yourself to affordable devices and materials.
Experience "Ice Needle"
Let us give an example of such a simple and at the same time interesting experiment with water. This is the construction of an ice sculpture - a “needle”. For the experiment you will need:
- water;
- salt;
- ice cubes.
The duration of the experiment is 2 hours, so regular lesson such an experiment cannot be carried out. First you need to pour water into the ice tray, put it in freezer. 1-2 hours after the water turns into ice, entertaining chemistry may continue. For the experiment you will need 40-50 ready-made ice cubes.

First, children should arrange 18 cubes on the table in the form of a square, leaving a free space in the center. Next, after sprinkling them with table salt, they are carefully applied to each other, thus gluing them together.
Gradually all the cubes are connected, and the result is a thick and long “needle” of ice. To make it, 2 teaspoons are enough table salt and 50 small pieces of ice.
You can tint the water to make ice sculptures multi-colored. And as a result of such a simple experience, chemistry for 9-year-old children becomes an understandable and fascinating science. You can experiment by gluing ice cubes in the shape of a pyramid or diamond.
Experiment "Tornado"
This experience is not required special materials, reagents and instruments. The guys can do it in 10-15 minutes. For the experiment, let's stock up:
- plastic transparent bottle with a cap;
- water;
- dishwashing detergent;
- sparkles.
The bottle needs to be filled 2/3 full plain water. Then add 1-2 drops of dishwashing detergent to it. After 5-10 seconds, pour a couple of pinches of glitter into the bottle. Screw the cap tightly, turn the bottle upside down, holding it by the neck, and twist it clockwise. Then we stop and look at the resulting vortex. Before the “tornado” starts working, you will have to spin the bottle 3-4 times.
Why does a “tornado” appear in an ordinary bottle?
When a child makes circular movements, a whirlwind appears, similar to a tornado. The rotation of water around the center occurs due to the action of centrifugal force. The teacher tells the children about how scary tornadoes are in nature.
Such an experience is absolutely safe, but after it, chemistry for children becomes a truly fabulous science. To make the experiment more vivid, you can use coloring matter, for example, potassium permanganate (potassium permanganate).

Experiment "Soap Bubbles"
Do you want to tell your children what fun chemistry is? Programs for children do not allow the teacher to pay due attention to experiments in lessons; there is simply no time for this. So, let's do this optionally.
For elementary school students, this experiment will bring a lot of positive emotions, and it can be done in a few minutes. We will need:
- liquid soap;
- jar;
- water;
- thin wire.
In a jar, mix one part liquid soap with six parts water. We bend the end of a small piece of wire into a ring, dip it into the soap mixture, carefully pull it out and blow out of the mold a beautiful soap bubble of our own making.
For this experiment, only wire that does not have a nylon layer is suitable. Otherwise, children will not be able to blow soap bubbles.
To make it more interesting for the children, you can add soap solution food coloring. You can arrange soap competitions between schoolchildren, then chemistry for children will become a real holiday. The teacher thus introduces the children to the concept of solutions, solubility and explains the reasons for the appearance of bubbles.

Entertaining experience “Water from plants”
To begin with, the teacher explains how important water is for cells in living organisms. It is with the help of it that transportation takes place. nutrients. The teacher notes that if insufficient quantity water in the body, all living things die.
For the experiment you will need:
- alcohol lamp;
- test tubes;
- green leaves;
- test tube holder;
- copper sulfate (2);
- beaker.
This experiment will require 1.5-2 hours, but as a result, chemistry for children will be a manifestation of a miracle, a symbol of magic.
Green leaves are placed in a test tube and secured in a holder. In the flame of an alcohol lamp, you need to heat the entire test tube 2-3 times, and then do this only with the part where the green leaves are located.
The glass should be placed so that the gaseous substances released in the test tube fall into it. As soon as heating is completed, add grains of white anhydrous copper sulfate to the drop of liquid obtained inside the glass. Gradually White color disappears, and copper sulfate becomes blue or dark blue.
This experience brings children into complete delight, because before their eyes the color of substances changes. At the end of the experiment, the teacher tells the children about such a property as hygroscopicity. It is due to its ability to absorb water vapor (moisture) that white copper sulfate changes its color to blue.
Experiment "Magic Wand"
This experiment is suitable for an introductory lesson in an elective course in chemistry. First you need to make a star-shaped blank and soak it in a solution of phenolphthalein (indicator).
During the experiment itself, attached to " magic wand"The star is first immersed in an alkali solution (for example, in a solution of sodium hydroxide). Children see how in a matter of seconds its color changes and a bright crimson color appears. Next, the colored form is placed in an acid solution (for the experiment, it would be optimal to use a solution of hydrochloric acid), and the crimson color disappears - the star becomes colorless again.
If the experiment is carried out for children, during the experiment the teacher tells a “chemical tale”. For example, the hero of a fairy tale can be an inquisitive mouse who wanted to find out why magical land so many bright colors. For students in grades 8-9, the teacher introduces the concept of “indicator” and notes which indicators can determine the acidic environment, and which substances are needed to determine the alkaline environment of solutions.
"Genie in a Bottle" Experience
This experiment is demonstrated by the teacher himself, using a special fume hood. The experience is based on the specific properties of concentrated nitric acid. Unlike many acids, concentrated nitric acid is capable of chemical interaction with metals located after hydrogen (with the exception of platinum and gold).
You need to pour it into a test tube and add a piece of copper wire there. Under the hood, the test tube is heated, and the children observe the appearance of “red gin” vapors.
For students in grades 8-9, the teacher writes an equation for a chemical reaction and identifies signs of its occurrence (change in color, appearance of gas). This experiment is not suitable for demonstration outside the walls of a school chemistry lab. According to safety regulations, it involves the use of vapors of nitrogen oxide (“brown gas”) that pose a danger to children.

Home experiments
In order to whet the interest of schoolchildren in chemistry, you can offer a home experiment. For example, conduct an experiment on growing table salt crystals.
The child must prepare a saturated solution of table salt. Then place a thin twig in it, and as the water evaporates from the solution, crystals of table salt will “grow” on the twig.
The jar of solution should not be shaken or rotated. And when the crystals grow after 2 weeks, the stick must be very carefully removed from the solution and dried. And then, if desired, you can coat the product with colorless varnish.
Conclusion
There is no more interesting subject in the school curriculum than chemistry. But in order for children not to be afraid of this complex science, the teacher must devote sufficient time in his work to entertaining experiences and unusual experiments.
It is the practical skills that are formed during such work that will help stimulate interest in the subject. And in the lower grades, entertaining experiments are considered according to the Federal State Educational Standards as independent project and research activities.
Municipal budgetary educational institution
"Average comprehensive school No. 35" Bryansk
Entertaining experiments in chemistry
Developed
chemistry teacher of the highest category
Velicheva Tamara Alexandrovna
When conducting experiments, it is necessary to observe safety precautions and skillfully handle substances, utensils and instruments. These experiments do not require complex equipment and expensive reagents, and their effect on the audience is enormous.
"Golden" nail.
10-15 ml of copper sulfate solution is poured into a test tube and a few drops of sulfuric acid are added. An iron nail is immersed in the solution for 5-10 seconds. A red coating of copper metal appears on the surface of the nail. To add shine, wipe the nail with filter paper.
Pharaoh's snakes.
Crushed dry fuel is placed in a heap on the asbestos mesh. Norsulfazole tablets are placed around the top of the slide at equal distances from each other. During the demonstration of the experiment, the top of the slide is set on fire with a match. During the experiment, make sure that three independent “snakes” are formed from three norsulfazole tablets. To prevent the reaction products from sticking together into one “snake”, it is necessary to correct the resulting “snakes” with a splinter.
Explosion in a bank.
Take for experience tin can from a coffee container (without a lid) with a capacity of 600-800 ml and punch a small hole in the bottom. The jar is placed on the table upside down and, covering the hole with damp paper, is brought from below gas outlet pipe from Kiryushkin’s device for filling with hydrogen ( the jar is filled with hydrogen for 30 seconds). Then the tube is removed and the gas is ignited with a long splinter through the hole in the bottom of the jar. At first the gas burns calmly, and then a hum begins and an explosion occurs. The can jumps high into the air and flames burst out. The explosion occurs because an explosive mixture has formed in the can.
"Butterfly Dance"
For the experiment, “butterflies” are made in advance. The wings are cut out of tissue paper and glued to the body (pieces of a match or toothpick) for greater stability in flight.
Prepare a wide-mouth jar, hermetically sealed with a stopper into which a funnel is inserted. The diameter of the funnel at the top should be no more than 10cm. Acetic acid CH 3 COOH is poured into the jar so much that the lower end of the funnel does not reach the surface of the acid by about 1 cm. Then several tablets of sodium bicarbonate (NaHCO 3) are thrown through a funnel into a jar of acid, and the “butterflies” are placed in the funnel. They begin to “dance” in the air.
The “butterflies” are held in the air by a stream of carbon dioxide formed as a result of a chemical reaction between sodium bicarbonate and acetic acid:
NaHCO 3 + CH 3 COOH = CH 3 COONa + CO 2 + H 2 O
Lead coat.
A human figure is cut out of a thin zinc plate, cleaned well and placed in a glass with a solution of tin chloride SnCl 2. A reaction begins, as a result of which the more active zinc displaces the less active tin from the solution:
Zn + SnCl 2 = ZnCl 2 + Sn
The zinc figurine begins to become covered with shiny needles.
"Fire" cloud.
Flour is sifted through a fine sieve and flour dust is collected, which settles far along the sides of the sieve. It is dried well. Then two full teaspoons of flour dust are introduced into the glass tube, closer to the middle, and slightly shaken along the length of the tube by 20 - 25 cm.
Then the dust is strongly blown out over the flame of an alcohol lamp placed on a demonstration table (the distance between the end of the tube and the alcohol lamp should be about one meter).
A “fire” cloud is formed.
"Star Rain.
Take three teaspoons of iron powder and the same amount of ground charcoal. All this is mixed and poured into a crucible. It is fixed in a tripod and heated on an alcohol lamp. Soon the starry rain begins.
These hot particles are ejected from the crucible by carbon dioxide produced when coal burns.
Change in color of flowers.
In a large battery glass, prepare a mixture of three parts of diethyl ether C 2 H 5 ─ O ─ C 2 H 5 and one part (by volume) of a strong ammonia solution NH 3 ( there should be no fire nearby). Ether is added to facilitate the penetration of ammonia into the cells of the flower petal.
Individual flowers or a bouquet of flowers are dipped into an ether-ammonia solution. At the same time, their color will change. Red, blue and purple flowers will turn green, white ( White Rose, chamomile) - will turn into dark, yellow ones will retain their natural color. The changed color is retained by the flowers for several hours, after which it becomes natural.
This is explained by the fact that the color of the petals of fresh flowers is caused by natural organic dyes, which have indicator properties and change their color in an alkaline (ammonia) environment.
List of used literature:
Shulgin G.B. This is fascinating chemistry. M. Chemistry, 1984.
Shkurko M.I. Entertaining experiments in chemistry. Minsk. People's Asveta, 1968.
Aleksinsky V.N. Entertaining experiments in chemistry. Teacher's manual. M. Education, 1980.
My personal experience teaching chemistry showed that a science such as chemistry is very difficult to study without any initial information and practice. Schoolchildren very often neglect this subject. I personally observed how an 8th grade student, when he heard the word “chemistry,” began to wince, as if he had eaten a lemon.
Later it turned out that due to dislike and misunderstanding of the subject, he skipped school secretly from his parents. Certainly, school program is designed in such a way that the teacher must give a lot of theory in the first chemistry lessons. Practice seems to fade into the background precisely at the moment when the student cannot yet independently realize whether he needs this subject in the future. This is primarily due to the laboratory equipment of schools. IN big cities Currently, the situation with reagents and instruments is better. As for the province, just like 10 years ago and now, many schools do not have the opportunity to conduct laboratory classes. But the process of studying and becoming interested in chemistry, as well as other natural sciences, usually begins with experiments. And this is no coincidence. Many famous chemists, such as Lomonosov, Mendeleev, Paracelsus, Robert Boyle, Pierre Curie and Marie Sklodowska-Curie (schoolchildren also study all of these researchers in physics lessons) began experimenting from childhood. The great discoveries of these great people were made precisely in home chemical laboratories, since studying chemistry in institutes was available only to people of means.
And, of course, the most important thing is to interest the child and convey to him that chemistry surrounds us everywhere, so the process of studying it can be very exciting. This is where home chemical experiments come to the rescue. By observing such experiments, one can further look for an explanation of why things happen this way and not otherwise. And when a young researcher encounters similar concepts in school lessons, the teacher’s explanations will be more understandable to him, since he will already have his own experience in conducting chemical experiments at home and the knowledge gained.
It is very important to start learning science with common observations and real-life examples that you think will be most successful for your child. Here are some of them. Water is a chemical substance consisting of two elements, as well as gases dissolved in it. Man also contains water. It is known that where there is no water, there is no life. A person can live without food for about a month, but without water - only a few days.
River sand is nothing more than silicon oxide, and is also the main raw material for glass production.
A person himself does not suspect it and carries out chemical reactions every second. The air we breathe is a mixture of gases - chemicals. During exhalation, another complex substance is released - carbon dioxide. We can say that we ourselves are a chemical laboratory. You can explain to your child that washing hands with soap is also a chemical process of water and soap.
An older child who, for example, has already started studying chemistry at school, can be explained that almost all elements can be found in the human body periodic table D. I. Mendeleev. Not only are all chemical elements present in a living organism, but each of them performs some biological function.
Chemistry also includes medicines, without which many people nowadays cannot live a day.
Plants also contain the chemical chlorophyll, which gives leaves their green color.
Cooking is a complex chemical process. Here is an example of how dough rises when yeast is added.
One of the options for getting a child interested in chemistry is to take an individual outstanding researcher and read the story of his life or watch an educational film about him (films about D.I. Mendeleev, Paracelsus, M.V. Lomonosov, Butlerov are now available).
Many people believe that real chemistry is harmful substances, experimenting with them is dangerous, especially at home. There are many very exciting experiences that you can do with your child without harming your health. And these home chemical experiments will be no less exciting and instructive than those that come with explosions, acrid odors and clouds of smoke.
Some parents are also afraid to conduct chemical experiments at home because of their complexity or lack of necessary equipment and reagents. It turns out that you can get by with improvised means and those substances that every housewife has in her kitchen. You can buy them at your local hardware store or pharmacy. Test tubes for conducting home chemical experiments can be replaced with bottles of tablets. You can use it to store reagents glass jars, for example, from baby food or mayonnaise.
It is worth remembering that the container with reagents must have a label with the inscription and be tightly closed. Sometimes the test tubes need to be heated. In order not to hold it in your hands when it heats up and not get burned, you can build such a device using a clothespin or a piece of wire.
It is also necessary to allocate several steel and wooden spoons for mixing.
You can make a stand for holding test tubes yourself by drilling through holes in the block.
To filter the resulting substances you will need a paper filter. It is very easy to make according to the diagram given here.
For children who do not yet go to school or are in elementary school, performing chemical experiments at home with their parents will be a kind of game. Most likely, such a young researcher will not yet be able to explain some individual laws and reactions. However, perhaps it is precisely this empirical method of discovering the surrounding world, nature, man, and plants through experiments that will lay the foundation for the study of natural sciences in the future. You can even organize some kind of competitions in the family to see who has the most successful experience and then demonstrate them at family holidays.
Regardless of your child's age or ability to read and write, I recommend keeping a laboratory journal in which you can record experiments or sketch. A real chemist always writes down a work plan, a list of reagents, sketches the instruments and describes the progress of the work.
When you and your child first begin to study this science of substances and conduct home chemical experiments, the first thing you need to remember is safety.
To do this you need to follow following rules security:
2. It is better to allocate a separate table for conducting chemical experiments at home. If you do not have a separate table at home, then it is better to conduct experiments on a steel or iron tray or pallet.
3. You need to get thin and thick gloves (they are sold at a pharmacy or hardware store).
4. For chemical experiments, it is best to buy a lab coat, but you can also use a thick apron instead of a coat.
5. Laboratory glassware should not be further used for food.
6. In home chemical experiments there should be no cruelty to animals or disruption of the ecological system. Acidic chemical wastes must be neutralized with soda, and alkaline ones with acetic acid.
7. If you want to check the smell of a gas, liquid or reagent, never bring the container directly to your face, but, holding it at some distance, direct the air above the container towards you by waving your hand and at the same time smell the air.
8. Always use small quantities of reagents in home experiments. Avoid leaving reagents in a container without an appropriate inscription (label) on the bottle, from which it should be clear what is in the bottle.
You should start learning chemistry with simple chemical experiments at home, allowing your child to master the basic concepts. A series of experiments 1-3 allow you to get acquainted with the basic aggregative states of substances and the properties of water. To begin with, you can show your preschooler how sugar and salt dissolve in water, accompanying this with an explanation that water is a universal solvent and is a liquid. Sugar or salt are solids that dissolve in liquid.
Experience No. 1 “Because - without water and neither here nor there”
Water is a liquid chemical substance consisting of two elements as well as gases dissolved in it. Man also contains water. It is known that where there is no water, there is no life. A person can live without food for about a month, and without water - only a few days.
Reagents and equipment: 2 test tubes, soda, citric acid, water
Experiment: Take two test tubes. Pour into them equal quantities soda and citric acid. Then pour water into one of the test tubes, but not into the other. In a test tube in which water was poured, carbon dioxide began to be released. In a test tube without water - nothing has changed
Discussion: This experiment explains the fact that without water many reactions and processes in living organisms are impossible, and water also accelerates many chemical reactions. It can be explained to schoolchildren that an exchange reaction occurred, as a result of which carbon dioxide was released.
Experiment No. 2 “What is dissolved in tap water”
Reagents and equipment: transparent glass, tap water
Experiment: Pour into a transparent glass tap water and put it in a warm place for an hour. After an hour, you will see settled bubbles on the walls of the glass.
Discussion: Bubbles are nothing more than gases dissolved in water. IN cold water gases dissolve better. As soon as the water becomes warm, the gases stop dissolving and settle on the walls. Such a home chemical experiment also allows you to introduce your child to the gaseous state of matter.
Experiment No. 3 “What is dissolved in mineral water or water is a universal solvent”
Reagents and equipment: test tube, mineral water, candle, magnifying glass
Experiment: Pour mineral water into a test tube and slowly evaporate it over a candle flame (the experiment can be done on the stove in a saucepan, but the crystals will be less visible). As the water evaporates, small crystals will remain on the walls of the test tube, all of them of different shapes.
Discussion: Crystals are salts dissolved in mineral water. They have different shape and size, since each crystal has its own chemical formula. With a child who has already started studying chemistry at school, you can read the label on mineral water, where its composition is indicated, and write the formulas of the compounds contained in the mineral water.
Experiment No. 4 “Filtering water mixed with sand”
Reagents and equipment: 2 test tubes, funnel, paper filter, water, river sand
Experiment: Pour water into a test tube and add a little river sand there, mix. Then, according to the scheme described above, make a filter out of paper. Insert a dry, clean test tube into the rack. Slowly pour the sand and water mixture through a funnel with a paper filter. The river sand will remain on the filter, and you will get clean water in the test tube.
Discussion: Chemical experiment allows us to show that there are substances that do not dissolve in water, for example, river sand. The experience also introduces one of the methods for purifying mixtures of substances from impurities. Here you can introduce the concepts of pure substances and mixtures, which are given in the 8th grade chemistry textbook. In this case, the mixture is sand and water, pure substance- filtrate, river sand is sediment.
The filtration process (described in grade 8) is used here to separate a mixture of water and sand. To diversify your study this process, we can delve a little deeper into the history of cleaning drinking water.
Filtration processes were used as early as the 8th and 7th centuries BC. in the state of Urartu (now the territory of Armenia) to purify drinking water. Its residents carried out the construction plumbing system using filters. We used as filters thick fabric And charcoal. Similar systems of intertwined drainpipes, clay channels, equipped with filters were also on the territory of the ancient Nile by the ancient Egyptians, Greeks and Romans. Water was passed through such a filter several times, ultimately many times, ultimately achieving best quality water.
One of the most interesting experiments is growing crystals. The experiment is very visual and gives an idea of many chemical and physical concepts.
Experiment No. 5 “Growing sugar crystals”
Reagents and equipment: two glasses of water; sugar - five glasses; wooden skewers; thin paper; pot; transparent cups; food coloring (the proportions of sugar and water can be reduced).
Experiment: The experiment should begin with preparation sugar syrup. Take a saucepan, pour 2 cups of water and 2.5 cups of sugar into it. Place over medium heat and, stirring, dissolve all the sugar. Pour the remaining 2.5 cups of sugar into the resulting syrup and cook until completely dissolved.
Now let's prepare the crystal seeds - rods. Sprinkle a small amount of sugar on a piece of paper, then dip the stick in the resulting syrup and roll it in sugar.
We take the pieces of paper and poke a hole in the middle with a skewer so that the paper fits tightly to the skewer.
Then pour the hot syrup into transparent glasses (it is important that the glasses are transparent - this way the process of crystal ripening will be more exciting and visual). The syrup must be hot, otherwise the crystals will not grow.
You can make colored sugar crystals. To do this, add a little food coloring to the resulting hot syrup and stir it.
The crystals will grow in different ways, some quickly and some may take longer. At the end of the experiment, the child can eat the resulting candies if he is not allergic to sweets.
If you do not have wooden skewers, then the experiment can be carried out with ordinary threads.
Discussion: A crystal is a solid state of matter. It has a certain shape and a certain number of faces due to the arrangement of its atoms. Substances whose atoms are arranged regularly so that they form a regular three-dimensional lattice, called crystalline, are considered crystalline. Row crystals chemical elements and their compounds have remarkable mechanical, electrical, magnetic and optical properties. For example, diamond is a natural crystal and the hardest and rarest mineral. Due to its exceptional hardness, diamond plays a huge role in technology. Diamond saws are used to cut stones. There are three ways to form crystals: crystallization from a melt, from a solution and from the gas phase. An example of crystallization from a melt is the formation of ice from water (after all, water is molten ice). An example of crystallization from a solution in nature is the precipitation of hundreds of millions of tons of salt from sea water. In this case, when growing crystals at home, we are dealing with the most common method of artificial growth - crystallization from solution. Sugar crystals grow from a saturated solution with the slow evaporation of the solvent - water or with a slow decrease in temperature.
The following experiment allows you to obtain at home one of the most useful crystalline products for humans - crystalline iodine. Before conducting the experiment, I advise you to watch the short film “The Life of Wonderful Ideas” with your child. Smart iodine." The film gives an idea of the benefits of iodine and the unusual story of its discovery, which the young researcher will remember for a long time. And it is interesting because the discoverer of iodine was an ordinary cat.
During the Napoleonic Wars, the French scientist Bernard Courtois noticed that the products obtained from the ash of seaweed that washed up on the shores of France contained some substance that corroded iron and copper vessels. But neither Courtois himself nor his assistants knew how to isolate this substance from algae ash. An accident helped speed up the discovery.
At his small saltpeter production plant in Dijon, Courtois planned to conduct several experiments. There were vessels on the table, one of which contained a tincture of seaweed in alcohol, and the other a mixture of sulfuric acid and iron. His favorite cat was sitting on the scientist’s shoulders.
There was a knock on the door, and the frightened cat jumped and ran away, sweeping away the flasks on the table with her tail. The vessels broke, the contents were mixed, and a violent chemical reaction suddenly began. When a small cloud of vapors and gases settled, the surprised scientist saw some kind of crystalline coating on objects and debris. Courtois began to investigate it. The crystals of this previously unknown substance were called “iodine”.
Thus, a new element was discovered, and Bernard Courtois’s domestic cat went down in history.
Experiment No. 6 “Obtaining iodine crystals”
Reagents and equipment: tincture of pharmaceutical iodine, water, glass or cylinder, napkin.
Experiment: Mix water with iodine tincture in the proportion: 10 ml iodine and 10 ml water. And put everything in the refrigerator for 3 hours. During the cooling process, iodine will precipitate at the bottom of the glass. Drain the liquid, remove the iodine precipitate and place it on a napkin. Squeeze with napkins until the iodine begins to crumble.
Discussion: The chemical experiment called extraction or extraction of one component from another. In this case, water extracts iodine from the alcohol solution. Thus, the young researcher will repeat the experiment of Courtois the cat without smoke and breaking of dishes.
Your child will already learn about the benefits of iodine for disinfecting wounds from the film. Thus, you will show that there is an inextricable connection between chemistry and medicine. However, it turns out that iodine can be used as an indicator or analyzer of the content of another useful substance - starch. The following experiment will introduce the young experimenter to a separate, very useful chemistry - analytical.
Experiment No. 7 “Iodine-indicator of starch content”
Reagents and equipment: fresh potatoes, pieces of banana, apple, bread, a glass of diluted starch, a glass of diluted iodine, a pipette.
Experiment: We cut the potatoes into two parts and drip diluted iodine on it - the potatoes turn blue. Then drop a few drops of iodine into a glass with diluted starch. The liquid also turns blue.
Using a pipette, drop iodine dissolved in water onto an apple, banana, bread, one at a time.
We observe:
The apple did not turn blue at all. Banana - slightly blue. The bread turned very blue. This part of the experiment shows the presence of starch in various foods.
Discussion: Starch reacts with iodine to give a blue color. This property allows us to detect the presence of starch in various products. Thus, iodine is like an indicator or analyzer of starch content.
As you know, starch can be converted into sugar; if you take an unripe apple and drop iodine, it will turn blue, since the apple is not yet ripe. As soon as the apple is ripe, all the starch contained will turn into sugar and the apple, when treated with iodine, will not turn blue at all.
The following experience will be useful for children who have already started studying chemistry at school. It introduces concepts such as chemical reaction, compound reaction, and qualitative reaction.
Experiment No. 8 “Flame coloring or compound reaction”
Reagents and equipment: tweezers, table salt, alcohol lamp
Experiment: Using tweezers, take a few crystals of coarse table salt. Let's hold them over the flame of the burner. The flame will turn yellow.
Discussion: This experiment allows us to conduct chemical reaction combustion, which is an example of a compound reaction. Due to the presence of sodium in table salt, during combustion it reacts with oxygen. As a result, a new substance is formed - sodium oxide. The appearance of a yellow flame indicates that the reaction has completed. Such reactions are qualitative reactions to compounds containing sodium, that is, they can be used to determine whether a substance contains sodium or not.
Guys, we put our soul into the site. Thank you for that
that you are discovering this beauty. Thanks for the inspiration and goosebumps.
Join us on Facebook And In contact with
We have a lot of things stored in our kitchen that we can use most interesting experiments for children. Well, for myself, to be honest, make a couple of discoveries from the “how did I not notice this before” category.
website I chose 9 experiments that will delight children and raise many new questions in them.
1. Lava lamp
Needed: Salt, water, a glass of vegetable oil, some food coloring, a large transparent glass or glass jar.
Experience: Fill the glass 2/3 with water, pour into the water vegetable oil. Oil will float on the surface. Add food coloring to water and oil. Then slowly add 1 teaspoon of salt.
Explanation: Oil is lighter than water, so it floats on the surface, but salt is heavier than oil, so when you add salt to a glass, the oil and salt begin to sink to the bottom. As the salt breaks down, it releases oil particles and they rise to the surface. Food coloring will help make the experience more visual and spectacular.
2. Personal rainbow
Needed: A container filled with water (bathtub, basin), a flashlight, a mirror, a sheet of white paper.
Experience: Pour water into a container and place a mirror on the bottom. We direct the light of the flashlight onto the mirror. The reflected light must be caught on the paper on which a rainbow should appear.
Explanation: A ray of light consists of several colors; when it passes through the water, it breaks down into its component parts - in the form of a rainbow.
3. Vulcan
Needed: Tray, sand, plastic bottle, food coloring, soda, vinegar.
Experience: A small volcano should be molded around a small plastic bottle from clay or sand - for the surroundings. To cause an eruption, you should pour two tablespoons of soda into the bottle, pour in a quarter cup of warm water, add a little food coloring, and finally pour in a quarter cup of vinegar.
Explanation: When baking soda and vinegar come into contact, a violent reaction begins, releasing water, salt and carbon dioxide. Gas bubbles push the contents out.
4. Growing crystals
Needed: Salt, water, wire.
Experience: To obtain crystals, you need to prepare a supersaturated salt solution - one in which the salt does not dissolve when adding a new portion. In this case, you need to keep the solution warm. To make the process go better, it is desirable that the water be distilled. When the solution is ready, it must be poured into a new container to get rid of the debris that is always in the salt. Next, you can lower a wire with a small loop at the end into the solution. Place the jar in a warm place so that the liquid cools more slowly. In a few days, beautiful salt crystals will grow on the wire. If you get the hang of it, you can grow fairly large crystals or patterned crafts on twisted wire.
Explanation: As the water cools, the solubility of the salt decreases, and it begins to precipitate and settle on the walls of the vessel and on your wire.
5. Dancing coin
Needed: Bottle, coin to cover the neck of the bottle, water.
Experience: The empty, unclosed bottle should be placed in the freezer for a few minutes. Moisten a coin with water and cover the bottle removed from the freezer with it. After a few seconds, the coin will begin to jump and, hitting the neck of the bottle, make sounds similar to clicks.
Explanation: The coin is lifted by air, which compressed in the freezer and occupied a smaller volume, but has now heated up and begun to expand.
6. Colored milk
Needed: Whole milk, food coloring, liquid detergent, cotton swabs, plate.
Experience: Pour milk into a plate, add a few drops of coloring. Then you need to take a cotton swab, dip it in the detergent and touch the swab to the very center of the plate with milk. The milk will begin to move and the colors will begin to mix.
Explanation: Detergent reacts with fat molecules in milk and sets them in motion. This is why skim milk is not suitable for the experiment.
7. Fireproof bill
Needed: Ten-ruble bill, tongs, matches or lighter, salt, 50% alcohol solution (1/2 part alcohol to 1/2 part water).
Experience: Add a pinch of salt to the alcohol solution, immerse the bill in the solution until it is completely saturated. Remove the bill from the solution with tongs and let it drain excess liquid. Set the bill on fire and watch it burn without getting burned.
Explanation: The combustion of ethyl alcohol produces water, carbon dioxide and heat (energy). When you set fire to a bill, the alcohol burns. The temperature at which it burns is not sufficient to evaporate the water with which it is soaked. paper bill. As a result, all the alcohol burns out, the flame goes out, and the slightly damp ten remains intact.
9. Camera obscura
You will need:
A camera that supports long shutter speeds (up to 30 s);
Large sheet of thick cardboard;
Masking tape (for gluing cardboard);
A room with a view of anything;
Sunny day.
1. Cover the window with cardboard so that light does not come from the street.
2. We make a smooth hole in the center (for a room 3 meters deep, the hole should be about 7-8 mm).
3. When your eyes get used to the darkness, you will see an inverted street on the walls of the room! The most visible effect will be achieved on a bright sunny day.
4. Now the result can be shot with a camera at a long shutter speed. A shutter speed of 10-30 seconds is fine.