What is better to lay on the bathroom floor? How to make a bathroom floor with your own hands
The bathroom is one of the most difficult rooms in terms of decoration. The main problem is that the materials used for finishing must not only be beautiful and wear-resistant, but also suitable for rooms with high humidity. Even if you don’t plan to spill anything on the floor, but instead of using a bathtub, eliminating the possibility of liquid getting on the surface, you won’t be able to get rid of moisture.
Condensation accumulating on walls, ceilings and floors is an inevitable consequence of taking a shower or bath. And the contact is ordinary finishing materials, not intended for use in rooms with high humidity, with water will soon cause deformation, deterioration in appearance and, as a result, the need for repair.
Do not forget that numerous pipes located in the bathroom can leak, which will invariably lead to a deterioration in the quality of the non-moisture resistant coating.
Choosing finishing materials for the bathroom is a complex process, since there are many materials on the market from traditional and inexpensive to exotic and designed for a large budget. Undoubtedly, it is worth choosing materials for finishing, taking into account the premises and interior style.
Finishing the bathroom floor with linoleum
It is very rare to find this material in the bathroom, since the advantages of such a coating are largely offset by its disadvantages.
Pros of using linoleum in the bathroom
The main “advantage” of linoleum as a material for finishing a bathroom is its low price, as well as ease of installation. All you need is glue and the linoleum itself, and you can lay it yourself, without the help of specialists.
This material has much more disadvantages:
- it is very slippery;
- mold and mildew forms under the linoleum;
- in places where water stagnates, an unpleasant “musty” smell appears;
- it is easily pressed.

You can avoid such problems by choosing suitable material. For example, you can purchase linoleum not with a smooth, but with a corrugated surface; it will significantly reduce the risk of falling and damage to health. However, the grooved surface will make cleaning more difficult as dirt will get stuck in the grooves.
To prevent linoleum from being pressed under heavy objects, for example, washing machine, you need to purchase a special thickened coating. You should also make sure that the material is moisture resistant, then it will last longer.
Another requirement concerns installation - when laying, it is necessary to place the floor covering on the wall so that water accumulating in the corners does not come into contact with the edge of the covering. You should also purchase special waterproof glue.
Finishing the bathroom floor with floor tiles

Tiles are undoubtedly the most popular of all bathroom finishing materials. It has not only a number of important advantages, but also a wide range of products. Another “advantage” of this choice is durability. floor tiles, at proper care it can last more than 20 years.
An undoubted advantage is moisture resistance; the tiles are not afraid of contact with any moist air, nor with water. If a pipe breaks, you won't have to replace your bathroom floors.

The only (but very significant) drawback is poor thermal insulation; the tiles transmit the cold of the concrete located underneath. This applies to both tiled and porcelain tiles. You can fix the problem by installing a “warm floor” in the bathroom, but this way out of the situation is associated with additional costs.
You can choose such a coating and avoid additional costs for heating by using vinyl tiles (PVC tiles), which combine all the advantages of previous materials, but are completely free from their disadvantages. For example, we looked at this tile in the ViniPol store and we immediately liked it. The good thermal insulation of vinyl tiles allows you to use this flooring comfortably without additional floor heating.
Besides vinyl tiles less susceptible to influence environment, in the event of heavy objects falling, the risk of damage is much less than with porcelain tiles and tiles.
Finishing the bathroom floor with laminate

The use of laminate in the bathroom can surprise many people, because this material seems completely unsuitable for rooms with high humidity. Laminate resembles wood, which is known to rot. However modern technologies allow you to protect the slats from water penetration. For finishing the bathroom, it is recommended to use a laminate with high moisture resistance.

This material has a lot of “advantages”: a wide price range, ease of installation (and dismantling if necessary), strength, wear resistance, good thermal insulation. The main drawback, however, is of considerable importance - it is almost impossible to avoid the penetration of moisture into the cracks. Optically, the gaps may not be noticeable, but water can accumulate in them, so there is a high risk of rotting of this material.
Finishing the bathroom floor with natural stone

This material can be classified as elite; creating such a floor for a bathroom is only possible with a very large renovation budget. Natural marble is most often used. In addition to the undoubted beauty and sophistication of the material, one can also note its wear resistance, strength and safety (the porous surface prevents slipping).

The most significant drawback is the high price. We also advise you to pay attention to the tone and pattern of each tile; natural material cannot be identical; the tile must be selected. Perfect option finishing a bathroom with marble - consultation with a specialist who can assemble individual tiles beautiful composition. In addition, professionals must also lay natural stone, so the cost of finishing will consist not only of the cost of the materials themselves, but also the cost of the work of specialists.
Finishing the floor in the bathroom will not take you much time if you can decide what characteristics the coating should have. In this situation it is much easier to choose required material, taking into account all its advantages and disadvantages.
Bathroom flooring should be a combination of beauty and practicality. For a comfortable and safe stay in the bathroom, the floor should not slip, but the material from which it is made should be attractive. appearance and pleasant to the touch. Also, do not forget about the resistance of the floor covering to moisture.
What to make a bathroom floor from
Market building materials V modern conditions is able to offer a range of high-quality materials that differ in installation method, practicality and aesthetic content. The main floor coverings for the bathroom are:
- Self-leveling floors (floors with 3D format)
- PVC tiles
- Vinyl floor
- Based on natural stone
- Ceramic tiles.
Let's take a closer look at flooring
1. Self-leveling floor. A coating based on a polymer mass, which is evenly distributed and quickly hardens, is called a “self-leveling floor.” Various impurities in the source material make it possible to obtain an absolutely transparent floor. This, in turn, opens up broad prospects for decorative filling.
Printed panels, photo wallpaper, individual decorative designs and even natural stone or coins can wonderfully decorate the bathroom floor. Usage decorative decoration allows you to achieve a three-dimensional look, which represents a fashionable 3D effect.
Self-leveling floors serve for a very long time - for decades, without changing their properties or appearance at all. They are durable, resistant to high bathroom moisture, easy to use and non-slip.
The disadvantages of the coating are the very expensive installation. However, the small area bathroom allows you to create a beautiful floor polymer based. Another “flaw” of this floor is the difficulty in re-equipment if necessary.
2. Ceramic tiles. This material is very common due to its high resistance to moisture and attractive appearance. Products made from tiles and porcelain stoneware are not subject to deformation, are resistant to chemical attack, as well as mechanical damage (due to abrasion or falling of a hard object).
 Experts recommend choosing tiles with relief or rough surface. This will ensure stability and a safe stay in the bathroom even with a large accumulation of moisture on the floor. In favor ceramic tiles also says the possibility of choosing different patterns and colors of the future floor.
3. Moisture-resistant laminate. Connoisseurs of exquisite comfort and high aesthetic content of the bathroom can pay attention to laminate. However, it is worth choosing materials that are highly resistant to moisture.
 It should be noted that even such a laminate does not tolerate permanent accumulation liquids. It is necessary to wipe it periodically to remove water stains or condensation to ensure beautiful view Paul and him long term services.
Laminate flooring in the bathroom - good decision. Floor based wood materials has a wonderful appearance, remains always warm and pleasant to the touch, and also opens ample opportunities choosing a pattern and texture. Laminate flooring is easy to install, and when making the right choice material and care during operation, it can please the owner of the premises for a long time.
 4. Artificial or natural stone. Flooring based on artificial or natural stone(marble) is very capricious during the installation process.
The price of the product is comparatively much higher than analogues of flooring materials. When wet, the stone becomes slippery, which is sometimes unsafe for visitors to the shower or bath.
However, the unusual appearance of the floor covering in the room determines the choice of individual home owners in favor of stone.
5. Inexpensive, but high-quality coating for the bathroom - PVC linoleum. The product is supplied in the form of convenient tile segments. This material shows excellent characteristics, has an affordable price and high durability. Linoleum segments are very easy to lay on a prepared base.
 It is warm, resistant to soaking and non-slippery. However for optimal use In a bathroom, you should choose linoleum on a moisture-resistant basis with a relief texture. It is also worth paying attention to the quality of laying the material. If the coating becomes too wet, fungi and mold may form on the surface.
 6. Vinyl flooring. Sheet vinyl is very convenient for organizing a floor with virtually no seams. Vinyl in separate sheets-fragments is also common. This material is produced in a variety of colors.
However, the popularity of the material was brought by its qualities: high practicality, the ability to repel moisture and non-slip behavior.
The bathroom coating is selected based on the following criteria:
- “Price of the issue” - the estimated budget for repairs
- Desire to use natural elements
- The desire to create a unique or special interior in the bathroom
- Safety considerations (anti-slip)
- Resistance of the material to moisture.
Conclusion
The bathroom is a special room, the floors of which must be beautiful and resistant to moisture. The building materials market offers a number of solutions with increased moisture resistance specifically for bathtubs and showers.
Add site to bookmarks
- Kinds
- Choice
- Installation
- Finishing
- Repair
- Installation
- Device
- Cleaning
How to make a bathroom floor correctly
One of the important and difficult stages in arranging an apartment or private house is the bathroom, because this room contains a large number of communication pipes that should be carefully hidden, and constant humidity requires the use of special materials. Taking into account these important factors Many people wonder how to make a bathroom floor so that it is durable enough and at the same time looks aesthetically pleasing.
Decorating the bathroom with ceramic tiles is very a good choice, since the tiles have the main quality required for a bathroom - water resistance.
Basically, all installation work related to the arrangement of the floor in the bathroom is carried out according to the same scheme as in other rooms of the apartment or house. And they are a kind of cake made from various building materials, each of which has its own specific purpose. The only significant difference is the top floor covering.
What is a bathroom floor?

There are two mandatory points that must be observed when choosing and installing a siphon for a shower in the floor: the design must be collapsible with a water seal at the drain.
- Concrete floor slab.
- Waterproofing layer, most often rolled or built-up bitumen is used here.
- Cement-sand screed about 50 mm thick.
- Waterproofing coating or painting layer.
- Cement-sand leveling screed.
- Flooring - tile, linoleum, laminate, wood or self-leveling floor.
IN Lately For additional heating, both separately only for the bathroom, and for the entire apartment or private house, underfloor heating systems are increasingly being used. Such a system is installed at the leveling screed stage, therefore similar work should be planned in advance and thoroughly prepared for it.
In order to carry out all installation work correctly in a room such as a bathtub, a lot of strength, patience and a certain amount of accuracy are required, because all working stages can drag on for quite some time. long time. This time is required so that the final structure becomes durable, and the materials used can finally dry out and achieve maximum strength.
Return to contents
Preparatory work

Arrangement of the premises, as well as preparatory work, completely depend on the type of house or apartment in which the flooring will be carried out: in a new, newly built, or residential premises in need of renovation. At repair work in a residential area you will need to spend more time and effort. First you should do complete removal floor covering, after which subsequent leveling of the screed is required. Carrying out preparatory work in a newly built residential building will be much easier. The only thing you need here is to sweep all the garbage out of the room.
After this room is completely prepared for subsequent work, it is recommended to vacuum the floor in both the new and renovated bathrooms and seal all visible cracks. To prevent these cracks and other holes from becoming larger in the future, it is recommended that all work be done using tile adhesive. After it has completely dried, you can begin to next stage.
Return to contents
Waterproofing works

First, the entire floor surface is treated with a soil mixture. After it has completely dried, one of the possible waterproofing options is selected: rolled, welded, painted or coated. Each of these options is effective, but the most durable, optimal, and therefore the most popular is the coating version of waterproofing.
For this you will need:
- Pour the dry coating mixture into water at a ratio of 1:1. Mix everything thoroughly until a homogeneous mass is formed.
- Apply to the floor surface ready mixture using a roller.
- At the junction of the floor and the walls, apply waterproofing tape.
- Apply the coating mixture to the waterproofing tape and walls, the height from the floor should be at least 15 cm.
- Allow the first waterproofing layer to dry completely and then apply another one.
After the waterproofing layer has completely dried, which takes about a day, you can proceed to the next stage of work. But here you should finally decide whether you plan to make any changes in this room, because this may affect the process of all further work associated with the installation of the flooring.
Return to contents
Possible changes
In connection with the arrangement and renovation of a bathroom, it is quite acceptable to do design changes in this room, for example, install a water drain, install a heated floor system, or move the toilet to another location. These and other changes must be carried out precisely at this stage, that is, before pouring the concrete screed.
- Water drainage equipment provides an excellent opportunity to avoid accidental flooding. To do this, you will have to make the floor at a slight slope towards the drain and install a drainage pipe in the corner to drain the water.
- The presence of a heated floor in the bathroom increases comfort and provides certain conveniences. This installation is completely safe for people, is easy to install and eliminates leaks in the future.
- To move the toilet to another location, it should be connected to the sewer drain. The connecting pipe must have a certain angle of inclination, which, when finishing works will need to be hidden from prying eyes.
Return to contents
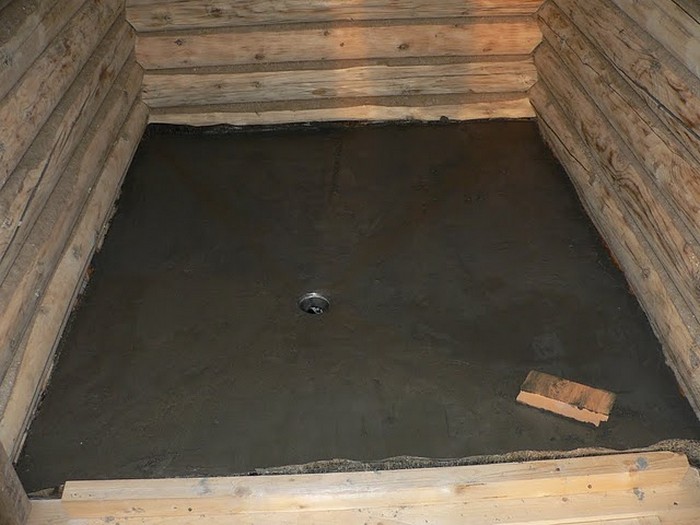
Bathroom floor screed

Floor screeding should be approached with all responsibility. The smoother the base is, the better the quality of laying the flooring will be. To perform a leveling screed, they are most often used cement-sand mixture, which is capable of qualitatively leveling any surface, even those with the most significant and obvious flaws.
The procedure for performing a concrete screed:
- On the walls, using a level, it is necessary to mark the boundaries up to which the floor will be poured.
- Using the marked boundaries as a guide, place the beacons at a distance of 1 m from each other.
- Using a drill with a mixing attachment, thoroughly knead cement-sand mortar.
- Pour the solution up to the top edge of the beacons and level it using the rule.
After completing the work, it is important to follow the rules of the microclimate and avoid drafts until the screed dries. When installing a heated floor, after the first pouring and the screed has completely dried, you should first lay down a heat-insulating layer, and then start installing the heated floor. Upon completion of this work, it is necessary to carry out another pouring of the second layer of cement-sand mortar.
The peculiarities of the processes occurring in the bathroom dictate certain requirements for all structures and finishing materials used in this room. The most troublesome part is installing the floor, since there is a high probability that a small amount of water will systematically enter here. When installing a bathroom floor in a private home or country house, there may be several design options depending on what base, concrete or wood, the flooring is laid on. It is especially important to correctly carry out all the work on the second floor in a private house in order to reliably protect the lower rooms from flooding. If you decide to make the floor yourself, then the photo and video at the end of the article, as well as our recommendations, will help you.
Requirements for bathroom floors

Regardless of what kind of bathroom floor you will make (concrete or wood), you need to know what requirements apply to the surface in this room:
- The entire structure of the bathroom floor must be reliably protected from moisture, since the risk of spilling some amount of water cannot be ruled out. This is especially important if the bathroom is located on the second floor in a private house or in a country house.
- Due to constant high humidity, finishing materials must have excellent moisture resistance, which guarantees the durability of the coating.
- Since many utilities are laid in the bathroom, they need to be hidden in the floor structure, and the place where they are laid through the floor slabs must be well insulated from moisture. Moreover, this applies equally to concrete and wooden floors.
- The weight of sanitary equipment is considerable; in addition, the floor in the bathroom must withstand vibration loads from the washing machine.
- The level of the finishing coating in this room should be slightly lower than the floor level on the floor. This will prevent water from spilling out of the bathroom when flooded.
- In a private house or country house, it makes sense to make the floor in the bathroom on the first or second floor sloping towards the drain, which goes out into sewer riser. This will save you from many problems when you hit large quantity water on the floor. Please note that this can only be done in country house, cottage or country house, apartment multi-storey building this is not feasible.
- The floors on the ground floor in a house without a basement must be carefully insulated to increase the comfort of the room. In addition, on any of the floors you can arrange heated floor coverings in the bathroom.
Preparatory work

- First, you need to remove all the furniture from the bathroom and remove the sanitary equipment.
- Next, the old coating is completely dismantled. In this case, it is worth not only removing the old finishing layer, but also disassembling old screed or other layers to a wood or concrete base.
- Next, the surface of the base is cleared of debris and inspected. If there are any cracks, chips, holes or cracks on the concrete surface, they are all carefully sealed with a repair compound. We will describe how to prepare a wooden base further in our article.
- Further concrete surface needs to be primed. For these purposes, it is better to use antiseptic penetrating mixtures that will protect against fungus and mold.
Waterproofing

Primary waterproofing can be done with your own hands using the following materials:
- Roll insulation performed using modern roofing felt on a self-adhesive or mastic base. It is better to choose products with a rubberized layer. Before installation, the bathroom floor is covered with bitumen mastic, which is also spread on the lower part of the walls (to a height of 20 cm). After this, strips of roofing felt are laid. In this case, it is necessary to overlap the adjacent strips by 10-15 cm. Ruberoid is also applied to the walls.
- Coating waterproofing. These ready-made compositions applied to the walls of the room using a roller or brush. The joints between the walls and the floor must be sealed with a special sealing tape, which is firmly pressed into the coating compound previously applied to the joints. After this, the entire floor surface and tape are covered. After 6-8 hours, the treatment is repeated. After a day, further work can begin.
Advice: do not use roofing felt instead plastic film, since over time it may change its characteristics due to contact with concrete.
Screed

After waterproofing the bathroom, you can begin installing the screed. It is quite difficult to understand the sequence of actions from photos on the Internet, especially if you do the work yourself, so we offer a step-by-step guide:
- First you need to determine the height of the screed. Don't forget that the finished floor level should be lower than the rest of the floor. After this, we draw a zero level line on the walls of the room.
- If the height of the screed is within 5-7 cm, then it is better to provide reinforcement. It can be made using a steel rod or a special reinforcing fiberglass mesh. A screed less than 3 cm high will not be very strong.
- To install beacons, you can use a steel plaster profile. The profiles are installed no closer than 30 cm from the walls. The spacing of the beacons between each other is determined by the length of the rule. We fix the beacons on mortar piles so as not to damage the waterproofing. We set all profiles by level.
- After the solution has hardened under the beacons, you can begin screeding. For these purposes, you can use cement-sand mortar prepared in a ratio of 1 to 3 or ready-made dry mixtures.
- We place the solution between the beacons and level it with a rule over their surface.
- After pouring, the screed is covered with plastic film for maturation and periodically moistened with water. After three days, the film can be removed.
- When the screed has completely hardened, you can proceed to laying the selected floor covering.
Wooden floor

IN wooden house or in the countryside, floor beams are usually used, so laying tiles in the bathroom has to be done on a wooden rough base. When doing work with your own hands on preparatory stage it is very important to carefully examine the base and draw conclusions about their bearing capacity and durability. To carry out a more thorough inspection, it is necessary to remove the boardwalk and inspect the logs:
- Rotten or cracked joists must be replaced.
- To prevent floorboards from sagging under the weight of ceramic tiles, the joist pitch should not be more than 50 cm. Otherwise, you will have to install additional elements to decrease the step.
- All beams must be aligned in the same horizontal plane.
- We lay waterproofing material on top of the joists.
- The sub-wood floor also needs to be repaired. We replace dilapidated and cracked boards, and strengthen creaking elements.
Advice: For everyone's protection structural elements from moisture, rough flooring boards and joists must be treated with antiseptic and moisture-repellent compounds.
- If the tiles are laid not on a leveling layer of gypsum fiber board or plywood, but directly on boards, then they must be thoroughly cleaned of old paints and varnishes.
- At the preparatory stage it is possible to provide additional insulation floor. To do this, expanded clay can be laid between the joists, mineral wool or polystyrene foam boards.
- To ensure ventilation of the wooden floor underneath floor covering(regardless of whether you will lay the tiles on GVL sheets, plywood or directly onto the subfloor boards), it is worth setting a gap between the floorboards. We also leave a 1 cm wide ventilation gap along all walls.
Methods of laying on a wooden base

So that you don’t have to look for photos or videos on the Internet about how to lay tiles on wooden floor, we will describe several methods. Our step by step guides will help you do everything yourself.
Laying on boards

- After preparing the boardwalk, it is necessary to apply a thin waterproofing layer. To do this, the surface is treated with latex impregnation. After the composition has been applied to the floor using a wide brush, it is covered with a fine-mesh fiberglass mesh. After the composition has dried, the mesh is additionally attached to the floor with self-tapping screws. This way we will get not only a waterproofing layer, but also a reinforcing layer.
- To improve the adhesion of tile adhesive to the prepared surface, prepare a composition of coarse sand, silicate adhesive and water in a 2:2:1 ratio. This composition needs to be treated with the floor surface. After drying, floor tiles are laid on this rough monolithic surface.
Thin screed
- We carry out the waterproofing stage of the floorboards in the same way as described in the previous method.
- Now we attach a damper tape along the perimeter of the room along the walls. It will protect the thin screed from deformation damage.
- For reinforcement, you can use thin fiberglass or metal mesh. We lay it on the floor.
- We install the beacons on the basis that the height of the screed will be about 30 mm.
- For work, it is better to use ready-made dry mixtures with fiber reinforcement. They are easier to prepare and lay, and the layer will be more durable.
- We treat the mature screed with a primer, after which it is ready for laying the finishing coating.
GVL base

You can find many photos on the Internet that show how to do alignment using GVL. To make it clearer for you, we present the sequence of performing this method:
- The plank base is processed antiseptic impregnation and covered waterproofing material. For these purposes, you can use plastic film, glassine or other rolled materials.
- GVL sheets are laid in staggered order. Since they have a tongue-and-groove joint, adjacent sheets are glued together along the locking part and additionally reinforced with self-tapping screws. Fasten the gypsum fiber board with self-tapping screws in the center and along the perimeter to wooden base no need.
- To make the base under the tiles especially strong, gypsum fiber board sheets can be laid in two layers. In this case, the seams in the layers should not match.
- After this, the surface of the GVL is treated with a primer. After it has dried, you can lay the floor covering.
Laying tiles on plywood, OSB or chipboard

- The rough boardwalk is subjected to antiseptic treatment. After it dries, the floor is covered with waterproofing material. You can use the same materials that were described in the method above.
- Sheets of plywood or other wood products are laid out in space. In this case, you need to leave a gap of 5-10 mm between them. The same distance must be set back with slabs from the walls. This will allow the material to freely expand and contract due to changes in humidity.
- Wood boards are attached to the floor with self-tapping screws in increments of 15-20 cm. They are screwed in along the edges and in the central part of the sheet. The fastener caps are recessed into the thickness of the slab.
- We fill all compensation gaps polyurethane foam or sealant. Cut off excess after drying.
- Next we make a waterproofing and reinforcing layer. To do this, we treat the floor with latex impregnation and lay a reinforcing mesh on it. After the composition has dried, we treat the entire surface of the floor with a silicate-sand mixture.
- After the mixture has completely dried, the base for laying floor tiles is completely ready.
Video instructions for installing floor screed in the bathroom.
Nowadays, the choice of finishing materials is so large that it is sometimes difficult for a buyer to understand this variety without the help of a specialist. This does not mean that you can use any material you like for the bathroom floor. It has special requirements.
Bathroom: which floor to choose
This room is damp, therefore, the flooring must fully comply with these conditions. What should the floor be like in the bathroom? Due to temperature changes and high humidity Not every material can be used in this room. So, the basic requirements for the floor:
- moisture resistance;
- safety;
- aesthetics;
- hygiene;
- ease of care;
- durability.
Linoleum flooring
At first glance, this use has long been known material may seem unusual. Quite rarely, but it is used for bathroom flooring. The reason for its use is its low price, variety color solutions. Linoleum reacts neutrally to moisture (provided that the coating is solid and has no joints).

Ceramic tile
Flooring made from this material is the undisputed leader in popularity. High quality, with high technical characteristics, bathroom creates an ideal surface. It is even and smooth. The material is quite easy to install, washes well, and can be partially replaced if necessary.
We use porcelain stoneware
According to experts, this is the most relevant material. The bathroom floor made from it is surprisingly durable, with ideal technical characteristics. Porcelain tiles - environmentally friendly pure material, only natural ingredients are used in its production. There are no chips in it, because it is impossible to break it. This material is also unique in that it perfectly imitates other materials that cannot be used in a given room - fabric, wood, clay, leather, etc.

In bathroom
Surely many will be surprised by this choice. And experts believe that this is one of the “warmest” options that can be made in such a complex room. The specially treated bark is soft, elastic, and has a long service life, making it an ideal floor covering for wet areas. The most important thing in this case is to use good glue and high-quality varnish, which is applied in two layers.
Self-leveling floor
The finish can be very unexpected. For example, polymer seamless coating, more often called self-leveling flooring, is intended for rooms with increased requirements. In addition to its manufacturability, it is bright design solution, radically changing the appearance of the room. There is probably only one such floor in the bathroom, but significant drawback- in his color scheme too few shades. There are now more than ten colors of this coating on sale, so when the right approach that's more than enough. Externally, self-leveling flooring is not much different from linoleum, but to the touch it resembles glossy tiles.
We have introduced you to some suitable ones for use in the bathroom. We hope that our information will be useful and you will make the right choice.