Decorative design of the ceiling. How to design a low ceiling - design tips in Russian realities
How to decorate the ceiling? This question is asked, perhaps, by every person who has started major renovation. To finish the ceiling, you can use plasterboard, moldings, bamboo or expanded polystyrene tiles. Wallpaper and water-based paints are also used as finishing materials. It is worth noting that decorating the ceiling in an apartment begins with a series of preparatory work.
If the apartment has a low ceiling, then use plasterboard and the like. Construction Materials undesirable, since they require the installation of a special frame. To visually expand the space, you can decorate the ceiling with specialized mirror tiles.
Mirror tiles can even be installed on concrete ceiling. However, experts recommend not to neglect priming and puttying the base surface. If there are no potholes or cracks on the base surface, then mirror ceiling will lie flatter.

Installation mirror tiles to the surface:
- Apply markings to the ceiling.
- Cut the tiles. For cutting, it is best to use a special grinder.
- Using a drill, drill a hole in each tile for screws.
- Place a rubber cap on the screw. This is necessary to avoid damage to the glass.
- Fix the tiles to the base surface.
- Install chrome caps in the places where the screws are attached.
- If desired, you can decorate the mirror ceiling with LED strips.
Decorating the walls and ceiling of an apartment with bamboo slabs
Recently, bamboo slabs have become very popular. They are used both for finishing walls and for finishing ceilings. This material does not deform under the influence of temperature changes, and perfectly tolerates high humidity. Installation of bamboo panels on the ceiling and walls is carried out in a similar sequence.
If you decide to decorate the ceiling and walls with bamboo, then remember that the tiles must be treated with a special antiseptic solution. Otherwise, the material may lose its strength.

Do-it-yourself installation of bamboo slabs is done in the following order:
- Apply primer to the surface.
- Fix cracks using sealant.
- Apply markings to the surface.
- If necessary, adjust the size of the tiles using a hacksaw.
- Apply adhesive to the slab.
- Place the slab against the surface and lightly press the material.
- Remove excess glue with a napkin.
- After you have installed all the slabs, seal the joints with sealant.
Material about the features of using bamboo wallpaper in the interior will also be useful:
Inexpensive ceiling design options
In order to decorate the ceiling beautifully, it is not necessary to spend a large number of Money. If you are looking for budget ones, you can use drywall or expanded polystyrene boards. Ceilings decorated using these materials look no worse. In addition, paint or other finishing materials can be applied over drywall and foam boards.
Sheets of plasterboard should be mounted on a special sheathing. For making the frame it is recommended to use aluminum profiles, as they are more durable and durable.
1.jpg)
Installation of drywall on the frame:
- Make holes in the drywall for the lights.
- Secure the panel using self-tapping screws.
- After all the panels are installed, it is necessary to seal the joints between them using putty mortar.
- Finally, you need to paint the ceiling and fix the lamps.
The procedure for installing foam plastic boards on the ceiling:
- Apply a primer to the ceiling and a layer of putty on top of it.
- Mark the surface.
- Apply to reverse side board adhesive solution.
- Place the slab against the ceiling and press it lightly with your palms.
- Once you have secured all the panels, make holes for Spotlights or a chandelier.
- Fill the gaps between the plates with putty.
The simplest design of a modern ceiling
If you are looking for the simplest ceiling design, then use wallpaper. Pasting the surface with this material is done very quickly. When using wallpaper, you must first turn off the power to the apartment and close the windows. Also, do not forget to apply primer and putty to the surface.

The ceiling is finished with wallpaper in several stages:
- Measure the length of the room.
- Cut the required piece of wallpaper. Remember that all stripes must be the same length and width.
- Apply glue to the back of the wallpaper. If desired adhesive composition Can also be applied to the ceiling.
- Glue the strip to the ceiling using a roller.
- Smooth the strip with a spatula.
- Glue the remaining strips in the same way.
- Gently fold and trim the edges of the wallpaper.
- Paint the wallpaper. It is advisable to use water-based paint.
Interesting ideas for decorating the ceiling with wallpaper can be found in the material:
Decorating the ceiling with moldings yourself
You can use moldings to decorate the ceiling. They are made of polyurethane, wood or plastic. Moldings are available in the form of corner strips. This material is glued to the wall.
To finish a curved ceiling, you need to use exclusively flexible moldings. They are made of polyurethane, so they are easy to bend. Flexible moldings are fixed with nails, which are subsequently removed.

The procedure for installing moldings on the ceiling:
- Cut the edge of the part at the desired angle using a miter box.
- Treat the installation site with a primer mixture and putty.
- Apply glue to the back side of the molding.
- Place the molding against the surface and apply light pressure.
- After a few minutes, remove excess glue.
- Seal the gaps between the ceiling and the molding using sealant.
Stretch ceilings in the living room - ideas and design options (video)
When choosing a finishing material, rely on your own preferences and the height of the room. To decorate low rooms, it is not advisable to use building materials that are installed on the frame. Also, when choosing a finishing material, take into account the design of the room. For example, bamboo tiles will not fit into the interior of a room designed in a classic or fusion style.
Decorating the ceiling in the apartment (photo)


Decorating ceilings in an apartment is not so simple task. Depends on appearance premises. Sloppy ceilings can spoil the impression of even the most luxurious room. When choosing materials, it is necessary to take into account the interior, the number of rooms, and the degree of illumination. It is recommended to use for different premises different kinds finishing. Thanks to this, each room will become original and unique. Options good design ceilings can be seen in the photo. It is advisable to imagine in advance how you want to decorate the ceiling.
Ceiling in the living room
The ceiling in the living room is being decorated different ways. For apartments in classic style Traditional white options, decorated with stucco and moldings, are suitable. For rooms in a modern style, you can choose glossy or matte. They make it possible to hide communications and electrical wiring. The color of the material can be either pastel or bright. When renovating a room, you can replace the old canvas with a new one of a different design.
Surfaces decorated with frescoes also look good - they are painted with decorative plaster. This decor looks elegant, rich and beautiful. Using drywall to create multi-level structures different forms. The original design option is steps of different shades of the same color with lighting.

Lighting is also important. In modern ceiling structures spotlights are often used. If their location is carefully considered, the quality of lighting will be sufficient even if the use of a chandelier is not intended. Plasterboard structures can be decorated with hidden lighting. The room is even divided into zones, combining several types of finishes and types of lighting fixtures.
It is not recommended to plaster or paint the surface in the living room - it looks too simple. Cassettes are not suitable for most interiors suspension systems– they look attractive in kitchens and bathrooms, but not in living rooms.
When developing a design, it is worth taking into account the age and gender of the child, his interests and hobbies, and character type. The ceiling can be covered with photo wallpapers with images of nature, animals, fairy-tale characters, and drawings and applications can be applied to the surface. Many children like pictures scattered all over the ceiling. Good fit stretch fabrics calm flowers. Using on ceiling surface various colors, you can conditionally divide the room into zones for play, relaxation, and study.

Nowadays, the kitchen can be used not only for preparing dishes and eating. Now it is very fashionable to combine it with the living room (read: ""). Before you start decorating the ceiling, you need to decide how the room will be used.
Most often used the following types finishes:
- painting;
- tiling;
- stretch ceiling;
- suspended structures.
A painted ceiling looks good in the kitchen - you just need to choose the right shade. This finishing option is ideal for low-rise rooms, but before painting the surface must be leveled, puttied, and primed, and this takes a lot of time. It is recommended to use water-based paint - this coating can be washed, and it will not be difficult to keep the kitchen clean.
Ceiling tiles are inexpensive, but they can only be glued to a flat surface. But the appearance of such a finish cannot be called sophisticated - it looks rather mediocre. Among the advantages of this material, it is worth noting moisture resistance and ease of installation.
Plasterboard structures are very popular - this material It easily takes any shape, so the ceiling can look luxurious. And at the same time it is inexpensive. For the kitchen it is better to choose moisture-resistant material. Suspended structure not only looks beautiful in itself, but also hides various communications - pipes, ventilation, etc. Decor suspended ceilings can be absolutely unique.
Stretch ceilings are expensive, but they look great. They are easy to wash, but you should avoid using abrasive substances that will scratch the fabric and make it lose its attractiveness. In general, suspended ceilings are easily damaged by mechanical impact, so you should avoid their contact with sharp objects. The combination of tension systems with drywall looks interesting. Their main disadvantage is the inability to carry out installation independently due to the fact that this work requires special, expensive equipment.
There are techniques that can visually enlarge a room:
- glossy surfaces reflect the decor of the room, so it seems larger than it actually is; Mirror panels have an even greater effect;
- longitudinal patterns on walls, curtains, furniture increase the height of the room, but only if they are not too bright and provocative;
- long curtains allow you to “stretch” the room vertically, so you should choose models that go all the way to the floor, and it is recommended to mount them on ceiling rather than wall cornices;
- elegant furniture with thin legs, openwork chair backs and bed headboards in small rooms do not take up too much space and make the design lighter.
Currently, there is a huge selection of materials and finishing technologies. Thanks to this, ceiling design options can be very different. It’s easy to get confused in this variety, so don’t ignore the advice experienced designers. The ceiling can either decorate a room or ruin the entire impression of it. To avoid mistakes, you need to carefully consider the interior of the room down to the smallest detail. Makes it easier to select and view photos of successful interiors.


In the interior design of the living room great importance has a ceiling finish. Correctly selected tones, competent decor, beautiful lighting create a harmonious atmosphere and emphasize the overall style. To do this, you don’t have to invest a lot of money and hire specialists - there are many interesting and affordable ways to do it yourself. Before you decorate the ceiling in the living room, you need to study the basic styles, select materials and become familiar with the technology.
The classic style in the living room interior will never become outdated. It is necessary bright hues, regular shapes, exquisite stucco molding and beautiful chandelier. The ceiling itself can be multi-level or simple, and as a decoration paint will do, decorative plaster and wallpaper. The main emphasis is placed on baguettes around the perimeter of the surface and additional accessories. To properly complete the finishing, you must first prepare the ceiling.

Preparatory process
The old coating is carefully removed, paint and plaster are removed, and the surface is cleaned of dust. Small cracks and the defects are smoothed out with putty, and after it dries, these areas are treated with sandpaper.
If you plan to install drywall, no additional surface treatment is needed, but if the finishing involves painting, wallpapering or plastering, more careful leveling will be required. To do this, the ceiling is primed, covered with a uniform thin layer of putty, and sanded. Each subsequent layer is applied after the previous one has completely dried. Finally apply finishing putty, sand the ceiling again and treat it with a primer mixture. After such processing, you can begin decorative design.

The easiest way is to paint the ceiling; you need to choose matte paint light shade. Even if the leveling of the working surface was very high-quality, barely noticeable bulges or depressions could remain, which immediately catch the eye under the glossy paint. And here matte paint easily hides any defects. Usually 2 coats are required to ensure an even color on the ceiling.
If wallpaper is chosen as a decoration, it should not have a catchy pattern and be too bright or dark. Wallpapers in white, light beige, or cream shades with a smooth texture and a barely noticeable pattern are ideal. And here Decorating the ceiling with plaster in this case is undesirable: textured surface creates glare and darkening, which is unacceptable for a classic style.
Decoration methods
For finishing living room ceiling you will need:
- straight and curly fillets;
- pencil for marking;
- polymer glue;
- clean dry cloth;
All joints between the ceiling and walls must be closed with straight fillets.. Start from the corner: on back side Glue is applied to each baguette in a narrow strip and gently pressed to the surface, closing the seam. The glue that comes out is carefully wiped off so as not to stain the ceiling. There should be no gaps between the fillets, and if they do form, you need to fill them with sealant. The last baguette should be trimmed correctly so that the edges match the pattern.

You can lay out a circle in the center of the ceiling from figured fillets correct form, and also secure a decorative rosette around the chandelier. If the living room is large enough, you can create an internal square on the ceiling from baguettes with curly corners, retreating 20-30 cm from the walls.
The space between the first and second rows of baseboards is often painted a different color, darker than the rest of the ceiling, and compatible with the interior elements. If ordinary baguettes are replaced with stucco, the look will be much more solid; In addition, this decor looks great with gilding, which also gives the interior an atmosphere of luxury.

Multi-level ceilings for a living room in a classic style are decorated according to the same principle: light colors, regular symmetrical shapes, beautiful baguettes around the perimeter, proper lighting. Plasterboard structures allow you to hide wiring, so you can use several lamps at once for lighting, placing them in ceiling niches or along the perimeter of each level.
Minimalism and eco-style in ceiling design

Modern living rooms are increasingly decorated in a minimalist and eco-style, based on the simplicity and naturalness of materials. To finish the ceiling yourself, you will need very little:
- white or beige paint;
- white matte wood varnish;
- wooden beams;
- simple shaped lamps.
Multi-level ceilings are not suitable for eco-style, so the surface must be flat and smooth. You should also not use a glossy finish - matte ceiling looks more natural. The base should be made white or beige, although a delicate blue tint is also possible.
When the paint has dried, several parallel wooden beams are fixed to the ceiling, from one wall to the other. It could be continuous wooden panels, then there is no need to paint the surface. The distance between the beams is chosen arbitrarily; There is no need to polish the wood to leave the most natural look. Upon completion of installation, the beams are coated with matte white varnish. Finishing touch– installation of lamps.

Living room in Japanese style it looks very unusual and elegant, and the design of the ceiling plays one of the main roles here. Distinctive feature This style is a harmonious combination of a white base and dark decor from wooden slats, as well as the presence of Japanese symbols. The simplest finishing option: the ceiling in the living room is painted in White color, then attach the structure from wooden beams, which divide the surface into large squares of equal size.
The beams are painted dark brown or black and varnished. Decorative lamps with hieroglyphs are hung at the intersections of the beams. If the living room is small, it is recommended to replace the beams with thin slats; they can not be mounted from wall to wall, but only in the central part of the ceiling. One of the squares can be decorated using a stencil with a branch of cherry blossoms or a composition of several hieroglyphs.

The interior in the Art Nouveau style is interesting with its unusual design shapes, exotic colors and plant prints. There are many options for decorating the ceiling, both simple and quite complex to implement. For a large living room, a multi-level ceiling is best suited, where each level has a special shape and a different shade. Stained glass inserts and original lamps are often used for decoration.

To decorate the ceiling with your own hands in this style, you don’t have to spend money and effort on creating complex structures from plasterboard. It will be enough acrylic paint different colors, stencil with floral ornament And unusual shape chandeliers or lamps. The base should be white; in one of the corners of the ceiling, using a stencil, a pattern is applied with bright paint. It’s good if part of the pattern goes down onto the wall, as if connecting two surfaces. You can draw a flower arrangement around the chandelier, but be sure to have a fancy shape and asymmetrically.

Also excellent result is obtained using thin baguettes: foam baguettes are glued to the ceiling, creating an asymmetrical geometric pattern. These can be parallel lines of different lengths, diverging rays, various squares, triangles or circles and curls. The pattern should be closer to one of the corners and occupy a certain part of the surface. Particular attention should be paid to the selection of lamps: they must have modern look, non-standard shape and small sizes.
Other design options
If it is difficult to decide on the style of the living room, you should use a decor for the ceiling that would be in harmony with common interior and at the same time expressing individuality. You can divide the surface into zones and paint them in different colors with smooth transitions. It is enough to take 3-4 muted shades to make the ceiling attractive, but not catchy and flashy. Bright, saturated colors are best used in other rooms.

The living room with ceilings covered with the same wallpaper as the walls looks nice and homely. For this purpose, wallpaper should be chosen with a medium-sized pattern, not too bright, preferably two-color. A geometric pattern on a light background is ideal. To prevent the ceiling and walls from merging, beautiful white baguettes must be glued around the perimeter.

The methods described are the simplest. Using your imagination, you can add to these options or create your own. When decorating ceilings, it is very important to show a sense of proportion, and it is better to leave empty areas than to fill them with unnecessary elements. A clutter of decor will never be able to decorate the interior, but minimalism in details, neatness and thoughtfulness in design will allow you to create real comfort and harmony!
Video - How to decorate the ceiling in the living room
Ceiling decor – important aspect interior decoration, making the room cozy and attractive. In some cases, a person wants to have a hand in creating the original image of his home. Therefore, you can decorate the ceiling yourself. Today there are many options for decorating the ceiling.
False beams
Certain interior design styles - chalet, country, grunge, gothic, etc. - require beams on the ceiling. Modern mixed styles have absorbed decorative elements different styles. Now beams are used every day by designers and decorators when interior decoration premises. Previously, beams were used for practical tasks - these elements supported the ceiling. Nowadays, beams perform an exclusively decorative function, so decorating the ceiling with massive oak or beech beams is not always advisable for economic reasons.


Now designers are actively using gypsum, polyurethane and foam beams. They are not subject to stress ceiling, that’s why they are called false beams. But with the help of paint or veneer they are given the shade and texture of any natural wood.

Textile
Interesting option decorative finishing ceiling – . The use of fabric creates comfort and brings harmony to the interior.

This finishing method is used in interior design due to a number of advantages.
- The fabric installation process does not require construction skills.
- The material hides various imperfections on the ceiling well.
- For drapery, you do not need to perform basic finishing work, because the fabric is attached to the edges of the room.
- You can lay electrical wiring and other communications on the ceiling - the fabric will hide everything.
- Drapery is an easy and pleasant way to decorate.
- If necessary, the fabric sheet can be easily removed. Convenient for repairing communications and electrical wiring in the ceiling.
- The fabric ceiling is almost impossible to damage. Minor damage to it will not be visible.

The disadvantages include high level absorption of odors and low resistance to humid environments.
Fabric canvas is an ideal material for creating original design effects. But they must correspond to the interior of the room in which the drapery will be made.
Fabric ceilings have many variations. It can be done, for example, in the shape of a tent or in waves. Stretching the material from the walls to the center allows you to realize individual ideas or use generally accepted methods of installing a fabric ceiling.

Main types of fabric for drapery
For finishing ceiling covering 6 main types of fabric are used.

Decorative plaster
The ceiling can be decorated with decorative textured plaster. It consists of special elements that create various reliefs during application to the ceiling. After it dries, it can be painted any color. It is advisable to use this type of decor when the ceiling covering is uneven, because it will not only decorate the home, but also level out the crooked ceiling.
Decorative plaster can be used in low rooms, because it does not visually reduce the height of the ceiling. Plaster is also often combined with other materials to create an imitation natural materials(granite, marble, mother of pearl).


Video - Finishing the ceiling with decorative plaster
Stucco molding
A fairly common type of repair and decorative work is finishing ceilings with stucco. In the arsenal of designer services, stucco molding has always occupied and still occupies a place of honor. This is due to the many advantages that it has this type decorative finishing of the ceiling.

Among them are:
- the possibility of restoration or replacement of damaged elements of a stucco composition;
- hiding defects in the ceiling and joints of the ceiling covering using fragments of moldings;
- the visual appeal of this type of decorative finishing (with the help of baguettes, rosettes, caissons you can create various decorative compositions on the ceiling);
- the ability to highlight the advantages of a room and change its visual perception;
- durability.


Stucco molding will help you quickly transform any room, making it attractive and presentable.
Artistic painting
With the help of artistic painting you can create a delightful interior in your home. Previously, to apply drawings to the ceiling, you had to call a master artist, but now there are many techniques and materials that allow you to do artistic painting on the ceiling yourself.

Stencils are special forms that make it possible to apply almost any pattern to the ceiling. You can purchase them or make them yourself. The stencils are attached to the ceiling surface using tape and then painted with the chosen paints. The main stages of working with a stencil are given below.

Cutting out a pattern for a stencil: 1 - bridges; 2 - round element of the design (made with a punch); 3 - cutting out patterns with a knife


If you don’t have time to tinker with stencils, you can purchase ready-made vinyl stickers, which easily stick to undamaged surfaces.
But there are simple techniques that can help you recreate a full-fledged artistic painting on the ceiling.
Create an imitation of clouds on the ceiling
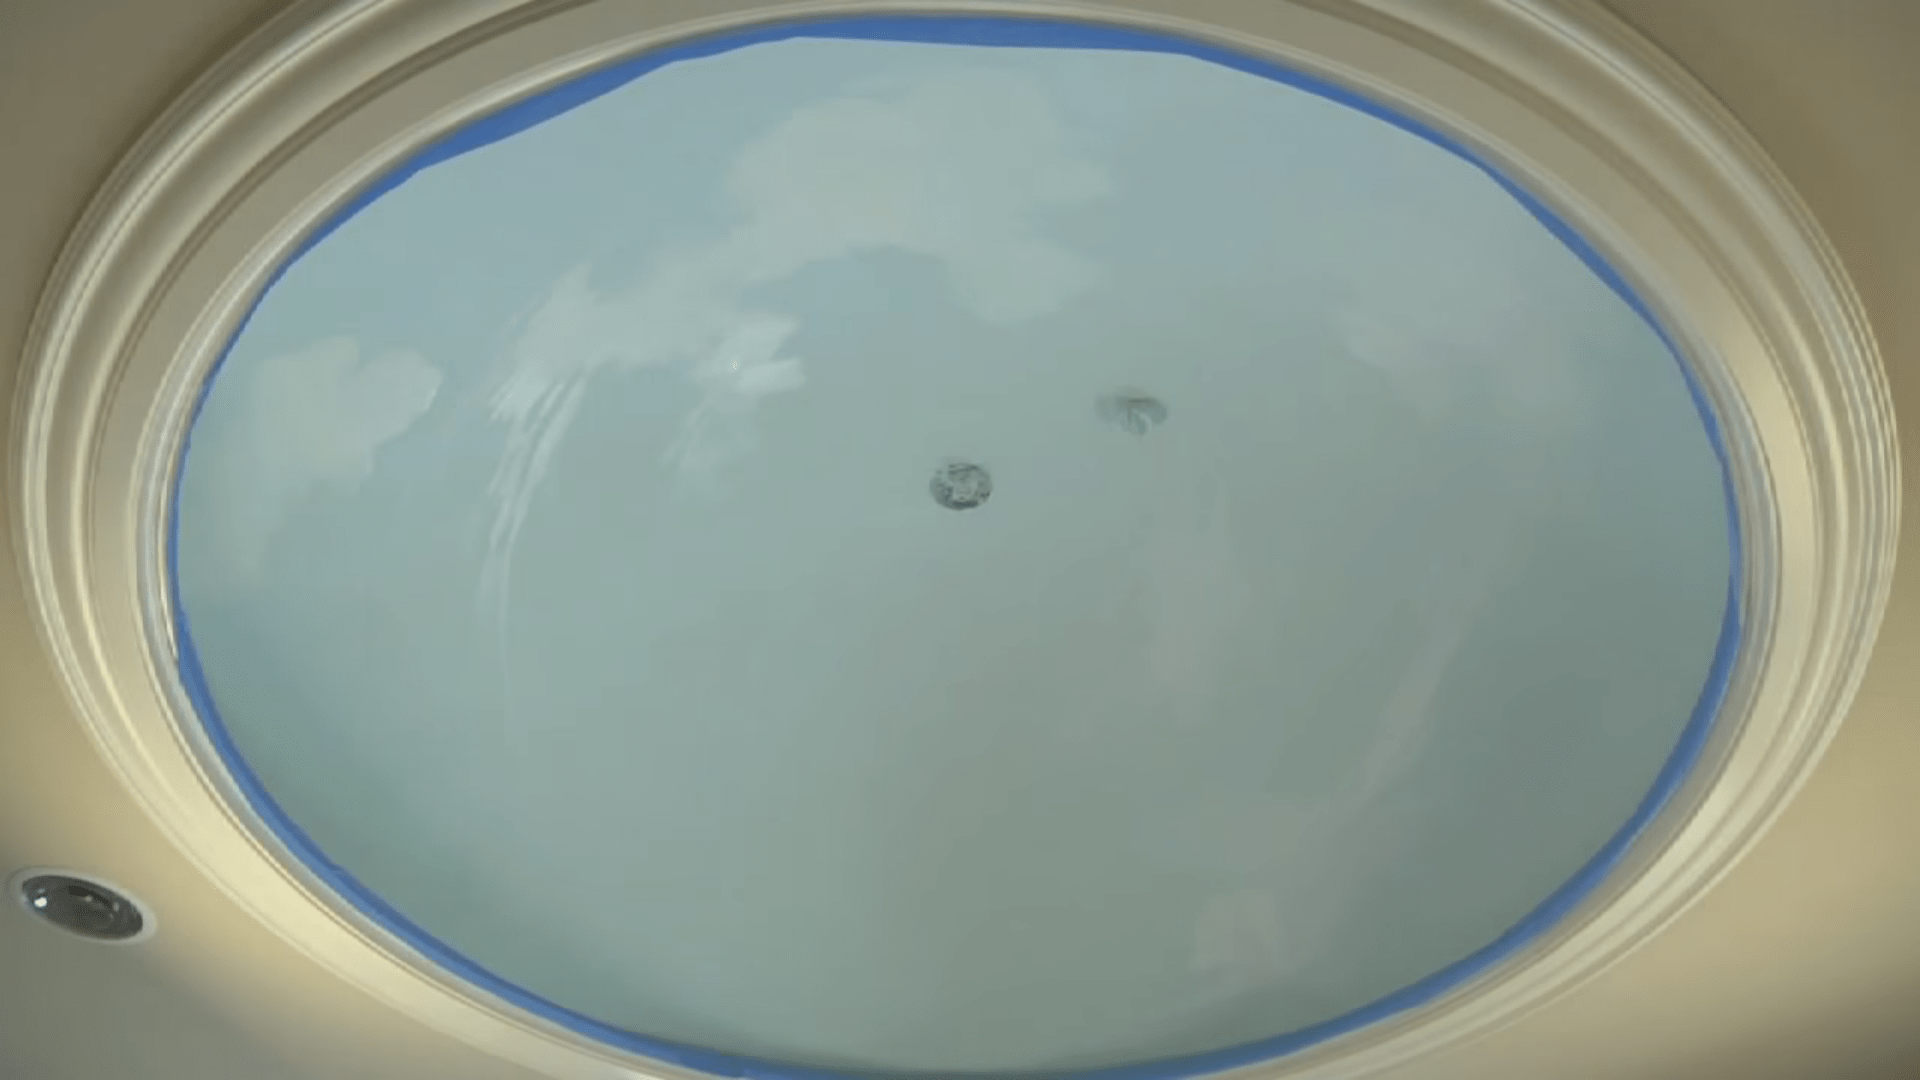
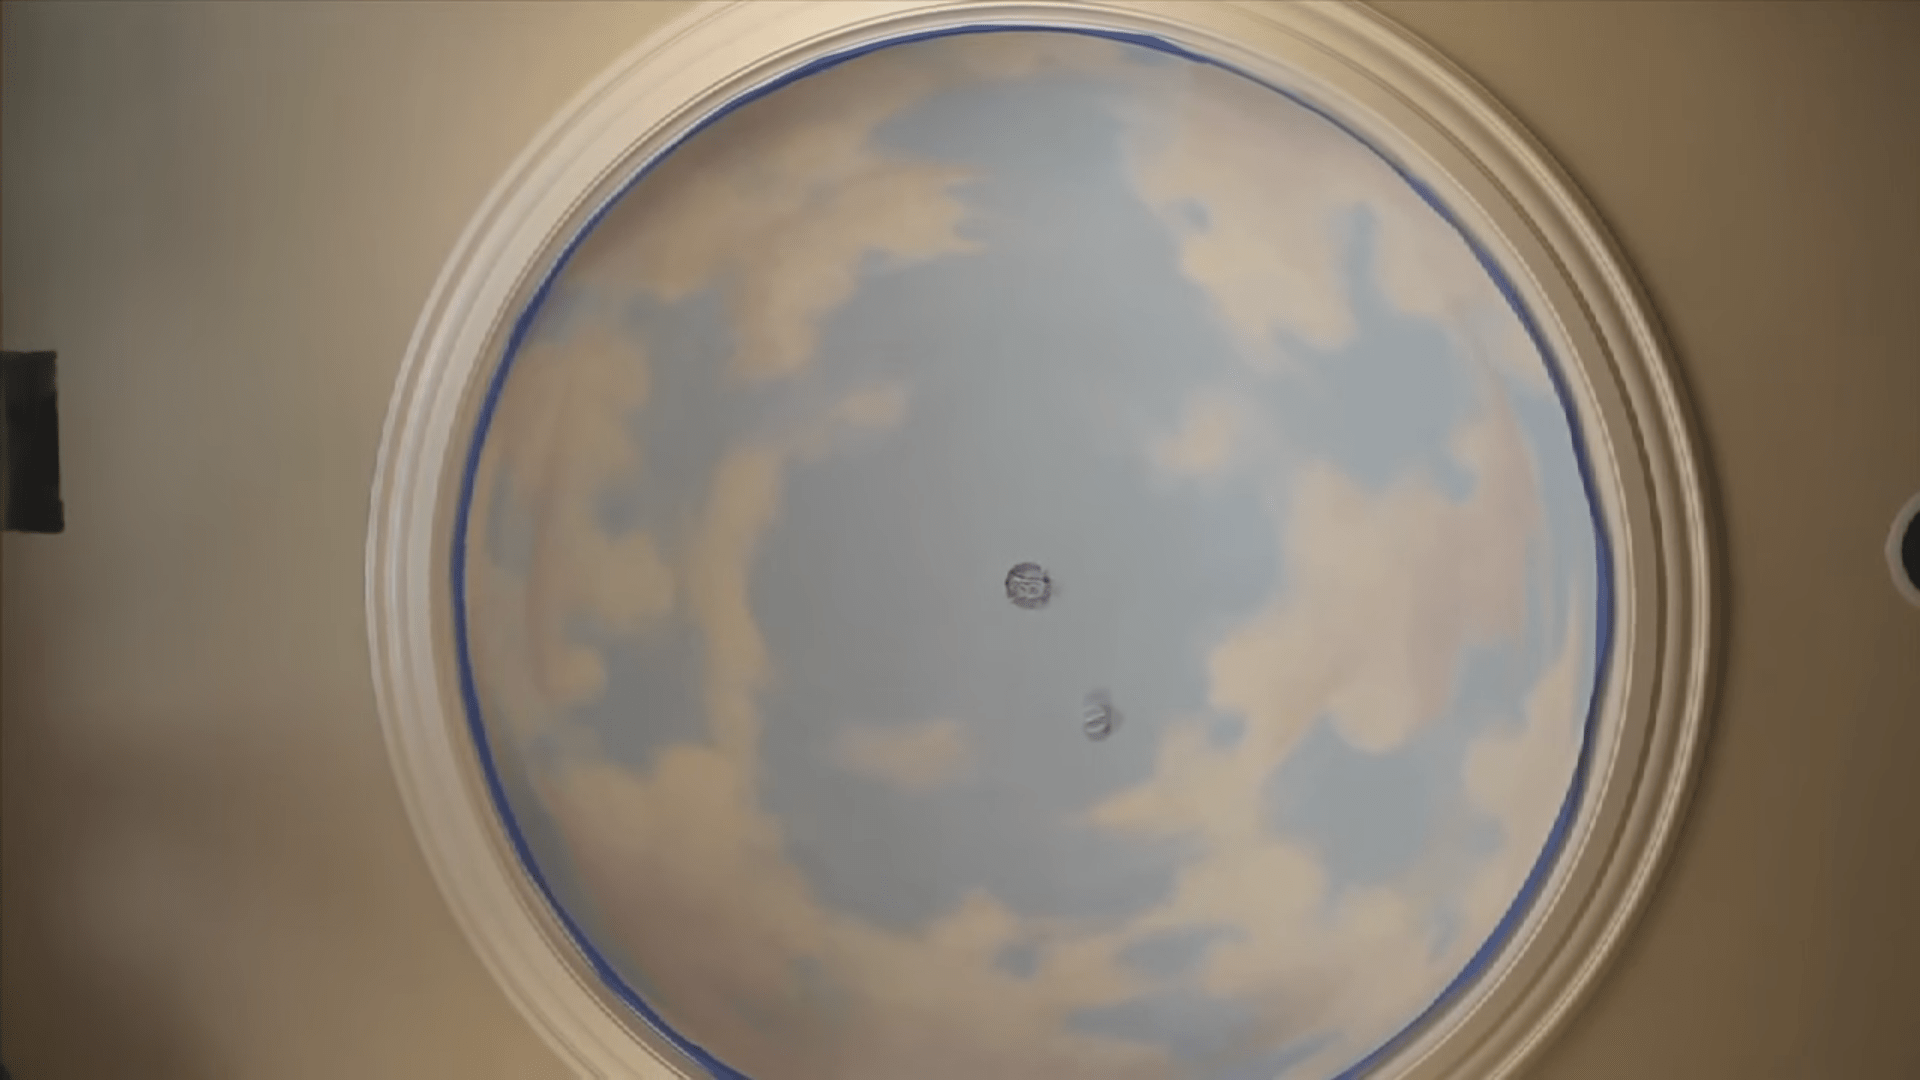
Very interesting way ceiling decorations are imitation clouds. You can bring this decor to life using paints and an ordinary sponge. It is better to decorate the ceiling in this way in small rooms, since this process is quite labor-intensive. You need a lot of paints of different origins and colors, but the final result will delight you - the room will take on an unsurpassed appearance.

It is advisable to start work from the center of the room. If you don’t have enough strength to create a cloudy ceiling throughout the room, you can enclose the finished part in a circle in the middle of the room, which will create the effect of a round window with a view of the sky. The second option is that white clouds have gathered only in the place where you started to draw them, and the rest of the space is clear sky. In any case, it’s worth trying to bring this incredible idea to life.
To create a “cloud” ceiling you will need:
- brush;
- several containers for diluting paints;
- wide roller;
- matte acrylic glaze;
- aquamarine and gray acrylic paints;
- emulsion white matte paint;
- matte light blue emulsion paint (you need to buy it to cover the entire ceiling).
The ceiling must be of high quality and cleaned.
Apply light blue paint to a clean ceiling surface with a roller.
Mix in equal proportions white paint with warm water. Apply the mixture to a sponge. Use a sponge (although you can also use a brush) to outline the clouds using gentle, loose movements. At the edges of the clouds, add a little white paint to make them (the clouds) visually appear denser.

Applying white paint to a light blue surface
Add aquamarine paint in different places using gentle, light movements of the sponge. This is necessary for the whiteness to show through in different places.
Apply a little more white paint to the clouds with a sponge to create thickness and richness of the clouds. Apply different paints in several layers. This way you can achieve depth in the image.

With light movements, use a sponge with white paint to work on the side where the sun should shine on the clouds. Gray - where there is no sun.
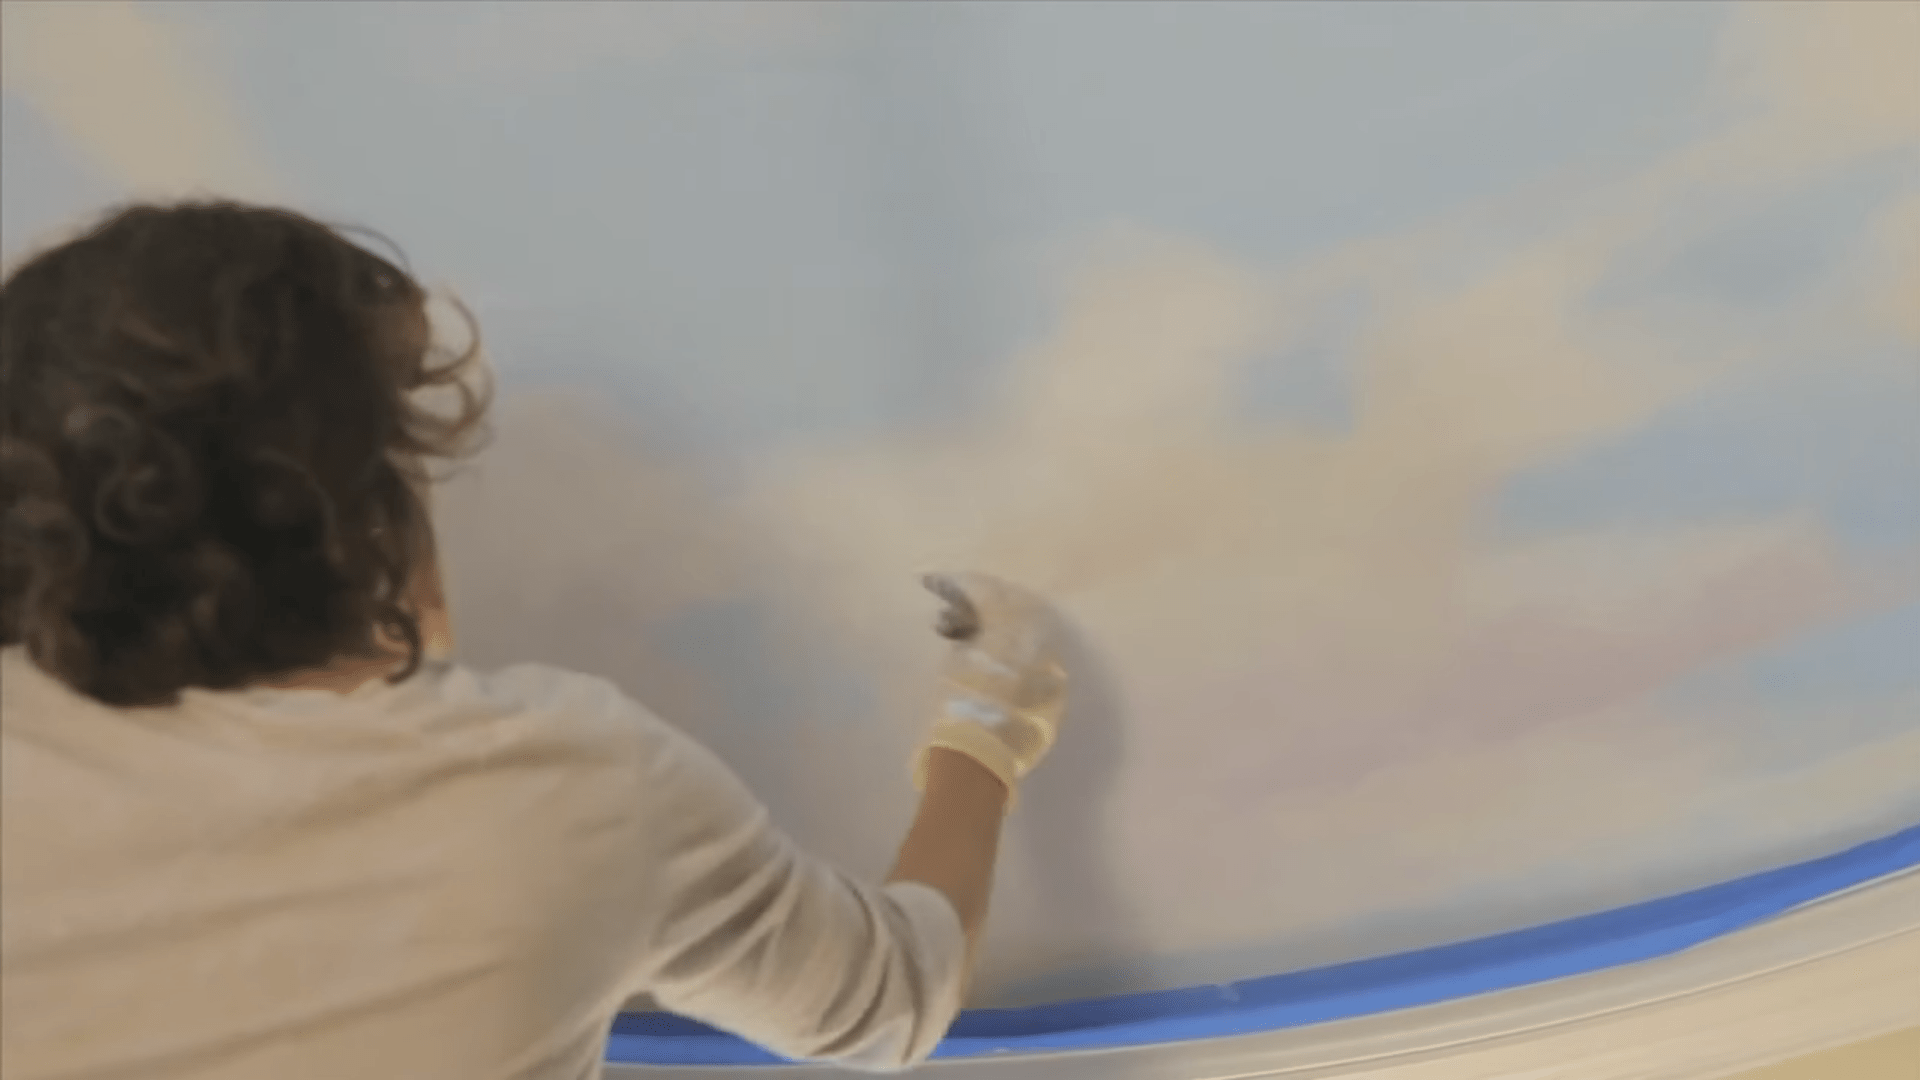
Processing the “sunny” side of clouds
Add a few more layers of paint, but make sure they are thin and do not paint over the previous images.
Highlight the edges of the clouds again with white tones and carefully cover everything with acrylic glaze.

Another option is to paint the ceiling with luminous colors.
Using this method, you can create a nice ceiling decor using paints. This perfect way creating an exclusive interior in your home.


Ceiling decoupage with paper
Decoupage is a specific decoration technique various surfaces. This method is often used to decorate ceilings and involves applying various patterns made from newspapers, magazines, calendars, and photographs to the surface. When choosing this finishing option, the owner of the room has a wide field for experimentation.
The main advantage of this technique is exclusivity. In most cases, decoupage can be completely re-done, especially if it was done independently, because all finishing elements are chosen by the person taking into account personal preferences. The disadvantage is painstaking process finishing.

Ceiling decoration can be complete or partial. For long-term use, the finished decor is coated with several layers of acrylic varnish.
Do-it-yourself ceiling decoupage with paper
How to decorate with applications from individual pictures or their composition? First you need to prepare everything necessary tools and materials.
These include:
- acrylic lacquer;
- PVA glue;
- nail scissors;
- Printer;
- books;
- clean cloth;
- synthetic brushes;
- colored paper;
- newspapers;
- putty knife;
- brush for removing old paint;
- putty;
- primer;
- dye;
- pencil.
Table. Stages of self-decoupage of the ceiling.
| Steps, illustrations | Actions |
|---|---|
| Online or printed edition Find a clearly defined image. It is necessary that the drawing matches the style of the interior. Designers recommend using images of natural motifs or abstractions for decoupage. |
| If necessary, change the image size and contrast. Create the overall composition of the decorative appliqué in advance. Print out all the selected pictures that will make up the composition. |
| Using nail scissors, cut out all the necessary pictures. |
| If the composition includes finishing the ceiling with printed drawings, then you will glue them to the ceiling. You can use other material - colored paper or fabric. If you chose colored paper or newspaper pages, then place the image cut out from the printout onto the selected material and cut out the elements of the ceiling applique along the contour. |
| Prepare the ceiling for application. To do this, remove old finishing using a spatula and brush. The surface must be completely free of old coating. |
| Level the surface of the ceiling using putty, if necessary. |
| Prime the ceiling and then paint it in the chosen color and wait for the paint to dry completely. |
| Now you have a smooth painted ceiling and prepared materials for applying the application. Before you start decorating, mark the design so that the finished composition is even and you don’t have to re-glue crookedly attached elements. |
| Apply PVA glue to the prepared drawings with a brush. Press the design against the ceiling and wipe the image with a clean cloth to remove all the air from the space between the design and the ceiling. |
| Apply acrylic varnish in 2 layers over the image. |


In this same way, you can completely cover the ceiling with black and white pages from newspapers, magazines, and calendars.
Moldings
Molding is decorative element ceiling finishing, which enriches the interior design. Moldings appeared in Ancient Rome, but are still actively used by designers. Baguettes are easy to install and remove.

Materials for the production of skirting boards.
- Aluminum. Lightweight and durable material. Attaches only to smooth walls using liquid nails or screws.
- Tree. Expensive and heavy, but presentable material. Suitable for decorating rooms that include wooden furniture.
- Polyurethane. The most common material for the production of ceiling cornices. Among the advantages are the abundance color solutions, variety of shapes and affordable price.
- Styrofoam. The advantage is low weight. Foam baguettes are easily attached to all types of surfaces using liquid nails. Foam skirting boards are ideal for interior finishing work in an apartment. The main disadvantage is the insufficient strength of the material.

You need to choose a baguette taking into account individual preferences and the height of the room. If the room is high, then it is advisable to use wide baseboards, if it is low, narrow baguettes. If the main selection criterion is cost savings, then it is better to choose polyurethane or polystyrene foam. If you want to create an environmentally friendly interior, you need to choose a wooden or aluminum baseboard.
Self-installation of foam baguette
Let's try to figure out how to glue foam molding ourselves. A plinth made from this material will cost 3-4 times less than a polyurethane baguette. In addition, installing foam molding is much easier than other types of baseboards.
To perform this procedure you need to stock up on:
- liquid nails;
- liquid nail gun;
- spatula;
- finishing putty;
- miter saw;
- miter box;
- painting knife;
Use a miter saw to straighten the ends of the baguette, because in most cases they are uneven. This may result in their incomplete contact during installation.

Trim the corner joints at 45 degrees using the same miter saw.


Another option is cutting corners using a miter box.
Make markings to avoid the plinth falling below or above the required level if the ceiling is suspended. Cut a small piece of baguette and attach it to the wall so that it does not reach the ceiling by a couple of millimeters.

Make a beating with a cord, and if this is not possible, make marks with a pencil along the entire perimeter of the room. You will look up to them.

Take a painting knife and sandpaper to adjust later uneven corner, cut with a miter saw. The latter does not always cut materials exactly at 45 degrees.
Spread the baguette with liquid nails.

Glue the baseboard to the wall. After pressing down from the bottom of the cornice, glue will flow out. Remove it with a spatula.


The baseboard will adhere well to liquid nails, but a gap will form underneath. Treat it with the same liquid nails or sealant.
Before painting, go over the joints of the baguettes with finishing putty.
Paint the baseboard in your chosen color and let dry.

Bamboo wallpaper
Wallpaper made from natural bamboo is an original design solution that has gained popularity thanks to the fashion for oriental motifs in interior design. This material has a unique color scheme and a variety of textures, which will allow you to show your imagination when decorating the ceiling.

This finishing material is used to decorate not only rooms in the home, but also administrative premises. Used to decorate the ceilings of hotels, offices and cottages. This kind of ceiling decoration fits organically into modern styles interior design premises.
Bamboo wallpaper is a solid canvas. They are created from thin bamboo slats. Fixed on a fabric base. For the production of wallpaper, the upper cut of the plant trunk is used, which has a pronounced bamboo structure. The canvases are produced in widths from 1 to 2.5 m.


Rules for using bamboo wallpaper
- Unfold the wallpaper in the room whose ceiling will be decorated. Allow the material to dry or gain some moisture for several days.
- The ceiling should not be covered with peeling finishing materials, which could prevent the wallpaper from attaching.
- Do not use water-based or water-soluble glue to prevent the wallpaper from coming off the ceiling. Polychloropene-based adhesives are best suited.
- When installing bamboo wallpaper, use a respirator.

Instructions for finishing the ceiling with bamboo wallpaper
Treat the ceiling thoroughly with primer. Wait a little until the surface is completely dry.

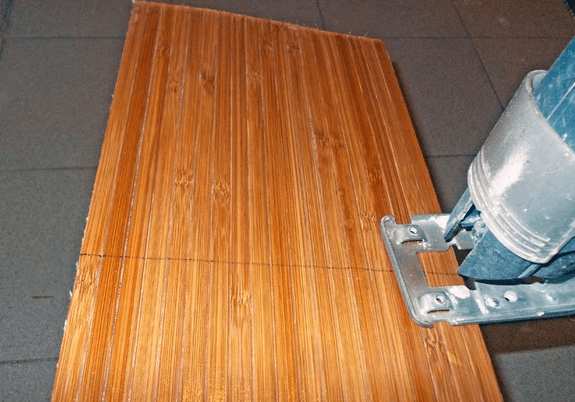
This type of wallpaper can only be glued end-to-end. Measure and then cut a piece of wallpaper required size. If you need to cut the wallpaper lengthwise, use a breadboard knife. Insert it from above between the bamboo slices and carefully guide it to the edge.

When cutting material across the web, you can resort to using metal scissors. At large volume work, use a jigsaw.
Apply an even layer of glue to the prepared ceiling with a spatula, and then apply it to the wallpaper with a brush. Glue consumption is approximately 350 g/sq. m. Let the glue dry for 15 minutes.

Place the wallpaper and press it against one side of the ceiling, then use a clean cloth to rub it away from the side that touches it (or you can use a rubber roller). This is necessary to ensure that there are no spaces containing air between the wallpaper and the ceiling. Then tap the wallpaper with your palm to ensure better contact with the ceiling. Repeat these steps with the next pieces of bamboo wallpaper.

Video - Instructions for gluing bamboo wallpaper
So we looked at the most popular ceiling decorating techniques. If you find the above information useful, be sure to share it with your friends and acquaintances who are doing or are going to do renovations in their home.
Video - DIY ceiling decor: original design options