Two-tier stretch ceilings. Basics of installation of two-level stretch ceilings How to properly make a two-level stretch ceiling
A two-level stretch ceiling is simple and convenient option room zoning. It helps to disguise utility lines and provides sufficient lighting in the room. In addition, suspended cladding is an extremely bright and very beautiful interior decoration.
In this article I will tell you in detail how to independently install a two-tier ceiling made of PVC film. I will not forget to remind you about the mistakes that you will need to avoid.
How to choose a canvas?

Stretch ceilings are made from a film made of polyvinyl chloride. Moreover, it can have different textures: matte, glossy, satin. The colors and patterns on the film are also varied. It is fixed to a frame made of metal profiles.
After installation, the material forms a flat, smooth and seamless plane. However, in reality this polymer coating consists of several firmly welded panels.
Two-level ceilings look especially good in large and high-ceiling rooms. In them you can not restrain your imagination and arrange a covering of a complex, bizarre shape.
Important benefits

- Recreating a flat ceiling surface. In most cases, the floors in apartments are uneven, with significant differences in height.
To get rid of this problem using the usual method - by plastering and puttying the ceiling, you will spend a lot of time and effort. A stretch ceiling will perfectly level the base surface. At the same time, you don’t have to spend money on additional building materials and remove mountains of garbage. - Labor costs for installation tension covering with your own hands are relatively small. In addition, such finishing has such an important advantage as speed of installation. You will spend one or two days on it.
- Ability to hide communications: electrical wiring, telephone, television cables, ventilation ducts etc.

- Highly aesthetic appearance. This beautiful finish appeals to most people, regardless of differences in their tastes and preferences.
- 2nd level stretch ceiling is universal. You can choose a variety of shapes and colors to suit any interior style.

- Moisture resistance and flood protection. IN apartment buildings There are frequent accidents, as a result of which those living above flood their neighbors below. By installing a two-tier ceiling structure, you will protect the room from such danger.
The polyvinyl chloride film will retain water and will not allow it to pass through. All you have to do is drain the liquid into a basin or bucket through a small puncture. And then re-stretch the sagging fabric using a heat gun.
Disadvantages that need to be mentioned

- Comparative fragility of the coating. If you touch the panel with any object with sharp edges, you can damage it - pierce or scratch it.
- I do not recommend installing ceilings made of polyvinyl chloride material in country houses and cottages. But provided that you live there seasonally and there is no heating in them in winter. Under influence low temperatures the polymer fabric will become unusable.

In this case, I can recommend you to use a fabric version of the stretch ceiling. Textiles are not afraid of the negative effects of extreme temperatures. Because is optimal solution for cladding ceilings in an unheated house.
- Quite a high price. A tensile structure, and especially a two-tier one, is far from cheap. However, the significant cost of such cladding is compensated by its long service life and high level of aesthetics.
If you assemble such a coating yourself, you will significantly reduce its price.
What to consider when designing a two-level suspended ceiling

It is the film stretch ceiling that is best suited for arranging complex two-tier structures. The polymer fabric is flexible and plastic. Therefore, it makes it possible to implement the most daring design solutions.
When thinking about what your 2nd level stretch ceilings should be like, consider two determining factors.
This is your desired aesthetic and stylistic outcome, as well as functional features coverings.

- With the help of a two-level ceiling, you will be able to hide uneven ceilings, as well as provide the room with effective and impressive lighting.

- You can do it without special costs zone the space of the room. For this purpose you will apply alignment various forms, colors and textures of the polymer cloth. This way you can divide the room into separate functional areas, as well as visually expand it.

- When choosing the color design and configuration of a two-tier suspended ceiling, take into account general style room interior.
For example, if it is minimalist in layout, design and colors, you should not install a bright ceiling with a complex configuration, elaborate waves and curls. This design will “crush” the room with its appearance, as it will look much stronger than the other elements of the interior. - Separately, I would like to say about panels with photo printing and 3D images. I don’t argue – such a design looks impressive and original.
However, excessive emphasis on the ceiling unusual shape and with bright color design will draw too much attention to him. This situation may be advisable only in large and high-ceiling rooms.

If you want to use a stretch fabric with a pattern, be sure to take into account the ability of the glossy coating to glare, that is, to strongly reflect light. Try, whenever possible, to mount the material with images on the upper level of a two-tier ceiling.
Preparing for work
The suspended ceiling should be installed at the final stage of construction, when all the dusty and dirty stages are completely completed.
Requirements to consider

Before installing a suspended ceiling, consider:
- Frame profiles can be attached to brick, concrete, wood, plaster and ceramic tiles.
Make sure the base ceiling is strong. If it crumbles, sand it first and then prime it.

- It is not forbidden to install a two-tier film ceiling in a room with household equipment, furniture and other room utensils. However, please note that the interval from ceiling covering to the top of the interior items should not be less than 0.7 meters.
- Be sure to draw a diagram electrical wiring, installations lighting fixtures and communications where the suspended ceiling will be installed. This will be useful for subsequent repairs.
- High-quality installation of a film structure is possible only with a certain heat transfer electrical appliances, built into the coating. The equipment should not heat up too much.
The same requirement applies to climate control, fire extinguishing and ventilation systems.

Do not use light bulbs that get very hot in lamps.
They can cause the film to sag and even melt.
- The maximum permissible power level for incandescent light bulbs and fluorescent analogues is 60 W.
- For 12 Volt halogen light sources, the maximum power should be 35 W. For analogues at 220 Volts, this figure should be 20 W.
- For installation of point LED lamps for 12 Volts, use 11.5 Volt step-down transformers.
Necessary tools

Before work prepare:
- hammer drill for fixing frame profiles to the walls;
- screwdriver for screwing in self-tapping screws;
- gas or electric heat gun for heating the room and PVC sheets;
- pencil, marking and building level(laser, bubble or hydraulic) for marking the structure;
- step ladder for high-altitude work;
- special spatulas and spatulas for tensioning and fixing polyvinyl chloride film in baguettes.
Materials needed

Below are the basic materials and design elements you will need.
- Aluminum or plastic molding of ceiling, wall or connecting type. It is needed to fix the canvas to the frame or ceiling.
- Tension fabric, already cut to the size of the ceiling (and reduced by 7 percent for tension). If you choose the harpoon method of installing the coating, then it should be bordered around the perimeter with a flexible plastic harpoon.
- Decorative strips that mask installation gaps between the film and the walls.

- Metal profiles for arranging the frame of the second tier.
- Drywall, if you are going to make an additional level out of it.
- Plastic dowels and screws.
Installation of a two-tier ceiling
Before installing the suspended ceiling, you should install a frame for it from metal profiles.
Frame arrangement

Please note that the plane of the stretch ceiling must be exactly horizontal.
- Using a laser level, place marks in each corner of the room. Next, beat off a solid line along them using a cord and pigment. It will indicate the level of installation of the frame for the second tier of the ceiling.

- Attach U-shaped profile strips along this line using dowels and a hammer drill. Mount the same guides along the ceiling along the previously marked line.
- The configuration of the box can be straight or wavy, curvilinear.
To fix the profiles along a curved path, their shelves must be trimmed with metal scissors in increments of 4 centimeters. Do this so that the bar can be bent to the desired curvature.
- Screw the lowers made from pieces of rack profiles to the guides fixed on the ceiling. The lower ends of the racks should be located with the wall planks at the same level (horizontal).
Together, these profiles form the lower plane of the two-tier structure. Attach the racks in increments of 0.25-0.3 meters.

- Mount a box from a couple of pieces of rack profiles and guide strips. Screw them with self-tapping screws for metal, so as to form a structure similar to a pipe with a rectangular cross-section.
- Fix this box to the already mounted lowers. Carry out fastening work with small self-tapping screws (they are called “bugs”) using a screwdriver.
- Fix this structure to the wall profiles with a load-bearing (wide) profile.

Be sure to maintain an exact correspondence between the verticals and horizontals of the frame. Check the angles using a bubble level.
- As described above, collect all load-bearing structure around the perimeter of the room.
- You will then screw the mounting baguette for the PVC film onto the box.
I want to warn you that the polymer fabric, as it cools, will create a strong tension. Based on this, the frame design must have high level strength sufficient for such a load.
Installation of plasterboard level
The next stage of installing a two-tier ceiling is laying the electrical wiring necessary for installing lighting and lining the frame with gypsum plasterboard sheets.

- Cut out pieces of drywall required size and mount it on the box. Fix the gypsum board to the frame with self-tapping screws.

- Once you have installed all the drywall, reinforce all corners using perforated corners. You can fix them using gypsum-based putty.

- Next, fill all joints and screw holes. When the putty has dried, sand the plasterboard layer with fine sandpaper.

- Then mark the locations of the built-in lighting fixtures. After this, cut holes for them using a drill bit - a “crown” or “ballerina”.
- Next, prime the surface of the tier and cover it with the paint of your choice or cover it with wallpaper.
The second level of the suspended ceiling is ready. Then you can start installation tension fabric.
Fixing the film

Now let’s talk about how suspended ceilings are installed. The panel itself can be attached to baguettes using three methods: glazing bead, wedge and harpoon.
The last types are the most common:
- The harpoon fastening system is the most popular due to its ease of installation and the need for special skills to work with it. In this case, a harpoon hook is factory welded around the perimeter of the canvas. It serves to tension and fix the film in baguettes.

Since the harpoons are attached during the production of the panel, it is very important to accurately measure the dimensions of the ceiling. I recommend that you take into account that you need to order the film in dimensions that are 7-10 percent smaller than the overlap area.
- The wedge method of fixing the panel is more technologically complex.
It requires certain work skills:

- however the method has one important advantage, namely versatility, since there is no harpoon around the perimeter of the film. Thanks to this, you do not have to adhere to the exact dimensions of the canvas. It is possible to retighten it many times, change the tension, cut off the excess;
- you can quickly remove and return the tension covering, fixed using the wedge method, during repairs or in case of leaks;

- When choosing a wedge fastening system, the film often has an area larger than the ceiling itself. Based on this, first measure the canvas accurately and, after stretching it, trim off the excess.
The glazing bead system for fixing the coating is similar to the wedge method. But here the canvas is attached to the baguettes using a special tape. This method guarantees good film tension.

Below are my instructions for installing stretch film, that is, the first level of a two-tier ceiling. Please take into account that competent technology installation of such a structure requires the preliminary drawing up of its exact drawing.
It should show the dimensions of all its elements.
The film should be cut and sewn only after measuring the room:
- When fixing the tension material to the frame or plasterboard box, ensure that the baguettes are securely fastened. The tightness of fit of the profiles to the structure being installed must be high. Please note that the appearance and durability of the suspended ceiling will depend on the fulfillment of these conditions.

- Before installing the PVC sheet, it must be heated to +60-70 degrees. Do this with a heat gun or a large construction hairdryer. When heated, the film will become more elastic and can be stretched.
- The room itself in which the tension fabric will be installed must also be heated. But up to a temperature of +40-45 degrees.

- When the panel heats up, first secure it with a spatula in one of the corners of the room. Then secure it on the opposite side. And only then attach the film to the remaining corners.
I warn you right away that in the last of them it will be the most difficult to fix the canvas. However, do not be nervous, do everything carefully and do not damage the film.

- Next, tighten the covering into baguettes. Do this in increments of 8-10 centimeters. Thus, fix the panel with a spatula around the perimeter of the entire ceiling. At the same time, pull it evenly.
- Trim off the excess film if you chose the glazing bead or wedge fastening method.
- Warming up the panel with a hairdryer, straighten out all the folds and wrinkled strips on it.
- When the film cools to natural temperature, it will stretch. Thanks to this, the coating will be absolutely smooth and even.

- Next, along the perimeter of the tier, mask the technological gaps with decorative tape.

- Lastly, cut holes in the film for the lighting fixtures. To protect the canvas from heated lamps, stick thermal insulation rings onto the holes.
If the lamps are placed inside the space between the base and suspended ceilings, then they will not touch the film. Therefore, she does not need to be protected from them.
Conclusion

As you understand from the article, it is quite possible to install a two-level stretch ceiling yourself. With relatively low labor and time costs, you will decorate your home with a beautiful coating that will hide all the imperfections of the ceiling. The video in this article continues this theme. And you can ask questions in the comments.
Two-tier stretch ceilings are options for an interesting, aesthetic, complex design of the ceiling surface. Looking at pictures of similar ceilings, you can see examples of space design, where beautiful ceilings take on, consider, the main role in the design. They zone the space, decorate it, unite disparate elements, and form a new look for the room.
Such a structure has many advantages, many times more than disadvantages. , they ennoble the space, but are also renovations with a long-term perspective.
In addition, two-level stretch ceilings:
- They retain their original appearance for a very long time;
- Installation of the tension fabric takes place in a matter of hours, without noise and dust;
- The surface turns out flat and smooth, hiding all defects of the base ceiling;
- And even if you managed to do the main repairs, by stretching the canvas you will not damage what was done in any way; the technology in this regard is very clean;
- In the interceiling space you can carry out different kinds communications;
- This ceiling provides additional sound insulation and sound insulation.

Contrary to myths, the stretch ceiling fabric does not emit any harmful emissions. Modern high-quality stretch ceilings are no more harmful than the fact that we wear synthetic clothes. Another question is if you purchase a ceiling that is uncertified, cheap, and made in an unknown location.
But the disadvantages can also be mentioned: installing the ceiling yourself is problematic, you need optional equipment. If you catch the blade with a tip, it will be damaged very easily. Glossy ceiling has a peculiarity - seams are noticeable on it, but matte ceilings better in this regard.
Do-it-yourself two-level ceiling: is it possible?
If your level of knowledge regarding repairs and related topics is higher than the initial one, you can at least partially do the installation of a two-level one yourself. Create a sketch (you can look it up on the Internet), make a calculation of materials (a calculation calculator is also available on the Internet), purchase materials, take measurements, etc. - all this can be done independently without any problems.
There are example drawings on the Internet, detailed reviews of the work performed, which are better than abstract instructions, etc. A diagram of the future design can also be drawn up using online tips, and you will definitely make one level yourself.

Namely:
- You need to measure the room, make marks, and start constructing the frame;
- The metal frame is then covered with plasterboard;
- Drywall is subjected to finishing.
That's it, the lower tier is ready. And then you invite specialists who install the tension fabric in a couple of hours (after taking measurements first). It is problematic to completely make such double ceilings yourself, because, for example, to stretch a PVC ceiling, you need to use a heat gun.
Installation of two-level stretch ceilings (video instructions)
Installation of supporting structure
First, you define the boundaries between the levels, this is done with a thick marker on the main ceiling. Attach the aluminum profile along the marked line, this is done with a hammer drill and dowels.
If the profile is not in a straight line (a curved fragment is needed), it is cut with special metal scissors. The end surface will be covered by a strip of plastic. Along the strip you need to install wooden blocks that will not exceed the width of the strip in height. The number of bars depends on the configuration - the more complex its shape, the more bars. It also depends on the length of the dividing line. Fixation to the bars is carried out with self-tapping screws.

There is another assembly option: you can use not a whole plastic strip, but pieces, fixed with self-tapping screws.
Installing the lower ceiling level
The first thing you work with is a metal profile. The canvas will be stretched over it.
Work order:
- Draw a contour around the perimeter of the room; profiles are already installed on it;
- The profiles are attached to the wall with self-tapping screws and dowels; for this you need to drill holes;
- The interval between fasteners should not be more than 30 cm;
- There will be two rows of profiles on the frame - the canvas will be mounted on the bottom row top level;
- Then any corner end of the canvas will be installed in the profiles, and then distributed over adjacent walls;
- The other ends are suspended from the profile, and this is done with special clothespins, which are fixed with a cord in the corners of the room;
- The outer sides of the canvas remain suspended, attention now turns to the inner edges, where the material is attached to the profiles;
- Then the outer edges are tucked in, and for this you need gas-burner– the tension fabric is heated by inserting the ends and edges into the profiles.

After cooling, the coating will become even and smooth, perfectly stretched. In this way, you can stretch the fabric yourself without resorting to the help of specialists.
Two-level suspended ceiling with lighting: how to install lighting elements
In this regard, there are two options. The first is that all the elements will be retracted inside, in which case they will have to be installed before tension occurs.
If you install the ceiling yourself, take into account all the smallest details, because the canvas manufacturing company will not provide any guarantee. That is, if you damage the ceiling during installation, no one will replace the ceiling.

Today, LED lighting can also be ordered from specialists, being confident in the safety of the canvas.
Design of two-level stretch ceilings
Black and white options will always be relevant; they look good in a spacious apartment, in a studio apartment. Square ceiling or rectangular ceilings today can be decorated with photo printing.

With photo printing you can completely change the entire appearance of a room. Photo printing is also used in ceilings with interesting shapes (wave, drop, sun, flower, etc.). With its help, they create the most romantic type of ceiling - a starry sky.
Wherever you purchase materials, Moscow, Odintsovo or a small company on the outskirts, ask for certificates of conformity, make sure of the good reputation of the manufacturer and seller, and then the repair will be a joy.
Good luck!
Design of a two-level stretch ceiling (interior photo)


A two-level stretch ceiling with lighting is a decorative structure made of metal and plastic profiles, attached to the main ceiling to hide unevenness and laid communications. All this is covered with an elastic fabric without forming a rigid metal frame, as when installing suspended ceilings. This solution looks extremely attractive. Today we will find out how to make such a ceiling at home with our own hands.

Preparatory stage
Installation of a two-level stretch ceiling begins with preparing the rough level. Deleted old finish, the whitewash is completely washed off down to the concrete layer.

Already at this stage it is necessary to draw up a preliminary sketch of the future project. The main thing is to determine the location of future lighting devices. With this ceiling design, it is recommended to create two levels of lighting - main (chandelier, lamps) and local (hidden lighting based on LED strips, built-in spotlights).
Prices for suspended ceilings
suspended ceiling

The installation of the stretch ceiling and its frame begins only after the rough finish has dried. In the room where all this will happen, it is necessary to maintain low humidity (about 75%) and relatively high temperature air (approx. 24°C). This is necessary to properly straighten the stretched fabric and prevent it from sagging.
While the primer and plaster are drying, it is necessary to prepare a sketch of the two-level ceiling itself. Clearly determine what shape the contours of each level will outline, where the main lighting (chandelier) will be located. First, all this is done with a pencil on paper, then transferred to the ceiling.

It is most convenient to draw curved lines using the material applied to the ceiling. plastic profile. It bends easily, maintaining smooth transitions.
Having drawn up a drawing according to which the levels will be created, you need to set the height at which you plan to place the lower level of the stretch ceiling. Optimal size– from 15 centimeters or more. If the main ceiling has unevenness and slopes, then you can use laser level and make marks on each wall where in the future the profile will be fixed, onto which, in turn, an elastic base will be stretched.
Prices for ceiling profiles
ceiling profile

Scheme 1. Design with hidden lighting: 1 - aluminum construction with hidden lighting; 2 - auxiliary beam; 3 — wall molding; 4, 5 — harpoon tension fabric; 6 — backlight; Dimensions are in millimeters.

Scheme 2. Sectional design of a multi-level stretch ceiling (harpoon-type fastening): 1 - upper level of the tension structure; 2 - separator; 3 — separator plugs; 4 — bump stop; 5 - base ceiling; 6 — internal frame; 7 - lower ceiling level; 8 - wall profile, as well as a plug for it; 9 - walls; 10 - decorative plinth.
In those places where the lamps and chandelier will be located, wooden blocks are attached to adjust the level. After the tension level has been formed, you need to make holes here (soldering) and attach the lamp with brackets, covering the installation site with a decorative insert.

Installation of a plastic frame
Step 1. Installation of the plastic frame begins with attaching wooden retaining bars under the future profile. They are attached to the main ceiling using dowels. This is a simplified variation of the stiffening frame. You can replace it with metal U- and C-shaped profiles, but without experience it will not be possible to create such a structure. Therefore, it is better to use wooden blocks. They are attached with a space of 20-30 centimeters between each other.


Another option is to install a suspended ceiling frame
Step 2. Now the plastic profile itself is being installed along the previously drawn line. It is attached to the bars using ordinary wood screws. The ends of the plastic profiles are connected using additional plastic insert. It should also be secured to the tree. The lower part of the plastic profile is covered with an angular flexible perforated insert - it is glued with polyurethane or glue with similar properties. This is done so that when the fabric is tensioned there are no sharp corners on which the elastic material can tear.
Prices for spotlights
spotlight


You can also use an aluminum profile - you need to cut it with a grinder, and you can’t rush here; the final cut is completed with a hacksaw
Step 3. During the installation of the plastic profile, it is important not to damage the communication cables (for example, fire alarm). They are either covered with a narrow plastic box or secured to the ceiling with brackets. At the junction of the cable and the frame, a small incision is made in the latter.
Step 4. The plastic profile sets the height of the lower level of the future ceiling. Be sure to check the reliability of the fastening. The best option– point load of 15 kilograms. This safety margin will be sufficient even taking into account possible flooding from neighbors (if we are talking about an apartment).

Step 5. In places where the plastic comes into contact with the wall, the corners of the profile are cramped. It is more convenient to do this with a grinder with an emery sheet or a regular file. It is necessary to create a smooth bevel to the wall so that the point of contact is smooth, without a rough transition. At the point of contact, a metal profile with a harpoon is attached, since the tension material will also be attached along this line.
After attaching the plastic, you can begin installing the metal profiles. They are attached along the perimeter of the wall at a previously specified level (using a laser). In this case, a special profile is used specifically for a suspended ceiling. Its key difference is the presence of an elastic clamping insert inside (called a harpoon). It is this that will hold the ends of the fabric stretched over the frame. This profile is attached to the wall. Dowels are used as fasteners.

The same metal profile is attached to a plastic one (according to outside, where there are no bars). Self-tapping screws are used as fasteners. Next, you need to cover all noticeable caps of the fasteners with a light color. masking tape. Otherwise, they will be noticeable if you use a glossy light base - in bright light it will show through.
The most difficult thing in installing profiles is maintaining the specified level, so after each stage you need to check that straight lines are maintained. If an error is detected in a timely manner, it can be easily corrected. But when everything is already covered with canvas, even minor defects will be evident. To correct them in this case, you will need to dismantle the frame.
Materials for stretch ceilings
There are 2 main types of materials for suspended ceilings:
- PVC film (polyvinyl chloride);
- textile.
Which one is better? You can list the advantages of each of them.
Table. Comparison of the advantages of fabric and film ceilings.
But fabric material for suspended ceilings is much more expensive. It is allowed to use several materials at once. For example, the first level will be made of glossy PVC film for visual increase space, the second is made of fabric with a satin texture. This optimal combination, which is often used by designers.

Be that as it may, the final choice is up to the consumer. It is recommended to visit specialized stores and independently evaluate the attractiveness of each of the materials by studying their texture. You can even order photographic film for the ceiling according to your own design. Everything is limited only by flights of fancy and the size of your wallet, nothing more.
Is it possible to combine tension fabric and suspended plasterboard in two-level ceilings? This option is possible, but it makes no sense. The exception is forced zoning of space. This is done when, for example, it is necessary to divide one large room into a sleeping and guest area. An aluminum frame made of C-shaped profiles must be mounted under a rigid base.
Fabric stretching
The selected fabric is stretched in the following order:
- first the lower level (the one closest to the floor);
- then the upper level (the one closer to the main ceiling).
Below is an algorithm of the required actions.
Step 1. When straightening the canvas, be sure to blow it with a gas heat gun (if PVC film is being installed). This is done to smooth out and eliminate wrinkles and prevent accidental tears.
Prices for fabric stretch ceiling
fabric stretch ceiling

Step 2. Next, the canvas is straightened out and hung at a height of at least 1.5-2 meters using special clothespins with rubber “sponges” - no trace remains after them. From below, the canvas is again blown with a gas gun to straighten all the folds. As a result, the material looks as if it had been ironed. The room temperature will rise to 30°C, but windows cannot be opened.

Step 3. Next, you can start stretching the fabric. They start from the side of the plastic profile, from the corner (it is called the “base”). As practice shows, it is most convenient to use plastic spatulas. They simply “put” the edge of the canvas on them and push them into the harpoon. There, the canvas is securely fastened with an insert, and it will not be possible to pull it out without the same spatula. This is done in each corner, after which the material is re-treated with a heat gun. This time the canvas should be completely straightened and smooth.

Step 4. After the film has cooled, fasteners are installed around the entire perimeter of the level. There is no need to rush here. It is imperative to ensure that the tension is evenly distributed to prevent screeds from forming. The place where the canvas is attached to the plastic profile is sealed with reinforced tape. A new profile for the upper level of the stretch ceiling will be attached there. It is mounted with the same self-tapping screws (you can use flea screws with recessed heads). Next, you can begin to straighten the second canvas.

The technique is similar and includes:
- straightening;
- hanging;
- heating with a heat gun;
- fastening at corners;
- reheating;
- final fastening on harpoons.
All that remains is to cover all the seams with decorative rubber inserts (bundle). It is manually pushed into the profile with the thin side without glue. If necessary, it can be quickly removed to pull off part of the canvas. This will be needed to access wiring and communications covered by a suspended ceiling.

Installation of lighting and fixtures
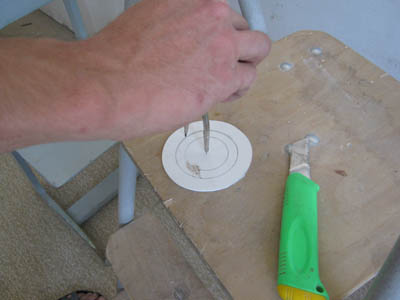
How to determine where to make a hole in a stretched fabric? It is easily pressed with your hands, thereby finding pre-attached bars or plastic rings. You cannot cut through the canvas - it must be burned. You can simply heat a piece of rounded reinforcement under a hot air gun and use the end to make a hole of the required diameter (but no more than 2-3 centimeters). The main thing is that the ends must be melted so that the fabric does not tear. Cutting is allowed only if a special thermal ring made of thin plastic is used, which is glued in the center of the future hole. Then by inner contour ring material is carefully cut out.


Next, all the lamps are fixed (with suspension, if necessary), the fastening points are covered with decorative inserts (included with the lighting fixtures). If necessary, power supplies and circuit breakers (for LED lighting or some energy-saving lamps) are attached to the rough ceiling. When performing this work, it is necessary to turn off the power to the room.
What other lighting options can be combined with stretch ceilings? Hidden LED strips look attractive - they are hidden behind the ceiling cornice. You can even use LED lighting with changeable lighting colors. If desired, you can also install a block remote control– Manufacturers offer any variations. The choice depends only on the preferences of the owner of the house.
Prices for LED strips

If glossy PVC film was used as a stretch fabric, then lamps aimed at the ceiling can be attached to the wall along the perimeter of the room. The result will be a mirror effect, which will visually double the free space. Relevant for small cramped rooms.
After completing the installation of lighting fixtures, the installation of a two-level stretch ceiling can be considered complete. Control is carried out using a laser level. There are no rules for caring for the canvas. If necessary, wipe it with a damp sponge (applies to PVC film). The service life of such a ceiling reaches 20 years. Most manufacturers of tension materials provide a warranty of 5-12 years. Be that as it may, upon repeated cosmetic repairs It is not necessary to change the frame. It is enough to remove the old tension material and replace it with new one. Simplicity, attractiveness and low cost are the main advantages of such ceilings!

And at the end - a few more examples of two-tier stretch ceilings
Video - Installation of a two-level stretch ceiling with lighting
Modern building materials make it possible to repair the ceiling literally in a day. One of these methods is multi-level stretch ceilings, the installation of which we will talk to you about today.
A stretch ceiling is a sheet of PVC film stretched over a frame made of profiles. After its installation, the surface becomes flat, smooth and without seams. For wide rooms, the canvases are glued together by welding, and they are almost invisible. Varied design two-level stretch ceilings allows you to use them in any room - from classic to high-tech.
When choosing a stretch ceiling from PVC films You should be aware that this material does not “breathe” and mold and pathogenic bacteria can develop under it. To minimize the risk of their occurrence, the ceiling should be treated with an antifungal compound before installation.
Many are led by advertising that promises excellent quality at the lowest price and purchase ceilings made from low-quality Chinese PVC film. This film releases harmful substances that are dangerous to your health. In addition to the low price, you should be wary of the specific smell and thinness of the material itself. Feel free to ask for certificates and guarantees. An honest installer will definitely provide you with everything.

Nowadays fabric ceilings are gaining great popularity. Their main advantage is complete safety for health, since they do not emit harmful substances and have a “breathing” effect. Any design can be applied to fabric ceilings using airbrushing or photo printing. The fabric ceiling is frost-resistant and suitable for installation in rooms with sudden temperature changes. The main disadvantages are the high cost and the inability to retain water for a long time in case of flooding from above. everyone can weigh the pros and cons when choosing material for suspended ceilings and make a choice based on their priorities.
Features of installation work
It is suspended ceilings that are most suitable for creating multi-level structures. Unlike plasterboard, stretch fabric almost does not steal the height of ceilings, so you can freely combine different textures and levels of tension fabric.
Usually built-in lamps, patterns, images, etc. are added to the second level of the ceiling.
 Scheme of harpoon and wedge fastening
 There are 2 ways to fix a suspended ceiling.
- Using a harpoon system. This option is the most popular due to its ease of installation and the required skills. The harpoons are attached during manufacture, so it is important to correctly measure the dimensions of the room. Experts recommend ordering stretch fabric 7% less than the area of the room. It is this method of fastening that we will tell you about.
- Using a wedge system. This method is technologically more complex and requires more experience of installers. However, its undoubted advantage is its versatility due to the absence of a harpoon around the perimeter of the canvas. It is not necessary to adhere to the strict dimensions of the tension film, and you can repeatedly tighten it, adjust the tension, and trim off the excess.
Basic elements of the harpoon mount design

- A profile made of aluminum or plastic located around the perimeter of the room (baguette). With its help, the tension fabric is attached to the ceiling or walls. Typically, the dimensions of a baguette on sale are 2.5 m and it is divided into several types: with ceiling, wall mounting and connecting (separation).
Typically, wall profiles are used for installation, but if conditions do not allow them to be fixed, then ceiling profiles are used. For large rooms more than 60 sq. m., in order to avoid sagging of the canvas, it is divided into several parts, which are connected by separation.

- Canvas welded from several pieces with a harpoon around the perimeter.
- Insert for closing the technological gap near the wall after fastening.
As a rule, the installation of two-level suspended ceilings occurs as a last resort, after the completion of the main dusty stages of repair.
Before starting installation, you must complete the installation of all necessary electrical wires, and stretch them to the desired place, hanging them on dowels.
Do not use lamps and electrical appliances that heat up, they can cause the stretch ceiling to sag. The maximum permissible power for incandescent and fluorescent lamps is 60 W. For 12 V halogen lamps - maximum power 35 W. For halogen lamps 220 V – 20 W. To install 12V recessed lights, use 11.5V step-down transformers.
If the base of the ceiling is in poor condition, it is necessary to prevent all kinds of shedding of the plaster. Clean and prime the old plaster.
Frame installation
- You can also use it as a second level by installing a baguette along its perimeter.
 Scheme of a plasterboard box for fastening the tension fabric
 - If you decide to make two-level suspended ceilings entirely from PVC film, then create a bar to separate the first level from the second in order to attach a baguette to it. To do this, attach a metal profile or wooden block to the ceiling exactly level.

- In principle, it doesn’t matter what the frame is made of - you can make it in any way convenient for you. For example, to create rounded structures, thin plywood is used, which is bent and attached to the ceiling. The main thing is to remove all irregularities so as not to tear the film.
- Secure the suspended ceiling profile to dowels around the perimeter of the room. It must be positioned strictly horizontally, so be sure to use a level. In contrast, the indentation of the tension fabric from the surface can be several centimeters. However, consider the distance required for and lamps.

- At the same time as this step, secure the profile for the second level. To create an even angle at the bend of the ceiling, secure a horizontal beam below the first one.
 Final view of the frame
 - To avoid tearing the fabric at the fold, attach a smooth plastic corner to the corner of the bar.
- To attach built-in lamps, create homemade mounts from two hangers. Although they do not look very aesthetically pleasing, they allow you to adjust their height.
- Attach the chandelier mount in the same way, as shown in the photo.
 Chandelier mount
 Fastening the tension fabric using harpoon technology

If you decide to make two-level stretch ceilings with your own hands, you You will definitely need a gas gun to heat the air in the room. The price of such equipment usually costs more than 5,000 rubles. Therefore, if you do not have the opportunity to rent it, there is no point in buying it for a one-time job and it will be easier to hire specialists.
- Using a heat gas gun, heat the air in the room to 50°-75°.
- Insert the fabric, softened from the heat, into the grooves of the profile; after cooling, it will stretch even more. The last corner will be the most difficult to attach. If any wrinkles have formed on the surface, heat them and they will disappear.
Look complete technology process in this video:
- To insert the film harpoon into the profile, use a special spatula. Be careful not to damage the thin PVC film.
- To attach the second level (lower), you also need to heat the room and secure the canvas to the profile. It is more convenient to do this together - one heats the air, the second inserts the film.

- To hide the cracks, insert a flexible plastic cover into them. It is attached to the inner tooth of the baguette, which is closer to the wall, as shown in the photo. Thanks to its design, it will help hide minor irregularities on the wall.

- When the air in the room has cooled, cut holes for the lamps. To do this, find their fastenings by pressing, and glue a thermal insulation ring to this place. Inside its radius, use a knife to make round hole. Install light bulbs on pre-prepared mounts.
How to install a chandelier in a suspended ceiling can be seen in this video:
That's the whole installation technology. On average, to make a room of 11 square meters. m. two-level suspended ceilings, it will only take 6 hours of work by two craftsmen.

Conclusion
As you may have noticed, to make two-level suspended ceilings, installation can be done with your own hands, using a heat gun. It's not as difficult as it seems at first glance. But since the cost of suspended ceilings includes their installation, there is no point in doing it yourself by purchasing expensive equipment. In any case, knowledge of the technology will help you check the correct installation.
Modern views ceiling design strike our imagination not only with their appearance, but are also capable of surprising us with the perfection of the technologies used. The design of most suspension systems is specially designed in such a way that it would be possible to make beautiful ceiling on our own, quickly and efficiently. Today there are quite a lot of options for finishing the ceiling part, but more and more often two-tier stretch ceilings are used for interior design. Why? The thing is that this type of finishing has high aesthetic qualities. Moreover, the installation of such a design became Lately much more accessible to the mass consumer.
A two-tier ceiling made of stretched PVC film can today successfully replace common plasterboard structures. The time spent on installing a tension two-tier system is an order of magnitude less than the time costs associated with installing a frame, installing drywall, puttying and painting a new surface.
Let's look at the question of what a two-level stretch ceiling system is. Let us look in detail at what main technical features of this ceiling design option you should know and what to focus your attention on during installation work.
Tensile suspended structures in two tiers - a tribute to fashion or a successful technical solution
Multi-level stretch ceilings are always stylish and fashionable. Thanks to the varied texture of the film material, you can always decorate the ceiling in a living room in an original and non-standard way. The technology of stretching polyvinyl chloride fabric has become much simpler and clearer. In terms of time spent and labor intensity, such work is significantly superior to the option of finishing ceilings using plasterboard. Two-tier surfaces radically change not only the appearance of the ceiling part of the room, but are also able to modify the geometry of the room and provide the necessary zoning of the internal space.
This design is distinguished not only by the enormous possibilities in choosing color range and textures. Stretch ceilings in two or more tiers amaze with the boldness of their design solutions. What you can get as a result:
- combined ceiling surfaces, where the color scheme and texture of the material are successfully combined;
- curved structures, ready-made ceiling parts of any shape;
- volumetric surfaces in 3D design.
Almost any finishing option is a wealth of forms, a variety of design variations and color solutions.

In addition, modern technologies allow you to use this finishing method yourself, using a minimum set of tools and devices. The cost of repairing ceilings using stretched fabric depends on the number of elements used in the design and the area of the working surface, as well as on the texture of the fabric and the complexity of the shapes.
Two-tier stretch ceilings. Design features and functionality
A system of suspended ceiling structures made from PVC film consists of a lightweight frame and a main fabric. Unlike plasterboard ceilings, the frame for a multi-tiered tension structure looks much simpler. What is used here is not a bulky set of metal profiles installed on the ceiling, but aluminum profiles, fortified around the perimeter of the room.
There are no longitudinal or transverse profiles in the frame. The canvas is attached directly to profiles attached to the walls in the upper part of the room. The canvas is made of polyvinyl chloride film. To fix the fabric in the profiles, you can use the most common technology, the harpoon method of attaching the film or other methods. All installation options are quite suitable for you to do it yourself, with your own hands.

The main difference between this finishing option and traditional, single-level tension systems is the configuration. The shape of the tiers, their configuration is a key factor that gives originality to the decoration of the ceilings.
On a note: Most often, several levels are achieved by creating stepped structures. Each tier has its own frame. For these purposes, it is best to use a gapless harpoon fastening system for the blade.
It should be noted that the height of each level is limited only by the technological parameters of the room. The outlines of each level can be of any shape, curved or rectangular. As for the functionality of this type of ceiling design, then tensile structures will give a head start to other execution options.
- Firstly: Such ceilings are always much easier to care for;
- Secondly: such ceiling surfaces protect the interior from flooding;
- Third: with proper use, such surfaces have a long service life;
- Fourth: stretched fabric allows for local repairs to the ceiling;
- Fifth: If desired, you can always dismantle one or more levels yourself by changing the design of the ceiling.
This could go on for a very long time, listing the main functional advantages of tension multi-tier systems. Do not forget that in the process of installing multi-tiered film ceilings you are solving several technical problems at once. With this type of ceiling design you will be able to hide obvious flaws and defects of the base surface and achieve the creation of the necessary zoning of the internal space. Externally, such a ceiling will meet the highest requirements of aesthetics and style.

It is worth noting that two-tier or multi-tier suspended ceiling systems based on stretched PVC film are very convenient in terms of improving the internal layout of rooms. Using the features of central lighting and local lighting sources using several levels, you can visually align the walls and give a square room an elongated, rectangular appearance. The design of the pendant system makes it easy to install hidden, decorative lighting.
Thanks to the combination of color and fabric structure in combination with the technical features of the room, multi-tiered tension and living rooms are irreplaceable.
For reference: care of two-tier or multi-tier hanging ceiling systems from PVC film is carried out using ordinary household detergents. Do not use chemically active substances, detergents or cleaners containing abrasive elements.
In which rooms do suspended ceilings look best?
First of all, it’s worth saying a few words about where such a surface would look best, since installing a two-level stretch ceiling can either radically change the interior of the room.
The main requirement that must be observed with these types of ceiling designs is readiness interior spaces. All repair and finishing work indoors must be completed. Tensioners ceiling structures are already the finishing point in the creation original interior.

As for in which rooms ceiling structures made of stretched film will look best, there are a number of aspects. First of all - if you want to quickly finish the finishing work, two-tier ceilings are not quick and easy technical solution. Therefore, you should be prepared for long-term work.
On a note: In comparison with the installation of plasterboard ceilings, completion of all stages takes 3-5 days, tension systems in several tiers are installed within 1-2 days.
The next aspect that you should pay attention to when choosing a ceiling design is the intended use of the room and its technological features. For example, in a children's room two-level ceilings don't always look good. The situation is similar with sleeping quarters. Most of levels eat up the internal volume, so this option for finishing the ceiling part is best used where the area and height of the premises are not critical.

Two levels do an excellent job of visually adjusting the interior space. An angular room, thanks to several levels on the ceiling, can become a room with smooth lines and contours. By installing a tension two-tier system, a square turns into a rectangle and vice versa. This property is typical for guest rooms, halls and hallways, where it is necessary to visually increase the volume of the premises.
Hidden lighting will only increase the aesthetic perception of the hanging part in the room. The picture shows various options design of the ceiling part, created by several levels of stretched fabric.

Two-level stretch ceiling - how to make it yourself
If you have an idea of what they should look like dropped ceilings, the way the installation technology is constructed means that it will not be difficult for you to make two-tier original hanging systems in your apartment.
Clean installation in this case is not associated with dirty and wet painting work. When installing a suspension system based on PVC film, you will not have large quantity construction waste.

On a note: when all finishing work has been completed inside the room, wallpaper has been hung, flooring has been installed, tensioning the canvas in the upper part of the room will not be associated with the risk of damaging interior elements.
All work is carried out in stages:
- preparing the upper part of the room (cleaning old structural elements and laying of wire communications);
- installation of a frame for each tier (plywood, chipboard or OSB is used);
- big square The base ceiling is covered with a stretched film of the selected color and texture (starry sky, galaxy or blue cloudy sky).
The combination of each level with a background or with a pattern on the film provides the desired effect. This option clearly conveys the method of installing a two-tier structure. With multi-level systems the situation is somewhat more complicated.

In custody
The technology that you will have to deal with when making multi-tiered suspended ceilings based on stretched fabric is not associated with any particular difficulties. It is important to remember that for the installation of such a structure it is best to use the gapless harpoon installation method. This technology is very convenient for working with multi-level ceiling systems.
All subsequent work is carried out in stages, where each stage is characterized by the achievement of certain goals and results. In order to do everything correctly, remember the following points:
1. Two-tier suspended tension systems are a very convenient and original type of ceiling design
2. Compared to plasterboard suspended structures in several tiers - stretched film in two or more tiers allows you to quickly achieve the desired effect
3. The main advantages of this type of ceiling design are as follows:
- quick installation;
- the ability to hide defects and communications in the inter-ceiling space;
- big choice colors, patterns, shapes and configurations for the design of the ceiling;
- affordable and easy care.
4. Ceilings made of stretched fabric in several levels are best installed inside large and spacious rooms
5. Installation is carried out only after completion of all finishing work