How to properly install cork flooring with glue. Cork flooring: how to install it correctly? stage – installation of decorative moldings
Cork flooring chosen by connoisseurs of natural materials. There are two ways to install it: glue and tongue and groove.
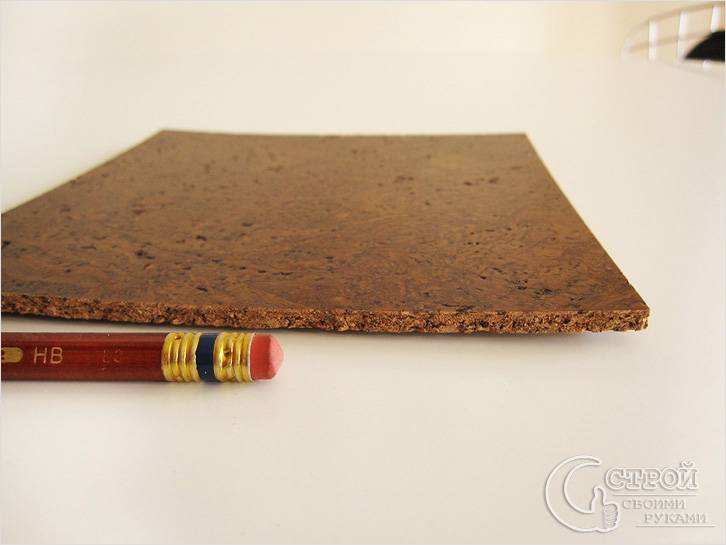
The glue method is used when using natural cork, produced in the form of thick sheets. The tongue and groove is used when installing cork laminate, which top layer cork acts as a base, and NDF boards are used as a base, similar to laminate.
Preparation before installation work
Have you decided how to install your cork floor? In fact, at the preparation stage it doesn’t matter; the preparation of the base is carried out the same way. The base must be perfectly level and smooth. The better the floor is prepared, the longer the service life will be. cork covering. Leveling the floor is carried out using beacons. The base is leveled using self-leveling mixtures. This process should be approached with full responsibility.
Note! A varnished cork floor will subsequently reveal the slightest irregularities.
The leveling mixture must dry completely. Otherwise, mold will appear under the floor covering. Based on this, it is worth starting preparatory work in advance, approximately 3 weeks before the start of laying the cork.
Adhesive installation method

To install cork with glue, you will need the following tools:
- roulette;
- square ruler;
- pencil;
- notched spatula;
- rubber mallet;
- roller and container for applying varnish.
Stages of work
- Dust and prime the floor.
- After waiting for the primer layer to dry, apply markings.
- Draw one line in the middle parallel to the wall and mark the center on it.
- Start laying from a wall along which there is no furniture. In this case, there should be a gap of 5-10 mm between the cork and the wall.
- A couple of days before installation work It is necessary to remove the cork from the packaging and leave it in the room where installation is planned for acclimatization.
Laying the cork in a run-up
- Move the slabs halfway, imitating brickwork.
- Start laying the material from the wall and insert a piece of slab at the end, and start the next row with the remaining piece. In this case, the amount of waste is minimized.
Laying tiles using the adhesive method
Apply adhesive to the base in an even layer and place the first tile, pressing it firmly. The area of the applied adhesive should exceed the size of one tile, so that when laying the next one, you will not stain the already laid one. Then apply adhesive to the next section and secure the second tile.
If there is no chamfer on the edges, difficulties may arise at the joints. To fix this, take a rubber mallet and hammer in the protruding edge. The entire surface is covered in the same way.
Final row
Note! When laying the last row, you will most likely need to trim the material using a sharp knife and ruler. Do not break the material, but run the knife several times.
Laying technology may vary depending on the adhesive chosen. For example, glue on polymer based applied directly to the material, not the floor. To avoid unforeseen situations, carefully read the instructions before use.
Final stage
As soon as the cork coating has dried, a layer of varnish is applied to it.
Note! Particularly good in combination with cork acrylic lacquer on water based, which is odorless and harmless.
Before work, the floor is dust-free and all window and door openings are covered. Each speck will be very noticeable under a layer of varnish. If you have an unvarnished cork from the manufacturer, you will need to apply at least three coats of varnish.
Video
Installation using the tongue-and-groove method

This method is much easier and for it you need the following tools:
- Electric jigsaw.
- Roulette.
- Square ruler.
- Pencil.
- Backing cutter.
Laminated cork flooring is installed similarly to conventional laminate flooring. The base is cleaned of dust, then a cork substrate is laid, the joints of which are treated with tape, and the installation process begins.
Laying rules

The first row is laid from whole planks. The missing part is cut off with a jigsaw. When laying, it is necessary to leave a distance of 1 cm between the material and the wall.
The second row begins with the trim that remains from the first. The row is assembled separately, and then moves to the previously laid one. The tenon is inserted into the groove at an angle, and then the row is lowered and compacted by tapping the hand. If the room is long, it is advisable to do this work with a partner.
Note! Installation of cork laminate is carried out in the direction of the sun's rays.
The final row is cut one at a time, you will need to measure them separately. The entire trimmed row is also completed and snapped into place. Cork laminate does not require a protective varnish layer, as this is provided by the manufacturer.
The work is completed and you can enjoy your new, environmentally friendly flooring.
Video
It doesn't matter what style your interior is. Cork is one of the most successful materials for decoration. So that the products please you for a long time with beauty, aesthetics and magnificent performance characteristics, very important correct installation cork floor covering.
Cork oak bark is a valuable natural raw material used to produce various necessary things, from shoes to finishing coatings. In particular, the following products are produced for floor decoration:
- Agglomerated cork boards are glued.
- Tiles or strips of crushed cork are self-adhesive.
Let's look at each variety in more detail.
Adhesive agglomerated plug

To obtain this type of product, the bark is crushed into crumbs of the required size, mixed with thermosetting synthetic resins and pressed into blocks with a density of 450 to 800 kg/m³. The resulting semi-finished product is cut into sheets with a thickness of 3 to 6 mm, from which tiles or planks of standard dimensions up to 30 cm wide and up to 120 cm long are formed on the machine. finished products They are even, so they need to be glued end-to-end. The cost of production is from 700 rubles/m² and above.

Cork agglomerate board.
The adhesive plug goes well with a water-based “warm floor,” but you need to choose an elastic adhesive marked “for heated bases.” We remind you that manufacturers (Corkstyle, Wicanders, etc.) strongly do not recommend gluing the product to the screed under which the classical system electric (cable) heating.
Finished with varnish or finishing wax, this finishing material perfect for rooms such as kitchen, hallway, balcony, living room and other areas with high degree foot and abrasive loads. At the same time, it combines equally well with ceramic tiles, classic parquet and any other floor covering.
Self-adhesive floor plug

The finishing material consists of thin tiles of standard or veneered agglomerate, on the reverse side of which an industrial grade is applied. adhesive layer under protective paper. The latter prevents the adhesive coating from drying out and greatly facilitates the installation process on any base, including walls and even ceilings. The price of the product starts from 800 rubles/m².
Cork flooring in this series is produced in the form of tiles with a side of no more than 30 cm, thickness from 3.6 mm to 5 mm. It is very rare to find adhesive-based planks of shortened dimensions - width up to 18 cm, length up to 90 cm. The front surface is usually clean, requiring protection from water, coloring liquids, household chemicals and abrasives. Additionally, adhesive compounds are almost never used, but it is important to carefully prepare the base, under which only water heating is allowed.

Cork in an interior decorated in eco style.
According to the manufacturers, floor cork can be glued to the floor and walls in any room with a normal level of humidity: bedrooms, kitchens, living rooms, children's rooms. The combinatorial nature of the products allows us to create interiors in the retro and eco-style that are so popular today.

Quite interesting and practical solution– a decorative layer of solid veneer or a thin sheet of agglomerated cork is glued onto a board made of HDF or composite rigid PVC. The perimeter strips are equipped with locking Click connection for glue-free assembly of products into a single piece.

Cork laminate with integrated backing.
Some manufacturers add, in addition to standard layers, a backing layer. As a rule, a high-density cork layer with a cross-section of up to 2 mm is used. The total thickness of the product does not exceed 12 mm. Product cost – from 1100 rubles/m².
The main advantages of this type of product:
- No glue or composition required finishing surfaces (varnishes, enamels, etc.);
- Compatibility with water and electric “soft” (infrared roll products, rod mats, etc.) floor heating systems.
- The technique for installing cork laminate is completely identical to the technique for assembling a conventional laminated flooring; accordingly, it can be easily implemented either with your own hands or by specialized teams.
- A wide range of applications, because cork parquet is produced in almost all load classes - from 21 to 41.
Products based on HDF are used in rooms with normal or partially high levels of humidity, including living rooms, loggias, kitchens, as well as shops, beauty salons, cafes, etc. For bathrooms, laundries and other similar objects, it is better to lay the product on PVC- stove.

Laying adhesive cork flooring - step-by-step instructions
To install cork flooring, you must first prepare the following tools and aids:
- Compositions for leveling and repairing concrete or wooden base(self-leveling floors, cement or epoxy restoration compositions, plywood sheets, chipboard, OSB, etc.);
- Adhesive primer for mineral floors or fungicidal for wood floors;
- Polymer contact adhesive (Decol Vern, Homakoll 277, Forbo 650 Eurostar fastcol, etc.);
- Polyurethane or acrylic varnish marked “for the floor”, finishing oil or wax to protect the surface (Lobadur Supra, Osmo Hartwachs-Öl, Biofa 9032, etc.);
- Brushes and other means of applying protective surface compounds;
- Construction vacuum cleaner;
- Tape measure, square, dye cord and marking pencil;
- Hygrometer and level;
- Notched trowel or short-haired velor roller for applying glue;
- Mallet or weight rollers for rolling cork tiles to the floor;
- Cutter and drill with bit attachments for forming technological holes or cutouts;
- Sponge or soft cloth to remove excess glue.

It is recommended to glue cork products without a surface protective layer with water-dispersion adhesive compounds. And tiles with a vinyl or varnish tread layer can be laid using solvent-based compounds.
Manufacturers print on each package of goods basic recommendations on installation. In particular, it is indicated that the packages must be brought into the room 24–48 hours before installation. And all work should be carried out with:
- Absence of drafts, operating heating devices;
- Room temperature – from +18 to +25 °C;
- Relative air humidity should be between 55–65%.
Laying cork flooring is not such a difficult undertaking and can be easily done on your own. It is carried out in 4 stages:
Step 1. Thorough preparation of the base

From quality preparatory work The beauty and durability of the decorative finishing coating depends. Cork tiles are thin and have little rigidity, so any defects in the base will immediately appear on the surface.
The subfloor should be:
- Durable, withstand compression of at least 150 MPa;
- Flat, with a maximum height difference of no more than 2 mm for every 2 meters of surface;
- Solid, without cracks, loose, rotten areas and other similar defects;
- Clean, without traces of glue, grease, soot, soot, bitumen and old coatings;
- Dry. Residual moisture indicators for mineral bases are 0.5–2%, for wood (including plywood and chipboard) – 8–12%.
The best base for cork is considered to be a mineral screed. Leveling the floor is also allowed. But you need to choose moisture-resistant products, preferably with grooved edges. This will prevent the base from swelling under the influence of glue and the formation of seams between the elements of the subfloor. The joints between sheets are usually filled with acrylic (not silicone) sealants. But the most The best way, time-tested - a mixture of sawdust and PVA glue.
To improve the characteristics of the base base, appropriate soil is used. In particular, for strengthening, you can use a strengthening composition or deep penetration. And to level out the absorbency of the floor and enhance adhesion to the coating - adhesive.

After checking the subfloor for evenness and the absence of the slightest defects, you can begin marking. Using a laser plotter or tape measure, mark the center of the room. Parallel and/or perpendicular to the length of the wall, a starting line is drawn on the base, relative to which the tiles will be laid out. If the customer requires the slats to be glued diagonally, then the axes are marked at an angle of 45° to the walls of the room.
Cork products are first laid out in a checkerboard pattern or offset onto a dry surface end-to-end along the reference axis as shown in the figure below. The outer tiles are cut taking into account the temperature gap around the perimeter of 8–10 mm. If necessary, technological holes for communications are cut out in the elements. If you need to form a chamfer, then it is enough to process the edges with fine-grained sandpaper and remove dust with a damp cloth.

Step 2. Gluing the cork covering
The installation process begins from the center of the room to the walls. The adhesive should be thoroughly mixed and applied to the subfloor and the underside of the tiles with a notched trowel or velor roller. In accordance with the manufacturer's recommendations, you need to wait 5–20 minutes for the composition to partially polymerize. Then apply the floor element to the base with slight tension, that is, forming a barely noticeable “wave”, smooth it and roll it with rollers. Excess adhesive mixture that appears must be immediately removed with a damp cloth.
When choosing a glue, pay attention to two important parameters. Firstly, solvent-based products are classified as professional and emit a strong chemical odor, so the technician needs a respirator and gloves. And secondly, during the cold season you need to buy only products labeled “frost-resistant”, which can easily withstand repeated freezing and thawing and do not delaminate.

Some adhesive compositions are distinguished by ultra-strong instant fixation, that is, they allow two dissimilar materials to be glued together almost immediately. But this is not very convenient to use, since it will not be possible to make minor adjustments to the floor elements during the installation process. Therefore, we recommend that inexperienced craftsmen use universal non-shrink adhesives.
The technology for working with self-adhesive cork products is much simpler. Remove the protective paper, place the tile on the base and tap it with a mallet. Try to work as accurately and carefully as possible, as fitting can lead to the formation of cracks and even tears.

Step 3. Applying a protective coating
It is recommended to cover the laid cork floor with glossy or matte finishing compounds 12–24 hours after gluing is completed. To do this, clean the surface with a vacuum cleaner or damp soft cloth. Mix the varnish, wax or oil thoroughly and apply with a roller, flexible pad or brush in 2-3 layers with intermediate drying for 2-3 hours. You can walk on the floor within a day, and you can use it after 3-5 days.

If the varnish or wax is chosen correctly, then your floor will not be afraid of women's heels, animal claws, or falling objects. Therefore, the higher the load, the more resistant the coating should be to abrasion. For example, standard products for home use are not suitable for salons, gyms or hotels. It is necessary to purchase special series of particularly resistant compounds containing polyurethane resins.
Step 4. Final decoration
The easiest stage is fixing various moldings, such as plinths, fillets, corner elements, etc. Their purpose is to ensure a smooth and uniform framing of cork coverings and give a finished look to the room.

Plinth made of cork agglomerate.
The following are used as molded products:
- Flexible plinth glued from agglomerated technical cork up to 1 meter long and 40–60 mm high. The products fit well on both smooth walls, and curved structures - bay windows, columns, etc. There are natural colors, as well as tinted or bleached. To protect against water and impacts, the surface is varnished.
- Semi-rigid planks made of solid agglomerated cork, veneered natural wood. The length of the product does not exceed 1 meter, height – up to 60 mm, thickness – no more than 20 mm. The color range includes from 5 to 12 shades.
- Rigid MDF plinth covered with cork-look imitation film. Good decision for rooms with high ceilings, since the length of the products is 2.5 m, the height can reach 100 mm, and the thickness is 30 mm. As a rule, the choice of colors is not too wide - up to 8 tones.
- Standard PVC plinth with a natural cork surface. Available in the assortment of almost every manufacturer of hard plastic products, including moldings with cable duct.

PVC plinth with imitation cork surface.
The first two types of moldings are fixed using contact adhesives for cork. MDF products can be installed both on “liquid nails” and using traditional self-tapping screws. For PVC skirting boards, it is recommended to use original fasteners or dowel nails.
For clarity, we suggest watching a professional video on the correct gluing of cork flooring.
Installation of cork laminate

Laminated parquet, veneered with cork, is laid according to the standard pattern for this type of coating - the “floating” method. You will need the following set of tools and materials:
- Leveling mixtures or sheets of plywood, OSB, chipboard, gypsum fiber board, etc.;
- Construction vacuum cleaner;
- Deep penetration soil;
- Waterproofing film 0.2 mm thick (for mineral substrates),
- Cork or any other substrate with a cross section of 2–3 mm;
- Tape measure, square and marker for marking;
- Hydraulic level;
- A jigsaw for cutting planks, as well as a drill with bits for forming holes for pipes;
- Spacer wedges for forming a temperature gap along the walls;
- Mallet and tamping block;
- Metal bracket for fitting planks.

The work is carried out in 4 stages:
Stage 1 – preparation of the base
The base must be level, dry, durable and clean. To do this, you need to carefully inspect the subfloor, check for:
- The presence of surface differences, potholes, and bumps. The permissible level is no more than 2 mm for every 2 linear meters. All irregularities must be leveled locally using available tools and repair compounds;
- The presence of cracks, loose, peeled, damaged areas, which must be eliminated with ready-made or dry mixtures.
- Residual humidity level. A moisture meter will easily cope with this task. Acceptable indicators for mineral screed are 0.5–4%, for organic screed – no more than 12%;
- No dirt or stains of grease, bitumen, old glue or mastic.
Often craftsmen assure customers that to eliminate all shortcomings it is enough to buy a roll substrate or in thicker mats. This is an erroneous statement. Not a single lock will withstand the play created by the soft underlying layer and will simply break under load. Therefore, if there is large quantity floor defects, it is better to form a new one, finishing layer with help liquid mixtures or dry prefabricated screed.

So, the base is leveled, primed and cleaned with a vacuum cleaner from the slightest signs of dust and sand. Now it is recommended to cover it with a waterproofing film with the strips overlapping by 10–15 cm. When working on a prefabricated screed made of plywood or chipboard, a moisture barrier layer is not required.
Next you need to lay down the backing. Although manufacturers claim that it is best to choose a cork underlying layer for a laminate, in fact, absolutely any one will do - from foamed polyethylene, extruded polystyrene foam, pressed coniferous substrate, etc. It is enough to lay the strips or mats evenly end-to-end and secure them.
Stage 2 – laying the finishing coating

First, calculate the required number of planks and rows. This is necessary in order to correctly position the outer strips, because their width must be at least 5 cm. If necessary, you can trim the strips of the first row a little.
The first lamella should be placed with the ridge against the wall farthest from the door, and spacer wedges should be inserted into the gap. Attach the following strips to the end and secure. After filling one row, a new one is formed, not from a solid floorboard, but from trimming the previous strip at least 30 cm long. It is recommended to lay the slats at an angle of 20–30° and snap them together until a smooth sheet is formed.
The planks of the last row must be cut taking into account the temperature gap, inserted into the opening and tightened with a metal bracket until the locking connections snap into place.
Stage 3 – installation of decorative moldings

At the end of the work, the floor must be vacuumed and skirting boards and thresholds installed. Products made from agglomerate, PVC, MDF or metal are equally suitable for cork laminate. The main thing is that the shades of the selected moldings do not discord with the main coating.
Features of caring for cork floors
The agglomerated array and cork veneer have a dense structure, but the surface is not very resistant to mechanical loads. The first level of protection is various finishing coatings, including varnishes, waxes, oils, vinyl films increased strength. As practice shows, even with them, you can ruin the floor.

- Maintaining stable indoor climate parameters: humidity from 45% to 65% and temperature from +15 to +35 °C;
- Gluing felt and silicone protectors onto furniture legs;
- The presence of rugs at the entrance and under movable elements of furniture (tea tables, chairs, office chairs);
- Protection against contact with rubber products. For example, rugs with a needle-punched base, bicycle or stroller wheels, and the soles of sports shoes are strictly contraindicated;
- Use of mild household chemicals for care, without containing abrasive particles;
- Use for frequent vacuuming.

The good thing about cork floors is that they can actually be restored. Thus, small dents, holes and similar defects are eliminated by gluing pieces of matching color and texture or by filling them with cork sealant or repair wax.
For elimination heavy pollution, stains, minor scratches and minor scuffs, cork manufacturers offer a wide range of special household chemicals in the form of concentrates or ready-to-use formulations.
For glued cork materials with a hopelessly damaged varnish layer, it has been developed effective method renovations – re-varnishing. First of all grinder the remnants of the old are removed protective coating. Then the floor is cleaned of dust, primed and varnish is reapplied in 1–3 layers.
Cork floors coated with oil or wax can also be restored. But for this it is better to turn to professionals, since you will need special equipment and special industrial tools.
Advice! If you need repairmen, there is a very convenient service for selecting them. Just submit in the form below detailed description work that needs to be done and offers will be sent to your email with prices ranging from construction crews and companies. You can see reviews about each of them and photographs with examples of work. It's FREE and there's no obligation.
Search interesting solutions for apartment renovation? How would you like to install a cork floor? Don’t know what it is, what the benefits are for you and how to do it? Everything is very simple. Let's look at what cork flooring is and how to lay it correctly.
Cork floor installation diagram.
The material for making cork is the bark of the cork oak tree. The bark is removed from trees that are 25-30 years old, but it is not used in construction. Then, within 6-9 years, the bark is restored, it is removed again (if the technology is followed, no damage is caused to the tree). And this material is already used for the manufacture of various products.
According to technology, cork fabric can be divided into types:
- veneer is the most expensive type of cork;
- agglomerate - the most cheap option(made by pressing at high temperature crumbs with the addition of various resins);
- combined - both pieces of veneer and crumbs are used for production.
Finished panels can be processed various compositions, which affect the properties of cork and give it greater strength and moisture resistance.
Pros and cons of the material
Benefits of cork floors:

Cork floor characteristics table.
- excellent heat and sound insulation;
- cork - the material is elastic and resilient, does not creak, does not slip, it is pleasant to walk on it;
- cork does not rot and is fireproof;
- the material is hypoallergenic, does not attract dust and does not accumulate static electricity;
- cork floors can withstand high pressure, including point ones.
Flaws:
- like anyone natural material, price cork panels higher than the usual laminate or parquet boards;
- the base for the cork covering must be perfectly level;
- if there are cats or dogs in the house, then claw marks may remain on the cork flooring;
- over time protective layer is erased and paths remain in places of heavy traffic.
Types and options of cork flooring
- Floating type (you can find the name cork parquet). Available in the form of panels with locks and consists of a layer of cork glued to an MDF panel.
- The adhesive type is produced in the form of square or rectangular shape. Sizes may vary. A protective layer can be applied on top.
- Technological cork is sold in the form of rolls or plates and is used as a substrate.
For final finishing, the first 2 types are widely used, it all depends on your choice. It should be taken into account that if you plan to lay cork in a bathroom or toilet, then you need to give preference to the adhesive type. This is due to the fact that it is treated with a special compound that prevents the floor from swelling.

Two ways to lay cork flooring.
Floating cork flooring is best used in a room with a low level of humidity: in a bedroom, nursery or hallway.
To lay a cork floor with your own hands, you will need:
- Pencil.
- Roulette.
- Square for precise cutting of panels at right angles.
- Long ruler.
- Chop cord.
- Construction knife. It can be used to easily cut adhesive-type cork panels.
- Spatula or roller for applying adhesive to floors and cork boards.
- Electric drill. Useful if you need to drill holes, for example, for heating pipes.
- Fine-toothed hacksaw or jigsaw. These tools are useful for cutting floating panels.
- Rubber hammer for fitting cork slabs into place.
Cork flooring technology
Surface preparation
Before laying the cork covering, the surface must be leveled, if necessary. It must be dry, clean and primed.
You don’t have to remove the old flooring, but lay cork on top.
Laying cork flooring with glue:

Cork floor installation diagram.
- Before laying the 1st row of cork tiles, you need to use a construction cord to mark the main line along which its assembly will begin. This can be diagonal from opposite corners of the room or laid in a straight line along the walls.
- Draw a pencil line using a ruler along the chop cord.
- When working with glue, you must use a respirator, for example RPG-67. Cork tile adhesive is flammable and has a pungent odor. After work, the room must be thoroughly ventilated.
- Apply glue evenly to the base using a spatula or roller along the marked line.
- You also need to apply glue to the panel and let it dry for 10-15 minutes.
- Then attach the panel to the base and tap the entire surface with a rubber hammer.
- In some places it will be necessary to adjust the cork panels. To do this, marks are made with a pencil, using a square or ruler, markings are made and construction knife the excess part is cut off.
- After laying the tiles on the floor, it is necessary to cover it with 2-3 layers of varnish. A two-component polyurethane varnish is perfect for these purposes.
- The glue dries within 24 hours. It is advisable not to walk on the laid panels during this time to avoid their displacement.
Installing a floating cork floor
Before laying cork panels, it is necessary to lay a substrate on the base.
The substrate for these purposes is unusual. It is also made of cork. If the surface is fairly flat, you can take a 2 mm backing, for small unevenness - 4 mm.
Assembling interlocking panels is not much different from laying laminate flooring. The 1st row must be laid from the wall along the light falling from the window. This way the joints will be less noticeable. The smaller castle would face the wall. It must be remembered that a thermal gap of 5-10 mm must be left between the wall and the panel. Spacer wedges of suitable width are ideal for this purpose.

Design of a “floating” cork covering.
The panels are connected using locks. After snapping each panel into place, they are lightly tapped with a rubber hammer to ensure a secure connection without gaps.
After laying all the panels, the plinth is attached, which will hide the gap between the wall and the laid panels. You can choose any baseboard, but cork will look great.
So, the time required to lay floating cork panels will be much less. A protective layer has already been applied to them, so no additional processing is required.
When laying, you do not need to work in a respirator, and then ventilate the room and wait for the glue to dry. But floating panels have their drawbacks. The main one is that joints are afraid of moisture and dirt can accumulate in them. Therefore, they require more careful maintenance than adhesive-type cork boards. Tip: Do not plan to install cork flooring over underfloor heating. You will not achieve the desired effect, but the cork itself is a warm material.
Let's summarize: laying a cork floor with your own hands is very simple, you just need to follow the recommendations outlined. Adhesive flooring is more expensive to install, but it is easier to use. And with a floating cork floor, installation work is cheap, but during operation it requires more attention and care.