DIY postcard for your beloved husband. DIY birthday card for a man
Romantic, love cards always include hearts and declarations of love on the cards. Such cards are given on occasion or without it: on Valentine's Day, Birthday, on the anniversary of a relationship, on the occasion of reconciliation, as a token of gratitude, etc.
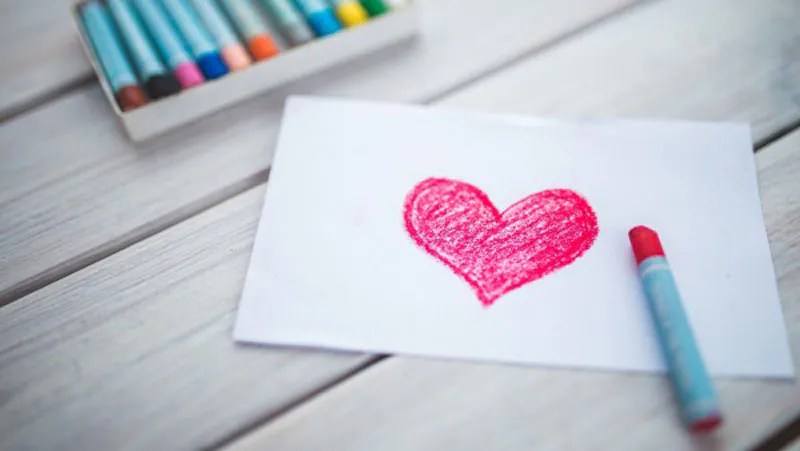 The news portal “site” has prepared for you on the eve of Valentine’s Day celebrations excellent selection cards for your loved ones that you can easily make with your own hands in a matter of minutes.
 DIY postcards
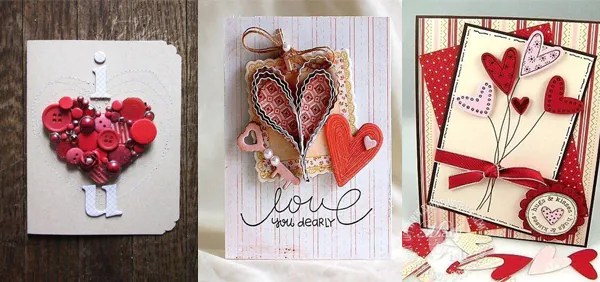
Postcards to your loved one
DIY postcard with a voluminous heart
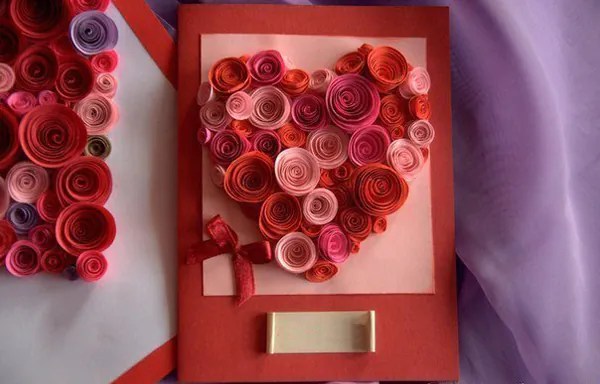 Such a luxurious voluminous heart will be a wonderful touching decoration for your homemade postcard. It's very easy to do. To make it you will need: colored paper, a sheet of thick colored paper (preferably choose red or its shades) for the base of the card, PVA glue and scissors.
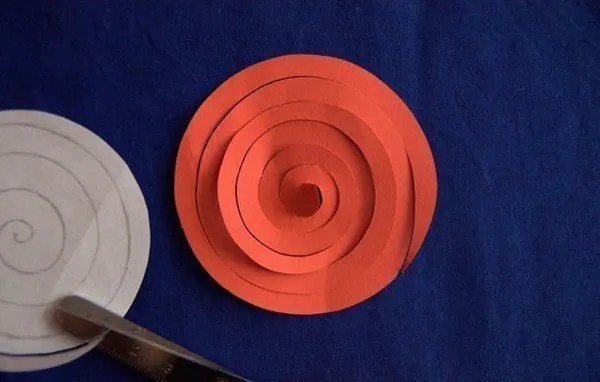
 Cut out from colored paper a large number of multi-colored circles. Try to choose paper colors that are the same color but in different shades.
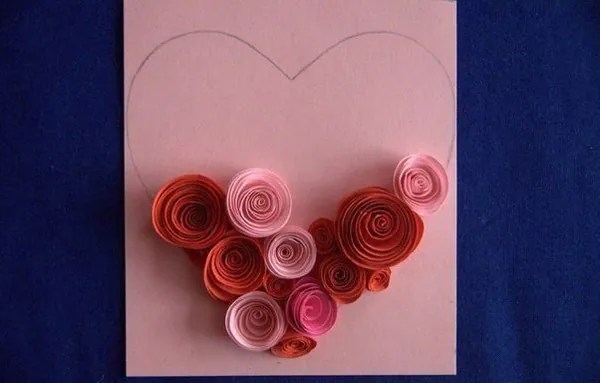 Then, using a pencil, draw a neat spiral on each circle and cut it out. Then form a small rose out of the finished paper spiral and secure it with PVA glue. From the resulting large number of paper roses, form a voluminous heart on the front side of the congratulatory romantic card. homemade postcard. Glue the roses using PVA glue or double-sided tape.
DIY love tree postcard
 A very cute and bright card that you can easily make with your own hands from colored paper.

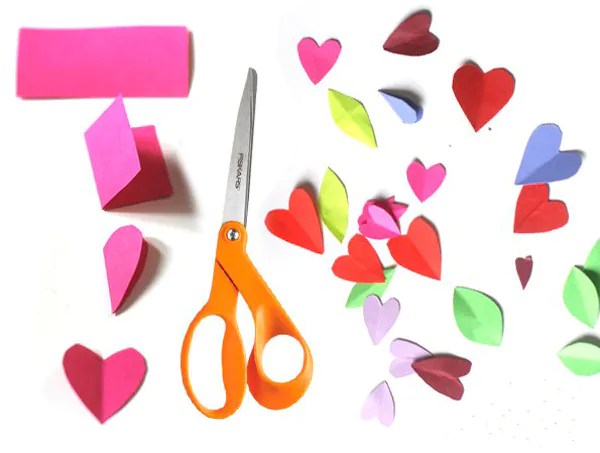 Trace your palm on colored paper Brown. Carefully cut it out. You should end up with a small tree with a trunk and branches. Since it’s frosty February outside, and you really want spring to come soon and warm rays of sunshine, decorate the tree with multi-colored hearts.
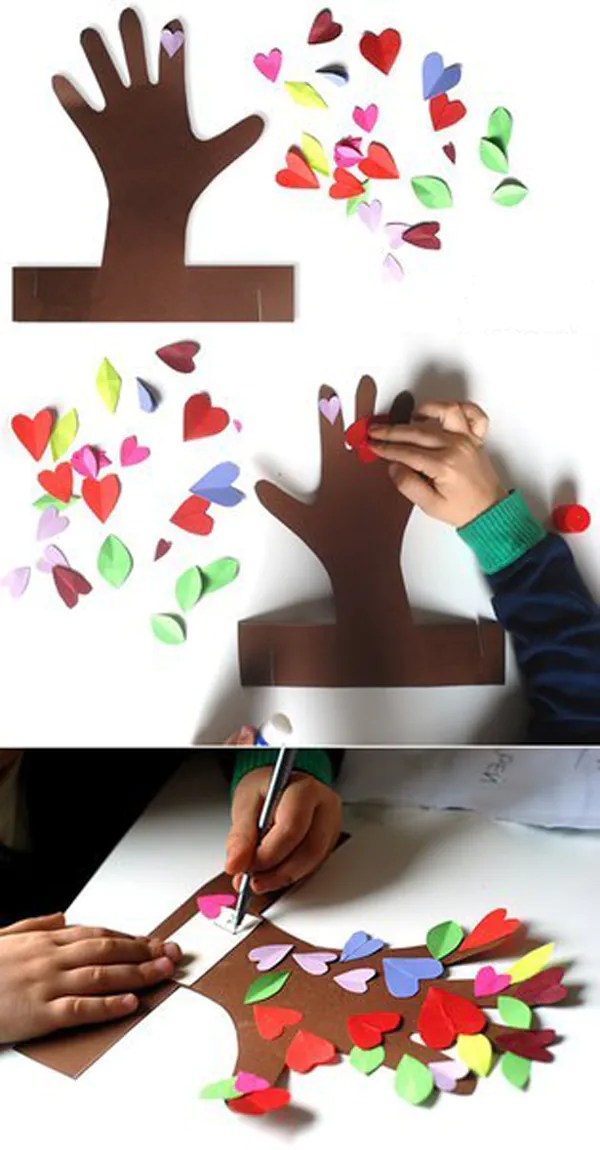

 On each heart you can write declarations of love, give compliments or write to your lover why you love him.
Postcard to your loved one with a heart
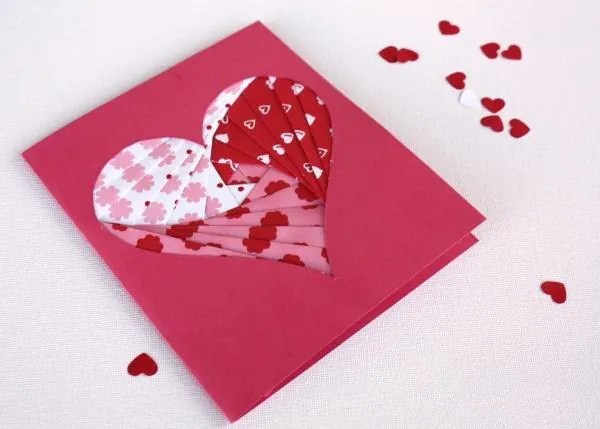 An unusual, but very easy to make postcard. Cut strips of the same width but different lengths from decorative paper (see template).


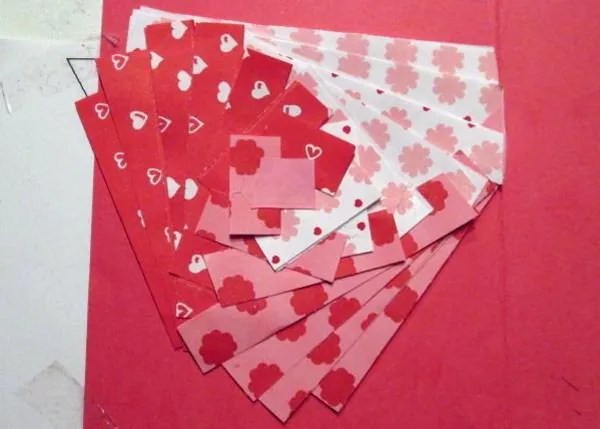 Glue pieces of decorative paper to the shape of the template and glue it inside the card. Cut out a neat, large heart on the front of the card.
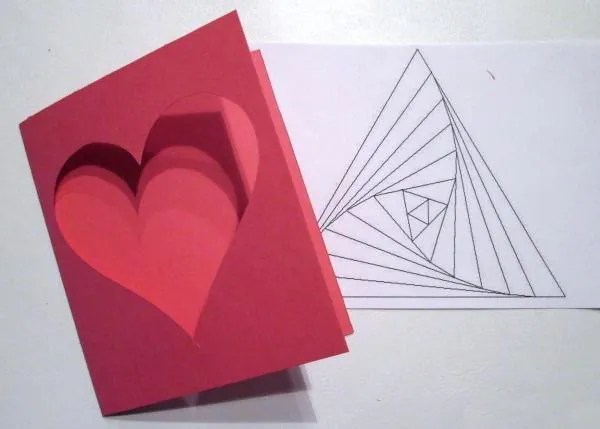
DIY postcard with 3D heart
 This version of a romantic postcard for a loved one is for the most patient and careful people in love.


 Precision and impeccable accuracy are very important in the production of this postcard.
The news portal “site” wishes you to love, be loved and try to make each other’s lives much brighter and warmer.
Women very often face this problem: how to congratulate their man on his birthday, February 23rd or Happy professional holiday. It’s not even a matter of the event, but rather what special thing you can give him. Well, imagine for a moment that this is a man you barely know: a colleague, director or distant relative. How can you surprise him if you don’t know him well? Agree, this is quite difficult and for this you need to think and try very carefully. It’s another matter if this man is a husband, brother, son, and then it’s quite difficult to guess what exactly it is preferable to get right now, so that it would be pleasant, useful, and original. A gift is a gift, but what kind of holiday is it if you don’t leave warm, sincere words with congratulations after it. And you can write such words in greeting card, which will preserve the memory of you and your attitude towards this person. Buying a ready-made card won’t pose any particular problems, but it’s better to make it by hand, it will add intrigue and some mystery to the holiday. Right now we’ll look at a couple of options for making small men’s cards using the technique. Beautiful paper, several color pictures and some other scrap materials allow you to create such wonderful cards that will surprise and delight any man.
To make men's cards you need to take:
Brown and gray cardboard;
Scrappaper with masculine motifs in brown and gray tones;
Pictures and die cuts different shapes with men's accessories;
Epoxy stickers;
Stampings “Congratulations” and “Happy Birthday”;
Brown lace;
Brown and white checkered ribbon;
Beige rep ribbon 5 mm wide;
Wooden buttons;
Metal pendants;
Suede lace;
Brown pearl half beads;
Gray and beige feather from cutting;
Creasing cord;
Watercolor paper;
golden pillow with ink for tinting;
Ruler, double-sided tape, pencil, glue gun, scissors.

Our cards will be very small, and first of all we will cut out the bases from cardboard. First, we cut out two rectangles 12.5 * 17 cm, then we divide them in half, bend them and fold them, we get the bases 8.5 * 12.5 cm.


From watercolor paper we cut out 8.2*12.2 cm rectangles for the internal inscription. Double-sided tape glue them inside the postcards.


From scrap paper we cut out two rectangles for each card, 8.2*12.2 cm. We glue one on the back of the cards.


We begin to decorate the front parts. We cut off the ribbons, laces, glue them onto scrap paper, glue inscriptions and pictures of watches at the bottom, and sew all the elements with a machine. Then we glue one more picture at a time and also sew them on.


We also glue the front parts to the card bases.
This master class will teach you how to make a happy birthday card for a man with your own hands. We have already created a similar one, in this article, but it was in a slightly different technique.
It’s very nice to give things made by yourself, as they are exclusive. Moreover, you can turn any idea into reality. IN in capable hands, it will take approximately 20-30 minutes to create.
Materials:
— One sheet of colored paper with a dark shade A4;
- Glue;
- A sheet of colored paper with a light tint;
- Scissors;
— Satin ribbon of two types;
- Pencil;
- Ruler;
— Helium pen white;
- Bead.
We collected the necessary things in a pile at once and began to create.

Let's start creating. Take blue jacket paper and shorten it so that the height is 18 centimeters. We measure 7.5 and 8.5 centimeters from each edge. And we make bends, one part will overlap the other, this is how it was intended. Then we bend the corners.

Then, we create this blank for the shirt. The top of the collar is off-center. We make exactly according to the dimensions indicated.

We make cuts on the collar in a horizontal direction and bend it.

It's time for decoration. Cut off the blue satin ribbon, slightly longer than halfway down the length of the shirt. We cut one edge into a triangle, and insert the other under the collar.

Glue a large bead onto the tie. The result is the correct shape.

This is what it looks like in full.

Cut out a pocket measuring 2 by 6 centimeters. We squeeze a piece of tape and glue it on the back side.

Glue the pocket with the handkerchief to the side of the jacket that is placed on top.

We put all the parts of the shirt together and draw a dotted line along the edges with a white pen. You can add any decor you want.

We write congratulations inside.


Sometimes, in a handicraft impulse, you want to make something beautiful with your own hands, but as luck would have it, nothing comes to mind, and so as not to suffer in Once again I decided to put together a selection of examples of how to make a postcard with your own hands. Here different examples postcards and small descriptions of how to make this or that postcard.
I tried to select as many different images as possible, both in style and theme, so that there was plenty to choose from. Of course, each postcard is just an example of how you can make postcards with your own hands.
To mom
How to make a card for mom? It’s clear that it should be the most beautiful and touching, but I want some specifics, right? The first thing you need to do is focus on the reason, it could be:- an unplanned card for no reason;
- Mother's Day or March 8;
- New Year and Christmas;
- birthday or name day;
- professional holidays.
Of course, no one can stop you from making and giving your mom a postcard dedicated to the first snow or even the release of your favorite TV series, but in general, the main reasons are indicated quite clearly.


A New Year's card for mom can be ordinary (from the point of view New Year's greetings, naturally), it is not necessary to somehow emphasize the special relationship. But a birthday or Mother's Day are special holidays on which it is worth presenting a personal card with the signature “To my beloved mother.”
How to make a birthday card for mom? Draw a sketch with a simple pencil, add a little color to guide you color scheme and understand what shades you will need as you work. So, you need to buy or find in the bins:
- a blank for your needlework (thick and thin cardboard is suitable);
- background image - it can be scrap paper, colored paper, any sheet that you like with its ornament, or you can simply artistically splash paint on a sheet of white thick paper or even use monotype and marbling techniques;
- chipboard for inscription - it is better to purchase a ready-made one or use a special stapler to decorate the edge;
- pair decorative elements- flowers, butterflies, beads and leaves;
- one or two large decorative elements - flowers or bows;
- decorative tape;
- good glue;
- scalloped ribbon or lace.
First you need to glue the background image to the blank, then arrange large flowers, and only then complement the resulting composition with small decor and lace. Dry well finished work, decorate with small decor and sparkles, and then sign - mom will be happy with such a sign of attention.
Now you know how to make a card for Mother's Day, and you can easily figure out what a card for an anniversary or angel's day should be like.
Another original version: the essence is that you need to cut out circles from colored paper, and then cut each circle in a spiral and twist it into a bud, you will get cute flowers with which you can decorate a card.


To dad
A DIY birthday card for dad is always very touching and sweet. Choosing a particular "papal" theme is not too easy, but there is a wonderful straw to grab onto - style. If you make a stylish card, then the father will undoubtedly be happy to receive it, even if it does not contain the usual symbols of “masculinity,” which in our country often include cars, weapons and fishing.
Naturally, if the father is celebrating the anniversary of his driving experience, then a car on a postcard is quite appropriate, but on dad’s birthday it is better to present a neutral and beautiful greeting card.

What kind of cards do men like:
- not too colorful;
- in a calm, slightly muted palette;
- with clean lines;
- in which a lot of effort has been visually invested.
Men admire the process, so before you make a nice card using the scrapbooking technique, think about how you can put your work into the card? This can be working with threads or embroidery, spirography and paper cutting, pyrography and much more.
Incorporate a few elements of hard work and love into your work and your dad's birthday card will be stunning.

So, we make paper cards with our own hands for our beloved daddy. Start by choosing a subject - this could be some element of a male portrait - a stylish beard and glasses in the spirit of hipsters, or the silhouette of dad's favorite pipe, you can also make some kind of heraldic flag or symbol.
Choose colors - they should be calm and beautiful, and also look good in harmony with each other.
Make a pattern for the future postcard and get to work - if this is a regular applique, then cut out all the elements and carefully lay out the future composition. And in the case of artistic cutting, it is better to spend time on the pattern and drawing. By the way, for this work you will need a good breadboard knife.
After all the main elements have been cut out, assemble the card - if you planned it using the scrapbooking technique, then you can simply glue the composition, and if you are trying to create a thin openwork product from cardboard and paper, then select shading colors for each layer - so that the work looked really delicate, you will need to choose shades that will highlight all the slits.
Make a central element on your card, and then put it under a press - this will help prevent the paper from deforming from the moisture contained in the glue.
In honor of the wedding
Making beautiful cards with your own hands for a wedding is not an easy task, and here it is better to watch master classes.

A wedding is one of the most important events in the life of a young family, and therefore it is not enough just to draw a card, you need to carefully design and package it, and perhaps supplement it with some other elements.


How to do beautiful postcard for congratulations on your wedding day:
- come up with an idea;
- ask the bride and groom main color weddings, or the main theme of the celebration;
- look various options postcards - using scrapbooking techniques, with embroidery, ribbons, and so on;
- choose several interesting lessons;
- make a rough postcard from paper and cardboard (and if you are not sure of your result, then it is better to do this step several times);
- make original cards with your own hands;
- choose packaging and make it a little more unique;
- label the envelope and postcard.
Other occasions and recipients
Rest assured, handmade birthday cards will delight the recipients - after all, this is not just a DIY postcard made in a master class, it is a real man-made miracle that keeps a piece of the soul.


You can make cards for mom and dad with your own hands, or you can delight your friends before every holiday with a custom greeting - all you need is free time, good master classes and a little patience.
3D postcards look especially impressive. How to make a three-dimensional postcard? Come up with (or look at experienced authors) an idea on how you can shape it so that you get voluminous postcards. You may want to use more decorative elements, or you may decide to make a simple DIY birthday card with 3D elements.

By the way, if you are wondering how to make a postcard for your mother or friend with voluminous paper elements, take a closer look at children's books. Surely you still have several copies, when opened, carriages and castles, trees and horses appeared between the pages.
Take a close look at how these elements are made and glued together - you may be able to reproduce this in your sketch.

Or try to do something in the shabby chic style and scrapbooking with your own hands - it’s not as difficult as it seems, the entire main volume effect is created by layering elements. By the way, flat cards are also good. :)
I think now you have enough ideas for creating greeting cards, postcards and tags - craft for your pleasure and bring joy to your loved ones!

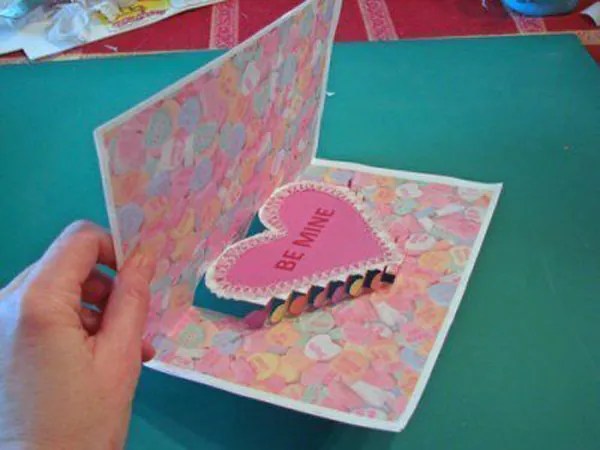
Moving card - “Waterfall of Hearts”:
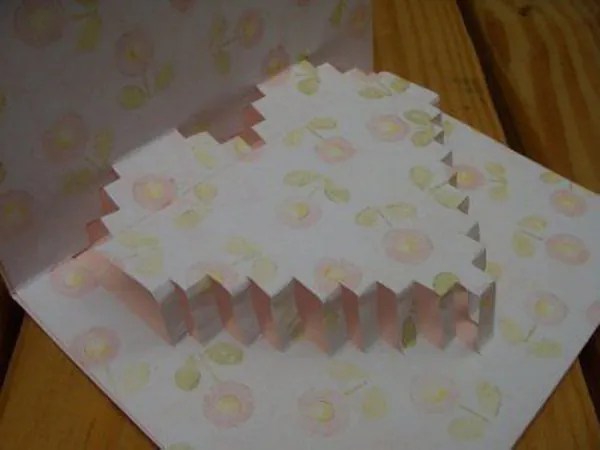
Some more ideas for inspiration:


It's always difficult to come up with a gift for a man... Let's try to surprise him with this shirt and tie using the origami technique.
DIY postcard in the form of a shirt and tie
This postcard can be used as an envelope for money or to write congratulations on back side. It is perfect for any occasion - Father's Day, brother's or grandfather's birthday, February 23rd. Instead of a tie, you can tie a bow tie or a headband. This postcard is very easy to make and takes about 10 minutes.
For work we will need:
- colored cardboard or A4 paper, choose the color according to your taste or the taste of the birthday boy
- bright ribbon.

Place the paper face down and fold the vertical edges toward the middle. The folds must be symmetrical and even.
We unfold the edges back and bend the upper corners inward along the fold line. Be sure to make sure the corners are turned evenly.
We fold the same corners in half inward. Try to make the correct fold right away; several folds in one place will not add beauty to the card.

Continue folding along the resulting fold line. top part paper down. The resulting triangles along the edges will be the sleeves of the future shirt.
We turn the paper over to the other side with the “sleeves” down and fold down a strip from the top along the width of the taken ribbon.
Turn the paper over to the other side and make a collar, folding it top corners to the middle.

Unfold the resulting collar, insert a ribbon at the fold and fold it back. Straighten and align the ribbon.
We fold the bottom of the paper upward, under the collar and tie a tie.
DIY greeting card for a man Tuxedo
Let's not waste precious time looking for an interesting and original birthday card, but make it ourselves. Moreover, it is not difficult at all and only takes 10 minutes!

The theme of our postcard will be a traditional men's jacket - a tuxedo.
For work we will need:
- paper of only two colors: white and black;
- glue;
- scissors;
- a pair of small white buttons.

Prepare necessary materials so that everything you need is at hand.
Fold the blank under the card in half. Now you need to cut out a piece of black paper that is the right size for the front of the card.
Divide the black rectangle vertically in half and choose the depth of the cut to your taste. Step back 1.5-2 cm from the edges at the top and connect the lines with a ruler. Glue the rest to the card base. Cut a triangle from the black paper.

From the black triangle, cut off the excess, and in the end we will get a butterfly bow.
Glue the bow to the card.
The final step is gluing the buttons.
Beautiful card DIY shirt for a man’s birthday
Another easy to implement idea men's cards in the form of a shirt with a tie.

Fold a piece of paper in half as shown in the picture. Make two cuts with different sides and fold the cut corners.
Cut out a tie from a different color of paper and glue it onto the card. You can also make a bow tie. Glue the corners of the collar of the resulting shirt, attach the buttons.
You can use any accessory that matches the size of the button. Don't use buttons that are too big, it will look bulky.
The postcard is ready!
Postcard Ties
Such a card with ties can be made for any men's holiday and for any man - husband, dad, grandfather, brother. It will take a little time, about 20-30 minutes.

Necessary:
- several matching shades of paper;
- scissors;
- paper glue and, preferably, hot glue;
- wire;
- pliers.

We use wire to make a hanger shape. To do this, bend the wire into a triangle with the end sticking out from above. We bend the hook at the end and twist the remaining edge at the base of the hook. Align all the parts so that the hanger looks neat.

We cut out several ties from paper. Of course, it will be more interesting if they are different colors and textures.

We bend the ties, place them on a hanger and glue them together.
We bend the cardboard in half for the base of the card, if desired, glue an additional background, the background color should be light shade so that the ties do not get lost against its background. Using hot glue, attach the hanger. We sign the card beautifully after it dries.


Original gift packaging for a man
There are many dates in the year to please your beloved man, brother or father. Let's try to pleasantly surprise them with elegant and original gift packaging.

We take for work:
- white cardboard;
- black paper;
- scissors;
- glue stick.

Creating a package will take 20 minutes. Let's start with the diagram.