How to use acrylic paints? Acrylic car painting. Advantages of the material and complete technology of work How to tint acrylic paint
Any repair should start from the ceiling, because one careless movement can ruin the look of new wallpaper or expensive flooring. Gone are the days when whitewashing was the usual and only way of finishing. Today there are many options that allow you to highlight the advantages of the interior.
One of them is the use of acrylic paint and then decorating the ceiling with ceiling plinth. Today it is one of the most popular surface coatings. However, before painting the ceiling with acrylic paint, it is advisable to familiarize yourself with the nuances of the work.
The process must be performed according to certain rules and sequence. Otherwise, the result may be disappointing. The ceiling surface for painting must be carefully prepared so that Painting works allowed us to emphasize the advantages of the interior. Much attention must be paid to the choice of color, because this will make it possible not only to decorate the room in an original way, but also, if necessary, to divide it into functional zones.
Acrylic paint is used to treat any surfaces - concrete, metal, wood, plastic, plastered and others. It is a polymer solution in a dispersion form and is highly soluble in water. Odorless and non-toxic.
The dried layer takes on the appearance of a glossy film, which is very durable. The advantages of acrylic paint include its fire resistance, resistance to abrasion and alkali. The disadvantage is absolute intolerance low temperatures, under their influence it bursts.
Until recently, ceilings were not particularly diverse. And although today White color The ceiling is quite relevant; changing its color scheme using acrylic paint is quite possible. To do this, you just need to mix the desired color with acrylic ceiling paint. It is also important that the ceiling covered with such a composition does not change color for a long period of time.
Choosing acrylic paint
Acrylic paint is produced various types– it can be intended for wall surfaces, ceiling doors, etc.
Therefore, when making a purchase, you need to carefully read the instructions:
- matte or glossy: if you plan to paint in a room where humidity is high, it is better to give preference to the glossy option;
- color: white paint also has its own shades, so you need to choose it right away the right option, and you need to buy it right away required amount the same manufacturer;
- When painting a ceiling, not a lot of material is used, but glossy paint uses less matte paint. The number of layers must also be determined in advance.
Using acrylate paint
 Acrylate paint used to create a decorative coating on the surface of walls. The advantage is that it can be used in cold climates. Acrylate paint consists of water purified from all kinds of impurities, a solvent, a special preservative that prevents the oxidation of compounds for coloring, and a concentrated pigment.
The composition also includes an acrylate dispersion, a thickener, antifreeze and a coalescent (a special substance that binds the particles of the composition). Substances that improve its properties can also be additionally added. Which paint is better to use – acrylic or acrylate? There are many building materials that have the same base.
Acrylic and acrylate differ in their binders. For the production of acrylic paints, concentrated substances without impurities are used. Acrylate paint contains vinyl, latex or styrene dispersions, which can significantly reduce the price of the material.
Using acrylic water-based paints
Acrylic paint for ceilings, water-based is one of the most popular. It got its name due to the fact that its main component is acrylic resins. Using acrylic paints is quite expensive. But the water-based one containing acrylic copolymers is much cheaper, although it is also a fairly high-quality material.
Elasticity acrylic materials very often increased by adding latex to them. At the same time, such water-based paint acquires good moisture resistance. A ceiling painted with it can be washed without worrying at all that it will deteriorate. Water-based paint dries quickly - it only takes a few hours to dry completely.
How to prepare the surface
 Before painting the ceiling with acrylic paint, you need to cover the furniture and floor with film so that nothing gets dirty when preparing and painting the surface.
Preparation takes place in several stages:
- Cleaning ceiling surface from old finishing materials and dust. This is done using a brush or roller, periodically wetting them in water. Glossy or matte surfaces are cleaned by adding detergent to water.
- The cracks are opened with a spatula, and then cleaned and covered with putty.
- The surface is being primed.
- Due to the fact that painting the ceiling with acrylic paint is carried out on a flat surface, the putty must be treated with sandpaper to create roughness.
Paint preparation and tools
The quality of the work depends on how correctly the water-based paint is prepared. The work must be performed in accordance with the instructions included. If it is said that it must be diluted with water, then usually about 5-10% is required. If it is not required to be diluted, then this is also always indicated in the instructions.
When choosing a tool, you can choose a brush or roller. It is better to use a brush when painting small areas. Ceilings large sizes It is more convenient to paint with a roller. The technology of painting with these tools has its own characteristics.
Painting with a brush
To prevent water-based paint from flowing during operation, you can attach foam rubber to the handle, just above the brush. When lowering the brush into the container, you need to be careful that it does not come into contact with the bottom. Otherwise, the tool may become deformed. When removing the brush from the container, you can tap on its edge - this will remove excess paint.
The brush strokes should be uniform to obtain wide stripes, which should be carefully shaded to avoid streaks. For getting smooth surface, crossing strokes is mandatory. When resting while working, you must not allow the brush to dry out - once it becomes stiff, it will become unsuitable for work. At the end of the work, the brush should be washed thoroughly.
Roller painting
 When choosing a roller for work, you need to ensure that its size matches the dimensions of the room. When immersed in paint, the roller must be completely saturated. After this, you need to roll it over a bathtub or a piece of old linoleum. This action is necessary so that it is evenly distributed on the roller. The result will be an even coating. Ignoring this point can cause streaks and unsightly stains on the ceiling.
The process begins correctly with application large quantity paint with its further distribution over the surface. The strokes should be placed crosswise in relation to each other - this way it will lie evenly, without leaving streaks or traces of the tool.
Dyeing technology
How to paint a ceiling using acrylic paint correctly? You need to start working from the corners. For this it is better to use a brush. It is advisable to apply the paint in one motion so that ceiling covering there were no areas of different colors. In this case, the movements must be in the same direction. Application of the next layer should be perpendicular to the first. After this, the layer must be smoothed to avoid streaks.
Before you start painting a second time, you need to evaluate the quality of the work done. Poorly painted areas must be corrected immediately. But in no case should you paint over them using thick paint - this requires a liquid consistency to blur the first layer and eliminate the resulting defects. Each layer should be applied only after the previous one has completely dried.
Acrylic water-based paint is very rarely applied to the ceiling in one layer. As a rule, 2-3 applications are done. After the ceiling is painted, you need to make sure that the coating is done well. If stains are found, you will have to sand the entire ceiling using fine sandpaper. But this method can only be used if 1-2 layers have been applied. With a larger number of layers, unfortunately, all the work will have to be redone.
Acrylic paints are an incredibly flexible medium: they dry quickly and can be applied straight from the tube like oil paints or diluted with water like watercolors, and many other options in between. We hope our tips will help you quickly start painting with acrylic paints.
1) Keep the paint in working condition.
Since acrylic paint dries very quickly, squeeze it out of the tube a little at a time. If you use a regular plastic palette, buy a spray bottle to spray water onto the paint, dampening it. If you have a wet palette—the paint is on a sheet of wax paper placed on top of a wet sheet of watercolor paper—then you don't need a sprayer, but these palettes usually don't have a thumb hole, so they're not as comfortable to hold.
2) Wipe the brush.
Keep it close paper towel or a cloth and wipe the brush every time you wash. Then drops of water will not go down the rim and fall on the drawing, leaving blots.
3) Transparent or opaque colors
All acrylic paints will be opaque if applied in a thick layer - straight from the tube or only slightly diluted with water, or adding a little titanium white. If you dilute the paint with water, you can paint with it like watercolors or using an airbrush.
4. Acrylic and watercolor washes
Unlike watercolor, when an acrylic wash dries, it sets and becomes insoluble, which means new layers can be applied to it without fear of damaging the current one. The colors of subsequent colors are optically mixed with the previous ones. Watercolor glaze can be removed with water and a cloth.

5) The glaze should be really thin
If you want to glaze in several translucent layers, they must be really thin so that the underlying layer is visible. Spread the paint evenly and thinly over the surface with a brush.
6. Improve flow without losing color
To improve the flow of acrylic paint without changing the color intensity, use special thinners rather than water.
7) Mixing
Since acrylic paints dry quickly, you also need to mix colors quickly. If you do this on paper, moisten it first - this will increase the speed.
8) Sharp boundaries
Masking tape can be applied to dry paint without harm and then removed. This makes it easy to draw sharp and sharp angles. Make sure the tape fits snugly around the edges and don't draw too quickly around the edges.
9) Masking fluid
It is convenient to use with both acrylic and watercolor washes. Make sure it is completely dry before painting on it. Don't apply too much on top thick layer, otherwise you will have to peel off the paint to get to the masking layer. Masking fluid is suitable for paper and canvas, but before using it in your work, you will need to get used to it. If the masking fluid dries on the brush, it will be almost impossible to clean. Wet the brush with brush cleaning fluid before rinsing - this will make the process much easier.
10) Using acrylic paint as glue for collages
If you apply it in a thick layer and the object is not very heavy, then acrylic paint can be used for collages. Just apply it to the surface like regular glue.

Repair always starts from the ceiling. This is due to the fact that paint can easily ruin new wallpaper or modern covering floor. Today we have moved away from the classic operation of finishing the ceiling - whitewashing it. By painting the ceiling with acrylic paints, you can emphasize the advantages of the interior, and also use any color scheme. As a rule, the ceiling plinth (read: " ") acts as a modern design sophistication.
How to paint a ceiling with acrylic paint: advantages
Today, acrylic-based ceiling paints are causing a stir. Thanks to its advantages, acrylic has managed to gain a leading position in the construction market of paints.
Let's talk about these advantages:
Modern acrylic paint includes a large variety of compositions that differ in consistency and composition. For example, there are paints only for dry rooms. A separate category includes compositions for bathrooms (moisture-resistant). Therefore, before using a substance, you need to read what room it is intended for.

According to the level of whiteness, acrylic paints are divided into: white, super white and milky white. To paint the ceiling, it is best to use white paint. But often manufacturers indicate “white” on packaging containers with milky-white paint. There are cases when they write “white” in superwhite. It is important to take this into account before painting the ceiling with acrylic paint.
When purchasing, ask the seller to slightly open the lid of the paint can. Take your regular one with you White list paper. Hold it near the paint and compare the color of the composition in the jar with this leaf. If the whiteness matches, you can safely use a similar substance to paint the ceiling. If the seller does not meet you halfway, explain to him that you need maximum whiteness. As a rule, under warranty you can always return a can of paint.

Once dry, it acquires a glossy or matte surface. When choosing paint, remember that matte is very important indicator for the ceiling. This puts this property on par with the importance of whiteness. With a maximum matte surface, defects will be almost invisible. As a rule, the defects are unevenness or uneven application of acrylic.
If you need to create a colored ceiling, use glossy paints. This composition is only suitable for flat ceiling surfaces that have a large square footage. also used for non-residential premises. We seem to have figured out how to paint a ceiling with acrylic paint. I would like to note domestic and imported manufacturers of such products. So, consumer confidence in the market building mixtures and the paints deserved: Dulux, Tikkurila, Siro mat+, Innetak, Himmaton, Himos, Svyatozar and Supermatt.
How to paint a ceiling with water-dispersion paint - prepare the surface

How to paint a ceiling with latex paint - mix the paint

How to paint a ceiling with oil paint - choose a tool
The best option would be to choose a roller or brush. Each instrument has its own characteristics. For example, brushes are used in small areas. Ceilings large area It is better to paint with a roller. Let's look at how to paint a ceiling with oil paint using a roller and brush.
Working with a brush

Working with a roller

How to paint a ceiling with water dispersion paint
The evenness of the surface depends on the pressure applied to the brush. With little pressure, the paint will lie in narrow stripes, and the layers will be thick and through (read: ""). Strong pressure will cause drips, but the layers will be thin.
When starting the process of painting the ceiling, use the so-called “testing ground”, for example, in the country. Use gentle pressure, which should be gradually increased.
How to paint a ceiling correctly, detailed video:
Usually they start from the corners using a special brush. With it you can paint and not miss all the hard-to-reach areas. It is recommended to adhere to the principle: one movement - one layer. Otherwise, the ceiling will be covered with areas of different colors. The movement should be carried out in a pre-selected direction.
The next layer is applied perpendicular to the first. Next, you need to smooth out the paint and joints - a roller or brush without paint is passed over the surface. Before painting the ceiling for the second time, examine the painted surface from all angles. All existing unpainted areas must be eliminated.
Do not cover unpainted areas with thick paint - this is unacceptable. The second layer must be liquid to blur the first one. Places painted twice are treated with a dry roller.
After applying the first coat, wait until it dries. In accordance with the instructions, the waiting period before applying paint is determined. Each new layer should be applied after the previous one has dried.

When applying a second layer on a wet surface, you may encounter blurring of the first. You should repeat the painting again, applying it towards the light. It is important to monitor the joints - they should not remain. The ceiling is usually covered with several layers of acrylic paint. Foreign-made paint is usually applied in two stages, while domestic paint is applied in three.
After applying acrylic paint to the ceiling, wait a while. The optimal time is 2 hours. After this, you need to make sure that the entire surface is covered with paint. In addition, the ceiling should have an even color, without any overflow or darkening. There are cases, despite the proper workmanship, stains form. Do not under any circumstances paint over the “holes” - you will only make things worse. It is better to use fine sandpaper. Using it on a block, sand the ceiling thoroughly.
It is important to use the entire surface, otherwise the spotting will not go away. This method always helps if you applied paint in one or two layers. When applying a significant number of layers, the best solution is to redo it. This work will include sanding, puttying and painting the ceiling.
Today, to express your “I” with the help of color and light, there are many people (professionals and amateurs from painting) who are ready to teach you drawing lessons. The lessons are laid out step by step both on YouTube and in various articles on the Internet, where they will tell you in detail and easily how to learn to draw, show you accessible techniques for painting with different paints on different canvases, and at the same time tell you what painting styles are accepted by artists.
By the way, an artist will never say about his work: “I drew!” Artists paint pictures like a musician writes music, where every note is like a stroke of a master’s brush.
Try and become a master of your feelings and emotions, pick up your brushes, open your paints, stand in front of the canvas and start painting!

The most common are gouache and watercolor; a person becomes familiar with them in early childhood. Oil paints require a more respectful attitude; they are applied tightly to the canvas, in several opaque layers, and take a very long time to dry.

And there are paints that combine the ease of use of gouache and the oily density of “serious” paints. These paints are diluted with water, dry quickly, which allows you to apply them layer by layer without the risk of spoiling the drawing, and after drying they do not fade or change color. Moreover, they are also waterproof (after drying, of course) and absolutely hypoallergenic! These are liquid acrylic paints.
You will object that you have already become acquainted with acrylic paints when you were making repairs. construction works V own home, and you know for sure that acrylic is a liquid plastic, a polymer. Right. This means that you already know the properties of acrylic and are aware that this polymer easily adheres to wood and glass, fabric and plaster, let alone canvas and cardboard! You also know that in addition to weather resistance, you can create volumes with acrylic paint, so many artists use acrylic paints to paint three-dimensional paintings to give them sculptural relief on a flat canvas.
Check out Justin Gaffey's acrylic paintings.

Impressive? But he is self-taught! And I also once faced a choice: “What colors are best for a beginning artist to paint?” — and settled on colored polymers.
It must be said that working with acrylic allows you to use both traditional painting techniques and various modernist “tricks”; it allows you to mix styles and techniques, which will make your paintings more interesting and emotional. But acrylic paints also have their own characteristics; you need to know how to handle acrylic paints.
Basic techniques when working with acrylic
- Wet. The diluted paint is applied to a canvas moistened with water. It is somewhat reminiscent of working with watercolors.

- Dry. You will need several brushes to edit the strokes on the canvas “dry”.

- Glaze. This technique involves the formation of a pattern from thin translucent layers. By adding layers step by step, we get beautiful iridescent colors that give our painting a richness and sophisticated mood.

- Impasto. Very similar to working with oil paints using the impasto technique. Dense, opaque paste layers applied with a flat brush or palette knife (something like a small spatula) can create relief. Impasto is a special painting technique, completely opposite to the glazing technique!

What might you need for drawing?
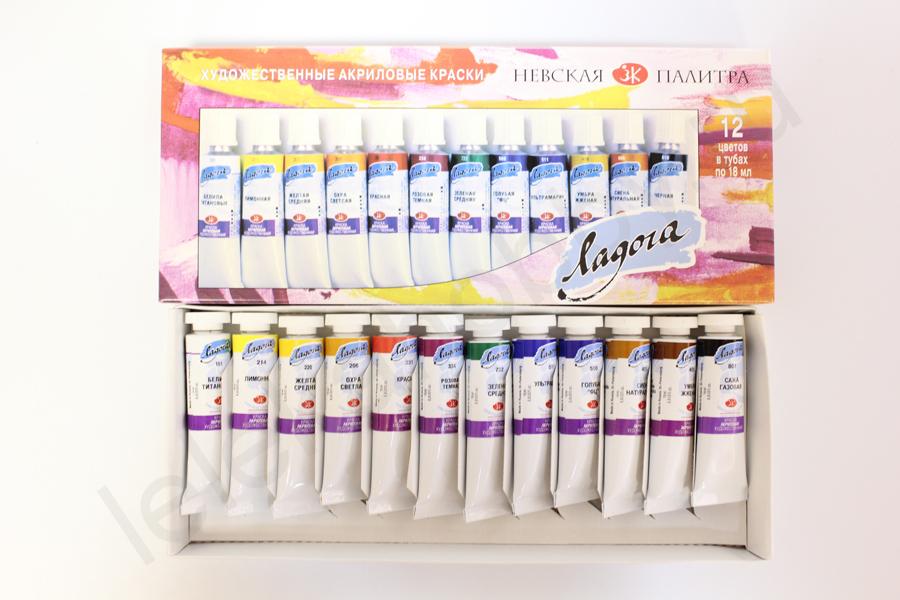
First of all, the artistic acrylic paints themselves. If you doubt your ability to mix various paints or you are afraid of not getting “in color” when applying color, it is better to use ready-made paint palettes, since acrylic paints are now available in about 130 colors both in tubes (tubes) and in small plastic container jars.
If you are just starting to paint with acrylic paints, so to speak, taking courses for beginners, try your hand as an artist with basic undiluted colors: white - black, red - blue, yellow - green, brown.
And don’t take on complex work right away, buy a regular children’s coloring book, and try to color any picture using your favorite acrylic painting technique.

This good practice for beginners - having learned to work in small areas, you will understand at first hand how to use acrylic paints when painting large canvases. It is important to remember when using acrylic paints that they dry very quickly and cannot be left open!
What else you will need:
- Long brushes made of natural and synthetic hair - flat and round in different numbers. Plastic pile will be needed when working with undiluted acrylic; natural “column” or “squirrel” - for watercolor techniques.
- A set of palette knives of different sizes. A palette knife is a device that artists use to clean the palette and apply thick paints to the canvas. A kind of trowel knife made of flexible steel strip or thick plastic.
- A bottle of clean water (preferably warm). You also need a spray gun to wet the working surface so that the acrylic paint adheres better to the canvas.
- Palette. You will place some paint on it for convenience or mix paints with each other, using some as dyes or colors for others. It is very convenient and economical to use ordinary disposable plastic trays or plates. You can purchase or make a palette that will retain moisture in the paint. The whole secret is two types of paper. The first, bottom layer is one that absorbs water and is therefore always wet, the second is parchment that covers the paint on top.
- Retarder (thinner) for acrylic paints. It will not allow it to form quickly polymer film, and will give you the opportunity to more carefully work out the drawing on paper or canvas for drawing. This “addition” will also increase the ability to spread and shade the paint and make it a little brighter. You can apply it directly into the paint, or simply on a brush. How to use them correctly is written in the instructions for use.
How to paint with acrylic paints using a palette knife? Just like with oil, applying thick paint in even layers or in a relief stroke.

Once you understand the peculiarity of this application and learn how to use a palette knife, you will appreciate it ample opportunities and you can work polymer paints on wood or canvas, and even give a master class to beginners on how to use it correctly in their work so that a painting with acrylic paints turns out not just bright, but also bas-relief and voluminous.
Among other things, you need to prepare:
- a large volume of water in a deep container for washing brushes;
- paper or cloth napkins and towels;
- sandpaper with grit P120;
- felt-tip pens, markers, gel pens or chanting (a glass or copper tube with a thin spout for applying fine contour lines) to complete the drawing;
- decoupage glue;
- An airbrush can also be used if you are sure that you are using it correctly and the acrylic paint is diluted in the proper proportion;
- and, of course, the basis for painting with acrylic paints.
On video: painting space with acrylic.
Preparing the base
The basis can be anything that requires your attention in artistic transformation: a piece of cardboard, a plywood board, a canvas on a board or an easel stretched on a stretcher.

Is it possible to make your own canvas to paint on? Yes. And even necessary! The law is simple: when we learn to draw, we learn to make a canvas for drawing on our own. For example, the basis for a future masterpiece will be wooden plank. How to make sure that the polymer of acrylic paints can easily “catch” and not crumble later? For the best adhesion effect (adhesion), we take texture paper or origami paper and glue it with decoupage glue over the area of the board on which we will paint with acrylic.
So that the background for the drawing is smooth, and the drawings themselves turn out bright and beautiful, without distortion (the kind we need!), use a needle to remove all the bubbles that appear on the future canvas - we make a puncture in each and remove the air. But even now something is missing to start drawing correctly. Our canvas looks clearly unpresentable. Painting on a fresh canvas is postponed: you need to use canvas primer.
We will use 10-15 layers of decoupage glue as a primer, each of which is applied only after the previous one has completely dried.

The time has come to polish our base, for which we have prepared sandpaper. They do this: lightly moisten the surface of the canvas with water and rub it to the desired gloss. The smoother the first layer of soil, the easier it is to paint on the canvas. Now we need to get a uniformly white background. To do this, we have used whitewash all our lives, we will do the same. Apply, wait for it to dry, and if necessary sand again.

The “canvas” we make contains all the characteristics for creating a painting with your own hands, on which artistic acrylic paints will easily and firmly lie.
Before you start painting with acrylic paints, check out our recommendations:
- The degree of transparency of acrylic paints is adjusted by adding water to them, but if there is more than 20% water, the paint will easily peel off when dry.
- When processing a drawing with paint, you need to start with large details with brushes with high numbers, and only then move on to smaller details, subject to brushes with lower numbers.
- After rinsing the brush after using the color, blot it on a clean cloth or paper napkin; this will protect the painted flowers from unnecessary color stains. When mixing paints, use acrylic thinner.
- When painting, use only the tip of the brush, this will give you a better chance of distributing the paint evenly.
- When mixing, move the colors towards each other, rather than “slipping” one into the middle of the other.
If you need to use a straight line to clearly separate one color spot from another, apply electrical tape or masking tape to the dry area. Afterwards you can easily remove it, and the straight line will remain.

To know how to mix acrylic art paints correctly, the video tutorials below may be useful, where they will explain to you that the best acrylic paints are those that can be used to paint something beautiful. Oh yes! We don’t draw, we write the music of our mood!
How to paint with acrylic (2 videos)
This article is about how to paint walls in an apartment. Perhaps you want to refresh the look of your home or dream of radically changing the interior to better suit your tastes... Grab a roller, brushes and go.
This procedure is quite simple, but we will still tell you in our step-by-step instructions how to do it correctly. If you follow our advice, the result of your work will be no worse than that of a professional.
1. You should carefully measure the surface area you want to paint so you know exactly the amount of paint you need. Once you've decided on a color, head to your local hardware store. Read the label on the paint can carefully to ensure the exact coverage area and drying time.
2. Prepare the surface before painting.
It is necessary to remove previous layers of paint using a scraper and sandpaper, degrease the surface and, if necessary, repair chips and gouged areas with putty.
Apply several layers acrylic primer to improve the adhesion of paint to the wall material. Do not skip this step, otherwise the paint will not lie smoothly and bond securely to the base.
3. After you have painted the walls, you need to replace the sockets and switches that you removed before starting work. Then clean the floor and remove the covers that protect the furniture from dust. Move the furniture back into place, being careful not to scratch the floor.
- dye;
- primer,
- 120 grit sandpaper;
- masking tape;
- polyethylene film.
Tools:
- protective gloves and glasses;
- brush;
- roller 5 cm wide (for corners);
- large roller;
- paint tray;
- vacuum cleaner, bucket.
Adviсe:
- put on old clothes that you no longer wear and will not wear again, since you will probably get paint on them;
- Before painting, eliminate all uneven walls;
- apply a coat of primer, especially if you are painting the walls in a new building;
- Apply a second coat of paint after the first has completely dried.
Preparing the room for painting the walls
In the picture below you can see the tools you will need to paint the walls. Do you need rollers? different sizes and relief (to create different textures), an emery block for manual grinding and paper masking tape designed to protect various elements from paint contamination. In addition, you cannot do without a paint tray.
Take down the curtains. Move furniture to the middle of the room and close it plastic film or special covers.
Painting tools.
The next step is to protect the baseboards and other interior elements from possible smudges and drops of paint. To do this you will need masking tape - a cheap but very useful material.
Tip: Cover the windows, doors and floors with plastic film, which can be secured with the same masking tape. Otherwise, you will have to remove paint drips from all these surfaces, which is sometimes not so easy to do.
Protect the baseboard with masking tape.
Preparing walls for painting - great opportunity to level their surface and eliminate various defects.
In addition, you will need to fill the potholes and cracks with plaster or putty using a small flat putty knife. When the material is dry, smooth the surface with 120 grit sandpaper.
Remove dust and dirt from the walls using a sponge or clean cloth and a suitable detergent. Finally, vacuum the floor.
Sanding walls before painting
Tip: Cover the inside of outlets and switches with masking tape to protect them from dirt and paint drips. Work patiently as preparatory stage is nearing its end.
Removing socket covers.
It is also necessary to temporarily remove the heating radiators in order to be able to paint the wall surface behind them. To do this, you must first close the valves.
Then place a tray where the pipes enter to prevent water from dripping onto the floor. Unscrew the union nuts connecting the radiator to the pipes and drain the water.
When the water stops flowing, remove the radiator from the brackets that hold it in place and pour out the remaining liquid.
Removing radiators.
Let's start painting the walls
If you only want to paint part of the wall, create a border using masking tape. If you're a traditionalist, stick some paper tape along the ceiling.
Tip: Make sure the tape is applied at the same level. To do this you will need a laser or spirit level.
Applying masking tape before painting
You can choose the height at which you want to place the masking tape. It doesn’t even have to be a horizontal line - the choice of location and shape depends on your tastes and needs.
Tip: For high-quality stickers of adhesive tape, lightly press it with your hands. You must be sure that there are no untaped areas left and, therefore, paint will not flow under the tape, otherwise the dividing line will not turn out to be perfectly smooth.
Using masking tape to create different areas when painting.
You should start painting the walls from the areas around door jambs. To do this, you will need a small roller specifically designed for narrow surfaces.
Tip: To avoid smearing the wood with paint, use a small brush (2-5 cm wide) in the immediate vicinity of the jambs. Try not to touch the jambs or cover them with masking tape in advance.
Roller painting the walls around the door frame.
Now it's time for the corners of the room, areas around windows, along the ceiling and baseboards, around switches and outlets. When painting walls in these areas, it's best to use a small brush as it gives you more control. Aim for straight lines.
Don't apply too much paint at once and roll out any drips or drips before moving on to the next area. Try to apply the paint as evenly as possible.
Painting the corners of the room.
Once you've finished painting the corners, along the ceiling, and along the baseboards, you can begin adding a coat of paint to the rest of the surfaces. Using a large roller, apply the paint to the wall in a vertical motion. Strive to ensure that the coating is uniform. You don't need to get too close to the ceiling or baseboards since you've already painted those areas.
Generally, one coat of paint is not enough, so you will need to apply at least two coats to achieve coverage. of proper quality. Before applying a new layer, you should wait until the previous one has completely dried.
Tip: If your strokes become uneven, it's time to renew your roller. Make sure that dust and other small particles do not get into the room - they can damage the finish.
Painting walls with a roller.
Roll the roller back and forth over the paint and then over the top of the tray several times to ensure the paint is evenly distributed across the roller.
Apply paint to the wall using vertical strokes of the roller.
The paint dries quite quickly, so try not to delay the process too much, otherwise the adjacent areas will have time to dry, and as a result the layer will not be applied evenly enough.
Tip: When you first apply paint to an area, move the roller in one direction (up or down) to get an even layer over the entire surface, without visible marks.
How to properly paint walls with a roller.
After you have finished painting the walls in the room, you should once again make sure that there are no areas of uneven application of the paint layer, drops, smudges or other flaws. If necessary, correct the defect using a roller.
If you think that the walls are painted perfectly, you can proceed to last stage– withdrawal paper tape. This must be done before the paint dries. Try to remove the tape carefully so as not to damage the edges of the freshly applied coating.
Removing masking tape.
As a rule, it takes about a day for the paint to dry completely (the time depends on the temperature in the room and the type of paint used). During this period, it is advisable to thoroughly ventilate the room, trying to avoid the entry of street dust into the room. Any small particles (dust, dirt, etc.) can damage the finish, so pay attention to this aspect.
Now you know how to properly paint walls with water-based paint.
It is this type of paint that is most often used today for interior decoration premises and we used it in our project.
However, if you suddenly want to paint the walls with oil or any other paint, the knowledge gained here will be useful to you, since the basic principles of working with paint depend little on its composition.
A room painted with your own hands.
Translation source: www.howtospecialist.com
Source: https://srbu.ru/stroitelnye-raboty/248-kak-krasit-steny.html
Painting walls with acrylic paint
You have already come up with the design of the apartment and each individual room and each room (bedroom, living room, nursery, kitchen, bathroom, hallway and corridor), you have even already chosen acrylic paint for painting the walls, but you don’t know how to properly paint the walls with acrylic paint? Let's hope this article will help you with this. not an easy task- repair. Well, or at least it will orient you to the right moments.
Nowadays, acrylic paint is one of the most popular finishing materials for walls and ceilings indoors.
After all, it is very effective and has many different advantages over various other types of paints, which makes it practically the most popular and effective type of coating these days.
The list of positive aspects of this paint is quite impressive.
Properties and advantages of acrylic paint
- it is very convenient to apply,
- dries quite quickly
- practically odorless (which is very important, especially if you have to live in the same room where you need to paint),
- relatively more economical than other options decorative design walls on a very limited budget,
- thousands of colors and shades in catalogs for tinting such paint,
- using acrylic paint you can create not only an even and smooth, but also a textured (structural) coating,
- such material can be either glossy or matte type (shine),
- acrylic paint fits perfectly on the surface,
- the paint is absolutely non-toxic to humans and the environment,
- Over time, this coating does not delaminate or crack,
- after application it forms a thin but quite durable film on the surface,
- the surface painted with this product is not afraid ultraviolet radiation sun,
- The surface after painting receives relative mechanical resistance and good resistance to heat treatment.
Paint is applied to the wall surface using traditional painting tools:
- brush of different widths (thin ones for painting details and thin elements),
- rollers of the most various sizes and types of fur coats,
- with a special paint sprayer (very convenient and relatively fast).
By the way, various art movements in creating works of art of various kinds also use acrylic paint in their works and masterpieces, because it can be applied to such non-greasy surfaces:
- wooden,
- concrete,
- glass,
- fabric,
- metal.
For painting walls, it is also important to know these properties of paint, because you can create various decorative inserts and elements by painting them in a suitable color.
This is how it turns out that paint and varnish materials help creativity; paintings are painted with ordinary acrylic paints, and they are also used to decorate rooms, creating a wide variety of decorative elements.
Therefore, turn on your imagination, stock up on plenty of creative inspiration and create, create!
Painting walls with acrylic paint yourself
Preparing walls for painting with acrylic paint is a mandatory step before any decorative works, be it painting, wallpapering or applying structural decorative plaster.
How to prepare walls for painting with acrylic paint? It is imperative to remove the old layer of paint from previously painted walls. If necessary, the walls must be leveled using plaster. You also need to use plaster to repair various chips, cracks, pits and holes on the walls.
Also, in any case, each surface needs the most thorough cleaning of various types of contaminants. Special cleaning agents can be used for cleaning. Carefully study the instructions for using plaster and putty.
For better adhesion, before applying a thick leveling layer of plaster (primary rough or starting, as well as finishing) and a thin layer of putty to the walls, the surface base should be coated with a primer, which will provide more high level adhesion (adhesion) of the base to the coating.
It is advisable to cover each new layer with a primer, which will improve the adhesion of the base and the material covering it. It is recommended to prime all layers between decorative and other coatings so that they adhere better to each other.
After applying the leveling layer of plaster or putty, do not forget to thoroughly sand the surface using special sanding materials (this could be, for example, sandpaper of a suitable grain size, you can buy such sandpaper with a handle, it is a very convenient thing to use). The grain size of sandpaper is a very important indicator, so choose the most optimal option, which depends directly on the type of surface.
Painting the surface with acrylic paint can only occur when the surface is prepared for painting, that is, the wall:
It is very convenient to paint walls with acrylic paint using a foam or nap roller of a suitable size. Usually the paint is applied in two layers; before applying the second layer, be sure to wait until the first layer applied earlier has completely dried.
It is more convenient to apply the material to the wall using a special paint roller cuvette. This cuvette often comes as a set with a roller the right size, but such sets are often much more expensive than buying a roller separately and a cuvette separately.
When purchasing collapsible parts (separate roller and separate cuvette), you should pay attention that the roller selected by size must completely match the width of the bath and fit freely in it. The essence of working with a roller with such a cuvette is as follows.
First you need to pour the required amount of paint into the tray (do not forget to check whether the paint needs to be diluted before painting). Then, dipping the roller in paint, you should roll it several times along the ribbed surface of the cuvette in order to remove excess paint from the roller.
Now you can apply paint to the walls.
The first layer can be done in different directions, rolling the paint carefully over the surface. Experts recommend making the last (second) layer strictly parallel to the direction of the incident light from the window. This will be much neater and, accordingly, more beautiful.
Remember that under no circumstances should transitions of a surface painted in several stages be visible, so immediately check the painted wall for visible boundaries of the previous paint application.
If there are such transitions, they must be removed (don’t be lazy to do this right away) by applying the required amount of paint to such areas and rolling it on both sides of the visible boundaries that appear.
Try to apply paint evenly on the walls to avoid the above-described shortcomings and errors.
Also, when painting work, you should not rush, it is better to complete everything more slowly and with better quality. necessary work than to repaint the entire surface again, which, you see, is quite difficult, time-consuming and expensive. And it’s always difficult to get ready to carry out the same work that was recently completed, but done poorly. This can be avoided.
Happy painting!
select a piece of text and press Ctrl+Enter
Source: https://podskazok.net/steny/pokraska-sten-akrilovoj-kraskoj.html
How to paint with acrylic paint: technique, necessary materials and tools, step-by-step instructions and expert advice
Very often, acrylic-based paints are used in construction, finishing and artistic works. Such coatings are especially popular. This is due to their unusual color brightness and durability.
Many people wonder what can be painted with acrylic paint? The technology and application of dyed acrylic are worth exploring.
Well, we invite you to learn how to properly paint walls, facades, wooden and metal products, fabrics and even nail plates with acrylic paints.
What is acrylic paint?
Acrylic-based paints are a substance based on polyacrylic polymers: methyl, ethyl and butyl. Also, some polymers are used to turn them into foam. This is a dispersed type of paint, diluted with water and formed using pigment pastes. Also, to break them down, a solvent consisting of chloroform, ethanol and ether is used. They give off a very pungent odor.
Acrylic itself is a synthetic material with a transparent texture. He has good mechanical characteristics and resistance to high temperatures. Acrylic substances are very light and durable, resistant to UV radiation.
The paint contains acrylic itself, small dispersive particles of plastic that tend to dissolve in water. After the paint dries, a film is formed that protects the painted surface from external influences.
Here is the composition of any acrylic coating:
- binder;
- toner;
- filler;
- solvent;
- additional particles.
The first binder holds all the ingredients together. This allows the coating to combine well with different surfaces. Such a binder is often acrylic resins. They give the paint strength, durability, and abrasion resistance. Type acrylic resin determines the quality of the paint.
Soluble powder is used as a pigment. It can be of the following types:
- with organic origin;
- of inorganic origin;
- manufactured artificially;
- from a natural source.
The process of making paints with acrylic base not that complicated. First, the acrylic composition and the coloring pigment are installed in the container, then all the components are mixed into a homogeneous mass and packaged in a separate container.
Advantages of acrylic paint
Acrylic paints have many advantages over others paint and varnish materials. They are most suitable for finishing works. They are universal and suitable for any surface. Here are their other advantages:
- Environmentally friendly. For their production, substances that are harmless to humans and do not affect health are used.
- Comfortable and easy to use. They do not have a special smell, so they are easy to work with.
- Fireproof. Do not ignite and do not contain flammable substances.
- Availability of unlimited color palette. Great amount shades allows you to use it not only in coloring various designs, but also used by artists to paint pictures.
- Dries quickly. It dries within 1-3 hours after painting.
- Elastic, durable, easy to care for, abrasion resistant.
- They do not contribute to the accumulation of dirt, allow air to pass through, and are resistant to moisture.
- They differ in their durability (they do not lose their attractiveness for 10 years).
- They have a wide scope of application. They are used in rooms, as well as outdoors under open sun rays.
- Versatile and multifaceted. Used in combination with others building materials. They can be applied to any surface, excluding some types of plastic.
What can you paint with acrylic paint and how?
So, this type paints are used in construction industry, and in painting. Sometimes they are used to apply designs to the surface of cars or to create nail designs. If you don’t yet know how to paint with acrylic paint, then use the following tips:
- clean the surface from dust, dirt and greasy stains;
- material with high moisture absorption must be treated with a primer;
- if the composition is too thick, add water and solvent;
- It is better to apply with a roller, brush or spray gun;
- carry out work at a temperature not lower than +10 °C;
- Clean brushes, paint container, paint container and other accessories with plain water.
If you have not completely used up all the paint, then close the jar tightly with a lid so that air does not get in, which can change its properties and make it unusable.
Types of acrylic coatings
Depending on where acrylic paint is used, it is divided into the following types:
- external;
- internal;
- automobile;
- used in painting.
The façade acrylic coating contains substances and additives that improve its resistance to sunlight, moisture and abrasion. This paint can be used to cover facades, fences, benches, gates and other external surfaces.
Interior paints have less resistance to external irritants, but they work well. Finishing interior paints Available separately for walls and ceilings. Universal compositions with acrylic have also been developed, suitable for both indoor and outdoor work.
Depending on the additional functions paints with acrylic are found:
- lightfast;
- moisture resistant;
- well-tolerant of mechanical stress;
- washable.
Such acrylic coatings can still have a beautiful shine. In this regard, the following paints are distinguished:
- glossy;
- matte;
- silky matte;
- semi-gloss.
A little about thinners
It is best to dilute acrylic paint with water, because it is created on water based. But when the coating dries, a film forms on its surface that no longer allows water to pass through. Therefore, after painting, all working tools should be washed immediately before they dry.
How much water is needed for dilution? The ideal mass would be a 1:1 ratio. If you dilute 1:2, you get a thin layer that saturates the surface. The thinner the layer of coloring is needed, the more water is added to the composition.
Some manufacturers offer their thinners directly. With them, the paint can already take on a glossy or matte appearance.
To dilute dried acrylic paint, it is first ground to a powder. Next, this powdery mass is poured with hot boiling water twice, wait until it cools down and the water is drained, and the paint is mixed. Such processed mass is suitable for second-rate work, because it loses some of its properties.
All artists know one feature of acrylic paints - after drying they darken. They are used as an alternative to oil tubes and use the same techniques for applying to canvas. Unlike oil, acrylic dries much faster.
For background images, artists use a liquid consistency diluted with water, and for expressiveness they use a paste-like mass. To do this, they often use special thickeners. Acrylic is good because it does not crack, unlike oil. It goes on very smoothly, has a shine and does not require fixatives or varnishing.
Artists paint with acrylic paints on wood, glass, metal, linen, and canvas. Fresh smears can be easily removed with water, while dried ones can only be removed with special solvents. To create acrylic paintings, gels, pastes, putties, and glue are used. Such masterpieces are distinguished by their special color rendition.
How to paint with acrylic paint correctly?
Water-based coatings are very easy to apply. To know how to paint with acrylic paint, you need to get acquainted with some technological aspects and subtleties. We invite you to get to know them:
- First, prepare the surface for painting. Check the ceiling for dirty, greasy and dusty residues. Then level the base perfectly. Treat the ceiling with a primer that protects against mold and mildew and saves on paint costs.
- If it remains on the surface old paint, then carefully remove it with a spatula.
- Be sure to repair cracks and chips with putty and wait until dry.
- Grout and apply primer.
- After this you can start painting.
- Take care of the tools first. Which roller to paint with acrylic paint interests many readers. In addition to this device, you will need brushes, a paint reservoir, a ladder or a table.
- The work should start from the corners, painting them with a brush. When you have painted all the edges around the perimeter, take a roller and boldly, stroke by stroke, paint the entire surface.
Methods of applying coloring mass to a surface
Acrylic paints can be applied to the surface in two ways. The first is to dilute the coatings with water or special mixtures. This composition can be applied in several layers.
In the second case, a paste-like form of paint is used, which is achieved with a special thickener.
Never dilute the paint in the container you bought it in; take a separate container, otherwise the moisture will evaporate and the residue will become unusable over time.
Painting wood with acrylic
Quite often people ask the question: “Is it possible to paint wood with acrylic paint?” Yes, there really is a special type of acrylic coating for wooden surfaces. the latter require preliminary priming.
For external works A water-based primer is suitable, and an oil-based one for interiors. A high-quality primer is good antiseptic. The answer to the above question is clear: “You can paint wood with acrylic paint.”
Many people use it to paint timber or plank facades.
Facade finishing
Painting the facade of a house with acrylic paint is not that difficult. All you have to do is follow these steps:
- Make sure there is no dirt or loose plaster on the walls. Check the façade surface for strength. Look to see if there is fungus anywhere on the surface. Fill all cracks and defects.
- Apply primer. This will improve the adhesion of the paint to the surface of the facade and save material.
- Take a roller and start painting. You will also need a brush. In some cases, they use a spray gun.
It is important to note that painting the facade requires two layers. The second layer should be painted only after the first has dried. Acrylic paint dries quickly, so you need to quickly apply stroke after stroke, otherwise the boundaries of the new joints may be visible.
Combination of acrylic and oil texture
You need to apply the paint material after thinking through all the details. The coating must be reliable and maintain its original appearance for a long time. It is especially important to take into account what kind of painting the surface was previously exposed to. You already know what can be painted with acrylic paint.
It fits perfectly on many surfaces.
But what if the room was previously renovated with a different coloring material? For example, can you paint with acrylic paint over oil paint or not? After all, so often in the old “Khrushchev” buildings of the last century, kitchen and bathroom panels were painted with an oil coating.
This is how you need to shoot oil paint before applying acrylic or not? Experts answer that it is possible to combine these two paints, you just need to use a special acrylic coating “Master-121”.
It has excellent adhesion properties and is considered universal. It is important that there are no cracks or chips on the old coating.
First, the oil coating is sanded with fine sandpaper, wiped off dust, degreased, and only then paint work begins.
Hot batteries and acrylic coating
During renovations in apartments, many people wonder whether it is possible to paint batteries with acrylic paint or not? After all, such a coloring agent must tolerate high temperatures up to 90-100 °C. It should not only look aesthetically pleasing, but also protect the metal from corrosion.
We can say that universal acrylic paint is also suitable for painting batteries. It is important that during painting works the heating was turned off. You cannot paint over hot batteries to avoid uneven layers and loss of color.
Combination with enamel
In addition to oil and acrylic coatings, enamel compositions are also found. They are used to paint metal, wood and plastered surfaces. If drying oil is added to an oil product, varnish is added to an enamel product. With it, the coating becomes glossy and aesthetic.
If we consider whether it is possible to paint on enamel with acrylic paint, then the answer is categorical: “No!” Acrylic coating it will simply lift the enamel and curl it. This is because the two products have different diluents or solvents.
If, nevertheless, such an action must be carried out, then first a layer of neutral composition must be applied to the enamel surface.