Mansard roof step by step. DIY mansard roof
Sloping roofs belong to the category of popular and most effective roofing structures. The construction and arrangement of such a roof requires the contractor to have certain skills in performing the necessary calculations and relevant measures.
However, having understood the basic provisions of the manual, with the arrangement of such roofing structure it will be possible to cope on our own without the involvement of third-party specialists, which will allow significant savings.

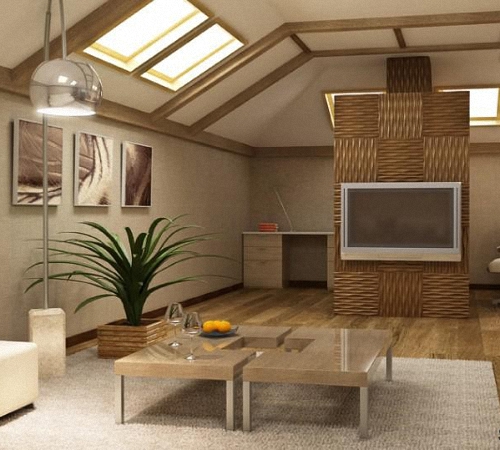
A sloping roof is perfect for situations where it is planned to equip a residential attic. In this case, the under-roof room will have fairly high ceilings.

It is somewhat more difficult to erect a sloping roof than an ordinary single- or double-slope structure, but, as you already know, there are no impossible tasks.
Broken roofs look best on buildings that have a square shape. If your house is narrow and long, there will be practically no benefit from the attic, and therefore from the roof structure in question.


Any roofing structure, and the broken line is no exception, are calculated in two stages. When performing the first calculation, the required amount of finishing material is established, and the second calculation is intended to establish the load-bearing capacity of the rafters.

Drawing - dimensions of the attic roof
The first calculation is performed using the geometric dimensions values roofing system. Calculating the load-bearing capacity of the rafter system is somewhat more complicated. When performing it, you need to take into account the following indicators:

Having received all the listed data, you will be able to calculate the rafter system using the appropriate formulas or special programs, which is simpler, faster and more convenient.

Based on the calculation results, you will determine whether the sections are suitable structural elements specifically to your roofing structure. If necessary, the characteristics of the sheathing and rafter legs can be changed. You can also replace the roofing material.
For maximum convenience, create a three-dimensional model of the future broken roof structure with the parameters you choose. Special programs will help you with this.

What to build a roof from?
After completing all calculations and preparing the necessary project documentation, you will know what the cross-section of elements should be rafter system roofs, what kind of sheathing is best to install and what kind of roofing the material is suitable specifically for your case.
Go buy the necessary equipment.
First of all, buy timber for arranging the mauerlat, as well as beams or boards for installing sheathing and edged board for the rafter system. Rafters can also be made from timber.

Perfect fit coniferous wood. It is important that the moisture content of the material does not exceed 20-22%. The material should not have large knots. Traces of damage by bugs and bluish spots should also be absent.
Consider the fact that the strength, reliability and durability of the broken roofing structure directly depends on the quality of the wood.
Before using the purchased material for its intended purpose, be sure to treat it with an antiseptic. Special means will protect the material from rotting. Also, periodic treatment with antiseptics will need to be carried out throughout the entire period of use of the roofing structure.

In addition to antiseptics, all wood must be treated with fire retardants - these are special fire-fighting agents.
Process the material outdoors or in a well-ventilated area. Be sure to wear protective gloves and a respirator. The mentioned products are applied in a double layer. For application it is most convenient to use a sprayer; ordinary brushes are also suitable.

After applying the impregnations, let them dry completely, and only then proceed to other planned activities.
Also, to equip a broken roof structure, you will need fasteners - screws, plates, bolts, etc.


Additionally, purchase suitable materials for waterproofing, insulation and vapor barrier of the structure, as well as finishing roofing material.
The procedure for constructing a roof
The arrangement of the structure in question is carried out in several simple steps.
First step
Secure the Mauerlat to the upper strapping beam.


Second step
Install the rafters as required by your design drawings. Pre-cut templates for connecting the rafter elements with the support beam (mauerlat).

Third step
Position the vertical posts and secure them to the floor beams. They will take over the function of the frame of the walls of the future under-roof room.

At the top, tie the posts together using purlins. These elements will simultaneously take on the functions of tightening for the upper rafter elements and ceiling beams For attic room.


Perform further work according to the requirements of your project. In this case, be sure to take into account that the rafters, due to which a vertical roof slope is formed and the tightening of the upper rafter legs with the Mauerlat is ensured, must be layered. The upper rafters in the design of such a roof will be of the hanging type.


For additional rigidity of hanging rafter legs, provide fixation on the headstocks. They must be connected to tie rods that serve as beams for the ceiling of the attic floor.


If necessary, install spacers and struts. All listed structural fasteners should be initially marked on your roof drawings.
On the outer rafters located at the ends of the house, install additional frames to accommodate the gables, doorways and double-glazed windows.

Insulation work and finishing
Finally, all that remains is to install the necessary insulating materials. First, attach a vapor barrier film to the frame of the roofing structure, laying it along the rafters and securing it with a stapler. Attach the film with an overlap, without excessive sagging.


Install the timber sheathing. Select the lathing pitch individually in accordance with the characteristics of the selected finishing coating. In some situations, a metal profile is used to arrange the sheathing, but the option of using wooden beams is the most common.
Lay thermal insulation material (preferably mineral wool) between rafter elements. Place the insulation in a spacer. From the outside attic room additionally secure the insulation with lathing. In the future, the final internal coating will be attached to it.


Lay waterproofing material. The principles of installation and fastening are the same as in the case of vapor barrier membrane. Proceed with laying the finishing material on top of the installed moisture insulation. The slopes of the design under consideration are based on a broken profile, so the finishing coating should be installed from the bottom.
At the joints of the roof slopes, lay the top row of finishing material so that it overlaps the lower tier and creates a kind of canopy over it.

Laying roofing on an attic roof
Finally, you need to install various additional elements roofing structures such as gutters, fencing, etc.
A finished broken roofing structure, created in-house, is in no way inferior to similar buildings equipped with the help of professionals.

Good luck!
Video - Do-it-yourself sloping roof
The cost of erecting a roof is 25-35% of the cost of building the entire house, and the cost of work is 50-80% of the price of materials, so if you build an attic roof with your own hands, the savings can amount to 15% of the entire estimate.
An attic roof is any roof under which there are rooms suitable in height for habitation (attic, or attic floor).
Installing an attic roof is a complex and painstaking job.
In industrial construction, roof installation is carried out when the drawings show each component, fastening parts and the parts themselves with their dimensions taken out.
Builders do not think about the structure of the roof, whether the load is calculated correctly, their task is to build a frame, cutting out templates of parts and fastening them together, while the system for fixing the roof elements is also indicated.
To figure out how to make a mansard roof, you will have to study videos, photos and master the theoretical part.
Comfortable ceiling heights for living spaces are from 2.5 m and above. The walls of the attic floor are most often the roof slopes, so it is necessary to ensure their thermal insulation.
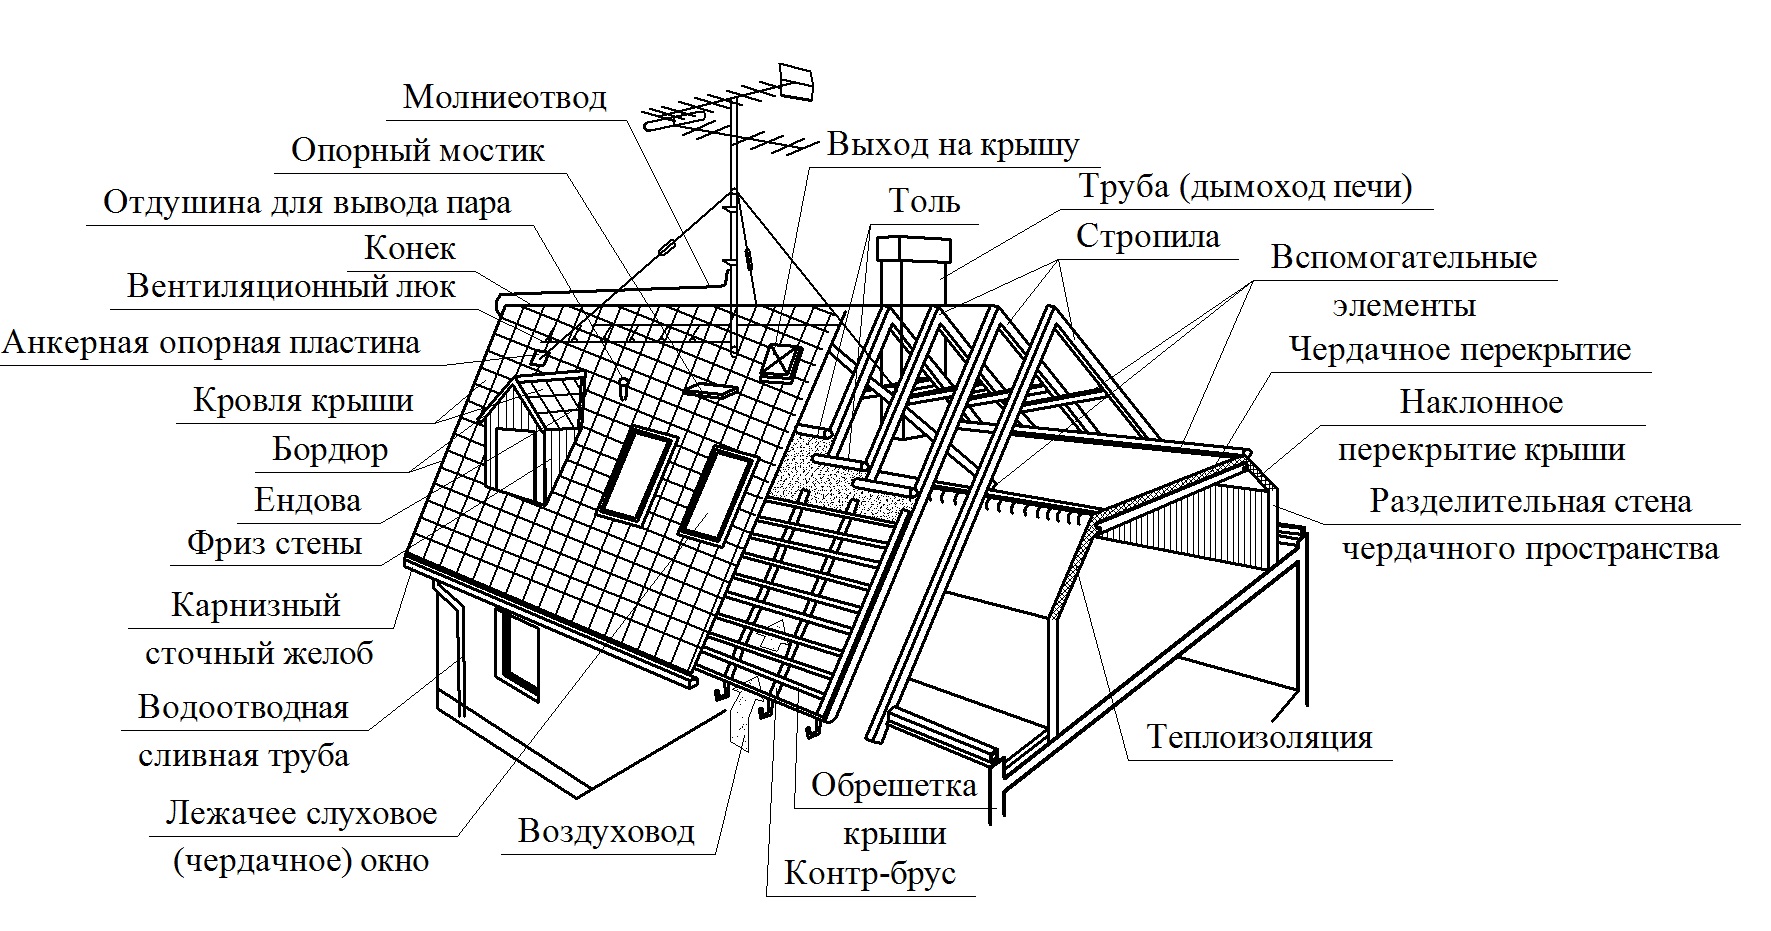
The top of the attic roof is the ridge, a beam that lies parallel to the plane of the floor of the house, and is the highest point of the roof. The ribs of the roof are called rafters.
Ridge (upper) rafters descend from the ridge. Beams attic floor connect the bases of the left and right ridge rafters of the same roof section.

The racks (bars with a section of 100x100) are fixed on the interfloor ceiling at a right angle at a distance of 0.8-1.5 meters from the external wall.
The higher the racks and the closer they are placed to the walls of the house, the larger the attic living space will be.
Side (bottom) rafters come from the attachment point attic beam to the Mauerlat. Each section of the attic roof consists of two ridge rafters and two side rafters on each side.
The system of rafters of the same name forms a slope - ridge or side.
The most used version of the attic roof is a broken one gable roof. In this case, the ridge and side rafters form an obtuse angle at the connection points.
If they lie on the same straight line, then outwardly it looks like a classic gable roof.
When calculating the slope of the slope, the materials of the future roof and climatic conditions are taken into account; it can range from 15 to 45 degrees. The greater the slope, the less snow will be retained.
In regions with little snow, the sloping roof of a house can be quite flat.
The standard slope of the slopes is 30-35 degrees.
Preparatory work
Roof mansard type planned even before laying the floor between the first and attic floors.
If you use wooden beams, then it is necessary to provide the cross-section of the beam and the distance between the beams so that they can withstand the permissible load for a residential second floor.
Typically these are beams with a cross section of 150 cm and above and a length of 6 m. Such beams are located at a distance of 80-90 cm from each other.
The system is such that the longer the beam, the greater the load it will experience in the middle. The pressure will be created by the floor of the attic floor itself, the furniture and, in fact, the residents.
Even if the attic is planned for unfurnished lounges, floor beams with a cross-section of less than 120 cm, laid at a distance of 100 cm from each other, are undesirable.
A reliable device will be ensured by the materials correctly selected for the attic roof.
The heavier the roofing materials are, and the longer the frame of the sloping roof, the larger the cross-section needed for the timber from which the frame can be built.
Typically, sections of 60x120, 60x100 cm are used.
In many photos there is no reinforcement belt installed on external load-bearing walls when a sloping roof is planned.
The weight distribution system is such that the entire weight of the roof falls on the floor beams, and they, in turn, transfer this and their weight to the walls.
A gable roof of a one-story building is much lighter than a broken attic roof, so a mauerlat (wooden sheathing along the perimeter of the walls below the floor beams) is quite sufficient.
If the walls are made of timber or brick, then the Mauerlat will cope with ensuring that the structure of the attic roof is reliable. It is important at the stage of wall construction to provide a device for fixing the Mauerlat.

The system must be reliable. In the case when a hollow cinder block or porous foam concrete is used as a wall material, it is difficult to secure the Mauerlat to the wall.
A good solution would be reinforcing concrete belt, into which, at the pouring stage, rods are placed level to install the Mauerlat.
It is placed on a backing made of roofing felt or other insulating material and aligned along the inner edge of the wall.
Before fixing, make sure that the bars forming the mauerlat lie strictly parallel. Even a deviation of 2-3 cm will cause the slope to sag.
If the house is up to 6 meters wide (the maximum permissible size of an unsupported interfloor beam), then the floor beam rests on the mauerlat at both edges.
If the width of the house is more than 6 meters and the house has load-bearing walls perpendicular to the floor beams, then the floors are installed according to the following system: one edge of the beam is attached to the mauerlat, and the second to the inner load-bearing wall, on which the Mauerlat is already installed.
In continuation of this line, the next beam is laid from interior wall to the opposite outer mauerlat. The gap between the beams should be at least 3-4 cm.
If the preliminary work has been carried out correctly, then you will have a completely finished floor between the first and attic floors. Now it's time to draw the future frame.
Start learning the theory with a photo of a sloping roof and a video showing the installation of a mansard roof.
Draw the house from the front, the pillars on the left and right, draw the rafters and calculate the angles of inclination. To change the slope of the slope, increase or decrease the height of the posts.
Calculate the length of the rafters (cosine of the angle of inclination, multiplied by the distance from the post to the projection of the ridge - for the ridge slope, and cosine of the angle of inclination of the side slope, multiplied by the distance from the mauerlat to the ridge - for side rafters).

Watch a video of various options for attaching beams to each other. High-quality fastening will provide a reliable frame.
If climatic conditions excessively overload the high sloping roof with winds, and the width of the house does not allow for a lot of space to be allocated for unused space behind the racks, then you can reduce the height of the racks and, after construction is completed, install built-in cabinets along the entire perimeter of the side walls of the attic.
Frame assembly procedure
Make the roof frame only from high-quality wood. The main sign of a “stale” tree is its dark color.
If you cannot buy dried drying chamber wood, then purchase raw wood, but still at the stage of wall construction.
Fresh wood cannot be used for a frame - under the influence of loads it will lose its shape and bend.
Raw timber can be dried naturally in one and a half to two months.
To do this, we lay it out clearly on a level with a distance between the beams of up to 5 cm. No two beams should touch. Every 75-100 cm the beam should rest on a flat surface.
You can use cinder blocks laid out on a flat area as support points, but in no case should you use another timber intended for the frame.
In sunny and warm weather, the beams dry naturally, but in rainy weather they need to be covered. Making a frame is allowed only from completely dried wood.
Begin installation, making sure that the posts and rafters are level. wooden beams and there are no cracks or knots in them.
Wooden blanks of the same type sawn according to a template must be treated with a fire retardant and a mixture that prevents the formation of fungus.
Treatment should be done twice with an interval of 1-2 days. Installation can begin when the wood has dried after treatments.
The procedure for assembling the frame step by step:
- Installation of racks. On top of the floor beams we place 5-6 boards, 5 cm thick, without fixing them. They form a floor on which you can safely move. The same size beams are installed on the floors according to the level. The extreme ones are placed first. Be sure to make sure that the opposite distances between the posts are equal. Then a cord is pulled between the outer beams. It serves as the level by which all others are set. The harness is placed on top of the posts and secured. Now we have a rectangle into which all other supports are mounted. To reduce the instability of the structure, the racks must be secured with jibs to the floor beams. It is the racks that are most weakness in the frame system, so we will pay special attention to their fixation. The post with the floor beam must be secured using a size 12-14 construction bracket. When all the racks are installed, wedge them together with the overlap using a beam with a cross-section of 50-60 cm. It is worth additionally fastening them on the outside together using an unedged board;
- Installation of upper slopes (gable roof). At the top point, the rafters are fastened together with brackets. Ridge rafter rests on the frame of the posts and is fixed to the attic floor beam. Installation of the upper triangle of the attic must be done only on the ground and raised completely finished design. The triangle is laid on the posts and attached to them with staples. As soon as the installation of the second triangle is completed, it is necessary to connect them in several places to each other. When all the structures are exposed, you can fix them with lathing;
- At the top of each side rafter, a groove 3-4 cm deep is cut out, and the rack trim is inserted into it. Groove angle equal to angle slope slope. A groove is also made at the bottom of the side rafter for installing it on the Mauerlat. Due to these two grooves, an unloaded rafter can stand without fixation. Before applying the load that the sheathing will carry, you need to secure the side rafter with a bracket to the frame and to the mauerlat. Additional fixation should be carried out with self-tapping screws twisted at an angle at the rafter attachment points;
- Lathing - edged or unedged board or OSB board– fixed to the rafters using self-tapping screws. The edges of the slopes should be smooth. The distance between the components of the sheathing depends on the roof. For slate, a distance of 3-4 cm is allowed, and for bitumen shingles a continuous sheathing is required;
- All that remains is to build the gables and insulate the slopes and the sloping mansard roof is ready.
Take photos and videos as you implement each step. This will help you understand errors if the result does not satisfy you.
To work you will need tools:
- hammers of different sizes;
- screwdriver;
- a circular saw;
- pliers and small carpentry tools.
You will also need consumables:
- staples size 12 or 14;
- wood screws 45-50 cm long for lathing and 150 cm long for additional fixation of rafters;
- hydrobarrier;
- construction stapler;
- as insurance - the installer's belt.
It’s better to call 2-3 assistants for help (it’s possible to do the cutting yourself on the ground, but installing structures at height cannot be done alone).
broken roof- This is essentially a type of gable roof. Most often, people choose this design when they want to get a larger volume of living space on attic floor. And some people just visually like this shape more than the usual gable one.
This article will describe the sequence of erecting a sloping roof when supporting the rafters on the floor beams. In what follows, I will often refer to previously published articles and. Therefore, I recommend that you first familiarize yourself with their contents if you have not already done so.
So, we start by taking a piece of paper (preferably in a box) and drawing the foot of our house on it, always observing the scale. Anyone who can draw on a computer is great. Now, based on our personal preferences, we draw (also to scale) the future roof. At this stage, you need to decide on the height of the structure, the angles of inclination of the slopes and the location and size of window openings.
 As rough recommendations, I can give you a diagram with the proportions that I usually use in my practice. In the figure, the height of the break is 3.1 meters, which ultimately allows us to obtain a final height of the ceilings on the attic floor (with plasterboard finishing on the frame) of at least 2.5 meters. The angles of inclination of the side and top slopes are approximately 60° and 30°, respectively. By the way, a tilt angle of 60° allows you to ignore side slopes when calculating rafters snow load. All these dimensions are optional and you can adjust them at your discretion.
Now we need to select sections of the rafter system elements and calculate their strength. For this we use the program that we talked about in the article. We calculate the rafters of the side slopes in the “Slings” tab. 1″ Having selected a suitable section, you also need to write down from the diagram the value of the vertical reaction force (red arrow up) at the top point of the rafter. Let it be “Q1, kg”.
We calculate the rafters of the upper slopes in the “Arch” tab. In the diagram, having first indicated the value of L, we substitute the value of h0 equal to h. Having chosen the cross-section of the rafters, we also write out the value of the vertical reaction force from the diagram, but at the lowest point of the rafter. It will be designated “Q, kg”.
By adding the values of Q1 and Q, we get a concentrated load N, which is transmitted through the racks to the floor beams. We use it when choosing the cross-section of racks and floor beams.
Having decided on all the dimensions, we proceed to the actual construction of the sloping roof. As an example, let’s again take a house box measuring 8x8 meters:
Step 1:
We install the mauerlat and floor beams. The details of this process have already been described in the article, so I will not repeat myself. The cross-section of the floor beams is calculated to be 100x200 mm.
Step 2:
 We align the racks along two lines (strictly vertically), first the outermost ones made of 100x150 mm timber, then, by pulling the laces, the intermediate ones, with a section of 50x150. The distance between them is no more than 3 meters. We secure all racks with temporary spacers. To keep the drawing clear, I only showed the spacers on one post. Take the height of the racks 10 cm more than the desired height finishing ceilings in the rooms.
Now I want to voice one thing important note. Happens often, especially when done new roof on an old house, that if we lay out the floor beams when looking at them from above, we will not get a strict rectangle. The house may be slightly narrowed in some directions. This is not scary, but to make the work easier, you need to place the racks so that they definitely form a rectangle. This will allow us to make all the rafters of the upper slopes according to one template. Otherwise, the rafters will have to be placed along the cord and cut in place, and this takes a lot of effort and time.
Step 3:
 We place purlins from a 50x150 mm board on top of the racks and install the remaining missing racks, also with a section of 50x150 mm. There is no need to install any more spacers. The resulting structures will play the role of a frame for the future side walls of the attic room.
Step 4:
 We install and fasten it onto the purlins, for example, using roofing corners or tie rods. I calculated their cross-section for this example (the length of the strings is 5.5 meters) using our program in the “Beam” tab in the “Distributed load” plate. In this case, “Load (norm.)” and “Load (calc.)” were taken equal to 150 kg/m². There is no operational load on them.
The calculation showed that with a section width of the puffs of 50 mm, the section height should be at least 210 mm. But I still took boards with a section of 50x200 mm. We will eliminate unacceptable deflection by installing suspensions (see below). Of course, this will put an additional load on the rafters of the upper slopes and therefore we will increase the cross-sectional dimensions of the rafters of the upper slopes obtained during the calculation from 50x150 mm to 50x200 mm.
When installing tie bars (crossbars), we place a temporary support under each of them approximately in the middle of the span. This can reduce the resulting sagging. It is enough to use an inch 25x150 (only one such support is shown in the figure). They are needed so that when installing the rafters of the upper slopes, you can calmly walk on the puffs, without fear that they will break, and, as I already said, to reduce sagging.
Having installed all the ties, we fasten them on top with a board (25x150 mm). The structure will become more rigid. Do not place this board strictly in the middle. Step back from the axis in any direction by about 20 cm. Why will be clear later.
Step 5:
Install the side rafters (left picture). This is done in the same way as was described in the article about the gable roof. We also prepare a template, make the top cut, mark the location of the bottom cut and fasten the rafter.
We install plugs for the insulation (right picture). By the way, when I wrote about the gable roof, I completely forgot about them.


Step 6:
We begin installing the rafters of the upper slopes.
 First, we make a rafter template. To do this, take a suitable piece of 25x150 board and temporarily fasten it strictly vertically on the outer crossbar according to the figure. One of upper corners this board (for example, like my right one) should coincide with the geometric center of the roof, i.e. the right edge of the board coincides with the axis of the roof (dashed line in the figure). Now we take a suitable board (also an inch board to make it easier), apply it and use a pencil to mark the bottom and top cuts.
 We make two rafters according to the template and install them. Three people need to work. Ridge beam here we don't use . Having installed the first pair of rafters, we secure it with a brace so that it does not fall.
 Next we install all the other rafters. On a roof like ours (length 8 meters) it will be enough to install four struts, two in different directions. While there is no sheathing, we temporarily fasten the remaining pairs of rafters with an inch board (see picture).
Step 7:
 According to the drawing, we sew on the pendants (board 25x150). They will prevent the ties (crossbars) from sagging when we remove the temporary supports. Now we see why we didn’t place the board holding all the ties together strictly in the middle. Otherwise she would be in the way now.
Step 8:
We install the pediment frame and sheathe it.


After this we make cornices, sheathing, gable overhangs and gable flashings. Read how to do all this in the article about a gable roof. Again, I won’t paint everything over again.


I hope this article will be useful to someone.

Construction of an attic is a very important process that is performed both at the design stage of the entire house and after its construction. This premises provides its owners with additional square meters living space. Let's look at the features of the attic construction below.
Construction of an attic: project and its development
The attic is a rather difficult part of the building to construct. It is preferable to design it at the stage of building the house itself. Because building a residential attic on a finished building is not always possible. First of all, due to the fact that the attic space has considerable weight, and therefore loads the foundation.

The construction of an attic consists of a certain kind of stages, such as:
- attic construction drawings;
- dismantling old roofing materials, if the attic is being built on an already completed building;
- strengthening the walls on the upper floor, strengthening the foundation, if necessary;
- erection of attic walls;
- construction of the roof, its insulation, waterproofing and finishing;
- installation of window structures;
- interior finishing works.
Compliance with all technological nuances in the construction of an attic will allow you to obtain a reliable and durable building.
The first and most important stage- drawing up a project for an attic room. At this stage, you should take into account such features as the size of the room, the material used in its construction, the roof and the level of its slope and many other nuances.

There are three ways to design an attic. The first is the most budgetary, drawing up the project manually. However, to carry out this operation it is necessary minimal experience design. The second way is to use ready-made design documentation; however, it is not a fact that someone else’s attic design will be completely suitable for your home, so you will still have to make some adjustments to it. The third way is to contact specialized organizations that, in the shortest possible time, will help you draw up an attic project that is ideal for your home.
In progress independent design wall loads on the building should be taken into account, its appearance and finishing materials used both indoors and outdoors. In addition, it is imperative to take into account the load from the building on the foundation; it may need to be strengthened. If the attic is too heavy, there is a risk of deformation or cracks in the house.
Experts will help you choose the optimal building materials, which, on the one hand, will ensure the attic's durability in operation, and on the other hand, will help reduce its load on the base of the entire building.
In addition, after drawing up the project, it should be agreed upon with special government agencies. If you have a competent project, this process It will go by pretty quickly.

Do-it-yourself attic construction in the house
We invite you to familiarize yourself with the option of constructing an attic in an already built and commissioned residential building. In this case, the first step is to dismantle the old roof. Thus, it will be possible to expand the under-roof space and increase the safety of the building under construction.
To dismantle the roof, it is not necessary to hire specialists; all work can be done with your own hands. To do this, you must first get rid of the external roofing finishing material. Next, you need to completely remove the sheathing and rafter system.
After this, it is necessary to strengthen the walls on the adjacent floor, since the attic will exert a certain pressure on them. The design features of the attic exert pressure not only on the surface of the base of the building, but also on its walls. Therefore, first of all, before constructing an attic, it is necessary to strengthen the walls close to it. To do this, you should use special calculations, according to which this process is carried out and the strength level of old walls is determined.
The next stage is insulation and waterproofing of the attic floor, which is also the ceiling on the previous floor. With the help of these actions it will be possible to ensure a healthy atmosphere in the room. To insulate the attic, you can use various thermal insulation materials in the form of polystyrene foam, mineral wool, etc.
Construction of the attic photo:

Next follows the process of erecting walls in the attic. The walls are made in accordance with the project developed in advance. Most often, wood or timber is used to build walls. To insulate the attic, it is recommended to use mineral wool or expanded polystyrene. Choosing material for external and interior decoration walls, try to give preference to materials with a high level of fire safety.
The next process is the construction of the roof. In this case, the calculation correct angle The slope of the roof is very important. Since a roof that is too flat will negatively affect the ease of use of the attic space. Please note that the roof must be properly waterproofed, since if there is the slightest leak on its surface, moisture enters the attic.
In addition, the shape of the roof should be as simple as possible; the presence of broken and shaped elements will only complicate the process of their construction. Also important is the issue of insulating the attic space. For these purposes they use various kinds Construction Materials. When choosing insulation for the attic, try to give preference to materials that do not absorb moisture and are resistant to frost, temperature changes and rodents. In addition, the thermal insulation material should not allow heat to escape from the room.

It is best to focus on conducting internal thermal insulation works. To create it, follow a number of steps:
- install finishing in the form of plasterboard or plywood base;
- form a vapor barrier layer; special films are used for these purposes;
- lay thermal insulation material - perfect solution - mineral wool;
- ensure proper waterproofing of the roof using a special type of membrane;
- lay external finishing roofing material.
To erect a roof, you will also need to install a rafter system and install lathing, the installation step of which depends on the type roofing material. After the roof installation is completed, windows should be installed.
In order to ensure high-quality lighting in the room, several windows should be installed in it, the size of which directly depends on the size of the attic itself. The window in the attic ceiling must be of high quality. It must be resistant to precipitation, wind, and temperature changes. In addition, with the help of window structures, high-quality ventilation of the attic is ensured.
Further actions for the construction of the attic are related to the carrying out of interior finishing work, the organization of heating, the decoration and design of the room. Strict adherence to all recommendations for attic construction will help ensure long-term operation of this room.
Frame attic construction technology
A frame attic is an excellent solution for any home, garage and even bathhouse. Among the advantages of attics frame type note:
- lightness of the structure, so it does not load the main building, there is no need for additional strengthening of the walls and foundation;
- affordable cost of the attic - in comparison with its stone options;
- high level of thermal insulation and sound insulation;
- the possibility of constructing an attic of almost any shape and configuration;
- ease of implementation construction work, since the materials for the construction are quite light and special equipment is not required to lift them to the surface of the house.
Construction frame attic allows you to get a finished building with excellent heat and sound insulation properties. In addition, the roof will remain completely intact, and the usable area of the room will increase significantly.

A simpler process is to build an attic on a building that has not yet been erected. Construction of an attic on an already finished house requires dismantling the old roofing. Work should begin by studying the characteristics of the soil on the site and determining load-bearing capacity foundation. If the foundation is not able to support the attic, then a series of works will be required to strengthen it.
Next, you should inspect the walls of the house for their susceptibility to additional loads. In this case, if necessary, it is necessary to strengthen the walls. After this, the old roof is dismantled and the ceiling is strengthened.
The construction of a wooden attic consists of the following stages:
- production of frame system;
- installation of walls;
- insulation of attic walls;
- installation work related to the installation of the roof;
- finishing the attic with roofing materials and insulating the roof;
- interior decoration of the attic.
In addition, the construction of an attic involves the installation of window and door designs, manufacturing and installation of stairs, etc.
In order to construct an attic from timber, you should prepare an edged board, plywood, screws and the timber itself. Frame structure The height should be comfortable for the average person to move around. The optimal height of the attic is at least two meters. The height of the ridge zone should be about 350 cm.
The easiest way is to assemble the frame on the ground and then lift it onto the roof. The top beam or frame frame will act as a hearth in the attic. To fix the frame structure on the surface of the house, special boards or plywood are used. In this way it is possible to obtain a special platform. The knots and quality of fastening depend on the material from which the attic walls are made. Self-tapping screws are used to connect the timber at the top of the structure. After production frame walls the roof should be thermally insulated and waterproofed. After this, external and internal wall cladding is carried out, windows and doors are installed, and interior finishing work is carried out.

When planning an attic you should carefully analyze general state main building. The attic can be one room or will consist of several rooms. At the design stage, you should also take into account the design and shape of the windows, as well as their location.
The attic should be constructed from light, but at the same time durable materials. Since the materials should easily rise to the roof and place minimal load on the base of the building.
The most optimal materials for the construction of an attic - wood or steel profile. An attic made of stone or concrete will load the main building. Roof finishing materials should also be light, but at the same time durable and reliable. Preferably used for roofing bitumen shingles or piece metal. We recommend using plasterboard for interior wall decoration and leveling.
Since the attic is located above the main building, it is in greater contact with cold air. Therefore, proper thermal insulation of this room should be ensured. Heated air in the room should not penetrate through the insulation. In addition, in order to prevent moisture from entering the room, it is necessary to ensure its waterproofing.

In relation to the design features of the attic, it consists of a rafter system, which is installed in increments of sixty centimeters. To fill the gaps between the rafter system, it is recommended to install thermal insulation materials, such as mineral wool, inside them. It is possible to lay the insulation in one, two or even three layers. To calculate the total thickness thermal insulation material, the overall heat loss coefficient in the room should be taken into account. To protect the roof from inside the room, a vapor barrier should be installed. Next, you should finish the roof using plasterboard, lining or finishing panels.
Do not forget to leave a ventilation gap, the main function of which will be to get rid of excess moisture in the under-roof space. The width of this gap directly depends on the type of roofing material. WITH outside thermal insulation material, a vapor-permeable wind protection should be installed.
Excellent vapor barrier material is a film made of polyethylene, glassine or roofing felt. The insulation is laid with an overlap of 15 cm. Construction tape is used to seal the seams. Please note that foil waterproofing is laid with a foil covering inside the room. Thus, the foil will reflect the heat that comes from the room.
Construction of the attic video:
Mansard roof- This great option to get enough large space residential premises
When building a private house with an attic, it is important to correctly design the structure and size of the roof. After all, the attic is a living space in which various processes occur: air evaporation, heating of the room. This has its effect on the roof. On the other hand, the roof must fulfill its main purpose - to reliably protect from bad weather and retain heat inside.
Therefore, it is important to obtain a high-quality design and calculations before starting construction. Calculations must be carried out by a specialist with experience in designing such objects. Even small errors can lead to incorrect load distribution of load-bearing units and elements. Excessive roof weight exceeding the strength of the rafter legs can lead to weakening general design and sad consequences.
But before we dwell in detail on how to correctly calculate the size, area and other parameters of the attic, let’s consider common types of structures mansard roof.
The rafter system and its elements are different for different types attic. The roof must be light so as not to load the walls of the houses, while the reliability and strength of the structure must comply with building requirements and standards.


Shapes of pitched roofs
The following structures are distinguished by types of mansard roofs:
- Gable. Two slopes and two pediments.
- Broken. Having two or more planes located at different angles of inclination. broken roof much more difficult to build.
- Hip. With triangular slopes covering the gables.
- Half-hip. The slopes of the facades cover part of the pediment area.
- Dome. Typical for houses with a round or polygonal structure.
- Vaulted. With an arched pediment projection.
In addition, roof structures are divided into design features into ventilated and non-ventilated. This or that option is chosen depending on the climatic characteristics of the region and the design of private houses.
Advice!
With large amounts of precipitation, high humidity Roofs with natural ventilation should be preferred. In addition, the air layer inside plays the role of additional insulation.
Designs without natural ventilation more often used in dry climate zones.


Private house with attic roof
The basis of the roof is the rafter system
Main and the most important element The roof is its frame or rafter system. It bears the main load, determines strength and reliability, the service life of the entire roof and how often it will have to be repaired will depend on it.
Therefore, installing a frame is the most labor-intensive process in constructing an attic. The main influences on the rafter system are the loads resulting from the mass of the frame itself, the weight of the snow cover and the effects of wind pressure. In this regard, calculations of loads on rafters must be carried out.
The strength and durability of the entire building depends on the correct calculation of the rafter system, loads and all connection points. An important requirement is the minimum weight of the frame structure. To keep the load on the walls and foundation small, materials with the lowest specific gravity should be included in the project.


Rafter system of a house with an attic
Area calculation
If you plan to use the attic as a living space, it is important to calculate it usable area. For calculations, an important parameter is the total area of the attic space and its useful volume. The latter is calculated using lines connecting the points where the height from the floor to the ceiling plane is 90 cm. The rest of the space is considered to be non-living, suitable only for the construction of closets and storage rooms.
The total area is taken from the house and attic plans. The roof area is calculated based on the total area internal structures. The entire roof frame can be represented as a set of elements with different geometries. By calculating the area of such figures separately and adding the values, you can get the total area of the roof structure of the house. This value necessary not only for further calculations of the strength and weight of the structure, but also for calculations required quantity materials.
Calculation of the area and geometry of the attic premises determine the ratio additional area to the lower floor of the building
Attic roof project
As mentioned above, the key to a reliable and durable roofing structure must be a well-designed project. You can use the standard finished project attic roof, which no longer requires additional calculations. This will speed up work and reduce design costs, but if construction is planned according to individual project, a detailed calculation will be required.
Important!
In addition to calculations, the project must contain information about the design of the rafters, a diagram for installing beams, calculation of its own weight and the expected load of natural factors (wind, snow, rain).
In order to calculate and draw up a competent project, it is necessary to provide for the resistance of all elements to temperature changes.Typically, a project consists of several sections and drawings. It contains calculations and all information about the roof structure:
- first of all, the project determines the main parameters - the shape of the roof, its dimensions, the slope of the slopes, the presence of a pediment;
- the second, and no less important point, is a list of all materials for each unit, indicating their quantity;
- a separate section should be devoted to calculation load-bearing structures indicating the cross-section of the rafter beams, the dimensions of the floor elements and other components;
- drawings with different projections and details of the main components;
- section with calculations of the thermal properties of the structure and instructions on insulation and waterproofing with a list of recommended materials;
- recommendations for roofing material based on calculation of maximum loads on the structure.

Calculation of the slope of the slopes
Determining the size of the roof is influenced by its slope. The angle of inclination of the slopes is great importance when building a house. An improperly constructed roof can be destroyed by strong winds if it is built too high. Conversely, if the slope is insufficient, this can lead to the accumulation of snow mass, which will also lead to destruction. Therefore, when calculating the slope of the slopes, local climatic conditions and the expected roofing materials (their weight) are taken into account. As a rule, in snowy areas, peaked roofs are built so that the snow slides down the floor with its weight. And in warmer areas, flat structures are common, reducing windage with an extended overhang.
When starting a specific calculation of the slope of the slopes, we take as initial data:
- The estimated height of the living space in the attic (desired, but not less than 2.5).
- Weather conditions of the area - average precipitation, maximum possible wind force.
- Planned weight and features of the roofing material.
- Type of roof according to the project.
For a gable structure, the slope of the slopes is considered optimal at 45 degrees or more. For a broken structure, the optimal angles are 60 degrees for the bottom slope and 30 degrees for the top. This will allow you to create a room inside that is comfortable for living.


Installation of the attic frame
Before starting the construction of the attic, when the walls of the building have already been erected, it is necessary to lay a 10x10 or 15x15 cm beam along the top of the walls to support the rafter system. This design is called Mauerlat, in chopped wooden house they can serve as the upper crown. If the house is built of brick or concrete, a layer of waterproofing (for example, roofing felt, preferably in two layers) must be laid under a wooden Mauerlat. The main task of the Mauerlat is to evenly distribute the loads on the walls of the house. The timber can be covered with cladding similar to the façade.
- We begin the installation of the rafter system with the installation of floors. We lay the beams, starting from the outermost ones, strictly checking the horizontality. It is recommended to keep the pitch of the beams at 50-60 cm. The beams should have an extension beyond the walls of approximately 30-50 cm, which will serve as a cornice. We fix it with the Mauerlat using nails and metal corner on screws.
- Let's start installing the frame. First of all, install vertical support posts. During installation, we secure them with temporary spacers. Starting from the corners, place the rest at a distance of no more than three meters. The height of the racks must be indicated in the project; it will determine the parameters of the entire structure. At the upper end of the racks we attach purlins (boards 15x5 cm).
- On the purlins, tie-downs (beam 20x5 cm) are installed, secured with an angle. The task of the puffs is to tie the side girders together. To avoid significant deflection of the tie rods, they must be secured in the future with hangers to the roof rafters. During the installation stage, deflection can be avoided by using temporary supports.
- We install the rafters. Before installation, it is necessary to make a template in the form of a 15x2 cm board. The template sets the same cut angle at the junction of the rafters with the Mauerlat at the lower end and the upper end with the purlin.
- The layered (lower) rafters are fastened to the side purlins with nails, and to the mauerlat with metal plates or staples.
- We proceed to the installation of hanging (upper) rafters. We also prepare a template and cut all the boards according to the template. Attic construction does not provide for a ridge, so additional rigidity should be given by installing struts.
- We install tie-downs on the upper rafters.
- In general, the frame of the rafter system is ready. Next, you can sew up the gables, leaving openings for the windows if they are provided for in the project.
- We make the sheathing. The design of the sheathing depends entirely on the type of roofing material determined by the project. If soft roll roofing(for example, ondulin), we make a continuous sheathing. For metal tiles or corrugated sheets, sparse lathing is required. Right choice and proper installation will affect the quality of the roof and its reliability.
Further work is related to insulation and insulation of the attic roof.


The basis of the attic roof is its frame
Advice!
In cases where the roof slope is more than six meters (length standard board), you need to order a board for the rafters of the required length or splice the rafters to the right size. At the joints, it will be necessary to install additional support posts.
Roof insulation
To create an atmosphere suitable for living in the attic, the roof must be reliably and efficiently insulated. In addition, vapor barrier and waterproofing films are laid together with insulation. To prevent leakage from the outside and accumulation of condensate from the inside, special modern materials. Thus, a “layer cake” is formed, placed between roofing covering and the attic room. Such a “pie” should include the following layers:
- Vapor barrier. Special, airtight film materials laid from the inside of the attic with sealing of the joints. The purpose of this layer is to prevent moisture from penetrating into the upper layers of the “pie”.
- Warming. Foam plastic or penoplex boards, mineral wool, eco wool, etc. are used as heat insulators. Laying is done with an overlap or with subsequent sealing of the seams with construction foam.
- Waterproofing. Special film membranes that protect the insulation from precipitation and prevent the formation of condensation. Stacked along the rafters while preserving air gap between the film and the roofing material.

The roofing pie is a multi-layer structure that provides reliable protection against various adverse factors.
Thus, the size of the roof, selected as a result of calculations and indicated in the project, influences the progress of the entire construction of the attic. Here you should take into account many nuances that are important for creating a reliable and durable roof.
Attic – design diagram, loads, DCS
Attic – calculation in SCAD, selection of sections of elements