Wall arch stone. Decorative finishing of arches: wallpaper, wood, tiles, mosaics, stone
An arch is a decoration for any room, adding coziness and spaciousness to it. However, the arch itself will look quite “boring” if you don’t add a little “zest” to it. Finishing this architectural element with decorative stone will help give the arch uniqueness and individuality. And although the process of decorating an arch with stone is quite complicated, it is nevertheless quite possible to do it yourself. So, let's take a step-by-step look at decorating an arch with decorative stone.
Required tools and materials
Before starting work, you should prepare everything necessary tools and materials. Let's start with the last ones. First of all, naturally, you will need a decorative stone. Considering the fact that the work will be carried out indoors, you can use both natural and artificial stone, since in this case the material’s resistance to “ external stimuli"practically unimportant. So you can choose a stone based solely on your aesthetic preferences and financial capabilities. In addition to the stone itself, you will need glue or mortar, a primer, grout and a special composition to protect the walls from moisture - a water repellent. Also for preliminary preparation the surface of the arch may need putty.
Choosing glue for decorative stone, please note that various brands glue can only support a stone of a certain weight. Therefore, it first makes sense to purchase the stone itself, and only then choose the appropriate glue for it.
The tools you will need are a building level, a spatula, a construction mixer, tile nippers or a cutting machine, a trowel, a bucket, a tape measure, paint brushes, metal brush, rubber mallet, plastic or wooden wedges of the same thickness and for final finishing - a household spray bottle.
Having prepared everything you need, you can begin work on decorating the arch with stone, which should begin with careful preparation of the surface.
Surface and material preparation
Before laying the stone, the arch and adjacent sections of the wall should be properly prepared. Firstly, if the arch was previously finished with another material, such as paint or wallpaper, the remnants of this material should be completely removed. Secondly, it is necessary to check the surface of the vault for defects and cracks, and if any are found, eliminate them using putty. When the putty dries, the surface on which you plan to lay the stone must be treated with a water repellent and primed.
To reach from the primer maximum effect It is recommended to use the type of mixture that best suits the material from which the walls in the room are made. For example, for concrete walls The best primer is from the Concrete Contact series.
In addition to preparing the surface, it is necessary to properly prepare the decorative stone itself. To do this, you need to lay out all the stones on the floor face up and group them so that they the best way matched each other in color and texture. You can, for example, sort them by the degree of change in tone or “dilute” smooth elements with more embossed ones.
In addition, you need to check reverse side stones. Sometimes a “foamy” coating forms on it, which will significantly reduce the adhesion of the stone to the wall, even when using the most the best glue. If such deposits are present on the stone, it must be removed with a metal brush.
The glue should be diluted immediately before starting work in a quantity sufficient for the process.
The glue is diluted immediately before installation, and only the amount of material that you are guaranteed to “work out” during working hours should be diluted. The glue should be diluted in accordance with the instructions supplied with it. The only one general recommendation Regardless of the brand of glue, use a construction mixer when preparing the solution. Thanks to the mixer, the glue will be homogeneous, which will significantly improve its bonding properties.
Laying stone
The stone is laid from the bottom up, and you need to start from the corner joint of the wall and the arch. Before laying, apply adhesive solution to the stone using a spatula. Make sure that the glue covers the entire surface of the stone and does not contain voids.
When laying each stone (except for those that form an arched vault), be sure to check that its position is horizontal. You can level the stone by lightly tapping it with a rubber mallet. Once aligned, press the stone firmly against the wall for a few seconds, thereby giving the glue a chance to “set.”
After laying the stone, be sure to “tap” it with the handle of a screwdriver or spatula. This way you will be able to detect voids formed in the adhesive layer. If they are found, it is necessary to remove the stone from the wall, clean it of any glue residue and repeat the installation again.
If you want to lay a stone without jointing, then all subsequent stones are laid close to the previous ones. If you plan to make decorative seams between the stones, then between the elements you need to insert plastic or wooden wedges - spacers, which can be easily removed after the glue has dried.
Video about laying decorative stone
You can learn more about the technology of laying decorative stone from the following video.
Working with chips
When decorating an arch with decorative stone, you will have to lay it on part of the wall adjacent to it. But if the edges of the stonework are smooth, then such decor will not look entirely natural. To make it more harmonious, it is necessary to “revive” the edges of the masonry with artificial chips. The most convenient way to make them is with the help of wire cutters. ceramic tiles, but in their absence, you can get by with ordinary pliers.
Artificial chips on the stone will help diversify the design
To begin with, on the wall around the arch, draw with a pencil the “irregular” shape of your future masonry. Those stones that, during preliminary fitting, will protrude beyond the intended contour will need to be trimmed with pliers. To do this, place the stone in its future location and use a pencil to draw a line along its front side so that it connects the contour lines on the wall visible on both sides. After this, start breaking off small pieces from the corner of the stone with pliers until you remove all the unnecessary part.
Do not try to break off very large pieces of stone, since in this case it may crack in an “unplanned” place.
After you have finished working with the nippers, the edge of the “chip” can be processed with a file, or it can be left “rough” - it all depends on the “design idea”. A chipped stone is laid on the wall in the same way as whole elements.
Sealing seams
If you laid decorative stone “under the jointing”, then you will need to fill the space between the stones with a special grout. For this purpose, you can use a grout similar to that used for seams. tiles. However, given that the seams between stones are much wider than the seams between tiles, the technology for applying grout in this case will be different. If a spatula is used in a situation with tiles, then when working with decorative stone it is better to use a construction syringe. If it is not available, you can use the usual plastic bag, having previously cut off one of the corners.
You can seal the seams with a construction syringe
To do this, the grout powder should be diluted to the consistency of “liquid sour cream” and poured into a construction syringe. After this, slowly squeezing out the contents of the syringe to fill the space of the seams between the stones.
If you want to emphasize the relief of the masonry, then fill the seams to about half their depth. If, on the contrary, you want to smooth out excessive texture, fill the seams completely.
30-40 minutes after applying the grout, the seams should be given a “shape” using for this purpose a special shaped spatula or, in its absence, any object with a rounded end, for example, the back of a paint brush handle.
Final decoration of masonry
After laying, the stone can be further decorated using a tinting mixture and acrylic varnish. By the way, the coloring mixture will also allow you to hide minor defects stone or cracks and scratches received during work.
You can apply the color mixture using an airbrush.
To apply the tinting mixture, it is best to use an airbrush, although you can get by with regular paint brushes.
Using an airbrush, it is necessary to apply the tinting mixture from a sufficiently large distance, holding the tool at an angle to the surface to be painted.
Naturally, you should not completely cover the stone with the tinting mixture. It is enough to just slightly tint the main protrusions and depressions and this will be enough to give the masonry a deeper texture.
Enough interesting effect can be achieved if gold or bronze coloring pigments are used as the basis for the tinting mixture. Moreover, in this case, only the ends of the tiles should be tinted. In this case, the “metal” will not be noticeable, but when lighting hits the ends of the stone, the entire masonry will “play” with light golden reflections.
After applying the tone, it is recommended to cover the decorative stone masonry with a layer of acrylic varnish, which will significantly simplify its care in the future.
The process of decorating an arch with decorative stone is quite complicated and can take you more than one day. But, nevertheless, it makes sense to find time and energy for this work, since an arch decorated in this way will become a real decoration of your home and will give you comfort for a long time. for long years. Good luck with your renovation!
Content:
Decorating the arch with decorative stone: a solid look and decoration of the interior opening
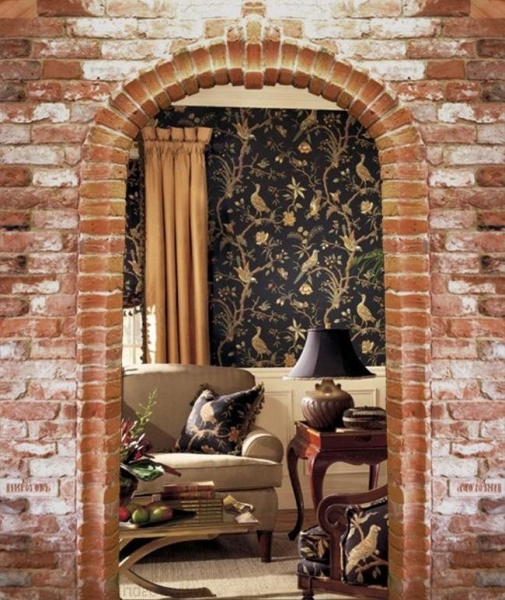
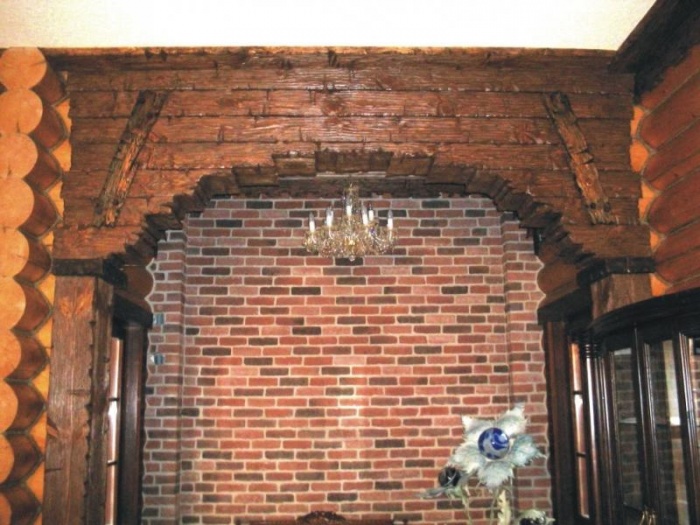
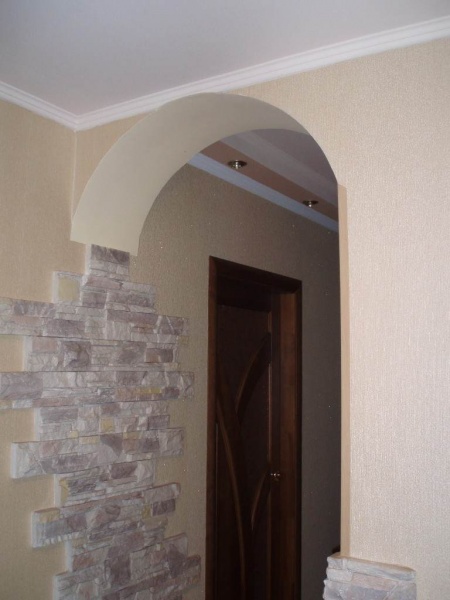
Decorating arches with decorative stone - Photo 1
The arched opening between the rooms is interesting option home or office interior design. The unusually shaped entrance to the room, rounded at the top, is associated for us either with a triumphal procession, or with a portal at the junction of two worlds. Additional finishing of the arch with decorative stone gives this architectural element even more solidity and emphasizes the originality of the style. From this article you can learn how to properly and beautifully decorate an arch with stone.
Ways to decorate interior arches
Designers offer us different ways decorative decoration of the arch. Among them, the decoration options look especially interesting wood panels, plaster stucco, or even forged metal parts. In the context general style When decorating the interior, any of the finishing methods will look quite attractive. But nothing can replace durability and beauty natural stone. This natural material can claim first place when finishing arched openings.
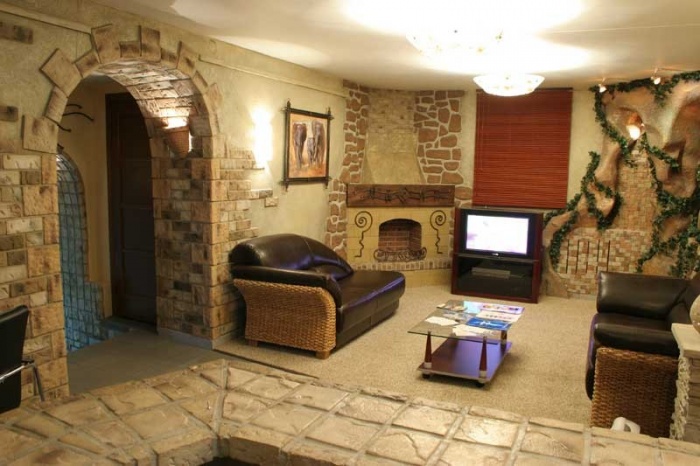
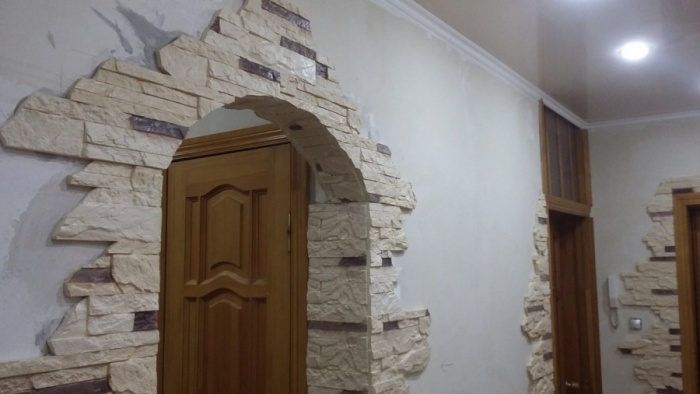
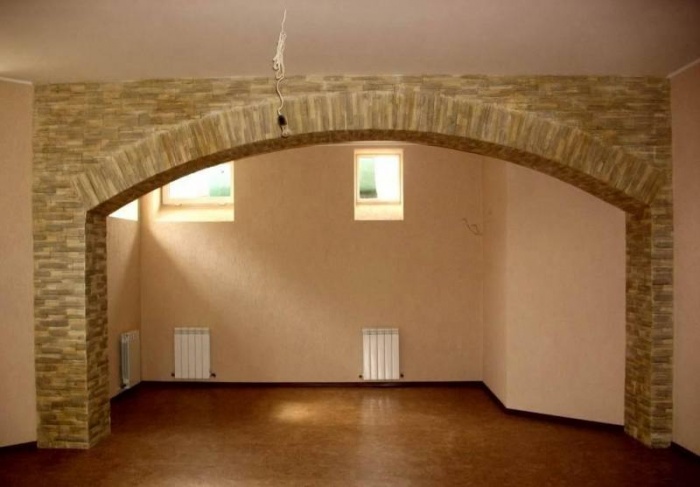
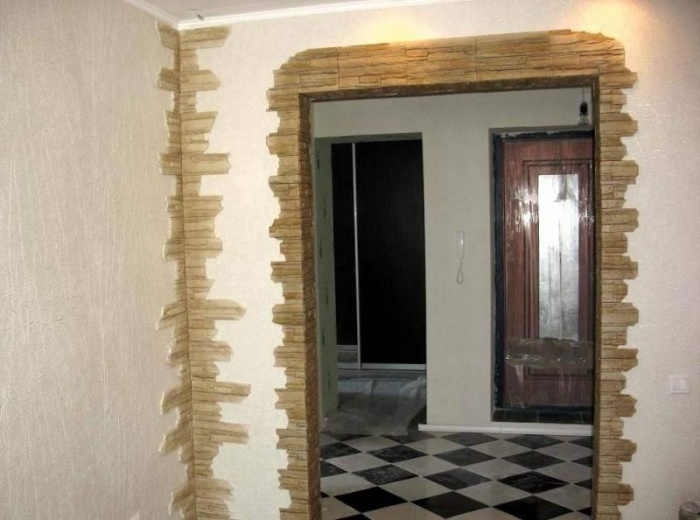
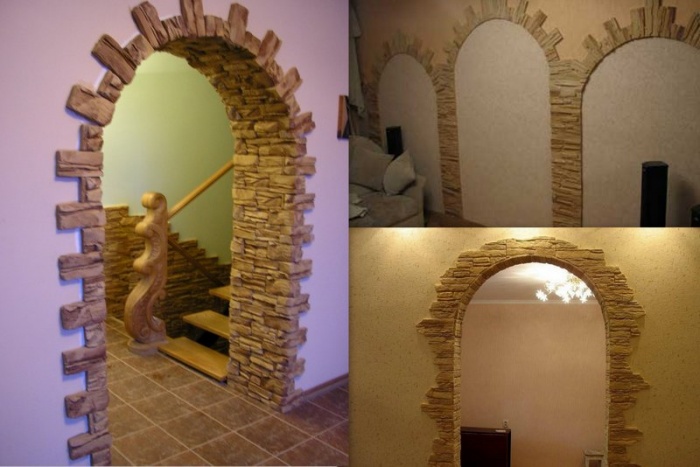
Arches made of decorative stone - Photo 2 Arches made of decorative stone - Photo 3 Decorating arches with stone - Photo 4 Decorating arches with stone - Photo 5
In some cases, it is permissible to use artificial ones to decorate the arch. Decoration Materials, imitating natural decorative stone.
What to choose: natural or artificial decorative stone?
Lovers of everything natural, without fakes, prefer materials made from real natural stone, no matter what it costs them. Rocks such as sandstone, tuff, shell rock and some others demonstrate a very interesting texture and unique surface. The delicate color and intricate patterns of marble have been valued for their special beauty for thousands of years.

Arch trimmed with decorative stone - Photo 6
Architectural details finished with granite impress with their majesty.At the same time, artificial decorative stone has no less right to exist. Compared to natural, it even has some advantages, since it is less expensive and can imitate any stone.
Artificial decorative stone is made from environmentally friendly components such as cement, pumice and expanded clay. To give it desired color Mineral pigments are added during production. After drying and firing, the decorative stone acquires a hardness that is in no way inferior to natural material.

Finishing an arch with stone in an apartment - Photo 7
The weight of artificial stone is much less than real granite, marble or slate. This important quality provides it with additional priority among finishing materials of this kind.Getting ready to lay decorative stone
In order to decorate an arch with decorative stone, you do not need any special professional knowledge. It will be enough to stock up on the appropriate tools, including:
- A cutting tool such as a grinder or a hand saw;
- Construction knife;
- Chisel or small pick;
- Hammer, pliers, spatula;
- Plumb and level;
- Sandpaper.
The facing stone should be cut in advance into thin tiles so as not to create difficulties during the work.
Stages of work completion
- Prepare the surface for laying decorative stone tiles. Make a notch on the wall and apply a primer so that glue or cement mortar held on tighter. The surface must be thoroughly leveled and free of dust.
- Prepare a solution on which you will glue the stone. Traditionally it may consist of Portland cement with the addition of sifted sand, lime and some PVA glue. It is permissible to use special types of glue or “liquid nails” instead of cement mortar.
- Start laying the stone tiles from below, from the junction of the arched opening with the floor. Apply a sufficient layer of mortar or glue to the wall with a spatula and press the stone against it. Try not to press too hard on the stone tiles to prevent cracks from forming.
- Level each next row of stone and install it using plastic crosses. Don't rush to complete all the work at once. It’s better to take a break when you reach half the height so that the lower rows have time to “grab.”
- When you get to the curve of the arch, you will have to cut the stone to give the tiles the desired shape. If you do this manually, you will need to walk a lot construction knife along the marking line, and then use pliers to remove excess edges. Irregularities will have to be sanded.
- When laying stone tiles on the inner surface of the arch, you should follow the same working technology. It is only necessary to more carefully monitor compliance with the dimensions of the facing material.
Video instructions for laying artificial stone
The final stage
When you finish finishing the arch with decorative stone, you will need to stop work for about two days. This period is necessary for reliable fastening of all elements of the stone cladding.
Only after the appropriate time has passed will it be possible to fill the tile joints with cement mortar or grout. At the same time, try not to allow drops of solution to fall on the outer surface of the stone. It is better to avoid unnecessary contamination immediately than to work hard to eliminate it later. Remove excess solution with a wet sponge or cloth.
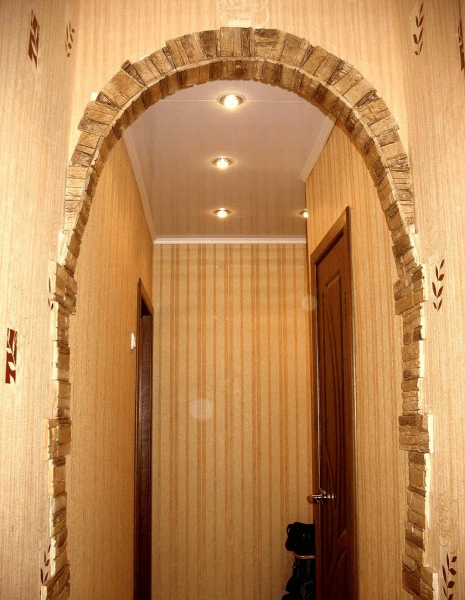
Interior arch trimmed with stone - Photo 8 Interior arch trimmed with stone - Photo 9 Finishing the arch with decorative stone - Photo 10 Finishing the arch with decorative stone - Photo 11
After the surface has completely dried decorative cladding arches, you can paint it or varnish it. It is important that new cladding arches matched the entire design style of your interior.
Decorative rock - not such a heavy and difficult material to use. Getting started finishing works, you will be convinced that he is capable of being obedient to your hands.
There are many options on how to make the interior original and attractive. One solution is to create a beautiful arch from the doorway. But such a design by itself may not be enough. In some cases it is impossible to do without spectacular finishing. And for this, artificial stone is very often used.
About arches
An arch is an architectural element that plays the role of an opening in the interior. It is known that there are references to the first arches from the times of the Ancient East.

Given such a long history, it is not possible to know the reasons for the creation of arched structures. For a very long time the structure was built from stone and brick. Nowadays, plasterboard, wood, plywood, and also have been added to this list. OSB boards, chipboard or fibreboard.
About decorative stone
This material is not just in a wonderful way interior decoration, it perfectly performs a protective function. That's why designers loved him so much. Of course, if artificial stone is used indoors, then it protective functions are reduced to resisting only accidental mechanical damage. And this material is used in the interior in a targeted manner, the maximum that can be finished in one room is a wall. But most often the material is used as an addition to existing elements.

Advantages of a stone arch
This design option has almost no disadvantages. After all, the material does not rot, is not subject to corrosion and fungus. Decorative artificial stone consists of environmentally friendly components and is therefore safe for health.

Why can't you use natural material? The fact is that, firstly, it is very expensive, and secondly, not all structures can withstand the weight of natural stone. The same granite is three times heavier than its artificial counterpart.
There are a number of other advantages of this approach:
- not required special care– any will do detergent, does not contain abrasives;
- you can use an artificial analogue of any natural stone - manufacturers began to make very high-quality imitation;
- Decorating arches with stone with your own hands does not require any special skills, so the procedure is easy.

Materials for creating the structure
Creating a stone arch in an apartment requires the use of a certain list of materials that need to be prepared in advance:
- the decorative stone itself;
- pencil;
- sandpaper;
- primer;
- mortar or glue;
- grout for seams.

Instructions
Finishing an arch with decorative stone starts with the traditional stage of surface preparation. You need to smooth out any unevenness using sandpaper, and then putty them using a pre-primer.

Preparation of adhesive solution
Decorative stone can be laid using special glue, cement-sand mortar or for liquid nails.

The quality of adhesion of the finishing material to the base depends on the roughness back side tiles and quality glue mixture. If you need to prepare the solution yourself, you need to do this in small portions, since it sets quickly enough, losing its properties. You need to mix the powder and water in a convenient, capacious container using a mixer (this can be a drill with a special attachment). You need to mix until you get the consistency of thick sour cream.
Laying
Laying is done from bottom to top. You need to start from the corner of the opening-wall. The seam should be left approximately 4-5 mm. If corner stones are used, they must be glued from below. If flat ones are used, the installation should be done with an overlap.

During the procedure, you should not forget to check the horizontal positioning. Elements on the arc can be trimmed to maintain the required radius. This can be done with wire cutters or a grinder with a special attachment.

The edges must be sanded using a file. When the finishing is completed, you need to wait for the solution or glue to dry. After this, you need to start refining the seams. For these purposes, we use grout of the appropriate color. To perform the procedure, it is better to use a construction syringe. Otherwise you can use rubber spatula. You can make the tool yourself. To do this, cut a square piece of polyethylene, roll it into a cone, and secure it with tape. The tip of this element must be cut so that the resulting size corresponds to the size of the seams between the stones.

Next, use one of these tools to press the grout into the seams to completely fill them. In this case, you need to do everything carefully so that the material does not get on front part products. All you have to do is wait until the grout dries - the decorative stone arch is ready.

Seamless installation
In this case, the tiles are laid tightly together, so the finishing of the arch artificial stone requires painstaking work. The glue or solution is applied to the stone. If the installation is done from top to bottom, you can get a smooth border with clear lines.
Since the edges of the finishing material are well prepared, no time is required for selection during installation, so the procedure is carried out quickly. At the end, the surface can be opened with impregnation, which will repel water and protect it from the effects of chemicals.
A stone arch is inexpensive, but looks great
Decorating an arch with stone allows you to give this element of the interior more expressiveness and style. The room takes on a more sophisticated and attractive look. This option looks especially good in hallways and living rooms. In a word, the effect of this finish is amazing, as you can see by looking at the photos of the options.
Finishing the arch with decorative stone allows you to make the interior truly stylish and bright. Such unusual openings always attract attention. They are associated with triumphal arches or mysterious cave entrances. If you decide to create an arched opening in your apartment and design it correctly, you can make the space visually wider.
Stucco, carving, forging or wood can be used for decoration. But perfect solution- decorative rock. Exist different types of this material, so finding the right one is very easy. An arch trimmed with stone will fit perfectly into the interior and add some zest to it. She looks truly great. At the same time, the material itself is durable and reliable.
Decorative stone has virtually no disadvantages. It is made of a material that is resistant to any corrosion. It is also not susceptible to rotting and fungal infection, which makes it truly reliable.

The decorative material includes:
- expanded clay;
- cement;
- pumice.
All fillers are environmentally friendly. Pumice is a glass of volcanic origin that is formed when lava quickly hardens. It has a porous structure and retains heat excellently. Expanded clay is baked balls of clay. Perlite is also of volcanic origin.
Another advantage of artificial stone is ease of maintenance. It can be cleaned with a mild detergent.
The widest range of artificial materials allows you to find an imitation of any natural stone. The similarity is noted in texture and color.
Arches made of decorative stone in the interior

Today, arches trimmed with decorative stone are very often used in interiors. With its help you can easily implement any, even the most unusual design ideas. So, for example, if an arch is framed with stones of light and blue-green tones, it can resemble a fabulous entrance to an underwater grotto, and if you create an imitation of granite, it can look like a fancy entrance to a cave or an ancient castle.
It must be remembered that to create the most harmonious design, additional decoration is required. An excellent solution is a plant and a masterful use of light. If the arch is stylized as a magical entrance to the underwater world, then plants are simply necessary.
Illumination will add special solemnity and some mystery. If you highlight a green arch with soft light, you can create the illusion of an aquarium.
Selection of material and arch finishing
Before you learn how to decorate an arch with decorative stone, you need to decide on the finishing material. It is worth noting that all types of artificial stone are quite easy to work with, so often the most important argument for choosing one option or another is its cost.
It is best to work with narrow tiles. In this case, finishing the arch bends is much easier. If you are decorating arches made of plasterboard, you need to take into account the weight of the material. Too heavy and it will deform or damage the surface.

How to decorate an arch with stone with your own hands?
The process of laying stone is very simple. For this work you do not need the help of a professional builder; everything can be done with your own hands. Let's look at it in more detail:
- Before you start work, you need to clean the surface of the arch and prime it. The work should be done carefully so that no dirt or debris remains. This is very important, because in the future you will need to glue elements of decorative stone, and they simply will not stick to an uncleaned surface. If the surface is very smooth, it is worth making notches.
- After which a cement-based mortar is prepared, the composition and proportions of which depend on the type of stone. At this stage, it is extremely important to fulfill the requirements set by the manufacturer of the selected material.
- Only after this can you proceed directly to the masonry. First, the stone is laid in those places where the arch comes into contact with the wall. Work is carried out in a bottom-up direction. To keep everything level, use a building level. You can also use plastic crosses. After the first row is laid, the second row is laid according to the chessboard principle. There is an overlap along the corner.
 Stone laying work should start from the bottom and then go up
 To finish an arched section, you must first mark the stone itself. To do this, it is applied to the wall and cut off. At this stage it is very important to maintain the radius of the arch. You need to remember the need to sand the cut areas.
In order to cut the product as accurately as possible, you must first draw a marking and then go over it several times with a special construction knife. Excess can be easily removed with simple pliers. Special tile nippers or a grinder will also work. Sandpaper is used to process the cut surface. The remaining elements, if necessary, are adjusted according to the same principle.
 Special tile nippers are suitable for removing excess decorative material.
 To post decorative material inner surface, similar actions should be performed. In this case, the elements are also adjusted in length. Used for trimming hand saw(suitable for gypsum-based material) or a circular saw. This is how the entire surface is covered.
When laying work is completed, a certain time is required for the cement mortar to harden well. This usually takes a day or two. Then you should definitely treat the seams using a special putty.
After everything has dried well and the initial processing has been completed, you can move on to decorating the arch in a specific style or painting the stone. An airbrush is ideal for this type of work. It is enough to choose the necessary coloring mixture and also take into account your own taste.
As you can see, finishing the arch with decorative stone is as simple as possible. It can be done without the help of specialists. You can bring into the room stylish element. Even an amateur enthusiast can do this with incredible ease. You just need to do it very carefully and follow the entire sequence of work.
Finishing the arch with stone makes it possible to make the interior unusual and memorable. Such unusual design openings will definitely attract the attention of guests at home and will help you be proud of the decoration of your apartment in front of your friends.
Original decorative arches, decorated with artificial stone, turn the interior into a mysterious cave. By choosing unusual arched designs to decorate doors, you will get a visual expansion of the space.

As the main materials for finishing the arch, you can choose wood, stucco, and metal. Despite such diversity, ideal option To create an arch, professionals consider decorative stone.

Currently you can choose different kinds this material. An arch decorated with artificial stone will be an excellent addition to the interior and will add a certain zest to it.
Advice! If your plans include creating a durable and reliable design, in this case, choose the stone.
Advantages
Decorative stone is practically free of any disadvantages. It is made from a material that is not subject to chemical and atmospheric corrosion.
In addition, it is called an environmentally friendly finishing material.
It contains cement, pumice, expanded clay. Pumice is a glassy substance that has a specific origin, similar to volcanic lava, since it is formed when the mass instantly solidifies. Pumice has an airy structure, so it does not let out of the room warm air. Expanded clay is baked clay balls.
Thanks to large assortment artificial material, you can choose an imitation of natural stone, similar to natural material.

Arches in the interior
How to decorate an arch with decorative stone in an apartment, photos, some nuances of finishing work, all this can be seen in the video
Advice! In order to create an unusual entrance to an underwater cave in your home, you can arm yourself with blue-green and light beige stones.
Finishing arches with decorative stone currently allows urban property owners to realize the most daring creative ideas and projects.
Attention! Finishing an arch with decorative stone in an apartment requires additional decoration so that it becomes a harmonious part general design premises.
For example, if you choose an arch to enter the underwater world, you need to use plants as additional decorative elements.
To give the atmosphere of the room some mystery and solemnity, you can arm yourself additional lighting. An arch decorated with green plants and additionally illuminated will become a complete illusion of an aquarium.

Selection of materials for creating an arch
Before you start finishing the arch with decorative stone, it is important to choose the right finishing material. Professionals prefer to choose narrow tiles for finishing. In this case, you can simplify the process of decorating the curves of the structure.
Attention! Upon registration plasterboard construction, it is important to consider the weight of the stone selected for the job.
If the material is too heavy, the drywall will not support it and the structure will not have a beautiful appearance.
To execute similar works, no need to use help professional builders. If you use some algorithm of actions, in this case it is quite possible to build beautiful arch, and even decorate it at your own discretion.
Before starting finishing work, you first need to remove all dirt from the surface of the arch, and also provide it with a high-quality primer. These actions are important, since the final result of the finishing depends on how well the surface is prepared, because the decorative stone will not adhere to uncleaned surfaces.
Advice! If registration is expected smooth surface, initially it is advisable to make additional notches.
Next, you can proceed to preparing the cement mortar, choosing the proportion taking into account the type of stone, its size, and shape. It is at this moment that it is important to fulfill all the requirements set by the manufacturer of this finishing material.
Only after everything preparatory work will be completely completed, you can begin the actual laying. The stone is placed on the sections of the arch that are in contact with the wall.
Advice! In order for the decorated arch to be beautiful and aesthetically pleasing, you will need a building level, as well as plastic crosses.
First, lay the stone in the lower part, then smoothly move up.
To finish the arc-shaped part of the structure, it is first important to mark the material itself. It is applied to the wall, then cut off.
Attention! It is important to maintain the radius of the arch so that the finished arch is smooth and beautiful.
The cut areas are sanded using a special grinding machine.
To accurately cut the product, you need to go through the previously prepared markings with a knife several times. All excess can be removed using ordinary pliers. For the same purposes you can use grinding machine or pliers, as well as sandpaper. The adjustment of the remaining elements is carried out using the same method.
After completing the finishing work, you need to wait some time for the cement mortar to completely harden. Professionals advise waiting a couple of days, and only after that proceed to processing the seams, armed with a special putty.
After the initial processing of the designed structure, you can begin painting the stone.
Tools for work
Among the tools needed for work, we will highlight a cutting device, a level or plumb line, a tape measure, a spray bottle, wedges, a brush for cleaning metal, and a spatula.
As consumables to decorate the arched structure you will also need special glue.
Advice! Try to select glue taking into account the weight of the stone so that it does not fall off immediately after you complete the finishing work.
Work must be carried out at an air temperature of more than five degrees. Before fixing the stone, it is advisable to check it for the presence of cement laitance (foamy layer). If it is detected, it is important to clean the back side using a wire brush.
The fact is that such a film significantly reduces adhesion, which can lead to the tiles peeling off.
To ensure that the adhesive mass is homogeneous, you can use a construction mixer.
Advice! You should not apply too thick a layer of adhesive, as the tiles will slide off the wall and you will not get the desired result.

Conclusion
Arched structures are suitable for those owners of urban and suburban premises who do not want to put up with ordinary interior. Depending on what individual characteristics premises, you can use a variety of finishing materials to create arches. Among the most common materials for work is construction plasterboard. It is this material that is often the basis for the manufacture of such unusual structures.

Keeping the tile to the right place, pressing it lightly, you need to arm yourself building level so that the stone is laid beautifully. Only if you follow all the recommendations given by decorative stone manufacturers can you count on getting the desired result.
Of course, with unusual design doorway, for example, using the original decorative arch, you can make positive changes to the design of your apartment or house.