Wiring diagram for a garage with a cellar. We do the wiring in the garage with our own hands: connection diagram, electrical panel, grounding and photo
The technology for installing electrical wiring in a garage is at least different from electrical installation in an apartment or house, but not significantly. The differences lie mostly in the features of your particular garage. If you have a building in the yard, you need to lay power to it, and if in a garage society or cooperative, then most likely you will have to connect to the line laid along the supports. To do this, be sure to contact an electrician who services this society. The cost of electrical installation by a professional can put a significant dent in your pocket, but in most cases you can install or replace the wiring yourself. In this article you will learn how to do electrical wiring in a garage with your own hands.
If you have little experience, then carefully follow the tips described in the article, and after finishing the work, consult a specialist and ask him to check the correct installation.
Create a schema
Before you move on to preparing the walls, you need to be thorough in the garage. The diagram must indicate the insertion location power cable inside, the installation location of the electrical panel, as well as the installation location of light bulbs, lamps and sockets.
A garage is a fire hazard; motorists always store fuel and lubricants there, as well as the car itself. By the way, to determine the fire hazard class of a garage, you can use paragraphs 7.3.38 to 7.3.53, as well as SP 12.13130.2009, since R 3107938-0301-89 is already outdated. When drawing up a diagram you need to remember:
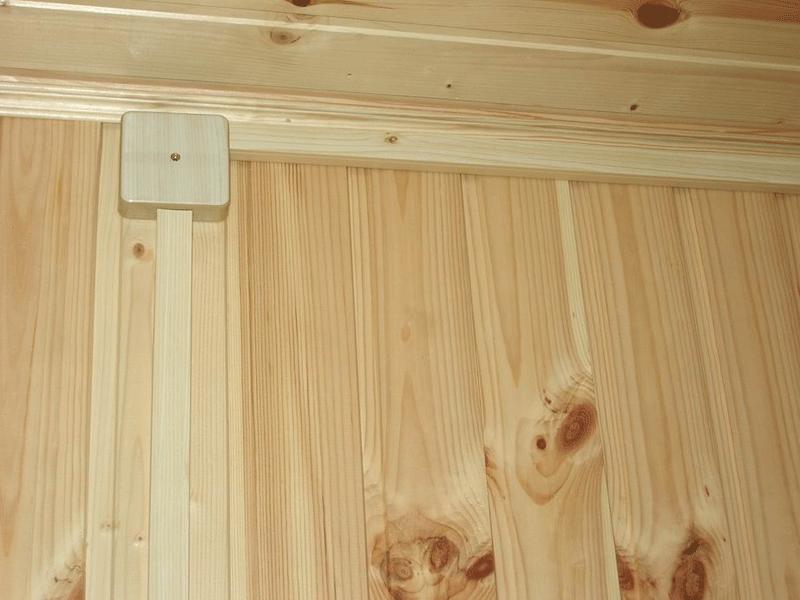
- Electrical wiring must run strictly vertically and horizontally along the walls. Rotation is carried out only at right angles.
- If there is heating in the garage, even central heating, even a potbelly stove, then the wire must be laid at a distance of at least 10 cm from heating pipes with parallel installation, in accordance with PUE 2.1.57. Moreover, when laying closer to the pipeline than 25 cm, the cable must be additionally protected from damage, that is, laid in a pipe, for example.
- It is recommended to mount the switch at a distance of 10-15 cm from door jamb, at a height of 1.5 meters from the ground.
- carried out at a height of 60 cm from the floor.
- Unlike an apartment, in a garage there is no need to place sockets in every corner. Install a group of sockets near the workplace, near each of the machines, if any, as well as an socket in the electrical panel.
- The frequent arrangement of sockets is dangerous because you can damage the sockets with switches and the wiring to them when performing some work in the garage, and when carrying heavy objects, demolish an electrical point.
- In many cases, it is better to get an extension cord on the drum and unwind it to the place where the work will be done.
- Do not install 220V sockets in the inspection hole. Water may accumulate in the pit; for electrical safety reasons, 220V lamps should not be installed.
- In the pit it is better to use 12V lamps (in stationary lamps), use portable lamps or place a 12V socket to connect them, for more details see PUE 6.1.16, 17.
- Separately for lighting and sockets it is recommended. If you suddenly need to repair an outlet, you can do it with the light on.
- Step-down transformer 220/12 for lighting inspection hole and install the carrier in the electrical panel.
- If possible, be sure to install a three-phase input in the garage. It will be needed when connecting three-phase asynchronous motors, namely, they are installed in most machines, both homemade and branded. You don’t have to buy capacitors (not cheap), or get out of the situation by looking for single-phase ones, for example, commutator motors. This will also allow you to connect a load of higher power, with the same current of the input circuit breaker.
Diagram of a three-phase electrical panel for connecting single-phase and three-phase equipment:

General wiring diagram in the garage:

It should be noted that it is best to use a building plan (if one is available) to create a diagram. In this document, the drawing is kept with all the exact dimensions, which will be convenient for creating the correct project.
Calculation of the quantity of materials
After creating the diagram, you need to go to next stage- counting the quantity. First, count the amount of cable. Please note that the electrical wiring in the garage will be both internal and external (for installation from the pole to the meter and input), so you will need to purchase materials for all types of work. They usually lay it from the pole, its cross-section will be indicated to you in the technical conditions for connection, while according to PUE 7.1.34 and in table 2.4.2 “The smallest cross-section or diameter of branch wires from overhead lines to inputs”, the cross-section of aluminum conductors is allowed to be used no less than 16 kV . mm, or more than 2.5 sq. mm, if this is power supply for separate electrical equipment (a garage is not one).
Based on the above (PUE 7.1.34), wiring inside the garage must be done copper wire or cable. To lay wiring inside the garage, use VVGng-LS.
Street work
The installation of external electrical wiring must be left to a specialist electrician. First, select a method for external cable routing. Recommended to use air way, because it is less expensive and labor intensive. If the distance from street pole to the garage is more than 25 meters, according to PUE 2.4.12. take care to create an intermediate support in the yard.

There are some requirements for overhead wiring:
- height above the roadway – at least 6 meters;
- height above the pedestrian area - at least 3.75 meters;
- the height of entry into the room is at least 2.75 meters.
This last requirement may create some problems because... the garage is a low-rise building, and when running a cable through the roof, many problems can arise (difficulty in waterproofing the room, high risk of mechanical damage, etc.).

At underground installation Electrical wiring to the garage does not pose such difficulties. You just need to dig a trench (from the central power line to the distribution panel) and place an armored copper cable, for example, in it. The main thing is to leave an entrance hole in the foundation in advance for entry inside. To do this, it is recommended to place it in a special steel box, on top of which a rubber band is additionally placed with the inscription “Do not dig, below the cable.” Under the foundation, the line must be protected with a pipe whose diameter is twice the cross-section of the core. From the outside, the pipe should extend no more than 5 cm.

The disadvantage of underground installation of wiring in a garage: the high cost of armored cable, as well as the complexity of the work. Despite the costs, this method is more durable.
Indoor installation
Internal installation of garage electrical wiring is not difficult. Let's consider the installation of hidden and open wiring.
Hidden way
When wiring in a hidden way It is necessary to place the cable in the grooves and secure it. For fastening, special plastic clamps or metal brackets.

External method
If you decide to conduct electrical wiring in a wooden or iron garage, then the line must be drawn open method. This is much simpler and more convenient, because if you need to connect new socket no need to chisel the wall from the installation box to the new “point”.
Open wiring, as a rule, stretches into special ones. They don't spoil appearance premises and are safe (if the material used to make the channels is self-extinguishing). You can also use mounting on isolated supports, but in this case the aesthetic appearance of the room will suffer slightly, and safety will also decrease.
If you have a wooden garage or made of SIP panels, or you are going to cover the walls with other combustible material, you must use the rules for laying electrical wiring on combustible surfaces; they can be found in (clauses 2.1.31-2.1.51), table 2.1.3 and chapter 7.
It says that when laying over combustible surfaces, it is necessary to place exposed wiring in pipes. Can be laid in steel and copper pipes. You must use cables with non-combustible insulation, in practice, products with the prefix marked FR, -ng-LS are used. It is also possible to carry out installation in gray PVC corrugation that does not support combustion. The distance between the wire and the combustible surface must be at least 10 mm. When laying a cable in a sheath made of combustible materials (without -ng-LS attachments, etc.) without a pipe, it is also necessary to lay a fireproof (metal, for example) strip.
That's all the technology for installing electrical wiring in a garage with your own hands. Don’t forget to call an electrician after finishing the work to check everything.

As you can see, the process of installing wiring in a garage is labor-intensive, but does not represent anything supernatural, so even you, a novice electrician, can do it! You can also watch video clips in which all types of work are presented more clearly:
This is how wiring can be done in a garage. We hope provided by us step-by-step instruction, diagram and tips helped complete the electrical installation.
Materials
The technology for creating electrical wiring in a garage differs from work in an apartment or private house. However, it is not difficult to install electricity into the garage, but you may need the help of a specialist. The fact is that the supply of electricity from the pole to the panel must be carried out by a qualified electrician with a license to work with high voltage. Inside the garage, you can already cope with the task yourself.
Scheme development
Before the beginning installation work You should create a wiring diagram for your garage. It must necessarily indicate the location of the cable entry into the building, as well as the location of the electrical panel, lamps and sockets. . When drawing up a diagram, you must follow several requirements:

Here is an example of an electrical wiring diagram in a garage, which will not be very difficult to create with your own hands:

Selection and calculation of materials
After completing the circuit design work, you can begin selecting necessary materials. First of all, you should decide on the amount of cable. Since it is necessary to carry out not only internal, but also external wiring (from the pole to the building), conductors must be selected for each type of work.
To extend the external line, you should use a cable with current-carrying copper cores, the cross-section of which is at least 10 mm 2. It is not advisable to use a conductor with aluminum cores. This is due not only to the need to use a conductor with a larger cross-section compared to copper wire, but also due to the low elasticity of aluminum. In such a situation, the risks of mechanical damage increase significantly.

For calculation required quantity wires, you need to decide on all the electrical appliances that you plan to install in the garage. The total power of these devices should be multiplied by 1.2 to provide a power reserve of 20%. To connect sockets, it is recommended to use conductors with a cross-section of 4 mm 2 or more, and for switches 1.5 mm 2 will be sufficient. It is also necessary to take extra wire in length. For each connection, it is recommended to increase the estimated length by 15 cm.
In a garage, it is often enough to install 2 sockets and switches. If there is no basement or inspection hole in the building, then you can limit yourself to one switch. Now many people are paying attention to LED lights. They are more expensive than fluorescent ones, but are more economical. Most often, electrical wiring is installed in a garage. open method, and in such a situation, the number of cable channels or corrugations should be additionally calculated.
Installation stages
All work can be divided into three stages. Each of them has its own characteristics that need to be taken into account when working independently.
Preparatory work
Preliminary work consists of preparing the walls and cutting conductors. It should be remembered that markings on the surface of the walls must be applied in accordance with the previously developed scheme. To solve this problem, the easiest way is to use a special cord.

It is installed at the starting point and secured. After this, the cord, in a taut state, is pulled along the wall to the next wiring point, pulled to the side and lowered with a sharp movement. As a result, an imprint remains on the surface of the wall. At this stage, it is important to pull the cord strictly vertically or horizontally in accordance with the diagram.
When the wiring is carried out in a hidden way, then after marking it is necessary to make grooves for the wires. If the garage is metal, then you should choose open wiring. It should be remembered that the dimensions of the grooves should be 20x20 mm.
External wiring
It is advisable to entrust these works to a specialist. The easiest way to route the cable from the pole to the garage is by air. However, it should be remembered that when the distance from the pole on the street to the building is more than 25 m, then another additional support must be installed. In addition, several height requirements are imposed on overhead electrical wiring:
- Above the roadway – from 6 m.
- Above pedestrian paths - more than 3.75 m.
- Entry into the building – minimum 2.77 m.
 If the first two requirements are met without problems, then the same cannot be said about the last. The garage is a low building and when entering the cable through the roof you can encounter a lot of problems. To avoid them, it is recommended to enter via metal pipe, slightly curved at the top.
You can also conduct electricity from a pole using underground wiring. There shouldn't be any difficulties here. you just need to make a trench, into which the armored conductor is then placed. An example of such a cable would be a cable marked VBBShV. However, this method of entry should be considered at the stage of construction of the garage and a hole should be provided in the foundation for cable entry.
To protect the conductor from mechanical damage, it is better to place it in a steel box. The only disadvantage of the underground installation method compared to the air method is its higher cost.
Internal gasket
 If electrical wiring is carried out in a hidden way, then the wires are laid in pre-made grooves, after which they are secured using staples or clamps. The next step will be the installation of junction boxes, as well as the installation of switches and sockets.
After this, all that remains is to connect all the wires and test the finished wiring with a multimeter. It should also be recalled that Wiring connections must be performed exclusively using terminal blocks.. If after checking the electrical wiring there are no problems, then the walls are plastered.
In iron or wooden garage Wiring is easier to do in an open way. To do this, cable channels are installed on the walls into which the wires are laid. This method of installing electrical wiring is extremely rarely used in residential premises, but is excellent for the garage.
Even a novice electrician can do wiring in a garage. Although this is a rather labor-intensive process, it is not very complex.
The lighting in the garage is very important role, especially if the garage is used not only for storing the car, but also for regular Maintenance. The garage electrical circuit should not only provide comfortable conditions working with electrical appliances, correct placement lighting elements, but also be safe for the owner.
In this article we will tell you how to correctly draw up an electrical circuit and describe the basic rules for placing important elements.
Electrical Design Principles for Garages

A simple garage wiring diagram provides for the external location of all elements, such as cables, sockets, and lamps (see). Many people try to hide cables by laying them in the walls before plastering or covering them with finishing materials.
But practice has shown that such a garage electrical circuit is not practical and the best option There will be surface laying of wiring. To protect the wire in the most likely places of damage, plastic or metal corrugated tubes are used, and special plastic boxes are used for decorative concealment.
For your information. The electrical circuit of the garage should be laid out in such a way as to provide quick access to all elements for their convenient replacement, since very often, with active and varied use of the garage, there is a need to move sockets or lighting elements to another place. Open wiring eliminates the possibility of damage when drilling into walls.
Step-by-step plan for building an electrical network

Procedure for compilation electrical diagram for the garage it looks like this:
- First of all, you need to draw a plan of the garage space and graphically indicate the location of the main distribution board, indicating the distance from the walls. Next, the electrical wiring in the garage is distributed, the diagram of which should contain cable routing and installation locations for lighting fixtures.
- The plan then indicates the exact location of the desktop and other stationary electrical appliances, such as lathe, welding machine, compressor and so on.
- Then a diagram is made of each wall on which the outlet will be placed. The diagram shows the location electrical appliances, their height and the plan for connecting the socket to them.
Energy supply is one of the important stages Carrying out home improvement work for a car. The wiring here, as well as installation technologies and methods of organizing it, differ from the implementation of electricity supply to other premises.
Without electricity, the arrangement of a garage is not complete, since it often serves not only as a place to store a car, but also for repairs or other work related to the use of electrical equipment and power tools.
Rules and basic requirements
Existing garage power supply rules are aimed at ensuring fire safety, explosion hazard and reducing the likelihood of a person being exposed to dangerous electrical current.
Among the basic rules and requirements for garage power supply and wiring are:
- electricity received from the supplier must be accounted for, that is, pass through a legal metering element - a meter;
- electrical wiring inside the garage must be correctly implemented in two ways: open (in corrugation) and closed (in grooves);
- according to the PUE (electrical installation rules), in rooms with an aggressive environment that have the possibility of ignition, explosion of fuel, fuels and lubricants must be installed circuit breakers, limiting the current, protecting against overheating of the wiring in the event of a short circuit;
- separation of power and lighting networks is carried out with the possibility of implementing duty (emergency lighting);
- for carrying, basement lighting (inspection pits) and extension cords, a reduced voltage with galvanic isolation of less than 42 volts is used, most often it is adapted for common lamps with a rated voltage of 36 or 12 volts;
- wiring must be designed for current, which directly depends on the power of the electrical equipment and the tool used.
After reading these rules and requirements, it becomes clear that it is possible to do the wiring yourself; all you need is standard set electrical installation tools, cable products.
Garage wiring diagram
When drawing up an electrical wiring diagram in a garage, you need to take into account the construction features of this room, but the main positions must remain unchanged. All power supply must be supplied through one common input circuit breaker, taking into account the loads of all outgoing lines.
An electric meter is installed on each of the lines or after the introductory machine, which is sealed by the control services illegal use and theft of electricity. If this is a garage cooperative, then its administration monitors the voltage received by the consumer.
In order to protect a person from falling under an electrical potential dangerous to his life and health, a sensitive and fast-acting RCD device (residual current device) is used.
When developing an electrical circuit for a garage, it is necessary to consider the possibility of connecting not a single-phase, but a three-phase circuit, since it is this circuit that is used for normal operation asynchronous electric motors, which are equipped with machines used in everyday life (sharpening, drilling, etc.).
With a three-phase option, the power of this electrical equipment will not be reduced, and this is important for organizing a workplace in the garage. The development of wiring and electrical circuits can be carried out both before and after connecting the electricity.
- There are two main electrical wiring diagrams:
- For a garage without an inspection hole. For rooms with inspection hole and a cellar. When developing a power supply circuit, in this case a step-down transformer is required to power the lamps in the inspection pit and cellar, since these rooms have. The housing of the luminaires must have a sealed design with rubber seals on the cover and at the wire entry point.
Important! If you plan to install a refrigerator or other equipment in the garage without a built-in voltage stabilizer, and the electrical circuit is unreliable, that is, there is a possibility of an increase or decrease in the minimum voltage, then it is recommended to install a device that normalizes it - a stabilizer.
Preparation for work
TO preparatory procedure This includes the selection of the necessary materials and tools that will be needed to carry out installation work on laying, fastening and connecting electrical wiring in the garage.
List of tools:
- flat and Phillips screwdrivers of different sizes;
- pliers;
- round nose pliers for making accurate connections to machines;
- hammer drill, grinder for grooves, holes for sockets, as well as installation mounting brackets for cable fastening;
- voltage indicator to check the lack of potential and safe work, since even when the input circuit breaker is turned off, one cannot be absolutely sure that there is no voltage on a separate section of the circuit (the current-carrying elements of the circuit breaker are hidden in the housing, so the installer cannot be sure that the connection of its contacts is reliable, that is, there is no visible break in the circuit);
- hammer, chisel;
- insulating materials ( insulation tape, PVC tube, etc.).

List of materials needed to organize electrical supply to the garage:
- current limiting and protective devices for supplying voltage and monitoring it (circuit breakers, RCDs, stabilizers);
- electric meter with electrical panel;
- cable products (wires);
- distribution boxes;
- lighting switches;
- sockets
After purchasing all the necessary materials and tools, you can begin preparatory work and directly laying wiring in the garage with your own hands.
Step-by-step instructions for installing wiring in a garage:
- Preparatory stage - everything construction works for cutting grooves, marking, punching holes in walls for cables, places for installing sockets and switches. The depth of the groove is selected individually and will depend on the thickness of the cable or insulated wire being laid. Electrical wiring must run strictly vertically or horizontally along the walls, and any turn must be made at a right angle. This rule applies to both external and internal type installation of cable products. If there is any type of heating in the room, the wire must not be located closer than 10 cm from the heating pipes. It is recommended that specialists increase this distance to 25 cm. The hole for sockets is made at a distance of 0.6 m from the floor, and switches - at a height of 1.5 m at a distance from the door frame of no less than 10-15 cm. Unlike apartments and residential premises, in garages, light switches are most often installed near the entrance gates or doors.
- Installation of electrical panel. The body of the electrical panel must be made of dielectric material, the dimensions of which depend on the dimensions of all the machines installed in it, the electric meter, the RCD, and the step-down transformer for lighting the pit. In some cases, the electrical panel is divided into two parts: a panel with an input machine, an electric meter, and a unit with automatic power supply units. separate groups consumers (lighting, sockets, etc.) with the possibility of installing a step-down transformer 220/36 or 12 Volt. After installing the electricity metering element, it is sealed.

- Laying the external part of the electrical wiring. If the garage is built separately, then outer part Wiring is carried out by air, calculating the cable cross-section and its length from the nearest power distribution point. In the case of implementing the energy supply to a garage in a cooperative, this part of the work is undertaken by the administration, laying the input cable along the walls of the garages, and is subsequently responsible for their safety and technical condition. Basic requirements for air cable line: height above the roadway - at least 6 m, above the pedestrian area - 3.74, and entry into the room at a height - not lower than 2.75 m.
- Internal wiring in the garage. The type of organization of internal registration depends on the type of power supply: single-phase or three-phase. Certainly, three phase voltage more functional, as it allows you to connect not only household appliances, But professional equipment designed for this voltage. The transition of electrical equipment to single-phase reduces the power of this equipment. All internal wiring It is performed hidden (using grooves) or externally (in a metal corrugation). The cross-section of the conductor is selected based on the load used according to the table below.
| Conductor cross-section, mm2 | Copper conductors of wires and cables | |||
|---|---|---|---|---|
| Voltage 220 V | Voltage 380 V | |||
| Current strength, A | power, kWt | Current strength, A | power, kWt | |
| 1,5 | 19 | 4,1 | 16 | 10,5 |
| 2,5 | 27 | 5,9 | 25 | 16,5 |
| 4,0 | 38 | 8,3 | 30 | 19,8 |
| 6,0 | 46 | 10,1 | 40 | 26,4 |
| 10 | 70 | 15,4 | 50 | 33,0 |
| 16 | 85 | 18,7 | 75 | 49,5 |
| 25 | 115 | 25,3 | 90 | 59,4 |
| 35 | 135 | 29,7 | 115 | 75,9 |
| 50 | 175 | 38,5 | 145 | 95,7 |
| 70 | 215 | 47,3 | 180 | 118,8 |
- Lighting of the inspection pit. These circuits are powered by a transformer that reduces the voltage to a value safe for humans below 42 volts. It is recommended to use LED-based lamps as light sources due to their efficiency and economy, as well as a long service life.
Important! The light switch necessarily interrupts the phase wire, and not the working zero wire.
- Wiring of the socket network. The main requirements are reliable insulation of the connection points and correct calculation of the cable cross-section in accordance with the load current. When using a voltage of 220 volts, it is performed with a two-core cable when using an RCD and a three-wire cable when organizing power supply to sockets with a ground loop.
- Proper organization of grounding. Grounding has a main function - it protects a person from injury. electric shock in the event of breakdown of equipment insulation and the appearance of danger on the conductive circuit. The implementation of a separate grounding loop in cooperative garages is problematic, in contrast to car spaces located near a private house. The ground loop is made by driving metal rods into the ground in the shape of a triangle, then connecting them to each other. A 40*1.5 mm metal strip is used as a grounding bus, which is laid directly into the garage, where it is connected to the grounding conductor.
Important! The grounding circuit is never used as a working zero in single-phase circuits.
Safety Key Points
- Safety rules should not be neglected, since the life and health of the person installing and implementing the garage’s energy supply with their own hands depends on it.
- All work on live parts is carried out after disconnecting it from electrical network, as well as checking for hazardous potential. Use only serviceable and tested voltage indicators.
- Before working with a hammer drill, grinder, etc. electric tool You should visually check the power cord for damage to the insulation.
- Wear safety glasses when working with power tools.
Thus, connecting electricity, distributing cable products, as well as organizing a workplace and lighting in the garage is a simple procedure if you comply with electrical safety requirements and also listen to the advice of professionals on choosing the cross-section of wires, switching and protective equipment.
Premises in a garage cooperative, as a rule, are also used as a workshop. Locksmith work, car repairs and maintenance are difficult to perform in an apartment. Therefore, car owners organize workplace in your own garage.
If you plan to perform more complex work than changing oil and filters, the room must be electrified. Majority garage cooperatives provide a similar service, but the service usually ends with connecting the input to the meter. Further wiring in the garage is carried out by the owner. Calling an electrician will cost a considerable amount. However, if you have basic electrician skills, you can do the job yourself.
You just need to follow some safety precautions
The basic rule (informal) is that the laying should be done carefully, using quality materials. A common misconception: “any kind of junk will go into the garage” can lead to a fire or electric shock.
Key points to know:
- Electrical wiring is laid either in grooves or in fireproof corrugation. This is especially true for a garage, since the likelihood of damage to the main line in such premises is higher.
- When installing wiring in a metal garage, insulating corrugations are required. Switching equipment is mounted on panels made of dielectric materials.
- Exposure to dampness and aggressive liquids must be taken into account.
- It is necessary to separate the lighting line and power sockets into separate circuit breakers.
- After the metering device, a general input machine is installed: when leaving the garage, you can turn off the power in one movement. A separate lighting line is allowed, which will always be under load.
- The power supply line for the inspection pit (basement) is provided with separate protection; it is advisable to use a low voltage source (12 volts) with galvanic isolation from a 220 volt network.
A situation often arises when you purchase a garage with already completed electrification. If the wiring diagram in the garage was made incorrectly by the previous owner, it must be redone.

How to properly plan your garage's power supply
Before installing wiring in the garage with your own hands, you need to draw a diagram. Regardless of the condition of the room (new garage, or equipment already located in it: workbenches, light fixtures, shelving), complete the layout.
Lighting is divided into several groups


Important! Installation of lamps and switches on metal walls unacceptable. Use dielectric substrates.
Socket network
The general rule for placing power points in the garage is: a duty socket near the input panel, and groups of sockets in work areas. Each group is connected to a separate circuit breaker. When the machine is triggered, your entire garage should not lose power.


Electrical panel installation
Do-it-yourself electrical wiring in the garage starts from switchgear. If the electricity meter is located outside, the “reference point” is the input machine. If the counter is inside, the same machine is installed immediately after it. The input machine can be connected in front of the meter (with consumer access), then it is sealed together with the meter.

Once the equipment is sealed by the energy sales employee, you will not be able to change the input configuration. Therefore, the wiring diagram in the garage is initially planned taking into account the location of these elements.
- The switchboard is located as close as possible to the entry point. The shorter the cable length to the first circuit breaker (in your area of responsibility), the higher the level of security.
- It is advisable to perform all switching in one box. An exception can be made if the meter does not fit your distribution panel.
- All circuit breakers must be marked. The idea that “I already remember everything” is dangerous. There are times when you physically cannot tell rescuers how to turn off power to a particular line.
- The electrical panel with a metal casing must be grounded. How to make grounding in a garage with your own hands depends on the material of the walls.
Correct organization of grounding
Why do you even need “earth” in the garage?
- For fire protection. If a phase (faulty power tool, damaged wire) touches grounded parts of the structure, heating does not occur and the circuit breaker is triggered.
- For protection against electric shock. Only for this one more condition is necessary: the installation of an RCD.
Grounding is carried out according to standard rules: 3 rigid conductors connected to each other are installed vertically into the ground.

A steel busbar (copper cable) is led from the ground loop to the garage. From the grounding connection point, wiring is carried out to the panel and to the socket network. Frame metal garage is grounded on a general basis and cannot be a connection point or grounding bus.
- The use of an ungrounded outlet network and ungrounded power tools in a metal case is unacceptable! Especially in a metal, grounded garage.
- It must be remembered that conventional circuit breakers and grounding do not guarantee against electric shock. RCDs are designed for this purpose.
Organization of wiring
From a safety point of view, the question is: “how to do the wiring in the garage with your own hands?” comes first. You may have excellent grounding, an expensive fireproof electrical panel, but the weak link will be a damaged wire with an incorrectly calculated cross-section.
You can select the required cable using the table.

It must be remembered that the diameter of the copper core and the cross-section of the conductor are different sizes. If you have a high-quality wire without markings, measure the diameter of the stripped core with a micrometer or caliper and calculate the cross-section using the formula:
cross section = 0.785 × diameter²
Classic wiring is not suitable for a garage; distribution boxes only increase the vulnerability of the wiring. The best option- star: one circuit breaker - one consumer (group).
The picture shows a wiring diagram in a garage.

Depending on the material from which the garage is built, we will organize cable laying. For stone and metal structures, ordinary corrugation (steel or plastic) is used. It must be remembered that laying the wire in corrugation only increases resistance to mechanical damage and does not provide protection against fire. Even the “NG” marking is not a 100% guarantee against fire due to overheating. Therefore, circuit breakers should not be overly powerful. Optimal overheating response is 2 times the permissible current.
The corrugated cable is laid parallel and perpendicular. Diagonals and rounding of corners are not allowed. There should be no shelves or racks in front of the laid lines. Squeezing the insulation with a metal box or canister is especially dangerous.

Of course, electrical wiring can be laid in cable ducts. This is somewhat more expensive than corrugation, but much more aesthetically pleasing.
Backup power 12 volts
In some cases, it may be the main one. Not all garages have power supply.

If you will not be using the garage for a long period of time, the battery should be completely disconnected from the backup power line.
Video on the topic