Installing an Electrolux hob into a countertop. How to install a gas panel in a countertop with your own hands
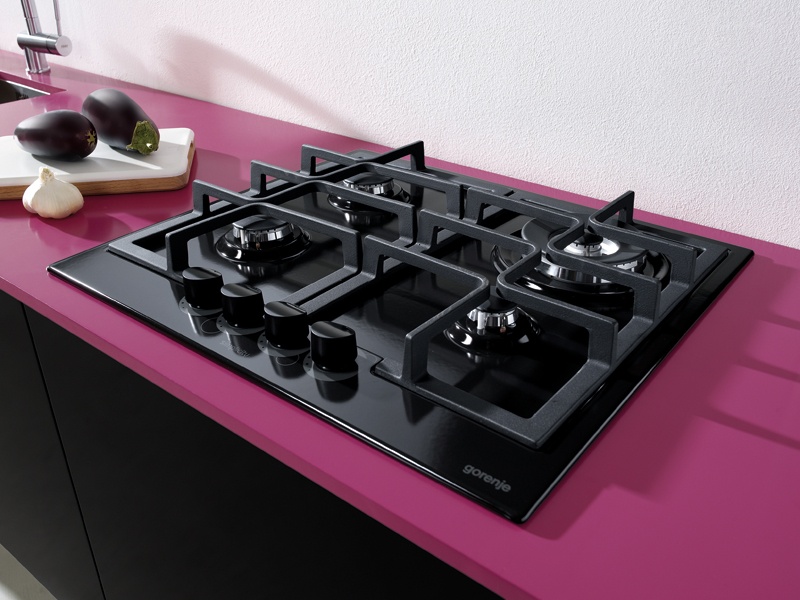
If previously it was customary for every home to have a large gas stove with four burners and an oven, now it is becoming more common to save living space in the apartment, and the old stoves have been replaced by a hob. It is a flat surface with burners, which you can easily find a place on small kitchen, and ideally it should be built into kitchen furniture. Depending on the interior of your kitchen, you need to choose an enameled stove, a model from of stainless steel or tempered glass.
There are three types of hobs:
- gas;
- electrical;
- induction
IN Lately Due to the rise in gas prices, everything more people prefer electric stoves. However, it should be borne in mind that the house may be without power for some time, and thus a person risks being left without hot food for some time. If you live in a house where, for some reason, power outages often occur, then you should think about purchasing a mixed type panel - both gas and electric burners. Such panels are more expensive, but are very helpful in such situations.
Induction hobs are a relatively new type and are not yet very common. The principle of their operation is based on the phenomenon of electromagnetic induction. An induction coil is installed in the stove body, which is the primary winding of the transformer, and the cookware in which food is cooked acts as a secondary winding.
Thus, while cooking induction panel only the dishes themselves and the products in them are heated, and the glass-ceramic panel itself is heated by the dishes standing on it and therefore does not heat up to high temperatures. Therefore, such a panel is considered the safest to use.  Please note that not all cookware is suitable for cooking on such panels. You need to use dishes that have ferromagnetic properties. Therefore, you should acquire cookware made of cast iron, stainless steel or enameled. Dishes made of copper, aluminum, glass and ceramics are absolutely not suitable.
Hob installation
When you have already made a choice in favor of a certain type of panel, you can begin installing it. You have the opportunity to entrust this to a professional or do it yourself. Installation of modern hob on the tabletop with your own  manually does not require any special skills and will not take much of your time. You will need a tape measure, a pencil, an electric drill and a jigsaw. First of all, you need to determine the dimensions of the panel - they are mainly indicated in the instructions, but you can measure them using a tape measure. Mostly the slabs have standard sizes– 50 by 60 cm, but there are exceptions. To the measurements obtained, you need to add 1-2 mm on each of the four sides so that there is a small gap between the panel and the tabletop. Then you need to make markings on the countertop by drawing the contours of your stove with a pencil.
The main safety requirement when choosing a place on the countertop is that the distance from the edge of the table to the stove must be at least 5 cm on each side. After marking, take an electric drill and make four holes in each corner of the marking. It is recommended to use drills with a diameter of 8-10 mm, so that the jigsaw blade can easily fit into it. Then we carefully cut out the space for the hob. After this cut location you will need  treat with silicone or acrylic. This is required for protection wooden surface from dirt and moisture.
It is also necessary to apply silicone to the perimeter of the cut niche, so to speak, to make a small side. If possible, you need to let the silicone dry a little for 1-2 hours. If not, then you can immediately lay the panel there. Often it comes with adhesive tapes or special plasticine that needs to be used to process its edges. In this case, it is necessary to apply them in accordance with the instructions, then sealing the cut of the tabletop will be completely high level. If there is nothing like that in the kit, then silicone is enough.
Place the prepared panel in the niche and remove excess silicone. Then, using the special clamps included in the kit, we secure the panel under the tabletop. All that remains is to connect the hob to a power source. If you have gas equipment, then it is safer to entrust its connection to professionals. If you connected the gas hose yourself, be sure to check all the joints with soapy water - no bubbles should form there, otherwise this indicates incomplete sealing, which can lead to a gas leak. You just need to connect a plug to an electric or induction panel and plug it into a power outlet. That's it, you can start preparing lunch.
Hello.
Today we will talk about built-in kitchen appliances.
The vast majority of modern kitchen sets include a hob. Therefore, those who want to make kitchens must be able to install it, especially since it is not at all difficult.
So how is this done?
Everything is very simple: you need to take a tabletop, cut a niche in it, insert the hob there, and secure it. It seems like that...
But for greater clarity, I suggest that we consider everything important points related to the installation of this equipment.
Personally, I advise, if possible, to purchase cookers with plasticine. But, in any case, such a technique is not a sink, which, usually, when installed, is attracted to the countertop with its entire surface.
 The hob fastener is located, I don’t even know how to put it correctly, in short, it is located “goat style”, and no matter what you do, you won’t be able to pull it with its entire surface to the countertop. Therefore, during installation, it is necessary to treat the outside of the joint with silicone.
Yes, it is better and more convenient to attach this equipment when the tabletop is already attached to the lower modules. And plan the set in such a way that the hob is not located close to the sink (well, at least not closer than 250-300 millimeters).


 Well, that seems to be all regarding the installation of the hob.
I would also like to note one more detail: Nothing ideal ever happens anywhere.
Therefore, if, when installing the hob, a small gap has not been removed somewhere, look at the fasteners (maybe they need to be bent), and if nothing helps, fill the gap with silicone and don’t worry, this is not an ideal technique. Not everything depends on you here.
Yes, still. Try to tighten the fasteners only once, otherwise, often in cookers, the threaded holes for the fasteners are such that if you screw the corresponding bolt in there a couple of times, the threads will slip off, and then you won’t be able to tighten the fasteners with anything at all...
Complex stoves for the kitchen, which simultaneously combine a hob and an oven, are increasingly becoming a thing of the past. Modern housewives are using ovens less and less for their intended purpose. They are increasingly turning into storage for pots and pans.
Why overpay for an unnecessary metal cabinet, when you can buy a comfortable and aesthetic hob, and the free space created underneath is perfect for storing dishes and other things. Even an inexperienced craftsman can install a hob into a countertop, because its installation does not require any experience or qualifications.
Types of hobs
So, before you begin such a procedure as installing a hob into a countertop with your own hands (you can see the photo in this article), you should understand the types of these devices. There are the following main types of hobs:
- Electrical.
- Induction.
- Gas.
It is advisable to entrust the installation and installation of the latter option to a professional, since incorrect connection can lead to serious problems. When using gas stoves indoors, you must comply special requirements. During installation electrical panels It is also important to use caution and safety rules when working with high voltage. It is necessary to provide high-quality electrical power with grounding.

When purchasing a hob, it is important Special attention pay attention to it since the installation of the hob into the countertop should be carried out with a small margin at the edges. In addition, you need to decide on the insertion location. Conduct in advance
Tabletop installation
If you purchased a glass or stone countertop, it is advisable to have it installed by professionals. Since you do not know about all the intricacies of the process, you can damage an expensive item. If you can handle the installation yourself, but with some construction skills.

You will need the following:
- Grouting compound for tiles.
- Tiles for cladding the surface of the countertop.
- Assembly or tile adhesive.
- Tungsten coated tiles.
- Gun with silicone sealant.
- Electric jigsaw.
- Waterproof wood board.
- Set of tools - square, screwdriver, screws.
Replacing a countertop should begin with dismantling the old one. Despite the fact that you will not need the old tabletop in the future, you must remove it very carefully to avoid damage kitchen set.
It is very important to adjust the new countertop to the dimensions of your furniture. It is likely that you will need to cut off the excess. In this case, the unprotected chipboard edges. This material perfectly absorbs moisture, so the saw cuts need to be well treated with sealant. If the table top is mounted with saw cuts to the stove, it is advisable to close them using special end strips.
Required Tools
Before moving on to a process such as installing a hob into a countertop (the photos show what they are like), you need to prepare the following tools:
- Pencil.
- Roulette.
- Jigsaw.
- Drill-driver with a wood drill bit with a diameter of 8-10 mm.
- Sealant.
Preparatory process
First, you should make sure that in the place where the hob will be installed in the countertop, there are accessible ones. The presence of an outlet, a suitable length of the gas supply hose, without squeezing and kinks for a gas stove - these are two fundamental aspects.
If the wiring is old and you are not sure that it is reliable, it is recommended to run an independent cable for the stove directly from the meter.

Installing a hob into a countertop
- First you need to make a hole in the tabletop. To do this, according to the instructions, an opening is marked. If there are no instructions, then
The full dimensions are outlined, while on each side you need to retreat approximately 5 mm. - Using a drill, a hole is drilled so as not to go beyond the boundary of the contour. Then we continue working with a jigsaw. To reduce chipping, it is recommended to use a file with fine teeth. In addition, you can cover the outline with stationery or masking tape.
- After the cut is made, you need to paint or seal the cut edges to prevent the tabletop from swelling.
- Next, the hob is installed in a 28 mm countertop, secured and connected to the network.
The insertion of the panel must be carried out with maximum precision. Otherwise, even a mistake of 1 cm can ruin the countertop, which is one of the most expensive elements of the kitchen set.
Artificial stone countertop
Compared to their counterparts from Chipboard table top from artificial stone is the most durable. Despite this, the main problem is installing the hob into an artificial stone countertop.
In most cases, an artificial stone countertop is ordered with ready-made holes for a specific hob. But what if the countertop is already installed, but the hob is not yet? In this case, the most reliable and the best option will give away the countertop qualified specialists, which with the help professional tool make the necessary hole.
If you still decide to take a risk, then this work can be done using the technology described above, but instead of a jigsaw you will need to take an angle saw grinding machine and a diamond-coated blade designed for cutting concrete.

It is important to remember that self-installation of a hob into a countertop must be carefully thought out at all stages of installation. Only in this case will less time be spent on this type of work, and their quality and subsequent result will also significantly improve.
Idea self-installation the hob can be a little intimidating. After all, you will have to deal with either electricity or gas and at the same time work with quite expensive kitchen equipment. However, none of the steps to install the cooktop are particularly difficult. You just need to do everything carefully and in correct sequence from the very beginning to the end.
Steps
Installing an electric hob
- To disconnect the hose, turn the hose nut in a counterclockwise direction.
-
Connect the gas hose to the new cooktop. Use gas sealant by applying it to the threads where the hose meets the hob. Apply sealant generously to the threads, making sure not to get it inside the hose. Use a wrench to tighten the nut gas hose to the hob.
Place the new hob into place. Carefully lower the hob into the hole so as not to damage any connections at the bottom of the hob. Before lowering the hob into the hole, you should run the gas hose into it first.
Connect the gas hose to the permanent gas pipe. Apply sealant to the fitting threads gas pipe. Then twist wrench gas hose nut. Be sure to tighten the nut tightly.
Prepare a soap solution. Make a solution of 1 part dish soap and 1 part water to check for possible gas leaks. Mix the solution thoroughly and then either spray it onto the gas connections or apply it with a brush. Turn on the gas supply valve by placing it in the position where its handle points in the direction of gas supply.
Turn on the burners and check their operation. If check soap solution did not detect any leaks, try lighting the burners. It may take a few seconds for the gas to come up and ignite, as normal air must come out of the hose first.
-
Attach the cooktop mounting brackets to the countertop. Once you are sure that the hob is working, attach it to the countertop with the mounting brackets. Your hob is now completely installed.
- Replace the doors and drawers of the cabinet under the hob, as well as all its contents.
Remove the old cooktop, if there is one. If you are replacing an old cooktop, you will need to remove it first. Turn off the electricity in the distribution panel. Remove any attachments from the cooktop and clean off any existing sealant. Disconnect the wires, taking note of how the old cooktop was connected, and lift the cooktop out of the hole in which it sat.
Make sure you have enough space in the location you choose for your hob. Ideally, you should have a clearance of 76 cm above the hob, and about 30-60 cm of free space on the sides of it. You should also make sure that there is enough space under the countertop to accommodate your new model hob.
Make sure there is a location near your chosen location. junction box to connect the hob to the mains. Most electric cooktops require a direct connection to the mains via a 220V junction box. If you are replacing your cooktop, you probably already have a junction box.
Measure the dimensions of the hob and make sure it fits into the old hole. If you are replacing a cooktop, there should already be a hole in the countertop, you just need to make sure it fits the new cooktop.
Adjust the hole for the cooktop to fit into it. The hole should be 1.5-2.5 cm smaller on each side than the dimensions of the hob. If you do not already have a hole for the hob, or it is too small, then you will need to cut it according to the right sizes. If the existing hole is too large, then sheets of metal can be screwed to the sides to reduce it.
Remove all removable parts from the cooktop to make it easier to put it back in place. The hob may have removable burners, protective screens and other details that should be temporarily put aside. You will also need to remember to remove all packaging materials from the cooktop.
Install the clamps. They are designed to fix the hob. You should hang them from the top edge of the slot and then screw them in place.
Lower the hob into the hole. Lower the new cooktop into the hole, making sure to push the wires through first. Press down on the hob until you hear the locking clips click.
Connect the hob wires to the mains. There should still be electricity turned off when doing this to avoid getting an electric shock. Connect the hob wires to the corresponding wires in the junction box.
Reinstall the previously removed removable parts onto the hob. Replace the burners, protective screens and other removable parts.
Turn on the electricity and check the operation of the hob. Turn on the power to the hob to check that everything is working properly.
Open all burners for a few minutes. Even though you have turned off the gas, there may still be some gas left in the hose. Open all burners to release gas. Don't set it on fire. All the gas will come out in a few minutes.
Disconnect the flexible gas supply hose from the fixed gas line using two wrenches. Take one wrench and install it on the hose nut, and the second wrench on the fixed gas line nut.
Remove all removable parts from the hob. Remove burners, hoods, and other removable parts before moving on. This will make the task of moving the hob easier.
Remove the clips holding the existing cooktop in place. Unscrew the clips from the underside of the old cooktop.
Push the hob from below to lift it up. Remove the hob from the worktop and place it in safe place. Don't forget that the gas hose is still attached to it.
Disconnect the gas hose from the old cooktop. If you will be using the old gas hose to connect your new cooktop, you will need to disconnect it from the old cooktop. Use two wrenches to do this, placing one on the hob and the other on the hose nut.
An integral attribute of the kitchen is gas stove, behind which in ideal A husband is standing and preparing breakfast for his wife. Non-classical gas or electric stoves, and cooking surfaces. Their convenience lies in their compactness and the possibility of installing a separate oven. But installing them on a countertop will make an inexperienced craftsman sweat. Is it possible to install such a module yourself and what will be needed for this? This will be discussed in the article.
Types of hobs
All hobs can be divided into two large groups. These groups are united by a power source; its role can be:
- electricity;

By appearance hobs that connect to the gas mains are practically no different from conventional stoves. An option for such modules may be an automatic start system, which can be autonomous or dependent on electricity. In the first case, it is represented by a piezoelectric element, which supplies a spark at the right moment. Burners on gas surfaces may vary in size for greater ease of use.
Electric hobs can be of two types:
- classical;
- induction

In a classic hob, the role of a burner is performed by a heating element or other a heating element. This module costs less and is not particularly economical. Induction hobs are the dream of any modern housewife. The essence of the product’s functioning is to heat the product thanks to electromagnetic field. However, if you put your hand on a working burner, you won’t feel anything. For normal operation of the product, a metal pan with a thick bottom is required. In this case, the material from which the dishes are made must be magnetic. The installation process for each of these surfaces is very similar. The difference lies only in the need to connect a gas hose for the first version of the stove.
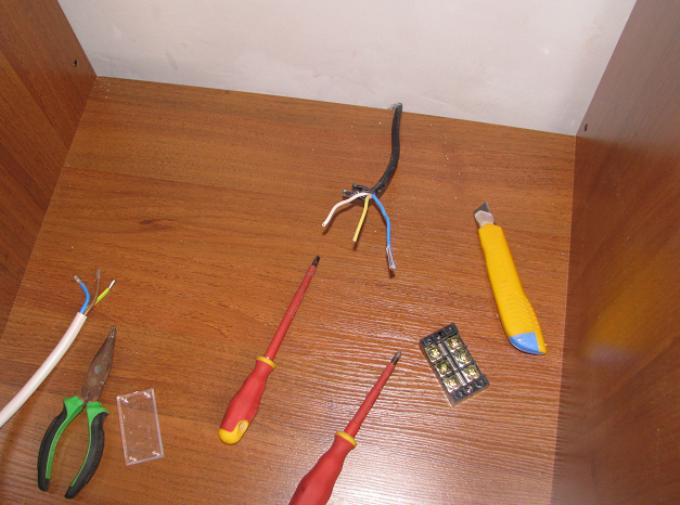
Installation tool

The entire installation process does not take much time and requires a tool that you may already have in your arsenal home handyman. Among the main tools are:
- screwdriver or drill;
- electric jigsaw;
- roulette;
- marker or pencil;
- silicone sealant.
Additionally, you may need a level or a long metal ruler to make it easier to draw straight lines.
Preparatory stage
If we are talking about a hob that is powered by electrical network, Then preparatory stage will consist of power supply. The average power consumption of such modules is within 3.2 kW. This means that a regular but good outlet will suffice for connection. If the socket was not installed in advance, then you can purchase a surface-mounted version, since it will be easier to install and you will not need an additional tool in the form of a hammer drill or drill with a crown. The cable for such an outlet must come directly from the distribution panel.

This step is being taken in order to provide such a powerful device with a separate circuit breaker, who would control its work. The rated current for which the machine must be designed is 16 amperes. The best solution There will be installation of a differential machine that is capable of detecting the slightest leaks. The socket is mounted slightly below the tabletop. This is done not for greater ease of connection, but to ensure that moisture and fats do not get on it during cooking. The outlet must be grounded in case of a short circuit.
Note! It is worth noting that standard socket can withstand a load of 3.5 kW and a current of 16 amperes.
Step-by-step instruction
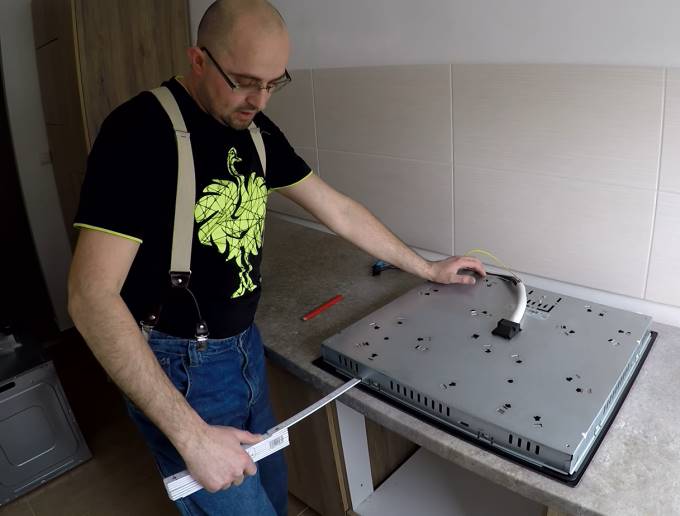
An important step when installing a hob into a countertop is marking. Usually the manufacturer is technical documentation, which comes complete with the hob, indicates what the dimensions of the hole for installation should be. One option would be to make a sample from cardboard, which can be used to draw the outline of the future hole. There is another option for marking, it can be seen in the photo below.

You need to place the hob on the countertop, but turn it upside down. She will be the model. It must be located in the place where direct installation will be carried out. The photo clearly shows that it is important to make a small gap from the edge of the countertop to the hob. Usually it is about 5 cm. It is done so that the edge of the cooking surface is not damaged by constant interaction with it.

The next step, as shown in the photo, is to apply markings. To do this, the hob is simply outlined in a circle with a pencil. The lines must be accurate so that they do not have to be redrawn several times, as this will only confuse you later.
The photo shows that the hob has a small protrusion, thanks to which it is fixed in the hole. This protrusion has a certain size that must be taken into account. It is also important to mark it on the outline of the future hole, as shown in the photo below.
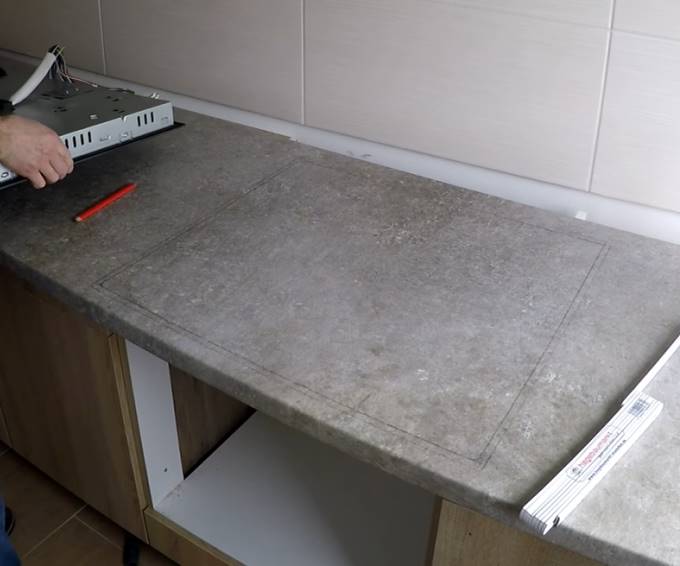
In this case, it is necessary to make a small gap. If the protrusion has a length of 15 mm, then the size of the hob should only deviate 10 mm from the main line. A five-millimeter gap is required for smooth installation of the hob into the prepared hole.

After marking the hob, you need to prepare the holes to make it easier to cut out the required part. Holes are drilled with a drill or screwdriver in the four corners. In this case, it is necessary to ensure that the drill does not damage the facade or other elements of the kitchen unit. The diameter of the drill should be such that the nail file fits freely into the hole.

To continue the hob installation process, you will need a jigsaw. His file is inserted into the prepared hole and the cut is made. It is important to remember that you need to cut along the inner, not the outer line. If a mistake is made, then the surface will simply fall into the hole without fixation.
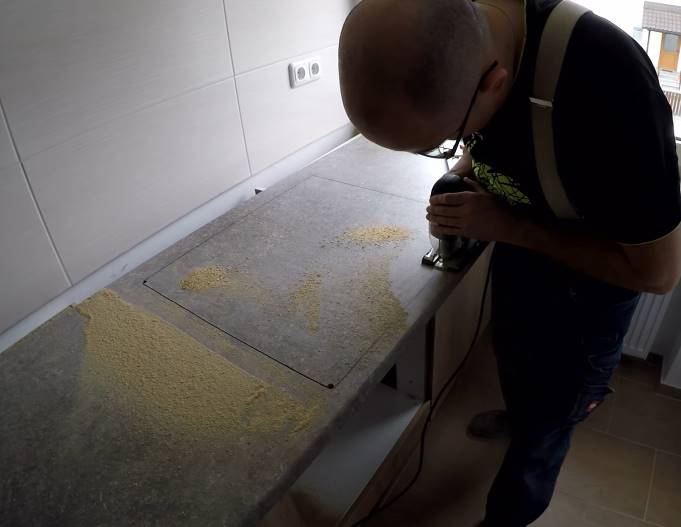
During the work process, it is necessary to promptly remove sawdust so that it does not block the cutting line, as it can easily come off and damage the tabletop. When cutting, you must ensure that the file does not damage the walls of the cabinets or their surface. Before going through the last side, it is necessary to provide the tabletop with sufficient support so that the nail file does not bite, and also so that part of the tabletop does not fall on your foot.

Once the hole is ready, you can try on the hob to make sure it fits as needed.

The process doesn't end there. The tabletop is most often made of chipboard. If moisture gets on it, it swells and becomes deformed. When cooking on a hob, this scenario is inevitable, so it is important to protect the area that has lost the laminated layer. To do this, a special sealant is applied to it, which is used when installing the panels. It simultaneously acts as a fixing basis for the entire structure. The layer should be sufficient to cover all areas accessible to moisture.

On reverse side An adhesive-sealant is applied to the edge of the hob, which will additionally fix the product on the countertop. After this, the panel is inserted into place and gently pressed until contact with the surface of the countertop is felt. The sealant that has come out must be removed immediately, because after drying it will be more difficult to do. It is important to check that the connection is the same over the entire surface. If this is not done, the pressure from a heavy pan may cause the glass to burst.
Advice! If the hob is glass, then it is important to be careful when applying pressure so that it does not break.
The fixation doesn't end there. Special metal plates are supplied with the surface, as can be seen in the photo above. They must be screwed in such a way that they provide support and prevent the panel from lifting off the tabletop. A video about installing the hob can be seen below.
Network connection

After completing the installation process, you can proceed to connecting the electrical part. Most often, hobs are supplied in a single-phase version, but they can also be three-phase, which will be useful if three phases come into a house or apartment. Usually the hob has a built-in power cable. But if you don't have it, you will need to buy it separately. To connect, you will need a wire marked PVA 3x4. Each core of this cable is designed for a rated constant load of 8 kW.

This is necessary for a small margin, which will prevent overheating of the conductor. The wires are stripped on both sides. A plug is mounted on one, which must correspond in current strength to that specified for the hob. If this is not observed, then it may simply melt. The wire is not monolithic, so you will need to crimp the wires with lugs. Markings are usually applied near the terminal block where the connection to the hob will be made.

The Latin letter L denotes the cable through which the phase arrives, the letter N denotes zero, and there may be a third letter E, which denotes the location of the ground wire connection. Most often, instead of the third letter, a drawing is applied that indicates grounding. It is important to secure each core that is crimped with a ferrule firmly with a bolt. The service life will depend on the quality of the contact. If under hob When installing an oven, it is necessary to provide a separate outlet for it. The total power consumption of the surface and cabinet is twice as high as permissible for a single-phase outlet.
Summary
As you can see, installation of the surface can be done independently without significant skills. During work, all precautions and safety precautions must be observed. During drilling and working electric jigsaw Be sure to wear safety glasses on your eyes to protect you from flying sawdust. When installing the socket and connecting the electrical part, it is necessary to use tools that have dielectric handles that protect against breakdown electric shock. Before starting work, it is necessary to de-energize the machine, which is attached to the prepared wire in the kitchen.