How to install a wooden staircase with your own hands. Installation of wooden stairs: high-quality installation and surface treatment
In a multi-storey and attic house the staircase is necessary attribute architecture for connecting rooms located on adjacent floors. Also useful in two-story townhouses or cottages. It is necessary that it provides convenience and safety, and fits correctly into the interior of the house. If you do not comply necessary rules or neglect mathematical calculations, the staircase will be built crookedly, and you will need to spend a large amount of money to redo everything. Required building codes must be followed.
Modular stairs will not require you to spend a lot of money. You only need to assemble the product from ready-made parts, completing all necessary instructions supplier. There are kits that ensure the production of spiral or marching staircases. Comes with a complete set of mounting hardware and necessary structures. If you are a novice builder or building for the first time wooden stairs, then no one will advise you to do the screw version.
If there is limited space in the apartment, it is better to entrust the matter to professional builders. The installers will do everything for you in accordance with GOSTs and SNiPs.

Or you can choose a shallow view. Installing a sloping vehicle on the second floor will require a lot of space. But it will be convenient to go up and down. If you have a small space in your home, you need to make a two-flight staircase. The width of the staircase must be at least 1 meter so that you can carry large furniture and large equipment.
A beginner cannot do repairs to even the simplest staircase himself. However, if you have already made one or more stairs according to the instructions above, you can try more difficult task: creating a spiral staircase with your own hands.
Installation: DIY wooden stairs
First of all, you need to design the staircase. Errors at the stage of planning and preparation of building materials are the cause of failures at subsequent stages. We suggest making stairs with risers so that the structure is held firmly. It is best to make a staircase structure using stringers.

Must be correct sizes such elements:
- Ladder:
- Tilt angle;
- Width of steps.
We determine the height of the stairs; to do this, we fix a horizontal board as the beginning of the structure. Having adjusted the board, we measure the height of the stairs. To prevent the level from dangling in the air, it must be secured to the board with tape. A suitable option will be if the angle of inclination is no more than 37 degrees. A slope of 45° will be inconvenient for descent. And if the angle of inclination is less than 30°, then walking on the stairs will be dangerous. The width of the step is taken according to the average length of a person’s foot. And the height is selected based on the height one simple step. The risers can be made from any coniferous wood.
Handmade production and installation of wooden stairs
To make stringers, we will take pine boards 40mm wide. Stringers are the main part of the stairs, on which you have to walk when walking. most of the entire load. Let's draw a pattern in accordance with the designed steps. After this, the markings are applied to the boards and electric jigsaw teeth are cut out. All elements must be symmetrical.

Therefore, having made one stringer, you use it as a template for making others. The more supporting structures, the better. Therefore, it is advisable to have four stringers.
When you have cut them all out and plane them, you must attach the stringers.
If necessary, dismantle anything that may be obstructing the wall or floor. At the very bottom of the stairs there will be a beam. Make several recesses in it for the stringers, or cut out corners in the stringers for fastening. The stringers also need to be securely fastened to the ceiling. The first stringer is attached directly to the wall. The support bars on the floor and ceiling must be properly secured. The stronger the better. The stringers should be parallel to each other. Next you can do the steps.
Installation of a wooden staircase to the second floor
You can buy ready-made steps (or treads, the same thing) and risers at a construction supermarket. Take the price list, select products from high-quality and inexpensive materials. Alternatively, you can cut it yourself or entrust it to installers.
A standard step must have certain standards and match the width of the staircase being built between two stringers. That is, the width should be 30cm, length in the range of 80-120cm, and thickness 3-4cm.

Now you can assemble the ladder. It is necessary that the risers have good strength and be protected from moisture. The blanks must be attached to the stringers with self-tapping screws and nails. They all need to be secured. Then you can attach the treads with nails and screws so that the caps are deep in the wood and do not protrude.
How to secure a staircase post and baluster
To ensure the strength of the stairs and fences of the structure, pillars are installed for support. Often wood does not guarantee against pillar cracks and is sometimes subject to deformation. Therefore, if you are making your own staircase posts, you will need two straight boards that need to be glued together. Usually a standard part is used as a pillar, which is made on a machine.
The base of the pillar should be of such a size that handrails are attached to the so-called square. The support column must have the following standards: height size 1000 - 13000mm, and section size from 70x70mm to 120x120mm. It is advisable to purchase poles and handrails from the store.

On the extreme parts of the steps, markings are made where balusters and pillars for support will be installed. Next, holes are drilled. After this, dowels are inserted into them, which protrude approximately 15mm. Next, holes are made in the balusters with a drill. The pillars are installed at the beginning and end of the stairs. The bases of the balusters are lubricated with glue and placed on dowels. The balusters are placed in a vertical position parallel to each other. We are waiting for the glue to dry.
After this, the railings are made. The edges must be cut at an angle. The railings are glued to the balusters, then you need to screw them from below with a thin self-tapping screw. The support post at the bottom is installed last. Finally, varnish is applied to the wood. We can use paint to make the stairs dark brown.
Quick repair of a wooden staircase: conclusion
Watch the video again with the repair rules. You can always entrust the job to builders. They will help you repair it if something goes wrong. Mistakes should not be made, because an improperly repaired staircase can lead to injury. And when making stairs with the help of builders, if you are injured due to a collapse of the structure, you can go to court.

Even if you did everything correctly, and the builders helped you, any thing requires repair. Wooden staircase, among others. The need to get rid of old varnish will bring little trouble. But sometimes you need to completely renovate the steps. You can dismantle them and install new ones. If you decide to repair the stairs, then you should take into account factors such as the degree of wear and material capabilities.
Aluminum edges are useful to get rid of uneven steps.
One-piece profiles are difficult to use, which you cannot do yourself. The split profile makes installation easy.
Installation of wooden stairs(video)
If your steps begin to creak, most likely the joining parts are moving. This may be due to increased humidity in the house. There are also such phenomena as leaking roofs and more. Between two rubbing surfaces it is necessary to lay an elastic mass with inside stairs. In any case, do you do it yourself or with outside help, contact your installers for help.
Good luck with your renovation!
The need for staircases may arise due to various reasons, from construction country house“with your own hands” before its expansion, or during redevelopment and any changes in a suburban cottage, when rebuilding an inherited house, equipment, and so on.
There are any number of reasons for getting a new staircase, even down to the simple desire to have beautiful new steps leading up.
But, before you install a staircase that you visually like, you need to find out what they are like and how, besides design and materials, they differ.
Types of stairs in the house
In addition to the division by purpose, for example, whether they lead to the basement or attic, and materials, the stairs also differ structurally:
- straight - marching and on rails;
- screw;
- with rotation and combined;
- folding.
Modular ones come in both screw and direct construction. Modular, that is, consisting of individual modules, stairs can be made of any material and be of any type, except folding.
Construction of such a staircase on our own much simpler than any other, in addition, the module system allows you to change steps that have become unusable without affecting the entire structure. This is the main difference between the modular variety and the others.
In private construction, wooden modular stair sections, both straight and with lapels, are in greater demand. Screw-type ones, although they are good for everyone, are built less often on their own, although they are not particularly complicated.

When it comes to attics, the leaders are “attics”, that is, folding stairs. However, before you decide to install this option, you need to think carefully, because if in the future there is a possibility of arranging an attic, such a staircase will no longer be suitable.
As for iron or concrete ones, their installation requires special skills and, of course, equipment, at least welding machine. Therefore, the most popular and optimal home stairs are made of wood, and the use of this material allows you to choose any structural type.


Folding ladders are very convenient for installation in the attic
Screw
They may be inconvenient, but they are ergonomic and beautiful. Basically, such designs are intended for places that do not have space for a “normal” staircase, but the choice of design for the “cogs” is so varied that it is worth at least considering the possibility of installing them.
In modular “screws” you can use different shapes- from round to triangular, different materials for the base and steps - from boards to ceramics and glass. Such an abundance of possibilities allows them to become the highlight of any interior.


Direct
“March” is a straight section of a staircase, consisting of several modules, if such structures are involved, of course.
Flight stairs are the most convenient for ascending and descending, but besides this, they are the simplest for construction. Even a beginner who has no experience in such work can cope with the installation of “marches”.

The design, called “on rails,” involves fastening the step sheets directly into the wall. There are no special nuances or difficulties in the installation, except that you will have to use a large number of different metal “spare parts,” fasteners, and all sorts of details.
It won’t be possible to build it “from scratch,” but similar ones already equipped with everything necessary stairs Quite a lot is sold in construction and interiors stores - you just need to choose the appropriate size and appearance, purchase and assemble it, like a simple construction set.

Many doubt the reliability of such a “floating” staircase, however, a minimally similar (the simplest) design will withstand a load of over a thousand kilograms; the relevant information is in the accompanying instructions attached to each kit with parts.
With a twist
These are the same marching ones, with the only difference being that the canvases are placed with a turn, at an angle relative to each other.
For a device of this type, you will need not only modules with steps, but also the arrangement of intermediate “spans” (platforms). Depending on how many sections will “turn”, they are called two-flight, three-flight, and so on.


Folding
“Folding beds” are used for climbing into attics; the simplest example is an ordinary two- or three-legged one, screwed to a hatch. There are quite a lot of similar homemade products in the houses of holiday villages.
The ladder can be folded any way you like. Among those ready for independent work for assembling kits, there are folding, retractable, and folding options. They have one thing in common - the staircase goes completely into attic hatch, that is, it hides behind the hatch and appears outside only when it is opened.

How to install a wooden staircase
Whatever type of staircase is chosen, it will be composed of:
- Steps.
Without exaggeration, the most important part for the staircase section. In turn, it consists of risers and treads. The tread is what people step on, the “working” surface of the step itself.
The most “correct” width that is comfortable for a person is from 30 cm, respectively, for the staircase itself – from 90 cm.
The tread is a vertical that holds the surface of the tread. In the construction of the simplest “classics” - within 15-20 cm in height.
If you are building an ergonomic spiral staircase, then you need to take into account that the treads will be different, the optimal combination is 45 cm for the outer “side” and 25 cm for the inner one.


- Supports.
Beams that carry the entire load on the stairs are called support beams and are divided into the following elements: bowstring, stringer, pillar.
Pillar - if under construction spiral staircase, and in the rest - a stringer and a bowstring.
The stringer is a massive “serious” beam with triangular cutouts for steps, but the stringer has round ones made on the inside.
- Railing.
Although they are perceived as a decorative part, they are actually a full-fledged component that provides convenience and safety.
They consist of a pair of elements - balusters and handrails. Baluster is a protective element that covers the top of the handrail.
In general, this is all you need to know before you start installation of wooden stairs.
Any construction begins with the development of a project, even if it is schematic drawing made on the wall country house, it will still be what is called a project.
It includes all the numbers, angles, pitch or rotation data, and all other “engineering” information. Of course, if we are talking about building a fundamental one, in a full-fledged mansion, then even if you want to do everything completely yourself, the calculations and elaboration of the project must be entrusted to those who do this professionally.


But in a small private building or in a house in a dacha community, it’s quite possible to calculate everything. The first thing is to decide on the place where the future staircase will be located.
Absolutely everything always depends on the location - what type it will be, height and width, what material (or combination thereof) and, in general, how much materials, fasteners and funds will be spent on its construction.
The process itself, the totality of actions how to install stairs to the second floor(simple, marching), will consist of the following:
- you need to start with “production”, the approach and treads - for them you should cut the boards according to measurements and sand them;
- next in line are the supports, they also need to be cut out strictly according to the measurements, having previously applied markings to the bars, and it is imperative to maintain the angle (slope) of the cutout with the future grooves of the steps; there is no need to rush when making the support;
- once the supporting elements are cut, they need to be installed and secured in place, after which the steps must be “laid”, starting, of course, with the riser;
- After the steps with supports are secured, you can begin installing the balusters that enclose the work and covering them with handrails.
Usually, newcomers to the construction business are perplexed by the question of how to install balusters on stairs. This is easy to do - with bolts or self-tapping screws, and then close the fastening points with plugs; balusters are sometimes placed on glue, but only if they are very light and carry an exclusively decorative load.


What you need for installation
To make and install stairs in the house, you will need:
- “holding” bars, dense from “reliable” wood species, approximately 40X40 in size, and the length depends on personal needs;
- boards, their sizes and thickness, are also dictated by individual factors;
- bars for steps and supports;
- balusters, handrails - can be in the form of material, or you can buy already turned, ready-made ones;
- self-tapping screws and other necessary fasteners, for example, corners or staples;
- wood glue;
- , screwdriver, hammer, plane, Sander and coarse sandpaper and other tools;
- protective equipment– gloves, glasses and so on.
When choosing a tree, you need to inspect everything - the presence of scrapes, knots, crooks or other defects for what is intended for a staircase is unacceptable.

How to install a modular staircase
There are almost no differences in the installation process with a wooden classic homemade staircase. By purchasing a ready-made or custom-made design, you can install modular staircase It won’t be difficult, you just need to follow the instructions included with the kit.
The main differences between working with modules, in addition to the fact that you don’t have to make components manually, are the methods of assembly and connecting elements:
- module into module - assembled with screws using various plates and angles, you will need a good flat-head screwdriver, the “step width” is not adjustable, you don’t have to try to do this;
- threaded studs, many included various fastenings, pins, studs and other elements, the work is quite difficult, it will require a lot of attention and accuracy, and, of course, a full set of tools;
- a combination of clamps and bolts, this cannot be considered completely modular, but it is extremely simple to install, you only need a screwdriver, self-tapping screws are usually already included in the kit.
From the point of view of operational issues, it is important to remember that such stairs can only be combined with thick, durable walls, at least 30 cm thick and a floor or in the form concrete slab, or with wood reinforced with additional beams.

The procedure is similar to creating a wooden one yourself. ordinary stairs– it all starts with the supports and ends with the railings.
How to install an attic ladder
There are enough available for sale various options ready-made products hiding behind manhole covers. They are divided according to how they are formed:
- scissor type - made of metal and sliding apart like books or;
- telescopic type - also “iron”, all sections fit into each other, just like nesting dolls;
- folding - the principle is the same as that of multi-legged stepladders; they are made of both metal and wood;
- automatic, the extension mechanism is driven by an electric drive.
They are sold both without the box and the hatch itself, and with them. With that how to install attic staircase , anyone can handle it.
The main points to pay attention to are:
- the hatch box should be smaller around the perimeter than the hole, but no more than 1-3 cm;
- for fastening, so that the box “fits”, you need to use such “helpers” as rough “auxiliary” boards to support it, which are then removed;
- It’s easier for two people to do the work; if one person is installing, then he should have alternative access to the attic, for example, a ladder placed outside.


The work will require:
- screwdriver;
- self-tapping screws, solid strong “bolts”;
- protractor, a simple protractor will do;
- a set of different screwdrivers;
- “rough” boards and wedges.
You can easily make a ladder that “jumps” out of the attic yourself, for example, from an old three-legged stepladder.

How much does it cost to have a ladder installed by third party workers?
That, how much does it cost to install a staircase, depends on various factors. The main pricing criteria are what type of stairs will need to be worked with and what type of services are required, for example:
- ready-made “marching” assembly (10-14 steps) – from 30,000 rubles;
- install railings on the stairs, including balusters - from 21,500 rubles;
- provide a turnkey staircase (one flight only), along with materials and direct manufacturing - from 54,000 rubles;
- assembly (without “deliveries and transportation”) of a finished (from the store) staircase with 2 flights - from 42,500 rubles.
The installation of “screws” is calculated only “on site”, individually.
The cost of the work is quite significant, so it makes sense to purchase a ready-made “constructor set” in the store and assemble everything yourself, or manufacture it completely.
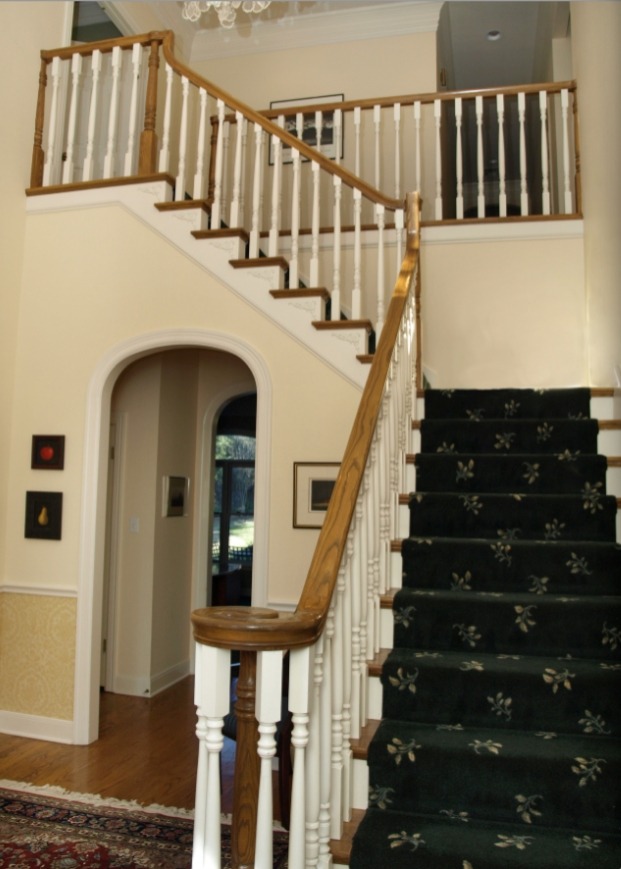
Interfloor staircase necessary to connect the premises of a house with several levels. It should be durable, safe and comfortable. In addition, the staircase is essential element interior design, it cannot be hidden or disguised.
You should think about the location, configuration and design of the staircase in the scrap at the very beginning of the design, because the layout of the building often depends on this. Taking into account the characteristics of this element, floor halls and entrances to rooms are located. Free zone in front of the stairs and around it, convenient location of the “start” of the stairs and its “finish”, lighting of the ascent - the most important conditions comfort and harmony of the interior. In addition, the safety of the stairs is directly related to its convenience.

Rules for installing stairs in the house
When designing a house, they take into account the required size of the opening for the staircase in the ceiling between floors and the method of supporting it. Concrete, marble or glass structure can weigh up to 2 tons, so it is necessary to take into account the additional load on the floor.
Concrete stairs- a structural component of the house, and they are erected during the construction phase. In a small building they are usually built between the main walls that limit the staircase space.
Light Stairs- wooden, metal - mounted at the final stage finishing works. They can be turned into a spectacular interior element, placed anywhere in the house, or made completely open.
When designing a staircase, the owner often has to choose between its convenience and usable area Houses. Create a convenient, economical and safe design Only a specialist can do it. The size of the opening in the second floor ceiling depends on the shape of the staircase and the height of the floor. For the most economical, single-flight structures, an opening of at least 100 x 250 cm will be required; for screw ones, the minimum opening diameter is 120 cm. Sometimes efficiency can be sacrificed for the sake of effect - for example, increasing the opening so that part of the first floor can be seen from the upper staircase hall.

Spacious hall - the best place for stairs
But you should always remember about the convenience and safety of the stairs. They will be provided with:
- correct ratio of parameters: angle of ascent and descent, width of passage along the stairs, turning sections;
- sufficient free space above the head of the person climbing - at least 2 m;
- reliable staircase fencing and landing;
- sufficient lighting - better, natural, and if this is not possible, it is advisable to provide bright staircase halls.

The staircase at the door ensures maximum autonomy for the second floor
Location of stairs in the house
It is better to place the staircase closer to the geometric center of the house in order to save on the length of communications. It is necessary to provide a convenient approach to it, and there should be free space around it so that two people can pass each other. Most often, the staircase is located in the hall or hallway - this ensures the autonomy of the premises and allows you to climb to the second floor directly from the entrance to the house. Sometimes the staircase is located in the living room and this multi-level design serves as a decoration for the room. The second floor hall can be made in the form of a gallery, open to the living room or hallway.

The staircase is located in the living room so that it does not disturb the comfort
Spiral staircase with gallery
This type of staircase is most often located in the living room. It is less convenient for lifting than the marching one, and involves limited use, for example, it leads to the mezzanine.

Spiral staircase with gallery
Staircase in the hall
The staircase in the hall is convenient because it connects special communication rooms and ensures the autonomy of all rooms. You can arrange utility rooms underneath.
Staircase in the hall
Staircase in the living room
The staircase located in the living room always attracts attention. It should have an expressive design. But for her you will have to sacrifice free space and peace in the common room.

Staircase in the living room
Stair elements
The staircase consists of load-bearing structure, steps and fences. The structure must be durable, and it can rest on walls or ceilings. The convenience of the stairs depends on the angle of ascent and is associated with the ratio of the height and width of the steps (they are calculated based on the average step of a person). The fence consists of railings and the filling between them and the steps. First of all, the strength and height of the fence are important, and secondly, its decorative effect.

Wide first steps invite you to start the climb and allow for turning
Stair terminology
Flight of stairs- a rise with a certain number of steps (preferably no more than 17) between landings or from the floor of one floor to the floor of another. Optimal inclination march - 30-40°, but not more than 45°, and its optimal width for a private house - 80-90 cm.
landing- a horizontal platform between marches, the width and length of which is not less than that of the march. Typically used to rotate stairs 90-180°.
Tread- the width of the step is commensurate with the human foot. Usually 25-30 cm, but not less than 22 cm.
Riser- step height. Optimal height- 15-18 cm, but not more than 20 cm. The height of all steps must be the same.
Winder steps- steps that taper towards the inner edge and widen towards the outer edge of the staircase. They serve to turn it. The width of the winder step in the center must be at least 22 cm. Stairs consisting only of winder steps are called spiral.
Balusters- staircase fencing elements: vertical posts located between steps and railings and delimiting the staircase, landing, gallery. They provide safety and decorate the stairs. The distance between the balusters should not exceed 10 cm, and the height of the fence with railings should be 96-98 cm, but not less than 90 cm.
Boltsy- elements of the supporting structure of the staircase: bolts mounted into the wall on which the stair step is attached.
Kosour- element of the supporting structure of the staircase: an inclined beam (or a pair of beams) to which the steps are attached. It is made of wood, metal, concrete and rests on the floors.

From the landing, as from a balcony, it’s nice to glance at the living room
Types and configurations of stairs
The configuration of the staircase depends on the floor layout, the area allocated for this element, the interior style, design and material. With the correct calculation of the parameters, any staircase configuration will be convenient. Moreover, the greater the number of flights and the slope of the structure, the more space it will take up, but it will be safer, more presentable and easier to lift.
Staircase with winder steps shorter than two-march. And the screw takes less space than others, but it is difficult to walk on, so it is better not to use it as the main one.

Ladder unusual shape does not require additional decorations
Configuration and area of a staircase 0.9 m wide with a floor height of 2.75 m (17 steps)

1. Single-flight straight (3.78 m²) 2. Double-flight straight with an intermediate platform (4.59 m²) 3. Double-flight L-shaped (4.59 m²) 4. Double-flight U-shaped with an intermediate platform (5.61 m²) 5. Three-flight with two platforms (5.51 m²)

6. Single-flight with winder steps and a 90° turn (4.23 m²) 7. Single-flight with winder steps and a 180° turn (4.32 m²) 8. Single-flight with winder steps and a 180° turn (3.75 m² ) 9. Single-flight only with winder steps and a 180° turn (3.54 m²)
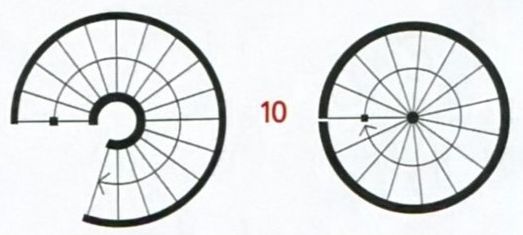
10. Spiral staircases (3.14 m²) and (2.54 m²)
Convenient staircase: step size ratio

About the safety of stairs
The staircase must be designed by a specialist. Should be given Special attention its safety and do not neglect the following rules:
- starting from a height of 1 m, flights of stairs, landings and galleries must have a fence at least 90 cm high;
- gaps between fencing elements should not be more than 10 cm in width or diameter;
- the railings should have a shape that is comfortable for your hand to grasp;
- all steps must be the same height;
- steps should not slide;
- on the upper landing to the stairs it is necessary to ensure free passage from all rooms.

Classic straight staircase with a convenient handrail along the wall
Stair materials
The supporting structures of stairs are made of wood, metal, glass and concrete. As finishing materials They use ceramics, stone and mosaics. When finishing steps, take into account that they must resist abrasion. If the steps are lined with slippery material, apply rough stripes to the tread surfaces or lay carpet. The fencing and cladding of the stairs are consistent with the interior design. The most popular are wooden stairs: they are suitable for interiors of any style, while steel and glass are attributes of a modern setting.

Wooden stairs are especially in demand in private homes; they are diverse, durable, environmentally friendly and beautiful. Solid wood or laminated wood is used for construction
Wooden stairs are traditionally decorated with carved balusters and railings, as well as wooden sculptures. A design made of any material is made spectacular by forged railings and fences, as well as glass elements. For the design of the staircase, an entrance platform with several initial steps is important. It can be oval, with unusually designed railings.

Glass stairs are made of triplex (several layers of tempered glass); metal is used for the non-existent structure. Glass stairs can have a complex spatial configuration and are spectacular. Fences are made of triplex, steel, brass
Metal stairs are made from metal profiles, pipes, reinforcing steel and steel sheets. They allow you to give the structure any configuration.

Concrete stairs can be prefabricated or monolithic. Concrete allows you to create representative stairs of complex, plastic, curved shapes. The surface of the stairs is lined with stone, mosaic, and ceramics. Fences are made of stone, forged metal, steel, less often - made of wood
Staircase lighting
If the stairs are dark or improperly lit, it is dangerous to use. The more complex the shape of the structure and the longer it is, the more carefully you need to pay attention to lighting flights of stairs and approaches to them.

Light finishing of the stairs is a guarantee of safety
If the stairs are located near outer wall, windows are needed. And using skylights, natural light can also be provided for a structure located in the back of the house.
Step lighting is one of the practical solutions to the safety problem
Installation of stairs may at first glance seem like a simple job, since there are no specific mechanisms - a single structure is made up of railings, subordinate to the steps. In fact, it is difficult to install wooden stairs yourself, because in this process You will have to face moments that cannot be ignored. Therefore, today we will try to figure out how to correctly install wooden stairs, and what is required for this.
Getting to know the design
Before you begin the process of assembling a wooden staircase, you should become familiar with its main components.
The most important detail can be called the stringer - load-bearing beam, which will serve as the lower support for the steps and will withstand the main load. By external signs every person is familiar with the steps, but few people were interested in them design features. These elements consist of the following main parts:
- horizontal beams (treads);
- vertical beams (steps).
A person steps on the first when climbing the stairs, and the second is located directly under it, performing a supporting and decorative function. There are also models of wooden stairs that only include treads, but they are less reliable.
Photo 1. Construction of a wooden staircase.The supporting-bearing function is also performed by a component such as a bowstring, on which the steps are also attached. These parts are fixed in the following way: the ends of the horizontal parts are inserted into certain holes located on the supporting part. But since the bowstring is not particularly reliable, the stringer is more popular.
Another integral part of stairs is the railing. They perform a protective and decorative function, that is, they allow a person to ascend/descend without risk to health. Stairs with multiple flights must also include support pillars. These are the parts located at the very top and bottom of the structure (final), as well as in the middle - intermediate.
You can visually familiarize yourself with the design of a wooden staircase in photo 1.
Preparatory work
To install a wooden staircase, you need to prepare the following tool:
- hammer;
- roulette;
- square;
- hacksaw;
- Sander;
- level;
- hammer drill
- The staircase design is purchased, and sometimes custom-made, for a specific location in the room. Therefore, you should not change the location for installing the stairs, since all its elements are made specifically for it.
- The staircase should be brought home disassembled, which reduces the risk of damage to it components. But at the same time, assembly will be carried out from ready-made elements.
- Care should be taken that the company where the structure is purchased makes grooves in the fastening beams for fastening the marches.
- Flights can be installed only after the railings have been adjusted to the floor level. Moreover, when adjusting the lower string, it should be taken into account that the covering on the floor may change.
- To make the staircase strong, it is necessary to screw the flights onto self-tapping screws.
- Before you begin installing stairs, in particular the march, you must install a fence. Only after it has been adjusted correctly to the future design can we proceed to the next steps.
- Marches should be attached to self-tapping screws, evenly distributing them around the perimeter of the structure, connecting them to the wall through support post and a bowstring.
This video talks about installing wooden stairs:
Each staircase consists of inclined and stepped parts - marches and platforms, respectively. Depending on the location of the spans, the following types are distinguished:
- single-march;
- two-flight;
- three-march.
The distance between spans must be greater than the width of one flight. The floor platform, in turn, must be wider than the span. To secure the steps, you can use one of the 2 options shown in the photo. The grooves connecting the ladder with the bowstring must hold the step tightly, for which it is necessary to maintain a flat surface and equal depth in the grooves.
Installation instructions
Since the staircase will be delivered to your home disassembled, you can install it without the help of specialists. Initially, all marches should be prepared. The sides of the stairs must be consistent with the opening and the floor surface, so you need to get rid of the excess using a hacksaw. After this, you can proceed to the upper part of the support post: we cut out the grooves that should be fixed afterwards to the transverse beam of the span. Using a pencil, we make a horizontal mark along the bottom edge of the groove, and another similar mark, but this time equal to the distance from the ceiling to the floor. We install risers in the grooves, and cut off the edges of the column if necessary.
The wooden staircase is assembled using glue. The structural parts are fastened in the following sequence:
- The upper support post is glued to the side.
- Then the railings and fencing are attached in the same way.
- The next step in the installation of a wooden staircase will be the connection of the lower support of the post and the corresponding ends of the railing.
- All that remains is to fasten the side parts and the lower support post.
Wooden tenons must be hammered into all necessary parts, and treads and upper risers must be glued to the side parts. After the glue has completely dried, installation begins again. This will require the help of three people. One should be on the top floor and two below. The stairs are installed on the floor and leveled using a level. Installation marks should be made on the floor support pillars. We drill holes in these places and carry out the same work from below the support pillars.
This video talks about the manufacture and installation of wooden stairs:
We fix the parts with bolts, and nail the tread to the transverse nut with two nails. We attach the side part to the wall with five screws. All that remains is to cover the span with plywood or plasterboard sheets, if necessary.
As you can see, installing a ladder with your own hands is possible if you follow the given rules and recommendations.
The overwhelming majority of projects used in the construction of private houses assume the presence of a second floor or attic. And here the need for arrangement inevitably arises staircase design.
Looking at photos or videos, it may seem that only experienced specialists can cope with such work. But this is far from true. You can build an aesthetically attractive and equally reliable staircase yourself, having read the instructions for its installation in advance.
Of course, building a staircase to the second floor with your own hands is a rather complex process that requires preliminary preparation. The main problem lies in calculating the span and inclination angle parameters. These characteristics have a direct impact on the service life of the structure and the level of convenience during its operation.
Beautiful and durable wooden stairs to the second floor are a unique opportunity to try your hand and gain experience for the further arrangement of a private home.

Types of wooden stairs
Owners country houses understand that designing a wooden staircase is optimal solution. If we draw an analogy with other materials, we can note that even inexperienced craftsmen can handle wood.
In order for the final result to exceed all expectations, you need to use drawings, tips and ideas of ready-made structures.

Over a long period of time, several main types of staircase structures have been used:
- Spiral staircase. Designs belonging to this option require careful preliminary calculations and measurements. This is quite a difficult job, since one, even insignificant, miscalculation can ruin the result of the entire work. But, if you put in some effort and carefully carry out all the calculations, the finished result will not leave anyone indifferent. The advantage of a spiral staircase is its compactness. It takes up very little space in the room. And very often it is the spiral staircase that is the central element of the interior.
- Marching staircase. Unlike the previous option, it is simpler to implement. At the same time, such structures have high level security. If a beginner is going to build the stairs, then this option is the best choice.


Features of installation of wooden stairs
Before you start self-construction stairs to the second floor, you should pay attention to some subtleties of work:
- Identify the main structural elements.
- Highlight the advantages and disadvantages of the chosen model.
- Think about how you can add or improve the design.
- Select decorative elements to decorate it.
- Decide on the supports that are responsible for the reliability of the stairs.
- Carefully calculate the size of the steps.
 Professionals from our company will help with the construction of stairs to the second floor
 If all the points listed above are analyzed in advance, then the finished staircase structure will not only be convenient on the descent or ascent, but also safe during operation.
 Convenient staircase from our company
 Next we move on to choosing wood, which is the main material. It is worth noting that wood is environmentally friendly pure material, so it is advisable to use it in residential premises. At the same time, this material is very practical. Not only professionals, but also beginners can work with it.
Using this easy-to-process material, you can build beautiful wooden stairs to the second floor with your own hands. The main thing is that the interior of the constructed structure fits harmoniously into general design Houses.

Today, there are the following design approaches when designing a staircase structure. She may be:
- round or straight;
- decorative or simple;
- lightweight or massive.

Modern electric tools can be used to process wood.

There are many photos and videos on the Internet showing beautiful wooden stairs to the second floor. But not all designs should be taken on. Especially when it comes to original projects made by real masters. Such photos and videos can be used as a source of inspiration.

As mentioned above, it is best for beginners to build a staircase. Depending on the area allocated for its implementation, you can choose a rotary or straight design.

The simplest instructions for installing a ladder with your own hands
It is best to start building your own stairs with simplest design. For example, it could be a single-flight straight staircase made of wood.

Follow the following work plan:
- Perform calculations, make a sketch and draw up a diagram of the stairs.
- Make reference blanks for the approach and risers. In the future, they can be used to measure steps so that you don’t get different sizes due to errors.
- Mark and cut stringers with notches for installing steps.

Stringers need to be placed parallel to each other, fixing them wooden slats. It is best to start the work with the installation of risers, which will give the structure strength. And attach the stair steps to the resulting structure using a screwdriver.
Calculation data for marking the stringer
Before installation structural elements All surfaces should be thoroughly sanded, removing unevenness on the cross sections. The edges, which were previously rounded and carefully processed with a router, look very beautiful.

The most difficult stage of the work is the installation of this entire heavy structure to the passage to the second floor. This work can be done in several ways. For example, the top of the span can be secured to special wooden posts. You can fix them to the ceiling or floor using special parts. Each master should have installation instructions that he will adhere to. Fastening balusters, handrails and railings
When the staircase is assembled, it is covered with stain and also varnished or painted with special enamel. As an additional decorative element You can use LED lighting for steps.

In conclusion, it is worth noting that different staircase layouts differ slightly in the installation method. For example, when installing double-flight models, the supports and platform are first installed, and the spans are connected to them.

But, regardless of the chosen type of construction, there must be instructions for do-it-yourself installation, where everything is spelled out step by step necessary actions. By following these instructions, you can make wooden stairs to the second floor that will not only be beautiful, but also durable, safe, and reliable.