How to secure a power cable to the wall of a building. Types of clips for fastening wires
Telephone and television cables, as well as radio broadcast network wires, are routed along the walls. Usually these are places near jambs, baseboards, and ceilings.
Before you begin wiring cables, you should measure the required sections of wiring and cut electrical wire with a small margin. Then it can be cut off if necessary. Then prepare the cable by straightening it by pulling it 2-3 times through a cloth held in the palm of your hand.
To fix the conductors, you can use metal strips, which are cut using metal scissors ( rice. 1).
Rice. 1 Metal strips are cut using scissors
The material can be an ordinary tin can. The length of the strips depends on the thickness of the wire or wires that need to be fixed on the surface of the wall, ceiling or floor ( rice. 2).

Rice. 2 The length of the strips depends on the thickness of the wire
Conductors are placed on clips fixed across the wires ( rice. 3).

Rice. 3 Laying wires on clips
The metal strips are bent as shown in Figure 4.

Rice. 4
This creates a fairly reliable and durable fastening for the conductors ( rice. 5).

Rice. 5 Conductor holder
If the metal of the clip is quite hard or thick, you can use pliers to seal the ends of the clip ( rice. 6).

Rice. 6 You can use pliers to seal the ends of the clip.
Cable wiring is done in various ways: open, hidden and using electrical skirting boards.
Open way
The cable is run along the surface of plastered or wallpapered concrete, brick, wooden walls and ceilings. For this purpose the lungs are used unarmored cables, protected by wires, or flat wires. You can also use copper and aluminum wires with rubber insulation, coated with a layer of polyvinyl chloride.
Wires open wiring attached to the walls and ceiling using rollers made of porcelain. A wire is put on them. The rollers have a hole axis through which they are attached to the surface using a nail. You can also secure the wires with clips ( rice. 7).

Rice. 7 Fastening wires with clips
Figure 8 shows the process of using the mounting clamp.

Rice. 8 Using a Mounting Clamp
It should be remembered that the mounting clamps are disposable and you should not try to unfasten them. There is only one way out - cut the clamp with a knife or side cutters.
Figure 9 shows the option of open telephone wiring when connecting to a telephone mini-PBX.

Rice. 9 Open telephone wiring option
The cut wires are secured according to pre-made markings.
Horizontal wiring is done parallel to the intersection lines of walls and ceiling or floor at a distance of no less than 100 mm and no more than 200 mm from the ceiling, floor, cornice, plinth, etc.
Vertical wiring is done perpendicular to the plane of the ceiling or floor.
Near doors and windows, the wire should be 100 mm from the edge of the door or window frame. The rollers for fastening the wire should be attached at a distance of 50 cm from one another. Wires can be secured different ways: nails, dowels, fastening clips, clamps, etc. ( rice. 10).

Rice. 10 Trimming excess ends of mounting clamps
On the image 11 Mounting clips for mounting conductors are shown.

Rice. eleven
The television cable is usually laid near the floor or along the baseboards. To attach cables to the place where they are routed, in addition to rollers, plastic or metal staples or nails are used.
Nails can only be driven into wooden walls or baseboards and door jambs. Flat telephone wire can be secured by driving a nail between the 2 strands of the wire. In this case, the nails are driven in 3/4 of their length so as not to damage the wire with a hammer blow.
On the image 12 a universal antenna connector is shown; from its elements you can make a “father” and a “mother”.

Rice. 12 Universal antenna connector
To install it, it is necessary to remove the insulation from the antenna cable to a length of about 30 mm ( rice. 13).

Rice. 13 Strip the insulation from the antenna cable to a length of about 30 mm
When removing insulation, be careful not to damage the cable shield. It needs to be unraveled a little and wrapped back, as shown in the picture. 14 .

Rice. 14 Unravel the cable shield a little and fold it back
It is necessary to remove the insulation from the central core of the cable to a length of about 12-15 mm ( rice. 15).

Rice. 15 Remove the insulation from the central core of the cable
After this, you should screw the connector segment onto the cable so that it provides good contact with wrapped multi-core braided screen ( rice. 16).

Rice. 16 Screw the connector segment onto the cable
A small excess length of the central core should be bitten off at the end of the operation, leaving it to protrude beyond the connector by 2 mm ( rice. 17).

Rice. 17 Excess length of the central core should be bitten off
On the image 18 shows a connector ready to be plugged into a television socket.

Rice. 18 Connector ready for connection
If you need to connect to a standard television antenna socket, its extension should be screwed onto the existing fragment of the connector. In this case, you need to be careful and carefully insert the central core of the antenna cable into the mating part of the connector. When installing the connector, you must ensure that the thin wires of the screen do not accidentally come into contact with the central core. In this case, there will simply be no image on the TV ( rice. 19).

Rice. 19 Make sure that the thin veins of the screen accidentally
did not come into contact with the central core
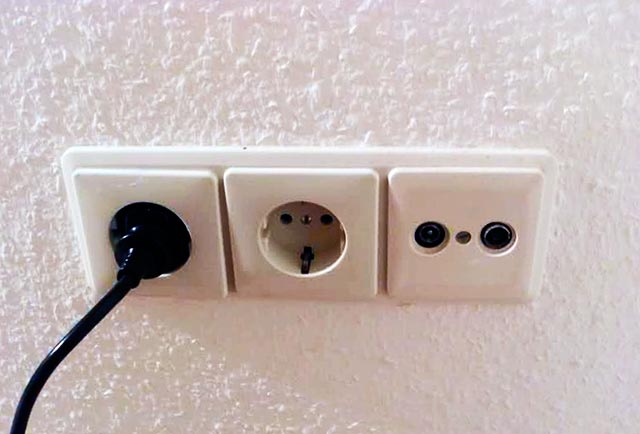
On the image 20 shows the antenna wire connected to the outlet.

Rice. 20 Antenna wire connected to socket
There is a special fastening nut that prevents the plug from falling out of the socket.
On the image 21 shows the installation of clips on the conductor. The frequency of their location depends on the operating conditions and the location of the conductor.

Rice. 21 Installation of clips on the conductor
Such clips allow you to safely secure the conductor without fear of damaging it with a nail, in contrast to installing nails between the conductors of the wire. To obtain neat cuts and correct angles at 45° you will need a sawing box or miter box. It allows you to easily and accurately cut cable channels of different widths.
An ordinary hacksaw for metal will help you cut the cable channel to the required length ( rice. 22).

Rice. 22 Cutting a cable channel with a hacksaw
However, there are cable channels of considerable size that are unlikely to fit into a miter box; in such cases, you will have to limit yourself to careful preliminary marking ( rice. 23).

Rice. 23 Trimming the cable channel in a miter box
TV sockets have a number of features that give them some advantages:
- the housing is completely shielded, which reduces interference and prevents signal loss;
- the presence of a screw contact necessary for connecting a coaxial cable;
- the optimal shape ensures ease of installation and reliable connection without the use of soldering;
- high quality signal isolation;
- has a wide frequency range and low signal loss;
- the presence of two standard connectors (for separate connection of a TV and FM radio).
It is necessary to plan a place for the splitter. This is especially important if you plan to connect several TVs in the apartment. After choosing a location for the future splitter, you need to connect the main cable to it (from the panel to one of the TVs), as well as all additional ones.
During calculations, all descents, ascents and turns of the cable should be taken into account. Be sure to leave a spare cable just in case. It can be put away in the shield.
All television sockets must be terminal, not pass-through. Sockets with one socket are not always suitable; for example, in this case it will not be possible to connect another device (music center, home theater or FM receiver) at the same time as the TV. If you need to connect more than three TVs in an apartment, you need to install an amplifier at the branching point. To do this, you must have a television outlet.
High-quality splitters have connectors in the form of F-sockets (threaded). For safety reasons, it is better not to install splitters on TV plugs.
On the image 24 Rigid cable ducts with covers are presented. An example of installation of a special series of sockets and switches directly on the surface of cable channels is shown.

Rice. 24 Rigid cable channels with covers
Hidden way
Cable wiring is carried out as follows:
- under plaster;
- in a layer of plaster;
- under the floor (bottom wiring system);
- gasket in channels ( rice. 25).

Rice. 25
For this wiring method, wires of the brands APPVS, APN, APPV, APV, VARN, etc. are used.
For hidden wiring, channels and pipes for the cable are used, closed along the entire length to a depth of at least 10 mm. The wires themselves are hidden to a depth of at least 5 mm.
The cable is also laid in grooves hollowed out in the walls and then sealed. First, the wiring is installed, the cable is secured with nails, driving them into the mortar between the bricks (if the wall is brick) or by applying the cable to the wall in several places using alabaster. After this, the walls and ceiling are plastered, and the cable is under a layer of plaster.
Wiring hidden in a layer or under a layer of plaster requires the presence of both horizontal and vertical routing of wires, as well as the presence of recesses, grooves and breakdowns. On the image 26 an insulated ring tip is shown.

Rice. 26 Insulated ring tip
On the image 27 a pin sleeve lug is shown.

Rice. 27 Pin sleeve lug
USE OF ELECTRICAL SKIRTING BOARDS
Electrical skirting boards are long narrow pencil cases with longitudinal partitions. They are made from fire-resistant plastic. The baseboard has a cover that snaps into place with the base. The side walls of the pencil case are springy. Electrical skirting boards are placed on the walls near the floor, ceiling and along the perimeter of doorways.
To prevent the cord of a portable telephone from jumping out of the socket, you can attach it to a wall or baseboard using a rubber compensator.
CORRUGATED CABLE CHANNELS
On the image 28 Corrugated flexible cable ducts for installation and installation work are presented.

Rice. 28 Cable channels for installation work
Corrugated cable channels can be of different diameters and are designed to accommodate various cables and wires ( rice. 29).

Rice. 29
They can be made of low-density polyethylene (HDPE) and self-extinguishing polyvinyl chloride (PVC) - more reliable, but also more expensive. The latter is more fireproof. Cable channels, or corrugations, protect cables from exposure external environment and to some extent from mechanical damage. For more reliable protection from damage, there is a metal sheath for the wires.
In order to pull the cable through the corrugated channel, you must first twist the ends of the wires ( rice. thirty).

Rice. thirty Before laying the cable in the corrugation, twist the ends
Each corrugated cable channel has a special wire so that it can be used to pull the cable through the channel ( rice. 31).

Rice. 31 Corrugated wire for pulling
It is better to perform this operation together, especially if the length of the cable channel and cable is quite long. If there are no assistants, you need to stretch the cable channel and secure its far end with a rope or insulation tape to some stationary object (for example, to a pole).
The twisted ends of the cable must be firmly attached to the wire ( rice. 32).

Rice. 32 The ends of the cable must be attached to the wire
Then you should pull the cable evenly through the corrugation.
When the cable being pulled appears from the nearest hole, you need to accurately measure its required length and only then cut off a piece ( rice. 33).

Rice. 33 Measure the required cable length and only then cut a piece
All the best, write to© 2010
Used to secure electrical wiring various devices, ensuring reliable retention of the cable and preventing it from sagging. A cable fastener is used to secure it to a hard surface or a tensioned cable.
Types of fastenings according to installation method
According to the installation method, fastenings can be divided into two types:
- Open fixation.
- Hidden fixation.
- Special fixation.
Open ones are used in cases where the electrical wire will be fixed to a section of the wall without further covering with plaster, false wall or decorative elements. Such fasteners provide neat fixation, maximizing the improvement of electrification engineering systems.
Concealed fastening elements serve solely to hold the cable. They do not serve a decorative function, since the wire system will subsequently be hidden from prying eyes. The hidden fixation cable mount is cheaper, but when choosing it, you should take into account that total costs installation costs will be higher, since they will be needed Additional materials for plastering or building a false wall.
Open fixation cable holder
There are several designs of fastenings for open fixation of wires:
- Cable channels.
- Clips.
- Staples.
- Installation sites.
- Insulators.
Cable channels are the most expensive, but at the same time neat and attractive way of attaching wires. This design is a rectangular hollow tube with a removable front panel. First, the cable channel is fixed to the wall, after which the wires are inserted into it. Externally, only the elongated tube-shaped neat box remains visible. This design not only hides the electrical network, but also provides additional protection from mechanical damage. This method is chosen for arranging residential and commercial premises– offices, shopping centers, shops, gyms, etc.
Clips used to secure a cable that is passed through a corrugated pipe. This method is more suitable for technical rooms where aesthetic appeal is not so important. The clip provides reliable fixation of the corrugation, preventing it from dangling or bending. When choosing a clip-type fastening, you must pay attention to its size, since it may be incompatible with the diameter of the corrugation. The clip is fixed to the wall using.

Staples This type of fastening is quite simple to install. The principle of its use involves fixing the bracket to the wall or ceiling using a nail or screw. In this case, the fasteners are not pressed to the end. After this, a wire is inserted under its protruding cap, and the bracket is finally attracted to the surface. This design implies tight pressing against the wall, therefore, according to safety regulations, the combination of brackets is allowed only with multilayer wires that have at least double insulation. Typically, cable brackets are used for communication systems or cable TV.

Mounting sites are a specialized fastening element. They allow installation to a smooth surface without piercing it with a nail or screw. The pads are simply glued, which allows you to quick installation, even without having a specialized tool such as , or . Such fastening will be appropriate for tiles, tiles, furniture and other smooth surfaces that need to be saved. Before gluing the pad, it is necessary to degrease the sticker area, which will ensure maximum reliability. On inside pads, you need to remove the protective tape like double sided tape, resulting in a sticky surface being exposed.

Insulators They are a ceramic or plastic barrel that is attached to the wall. The wire itself, pre-twisted into a bundle, is fixed on it. It should be noted that this method, although it looks rather repulsive, provides quite high level security. The cable practically does not touch the wall, and the barrels themselves are made of non-conducting material. This fastener is used on wooden buildings. It can be found in bathhouses and houses made of timber. It is also chosen when decorating the interior in retro style, since this installation method was the only one known on initial stage electrification and was practiced until the 60s of the last century.

Hidden fixation fastenings
Several types of fastenings are used for hidden fixation of electrical cables:
- Dowel clamp.
- Dowel tie.
- Clamps.
- PP fastenings.
Dowel clamp- This is a very cheap and easy-to-use mount that provides fairly reliable fixation of the wires. Its design is a plastic rod bent in half, which bends around the wire and is pushed at the ends into a hole made with a drill in the wall or ceiling. It is used for fastening to brick or concrete surface. It is worth noting that the degree of fixation of the clamp is rather weak, but it can be combined with wires of various sections. Despite the rather flimsy connection, this type of fastening is quite practical, since in most cases it is used to fix electrical wires in grooves, where everything will be plastered later. The distance between dowels should be up to 60 cm.

There is also more complex design dowel clamp with tie. It allows you to first secure all the dowels around the perimeter, and only then insert the wire and tighten it using a special strap. The advantages of this type include the ability to simultaneously hold a whole bundle of cables. The dowel with tie has a spacer, so it can withstand a load of up to 8 kg. Its installation is allowed in concrete and brick walls.

Cable holder in the form clamp a fairly common type of fastener. They are a dowel with a clamp held down by a screw. Unlike conventional dowel clamps, the clamp allows for dismantling to install a new cable in the old mount. A metal screw is used to space the clamps, which adds strength to them. When choosing such a clamp, you need to ensure that the diameter of the clamp matches the thickness of the cable.

PP fastening It is a plastic dowel with side horns that press the cable to the wall. Use of this type is only possible with well-insulated wire. There are several types of PP dowels designed for different cross-sections of electrical wires. If necessary, the connection can be dismantled; to do this, you just need to remove the spacer wedge from the dowel and pull it out by the horns.

Fastenings for special fixation
A cable mount with special fixation is used for laying wires in difficult conditions, in particular for connection with a tensioned cable. To do this, you can use specialized hangers or regular ties. The hangers provide rigid fixation, preventing the wire from chafing when exposed to wind. The suspension will not allow the wire to contact the cable, which eliminates the transfer of charge in the event of damage to the insulation.

Regular couplers Same effective method fastenings, but only in cases where the cable is not subject to constant swinging, since they do not allow for stationary retention. Ties can only provide a tight connection, so if the insulation is damaged, it is likely that the charge will be able to transfer to the cable.

How to get out of the situation if there is no factory fastening
The factory cable holder is not the only way to secure wires. In the absence of specialized materials, it is quite possible to make do with improvised means.
The most in a simple way is to use a cable cut with two cores. It is necessary to cut it into pieces about 7 cm long. After this, you need to find the center of each piece and pierce it with a screw. Fixing homemade mount into the wall, and applying the cable to it, you just need to twist the ends of the wires, thereby ensuring retention. This method does not look aesthetically pleasing, but if the wiring is hidden in the plaster or behind drywall, then it will do just fine.

Instead of wires, it is quite possible to cut strips sheet metal, but for this you need to have . Such strips will provide a more attractive hold, without protruding tails. As a material for creating segments, you can use not only sheets of tin, but also completely improvised materials - cans, beer and coffee cans.

When installing the cable, use various ways fasteners It all depends on the specific conditions, financial capabilities and tastes of the owners of the premises. When performing this work, everything must be securely fixed, the insulation is not broken, and appearance corresponded to the environment and was favorable.
Types of fastening cables and wires to the wall
The materials from which walls and ceilings are made can have different densities and structures. The cable, depending on the task at hand, can be completely or partially “hidden” in grooves (groove recesses), plastic pipes, corrugated or special trays. And if this is not really necessary, you should secure it more carefully.
All this can be done using a wide variety of devices. Let's try to take a closer look at the most common types of fastening.
General rules for cable installation
When laying cables on walls or ceilings, it is recommended to follow the following rules:
- When using screws, dowels and self-tapping screws, try to tighten them all the way. Otherwise, the protruding cap may damage the insulation.
- The maximum distance between fastening points should not exceed 50 cm, and at bending points (turns) it can be reduced to 5 - 10 cm.
- Laying is carried out without humps, evenly and preferably in a straight line (horizontally or vertically).
- If a margin is provided, it should be made less noticeable.
- When laying cables hidden in a groove, they are laid so that they do not interfere with further finishing of the walls.
- If you will have hanging or stretch ceiling, there is no need to make grooves under them.
- The main tools that should be used during installation are a drill, a hammer drill, a screwdriver, screwdrivers and a hammer.
Methods of fastening to walls made of various materials
Depending on the type of surface, the method of fastening is selected.
- Soft and thin . These include walls made of foam concrete, aerated concrete, fiberboard, plastic, plasterboard, etc. Simple fasteners will not hold here. Will be more reliable and stable special devices, in which the end or middle part is made expanded. These can be butterfly dowels, umbrellas or dowels with a drill.
- Dense . These are wooden, gypsum, plastered surfaces, OSB and chipboard. In this case, use ordinary self-tapping screws or simple nails. If the screws are screwed in with with great effort, you can pre-drill holes with a smaller diameter.
- Solid . Brick and concrete walls are the most common materials in this category. Here even in advance drilled holes It will be problematic to just screw in the screws. It is in this case that dowels should be used. Most often, they consist of a plastic cap and a screw. Holes are drilled in the wall. For walls made of concrete and brick, the diameter of the drill must match the diameter of the dowel (drill 6 mm - dowel 6 mm). For less dense surfaces, the drill should be 1 mm thinner (5 mm drill - 6 mm dowel). Caps are inserted into the holes, the end of which should not protrude from the surface. Then the fastener itself (clamp, plates, etc.) is attached to them using screws.
Cable channels of various sizes
Cable duct is a very common method of fastening wires and cables in an open way. According to many electricians, it is the most in a convenient way fastenings The cable channel is made of galvanized steel, flame retardant plastic, aluminum and is a simple U-shaped structure. Wires are placed in this technical box and covered with a one-sided or double-sided cover. They differ in manufacturing materials, colors, sizes, design (which cover), moisture protection, and also in design:
- floor;
- main lines;
- baseboard;
- parapet.

Types of cable channels
When installing a channel cable, first mark it on the wall, then fasten it using self-tapping screws, dowel nails or " liquid nails" The video shows how to do it correctly PVC installation boxes
Fastening with clips
These fasteners are quite popular when laying open cables. The clips look pretty neat after installation. They can be of different sizes, shapes and be metal or plastic,
A simple version looks like a bow, on both sides of which there are holes for dowels or screws. good and simple design, but there is a small drawback - for installation you need to drill two holes. This slightly increases installation time.
Metal clips

Made from metal strip. To install, first “wrap” the cable with it, align the holes and secure it to the surface. Can be used on the wall and ceiling. For the latter, they are inconvenient only because you need to drill a lot of holes.
Mainly used for installation of corrugated cables for hidden and external gasket. Corresponding clip sizes are available for different pipe diameters. On concrete walls they are mounted using dowels, and on wooden surfaces- using ordinary self-tapping screws.

The installation can be performed for one cable, or combine several pieces to secure a bundle of wiring. The design of the clips allows them to be assembled into a single block. Each side has locks (special grooves), with their help they produce reliable connection clips with each other. The layout using these elements is neat and even.
Self-adhesive clip

Used for fastening cables or wires various shapes, can be made in plastic or metal form. The surface where it will be attached must be cleaned of all dust and dirt. At the clip on back side There is one-sided adhesive tape. This type of fastener is used to secure cables to plastic panels or furniture. There is no need to drill holes in expensive or brittle materials.
Clips with nail
They are made in the form of a plastic bracket, on the side of which there is a hole for a nail. They can be very different in shape. Used for open installation on wooden and similar density walls. In the photo above.
This fastening is very fast and convenient. It is often used when it is necessary to route telephone, television and other small cross-section cables along the baseboard.
Metal bracket
Used for installing cables in metal sleeves. They have one or two ears with a hole for fastening. Sizes may vary. They are selected based on the diameter of the metal sleeve. Clips are good for holding bulky cables. They are easy to install and remove. In the photo above.
Dowels
The use of dowels is justified by their ease of installation, versatility of use and low price. They can be used both hidden and open installation on walls and ceilings made of hard materials.
Dowel tie
Made from non-flammable plastic. It is a convenient fastening element. Used for quick installation of open or hidden gaskets.

The coupler can have a detachable or permanent lock. The first option allows, if necessary, to change the number of cores. Installation is the same as for conventional dowels.
Screeds with platform
It is a dowel with a thread and a platform (square or rectangular) to which a tie is attached. These fasteners (KSP) are convenient for quick installation. Made from non-flammable plastic.

KSP - screed with mounting platform for dowels
Initially, a dowel is installed, onto which the platform with the screed is screwed. After this, the wires are attached. Installation is suitable for wooden, brick and concrete walls and ceilings. With the help of such platforms you can attach several cables at once.
Dowel clamp
Used for quick fastening of one cable. The clamp is very easy to install. Using a hammer drill (if the wall is concrete), a hole of the required length and diameter is drilled. After this, the clamp is carefully opened, the cable is placed in it and the sharp end is inserted into the hole. The clamp will not fall out of it thanks to the double-sided notches on its sides. 
The shape of the clamp must match the cross-sectional shape of the cable. Basically it is either round or rectangular. These installation elements are low cost and reliable in installation.
Dowel type bases
The dowel-type (BD) base for screeds is made of plastic. “Two in one” - like a self-tapping screw and a dowel. There is a hole in the head into which a tie is inserted to tighten the cable.

Installation is very simple. A bandage is hammered into the prepared hole. The screed is installed and the wiring is laid in it. Then tighten.
Construction mixture
Used for hidden cable laying in wall and ceiling grooves. For this they often use gypsum mortar. This type of installation has a special name - “freezing”. There is nothing complicated about this method. An alabaster mixture is made and the cable is tacked in the groove in places evenly spaced from each other. This should be done promptly, since the plaster sets quickly enough.

Plaster solution for fastening wiring
This “freezing” is well suited for installation of a single cable in a groove. But this method is also used as an additional fastening of several cables, to secure already installed brackets, dowels, clamps, etc. After all this, the groove channels are filled with plaster mortar.
If the laying volumes are large, frequent preparation of the solution and fixation of the cable significantly reduces the installation speed. But in many cases this is completely justified.
Insulators
In most cases, fastening wires to insulators is used for retro or decorative purposes. This open installation method is used for installing electrical wiring both in the house and in the bathhouse.

Retro wiring, mounting on insulators
The barrel is attached to the wall with a screw or nail and a pre-twisted wire is attached to it. You can twist it yourself or buy it already twisted.
Homemade fasteners
It often happens that there are no suitable brackets, pads or clamps to secure the cable. All these elements can be made yourself. Of course, in terms of their design they will most likely be inferior to factory elements, but in some cases this is not so important. And if the hands grow from where they need to, then the fasteners can be quite a worthy replacement branded fasteners.

Homemade wire fastener
A wide variety of materials can be used to make installation elements. These can be single-core or double-core wires, plastic, galvanized sheet and much more. Here are some of the DIY options.
- We cut two-core pieces of wire; the length is selected depending on the wire being attached. We thread a self-tapping screw into the middle of each.
- We wrap the same, but single-core pieces around the head of a dowel or self-tapping screw.
- We cut tin strips. We punch a nail or self-tapping screw into the middle.
The advantages of such homemade fasteners are as follows:
- ease of manufacture and installation;
- there is no need to search for fasteners and buy them in stores;
- the ability to use (install and replace) homemade products repeatedly;
- You can attach one or several wires at the same time.
When installing wiring, one of the tasks is correct fastening cable. It shouldn't take much time, but it should be reliable and safe.
Fasteners for the cable are selected depending on the method of laying it and the base material to which the wire will be fixed. Let's start with choosing the material.
Depending on the type of material
All bases are divided into soft and hard, but there are also thin and brittle ones. Soft bases include wood, and plaster can also be included here. If you need to attach the cable to these bases, nails or self-tapping screws are most often used. The process of installing fasteners is known to everyone and does not take much time.

Rigid foundations include concrete, reinforced concrete, and brick. Fasteners with dowels (dowel-nails) are installed in such bases. The process of installing dowels is longer - you have to first drill holes and insert plastic stopper, only then install the fasteners. But in such materials this is inevitable. Exception - brickwork. If you place fasteners in a seam, you can use nails. But the fastening in this case will not be very reliable.
Brittle bases. This category includes drywall and building blocks from the lung cellular concrete any type. For these bases there are special dowels that have large area stop than standard ones. Also for light cellular concrete, there is fastening with glue.

Special butterfly dowels for installation in drywall or foam concrete
Thin bases. These are plastic, fiberboard, chipboard and other similar materials. If you need to secure the cable on such a surface, use thin nails and staples; if there are a small number of conductors, use adhesive-based fasteners. Usually these are small plastic elements with adhesive tape with a protective strip attached to the back side. During installation protective strip is removed, the fasteners are installed with glue. It will not withstand heavy loads, but you can organize the wiring harness that goes to the desktop.
Nails, screws or dowels?
Most standard fasteners can be fixed either with nails or self-tapping screws, or with dowels. In accordance with the type of material, its strength and density, choose the type of fastening elements.

There are a few exceptions. For example, U-shaped brackets from construction stapler can only be installed in soft bases or chipboards, and dowel clips are not suitable for them.
Installation rules
Regardless of the type of fastener chosen, it is worth following simple rules for its location. In this case, the cable fastening will be reliable.

This is all general rules cable fastening. This is not a dogma, but their implementation makes the work easier and guarantees normal results.
Open installation fasteners
At open method gaskets try to use the least visible types of fasteners. Such cable fastening cannot be completely invisible, but it may not attract attention.

We must try to make the cable invisible...
Staples from a construction stapler
If you have a stapler on your farm, you can fasten a small-diameter low-voltage cable easily and quickly. There are special U-shaped brackets on sale. They are designed precisely for these purposes. There are two types:

There are also special cable cleats with a plastic housing (pictured on the right). They are more expensive, but due to the plastic housing there is less chance of crushing the wires or damaging the insulation.
The brackets can be made of galvanized steel or stainless steel. The legs can be regular or pointed. The second option fits easier even into dense substrates such as chipboard. As you understand, this fastener is not used for serious conductors, but for wired internet, telephone, etc. very convenient.
Staples and clips
Fastening cables of different diameters is most often done using staples and clips. They are made from metal and especially durable plastic. Plastic clips are used to secure wires indoors; metal clips can also be used outdoors. The metal can be galvanized or painted, but it is better to find ones made of stainless steel for outdoor use.

The most inconspicuous of the clips are small plastic clips with nails (upper left corner in the photo). They are used if it is necessary to stretch one thread of cable. The work is progressing quickly - I put a nail in place and drove it in. The remaining staples are more noticeable, but stronger and stiffer wires can hold them.
There are also plastic clips for attaching the corrugated protective shell to the wall. There are them in the form of several rulers, and there are one at a time. So you can secure both a single conductor and a group of cables.

The same clips can be used to secure cables suitable diameter. For very hard ones, it is better to use metal staples, and for conductors of medium hardness, these are also suitable. Clips with a lock are good for these purposes (pictured below on the left). They can also be used to secure cables to the ceiling.
Based on dowels
There are cable fasteners based on plastic dowels. The plastic used is heavy-duty, so the area of use is not limited - it can be installed in both brick and concrete walls. There are several types:

All these types of fasteners are inexpensive, but do their job well. They are even better to use than with metal nails - there is less chance of damaging the insulation. Since they are inexpensive, they can be used to secure cables in a groove.
Fastening the cable in the groove
When laying hidden in non-combustible foundations, the cables are laid in a special groove cut into the wall. These grooves are called grooves, and the process is called gating or gating. In order for the cable to stay in this groove and not fall out, it must be secured in some way. There are several ways to fix:

Features of combustible substrates
If hidden wiring made in combustible walls - wooden, frame, etc. - according to requirements fire safety, they must be laid in a non-flammable protective shell. The non-combustible casing is either corrugated hoses made of non-flammable plastics, or all-metal boxes. When using corrugated hoses, the fastening method is the same as when fixing the cable. The difference is in the diameters of the required fasteners.

When using metal boxes, they are fixed in the wall, and then cables are laid in trays. This method is most often used in frame housing construction, because the blocking of channels in wooden walls significantly reduces their thermal insulation properties. In addition, a wooden house constantly changes its size and rigidly fixed boxes can become a problem. When laying wiring in wooden houses more often they use open laying in cable ducts or do.
Large bundles of wires
Often when installing electrical wiring it is necessary to lay large quantity cables To minimize the time required to attach large bundles of wires, you can:

A combination of these methods can also be used. When using tape, it is attached along the edges. Due to its rigidity, it holds even hard conductors or corrugated shells well. If necessary, you can install fasteners between the cables, but you must be careful not to damage the insulation.
How to secure cables to the ceiling
If there are not very many cables on the ceiling, you can use ordinary fasteners - clamps, ties, clips, homemade clamps, etc. But they are inconvenient to install - you have to work for a long time with your hands raised, and even hold the tool and cable in them. Hard work.
If the ceiling is suspended, the cables can be secured to hangers. In this case, use the usual plastic clamps(tightenings) that secure the wires above the level of the future ceiling. In order not to damage the sheath or even the cores, it is better to lay the wires in a protective corrugated hose. This will also make the wiring safer from a fire safety point of view.

Large bundles of cables on the ceiling are easier to lay in trays. They are available in wire and metal (solid metal and perforated). In apartments and houses, wire ones are usually used. They cost and weigh less. They are attached to the ceiling with adjustable hangers.

This type of cable fastening also requires the installation of hangers, but the number of fasteners is much less. Another advantage of this method of laying cables is that it is easy to replace or lay new ones if necessary. The downside is that the trays are not very cheap.
How to organize bundles of wires
More and more equipment is appearing in our homes, and it all has wires. There are often about a dozen wires running to the desktop. To prevent them from getting confused, it is better to organize them. For this there is different types plastic platforms. Some collect wires into bundles, while others, on the contrary, allow each thread to be routed separately.

Some of this cable fastening goes with self-tapping screws or nails, and some is based on Velcro. The second option can be safely installed on furniture. The adhesive adheres well to a laminated or varnished surface and there is no need to make holes.
Attaching to poles and walls using aerial installation method
When laying cables aerially, they must be secured to poles, walls of buildings and other objects. There are fasteners for self-supporting and conventional cables. Ordinary cables cannot be suspended between poles without support - they will not withstand the load and will break. For such conductors, a cable is stretched between the supports and the cable is attached to it on hangers. In this case, the load falls on the cable, and not on the cable. There are any ways to attach a cable, but the most common is to make a loop around a pole and secure the end. For intermediate posts you can use any affordable way- two separate cables, a driven hook, a suitable bracket.

The cable is fastened to the supporting cable using supporting clamps. They come under cables different shapes, sections. It is also possible to use ties made of UV-resistant plastic. Sometimes, to save money, the cable is screwed in with pieces of wire, twisting it. This method is the least reliable - under heavy loads, the twist may not hold the wire, it will sag and break.

For self-supporting cables, the fastening usually consists of two parts - brackets or clamps that are attached to the wall or pole, and clamps that cling to the installed bracket and hold the cables. Clamps are used only on poles. They are especially convenient on reinforced concrete pillars - there is no need to drill holes, which is very difficult.

There are several types of brackets. They are selected depending on the type of base (wooden, steel, concrete, aluminum) and the planned load. By purpose there are:
- branch - for installation on poles and supports in places where the route turns;
- intermediate fastenings - for installation on poles and supports along the route without turns or branches;
- facade - for installation on external walls.
Suspensions or clamps are attached to the brackets. They are selected depending on the type of cable, its cross-section, etc.

In most cases, when installing electrical wiring, it is hidden under a layer of plaster. This method is safer and more reliable: after all, wires embedded in the wall are reliably protected from mechanical stress, moisture and corrosion. This method of laying also has disadvantages - it will be impossible to move it to another place, and it will be difficult to determine the location of the cable in the absence of a diagram.
What comes first, plaster or wires?
When to do the electrical wiring - before or after plastering? - This is a dispute between an electrician and a plasterer. It is more convenient for everyone to first complete their part of the work without any interference. But if you do the repairs yourself, or one technician does it, then the procedure will be as follows:
What's your opinion, what comes first?
ElectricsPlaster
- The walls are cleared of old decoration. Lines are drawn on them along which the wires will pass, the installation locations of socket boxes and junction boxes.
- Under thick wires and corrugation, grooves (grooves) are laid along the entire length to exit points: switches, sockets. The use of corrugated channels is mandatory when the walls are made of combustible materials. They are also used to make it possible to pull out and replace the wires. Laying cables in plaster is allowed without corrugation.
- Thin wires can be laid directly over the surface without gating, if the layer plaster mortar will hide them.
- Next, the electrical wiring is laid and fixed to the wall.
- The walls are plastered with or without beacons. The ends of the wires protruding from the channels can be wound up and covered with film.
- After the walls have dried, use a hammer drill with a crown to drill out spaces for sockets, distribution boxes and switches. This is done after plastering, because otherwise it is not clear to what depth they will be installed.
- Then it's done final finishing- wallpaper or decorative plaster. After this, sockets and switches are inserted.
But there is one point in favor of the fact that all electrical work should be carried out after the walls are plastered. If grooves are laid in the walls, then it is much easier to do this over a layer of plaster, for example, on the second or third day, when it has not yet completely dried. Drilling concrete or brick will take longer, and there will be more dust.
Electrical installation rules
Compliance with generally accepted building codes and requirements - the key to the safety and durability of electrical wiring. Therefore, before preparing wall stubs for cables, you need to familiarize yourself with the rules for electrical installations (PUE). The location of the wiring is determined by the following points:
- 15-20 cm higher than baseboards;
- 20-30 cm below the ceiling and beams;
- from the corners at a distance of 10 cm;
- in the area of heating pipes, gas pipes with an indentation of 50 cm.
This also applies to television cables.
It is better to purchase wires in coils. In this case, the cables will be solid, and there will be no need to lay spliced and insulated connections under the plaster.
Electrical wires are laid hidden in walls, floors or corrugated pipes. When laying in a non-combustible surface, including plaster, the absence of corrugation is allowed.
According to the PUE, aluminum wires can only be used with a cross-section of 16 mm2 or more. Smaller sections - only copper. This is due to the fact that aluminum has higher electrical resistance than copper. Under heavy load, it heats up and can melt.
Depending on the installation conditions, the following types of wires are used:
- VVGng: fire-resistant, non-flammable, for laying under plaster;
- VVGng-LS: mainly under plasterboard, for protection against mechanical influences it is placed in PVC boxes; its analogue can be the gray cable NYng-LS with a layer of rubber, more expensive, easy to install, not very convenient for grooves, since it has a round rather than flat cross-section;
- PVA: stranded, white, can only be used as an extension cord or when connecting electrical appliances directly to an outlet.
In old wiring, a 2-wire cable is used, and in new wiring, a 3-wire cable is used. Chandeliers with two-key switching require 4 wires.