Options for restoring chairs. Repair of wooden chairs: elimination of minor defects and replacement of upholstery
Carefully inspect the wooden chair from all sides. To fix it, you will need to disassemble the piece of furniture into its components. Remember its design. It is best for a novice craftsman to photograph the chair from all sides, so that later he can know exactly where and what part is attached.
Turn the chair over and look at the fastening of the soft or hard seat. It can be secured with bolts, or it can simply be inserted into the grooves. Pull it out and set it aside.
Separate the legs and remaining crossbars of the chair from each other. If there are screws anywhere, remove them. Disassemble the remaining connections using a hammer and wooden block. Apply all blows to the chair only through a block so that you do not form dents or chips on the wooden surface.
Clean all grooves from any glue residue. Use a screwdriver, an awl and sandpaper. Examine the wooden spikes. If any of them are damaged, remove them with pliers. Lubricate the recess with PVA wood glue and insert a new one. Clean the remaining spikes with sandpaper.
For repairs of chairs, use a joiner or furniture PVA glue. They have special additives that after drying the adhesive to maintain the elasticity of the connection. Operation During the chair, the tree will not break down.
Chair assembly
Spread newspapers on the floor or plastic film. Thickly coat the grooves and tenons with PVA glue and assemble the chair structure. Press each joint firmly so that the adhesive comes to the surface. First remove the excess with a knife blade, and then immediately wipe with a damp cloth.
If the groove is loose and became too large for the inserted spike, will drive the wooden stick, a toothpick or a wooden skewer, fluff them with glue.
Secure the assembled frame of your wooden rarity tightly with a rope and leave to dry for a day or two, depending on the ambient temperature.
Seat update
Bye wooden frame dries, take care of the seat. Remove the upholstery from the upholstered seat. Look at the condition of the foam. Remove it if necessary. Cut out a new piece of foam and secure it to the seat using double sided tape.
Place the old upholstery on newspaper and trace it with a pen. Cut out the pattern and transfer it to new material. If the fabric is thin, make a backing for the foam from another dense material. Assemble the seat. Cover it with new fabric, securing it with reverse side parentheses from furniture stapler.
Renew a dried out wooden chair frame. Take off the old one varnish coating using a sander and sandpaper. Fill any old chips with wood putty. Prime the surface, and after drying, apply several layers of varnish with intermediate drying. Place the seat back into place.
Over time, even the most reliable and high-quality wooden chairs fail. The most common problem is loose stool. As a rule, it can begin to wobble if the connection comes unglued in some place. Even a non-professional can repair chairs with his own hands.
Over time, wooden chairs lose their luster and become loose, resulting in them requiring repairs.
The main feature of the old wooden chairs is that they consist of many parts small size, which are connected to each other with glue. Over time, wood can dry out and shrink. In this case, the joints often diverge completely or become loose. Also, the connection may come apart due to the fact that the glue has dried out. At the same time, all elements of the chair remain in full working order, so repairing it will not be difficult.
Basic repair rules
The easiest design to repair includes 4 legs, which are inserted into grooves in the lower surface of the seat, which is one solid board of sufficient thickness. Stools are made using the same principle. In this case, it is enough to remove the loose leg and clean out the glue from the recess so that the surface becomes clean. After this, you need to apply a portion of new glue to the leg and insert it back into the groove.

More complex design They are chairs with crossbars between the legs or a drawer underneath the seat. This design contains a large number of tenon joints that are fixed with glue. In order not to damage the parts of the chair, you need to disassemble it very carefully. If the glue seam diverges only in one place, then it is not necessary to completely disassemble the chair. You can make a hole in the damaged area using a thin drill with inside(to maintain aesthetic appearance) and pour glue into it. It is possible to use a syringe to inject glue.
If the trunnion (the tenon on the top of the joint leg) is damaged, you can use a piece of paper to seal it. In this case, the strip of paper must be folded several times so that it is no wider than the pin. This will seal the connection. It is better to coat the paper with glue so that the connection with its use is stronger. After making such a unique bandage, you need to glue the leg into the socket in the seat.
Repairing a chair with curved legs must be done especially carefully. It is recommended to glue the legs one by one. If you try to glue all the legs at once, it will be quite difficult to get the chair in the correct position.
Features of work

If the axle is very dry, then you need to insert a wedge into it. First, the part is removed from the groove, then its upper edge is split with a saw, and a wedge is inserted into the resulting gap. It should be thin and not very long so that it protrudes just a little from the surface of the trunnion. Best used as a wedge wood chips. As a result, the trunnion will be expanded and the connection will become more reliable.
If the pin has dried out, but is held firmly by the glue, then getting it out of the groove can be quite difficult. In this case, you need to try to move the parts of the chair as far apart as possible and inject glue into the resulting space. However, it is recommended to remove the leg from the groove.
You may need to soften the glue to release glued parts. If you are repairing a chair with slats between the legs, even strong seams will need to be separated. It is recommended to use steam on a strong adhesive joint. Steam is effective even for properly closed adhesive joints. To create a directed flow of steam you will need a thin rubber hose (6-7 mm in diameter), 2 pieces of metal tube suitable diameter, cork and teapot. You need to put tubes on both ends of the hose, insert one of them into the hole drilled in the cork, and the cork into the spout of the kettle. Such a simple device will allow you to direct steam to the seam.
Before steam treatment, it is recommended to place a chair as close to the stove as possible; access to the treatment area must be provided. After cooling, the steam will turn into water, which it is advisable to remove. It must not be allowed to get on others. wooden parts or upholstery. It is necessary to carry out steam treatment with gloves. You need to put at least one on the hand that will hold the hose. This will protect you from exposure high temperature. Typically, 1-2 minutes of steaming is enough to separate the wood elements. They can be re-glued only after complete drying.
Repair of chairs with fixed corners

Methods for repairing frequently occurring chair destruction: 1 – destruction of the leg; 2 – destruction of the king; 3 – replacement of the damaged section of the leg; 4 – replacement of the tsar pin; 5 – elastic crack screed with tenon reinforcement with an insert; 6 – sealing a wide crack with a bet.
Repairing chairs in which the drawers at the bottom of the seat are connected to the legs with a tenon joint is quite labor-intensive. Such designs provide additional corner fastening elements - chocks made of solid wood. They can be in the shape of a trapezoid or triangle.
With such a connection, separating 1 adhesive seam is usually not enough. It is necessary to disassemble at least 1 corner, and in some cases, the entire frame. Do not use force to disconnect such a connection. In this case, the tsar pin can be damaged or completely broken off. You can glue the parts by steam softening the glue. When gluing back, it is very important to maintain the angle. Small wedges can be inserted into the tenons on the sides to seal the joint.
In some cases, it is necessary to strengthen the chair frame.
This may be necessary if the seat panel is not firmly and securely fastened to the frame. To strengthen such a structure, it is necessary on the inside of each corner connection screw onto a triangular or trapezoidal chock. Over time, under high loads on the chair, even such strengthened joints can become loose. In this case, you will need to tighten the screws or replace them with new ones.
Sometimes you need to replace the lumps. This is necessary if they are cracked, splintered, separated or split. The new parts must completely match the old ones in shape. In addition, it is very important to fit lateral surface chock under the frame. If the new chocks do not match the old ones, then the entire frame may be warped. The chocks must first be glued inside the frame, and then additionally secured with screws.
After gluing the frame, it must be secured with clamps. It is not recommended to create very high pressure, so as not to squeeze out too much glue from the seams. Tensioning will take about 12 hours. It is very important to comply correct angle for the chair and prevent it from distorting. The tension pressure should be uniform.
Thus, repairing chairs with your own hands can be done even by an inexperienced craftsman, who will adhere to accuracy and precision in his work. Do not apply too much force to the frame of the chair, as this may damage its parts. Some adhesive joints may require steaming to release.
Sooner or later, every person needs to buy new furniture, this applies not only to large interior items, but also to chairs. But before you go to the store, you need to think carefully, because perhaps there is a lot of furniture in your home that you can update yourself and transform beyond recognition. In addition, prices in modern salons and markets are often inflated. For example, restoring chairs with your own hands is an ideal way out of this situation. Today we will tell you how recovery occurs old furniture How to act step by step to achieve a good result.
The main advantages of furniture restoration
This option for restoring interior items has many advantages. The most obvious ones include:
- This process takes very little time, especially if you strictly follow the instructions.
- Transforming old furniture allows you to save a lot on buying new products.
- Restoring chairs allows you to get completely new, unique things that cannot be found in any other home.
Chairs, like other pieces of furniture, tend to wear out quite quickly. Even the highest quality products are subject to breakdowns and aging, especially when a person accelerates this process through his actions. This can be serious damage caused by negligence and too intense use. The seats suffer the most as they bear the maximum load.
To restore worn-out items, it is not at all necessary to have extensive experience in the field of repair and decoration. It is enough to familiarize yourself with several master classes on painting, upholstery, decoupage, decorating, and remaking old furniture, and you will succeed.
Important! This experience will certainly come in handy in the future if you decide to reupholster an old sofa or reupholster an armchair. Using this approach, you can breathe new life into any product instead of sending it to landfill.
In addition, this idea has another huge advantage: you will not only restore old chairs yourself, but will also experience maximum positive emotions from the implementation of your own creative idea.
Features of updating a chair or chair
Remember that the method you choose to restore a chair with your own hands directly depends on the nature of the damage. There are three main types of damage:
- Upholstery wear.
- Problems with the back, a broken leg, seat or other wooden part.
- The paintwork on the wooden surface has become unusable.
Based on this, we can conclude that the repair and restoration scheme is selected depending on where on the furniture the problem arose:
- Often it is enough to connect loose parts or replace a connecting part that has failed over time. This applies to tenons and grooves.
- The expansion and wear of these very elements leads to the fact that the chair slowly begins to loosen and becomes completely unstable. In such cases, the repair consists of complete disassembly furniture with tenon extensions. You'll have to work hard here.
- If the problem concerns wear paint coating, then it is easier to eliminate it. If the varnish is cracked, just remove it, sand the surface and apply a new layer of paint or varnish.
- Reupholstering old chairs can also be called a simple task, because you just need to replace the torn or worn fabric with new material.
Now we will consider the most popular restoration options step by step.
Step-by-step reconstruction of an old chair
Before restoration old chair do it yourself, you should familiarize yourself with the sequence of performing this work. If this is your first time encountering this, then study the short master class that we will provide below.
Preparation
If you approach the work correctly, you can completely restore the furniture yourself, even if the upholstery is torn, the legs are loose, or the paint or varnish is completely or partially cracked.
The first step is to prepare a minimum set of necessary materials and tools:
- Materials: self-tapping screws (screws), upholstery fabric, staples for staplers, foam rubber, glue for wooden furniture, varnish or paint.
- Tools: hammer, screwdriver, scissors, two different screwdrivers, clamp, brush, sandpaper, stapler, small mallet.
After this, prepare the chair: clean it of dust, dirt, and wash it thoroughly.
Disassembly
Naturally, before you update an old chair with a backrest with your own hands, it must be completely disassembled. As soon as it dries, you can start working:
- First of all, the back and seat are removed, only then the frame is disassembled.
- When knocking out parts, use a rubber mallet to avoid damaging them. Work as carefully as possible.
- If the chair is assembled with screws or tenons, then it is enough to unscrew them.
- Fold all the parts carefully or mark them in some way so as not to confuse them later.
- If it's left somewhere old glue, in particular epoxy, then apply moistened rags or sponges to these places. Any unwanted old rag will do. Let it sit on the parts until the glue is completely wet, then you can scrape it off with a knife. A dull old knife will do the job.
- After the old glue is removed, let wooden elements dry a little.
Important! If epoxy resin got into hard to reach places, then you can use steam instead of water to remove it.

Reconstruction
So, preparatory work completely completed, you can now proceed to the process of restoring the old chair.
Do it in this order:
- First, get rid of possible cracks and chips using putty.
- Sand the wood thoroughly with sandpaper until the entire work surface is perfectly smooth.
- Carefully inspect all the details. If the legs are loose, then solve this problem now. Use a wedge, drive it in from the end of the axle or wrap the axle with a bandage, then carefully coat it with glue.
Important! If you were unable to secure the legs using the suggested methods, then try using another method that is more effective. Drill a thin hole at the joint and pour glue into it using a syringe. To secure the glue and make the connection more reliable, place some weight on the seat and wait until the glue dries.
- Then restore the seat if necessary. It can be wooden or made of soft fabric. It all depends on the design of the furniture itself.
- As for updating the frame, this can be done by restoring the paintwork or using the decoupage technique.
Important! If desired, you can sew new covers to not only update the chair, but also make its design more interesting and attractive.
Ideas for decorating old chairs
The refurbishment of old chairs does not end here, you can different ways decorate them. Below we present options on how to restore in an interesting way vintage interior items and decorate them.
Decorate an old chair using one of the suggested options:
- Decoration with fabric. This decoration option is considered the simplest, because it’s enough just to drag the old soft spots or sew covers. You can use a similar approach to update other interior items.
- Back update. You can decorate the back using decoupage techniques or covering it with some interesting fabric, for example, denim. Any novice craftsman can actually figure out how to cover a chair with a backrest with his own hands, and this work will not take much time.
- Upholstery reupholstery. It is important to choose durable and high-quality fabric. It can be tapestry, jute, jacquard. In some cases, even velor is suitable.
Important! Best result upholstery with tapestry gives, since it is - reliable material, which looks quite attractive from the outside.
You don’t always need to throw away old furniture; you can do the work of restoring it or completely remodeling it yourself. A refurbished chair, table and stool are quite suitable for a terrace, kitchen, or hallway. The remodel itself may include painting, seat upholstery, and the use of beautiful and stylish covers.
Restoring old furniture includes painting, upholstering seats, and using beautiful and stylish covers.
The process of remodeling with your own hands is not so complicated, you just need to use your imagination. The materials are usually used as simple as possible: for upholstery you can take old jeans, pieces of unnecessary drapery fabric, leftover curtain fabric. Buttons, beads, and tassels are used. If you plan to paint, then first it is better to inspect the surface of the item being repaired; it is quite possible that you will have to replace the seat of the chair or mask the cracks.

Before restoration, you should carefully inspect the stool for defects.
Not only can you repaint furniture, but you can also use beautiful fabric covers for stools and chairs to disguise old upholstery. The procedure is simple, but first you need to draw up a remodeling diagram. For example, it is necessary to completely transform several stools for the kitchen, make them more attractive, comfortable, suitable for general style kitchens. First, the stools should be carefully examined, as they may be covered with cracks and chips. Further work can be divided into 2 options:
- The surface of the stools is durable, there are no defects. You just need to clean off the old paint and polish the wood.
- There may be cracks and small chips on the surface of the wood. If such defects are identified, it is recommended to fill the cracks with a mixture of sawdust and PVA glue. If the damage is significant, then it is better to replace some elements.
Once the old paint has been removed and the surface has been repaired, you can begin decorating. If all the kitchen furniture is made in light yellow color, then the stools can be designed in a more dark tone, but with a pattern of contrasting details. The covers can be chosen light yellow, and the chairs themselves can be painted in light green color, use applications. To sew covers you should take:

- a piece of fabric to sew 2-3 covers (according to the number of stools);
- fabric for appliqué to match the main color of the furniture;
- threads, needles, scissors;
- ruler;
- chalk for marking or a special marker that leaves no marks after washing;
- iron;
- sewing machine;
- several sheets of paper;
- colored braid;
- wood primer;
- brushes;
- acrylic paint;
- sandpaper;
- plastic film.
The work begins with the stools being completely cleared of old paint, after which the surface is leveled with sandpaper. There should be no dust or burrs left. It is best to work by laying plastic film on the floor so as not to stain it. It is on a horizontal surface that it is most convenient to work with materials.
Return to contents
Working with primer, paint, upholstery

Before painting the stool, the surface must be coated with a special wood primer.
When the stools are ready, it is necessary to cover their surface with a special wood primer. One layer is enough, but it must dry completely before further work. The time it takes may vary; here you should pay attention to the manufacturer’s recommendations.
Once the primer is dry, you can begin painting the stool. Are used various options. The easiest way is to paint with a brush, but for the seat and legs it is better to use a roller. The most convenient and economical option is painting using a special spray gun, which allows you to process even the most complex surfaces.
While the paint dries, which may take several days, although most often acrylic paints dry quickly, you need to start sewing covers. If you need a simple design with fabric, then just cutting is enough.
If you want to install comfortable chairs in the kitchen, then it is best to first upholster the seat with foam rubber.
From big piece a square is cut out, the area of which will be slightly larger than the area of the seat. This is done so that the foam rubber can be carefully bent over the edge and attached with a construction stapler. This square can be used as a template for the rest of the stools to simplify the work.
When the upholstery is ready, you need to start next stage remodeling old furniture. First, a pattern is prepared, according to which the canvas will be cut. There is nothing complicated about this; most often these are large rectangles that will be tied under the seat with ribbons. After the canvases are cut, you should use sewing machine handle products carefully. A beautiful ribbon or braid is used for decoration. It all depends on what kind of interior is used.
It is very disappointing to throw away something that is part of the furniture set. Do-it-yourself restoration of chairs will help you avoid damaging the package. Also, do not be upset if something that plays the role of an exclusive, dear to the heart, memorable item fails. And here restoration can work real miracles.
Paint coating of chairs
What is a favorite chair? These are wonderful moments of returning to childhood... Or the memory of a loved one... Or even the chair may be passed down from generation to generation. Or something else, but so dear that you don’t want to part with it.
But, unfortunately, a thing cannot last forever. The furniture gets scratches and peels. alas, it becomes unpresentable. However, restoring old chairs with your own hands will help preserve the item for some time.

Often, before varnishing a chair, it is necessary to completely remove old paint or varnish. This process requires patience and perseverance from the master. But the payment for labor will be fully consistent with the efforts invested.
Decorating chairs
Sometimes it makes sense to make drastic changes color scheme furniture. Chairs painted white or gold look very creative. Often craftsmen choose other colors for the wooden part of the chair: blue or light blue, pink or bright red. But then the upholstery should be pure white or with golden ornaments. The elegance of this design transports people to the times of Catherine the Second, reviving palace luxury.
White furniture can be decorated with gilded ornaments, simply drawn or made in the form of a bas-relief. Blanks for this type of decoration can be purchased in stores or cast yourself from plaster and glued on. Restoring and decorating chairs with your own hands in an antique style will add charm and originality to the design. Sometimes the edges of the upholstery are decorated with beautiful braid and tassels.

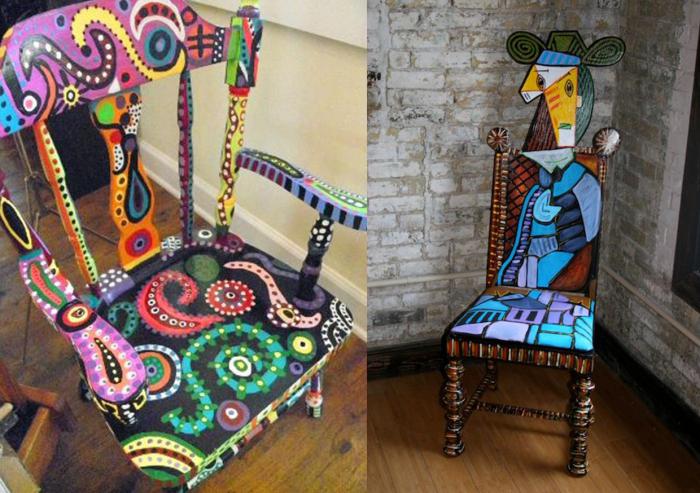
Chairs painted in a cubic style will also change the image of the room. And some will prefer floral or plant colors. In any case, surface coating will protect the item from corrosion and increase its service life. Therefore, the practical benefits that such a DIY restoration of chairs will bring are also obvious.
Comprehensive instructions for replacing failed parts
In addition to the appearance of the products, owners of beautiful antique chairs are concerned about their functionality. Therefore, do-it-yourself restoration of wooden chairs includes replacing some parts in the product. For example, it is difficult to turn a broken strip from the back of a chair absolutely identical to the remaining ones. Therefore, it is recommended to make the required number of slats of a different configuration, but of the appropriate size (height and thickness). You can even try to buy them in a store, although it will be very difficult.

Repair of Viennese chairs
Very often the slats simply fall out of their sockets. Viennese chairs usually suffer from this defect. Do-it-yourself restoration in this case occurs according to the algorithm described above. Only here you no longer need to remove all the slats from the lower grooves. It is enough to clean the vacated hollow from the remnants of dried glue, fill it with an adhesive compound and strengthen the fallen part in it.
Upholstered chair repair
Furniture plays a role in our lives important role. For example, soft chairs look elegant and stylish in the interior. And it’s much more comfortable to sit on them than on regular ones.
The most common repair is do-it-yourself restoration of chairs when it comes to upholstery that has lost its visual appeal. It also often shows stains or even holes that cannot be removed, unsightly scuffs, and once-bright colors fade. And sometimes you just want to change the entire design of the room, redo it in a different color scheme.
Restoring an upholstered chair with your own hands will not take very much time. Even an inexperienced craftsman, a teenager or a woman can produce it. It is only important to choose sufficiently durable upholstery fabric and professional furniture foam rubber.
Calculation of fabric when replacing upholstery
Often a set of furniture is used in the interior. In this case, the upholstery is usually replaced on all chairs at once. Therefore, you should calculate in advance the size of the fabric needed for the restoration.
First you need to measure the width and length of the seat. Do not forget to add a centimeter on all sides for the hem of the fabric. Most often, this part is square, measuring 50 by 50 centimeters, that is, 50 square centimeters.
Then, if the chair has a soft back, the same must be done with this part of the object. By calculating the size of upholstery needed to restore one chair, you can calculate the amount required material for all chairs. Simply multiplying the result by the number of objects (usually 6 pieces), the restorer will receive the number of square centimeters. They need to be divided by width upholstery fabric, which we looked at in the store. The answer to this problem will include the number of required “linear” centimeters.

It is best to buy a little more material, with a reserve, because otherwise, the craftsman may have to sew the fabric together, because when cutting, there will be a piece left in one strip, and a piece in the other.
And to avoid this, the master will also need the ability to lay out patterns on fabric in such a way that there is as little unused fabric left as possible. This will not be difficult to do if you prepare the number of details you need from the newspaper in advance.
Upholstery replacement
If restoring old chairs with your own hands consists only in the fact that the master needs to change the fabric on the soft part of the object, then this will take very little time.
It is enough to simply unscrew all the parts that require repair, that is, the seats and backrests. Then it is removed from them old upholstery, a new one is applied, a hem is made, the edges are nailed with small furniture nails with wide heads. In the absence of such, small pieces should be cut out of cardboard or leatherette. Before hammering, you need to put them on the nails so that they hold the fabric tightly and do not slip through the holes punched in the fabric.
First, secure the front part of the seat. The nails are distributed quite often, 0.7 centimeters apart. If necessary, make small folds that are permanently fixed.
Then the second symmetrical side is pierced, stretching the fabric. After this, work with the sides, leaving the corners free. Before stuffing, they should be carefully stretched, straightening the fabric so that there are no folds on the front of the upholstery.
The last stage of this repair is to fix the corners of the upholstery with staples. If the thickness of the plywood or fiberboard used for the frame of the soft part of the chair is 3-4 mm, four-millimeter staples will be required. You definitely need to take this fact into account! Naturally, if the frame is made of material 10 millimeters thick, then the staples are 10 millimeters thick.
Replacing padding when repairing an upholstered chair
The amount of foam rubber is calculated in the same way as for upholstery fabric. Only now you no longer need to add hem allowances. Instead of foam rubber, you can use batting.
Sometimes it makes sense to not completely replace the packing. Then it’s enough just to apply a “patch” in the place where the pressure was pressed and cover everything on top thin layer batting or foam rubber.
If it is produced complete replacement padding, then all parts should be removed from the seat: screws, staples, nails. It may be easier to cut out a new seat piece from plywood or fiberboard, attach the padding to it, and cover it with new upholstery on top.
Sealing the joints of chair parts
Loose furniture can be repaired in two ways. One is to tighten the joints using screws or bolts. They should not be screwed into the old grooves, but nearby, if possible. Sometimes a craftsman needs to use a “patch” cut from soft metal.

The second method is gluing. Then the chair is disassembled into parts and the joints are cleaned of old glue. Having carefully coated the joints, the parts are connected and tightened with clamps.

Repairing broken legs
The most difficult thing is if the “trauma” to the chair consists of a “fracture” of a part. U regular stool You can completely replace the part by turning another one. But it is almost impossible to make a twisted or curved leg at home, which is typical for, for example, Viennese chairs.
Do-it-yourself restoration in this case is carried out only with the help of glue. Moreover, tightening the part must be done not only in the gluing areas, but also at the ends of the leg, so that its size remains the same.

After drying, the joint is treated with sandpaper. To fix the “fracture” more reliably, you need to make a groove on the inside, into which you then glue wooden plate, drowning her completely.
Can also be used metal part, placing it on self-tapping screws. The excavation site is then carefully covered with putty or a mixture with sawdust, leveled, sanded and processed