How to restore a kitchen table with your own hands. How to restore a table with your own hands? Sequence of restoration work
If you have an old table that has lost its presentable appearance, do not rush to throw it in the trash. It has served you for many years, and rest assured, it will continue to serve you if you spend a little time on it. The restoration of the table can be carried out in such a way that it will compete with any designer item. New life can be breathed in with absolutely different methods and technician. Let's look at the most popular methods.
Options for how to transform an old table
To restore old table with your own hands, you can resort to one of the following options:
- Veneering (covering an old wooden surface with veneer).
- Painting.
- Pasting with self-adhesive film.
- Decoupage (application of tabletops with designs from napkins, banana or rice paper).
- Painting using stencils (using a paper or fabric stencil).
- Tiling.
- Decor using gold leaf (foil that is glued in the form of patterns).
Materials and tools for restoration
To restore your old table to its former beauty, you will need the following:
- Sandpaper.
- Sander.
- Paint for wooden surfaces.
- Impregnation.
- Primer.
- Primer roller.
- Varnish (colorless and colored).
Also don't forget about individual means protection:
- Respirator.
- Protective glasses.
- Work gloves.
Restoration
To restore an old table with your own hands, you need to follow the following steps:
- First, inspect the table for scratches, cracks and other defects. If there are any damage, be sure to fix them. Check all bolts on the table top and legs and tighten them.
Important! The most the best option will disassemble the table into individual parts, clean them from dust and dirt, and then assemble it again. When assembling, for better fixation, you can add glue to the attachment points and wait until it dries completely (at least 15 hours).
- Next, sand the table using a machine or sand it by hand. This will make it possible to align all problem areas that were not previously visible. Removing old varnish and paint is quite time-consuming and labor-intensive. Sand the surface with medium-grain and then fine-grain sandpaper.
Important! Try to sand the wood along the grain. If processed incorrectly, defects may occur that are subsequently very difficult to eliminate.
- Fill any deep scratches and cracks found with putty. Dry the patches completely, then clean and sand the surface.
- Degrease the table with acetone and prime its surface. For these purposes, you can use a universal primer. Instead of impregnation, prime the tabletop 2-3 times, completely drying each layer.
- Sand the table surface thoroughly again.
- If there are no cracks, chips or scratches on the countertop, you can treat it with water-repellent impregnation, and then cover it with several layers of varnish or stain. This gives the surface the unique effect of fresh wood.
- If the condition of the surface is unimportant and the table is subsequently planned to be decorated, then it needs to be painted. For these purposes, it is better to use water-based paint. Apply it with a large brush. When the paint is dry, apply a second coat. Application should be quick, thin layers. Dry the table for at least four days.
Important! It is advisable to apply dark paint in two or three layers to avoid unsightly gaps.
How can you decorate a tabletop?
Restoring a table is, of course, good. But to create a real work of art, you need to design the tabletop. To do this, you can choose one of the following methods.
painting
Painting is one of the most popular techniques for decorating interiors and household items. There are several options for painting furniture:
- Artistic painting with thin brushes.
- Painting with stamps.
- Painting using stencils (templates).
Important! For glass table top ideal options there will be an airy and bright painting with stained glass paints.
Painting using tulle or some other lace looks incredibly beautiful. To apply an openwork pattern to the surface of the table, you just need to attach the tulle to the tabletop, securing it with tape, and paint the table in the same way as with an ordinary stencil - using a roller, foam sponge or spray paint. It is advisable to choose a paint color that contrasts with the color of the surface.
Important! Painting on a glass tabletop must be applied from the reverse side, while the front side must remain smooth.
Tile decor
You can update your countertop by decorating it with tiles. The use of tiles on the table opens up a lot of scope for imagination, since today the choice is truly huge. For these purposes you can choose:
- Mosaic tiles.
- Ceramic tiles.
- Tiles made of plastic composite materials.
Important! It is very convenient to work with mosaic tiles. Such tiles are simply cut with a knife. Thus, excess parts can be removed without any problems.
The whole procedure will be creative and simple:
- Restoring a table begins with cleaning the surface and degreasing it.
- Then, using a special glue, the tiles are fixed on the table.
- After a few hours, the joints between the tiles are grouted, using grout or special joint paint for this purpose.
Important! A mosaic made of pieces of tiles looks very interesting on the table.
Potal
Potal is very thin sheets of different metal alloys, used to imitate any surface in silver, bronze or gold. The gilding technique is often used when finishing pieces of furniture along with other decorative techniques and techniques:
- To begin, draw a stencil on which the gold leaf will later be glued.
- Then apply glue to it using a thin brush.
- Carefully place the sheets of gold leaf onto the glue.
- Using a soft brush, very carefully remove unnecessary parts of the sheet.
- The thicker the brush you use to apply the glue, the thicker the gold leaf pattern will be.
Important! Particles of sheets of gold that remain from decorating the tabletop in this style can be collected and used again in powder form.
Painting in different colors
You can restore an old table with your own hands by painting it in different colors. This is a very interesting technique that many modern designers use:
- To begin, cover the entire tabletop with one color.
- After the paint has dried, apply masking tape to create a stencil for the remaining colors.
- Using a brush or roller, apply all the other colors one after another.
- After the paint has dried, remove the masking tape.
Important! You can glue or draw various pictures on a colored background.
- Finally, coat the table with two or three coats of clear varnish. This will add strength to the decor and protect from mechanical damage.
Important! The varnish can be either matte or glossy - according to your desire.

Decoupage
You can update an old table using the decoupage technique even without any special skills. Learning to create masterpieces using this technique is not at all difficult.
To restore a table using decoupage technique you will need the following:
- Pictures for decoupage - you can use ordinary napkins with a design you like or even images from magazines.
- PVA glue.
- Acrylic varnish (it is better to buy varnish in a can).
- Napkin.
- Acetone or alcohol.
- Brush.
The work sequence is as follows:
- Clear the table of old paint, dirt. After this, degrease the surface by wiping it thoroughly with a cloth with alcohol or acetone.
Important! If the surface is poorly cleaned, the decor will turn out sloppy.
- Select pictures and make the necessary composition from them. Any image will do: for the kitchen table you can choose motifs of vegetables and fruits, various colors. A table with motifs of ancient buildings looks very interesting.
Important! If you use special decoupage pictures, then you don’t need to do anything extra with them - just glue them on, removing the top layer.
- Place the cut out pictures on the table. Mix PVA and water in equal proportions and glue the pictures to the surface in selected places. To prevent bubbles from forming, smooth the pictures with a napkin, expelling excess air from under them. Next, leave the pictures to dry.
- After the decoupage is completely dry, varnish the surface of the table with pictures. Apply the varnish in several stages, waiting until the previous layer has completely dried.
Restoring a table can help turn an old, unnecessary item into a real work of art. In order to decorate a piece of furniture, you can choose any decor option convenient for you. As you can see, this does not require a lot of money, effort or skills - even a beginner can cope with this task.
We continue our journey into the world of updated things. In the previous episode they told us their stories, this time there are 8 tables on stage. And no less interesting transformations that occurred with each of them.
They received not only fresh appearance, but also new functions. And for their “flexibility of character” and willingness to change, the owners gave them a chance for a second youth. Some have become simply comfortable things, and others - even as interior decoration.
Check out the stories 8 tables and tables in “before” and “after” condition, and let your own things acquire equally interesting and spectacular “faces”!
If you want, take a look at our new collection of ideas, where 23 models are described in detail.
idea No. 1: ancient table-book-> colorful table for the terrace
Very old thing, which, despite everything, has retained stability and grace lower limbs. Her young owners decided that a slightly outrageous outfit would not hurt her. Unlike lovely ladies, old things bright colors sometimes it suits you very well.
But when little children come to visit, they are delighted with this dining table, which on ordinary days does not take up any extra space at all. These are acrylic paints, a stencil and a preliminary sketch on paper.

|
|
|


idea #2: instead of boring lessons-> exciting hobby
Once upon a time there was a girl, and she considered preparing her homework to be the most boring thing in the world. Therefore, on your own school desk endured all my feelings. And then she grew up and realized how to get rid of not the most pleasant memories.
The body of the old table was stripped of its worn paint, puttied and repainted in a stylish wenge color. Attached to the fronts of the drawers furniture film with a zebrano pattern. And the new bright red funny paw-shaped handles are in harmony with the shade of the inside of the drawers, also updated. It turned out to be an excellent place for a home hobby: just look at it, and the boredom will blow away like the wind.

|
|
|


idea #3:massive monster ->elegant gentleman
The massive old table has survived more than one generation of intellectuals in this family. One of the great-grandfathers of the current owner even owned a successful publishing house. His entrepreneurial spirit was inherited.
The young lady got creative and transformed a family heirloom into an elegant piece that fits perfectly into her home. And to complete the impression, I surrounded it with interior details that matched the color. Laconic bronze handles, specially purchased in vintage style- in memory of the origin of the table.

|
|
|


idea #4: sad gray donkey-> flirty green crocodile
The gray, faceless two-pedestal table had long ceased to please its owners, and they were thinking about how to get rid of it. But one day a student niece came to visit, critically examined the “donkey” and a couple of days later moved it to her home, despite the protests of her parents.
Imagine the amazement of the old owners when they saw what happened to the boring object. Its young owner created a flirtatious corner for studying and sewing. Juicy green tone matte paint- on the table and old chair from the pantry. Plus - new fluffy leather upholstery for the seat. And for harmony - flat handles for drawers, covered with printed pink fabric.
By the way, she is thinking about attaching a mirror in the same colors to the wall: it would also create a dressing table. That's what fantasy is!

|
|
|


Do you want to stay in touch with us every day? Welcome to our Planet of Inspiration VKontakte! Take a look, scroll through! Like? Join and get inspired every day!
idea No. 5: the Baroness's journey from the 18th to the 21st century
Its new owner purchased this elegant antique item at a flea market. The seller assured that Baroness N had once owned it. Well, the buyer decided, then we’ll rejuvenate the Baroness.
As is known, White color even a very advanced age is refreshing. This was chosen as the new color for this antique dressing table. The necessary variety is achieved thanks to a new tabletop using the decoupage technique and harmoniously selected objects on it.
|
|
|


Idea #6: The Exhausted Friend of Magazines-> mobile thing for a children's room
Almost every home once had a coffee table like this. And some people still have it somewhere in their closet or at their dacha to this day. Why not give it a chance to serve your children too?!
Check how tightly the fastenings for the legs and table top are held. Add bright colors and a stencil pattern - in general, nothing complicated. This table already “wore” rollers. If yours does not yet have such mobility, then strengthen them too: a bright mobile thing will certainly please the young owner.
|
|
|


idea #7:old card table -> a cozy place for a meal on the balcony
Like all previous tables, this card table was stripped of its old finish and given a fresh coat of paint. And small format ceramic tiles were attached inside. Now it can easily withstand weather fluctuations on an open balcony.
Let's give our 2 cents on this topic: instead of tiles, you can use inexpensive mosaics - it will look absolutely luxurious. Or - scraps of multi-colored tiles left over from renovation: split into small pieces and laid like a mosaic - this is a budget solution.
Important: regular glue for tiles (dry in bags) cannot be used, only ready-made viscous, solvent-based (dragon type).
|
|
|


idea #8: fresh colors bring summer closer
A weather- and wind-resistant metal table served you faithfully in your yard for several years, but now, alas, it has lost its appearance? The same situation happened in this story. And recently folding chairs with wooden seat and back on metal frame. In anticipation of summer, the owners decided to create such a colorful corner that attracts attention. Turquoise paint for metal and the same for wood (on chairs). Plus - update the legs of the entire “set” with black.
But the most spectacular decoration is the white pattern on the tabletop, applied using a stencil. If you don’t want to bother with “small art,” you can use ready-made stickers made from vinyl film.
|
|
|


An old table in the house is more than just a piece of furniture. In a sense, this is history, the memory of our ancestors, a symbol of the long-term stability of our home.
You can restore an old table, giving it a second life, and saving yourself a lot of money on buying a new table.
The ideal balance between careful attention to the history of one's family and the needs of everyday comfort is provided by restoring a table with one's own hands. Indeed, you shouldn’t rush to throw away an antique table found in the attic - good repair is able to breathe a second life into a dilapidated object, saving cash its owner, intended for the purchase of new furniture.
Perhaps such a renovation will also give new aesthetic sensations at the sight of unusual shapes and silhouettes, and will delight you with the pleasant warm texture of solid wood, cleaned of dirt and layers of outdated finishing.
But before moving on to the description of the move restoration work, let's see what can be used to perform them most efficiently.
Materials and tools necessary for restoration
For work on restoring and updating an old table with your own hands, it is recommended to stock up on tools and materials from the following list:

Hand tools for restoration.
- electric drill, wood drills;
- set of chisels;
- end plane;
- hammer;
- nail puller;
- screwdrivers (flat and Phillips);
- clamps;
- jigsaw (manual or electric);
- pliers and round nose pliers;
- hacksaws (for wood and metal);
- assembly knife;
- set of files;
- measuring devices (ruler, square, tape measure);
- felt polishing;
- set of brushes;
- wood glue;
- acrylic varnish, stain.
Restoring a wooden table: the order of operations performed

Restoration begins with the removal of old varnish and paint.
Before proceeding with this plan, it is necessary to carefully examine the entire table and its most hidden nooks and crannies. This is done in order to correctly assess the general technical condition of the item and plan the total amount of work.
Almost any major restoration of a table begins with its disassembly. As a rule, the older the item, the more of its parts require serious instrumental intervention. In some cases (if, for example, the tabletop has become very warped due to very long use), it is simply pointless to restore certain parts - it will be too expensive and ineffective.
Then it is better to either independently manufacture a product that has completely failed, or order the part from outside specialists. If damage from time and improper storage turned out to be not so destructive, then the old structure should be carefully strengthened. This means, in particular, that the existing ones are not very strong connections should be tightened, and severely loose joints should be disassembled, then cleaned and re-twisted or glued.
It has been noticed that in furniture one of the most damaged components over time is the paint and varnish coating.

The varnish is removed from the table to the very base.
Therefore, often when they start updating the old wooden table, you have to remove old paint (which may be laid in several layers) from the surfaces of the table.
If there are too thick coatings or large areas of damaged surface, it is recommended to use a drill with a nozzle in the form of metal brush or a grinding machine. After complete removal of the old paint, next stage preparation.
It consists of degreasing the cleaned surface. This can be done by thoroughly wiping wooden parts soft rags soaked in special solvents suitable for this coating, alcohol or acetone. Parallel sandpaper or use a grinder to smooth out obvious defects.
However, old damage (potholes, scratches, chips, etc.) cannot always be removed by sanding. High-quality restoration involves mandatory puttying of the surfaces of the old table. At the same time, we must not forget that after the putty has completely dried, all treated surfaces must be sanded well again.
If possible, it is advisable to process old wooden parts separately, after carefully separating the tabletop and underframe. The tabletop is sanded again, after which it is painted with a paint suitable for furniture and covered with 2-3 layers of colorless varnish. This operation is performed without haste, allowing each layer of paint and varnish to dry until it is completely dry.

if there are breaks, these places are glued and pressed tightly against each other with a clamp.
Another part of the table - the underframe - often requires more more attention than a table top. After many years of use, it may have cracks in parts and serious breaks. If the owner of such a rarity nevertheless decides to restore it, then he should first, using the appropriate tools, disconnect the legs from the base.
The fracture sites must be glued to further connect the separated parts. Then, using clamps, these parts are pressed tightly against each other. Sometimes, to better tighten the dried parts together, you can use self-tapping screws, which are very useful in inconvenient places where it is difficult or impossible to install a clamp.
After the glue has dried (about 12-15 hours), the screws are removed from wooden elements table. The tabletop and underframe are connected to each other either with glue, or by providing a removable connection, which will be very useful in small apartments.
The restoration of the table ends with varnishing of the wood parts. But before that they need to be opened with stain. To avoid drips, it is better to do this with a piece of soft foam rubber. After the stain has dried, the wooden surfaces of the table are primed with transparent varnish (primer) and lightly sanded with fine sandpaper.
How can you restore “specialized” tables?
When updating tables, you should always take into account their purpose and the place where they will be located in the future:

A children's table can be decorated with photographs and drawings.
- Children's table. It is recommended that after stripping the tabletop of old paint and sanding, paste clippings from bright glossy magazines or children's pictures onto its surface. Then the whole thing is covered with 4 layers of acrylic varnish.
- Restoration of a dressing table. An original solution Repurposing an old vanity table into a sink stand might be a good idea. A hole is cut in the middle of the table of such a size that a sink can fit into it, but without significant protrusions above the surface of the table. Ceramic tiles can be glued to the remaining space on the countertop.
- Kitchen table. You can paint an old piece of furniture with some bright paint. A film is glued to the painted tabletop, which, for example, imitates beautiful lace. At the same time, the film can not be glued to the tabletop, but attached from below with special brackets.
- Update desk. You can cover the old tabletop with some wallpaper with a spectacular print. To give furniture freshness and solidity, wallpaper that imitates the texture of some kind of wood is well suited. valuable breed. To give the composition a feeling of integrity and completeness, the table legs can be varnished in wood tones.
- Coffee table. A bright pattern with geometric elements will harmonize well with this option. As a background, it is better to choose some kind of dull paint, which is recommended to be applied to the tabletop with a spray gun. The geometric pattern is applied to the dried painted surface with a brush or special masking tape. The fragments between the stripes can be filled with brightly colored paints.

The kitchen table can be decorated using decoupage technique.
If the table legs will be detached from the underframe, it is worth marking in advance where exactly the particular leg was located. Each leg should be installed in the place where it was before repair.
When covering a table with a white primer, you must be prepared for the fact that almost all defects will become visible on its surfaces.
To provide furniture surfaces with maximum strength, varnish coating must consist of at least 3 layers made with a paint roller, 5 layers with a spray gun and 10 layers with a cotton swab.
Grind wooden table top follows the wood grain. If you do this across the grain, noticeable small marks will remain on the countertop.
When taking on the restoration of old furniture with your own hands, it is worth thinking about the fact that this process is not only an opportunity to save your money, but also an excellent chance to reveal your talent as a home design master.
It is not uncommon for a favorite piece of furniture to lose its original appearance, and there is simply no financial means to buy a new one. In such cases, furniture restoration can help. Let's take a closer look at how to restore a table at home, what is important to take into account and what steps should not be skipped.

Methods
There are quite a lot of methods for restoring furniture, ranging from light “cosmetic” decor to a complete overhaul of the product. Restoring an old table with your own hands is not so difficult if it does not have any serious damage. In this case, it will be enough to sand and paint the old piece of furniture to make it shine in a completely new light.
Repairing glass tables at home can be more labor intensive, and also a very costly process. If the glass surface breaks, it may be necessary not only to repair it, but also to purchase a new one, since not every glass deformation can be eliminated by gluing and grinding.

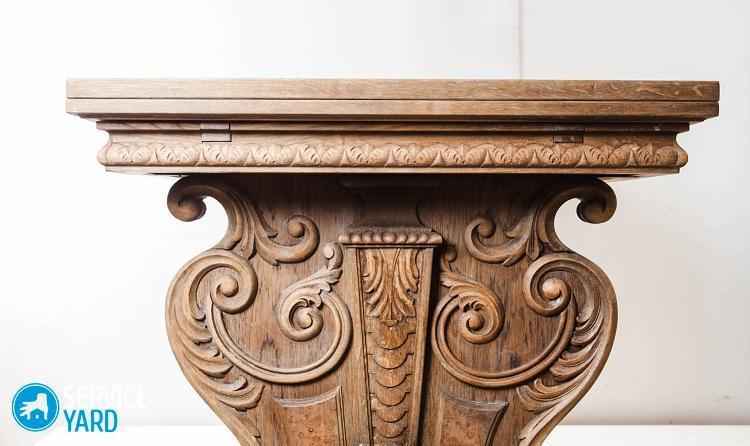
The greatest scope for creativity opens up when restoring a wooden table. After all, they are perfectly applied to furniture made from solid wood. various techniques painting and applying patterns, including the “decoupage” technique. It is worth noting that painting and various decorative techniques most applicable to tables small sizes. This can be used to decorate, for example, a small desk or compact coffee table. But for the restoration of an oak folding model, additional resources may be needed. Since the table has a large continuous surface, finishing its parts with materials such as MDF and chipboard is quite acceptable. Securely fastened and carefully processed, they will give the table not only new life, but will also give a completely different appearance.

Plastic table can be restored using the same painting, but this can only be done if the piece of furniture does not have serious cracks. Plastic is a rather capricious material, and when exposed to high temperatures the glued seam may not hold up, which will lead to a new breakdown.
Computer tables, made from chipboard and laminated chipboard, are often peeled off, which is why their appearance becomes sloppy and careless. To repair such models, special adhesive tapes and films that imitate a wooden surface are suitable.


The kitchen table-book must be reconstructed as carefully as possible, using exclusively environmentally friendly and hypoallergenic materials. Since the countertop quite often comes into contact with food, care must be taken to ensure that the materials used to finish its surface are not toxic or harmful to health. The same goes for the children's table.

Restoration of a polished dining table can be done by grinding the surface and applying a new layer of decorative varnish to it. This way the surface of the furniture attribute will again acquire a glossy shine.

Sometimes it may be necessary to increase the height of, for example, a dressing table if its legs break. In this case, from wood material special extensions or new legs are constructed required size. To update any model, you can use classic hand painting. This technique is also suitable for sliding tables without any critical surface damage.

Materials and tools
The restoration process may require various materials and tools.
Let's take a closer look at their list and purpose:
- To restore tables with wooden surface, you will definitely need a sanding machine or coarse sandpaper. Using these tools, you can make the surface smooth, removing all roughness;
- To give the surface a more fresh look and a different color will require completely ordinary paint. It’s quite easy to find out which variety you can paint a table with, since the scope of application is almost always described on the packaging of any manufacturer;
- It is best to apply various patterns and ornaments acrylic paint, since it is very durable and will stay on the surface of the furniture for a long time.


To repair any individual parts of the table, you may need various construction tools:
- For example, using a hammer, screws and simple nails you can secure the table legs well;
- To fasten panels made of plastic and MDF, you will need to acquire special glue, which is also called liquid nails and are often used for repairs;
- To work with wooden parts, you need to have a small saw or jigsaw with you, with the help of which you can cut a piece solid wood you can cut out the required part.


We must not lose sight of various small details that greatly simplify the restoration process. So it’s better to have a large ruler or tape measure, a bright marker or pencil, construction tape, brushes to remove dust and sawdust, protective equipment and a damp cloth.


Upgrade process step by step
Repairing a piece of furniture at home entirely, in the form in which it is, is an almost impossible task, since many details require an individual approach. For example, it is better to remove the tabletop while finishing the remaining parts in order to protect it from causing even greater damage.

Do-it-yourself restoration even the smallest table can become a very labor-intensive process if you approach the matter incorrectly, skipping important details and steps. It is for the timely completion of each stage of work that it is necessary to draw up an action plan.
Damage Inspection
Before starting restoration, it is necessary to carefully examine the front of the upcoming work. Very often there are products with serious damage, which cannot be dealt with only through cosmetic finishing. For example, if a table leg has fallen off, painting will not fix it.
The first step is to disassemble the table, if the model allows it, and carefully examine the surface of each part for serious damage. If there are none, you can proceed to further actions depending on the planned restoration work.

If the surface of the parts has fairly deep cuts, severe chips or serious damage, it will be necessary to take measures to eliminate them. If the damage cannot be easily repaired, you may have to resort to replacing some part of the furniture attribute.
Only after a thorough examination and identification of all “ weak points» piece of furniture, you can draw up a further action plan and proceed directly to the process of restoration work itself. Maintaining consistency is very important in this matter.
Grinding
In any repair process, after determining the “front of work,” the stage of cleaning and smoothing the surface follows. Restoring tables is no exception and, regardless of their types, polishing individual parts is an essential part of the entire process.
If you do not have a special device at hand for grinding the surface, you will need to use sandpaper. To remove the leftovers old surface you will need a type with a coarse-grained surface.


If it is possible to use a belt machine for sanding surfaces, you should opt for it, as it will help speed up the process. But you should know that the machine is only suitable for processing spacious, flat surfaces, and small parts will still have to be processed manually.
If the coating has been completely removed and you just need to make the surface smooth, you should use fine-grained paper. This way, roughness will be smoothed out without damaging the surface. Under no circumstances should you sand the surface across the fibers, as they are quite damaged and scratches of varying depths are formed. Processing is carried out exclusively along the location of the fibers. It is also worth using a respirator or a special mask to avoid dust and small wood particles from entering the respiratory tract.


Putty
As mentioned earlier, in the presence of severe damage and deep scratches it will be necessary to get rid of them. The simplest and in an accessible way is putty. In addition, even the largest holes can be sealed with putty, so replacing the part may no longer be necessary.
It is necessary to use only special putty for wood, since the usual composition for other repair work will not fit and will not stick to a wooden surface.

If the surface of the product has only shallow cracks, you can use stain and then apply several layers of protective varnish. Thus, fibrous structure wooden elements will be preserved and beautifully decorated.
After applying the putty and before applying the final coating, the surface must be thoroughly primed and sanded again. The primer will help degrease parts of the furniture attribute, and repeated sanding will smooth out the remaining unevenness.


Painting
Final and very important stage, requiring special attention, is the process of painting a surface. It is important not only to choose the right paint, but also to carefully apply it without various entities, lumps, irregularities and protect the freshly painted surface from small particles of wool, dust and hairs.
Dark shades are best applied in several thin layers. This way the paint will adhere better and the color will be more saturated.

To create the effect of antiquity and scuffs, the painted surface of the table will need to be sanded in certain places.
You should carefully select shades and apply the paint very carefully, since if you are dissatisfied with your work, it will be quite difficult to repaint the table; you will have to do all the labor-intensive work again, starting from the stage of sanding the surface.


In order for the gloss to shine beautifully on the surface, you should treat the surface with a layer of varnish, and after it dries and protective layer. Most often, to protect the surface of furniture, various polishing compounds are used, as well as wax mixtures, which, when rubbed into the surface of the table, will give it a glossy shine and protect it from dirt and large accumulations of dust.
You can see how to update an old table in the following video.
Finishing and decoration
After painting or during the painting process, if desired, you can further decorate the surface of the table, giving it a lighter, more relaxed and informal look. Let's look at the most common and beautiful ways decor of restored tables.
So, what is such a procedure as restoring an old table, what methods and materials are there to restore its appearance? In general, how to return this piece of furniture to its youth?
General principles
When a table is restored, the item not only gets its appearance back. Its functions also need to be restored. Therefore, before proceeding directly to the updating process, you need to carefully check the integrity of the item: what is the condition of its legs, are they broken, are the fittings in place. And think about whether it’s worth doing this at all. Indeed, it is unlikely that the updated lanky table, sparkling new paint, will bring satisfaction to the owner. So first evaluate the scope of work, think about its feasibility, and then, if you come to a positive decision, fix all the breakdowns first. And then start updating the appearance.
Restoring a desk
As a rule, there is not much hassle with this piece of furniture. Usually, due to its bulkiness, it always stands in one place throughout the apartment to hang curtains or remove cobwebs; no one drags it around. And his countertop suffers the most from time to time. How to revive her? Yes, very simple. Restoring a desk is a simple procedure that does not require any special material or physical costs.
Description of work
First find suitable wallpaper, which most closely match the existing interior. Then paint the entire table their color. After it has dried, wallpaper the tabletop using PVA glue, and then cover it with glass. The latter can be ordered in the store. Instead of wallpaper, you can take some kind of poster, or make a custom photo according to the size of the tabletop, or even buy a beautiful thick fabric of the desired color and also cover the surface with it. In general, you need to imagine. Restoring a table is a creative endeavor, so get creative and come up with your own options.
What can you do with an old coffee table?
If this piece of furniture, albeit inexpensive, but so beloved and convenient, has become, to put it mildly, no longer particularly attractive, arm yourself with paints and a brush to update it. Restoring a table by painting it is not a difficult job. However, the method we want to propose will take time. First paint the table with white paint. This will be the base. Then, when dry, paint the tabletop with stripes of different colors and unequal widths. To ensure they lay evenly, paint the surface gradually, and use tape to define the boundaries of each.

Decoupage
Restoring a table in is perfect for those items that do not come into contact with water very often. That is, with its help you can update the written and journal documents described above, as well as To do this, you first need to put the selected item in order, paint it and give it time to dry. And then glue images from a napkin or special paper for decoupage onto the surface using PVA glue. When the pictures are dry, the entire surface needs to be covered. acrylic varnish. And preferably more than once.

How to update your kitchen table
The simplest option is to cover the surface of the tabletop and the legs and side surfaces paint. Or, for example, paint them in different colors. And stretch a thick, beautiful oilcloth on top and secure it at the bottom with a stapler. If the tabletop is completely falling apart, there are two options. Replace it with glass and install lighting underneath it. Or don’t throw it away, but put it on ceramic tiles, for example mosaic. And then carefully seal all the seams with grout. In general, the restoration of a kitchen table has such a mass available options, that it will definitely not be difficult to carry it out correctly.

Wooden tables
What to do if a table made of solid wood has acquired an unsightly appearance over time? You can also put it in order, but, of course, the process will be quite long. If your table was once only varnished and has no defects, then the procedure will be quite simple. It is enough just to carefully sand it (it is advisable to use a special machine for this) and then varnish it several times. Moreover, the varnish should be taken several tones darker than the original coating. Well, if the table is literally asking to go to the landfill, but it’s still a pity to throw it away, then you need to prepare for a long updating procedure.

Restoration of a wooden table
We first carry out the preparation, as mentioned above. Let's think about whether we should replace the loose legs with new ones. If a positive decision is made, we go and buy. If not, we process the old ones in the same way as all other table parts. Let's take it grinder and carefully remove all the old coating. First we work with coarse grain discs. When all the paint or varnish has been removed, take a fine-grained disc and smooth the surface. Now we repair all the defects, even the smallest ones. We use it for this. When the patches dry, we clean them too.
The entire procedure must be done very carefully, since even the smallest chips and scratches will be noticeable. Then we degrease all surfaces using a special compound that can be purchased at any hardware store.
Remember: each stage takes time; before applying any next composition, be sure to wait until the previous one has dried. After degreasing, apply primer. And not the first one you come across, but acrylic. When the soil has dried, we sand the surface again, but this time by hand, gently and carefully. And you can start painting. As a finishing coat, you can choose varnish or choose paint. Today there is very big choice all kinds of compositions, the main thing is that they are of high quality. So, buy varnish or paint only from a trusted manufacturer; you should not skimp on the coating. Also, be careful when choosing a brush. A poor quality one will shed and leave behind hairs, which will definitely not add to the beauty of the surface.

It is advisable to apply three layers - with a break, of course - of varnish or paint. When all the elements of the table are completely dry, start applying protective coating. As a rule, wax is used for these purposes. It is applied to a cloth and carefully rubbed into the surface. To ensure that your renewed table serves you for a long time, wait until the wax has completely hardened. This will take a week.
Conclusion
As you can see, restoring a table is a creative process and sometimes, unfortunately, quite lengthy, but nevertheless satisfying. However, not only that. After all, if you do everything correctly, you can save yourself from unnecessary expenses on buying a new piece of furniture.