Toilet installation installation - system options, installation instructions. How to install a wall-hung toilet - installation technology Installing a wall-hung toilet with do-it-yourself installation
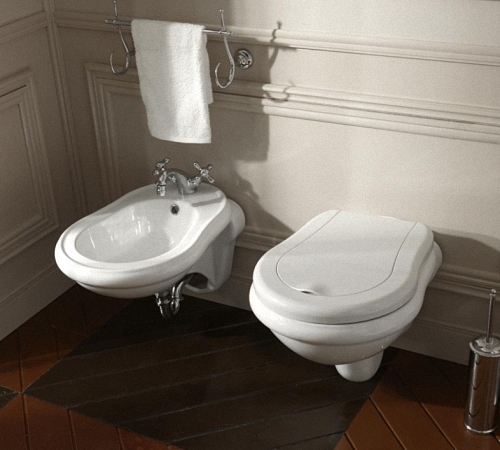
An excellent decoration and an extraordinary detail in the design of a bathroom will be the purchase wall hung toilet. This device does not take up much space, and when the right approach to installation, will last quite a long time. We’ll talk about how to choose a wall-hung toilet and how to install this device.
Construction and design of a wall-hung toilet
A wall-hung toilet is a structure consisting of a bowl and a cistern, which are placed in a suspended state.

The bowl is a vessel made of porcelain. The only difference between a wall-hung toilet and a floor-mounted one is the type of fastening, which is done from the side.
Wall-hung toilets come with standard equipment. Wall-hung toilet dimensions:
- length: 50-60 cm;
- width: 30-40 cm;
- height 35-45 cm.
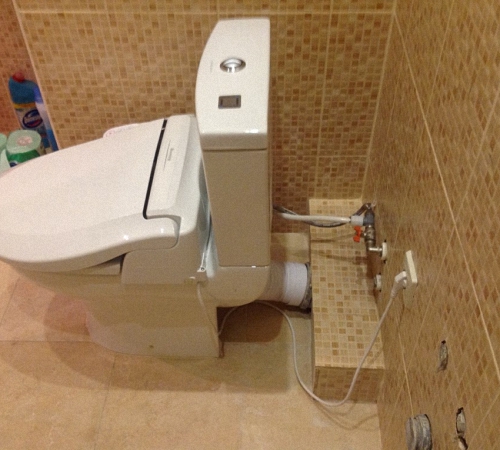
The wall-hung toilet system is characterized by the presence of a hidden drainage system, which consists of a flush cistern. It is located behind the partition and has the following features:
- small sizes, thickness 80-120 mm;
- the start button is located on the side;
- It has plastic base, equipped with thermal insulation, which prevents the formation of condensation.
The standard tank volume is 8-10 liters. To install a cistern, you must have pipes, components, a side flush button and a flush panel.
Some toilets require the installation of a flush, which is carried out thanks to the presence of high pressure into streams of water. This system consists of a special button that is connected to the water supply system.
Wall-hung toilet photo:

Advantages of installing a wall-hung toilet
1. A wall-hung toilet allows you to save space in the bathroom, as it has a built-in tank and does not require a large distance from the wall for installation.
2. High strength the toilet bowl will not allow the bowl to break even in a suspended state.
3. Due to the fact that the toilet is suspended, the floor under the toilet is easy to clean.
4. A variety of types will allow you to choose a toilet in relation to material and individual preferences.
5. Reviews about the wall-hung toilet characterize this device as a convenient, reliable and durable item.
6. Wall-hung toilets fully comply with sanitary and hygienic standards.
Types of wall-hung toilets
Depending on the size, wall-hung toilets are divided into:
- small, the length of which does not exceed 550 mm, are installed in small bathrooms, significantly saving space;
- medium, up to 600 mm long, are the most popular, as they are excellent for installation in any room;
- large ones, up to 700 mm, are installed if there are elderly or disabled people in the house.
In relation to the design, toilets are distinguished:
- wall type - the frame is fastened to the wall and to the floor;
- corner type - attached at a certain angle only to the wall, significantly saving space.
Depending on the shape, toilets are distinguished:
- round,
- rectangular,
- square,
- oval.
Mounting a wall-hung toilet
There are two ways to attach a wall-hung toilet:
- using a ready-made installation system,
- concrete screed.
The first option is more expensive, but less complex. Ready system The installation consists of a steel frame that is attached to the wall and to the floor. To fix the frame, four points are used: two are located on the wall, and two are on the floor.
More expensive systems offer a choice of the width of the dots and their adjustment.
This installation is installed at a distance of 15-18 cm from the wall. The set includes:
- toilet bowls,
- tank drain,
- flush button panels,
- open ceramic cistern,
- installation systems.
Installation of a wall-hung toilet without a finished installation
To install the toilet yourself, without using ready-made fasteners, you must have:
- two threaded rods, the diameter of which is 2 cm and the length is 50-80 cm;
- four nuts, four washers;
- 40 liters of concrete mass grade M 200;
- several sheets of plywood;
- wood screws.
To connect a wall-hung toilet you need:
- drain rectangular coupling;
- plastic sewer pipe with a diameter of 1.10 cm;
- silicone sealant.
Instructions for implementation preparatory work before installing a wall-hung toilet:
1. Begin installation work by installing the drain coupling. This process will help determine the height of the toilet.
2. If the height is too high, the coupling may be cut off. If the height is insufficient, a section of sewer pipe is added.
3. Measure the distance of the panels for constructing the formwork. Increase the distance by a few centimeters for extra space.
4. Using a tape measure, you should measure the interval between the place where the fasteners are attached. The standard distance is 20 cm.

5. After taking measurements, transfer the data onto plywood sheets to make the formwork panel. Chipboard, plywood or other boards are suitable as materials for the shield.
6. Check again that the measurements taken are correct.
7. Cut the rods threaded type. The length of the rods is the distance between the end point of penetration into the wall, the interval between the wall and the toilet, the installation length of the toilet and the end for screwing on the nuts.
8. There are two ways to attach the rods:
- wall mounting, which is carried out with a washer and a nut m 20, the simplicity and versatility of this method make it more popular, in order to attach the rod you just need to drill a hole in the wall, put on the washer and tighten the nut, this method suitable for any walls;
- in the absence of access to outside walls, secure the rod with glue or special means, for example, “chemical anchor”, Drill a hole in the wall, the minimum length of which is 14 cm, clean it from dust, fill it with glue and install the rod, this method is suitable for walls made of concrete, brick, foam blocks, wood,
9. After the formwork is assembled, a structure consisting of three panels is obtained, which has holes for installing rods.
Advice: Before fastening the formwork panels, the coupling outlet should be closed using plastic bag, so that concrete and dirt do not enter the drainage system.
10. The correct assembly of wooden panels is checked building level. To make the formwork more stable, install the rods and tighten the nuts.
11. Try on the toilet bowl, installing it in its future location after completing the formwork. If there are any shortcomings, it is not too late to correct them.
Tip: In order to ensure that after pouring the formwork with concrete there is still space for connecting the toilet, you should attach a small rectangular piece of foam plastic to the rod.
12. After completing the preparatory work, begin pouring concrete. To prepare concrete mortar for one part cement, take two parts sand, three parts crushed stone and a seventh part water.
Tip: To make the concrete lay easily on the surface, it is recommended to add a little liquid soap to the water.
13. To lay concrete, use a trowel and place in small portions. Gradually leveling the surface.

14. The rods for installing the toilet should also be covered with polyethylene to prevent concrete from getting on them.
15. To compact the concrete, use a long rod, which gradually pierces the poured surface, paying attention to the corner places.
16. After pouring the formwork, 7-10 days must pass before it is removed.
17. To connect the cistern, use flexible PVC corrugation. Insert it into the toilet hole and secure it with sealant.
18. Secure the pipe in this position and leave for 24 hours for the silicone to dry completely.
Installation of a wall-hung toilet
1. To reliably seal the joint between the toilet bowl and the rubber ring, apply silicone around the entire perimeter of these devices.
2. Place the toilet on the rods and tighten the nuts.
3. Wait 12 hours for the sealant to cure.
4. Connect the toilet to the sewer drain.

5. Install the toilet lid.
6. To produce finishing finishing works concrete base use any moisture-resistant materials.
Installation of a wall-hung toilet with installation
Most frames for wall-hung toilets allow height adjustment. Before installation, you should take measurements and make markings. Before installation, it is recommended to study the instructions, which usually indicate the interval between the cistern and the floor. average value this distance is equal to one meter.
Before the beginning installation work, take care of the outlet of the sewer and water pipes. The frame is fastened using anchor bolts. They are able to fix it in one position and ensure the immobility of the structure.
When installing the frame on wooden floor, you should use the most powerful wood screws.
Before fixing the installation, you should once again measure the evenness of the structure. Use a regular level to level the frame. Measure front, back, top and bottom. For fixation correct settings use studs and rods that can temporarily attach the frame to the wall.
The height of the bowl is selected in accordance with individual parameters living people. The average height that is optimal for the average adult is 400 mm.
To connect the toilet, use a flexible hose; to connect to the water supply, use a metal hose to ensure the reliability and durability of the connection.
Tip: Close the valve on the cistern while connecting the toilet to the water supply.
For exterior finishing use any materials that must be waterproof.
Do not block access to the drain tank in order to carry out maintenance or repair work at any time.
Installation of a wall-hung toilet video:
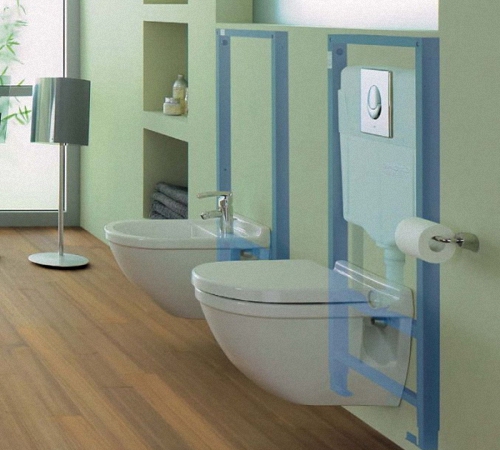
An innovative solution that allows you to create a comfortable and practical bathroom is the installation of an installation for plumbing fixtures. The design hides all pipes, components, couplings and other components in the wall, and the visible part is laconic and harmonious. How to install a toilet installation yourself is described in the article.
Advantages and disadvantages of using a toilet installation
The toilet installation system is a clearly thought-out design that allows you to fix plumbing elements and hide their connection to the sewer system. Thanks to such an installation system, it will be possible to hide the “technical stuffing” behind a false panel, while the toilet and flush button remain in sight.

The installation is used when installing floor or hanging plumbing fixtures. At the same time, the second option is gaining great popularity among consumers due to its undeniable advantages:
- liberation extra space in the bathroom - especially important for small rooms;
- The plumbing does not come into contact with the floor, making cleaning easier.
Installing a toilet with installation has a number of advantages compared to traditional way plumbing installations. The main advantages include:
- Attractive appearance. The installation is closed with finishing selected to match the style of the room. Exposed parts of plumbing may have unusual design solutions.
- Visual expansion of space - a less overloaded bathroom seems larger.
- Use of higher quality fittings. Since the components of the working mechanism are hidden and access to them is difficult, manufacturers try to minimize the risk of breakdown by installing high-quality float and key elements.
- Toilets designed for installation are equipped with a barrel with efficient water supply. Flushing occurs under high pressure, while water is used sparingly.
- Possibility of installing the installation under various walls. The range of designs allows you to choose the model that is optimally suitable for the bathroom.
- It is quite possible to install an installation for a wall-hung toilet with your own hands. The main thing is to carefully study the instructions, understand the device and follow the installation technology.
- Quiet operation of the cistern.
- The height of the hanging models can be adjusted, selecting the optimal value for your own height.

Despite the significant advantages, such a device also has some disadvantages:
- Installing a toilet with installation will cost more than purchasing conventional plumbing fixtures.
- To replace it, you will have to renovate the bathroom finishing.
- More complex installation technology.
Important! There is an opinion that in case of any breakdown it is necessary to dismantle the finishing and disassemble the structure. In fact, there is usually access to the internal parts underneath the removable drain key. Inspection hatches are provided for connection points and taps.
Types of wall-hung toilet installation designs
The construction market presents two types of installations for plumbing: block and frame systems.
Block module“recessed” into the load-bearing wall of the room. The design includes a plastic tank with fittings and fasteners for fixing the toilet. This option is designed for the installation of wall-mounted plumbing fixtures only. To build a block installation, you should cut a niche in the wall in advance. By choosing this model, you can save up to 15 cm of space.
Frame installation consists of one piece steel frame and various fasteners. Standard frame configuration:

- steel body;
- holders for fixing the module to the wall;
- drain tank system;
- water supply hose;
- cistern;
- sewer pipe for draining;
- studs for attaching the toilet;
- water supply pipe;
- legs that regulate the installation height of the installation.
Distinctive features of frame modules:
- a large selection of installation options, both straight and angular;
- Possibility of installation near any wall and interior partition;
- the cost of frame modules is higher than block structures.
When purchasing a toilet installation, it is important to consider the following parameters:
- Placement of plumbing fixtures and general arrangement in the bathroom.
- Compatibility of the selected installation system with the toilet. When purchasing a module, you need to check with the seller whether the system will fit a specific model of plumbing fixtures.
- The operating principle of the flush keys and the possibility of inspection through the viewing window.
- Installation system components. At the purchase stage, you should check the availability of all elements for self-installation. Sometimes, some parts are sold separately.
Installation of a wall-hung toilet with DIY installation. Frame design.
The optimal place for installing a toilet
A convenient location for the toilet is the least accessible place, away from the door. Usually, when placing installations, they are guided by the placement of risers. In some situations the module has to be moved:
- installation under a window requires the use of a low module up to 82 cm;
- double-sided installation - fastening of plumbing fixtures on both sides of the partition is carried out using a three-dimensional frame system that allows you to hang objects on both sides of the partition;
- installing a toilet in the corner.

After choosing the installation location, you will need to make markings on the wall. First, you should mark the central axis of the model, then the contours of the frame location and the location of the installation on the wall/floor.
Advice. Before installing a toilet with your own hands, be sure to read the instructions and study the attached installation diagram.
- toilet installation height from floor level - 43 cm;
- the optimal place to place the drain button is 1 m;
- the distance from the base of the wall to the surface of the steel frame of the module is 15 cm;
- gap between wall and drain tank- at least 2 cm.
DIY toilet installation height: video
List of required tools
Installation of the installation module requires the following tools:

- a simple pencil or marker for making preliminary markings;
- construction/laser level for maintaining vertical and horizontal lines;
- roulette;
- tow for sealing seams;
- a hammer drill with a drill will be needed to create holes for fasteners;
- overhead open-end wrenches for connecting the pipeline and installing the toilet;
- silicone sealant for reliable connection of parts and sealing of joints.
Step-by-step instructions for installing a toilet installation yourself
Before starting installation work, the sewerage and water supply pipes should be installed. The subsequent installation algorithm includes the following steps:
- Preparing the fastening system. Using a puncher, make holes according to the marks and insert dowels into them. The steel frame is fixed using 4 required fasteners.
- Installation of metal structures. First, the lower part is attached, then the evenness of the installation of the frame is checked and the height of the module is adjusted.
- Secure with anchor screws or special brackets metal carcass to Wall. At this stage, it is important to check the strength of the installation - the structure should not wobble.

Connecting the sewerage and water supply system
For connection you will need fixing plastic clamps, to which the pipes of the sewerage system and the cistern are attached. It is advisable to carry out work using reliable materials, for example, copper pipes. To save money, they can be replaced with polypropylene pipes.
After connecting and sealing the seams, a check is carried out - run the water and make sure that there are no leaks. Next, the pipes for installing the toilet are mounted, the drain pipe is fixed to the installation in a special recess.

Finishing work
Upon completion of work on supplying communications before installing the toilet, it is necessary to line the false panel. The frame is usually “sheathed” with plasterboard that is resistant to high humidity. Plaster sheets are attached with self-tapping screws to the frame or to a prepared frame of guide profiles.
Conceal the tank capacity with a safety strip. After this, finish the plaster with tiles or other decorative material, suitable for bathrooms.

Advice. It is advisable to start laying tiles on the installation with the drain button. It should be in the center of the tile or at the joint.
Securing the toilet
At the final stage, the toilet bowl is installed:
- There must be a backing between the toilet and the installation frame that protects the lining from friction with the body of the plumbing fixtures. If there is no suitable rubber backing, you can use silicone sealant.
- The nuts and bolts should not be over-tightened as this may cause cracks to appear on the toilet bowl. When fastening, a gasket must be placed between the elements.
- After installing the toilet, the flush button is installed. Insert the cables from the tank into the special holes on the button.

The frame module installation technology is identical for systems from most manufacturers. Do-it-yourself installation of a Grohe toilet is done in the manner described above.
Do-it-yourself toilet installation: video
Features of installing a block design installation
The installation of block modules is somewhat different from the installation technology of frame models. General procedure for commissioning a block installation:

- Use metal fasteners to secure the position of the knees.
- Cover the toilet outlet with silicone, install the plumbing fixtures in the right place and make a mark for future fasteners.
- Cistern secure with bolts.
- Attach the connecting cuff to the toilet.
- Close the drain button and check the system for leaks.
- Finish the wall and fix the position of the toilet.
Possible difficulties during the operation and installation of a DIY toilet installation

- If leaks appear in a floor-standing toilet, you need to check the tightness of the connections between the pipes and corrugations, and also improve the sealing of the joints.
- Leakage of the cistern is the result of errors in the placement of sealing gaskets. To eliminate leaks, you need to turn off the water supply taps, open the inspection hatch, change the position of the gaskets and screw the tank panel back on.
- If the slope of the drain is chosen incorrectly (less than 45°), then the water in the toilet will stagnate.
- Loosening of the toilet bowl is eliminated by tightening the bolts.
Do-it-yourself toilet installation repair
The main feature of plumbing repairs with installation is the dismantling of the decorative box. The most common breakdowns:
- tank leak;
- insufficient filling of the drain tank with water;
- constant filling of the tank;
- malfunction drain mechanism due to incorrect selection of disinfectant.

Installation dismantling sequence:
- Remove the flush plate by pressing it from the bottom.
- Remove frames. To begin, unscrew the screws and remove the pusher clamps.
- Disconnect the partitions by pressing the fastening clips.
- Shut off the water supply.
- Remove the fill valve and drain valve retainer.
- There is a drain valve inside the tank - it must be removed. After this, further repair work is carried out.
When the problems are resolved, assembly of the toilet installation is carried out in the reverse order.
Installation for a Grohe toilet: do-it-yourself repair. Video.
Despite the fact that toilets with installation appeared in the late 80s of the last century, in Russia and neighboring countries this wall-hung plumbing equipment is just beginning to gain popularity. The emergence of any innovation is almost always accompanied by a lot of speculation, most of which have no basis. The reason for this is lack of information. To dispel all doubts, we have made a selection of materials that will provide answers to most questions related to hanging plumbing.
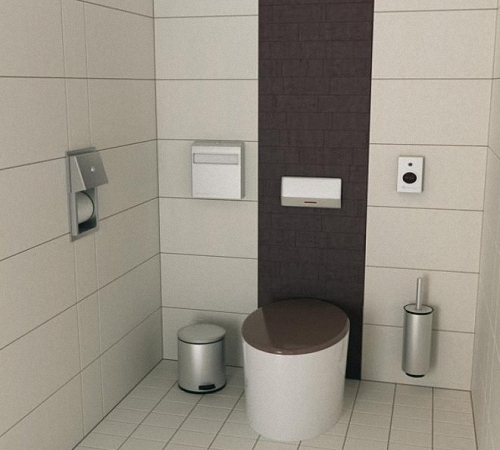
Wall-hung toilet design
This type is a mounting structure used to attach a toilet bowl, bidet or other included equipment. The system is installed on a wall or a cavity made in it. At the same time, the tank, supply pipes and other utilities remain hidden behind false panels. The drain button, as well as other controls, remain on the surface.
To gain access to servicing the system, simply remove the false panel. The statement that this requires dismantling the wall covering is, to put it mildly, incorrect (provided that the installation was carried out correctly).
Installation systems require supports, depending on the mounting method, they can be:
- Block-based. This type is considered budget option installations. This design consists of two main elements:

The main disadvantage of this scheme is that in the case of installing suspended equipment, the entire load falls on the main wall. The advantages include the ease of installation and the relatively low cost of the solution.

Designations:
- A – Drain valve control button.
- B – Support frame.
- C – Water supply pipe from the tank.
- D – Support leg for mounting with a load-bearing base.
- E – Outlet to the sewer system.
- F – Fasteners for hanging bowl.
- G – Built-in cistern.
- N – Mounting to the wall.
The presented design is designed for a load of up to 400-450 kg, this refutes the unfounded claim that wall-hung toilets can only be used by children.
Depending on the design, frame supports can be:

In addition, many manufacturers (for example, Gustavsberg, Delafon, Cersanit, etc.) produce universal models for different kinds plumbing equipment. This is achieved due to the ability to adjust the height of its installation and additional mounting kits.
Typical sizes
To carry out installation work on installing suspended equipment, it is important to know its dimensions. Most manufacturers adhere to the following standard sizes:
- For block type systems:
– Width – 50.0 cm.
– Height – 100.0 cm.
– Depth – 10.0-15.0 cm.
- For frame structures:
– Width – 50.0-60.0 cm.
– Height – 80.0-140.0 cm.
– Depth – 15.0-30.0 cm.
Such a significant variation in height among the latter makes it possible to select equipment for certain conditions of the installation site. For example, to place it under a window, you need to choose a compact model with a short frame. As for the dimensions of hanging equipment, in particular, toilet bowls, their dimensions correspond to classic floor structures:
- Length – 50.0-60.0 cm.
- Height and width – 30.0-40.0 cm.
Advantages and disadvantages
Before installing hanging plumbing, you need to make an objective decision. To do this, you need to know all the features of this equipment, let's start with the advantages:
- The process of cleaning the bathroom is greatly simplified; in particular, there are no problems with access behind the toilet, the same applies to the bidet and washbasin.
- The space in the room is used more efficiently, since some of the equipment is built into the wall.
- The space of the bathroom is visually increased.
- The room takes on a more aesthetic appearance.
Of course, such a solution also has its negative sides, namely:
- Access to communications is blocked. Even if there are false panels, it will not be possible to quickly turn off the taps in the event of a leak; this will require some time or, as an option, shutting off the input.
- If the drain valve of the tank breaks down, problems will arise with its replacement. In most cases, it will not be possible to solve the problem on your own; you will need the help of a specialist, which leads to additional expenses. Choosing quality equipment from well-known brands such as Grohe, Jacob, Vitra or Belbagno significantly reduces the risk of such a problem.
- Problems arise when replacing plumbing equipment; first of all, this is associated with finding a toilet or sink from the same manufacturer or with suitable fastening and connection of water inlet and outlet. Replacing the installation is equivalent to major renovation in room.
- In order for the frame to withstand the required load, it must be installed on a strong foundation; partition walls are not suitable for this purpose, and this reduces the choice of installation locations.
How to choose?
We offer some tips to help when choosing equipment:
- We recommend purchasing products from well-known brands; the quality and reliability of such products are an order of magnitude higher than Chinese manufacturers. Considering the features listed above, cost savings can later turn into serious costs.
- Some models may have additional functions, increasing comfort, an example is a microlift, which ensures smooth lowering of the seat and lid. But it should be remembered that such additional piping significantly increases the cost of the equipment.

- Pay attention to rimless models, their popularity rating has risen high in recent years.

- The circular flush system cleans thickets much more effectively than a horizontal flush.

- Pay attention to the mechanism of the drain fittings; they can be mechanical or pneumatic; the first is more reliable.
- Fittings that save water pay for themselves within a year or two. Now almost everything famous manufacturers By default they install it on their products.

- Before purchasing, be sure to check the dimensions of the installation module; it may be larger or smaller than the required dimensions.
- Don’t rush to buy an additional bidet, some toilets support this function, so inquire about the availability of this model.
- Checking the availability of the appropriate certificate will help you avoid purchasing counterfeit products. Branded products (Roca, GaP, IFO, Laufen, etc.) must be technical documentation, which includes installation and connection instructions.
- Please check that the warranty card is filled out correctly.
Review of manufacturers
Below is a table containing best manufacturers taking into account various criteria.

We hope this table will answer the question of which manufacturer is better. It should be taken into account that new models are entering the market, therefore, the objectivity and relevance of the sample may not be reliable.
How to install a wall-hung toilet?
Before attempting the installation yourself, please be aware that this may void your warranty. Many manufacturers set a condition under which warranty obligations are recognized only if installation work is performed by specialists from certified centers.
The algorithm of actions given below assumes that the necessary communications have been laid to the installation site, and the installation module has been assembled in accordance with the instructions (the tank is secured, an outlet is connected to it, etc.). It makes no sense to give the order of assembly due to the wide variety of models and their design features. This installation process must be done independently, checking the instructions. The most we can help is to give a few recommendations:
- The drain button is conveniently located at a height of 80.0-100.0 cm from the base.
- Install the toilet bowl at a height of 40.0-45.0 cm.
- Height to sewer outlet 20.0-25.0 cm.
Algorithm of actions:
- We align the installation module vertically and horizontally, using a building level for this.
- We fix the frame frame to the supporting surfaces using the included fasteners.
- Install the toilet holder studs.
- We check the horizontal and vertical and, if necessary, make adjustments using adjusting bolts.
- We connect the corrugated pipe to the sewer outlet at one end.
- We attach the toilet and connect the second end of the corrugation to the drain.
- We fill the bucket with water and simulate draining if there are no leaks.
- We connect the water drainage from the tank to the toilet. Pour water into the tank and press drain.
- We connect the water supply to the tank and check the operation of the entire system.
- We shut off the flow of water into the tank and remove the bowl.
- We install plugs on the drain holes.
- We cover the installation area with plasterboard or false panel. In order to correctly cut technological holes in the casing, the equipment set, as a rule, includes a special template.
- Next, finishing work is carried out in the room; upon completion, we install and connect the bowl.
- At the final stage, tighten the mounting bolts on the toilet and turn on the water supply.
Floor standing toilets for a long time were out of competition, but everything is changing. Owners modern apartments More and more people are choosing hanging models. This pleasure is not cheap, but this is practically the only drawback of this solution. But among the advantages of its design great design and ease of maintenance.
It is important that the installation of a wall-hung toilet is carried out in accordance with all the rules. We will tell you how and in what sequence the work is carried out, what devices will be needed to attach the bowl. Taking into account our recommendations, you can do everything yourself or supervise the actions of plumbers.
Home master can handle installation with ease wall model, if he understands distinctive features its designs.
The visible element of such a plumbing fixture is the toilet bowl itself. Its installation on the wall is carried out in two ways: using an installation and on a concrete base. In our article we will look at both options.
A wall-hung toilet model is more expensive than a regular one floor option, but you can reduce costs if you install the product yourself
Strong and weak sides hanging type plumbing fixtures are listed, which describes in detail the varieties and design specifics, and provides guidelines for choosing the best model for you personally.
The design of a wall-mounted plumbing fixture can be roughly divided into three main elements, which will be discussed further.
Reliable steel frame (module)
The frame is the main element of the entire structure, which is attached to the floor and wall of the bathroom. It is the frame that supports the cistern and bowl. The quality of subsequent operation of the product depends on its reliability. After putting the toilet into operation, the structure will need to have a sufficient margin of strength to support the weight of an adult.
To secure the frame you must have solid foundation. Plasterboard walls cannot be considered in this capacity. The frame is equipped with a mechanism that allows you to vary the installation height of the toilet bowl in the range of 40-43 cm. To securely fasten the bowl, manufacturers recommend using strong pins made of steel.

In this photo, all three elements of the toilet design are clearly visible: a light blue frame, a gray-blue plastic tank with a flush button and a white bowl
The best models of support frames for hanging plumbing fixtures are listed, which we recommend that you familiarize yourself with.
Hidden cistern
The hidden fastening of this element, according to supporters of the wall model, is considered one of the advantages of the design. The material for its manufacture is very durable plastic. To prevent condensation from accumulating on the surface, the plastic is treated with styrene.
The tank has flat shape, characterized by a technological cutout on one side. This cutout is necessary for the drain key device. This hole has another purpose: it allows you to remove the drain tank fittings when performing repair work.
Another feature of cisterns suspended structure is economical system drain that such a model can be equipped with. Depending on the need, the drain dose can be 3 or 6 liters.
The bowl is a visible structural element
The bowl is chosen, as a rule, based on the personal preferences of the users. It is visible and must correspond general interior premises. In addition, it should be easy to use.

It is the toilet bowl, as a visible structural element, that should fit organically into the interior of the room: it can even have a square shape
Most buyers prefer the product oval shape. Although there are round, rectangular and even square models on sale.
Fastening elements are part of the selected model and are included in its configuration. There is no need to purchase additional hardware for a wall-hung toilet. In addition, among the mounted models there are electronic controls and numerous hygienic functions.
Intelligent types of plumbing fixtures with retractable nozzles for washing and drying, deodorizing and other actions need to be connected to a power supply. Their installation is complicated by eyeliner power line and setting up the system:
Image gallery

These long steel pins, running through holes in the frame and attached to the wall, are needed to hold the toilet bowl securely in place.
Connecting the necessary communications
First of all, we connect the sewer. For this connection, a black tap is used, which, as a rule, is included in the installation package. One end of this outlet is adjusted to the sewer pipe, and its other end is attached to the frame with special clips.
Water pipes should be located to the right or left of the module. The pipe should be connected to the structure using the threaded connection already present in it. To connect the water supply it is better to use copper or polypropylene pipes, and make the connection detachable.
Cold water can also be supplied to the tank using flexible hoses. Such hoses are more profitable in terms of price, but their fragility should be taken into account. And when replacing failed hoses, you will have to carry out expensive repairs, so the option with pipes is still preferable.
Don't forget to check how securely the drain container is connected to the water supply system. For this purpose, open the water supply tap. It is located inside the drain tank. After filling the container, all possible leaks are eliminated. This can be done without draining the water.

If, during the process of checking the correct connection of the toilet to the sewer or water supply system, leaks are identified, they should be carefully repaired
The connection to the sewer drain should also be checked. To do this, put a toilet bowl on the studs and perform a test flush without finally securing the structure. After which the bowl is removed again and all identified leaks, if any, are eliminated.
Finishing work
On next stage you have to sew up the niche using a moisture-resistant sheet of plasterboard, and then carry out the finishing work. Please note that we need exactly moisture resistant drywall, because the usual one will quickly deteriorate under the influence of condensation.

To perform finishing work when installing a wall-hung toilet with an installation, moisture-resistant plasterboard is used, which can be used in rooms with high humidity without reducing its quality
To cut drywall, you need to use a template, which should be included with the installation. It will allow you to correctly cut all the necessary mounting holes without damaging the material.
After installing the moisture-resistant sheet, finishing material can be fixed to its surface. Ceramic tiles are most often used to decorate a bathroom.
Final installation steps
You can begin installing the visible part of the wall-hung toilet only after the tile adhesive has thoroughly dried.
The procedure for installing a toilet bowl:
- the drainage pipe must protrude 50 mm beyond the wall surface: it must be adjusted to this size;
- do the same with the pipe that leads to the sewer drain;
- both pipes are installed in the places intended for them;
- a large gasket similar in shape to a truncated pyramid is put on the studs that were fixed in advance, as well as on the pipes;
- the bowl is put on the studs and the pipes are attached to it;
- put rubber gaskets and plastic inserts in their places;
- put on and tighten the fastening nuts;
- The protruding parts of the rubber gasket are carefully trimmed.
Now you can drain the water from the tank, thereby checking the operation of the sewer drain. The installation height of the wall-hung toilet bowl relative to the floor can be adjusted by changing the position of the studs and retractable pins that are used to secure this element. It must match the height of the toilet visitors.

The installation height of the bowl can be adjusted in the range of 40-43 cm, but the standard distance is 40 cm from the floor surface
The standard height is 40 cm, measured from the floor surface to the top edge of the bowl.
Attaching the flush key
The installation process is completed by installing the drain key. It is included in the basic package and can be mechanical or pneumatic. Usually this procedure does not cause any problems, since all the provided connections should already be brought to the surface of the wall.
There are special pins for a mechanical key, and tubes for a pneumatic key. All that remains is to install this element in its intended place and adjust its position. That's it: the toilet can be used.
Suspended model on a concrete base
A steel frame is expensive. In principle, you can do without it by building a concrete pedestal with your own hands, which will serve as a reliable foundation for the wall-hung toilet. This option is considered the most economical.

The diagram of the model on a concrete base includes: 1 – two rods for fixing the toilet bowl, mounted into the wall; 2 – concrete base; 3 – pipe for draining into the sewer
With this installation method, the drain container can either be mounted into the wall, with the drain button located outside, or placed above the bowl of the plumbing fixture.
Pre-installation procedure
Let's consider the option that is considered the least expensive. Let's prepare everything you need for work:
- concrete M200 - approximately 40 liters;
- boards for making formwork;
- threaded rods (length 50-80 cm, thickness 2 cm) - 2 pieces;
- washers, nuts, screws for woodworking;
- plastic pipe (diameter 11 cm, length 8 cm);
- drain coupling;
- Styrofoam;
- silicone sealant.
I think it’s worth repeating that the wall we have to work with must be permanent.
Step-by-step installation process
We fix rods in the main wall, onto the outlets of which the toilet bowl will then be placed. Let us remind you that we should get a stable and reliable design, capable of supporting a weight of 400 kg.
The next step is to install the drain coupling. At this stage, it is necessary to determine the height of the toilet in order to cut the coupling to the appropriate length.
Now we need to install the formwork. In order to mark fastening points on the formwork, you should determine the distance between the holes intended for fastening.
To calculate the length of the rods, you need to add up the thickness of the recess, which is approximately 15 cm, and the distance from the wall to the toilet bowl. To fix the rods in the wall, concrete adhesive is used - a chemical anchor.

This is what the structure looks like ready for the concreting process: the place where the drain will be connected to the toilet bowl is covered with foam plastic
When the formwork is installed and the installation of the pins is completed, the bowl should be installed in the place intended for it. Make sure that the mounting holes match the outlets, and the outlet hole matches the coupling drain.
The next step is concreting. This must be done by installing foam plastic in the place where the drain hole will be. Remember that the concrete will finally harden only after 28 days.
After this, you can remove the formwork and make sure that in front of us there is a monolithic concrete block with pins coming out of it and an open, fixed coupling. A toilet is mounted to the front of the block, and a tank is placed on the base itself.

This is exactly what a wall-hung toilet will look like after installing the bowl, and its tank will be installed on a concrete base
The procedure for installing the bowl to concrete base no different from installation floor-standing toilet. You need to install the bowl on the pins, tighten the nuts, connect and seal the drain. Lastly, a drain tank is placed on the concrete base.
As you can see, this method of installing a hanging model is much cheaper and easier than working with the installation. But, to be honest, the result is not much different from a floor-standing toilet.
Conclusions and useful video on the topic
The information you just read will be perceived much better if you supplement it with a video. We invite you to see the installation with toilet mounting hanging type with an installation filmed on video.
The range of plumbing fixtures is expanding: toilets are being improved, updated, and become more and more attractive. But modern models, as a rule, are more expensive than traditional ones.
Tell us about how you installed a wall-hung toilet in your house/apartment. It is possible that you know technological nuances, which will be useful to site visitors. Please write comments, post photos, share your impressions and ask questions in the block below.
Conventional floor-mounted toilets have been replaced by wall-hung structures that do not take up floor space and look more modern. It is not surprising that wall-mounted models have begun to push traditional products out of the market. Installing a wall-hung structure is more difficult, takes more time and costs more, but you can save money if you consider an option such as installing a wall-hung toilet yourself.
Internal structure and principle of operation of the design
If you look into design features products, it becomes clear how to install a wall-mounted toilet.
The design of the wall-mounted product is such that the only visible element is the toilet bowl
The first element is a strong steel frame, which is the base to which the visible part of the structure is attached - the toilet bowl. It is with its installation that the installation of a wall-hung toilet begins. The frame is securely fixed to the wall and also fixed to the floor - as a result, it must withstand the weight of a heavy person.
Accordingly, it is unacceptable to install this structure on weak walls (for example, made of plasterboard), since the wall simply will not hold up. The frame is equipped with a device that allows you to adjust the height (400-430 mm) at which the product bowl is mounted. It is suspended from the frame using special pins - this is the main fastening of the wall-hung toilet.

Often two installations are installed simultaneously - for the toilet and for the bidet
The second element is a plastic cistern hidden in the wall. Its shape differs from the traditional one, since the container must fit into a narrow structure. It is mounted in a steel frame and insulated special material, eliminating the appearance of condensation - styropol. The front wall of the tank is equipped with a cutout for mounting a release button device. In case of repair, this cutout is also used. Almost all modern tanks require dosing of drainage: for example, the volume of water discharged can be 3 liters or 6 liters, depending on the purpose.

Flush tanks of a flat configuration are fixed inside the installation
The third element is the toilet bowl, the only visible and actively used structural part. Its shape is traditional, oval, although designer models There are both round and rectangular configurations.

The toilet bowl can be rectangular, or even round shape- it all depends on the designer’s imagination and the client’s desires
There should be no problems with fasteners, since the product comes with a set of necessary parts and tools and installation instructions. Sometimes it is necessary to additionally purchase Teflon tape, a polyethylene outlet, flexible hose, studs.
Installation technology
Installing a wall-hung toilet using a special frame installed in the wall is more expensive, but more reliable and faster.

The installation must be mounted to the floor and main wall
Installation steps:
- Installation of a steel frame - through special holes it is attached to the main wall and floor using dowels. At the installation site, sewerage and water pipe. The frame (installation) should be checked for evenness using a level. It must be clearly parallel to the wall to which it is attached. At this stage, the installation height of the wall-hung toilet is also set - 40-43 cm. It depends on the height of the apartment owners.

The height of the toilet bowl is adjustable during installation
- Water supply to the tank. It can be flexible or rigid. Experts insist on the hard version, as it lasts much longer. While the liner is being installed, the valve in the tank is closed.

During work, the water drain from the tank should be shut off.
- Connecting the toilet to the sewerage system. The toilet outlet is inserted into sewer outlet, secure the connection using corrugations. After installation, it is necessary to test the system - do a test drain. To do this, the toilet bowl is temporarily completely screwed to the frame. It is then removed again, as it is usually installed at the final stage.

Many installation kits are connected to a sewer pipe without the use of corrugations
- Covering the work area with sheets of plasterboard. For the plumbing unit, choose sheets of waterproof double plasterboard, which is stronger than regular plasterboard. The panels are mounted to the frame and metal profile, which is mounted on the wall. The instructions included with the product include detailed diagram cutting the material with places to cut out the necessary holes. There can be two options for covering: for the entire wall area or just to cover the installation. In the second case, an improvised shelf will appear above the toilet bowl.

An improvised shelf above the toilet and bidet can be used for decoration or necessary things
- Facing the partition with ceramic tiles or panels similar finishing material bathroom.

The wall cladding behind the toilet should be in harmony with the rest of the room’s decoration
- The final stage is the installation of a wall-mounted toilet, specifically its bowl. It is hung on a designated part of the steel frame using two pins.

Sheets of plasterboard with lining cover the installation and the flush cistern, leaving the toilet bowl and flush button
Particular attention should be paid correct installation installation, since the correct execution of subsequent work depends on it.
Installation of a toilet without installation, on a concrete base
Sometimes people are interested in how to install a wall-hung toilet without installation. Of course, installing a toilet on a frame can be replaced with a cheaper option - installing it on a self-made concrete base.
The flush cistern is installed in two ways: either mounted in the wall with flush buttons, or placed in a standard manner above the toilet bowl in a manufactured base.

Wall-mounted toilet mounting diagram: 1 - 2 rods mounted in the wall; 2 - monolithic concrete base; 3 - drain pipe
Let's consider the most economical option.
To install you need to prepare:
- about 40 liters of M200 concrete;
- boards for formwork;
- nuts, washers, wood screws;
- 2 threaded rods 2 cm thick (length from 50 to 80 cm);
- piece plastic pipe(length – 8 cm or more, diameter – 11 cm);
- drain coupling;
- silicone sealant.
Procedure:
They start by securing the rods in the main wall. In the future, the toilet bowl will be “planted” on the outlets of the rods. The result is a fairly stable structure that can withstand a weight of 400-500 kg.

The dimensions of the concrete base are calculated taking into account further dismantling of the formwork
Install the formwork. Calculate the distance between the holes for fasteners and mark the fastening points on the formwork.
Calculate the length of the rods: sum up the thickness of the recess (about 15 cm), the distance from the toilet bowl to the wall. To fix the rods in the wall, a chemical anchor is used - a special glue for concrete.
After installing the pins and installing the formwork, try on the toilet bowl. The holes for fastening must coincide with the outlets, the outlet hole must coincide with the outlet of the coupling.

The concrete base will finally harden only after 2-3 weeks.
Concreting begins, supporting the drain hole with foam. The result is monolithic block with fixed open coupling and protruding pins.

The concrete base should include pins for the toilet bowl, a coupling outlet for the flush and space at the top for mounting a cistern.
How to install wall hung toilet on a prepared base, there is no need to think twice - the subsequent steps are no different from installing a conventional floor-standing toilet: connect the drain, seal the connections, install the bowl on the pins, tighten the nuts. The flush cistern is fixed above the toilet bowl.

The concrete base and drain pipe can be covered with sheets of plasterboard, leaving an opening for access to the drain tank
Installing a wall-hung toilet like this yourself will save family budget, since expensive installation is not required.