Wood burning patterns are beautiful. Why do you need stencils and inscriptions for wood burning?
Nowadays, there are many ways of wood burning, each of which requires separate skills and materials. This article will discuss the most common method - pyrography. This method is literally painting on wood using a special electric burner, which can be purchased in many stores, both in the craft supply and in the tool department. In this article we will look at popular designs that are perfect for wood burning.
The best material for applying a design is considered to be a plywood board made from alder or linden. Before work, it must be sanded using sandpaper. Sketches can be drawn on wood by hand or transferred through carbon paper, you can also use a stencil, but do not forget to remove it before burning.
Let's look at popular designs for wood burning with your own hands
Drawing technique:- Burning is carried out exclusively on dry wood.
- To begin with, dots are first placed on a pre-drawn drawing, and only after that lines are drawn. In order for the line to be thin, the pen of the electric burner should be moved quickly. And to get a thick line, on the contrary, go slowly. When the line is finished, the pen should be torn off quickly, without holding it in place. You should not press the pen while drawing.
- First, burn out the outer edge of the design, gradually moving to the center.
- By changing the heat and angle of the pin, you can create both deeply saturated lines and barely noticeable strokes. You can also change the color intensity of the lines.
- Do not slow down the movement of the electric burner pen along the drawing. This can cause the edges of the burnt grooves to become charred. The same thing happens if the pin overheats.
- You can cool the tip of the pin by simply holding it upright for a while.
- Burning should be done in several parts of the drawing at once. After working a little in one area, they leave it and move on to another, and then return to the first. This is necessary to avoid intermediate burns between nearby strokes that occur due to overheating. Therefore, you should not immediately burn out several parts that are close to each other; before you burn a new stroke, you need to let the neighboring one cool down.
- If you need to shade a large area, you should first burn out the outline (outline), and then work inside it with the wide side of the pin. When creating a background, you can use a variety of techniques: paint with vertical lines or strokes, dots, patterns of various sizes and density of application. Also, wood burning kits often contain shaped tips, the use of which helps to diversify the design in a simple, uncomplicated way.
- Having finished burning the design, the surface is carefully, but carefully, so as not to damage small strokes and lines and not to round the edges of the protrusions, sand the surface with the smallest sandpaper.
- An already finished drawing can be supplemented by painting it with watercolors or oil paints. To paint on wood, you will need high quality paints and a sufficient set of soft round and flat brushes.
- Burnt and then painted works require a special finishing, which is waxing. The wax finish gives the picture a matte silky shine and preserves the natural color of the wood, and also helps to preserve the tone and richness of the applied paints for a long time.
We study diagrams and examples of beautiful works for inspiration
The photo below shows a selection of light patterns that can help beginners get their hands on:

Of course, popular motifs for burning, for example, on a cutting board are paintings depicting nature.
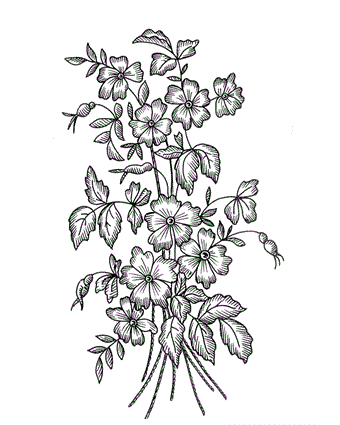
Flowers burned on wood look very beautiful. Here are a few patterns that are very easy to complete even for those who are new to this craft.
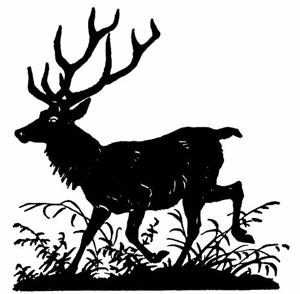
Perhaps the following examples will seem more complicated than the previous ones, but the animals made on wood are worth the effort put into their creation:

Video for beginners on the topic of the article
In these videos you will see how the process of wood burning takes place, you will learn some of the nuances of this type of activity, how to choose the right burner and, perhaps, you will find new ideas for yourself and the performance of your work.
Everyone remembers one of the pastimes of childhood - burning pictures or portraits on wood. And the smell of burning wood remained in my memory forever. Everything returns to normal. Today it is called pyrography, and is becoming fashionable again. Computers are computers, and many children want to show their individuality in a different way. And not only for children, to say the least. Let's remember how this is done and what is needed for this. Below is all the information for beginners and more.
Everyone remembers one of the childhood pastimes - wood burning.
The burning apparatus (pyrograph) is the main equipment. Previously, it was a plastic box (usually yellow) with a small soldering iron inside, the tip of which was similar to a paper clip in appearance and thickness. Today, when this art is making a comeback, the burning machine is a more serious device. There are also old-type devices, but it is still better to purchase a burner with hard feathers. It will last for a long time, since it is highly durable, and it has many different attachments.
There are also disadvantages:
- long heating - long cooling;
- sometimes - uncomfortable (heating) handles;
- Possibility of burnout during long-term operation.
Wire burners have more serious disadvantages:
- high cost;
- expensive repairs;
- frequent replacement of thin needles;
- difficulty in finding spare parts.
The choice of a burner is a purely individual decision. But most choose the first option. I can recommend the Stayer pyrograph. An excellent burner suitable for all materials.

How to use the device? This burning device is conveniently located in a plastic box, making it convenient for transportation. The kit includes a stand for the soldering iron (which is very important), a set of tips of 20 pieces (always necessary and shaped). In general, a great gift for both a beginner and a professional pyrographer. Next you will need a wood burning kit. It will be cheaper and easier than searching for the necessary means at hand on your own. There is enough material there for the first time. The sets look something like this:

A good set contains several boards, some with ready-made sketches. We also need drawings, which are not a problem to find. For starters, they are again included in the burning kit.
Gallery: wood burning (crafts - 25 photos)


Burning lesson and technique - master class for beginners (video)
Preparation and burning wood with a soldering iron: beauty technology
Having prepared the necessary equipment, decide on the material. It is better to stick to soft woods.
Good fit:
- pine;
- Linden;
- birch;
- ash;
- maple.

Having prepared the necessary equipment, decide on the material
You need to let the device warm up on the stand. Then take the properly sanded material. Remember:
- It is necessary to grind along the grain - this will remove all the unevenness and roughness.
- After sanding, be sure to walk over the material with a damp cloth. Be sure to let the material dry.
- Next, you need to carefully apply the sketch to the surface of the prepared material with a pencil, using light strokes.
Once you start work, forget about haste: no one sets the task of completing it quickly. This is not a quick process. Like any art, it requires care and gives great pleasure from the work done.
- Sketch, if you are not good at drawing yourself, apply it to the surface using carbon paper.
- You need to apply the design onto the prepared surface with a soldering iron with the same force - this way there will be no gaps on it.
- Do not keep the hot needle in one place - the wood will darken more than in other places. This may ruin the final look.
- Keep the material with the fibers facing down - this will make it easier for the needle to move along it without encountering obstacles or resistance.
Always be careful and remember: you are working with a hot tool. Always keep it on a stand: it’s better to blow on the water one more time, but not get burned.
How to burn on boards correctly: the birth of the first masterpieces
As mentioned, this requires the following tool:
- sketch (it can be whatever you like best);
- planks (pine, linden, birch, ash, maple);
- fireproof stand for the pyrograph (required!);
- pyrograph

Depending on the need and features of the pattern, change the attachments, which you always keep at hand.
- Prepare a tablet. Clean it with fine sandpaper. Rub with a chalk-water solution. Allow the board to dry (you can only burn it when the material is dry).
- Transfer the selected sketch to the board.
- Turn on the pyrograph. Wait until the pen heats up and turns red.
- Then, with equal pressure, move the pen along the contour and all elements of the sketch so that a clear dark brown stripe appears (or black, if you want).
- Burning is completed when all parts of the sketch are drawn and it turns into a full-fledged drawing.
Depending on the need and features of the pattern, change the attachments, which you always keep at hand. This technology for beginners allows you to quickly learn the art of pyrography.
Burning on plywood: the easiest way
The process of burning on plywood is not much different from pyrography on a thick board. It is easy to purchase plywood sheets at any construction market. You can ask and they will cut it into pieces of the desired size. Plywood weighs less and costs less than other materials. It contains no harmful resins. You need to choose plywood from birch, pine, beech, no more than 2 centimeters thick.
After choosing plywood, the process follows the scheme already given.
- The plywood needs to be cleaned. Wet with a solution of chalk and water. Let the plywood dry.
- During the drying time, you need to select a sketch, a pencil, and carbon paper.
- As soon as the plywood is dry, start transferring the sketch onto the plywood.
- Turn on the pyrograph - it must be on a stand.
- After the pyrograph is hot and the sketch is transferred to plywood, begin work.

The process of burning on plywood is not much different from pyrography on a thick board
By following this simple technology, you can burn out anything you want: from a simple inscription to a real painting. This is easier to do than it seems.
Which attachments are best to buy?
All you need to do is purchase a set of attachments to get started. This is what a great set looks like, tested experimentally.
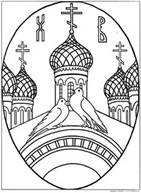
Since only talented artists can draw and burn icons on their own, it is much easier for novice pyrographers to implement this idea using ready-made stencils for burning. Be prepared for the fact that work on this “project” will take a lot of time, because icons are very complex artistic compositions. However, the end result will meet any of your expectations. You can download pictures for wood burning on the Internet. You can enlarge the picture to the desired size using any free program for working with digital images.
Print the sketch on a printer, and then transfer it to a wooden blank using tracing paper (copy paper) or other available methods that were discussed in detail in previous articles. When burning a design on wood, start first with the main contours, and only then move on to small strokes and lines. If you wish, you can decorate the frame and frame of the icon with jute filigree - the effect will be amazing.
submitted by Anton 13.01.2018, 18:14
To burn an image in the form of ornate patterns on wood, it is best to use a plywood board - it is soft, light and easy to process, so it is ideal for such work. As for sketches and stencils for burning, they can also be found and downloaded for free on the Internet on thematic websites. Choose the pattern you like, transfer it to a prepared piece of wood and start creative work.
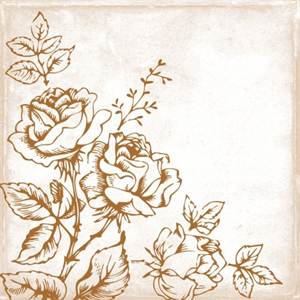
Any artistic patterns will look perfect on pieces of furniture (for example, wall shelves for books or homemade decor), as well as kitchen utensils: wooden spoons, rolling pins, cutting boards. Particularly popular are patterns for wood burning with light floral motifs that will decorate any wooden surface. They are much easier to draw than openwork compositions or “swirly” lace.
submitted by Anton 13.01.2018, 18:23
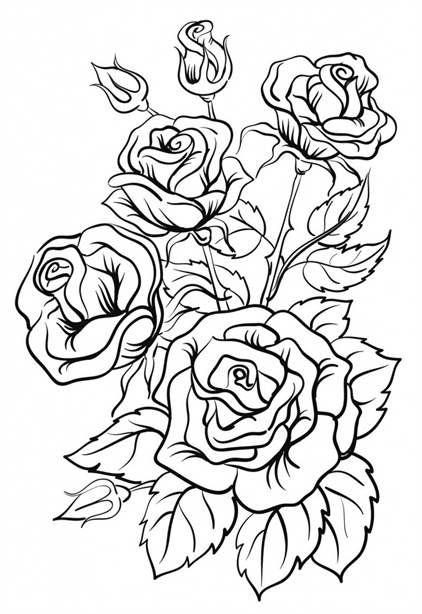
If you have already mastered the initial technique of “drawing with fire” at home and learned how to skillfully use a pyrograph, it’s time to move on to drawing more complex images - for example, still lifes. These can be either flowers in a vase that stands on the table, or an unusual floral pattern in space. There are many ideas for burning. For beginners, you can choose primitive flower schemes and sketches (chamomile or tulip). But if you draw well, you can burn larger flowers - roses, carnations or gladioli. Such stencils for wood burning can be easily found on the Internet. Flowers always look good on a variety of decorative surfaces and cutting boards. You can even make your own exclusive painting, which you can then proudly hang on the wall or give to loved ones.
submitted by Anton 13.01.2018, 18:26
For burning, drawings and sketches can be neutral (landscapes, geometric shapes, animals and other similar images) and thematic. The latter include drawings of a specific theme or holiday ones. The most popular pictures are New Year's (Happy New Year cards, images of Santa Claus, decorated Christmas trees, garlands and gifts). This list can be continued for a long time.
Select a suitable stencil on the Internet, download it to your computer (if necessary, you can process the image in Photoshop), print it and carefully transfer it to a sanded plywood board or other suitable piece of wood. Beautiful New Year's pictures, burned with your own hands, will delight you not only on holidays, but also throughout the next year.
submitted by Anton 13.01.2018, 18:28
For boys, designs for wood burning should have a “masculine character” - it is unlikely that young pyrographers will want to draw ornate patterns, flower arrangements or cartoon anime girls on the surface. They prefer to burn cars, ships, and architectural structures.
Therefore, the best option for boys who are interested in pyrography are paintings for wood burning not with elements of painting or still lifes, but images of cars, buildings, airplanes, weapons and military equipment. As an option, you can download house templates (country cottages, country houses, high-rise skyscrapers). Boys will burn even a simple license plate of a house with much more pleasure than flowers in vases and other feminine “things.”
Many of us love to create something with our own hands, including interior items. In order to diversify the decor and add new details to the comfort of your apartment, you can knit a carpet, sew a fashionable bedspread or decorative pillowcases, or paint a landscape. Or you can resort to a form of creativity such as pyrography, or simply wood burning. If you're not good at painting, this option is just for you because you can find a lot of wood burning stencils online. You just need to download them to your computer, print them, cut them out and transfer them to wood.
Anyone can use this simple method of applying a design to wood; it is suitable for both children and adults. However, you can come up with sketches yourself, but this can be done by people with a rich imagination or experience. Therefore, we suggest you use templates.
Progress
It is best to use soft and light wood species for burning, these include poplar, birch, and chestnut. The surface must be sanded with sandpaper, treated with furniture varnish and sanding repeated. This way you will avoid unwanted splinters getting into your fingers or your child’s fingers.
You will also need a pyrograph. This is an electric burner and can be purchased at hobby and craft stores. These stores also sell special kits for wood burning; they usually already include a pyrograph, a wooden block, and the drawing itself, which you will use as a stencil. For beginners, it is better to choose just such a set to try your hand at a new business, especially since it includes everything you need.
Make sure the board is dry and that your hand has something to rest on as you work. Support is very important because one wrong move can ruin the entire design or, even worse, the hot tip of the pyrograph can burn you. The hand must stand firmly.
Then draw the design using a pencil. If you are using a stencil, simply trace the outline of the cut out design. If the picture you choose is multi-layered, that is, it includes additional details (for example, hair, eyes, facial features or muzzles), then it is better to use carbon paper or tracing paper.
Advice for beginners: choose fairly simple and easy subjects for paintings until you get the hang of it. It’s better to do it simpler, but more effectively, than to take on an impossible task.
It is not entirely correct to put all the stencils under the same comb, so we divide the ready-made templates into different categories.
Create letters
Letter stencils are ideal for creating lettering on wood. For example, on cutting boards or any other wooden panels with congratulations.
Beginning pyrographers can practice their skills by first burning out letters, then whole words and sentences. You can download a whole set of different fonts to suit every taste.


Bright flowers
Flowers are a known antidepressant, whether real or painted. Now there are even special anti-stress coloring books depicting various floral patterns of any complexity. You can use this coloring book, or you can download the desired picture on the Internet. Beautiful flowers will always cheer you up!


Such works can be painted with acrylic or watercolor and then covered with wax to preserve the colors.
Outline animals
Animals depicted on a tree will perfectly complement the houses in which pets live, because you can transfer an outline image from a photograph of your pet onto the tree and burn it. It can also be a stylish gift for animal lovers, hunting lovers or professional breeders.


Holiday drawings
These can be any holiday motifs: for the New Year - Santa Claus with deer, gifts, a Christmas tree, snowflakes and so on. For Easter - Easter eggs; various Easter patterns on wooden eggs will look especially cool. For Defender of the Fatherland Day, you can burn military equipment or shoulder straps, and for March 8, bouquets of flowers.


Burning on a cutting board is no different from burning on any other wooden object. Of course, cutting boards are constantly exposed to water, a knife or other liquids. Therefore, if you are going to not just create a decorative element from a board, but decorate your work surface, then be prepared for the fact that it will not last very long. But what does service life mean compared to the joy of creating a real, albeit small, masterpiece with your own hands?
For cutting on a cutting board, 4 types of wood are typically used. All of them are different in their density and color. The lighter the wood, the softer it is, which means the lower the temperature of the burner will work. In addition, light shades of wood provide greater opportunity to create shadows and different shades of strokes, which means that it will be easier to create real “living” paintings on their surface. It is the light and soft varieties of trees that are best suited for beginning burners.

First, you need to decide whether the board will just be a decoration for the kitchen or will it still be used for its intended purpose?
If you want to use the board in the future, then the drawing should not occupy the working part of the board. A simple pattern bordering the board or a small picture in the very corner will look great.

You can make the board not just beautiful, but also useful - if you burn a simple line on it, it will be easier to cut food into slices of the same length and thickness.
Using a burnt pattern, you can also mark the functionality of the board. For example, burn bread on a board for cutting bakery products, fish on a board for fish, as well as fruits and vegetables. This will help avoid the problem of mixing the smells of products, because wooden boards very tightly hold the smell of the products being cut on them. For such burning, you can use the templates presented below, or download others from the Internet.

If you just want to create an original decorative element, then the choice of pictures will be much wider. Again, a board with a burnt image of animals divided into specific meat parts with the name of each of them can be very useful in the kitchen.
Any mother or grandmother will be very pleased to hang in the kitchen a cutting board received as a gift and made by the hands of a beloved child. But it’s enough to buy a wood burning set for children, help translate a beautiful greeting picture and teach the child how to burn it correctly. Spending time with your child will allow you to give your mother or grandmother an excellent board, and your child to acquire a new exciting hobby. Look at an example of such work in the photo:

Video on how to transfer a design to a wooden surface
To transfer any template to wood, you can always use a simple carbon copy, but what to do when you don’t have it? Watch the videos below, perhaps one of the methods described in them will suit you.
The most interesting articles:
Burning photos on wood: how to transfer an image from a photo to the desired surface + tips for beginning craftsmen
Using the wood burning technique, many different images of ornaments, patterns, images of animals, birds, plants, people, nature, etc. are created. To transfer an image onto a wooden base, black graphite or regular copy paper is most often used. Some burners suggest printing a design on parchment paper, gluing it to wood and burning the design onto it. When heated, the parchment will melt, leaving scorched lines underneath. Some especially gifted pyrographists with artistic inclinations draw images, including portraits of people, by hand with a simple pencil down to the smallest detail. But what if you don’t know how to draw, but want to burn a portrait or other image without copying? Today's article will tell you how to burn photos on wood.

Methods for burning photographs on wood
Photographs depicting people, animals, and flora are processed in a special program, for example in Photoshop, until an image consisting of small strokes and dots is obtained. Sketches of these images are then printed on parchment paper and transferred to a wooden base using a hot burning machine. Remains of parchment can be easily removed without leaving a trace.
Photo burning on wood using an image printed on a laser printer

A portrait of a person, any image of an animal, plant or anything else, at your request, is printed in a schematic extension on a laser printer. Ideally, this image is printed on thin photo paper. Then a burner with a round tip is drawn along the wrong side of the image, which is tightly pressed with toner to a wooden or some other base. When heated by a hot burning device, the toner on the paper melts and is printed on the surface you need. The burner must be heated to the lowest possible temperature so that the paper does not catch fire when it comes into contact with it.

It will only take a few minutes to transfer an image this way, which is a huge advantage of this method. It's also an ideal way for beginners to transfer images onto a work surface. When the toner is heated, miniature pieces of paper may remain on the surface in some places, which can be removed after the base has completely cooled by slightly moistening a cotton pad in warm water.
Burning photos on wood using a special laser machine
This method is probably the most expensive in terms of budget, but burning will require a minimum of effort from you. Typically, such a laser device is attached to a computer, which will act as a brain. A photograph with the desired image is loaded into it, processed and sent to the laser. Next, the laser burns the image line by line with progressive movements. All you have to do is coat it with varnish or paints for color.
Photos transferred to wood using custom burning technique
Paintings burned from your photograph on a wooden base can be ordered on the Internet. The price of such an image will depend on the complexity of the work, timing and method of production. For example, for a family portrait, sized 27x35 cm, burned from a photograph, an American-born pyrographer asks $250. He makes his paintings only by hand using only metal and flame, each of them is unique and made to order. In addition, we think there is also a markup for the painstaking work involved.
How to learn wood burning
During the three years of his official website's existence, he sold only 48 paintings. As you can see, there are not many connoisseurs of diligence at this price.

Another English pyrographer is doing much better, who burns paintings for sale that are typical, standard, not as complex and individual as his American colleague. Therefore, his paintings using the wood burning technique are definitely cheaper, for example, he priced a portrait of singer Lana del Rey, measuring 20x20 cm, at $35, and a map of the ancient world based on The Lord of the Rings, measuring 30x30 cm, at $45.

As you can see, the bulk of its potential buyers are fans of media people and film buffs. During 4 months of work, this little-known pyrographer sold about 30 similar images.
Patriotic attributes and various jokes in the form of wooden signs are in great demand.

There are a sufficient number of talented pyrographers and portrait painters in Russia; their websites or groups can be easily found by typing in the search bar “wood burning to order.” Below are several works of our compatriots who professionally burn portraits on wood.
Video on the topic
We bring to your attention several videos of burning portraits on wood with clear results.
The most interesting articles:
Pyrographyas a form of decorative and applied art
Pyrography (literally - " fire drawing") is a special type of decorative and applied art technique.
Can be used both in the design of objects and in the creation of graphic images. A variety of materials can be used as the basis for such decor - plywood, cardboard, wood, felt, leather, fabric.
Burning designs on a cutting board are a way to add variety to the look of your kitchen.
Since craftsmen most often make drawings on wood, pyrography is better known as wood burning.
Types of pyrography
Depending on the manner of execution of the design, there are several types of wood burning.
. Burning along contours
. This is the simplest variety. The finished drawing is a burnt outline.
. Silhouette burning
. Figures of people and animals, as well as elements of patterns and ornaments are burned in a continuous volume.
. Decorative burning
. Images made using this technique are distinguished by rich contours and shadows.
. Burning with chiaroscuro
. This is the most difficult variety to perform.
History of pyrography
People have always strived to realize their creative potential. Wood has always been one of the most accessible materials for processing. Currently, there are a huge number of artistic crafts associated with its processing. Wood burning occupies a special place among them. People began making such products quite a long time ago.
The very first objects decorated in this way were discovered in Peru. They date back to 700 BC. Initially, the image was applied to the object using fire. Later, they began to use heated metal rods and nails sharpened in a certain way. In the 17th century, pyrography became a very common craft in Europe. Initially, craftsmen decorated household items. Later, they began to decorate furniture in this way. Traditional ornaments were used, exactly the same as in the manufacture of silver items and clothing trim.
The professionalism of pyromasters increased significantly in the 19th century. However, even during this period, this technique of decorating a product still remains mostly a home hobby and has no commercial significance. The reason for this was the lack of special tools that would allow the work to be done quickly. The typical toolkit of a craftsman of that time included a brazier with holes, a portable pot and a poker. A special tip was put on the poker, and it was inserted into the brazier through a special hole. Each master had a whole set of tips of various shapes. The handle of the poker was covered with asbestos in order to prevent possible burns. Later, in addition to the poker, they began to use special tubes through which gas was supplied.
The first pyrographic tool, the design of which resembled a soldering iron, appeared only in the 20th century. His invention marked a revolution in the art of wood burning. Despite its rather significant dimensions, this device is still used by some pyromasters. They find it quite comfortable even though the handle gets very hot during prolonged use.
In 1962, the pyrographic device was improved by Roy Child. Industrial production of such burning tools began in 1973; the image began to be applied to the wood with hot wire. Currently, the pyrography tool is an even more advanced device.
The wire tip is specially shaped and held in stainless steel holders to minimize heat buildup in the handle.
In 1975, a device with a rigid tip was launched into mass production. It is less versatile, but costs less. This explains its popularity among modern masters. Very often, both this and the devices described above are used simultaneously.
Pyrography in Russia
In our country, pyrography as a type of craft appeared in the 9th century. Already in this century, wood was widely used for the manufacture of various kinds of decorative products. When creating the decor, the craftsmen took into account the peculiarities of the wood texture, trying to emphasize its beauty. Burning has always occupied a special place among decorative crafts. The decoration performed in this way was deeply connected with the traditions of folk art.
Pyrography has always developed in parallel with such types of wood-processing works as turning, carvings, mosaics, and wood painting, often complementing these works of art, and sometimes acting as an independent creative object. In the old days in Russia, special metal rods were used to apply drawings, the ends of which were heated red-hot. Sometimes the image was also applied using special metal stamps with reliefs engraved on them based on folk carvings. Nowadays, pyromasters use a special device consisting of a handle with a pin and a step-down transformer. The tip of such devices is usually made of nichrome wire.
DPI > Artistic carving > Pyrography
Drawings for wood burning - beautiful ideas for your inspiration, help and tips for beginners

Introductory for Beginners
Nowadays, there are many ways of wood burning, each of which requires separate skills and materials. This article will discuss the most common method - pyrography. This method is literally painting on wood using a special electric burner, which can be purchased in many stores, both in the craft supply and in the tool department.
The best material for applying a design is considered to be a plywood board made from alder or linden. Before work, it must be sanded using sandpaper. Sketches can be drawn on wood by hand or transferred through carbon paper, you can also use a stencil, but do not forget to remove it before burning.
Drawing technique
- Burning is carried out exclusively on dry wood.
- To begin with, dots are first placed on a pre-drawn drawing, and only after that lines are drawn. In order for the line to be thin, the pen of the electric burner should be moved quickly. And to get a thick line, on the contrary, go slowly. When the line is finished, the pen should be torn off quickly, without holding it in place. You should not press the pen while drawing.
- First, burn out the outer edge of the design, gradually moving to the center.
- By changing the heat and angle of the pin, you can create both deeply saturated lines and barely noticeable strokes. You can also change the color intensity of the lines.
- Do not slow down the movement of the electric burner pen along the drawing. This can cause the edges of the burnt grooves to become charred. The same thing happens if the pin overheats.
- You can cool the tip of the pin by simply holding it upright for a while.
- Burning should be done in several parts of the drawing at once. After working a little in one area, they leave it and move on to another, and then return to the first. This is necessary to avoid intermediate burns between nearby strokes that occur due to overheating. Therefore, you should not immediately burn out several parts that are close to each other; before you burn a new stroke, you need to let the neighboring one cool down.
- If you need to shade a large area, you should first burn out the outline (outline), and then work inside it with the wide side of the pin. When creating a background, you can use a variety of techniques: paint with vertical lines or strokes, dots, patterns of various sizes and density of application.
Wood burning on a cutting board: tools, rules, sketches
Also, wood burning kits often contain shaped tips, the use of which helps to diversify the design in a simple, uncomplicated way.
- Having finished burning the design, the surface is carefully, but carefully, so as not to damage small strokes and lines and not to round the edges of the protrusions, sand the surface with the smallest sandpaper.
- An already finished drawing can be supplemented by painting it with watercolors or oil paints. To paint on wood, you will need high quality paints and a sufficient set of soft round and flat brushes.
- Burnt and then painted works require a special finishing, which is waxing. The wax finish gives the picture a matte silky shine and preserves the natural color of the wood, and also helps to preserve the tone and richness of the applied paints for a long time.
Schemes and examples of beautiful works for inspiration
The photo below shows a selection of light patterns that can help beginners get their hands on:

Of course, popular motifs for burning, for example, on a cutting board are paintings depicting nature.
Flowers burned on wood look very beautiful. Here are a few patterns that are very easy to complete even for those who are new to this craft.
Perhaps the following examples will seem more complicated than the previous ones, but the animals made on wood are worth the effort put into their creation:

Video for beginners in the art of wood burning
In these videos you will see how the process of wood burning takes place, you will learn some of the nuances of this type of activity, how to choose the right burner and, perhaps, you will find new ideas for yourself and the performance of your work.
The most interesting articles:
Wood burning in its modern form is a relatively young decorative art, but its roots lie in ancient times. In the distant past, the burning method was used mainly to decorate household utensils. Today, the art of burning has become more of a hobby. This craft is practiced not only by folk craftsmen, but also by children in labor lessons.
What tools are required for wood burning?

To ensure the quality of the finished work meets the highest standards, you need a wood burning machine. Such a tool can be purchased ready-made or made independently. The domestic market is able to offer consumers several options for burning devices.
Fruits and berries on cutting boards.
However, all modifications are characterized by the presence of almost the same components:
- metal screen;
- burning needle;
- needle holder;
- housings;
- power electrical wire.
Wood burning tools are most often powered from a standard 220 V power supply through a transformer. Electric burning devices have an advantage, in which the standard wire is replaced by a cable with a large cross-section ranging from 4 to 6 mm 2. This modification allows you to significantly increase the incandescence of the burning needle.

A standard burning device with nozzles contains straight needles, the shape of which is better to change yourself to a curved one, bending it at an angle of about 45 degrees. For ease of work, the plane of the burning needle should be processed using a fine file. Thus, you can get the most convenient, universal device with a needle that will allow you to perform burning with both the tip and the plane.
Main types of wood burning devices
The first category includes devices with hard pens, the second - with wire needles. In this case, both types of devices occur through their operation from a standard electrical network. Wire devices have a function for adjusting the temperature of the working surface of the needle.

To understand which wood burning machine will be the most convenient and effective in a given situation, it is enough to familiarize yourself with the specific design of individual options.
Instruments with hard pens limit the choice to only a few available models, since their functionality remains extremely limited due to the constant filament temperature.
Attention here should be focused on power, which should be at least 20 watts, otherwise the wood burning machine will significantly slow down its work.
If we talk about burners with wire pens, then their range is much wider compared to the previous category of devices. Therefore, when leaning toward this option, it is better for an unprepared user to consult a specialist. If we talk about the most advanced, modern devices, here we can highlight a laser for burning wood.
Ultimately, having decided on a specific model, you should make sure that the kit includes a sufficient number of attachments. This will significantly diversify the range of available work.
Advantages and disadvantages of burning devices with hard feathers
Returning to the question of choosing burners with hard feathers, it is worth considering their main advantages and obvious disadvantages. If we talk about the advantages, then such a wood burning machine boasts an affordable, affordable price, extreme ease of use, the highest strength and, accordingly, a long service life.
Among the disadvantages of such devices it is worth highlighting:
- long heating and cooling;
- strong heating and possible overheating of the handle;
- lack of opportunity to implement subtle, skillful artistic ideas;
- insufficient comfort of most handles;
- there is a high probability of burnout during prolonged use.
Features of burners with wire needles
Any professional burning device with wire needles has a much wider range of advantages compared to the previous category of devices.
Such devices are used for the most delicate, artistic work. These devices have enough power to process the hardest types of wood, and it takes no more than a few seconds to fully heat the needle.
The main disadvantages of wire devices include high cost, high cost of repair, difficulty in finding spare parts and components, especially if the burner is homemade and purchased via the Internet. Moreover, wire needles often burn out, become deformed and become completely unusable. Therefore they need frequent replacement.
What materials can be called optimal for burning?
 Nowadays, to practice burning, it is not at all necessary to spend time searching for materials and sketches on your own. It is enough to purchase a ready-made set for wood burning. If it is necessary to bring to life the author’s unique idea, wooden blocks, boards, and wood boards can serve as a basis.
It is better to choose well-dried wood for work, which will not warp or deform after completion of the work. An important issue is the selection of the appropriate texture, shade and gloss of the wood species. The best option for burning may be fine-vascular wood that does not contain pronounced rings and knots.
If suitable materials are not at hand or a burning device is used to teach a child, then for starters it is better to use a wood burning kit, which today can easily be ordered on the Internet.
Preparation of material
The surface of the workpiece for burning must be leveled and, if possible, thoroughly sanded with sandpaper. At first, you should not resort to using too complex drawings. If the image does not correspond to the size of the workpiece, its scale should be reduced or enlarged.
If you don’t want to, you don’t have to draw the design on the workpiece yourself. It is enough to use carbon paper, which will allow you to draw the main outlines of the drawing, which can later be traced with a pencil.
To avoid staining the material, it is better to choose old copy paper. This is the only way to avoid damage to the wooden base, which was carefully sanded and prepared for work.
Wood burning technology
Currently, there are several common wood burning technologies. Silhouette, contour and artistic or pictorial burning are popular among craftsmen. The main differences in these technologies lie primarily in the execution technique and types of patterns.
Contour burning
This technology is most often used by beginners, inexperienced craftsmen. The execution here can be compared to drawing a contour image on a sheet of paper. When performing contour work, the main thing is to keep it in the most free position with a well-fixed fulcrum.
All lines must be equal in depth and width. For work, it is better to use the hottest needle possible, reducing the voltage on the transformer to the limit. When making a contour drawing on wood, you should not be overzealous, pressing the needle with force.
Silhouette burning
To use the silhouette burning technique, carefully ground, curved needles are suitable, the working surface of which should completely touch the material.
The needle should be directed along the wood fibers.
Beginners who use the silhouette burning technique are recommended to use moderately heated needles. Only in this case can you achieve the smoothest possible surface texture when completing the work.

Silhouette burning can be used to process fairly impressive areas of wood. At the same time, applying smooth strokes can form not only dark lines. Moving a hot needle at a fast pace makes it possible to obtain a wide variety of shades, from the deepest brown color to a light beige pattern.
Artistic burning

The technology is based on a professional combination of both of the above techniques. It is better to make your first attempts at artistic burning with images of geometric figures of the simplest form. This approach will allow you to become familiar with the peculiarities of the formation of the effect of the play of light and shadow on the surface of wood.
When doing artistic wood burning, you need to remember the need to draw clear contours of the depicted figures. At the same time, the main task of artistic burning technology is to convey volume in space.
 A do-it-yourself wood burner is mounted in a plastic or metal case. A DIY wood burner is used to create paintings and other images. You can make a wood burner with your own hands in different ways and even provide software control of the device.
It all started with the fact that I needed a burner. I looked on the Internet for what I could do, and found it out of a light bulb and a pen-flashlight - it didn’t work. And so, First I wanted to make a head from two medium resistors, since the large ones have a through hole.

The advantage of the described version of the burner is its simplicity, safety and ease of use. Surely, assembling the power supply for the burner will not be difficult for you, but what to do if you do not have a convenient holder handle (electrode)?

Homemade 12 volt burner
I assure you, I personally assembled a wood burner using the above transformer control diagram. I am convinced that you simply did not take into account the dissipated power, which is why the burner burned out! And accordingly, the operating conditions of the circuit vary greatly, for these reasons I did not indicate the power of my transformer.
We make a handler and knives for it with our own hands
I myself didn’t think that this could be done with a transformer - but when I tried it, I was pleasantly surprised, and was personally convinced that this circuit was successfully suitable for a burner. How many times have I looked at industrial burners inside - there is a trans, a resistor and a fuse. There are a huge number of options for burning schemes, in fact, I presented my own development, and it seems to me that it is quite successful - it works like a clockwork.

Operation of the wood burner circuit and its settings:
A friend asked me to watch the prom. The burner, Pattern, complains that the thread does not heat. Having disassembled and checked the installation, everything seems to be working? Secondly, look for the passport for this burner model, or at least find the parameters of the transformer used. I recently decided to make a burner for my son. They can also cut plastics when making cases, they can also solder, and even cut out PCB.
Nichrome wire holder for wood burner:
We drill holes in the plastic front panel for the burner operating mode switch - for wires and for LEDs. As a handle, I used a ready-made handle from an industrial burner.
Or we cut it out of textolite, wood with a fluoroplastic tip of suitable thickness. The wire for the electric burner must be selected with a large cross-section and the most flexible.
Materials and components for a homemade burner
We make a tattoo machine with our own hands. Nowadays, wood burning (pyrography) is becoming an interesting hobby not only for schoolchildren, but also for adults. In addition, you can burn not only on wood, but also, for example, on synthetic fabrics, producing wonderful airy lace.
There is a way out - make the device yourself. The classic design of an industrial wood burner is difficult to implement in a home-made environment. This could be a ready-made soldering iron handle made of wood or heat-resistant polymer.
As you know, back in the 90s, our ancestors practiced such art as wood burning; it looked beautiful and had its own direction in art. Since from those times the burners have not remained or have simply become out of order, and many wooden things want to be embellished somehow, in this article I will tell you how to make a burner with your own hands.

This means that a soft wire with a cross-section of 4 mm square will be more than enough for us. in isolation. This is an audio cable, it has its limitations, but in our case nothing prevents us from using it. 500 rubles. The handle is simple and reliable; a nichrome needle with a thickness of 0.6 - 1.0 mm is used. There are “sophisticated” options, with memory, push-button control (photo in the next forum thread).
We will talk about how to make this tool from improvised means in this article.
The current in these devices does not pass through the knife, but through some heating element to which the blade is attached. Such a heating element can be the tip of a soldering iron or a burner, and a regular kitchen knife or razor can be used as a blade.
The general principle is the same: disassemble the burner and attach a blade (in this case, a double-sided razor blade) to the heating element. The burner pen should be disassembled and the wires removed from it.
Making from a burner
The first pair of holes is necessary for fastening the blade, the second pair of holes will be screwed into the bolts for fastening the burner wires. In the same plates, 2 more holes should be drilled, the axes of these 4 holes should be perpendicular to the axes of the above mounting holes. These holes are necessary for attaching the handle of the regulator, which can be made of wood and attached to the plates with long bolts.
Only a razor is suitable for the burner (all because of its low power - the smaller the cross-section of the blade, the faster it will heat up). In addition, there is a risk of electric shock (this is especially true for burner regrovers). So, we found out that making a regrower with your own hands is not at all difficult and even a novice car enthusiast can complete this task. Write to (ignel(woof)mail.ru, ICQ 50389649), indicating your nickname and the address from which you registered. Don’t forget to look at the forum rules.

I had on hand: 1.
Burning on wooden kitchen utensils
some kind of step-down transformer (220/7v)2. That's why what happened was what happened. The downside of tile wire is its low thermal inertia; it cools quickly upon contact with wood.
It is quite possible to judge the effectiveness of woodworking, given that bone can only be used with the most powerful burners. This is all left over from the experiment that I wrote about in my first message. The outer diameter is 2 mm, the hole is 1 mm, the tubes are quite strong and the 1 mm wire fits into them very well; after crimping, it is impossible to pull out the wire.
It's simple - not all craftsmen have the desire, time and opportunity to spend their time making home-made devices. Plus, all the clients who bought my burners did not consider their prices in any way overpriced, and were also VERY satisfied with the heating time, the number of tips, and the overall performance efficiency. So before you so radically criticize anything mass-produced, please list the shortcomings of DIY as such and your model in particular.
A wood burner, assembled with your own hands from available materials, will be an excellent tool for creative personal development. I sculpted my burner from what was at hand with a minimum of control and measuring equipment (only a tape measure). This article describes how you can quickly and easily assemble an excellent wood burner from “improvised” materials, with adjustable incandescent temperature of the heating wire.