How to properly glue foam ceiling tiles. How to properly glue ceiling tiles: features of creating an unusual ceiling
The easiest way to update the ceiling in an apartment is to make it from foam tiles. The finishing material, has earned its popularity due to its low price and easy installation. Before starting work, be sure to read general rules and recommendations (especially if you have no experience), otherwise the consequences will be dire. In this article we will tell you:
Types of ceiling tiles
Foam tiles are made in 3 ways, so their properties differ.
Advice! When choosing tiles, pay attention to the quality of the edges; the edges should be smooth, without defects. Do not bend or cut the edges of the tiles. It is important to understand that the smoother the edges, the less noticeable the seams.
Tiles with fine grain and a clear pattern are considered to be of higher quality. Also pay attention to strength: if you grab any of the corners, the tile should not break under its own weight.
Calculation of material and choice of glue
Before purchasing, calculate required amount material and select the appropriate adhesive. It is recommended to take 10-15% more tiles, in case of defects and pruning. If you decide to glue the tiles diagonally, the material consumption will increase by about 30%, take this into account when purchasing.
 Glue for ceiling tiles To calculate the amount of material, you need to know the area of the room and divide it by the area of one tile. They usually have dimensions of 50x50 cm, that is, 1 tile has an area of 0.25 square meters. m.
After calculating the material, you need to decide on the choice of glue. Many craftsmen use special “Titan” glue for ceiling tiles, as well as universal “Eco-Naset” glue and liquid nails. Don’t even think about buying “moment” adhesive for installing tiles! This glue tends to darken greatly over time, so the excess that comes out of the seams will appear and disfigure your ceiling.
Tile layout options
 Foam tile ceiling
There are several ways to install tiles. The most popular of them are parallel and diagonal arrangement. If you decide to do something unusual, you can use a combined method, which will require several types of colored tiles, for example:
- alternating or intersecting diagonals different color, textures;
- Chess board;
- snake;
- around the perimeter of the room, in squares in the center and other shapes.
 Tile placement options
 Ceiling tile sticker
All consumables have been purchased, let's now figure out how to glue tiles to the ceiling.
Many novice finishers do not like to do markings and rely on their eye. This approach to work results in a crooked ceiling and a call to specialists for remodeling. If you want to receive good result, then before gluing the tiles, be sure to apply markings.
From carrier façade wall, measure a line at an angle of 90 degrees, then draw parallel lines from it, retreating the required distance. This way you will get an even ceiling marking. To create a straight line, it is most convenient to use a painter's cord.
Sticking the tiles begins from one of the corners of the room or from its center. It is better to do this from the most visible corner and finish above the door so that the last incomplete row is not noticeable.
Advice! To know how to stick ceiling tiles diagonally, make a mark of two perpendicular lines in the center of the room. This way, the ceiling will be divided into 4 even parts, and you can start sticking from the center of the room, following the lines.
Most often, the pattern on the tiles is repeating, but if joining is necessary, pay attention to symmetry. Press the tiles tightly together so that there are no gaps. Also, do not forget to cut off any burrs on the edges left after pressing before applying the sticker.  Example of a combined ceiling
There are several options for how to glue ceiling tiles.
- Most often, the sticker is applied to whitewash, so it needs to be treated with a primer and wait until it dries. If there is no primer, you can create it yourself by diluting PVA glue with water in a ratio of 1 to 3.
- Another option - complete removal old layer with a spatula. This is usually done if the whitewash is applied in a thick layer and does not adhere well; in other cases, treatment with a primer will be sufficient.
Apply glue only to the tiles, along the perimeter and diagonally. There is no need to coat the ends, this will only increase the seams and leave traces of glue on the edges. Try to do this job quickly if you are using instant glue.
After this, press the tile firmly against the ceiling and gently smooth the surface with a rag or hand to ensure even adhesion. To make the seams invisible, first join them, and only then press them to the ceiling. No additional fixation is needed.  Ceiling tile sticker
For the outer rows near the walls, you will need to cut the tiles; this can be done using a construction knife.
If necessary, after applying the sticker, seal the seams and paint the ceiling acrylic paint in any color.  Painted ceiling tiles
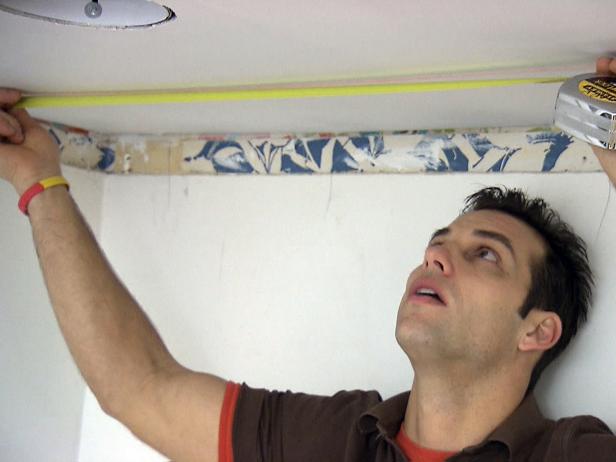
To hide the gaps around the perimeter of the room and give the ceiling a finished look, do not forget to glue the foam baseboard at the end. It is glued with the same glue as tiles. To join the corners, the ends must be cut at an angle of 45 degrees. If there are external corners, a plastic corner is glued onto them.
For a more visual understanding of the process of installing ceiling tiles, watch the video below:
Conclusion
 Finished ceiling made of foam tiles
This is how you tile the ceiling yourself. As you can see, the technology is quite simple, and even a beginner in construction can do this work without any problems. This finishing method is well suited for temporary repairs, for example in rented apartment. Also for the bath and kitchen, there is another inexpensive and quick way finishing – . And when the opportunity arises, make the ceiling out of more modern materials. Good luck with the renovation!
Many will agree that it is much more pleasant to be in a room with a beautiful original ceiling than constantly admiring the traditionally white “naked” ceiling tiles. Sometimes it helps to diversify the interior decorative painting ceiling. But paint does not hide coating defects and does not radically change the appearance of the room.
High-quality ceiling tiles help to quickly and economically transform a room. A variety of colors, intricate relief patterns and strict ornaments, imitation of the texture of stone, wood or brick allows you to create original design any room is finished. Experienced repairmen recommend ceiling decoration with your own hands before repairing the walls. If replacing the wall covering is not expected, it is advisable to cover the wallpaper with film.
Tiling the ceiling in different ways
Square or rectangular shape Expanded polystyrene tiles are all the same at first glance. Its front side can be absolutely smooth or fine-grained, with a convex pattern or simply a relief imitation of stone, with a glossy laminated coating or matte without film. Variety of colors and textures ceiling coverings help to realize any design ideas.
Depending on the manufacturing technology, there are three types of ceiling tiles:

The quality of the tiles can be determined by several parameters:
- The surface has a uniform grain size, the pattern relief is clear and even over the entire area.
- Correct geometric shape: all corners are straight and even, not wrinkled.
- There are no flaking or signs of crumbling on the corners and sides.
 Before purchasing a tile covering, you need to choose a laying scheme and measure the ceiling area with your own hands. It is recommended to purchase all required volume tile material from one batch and 10-15% more in case of incorrect cutting or breakage during installation.
Knowing the ceiling area and the size of one element, the question arises: how to calculate number of ceiling tiles? To do this, the ceiling area is divided by the area of one tile. For example, a room measures 4.5 m by 3.5 m. Its area is 15.75 square meters. meters. Tiles usually have a size of 50 cm by 50 cm, that is, the area of 1 tile is 0.25 square meters. Divide 15.75 by 0.25 to get 63 pieces. It is advisable to purchase at least 70 pieces.
Ceiling covering like any construction material, it is necessary to keep it unpacked in the repair room for about a day. In addition to the tile itself, you also need to purchase a decorative rosette for the chandelier and masking joints with the baseboard walls.
From tools you must have: a stepladder, a construction or stationery knife for cutting tiles, twine or other strong thread and a simple pencil for marking the ceiling, a spatula and a sponge for applying glue to the tiles and removing its residues, wooden block to press the tile.
An equally important question: how to glue ceiling tiles? The modern construction market offers a huge range of adhesives:

Ceiling surface for gluing polystyrene foam board can be anything: chipboard, plywood, drywall, wood, concrete. For high-quality and durable finishing of the ceiling before installing tiles it is recommended to clean from paint, whitewash, crumbling plaster, wallpaper and the remains of any other coating that interferes with the strong adhesion of surfaces. The old tile covering is removed with a metal spatula starting from any corner. Stains of grease, soot, mold or rust must be removed with an antiseptic solution. High-quality whitewash, provided that it does not crumble or crumble, can simply be primed.
When cracks, craters or irregularities appear, putty is used to eliminate defects. Dry clean flat ceiling covered with primer. Before preparing the ceiling for gluing, it is necessary to remove the chandelier and insulate the exposed wires.
Methods for gluing ceiling tiles: straight and diagonal
IN small spaces For example, in a bathroom, it is recommended to start pasting the ceiling from the corner to the middle. In spacious rooms, installation is done from the center or from the chandelier. Exists Several ways of gluing ceiling tiles:
- Laying diagonally increases the amount consumables. But when pasting with a diamond shape, the joints are almost invisible, it is easier to lay out an even and beautiful pattern.
- Parallel to the walls tiles are glued in straight rows, in a snake pattern or in a checkerboard pattern.
With a chess layout boards of two colors are used. By alternating contrasting colors, an imitation of a chess field is created. By moving the tiles halfway, you can create a unique geometric pattern.
Gluing slabs in two contrasting colors or matching shades in the form of a twisting spiral creates an original graphic drawing. If you cannot find a tile covering of the required color, you can paint white tiles water-based paint based on acrylic or latex. Uniform coloring will be ensured by double coating with a foam roller one day after installation.
How to properly glue tiles to the ceiling
 To make the drawing look beautiful and neat, it is necessary to correctly outline the area to be pasted and determine its center. You can determine the geometric center by stretching two cords from the corners of the room diagonally. Two lines are drawn through the central point, parallel to the walls and perpendicular to each other. Then the entire space is drawn into squares with a side equal to the width of the tile.
Having marked the entire area, it will become clear how to glue the ceiling tiles. Without seams, special triangular arrows on the back side each tile.
Sometimes a chandelier is fixed at the central point. More often, the light source is displaced and its location does not coincide with the geometric center of the room. In this case, pasting should start from the lamp, and make markings through the attachment point by drawing two perpendicular lines parallel to the walls. The corners of the rectangles are divided exactly in half, 45°, and diagonal lines are drawn. To bring out the wires, the tile corners are cut off, then the cutout is covered with a decorative chandelier rosette.
Tiling the ceiling
 With any installation method, whether snake, checkerboard or diagonal, pasting begins from the central point. It is extremely important to glue the first slab correctly and as evenly as possible.
When laying in parallel The first square is glued exactly along parallel lines dividing the space into 4 parts. The angle should coincide with the center point. Three tiles are glued tightly end to end, forming a central square. Then rows of two tiles are laid in the form of a cross. Then the remaining rectangular spaces are covered. The snake is more difficult to install.
At diagonal laying the first square is glued relative to the lines drawn from the corners. Its corner is placed in the center of the room and the following slabs are mounted relative to it. Or the first square is laid exactly in the center, with the marking lines coming out of the corners of the tile.
Small rooms, such as a kitchen, hallway or bathroom, are covered from the corner and do not require preliminary marking. With parallel installation, the first square is glued to the corner and the entire area is glued relative to it. With a diagonal layout, the first square is cut into two triangles. Installation begins by gluing the first triangle into the corner, then a whole square is mounted to it. All rows are laid out similarly.
Tile backing adhesive applied pointwise around the perimeter, stepping back from the edge by 1 cm, and into the center of the tile or with a cross. The applied glue is allowed to thicken a little and set for 1-3 minutes. Then glue the slab, pressing it evenly to the ceiling. Excess glue is removed with a damp sponge or soft cloth. Drafts have a bad effect on the strength of the coupling. Therefore, it is recommended to close all windows and doors in the room. Each subsequent coating element is applied dry and checked against the markings. The last rows of tiles are cut off stationery knife on a hard surface. The resulting cracks are sealed with white sealant and, if necessary, painted in the same color as the ceiling.
Irregularities when joining the ceiling covering to the wall wallpaper are covered with skirting boards after the adhesive base has completely dried.
If the room has a hexagon shape or an irregular geometric configuration, installation of the ceiling covering begins from the wall opposite the door, or from the most visible corner.
Home renovation is a serious challenge for all residents. One of the stages in this complex process- gluing ceiling tiles. Application foam finishing the ceiling is a budget option. But there is a large assortment on the market, so everyone will choose the right look for themselves in terms of color and design. If you want to preserve such a repair for a long time, you need competent actions during the gluing process.
Preparation
How to properly glue ceiling tiles? This is the main question that interests everyone who has decided to carry out repairs themselves. It is better to decorate the ceiling until the walls are covered.
Provided that there will be no other changes to the interior, you need to hide everything under polyethylene so as not to spoil it. The use of tiles is permissible on any surface. In order for the tiles to fix securely, it is worth preparing:
- The chandelier is removed.
- The old finish is removed and the entire perimeter is checked for the reliability of each element present. You need to carefully check the corners (this is usually the weakest area).
- If large cracks appear afterwards, they need to be covered.
- After drying, an adhesive-based primer is used.
- The evenness of the ceiling is assessed. If there are differences and convex areas, you need to level them using putty. This is done for large uneven areas. In other cases, the tile will hide everything.
How to glue ceiling tiles diagonally with your own hands? Anyone can do this, even with simple lime on the ceiling, provided there is no shedding. In any case, each surface is pre-primed with an adhesive compound for reliability and durability.
What kind of ceiling tiles can you find in the store?
So, we will have to purchase good ceiling tiles and quality glue. How to make a choice? Before you go shopping, everyone should know that tiles come in:
- Pressed. It is not too dense, and it is stamped, so it is often found defective.
- Extruded. Such tiles are covered with film. Polystyrene is used in the manufacturing process. This option is dense and smooth. They often create imitations of other materials - wood, marble, etc. A big plus is its resistance to moisture.
- Injection. Such models have patterns, as they are produced in a special way, the thickness reaches 12 millimeters.
- Seamless. This is the most expensive finishing material in this series. But it looks beautiful, since there are no joints at all.

As soon as desired type chosen, you need to understand how to glue. Due attention will have to be paid to quality:
- It is necessary to inspect the packaging with the tiles so that the corners are even, otherwise problems will arise when gluing.
- The tiles should not crumble along the edges. It is better to choose one that has small grains in its composition.
- If there is a pattern, it is important that it is clear and symmetrical.
- Basically, companies produce standard parts 50x50 cm. Based on this size and knowing the area of the ceiling, it is easy to calculate the required amount of material.
You need to buy material with a reserve, but with a small one (10 percent). Each batch of the same tile may have slight differences. And if there is not enough, it will be difficult to find something similar.
What glue is suitable?
Not only the speed of finishing, but also durability depends on which adhesive will be purchased. You need to choose a consistency that is not too thick. But too liquid will not work either. This mass will be convenient for application where thick is required, and in other places thin layer. Many things will do:
- Putty.
- Liquid Nails.
- Mounting adhesive "Moment".
You need to make a choice depending on the surface of the ceiling. If it doesn't matter then suitable option- these are liquid nails. When there are differences, putty is used. To hide the joints, you will need ceiling skirting boards.

How to start?
Before answering the question of how to glue ceiling tiles, you need to make a sketch - create a diagram of the ceiling, reflecting on it the method of applying the finishing material:
- Parallel.
- Diagonally.
- In a checkerboard pattern.

To mark everything, you will need a tape measure and a cord. You should not rely on clarity, otherwise it will turn out ugly. The presence of unevenness will ruin the look. How is each fastening made? It is believed that the methods of how to properly glue ceiling tiles have their own algorithm.
Parallel execution
The beginning is the corner that first catches your eye. The process is carried out in several stages:
- The glue is applied on all sides from the inside of the tile and in the middle. You don’t need too much, otherwise it will protrude and make the joints uneven.
- Press the tile and iron it evenly around its perimeter so that the adhesive mass is distributed.
- The next one is joined and only after that it is pressed. Everything needs to be done carefully, without breaking symmetry.
- Next we perform the same actions on the ceiling area.
- Once the complete parts are glued, you need to measure and glue the rest. It is convenient to cut with a stationery knife. The walls may be uneven, so it is better to take preliminary measurements.
Diagonal application
How to glue ceiling tiles? Different methods have the same beginning. You need to glue from the center of the room. Next - work according to a simple plan:
- Marking and the fastening process itself. The first tile is installed so that the corners are in the middle of the line.
- The second is placed along the marked marking lines.
- Following in order are the remaining components.
- The necessary elements are cut out along the edges.

Upon completion of the work, the plinth is glued and the remaining glue is removed. Already noted earlier: seamless tile- the most convenient during installation. After application, nothing additional is required. Other options involve a careful inspection of the perimeter. If there are gaps between components finishing material, they are removed when using sealant. It does not react to water and temperature increases. When filling the existing holes, it is leveled and the excess is removed.
How to glue ceiling tiles with your own hands in a checkerboard pattern? To do this, after marking, the parts are attached strictly along the axis. And the outer row is made from prepared measured segments. To make the ceiling surface look beautiful, you need to use building level. But it's not that simple. Therefore, experts say that it will be easier to initially remove imperfections and imperfections using a spatula.

Depending on the chosen adhesive, the process of applying it to the surface of the tile is determined. On the back of the finishing material there are special protrusions for the adhesive mass. Application is done with dotted lines or a full layer. If the selected product is too liquid, then after spreading it on the surface, you need to wait two minutes and proceed to installation.
At the right approach By the process of fixing the tiles, you will get a high-quality result. Below we provide small tips that will help you do everything quickly and well:
- In order for work with the finishing material to be easy, you need to leave the tiles in the room for about a couple of hours. She must buy room temperature. After this, you can begin installation.
- It turns out to be a beautiful combination if the tiles are assembled from different colors. You can use any convenient way gluing.
- According to experts, the best adhesive material is liquid nails. They are used with mounting gun.
- If you decide to paste over the ceiling, this is done immediately. Do not stop, otherwise cracks and nicks may form.
- When the gaps are covered in some places, if the sealant gets in, it is removed immediately wet cloth. Because afterwards it will be difficult to do it carefully.
- To ensure that the tile is firmly fixed, it is held not with your hands, but with a block.
- To see the distribution of the adhesive on the tile, it is better to take it in color.
- If foam tiles are used, then they cannot be coated with water-based paint, as peeling will occur.

Conclusion
So we've looked at different ways. How to glue ceiling tiles is now clear. Anyone can cope with gluing tiles to the ceiling. The main thing is to prepare what you need before starting so that the process does not stand still.
Even if you are not a supporter of gluing the ceiling with ceiling tiles, in some cases gluing white polystyrene foam tiles is the only way to quickly redecorating rooms.
One more advantage of ceiling tiles is the fact that it makes it relatively easy to hide a large difference between two sloppily laid concrete slabs ceilings And so, let's begin.
How to properly glue ceiling tiles with your own hands?
We are preparing the ceiling for gluing.
- Spatula strip the old one from the ceiling peeling putty .
- Anything that comes off with difficulty should remain there, but keep in mind that if you are going to glue thin and smooth tiles , then they are partially transparent, that is dark spots will show through thin tiles , so the most reasonable thing is go over the ceiling with one layer of putty (to give the entire ceiling a uniform white tint), but it’s still easier to glue seamless (7 mm) tiles , or thin tiles , nose patterned embossing .
- Necessarily prime the ceiling with concrete primer . The primer will remove dust from the ceiling and strengthen the surface layer of putty.
Where to start gluing ceiling tiles?

Choosing an option for gluing tiles . The main options are shown in Figure 1.
A non-rectangular room is specifically depicted here, since perfectly rectangular rooms are practically never found. Chandeliers hanging strictly in the geometric center (intersection of diagonals) of the room are not found in the same way, so we give the most realistic picture of a room 2.4 x 1.75 with a chandelier offset from the geometric center.
- The first two options ( sticking from the center And sticking from the central tile ) are identical, this symmetrical sticking from the geometric center of the ceiling , looks neat, but complicates gluing the tiles at the base of the chandelier.
- More likely I'll have to remove the chandelier , cut a hole in the tile and, when gluing, thread the ends of the electrical wiring through this hole.
- When choosing between these two options, it is recommended to calculate the width of the cut tiles around the perimeter of the room. The fact is that if these stripes turn out to be narrow (up to 7 centimeters) and oblique, then their wedge shape will be easily noticeable to the eye.
- Try to choose an option in which the outer tiles are wider , then even a large wedge shape may not be noticeable.
- Sticker from a chandelier greatly simplifies the work, since it the chandelier can not be removed , but you run the risk of getting a narrow outermost strip of tiles near one of the walls, and “by the law of meanness” this wall will not be parallel to the edge of the tile you are pasting.
- Sticking from the corner is good , If the room is long and narrow or has any niches or corner projections, that is asymmetrical . For the “starting” angle you should choose , which is clearly visible from front door rooms . However, this option has the disadvantages of all previous options.
- Combined option combines partially aesthetics of gluing from the center And ease of gluing from a light source . With this option, the longitudinal seam of the tiles passes through the center of the room, and the transverse seam through the chandelier attachment point.
The key to gluing the ceiling is gluing the first tile; it will determine everything you get as a result. It is almost impossible to correct anything during work, so marking the ceiling must be carried out with the utmost care and without haste.
Don’t be alarmed, there is no need to paint the ceiling into squares, we it is enough to get a line, along which we let's orient the first two tiles And the joining point of these tiles .
In the first three options We start gluing the first tiles from the center , with this method, all the “flaws” of the work, inevitable in the absence of experience, will “go to the walls”, where they will be less noticeable.
With option sticking “from the corner” the work must be approached with extreme care so as not to cause a noticeable displacement of the seams between the tiles already in the center of the room.
Marking for gluing ceiling tiles in different ways
We give detailed description markings for each gluing option. Original size tiles 50 x 50 cm.
Marking the ceiling for gluing ceiling tiles “from the center”
see fig.2

Let's make the markup:
- at two opposite walls and mark them with risks.
- Cut a strip of transparent tape and stick it on the end of a regular thread to its middle and then glue the tape to the ceiling so that the thread coincides with one of the marks.
- Unwind the required length of thread , press it to the second risk and glue the thread to the ceiling with a second piece of tape . (If you are too lazy to prime the ceiling, then most likely you will not succeed in this operation - the tape will not stick.) There is no need to tighten the thread too much, let it sag slightly.
- At the thread attachment points (near the tape) put some padding under the thread (matches, a sheet of paper folded several times or scraps of foam plastic), task - pull the thread slightly and remove it from the ceiling by 7-15 mm. The thread should not touch the ceiling anywhere.
- We measure the distance from wall to wall along the stretched thread and mark the middle of this line with a line .
- The marking is ready , in the future we will glue the first two tiles, placing their cuts along the thread, and the joint line of these tiles in the place marked with a mark.
Marking the ceiling for gluing ceiling tiles “from the central tile”

Markings for gluing “from the central tile” (see Fig. 3):
With this option in the geometric center of the ceiling will be located not at the junction of the four corners of adjacent slabs, but center of center tile .
When describing the marking order, we will focus on the previous description:
- Determining the middle of the ceiling width
on two opposite walls, but we shift both marks from the middle by 25 cm to one of the side walls (either of the two).
2,3,4. We repeat exactly the corresponding points of the previous description. - (5.) We measure the distance from wall to wall along the stretched thread and place the risk at a distance of 25 cm from the center. It doesn’t matter in which direction to shift the risk from the center.
- (6.) When we glue a couple of tiles along the thread with the joint at the risk, then one of the tiles will be central .
Marking the ceiling for gluing ceiling tiles “from the lamp”

Markings for sticking “from the lamp” (see Fig. 4):
- The wall , which is clearly visible from the entrance to the room, we take it as basic .
- We measure the distance from the base wall to the mounting point of the chandelier . We add the width of the tile to this distance (that is, 50 centimeters) and beat this distance from the base wall on the ceiling near the opposite walls.
- Using the resulting marks, we pull the thread . If we had not added 50 cm to the size, then the hanging chandelier would have prevented us from pulling the thread evenly.
- The junction of adjacent slabs need not be marked here, but when gluing the first two slabs we will focus on the chandelier itself. To do this we cut two adjacent angle on both tiles and glue the tiles so that the chandelier suspension bracket is located in the resulting cutout.
Marking the ceiling for gluing ceiling tiles “from the corner”

Marking for sticking “from the corner” (see Fig. 5):
- Determining the base wall and base ceiling angle (the wall and corner are clearly visible from the entrance to the room).
- We beat off two risks on the ceiling at a distance of 51 centimeters from the base wall on opposite edges of the ceiling (we leave one centimeter for a gap to the wall, it will then be covered ceiling plinth. But the “licked” corners between the wall and the ceiling will not interfere with gluing the base row)
- Stretch the thread through these risks we get baseline . In the base corner, measure 51 cm from the adjacent wall along the thread.
- The tape that fixes the thread on the ceiling does not give us the opportunity to start gluing the ceiling tiles from the very corner, so We start gluing by gluing the 2nd and 3rd tiles . Here we want to warn you against dangerous mistake: the lazy person will say: “What for do I need this thread, we will glue the tiles parallel to the base wall - and no problems.” This is where the problems will begin. It is not a fact that the wall is smooth and it is not a fact that you can stick the first tiles strictly parallel to the wall. As a result, after gluing 4-5 tiles along the base wall, you may find that the next tile “runs” onto the wall, or, even worse, “crawls” away from it by 5 centimeters and the resulting gap cannot be covered with a ceiling plinth.

Marking for combined gluing completely coincides with markings for sticking “from the center” , with the only difference being that We don't need the risk of the middle (we don’t do point 5) a glue tiles we will, resting them on the chandelier suspension bracket. In this place, you can even make a cutout in the tile so that the chandelier is then located along the seam of the tiles, and not to the side of it.
Let's go directly to gluing the first two tiles , but don’t rush, we draw your attention to one point: on many manufactured ceilings there are arrows on the back side indicating the direction of gluing the tiles.
If there are no such arrows, and there are no embossed inscriptions by which you can unambiguously orient the tiles to the sides, then we advise you to make them yourself, for which purpose immediately, when opening the next package, back side Each tile on the side of the once chosen direction relative to the attached label should be marked DIM!!! two dots with a felt-tip pen. (see figure 7 a)
We explain why:
Firstly , smooth tiles reflect light differently in different directions. If you do not take this fact into account, you will end up completely disappointed - in daylight from the window, the tiles will clearly differ in tone, some will be white, while others will be noticeably gray - the picture is not at all pleasant.
Secondly , there are tiles whose sides differ in size by 0.5 mm. You may say it’s a small thing, but on 10 tiles the difference will be 5 millimeters!!! If the tiles are glued strictly orienting them in one direction, then these disadvantages in the production of ceilings will be absolutely invisible either in the work or in the result.

How to properly glue ceiling tiles, video
What glue should I use to glue foam ceiling tiles?
This is perhaps the most discussed issue in this topic. There have been cases that when gluing ceiling tiles with a “special” glue recommended by sellers (transparent color, Baltic production), each tile had to be held for 10 minutes before the glue dried, and quite often it turned out that the corners did not stick and protruded above the general level.
Therefore, a proven method for gluing ceilings on ordinary polymer putty, adding a little PVA glue to it when mixing .
Expanded polystyrene tiles are one of the most popular types of ceiling coverings. Therefore, the question of how to glue ceiling tiles is of interest to many novice craftsmen who plan to do the finishing work with their own hands.
How to choose tiles for finishing the ceiling?
Great popularity of this decorative material due to its following advantages:
- simple installation - anyone can handle gluing tiles;
- easy care - foam tiles can be washed with any non-abrasive product;
- the ability to hide small defects in the base;
- speed of finishing - a small base (for example, a ceiling in a bathroom) can be easily completed in a few hours;
- low cost - prices for ceiling tiles are quite low, so everyone can afford such finishing.
For successful execution repair work you need to answer 3 questions:
- how to choose facing material so that it lasts for many years;
- how to glue the selected finishing option so that it does not fall off;
- how to properly glue ceiling tiles so that the ceiling is not only reliable, but also attractive.
In the domestic market, ceiling tiles are presented in a wide range. Various models They differ from each other in color and texture, production technology, geometric dimensions, quality of polystyrene foam and cost. Therefore, before gluing tiles to the ceiling, you need to choose the right finishing material.
According to the production method, ceiling tiles are divided into 3 types:
- Injection. It has low density and, accordingly, strength, which is why it costs less than other types of finishing. Its thickness is no more than 14 mm. Such tiles are produced by sintering foamed plastic, which is why they are called foam tiles.
- Stamping. Characterized by a denser structure and mechanical strength. The thickness of the product is 6-8 mm. It is made by pressing polystyrene foam at high temperatures.
- Extruded. Is the most expensive and most quality tiles. With high density and strength, its thickness is about 3 mm, which allows you to save extra millimeters of free space during finishing. During the production process, the tiles are covered with a laminated layer, which not only improves its appearance, but also protects against the harmful effects of moisture. This allows the material to be used in rooms with high humidity(bathroom, kitchen).

By selecting suitable type product, its color and pattern, you need to check the quality of the material and its geometric dimensions. The first step is to inspect the edges of the sheets - they should be dense and consist of small granules. The smaller the granules, the better. Then the strength of the material is checked. To do this, you need to take one element from the selected batch by the edge and shake it a little. If at the same time it does not deform or break, then its quality is good.
Each tile must have the correct geometric dimensions. For example, if it is a square, then all the edges should be the same length, and the corners should be 90°, that is, they should not be rounded or flattened. Only in this case will you be able to finish the ceiling without seams.
Choosing adhesive for ceiling tiles
When answering the question of how to glue ceiling tiles, one cannot ignore the glue, which is the connecting link between the base and the finishing material. The adhesive composition for ceiling cladding must have the following properties:
- strength and reliability;
- quick setting;
- good adhesion;
- environmental safety;
- the ability to lay down both thin and thick layers.

If everything is more or less clear with the first four points, then we need to dwell a little on the last one for clarification. Most old-style apartments do not have flat ceilings; they can have height differences of more than 15 mm. How to finish in this case? There are two ways to get out of this situation: level the ceiling before cladding or use glue, which can be applied in a thick layer. The first option is not optimal, since it requires additional financial investments from the contractor. That's why the best option is the application adhesive composition in a thick layer, thereby simultaneously leveling and finishing the ceiling base.
Gluing tiles to a flat ceiling can be done using adhesives such as liquid nails, Moment, Eco-naset or Titan. They have excellent adhesion to any coating, be it plaster, wallpaper or other material, and fast drying time, which greatly facilitates installation work.
What to glue foam tiles onto uneven ceiling? In this case the best option stands ordinary putty and tile or drywall adhesive. These compounds can be applied in a layer of up to 40 mm, thereby leveling even big differences heights
Preparatory work
Any repair process begins with preparatory work. And finishing the ceiling with tiles is no exception in this regard. Before gluing this material, you need to do the following:
- choose a laying scheme;
- calculate the required number of tiles;
- prepare the ceiling for finishing.
There are different ways to place tiles on the ceiling relative to the walls, the most popular are (Fig. 1):
- in rows;
- in a checkerboard pattern (with a shift);
- diagonally.

Each installation option allows you to create a specific pattern, the best way suitable for a specific design idea.
To calculate the required amount of finishing material, it is necessary to make drawings on a sheet of checkered paper at the selected scale, which indicate the dimensions of the room and the layout of the tiles. It should be taken into account that standard sizes ceiling tiles are 50x50 cm. You can start laying from the center of the room or from the wall opposite the window. If there is a chandelier in the center of the ceiling, then it is recommended to start finishing from there (Fig. 2).
After this, the number of intact tiles and the number of elements that will be cut are calculated from the drawing. If there are gaps near the walls, the width of which will be less than the width of the tiles (less than 25 cm), then in this case 1 element will be used to cover two rows. If the size of the gaps is more than 25 cm, then you should buy tiles at the rate of 1 piece per 1 row.

How to glue tiles so that they don't fall off over time? To do this, it is necessary to properly prepare the finishing surface. First, the ceiling is cleared of poorly adherent old decoration and treated with primer deep penetration. If the base has deep cracks and chips, they should additionally be repaired with putty. Before finishing, it is recommended to prime a ceiling made of chipboard or plywood with a special mixture with abrasive additives that increase the adhesion of the material. After the primer has dried, gluing can be done.
How to beautifully cover a ceiling? First you need to correctly draw the finishing base and mark its center. To do this, take two cords that are pulled diagonally from opposite corners. The point of their intersection will be the center of the room. Then they retreat 25 cm from this point (half a tile) and draw lines along which the first element will be glued.
DIY tile gluing
Before gluing the tiles, you need to prepare the following tools and materials:
- stepladder;
- spatula if a drywall mixture or putty will be used as glue;
- roulette;
- stationery knife;
- mounting gun;
- tiles;
- adhesive composition;
- white sealant.

How to apply adhesive to tiles depends on what composition will be used. If gluing will be done using putty or cement mixture, then the glue is applied pointwise so as not to increase the weight of the finishing material. If you plan to use “Titanium”, liquid nails or another similar composition, then it is applied along the entire perimeter of the tile with a thickness of 20-30 mm, and a small spot is also made in the center.
After applying the glue, you need to leave the tiles alone for a few minutes so that the glue dries a little. After this, the finishing material is applied to the ceiling according to the markings and pressed with uniform force over the entire area. Before installing each subsequent element, it is applied dry to its place to see how it will lie and whether it will spoil the design. If necessary, the tiles in the last row are trimmed with a stationery knife on a hard surface. On last stage finishing works The ceiling plinth is being glued.
Before gluing the tiles, all windows and doors in the room must be closed to prevent drafts, because they negatively affect the strength of the adhesion.
If for some reason there are formed in some places small cracks, then you shouldn’t be upset, as they can be sealed with white sealant. After the sealant has dried, it will need to be painted over.
There is nothing complicated about gluing ceiling tiles. The only thing that can cause difficulties is marking the ceiling, since it must be done as accurately as possible. If everything is done correctly, the ceiling, finished with your own hands, will look no worse than if the installation work was carried out by a repair team.