Path made of wooden circles. DIY paths made from wood cuts
One can only envy those who have the opportunity to make paths from wood. Wooden paths attract the eye even in the most prestigious property. Walking on them barefoot is an unspeakable pleasure: pleasant tactile sensations arise both in the heat and in the cold. Of course, the paths must match the landscape and be suitable for the conditions of use.
Path from saw cuts in the gardenFeatures of wooden paths.
We have already noticed that, unlike other materials for paths, wood has low thermal conductivity, and it is pleasant to walk on it barefoot. Let's note others positive traits country paths of this kind:
- available material in some cases;
- environmental cleanliness;
- low complexity and labor intensity in manufacturing;
- the unique appearance of each track;
- accessible and limited list of necessary tools.
Unfortunately, there are also disadvantages:
- cracking due to sun exposure;
- rotting due to moisture;
- destruction by insects;
- instability to fire;
- wet surface becomes slippery.
Note that the fragility of wood is balanced by the ease of repair. Of course, wooden country and garden paths will last longer in dry climates and if installation technology is followed.
Paths made from wood cuts
 Options for laying wood cuts
 Garden paths made from wood cuts are popular and attract attention with their unusual nature. When using this technology with your own hands, you can easily create variations by changing the width and direction, without using a border. Paths made from sawn wood are especially appropriate in rustic and eco-style landscapes.
As you can see, the spaces between the wood can be filled with small crushed stone, gravel, soil, covered with pine needles, or planted with grass. On a decorative path, as well as when it is rarely used, the cuts are laid at a step distance.
Wooden paths can have steps and perform duties retaining walls when the ground level changes.
Preparation of material
When preparing wood and paving the path, you will need the following tool.
 For paths made from saw cuts, it is recommended to use the following wood:
- larch;
- pine;
- birch.
 Preparation of cuts for the path
 If possible, it is best to use larch as the most durable option. It can last for thirty years. The service life of pine is 5-10 years. Small diameter saw cuts are placed between the workpieces large diameter, providing maximum density of the fabric. Logs are sawn into pieces 10-20cm high. A path made from stumps that have been cleared of bark will last longer. If the cut surface is perpendicular to the log, installation of the coating will be easier.
 The saw cuts are processed and ready for installation
 To protect against rotting, the workpieces are processed in two stages. First, they are impregnated with hot drying oil or a special ready-made antifungal impregnation. Dipping saw cuts into boiling drying oil is cheaper, but more dangerous than treating with an antiseptic. After complete drying, the lower parts of the wood are coated with hot resin. In this case, it is also more convenient to use bitumen diluted in gasoline, which is called automobile anticorrosive. The upper planes of the cuts can be forcibly “aged” by treating them with copper sulfate.
Laying the path
 The trench is ready for paving the path
 Before paving the path from cuts, it is necessary to carry out preparatory work on the site:
- mark the path;
- remove the fertile layer and dig a trench;
- arrange waterproofing and foundation.
It is convenient to mark the contours of the path with pegs and a cord, or sprinkle it with sand. The ditch is dug at a depth 10cm greater than the height. wooden blanks.
 Geotextiles, crushed stone and sand are laid in the trench
 The bottom of the trench is leveled and geotextiles are laid on it, which allows water to pass through upper layers, but does not allow the crushed stone to mix with the ground. Next, a layer of crushed stone 5-10 cm high is filled and laid. 5-10 cm of sand is poured on top of the crushed stone, which is moistened and compacted. Ideally, another layer of geofabric should be laid between the sand and crushed stone.
 The saw cuts are set according to level
 Segments of logs are sequentially placed on a sand substrate and slightly hammered into it with a rubber hammer. You can make a pattern from the saw cuts or mount them, focusing on ease of installation. The job is easier to complete starting with larger elements. The upper planes of the pieces of wood are leveled. The gaps between the trees are filled with fine crushed stone, gravel, soil or sand.

Paths made of boards
You can make a wooden path in your dacha yourself using edged boards. This work is noticeably simpler than laying saw cuts. At the same time, the quality of the material used and the level of its processing determine whether these will be the simplest paths or paths with high decorative properties.
As with the use of saw cuts, the best wood larch stands out, and the most popular option is pine. Lumber flooring can be made above the ground at a height of about 10 cm, laid on the surface of the ground, or it is located in the ground. The recommended coating thickness is at least 40mm.
 Winding path made of planks
 To extend its service life, the flooring material is first treated with an antiseptic and then painted. If you want to preserve the structure of the wood, the wood is covered with stain and yacht varnish. To organize paths in a dacha with complex shapes, boards of different lengths and with variable widths of one element are used.
Experienced builders must leave a gap of 5-10mm between the boards to compensate for the expansion of the material when moistened.
 Flooring and joists made of identical boards
 Before installing the decking, it is recommended to arrange a base for water drainage. To do this, a trench about 15cm deep is opened, into which geotextiles, 5-10cm of crushed stone and 5-10cm of sand are laid in succession. Crushed stone and sand are compacted in turn. The frame for the deck above the ground is mounted on logs made of timber or boards. They must be treated sequentially with an antiseptic and resin, or they can be wrapped in roofing felt.
Between the board joists every other linear meter install crossbars. This will prevent the joists from falling to one side. The flooring is secured to the supports with nails or screws. To ensure an equal gap of 5-10mm between the boards, bookmarks made of thin slats are used.
 The path is laid directly on the ground
 Wood flooring is easier to lay directly on the base. To install the track, the boards are put on two cables through a preliminarily drilled holes. Between the individual elements, segments are put on the cable plastic pipe to ensure equal clearance.
 A path made of boards is convenient to use on sand
 The decking elements can be secured to a fire hose or garden border tape. In this case, screws are screwed in from the tape side, and then the finished track is turned over. Such a path can be rolled up and hidden from bad weather for the winter.
 Convenient to walk on wood laid in the ground
 A path made of boards laid at the level of the soil surface looks original and is easy to use. In this embodiment, the material is in conditions high humidity. This means that it is imperative to arrange the preparation specified above from sand and crushed stone. The gaps between the individual elements are filled with crushed stone. The wood must be pre-treated and carefully sequentially processed protective impregnations and coatings.
Laying decking
Wooden paths are very attractive in appearance, but are short-lived. To solve this problem, it was developed synthetic material– decking. It consists of shredded wood and plastic. Terrace boards made from this material are very stable in atmospheric conditions and do not require additional coating. Of course, decking is much more expensive than regular lumber, but its appearance and reliability are worth it.
 Decking on the lawn looks good
 Note that with noticeable bends terrace board may crack, so to lay the decking you will have to arrange a fairly even and solid foundation. It is best to prepare in the form of cement screed. Installation of the covering is carried out on logs made of the same material, in increments of 0.2-0.3 m. When laying them, it is necessary to provide a gap of 3-10 mm between the individual elements for water drainage.
 The appearance and stability of the decking are beyond doubt
 At the same time as decking, you should purchase everything necessary components for assembly: corners, plugs, connecting brackets, end strips and hardware. Self-tapping screws should be tightened with sufficient force, however, excessive zeal can lead to destruction of the material. The fasteners are covered with plugs or painted. In the case of a closed connection, no installation elements are visible. The material must be unpacked one day before use. Do-it-yourself assembly of decking flooring is carried out only at positive temperatures.
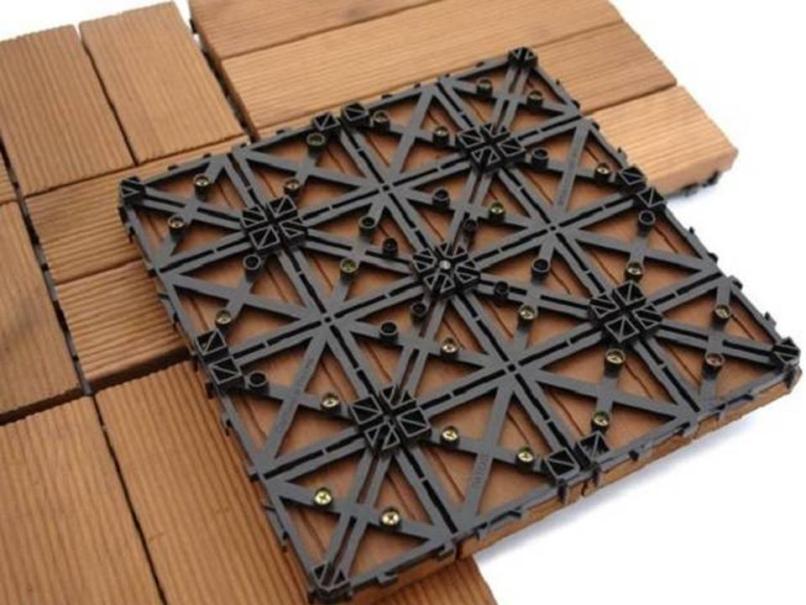
There is an option for decking in the form of tiles for garden paths. Such elements consist of several planks secured with screws to plastic base. Individual tiles are fastened together using special locks on a plastic grid.
 The tile flooring is eye-catching
 A garden path made of tiles looks impeccable, but it costs even more than one made from conventional decking. Plastic locks will fail if there are significant distortions, so it is necessary to prepare a fairly level base for the flooring.
Photos and examples
Of course, it’s easier to do any work if you have it in front of your eyes. interesting examples for imitation. Sometimes it is better to see once than to hear a hundred times. We tried to select for you the most interesting examples of photos with comments.

Often, saw cuts are laid without removing the bark. Geometric paths can be made from perfectly flat calibrated logs correct form. A path of stumps in the garden makes it surprisingly cozy. A path made of wooden saw cuts fits organically into the surface of the lawn.

All buildings on a summer cottage require the creation of comfortable hard paths that will function at any time, without interfering with free movement and without losing their appearance. Since the design of dachas consists of trees, flowers and other plantings, a wooden path will fit best into the landscape.
Garden paths made of wood can look different, but those paved with closely spaced saw cuts look most beautiful. Rings made of wood of different diameters allow you to create the most unusual shapes and compositions on the ground. As a result, even a straight path of this type will look stylish and original. Let's figure out how to make garden paths from wood cuts with your own hands and what to pay attention to in the preparation process.
General Features
What is so attractive about garden paths made from saw cuts? First of all, it is an extraordinary harmony with nature. Whatever shade you choose, whatever design you choose - wooden elements your paths will set the rhythm of the picture of your site.
If desired, the tracks can be designed additional materials. For example, combine with stones unusual shape, fill the cracks with sand or gravel. Grass sprouted inside the structure of the path will make it bright and contrasting. The color of the tree can also be changed using quality paint. Spectacular design paths will be obtained by alternating wide and narrow cuts.
Tip: by arranging the rings in even, ordered rows, you will emphasize the rigor and restraint of your design. summer cottage.
While the winding paths with disproportionate shapes will be perceived as elements of light and playful design.
 Along such a path you can plant flowers or bushes, arrange flower beds or borders, and also create interesting design from stones. Often the edges of wooden paths are decorated with cuts of greater height.
The naturalness of paths made from saw cuts successfully complements the carpets of flower beds.
Pros and cons of wooden walkways
There are many advantages to using saw-cut paths in your summer cottage. Let's look at the main ones:
- For such a design, you can choose cheap tree species, saving on materials;
- It won’t be difficult to design a path: just cut a log and lay out a strip of them, like a puzzle. A simple preparation technique is available to everyone, so you can do it yourself;
- there are almost no puddles in such paths;
- spectacular appearance allows you to design such paths not only traditional, but also modern houses and cottages;
- if one of the cuts is damaged, you can always replace it, and repairing the entire path will not require significant effort;
- wooden materials safe and environmentally friendly.
In addition, creating a path from wooden saw cuts has decorative advantages, since you can create your own design. Look at the photos of garden paths made of wood: each of them looks harmonious and special.
Disadvantages include the natural properties of the materials used. Trees can rot, crack, and pests can infest them. Besides, wooden paths will require careful care, and after rain they can slip a lot, be careful.
Attention! You can get rid of some problems (for example, pests or the risk of slipping) using special wood impregnations.
However, even with such shortcomings, wooden paths will last quite a long time. The service life will depend on the type of wood chosen and the correct processing. So what kind of wood materials the best way Are they suitable for constructing such paths?
Choosing materials for paths

Of course, the choice of breed will also depend on cost. Poplar is considered one of the most reliable materials with a low price. Approximate cost of logs different breeds listed below (data for 2015):
- one cubic meter oak will cost you from 4 thousand rubles;
- the cost of pine is from 6.2 thousand rubles per cubic meter;
- larch costs from 7.5 thousand per cubic meter;
- cedar is estimated at 7-8 thousand rubles;
- poplar can be purchased at a cost of 1.5 thousand rubles.
In order for the result of your expenses and efforts to be preserved for a long time, it is not enough to purchase a high-quality type of wood; it is necessary to use it correctly.
Making the path yourself
Preparatory stage of the process self-creation garden paths made of wood consists of choosing wood and making cuts (the log is sawn into rings with a width of 15 cm, depending on your preferences).
Attention! The height of the cut should depend not only on the required strength of the rings, but also on the diameter of the tree. The larger and wider the ring, the stronger its structure should be. Thin saw cuts will not be able to maintain stability in the ground and will quickly deteriorate under the influence of external factors.
In order for your path to serve you as long as possible, first clear each cut of bark. Then you won’t have to deal with the problem of peeling after installation is complete. Remove saw cuts with cracks immediately. Do not forget that each element of the future track must be processed protective equipment.
 Individual cuts can be tinted, which will make the path brighter and more interesting.
 Drying oil heated to a boil is considered the most reliable. Such treatment can be dangerous, so if you wish, you can purchase an antiseptic solution (in which the cut will lie for 2 hours to 2 days) or bitumen. After treatment, wait until the wood is completely dry.
When the cuts are ready, you can begin installation. Creating garden paths from wooden saw cuts involves several successive stages. Let's describe the process step by step:
1. Create markup. Find out the dimensions of the future path (its width should be 35 cm or more), shape and intended design. Mark the route on the ground, set boundaries with pegs and connect them with fishing line.
2. Ensure that the track base is secured. Dig a trench at the site where the cuts will be installed. The depth of the trench should be sufficient for installing stumps, and also have a reserve of 5-10 cm. The width of the trench corresponds to the future path. After creating it, lay a waterproofing film or durable polyethylene, and cover the base with a 2.5-5 cm layer of crushed stone or gravel on top. Such a base will protect the tree from moisture and displacement. Using a level, the layer is leveled for subsequent processing.
 An example of making a path from wood cuts without borders (first part).
 3. Install curbs if your design calls for them. To do this, use beams, stones, concrete posts or whole logs of similar species.
4. Create another one protective layer. This time sand is poured along the entire path. The layer height should be about 5-10 cm. Fill the sand with water for better compaction.
 Laying out the cuts and forming a path without a border (second part).
 5. You can start installing the cuts. It is advisable to provide a minimum of free space between each of them, since a dense path will be more stable. Be sure to compact each cut and ensure that the top of the path is even.
6. When the path is ready, you can start decorating. Paint the wooden parts, pour sand, earth, stones or seeds into the niches.
Tip: Your path will last much longer with careful care, so clean the surface annually with a metal scraper and also treat by special means.
Look at another set of photos step-by-step production original garden path made from saw cuts.


Consumption of materials
Required amount The material will depend on what kind of future path you see: straight or winding, with dense laying of cuts or the presence of large distances between individual elements. Sketch out a sketch of the path and calculate how many cuts will be enough to realize your idea. As a rule, at 1 square meter The path takes from 8 to 11 laps depending on the diameter of the log.
Do not forget that each element of the path must have sufficient width and strength, otherwise during operation cracks may appear along the entire path in your dacha. By comparing required thickness each cut and the height of the existing tree, you can figure out how many parts you can divide it into. It is advisable to leave a few cuts in reserve, since in the future you will have to replace damaged track rings.
Making a path from saw cuts is a simple process, but, nevertheless, it is better not to undertake it without a lack of experience. Entrust the installation to specialists - and your path will last much longer, allowing you to save on subsequent landscape works. We learn from reviews about what else you might encounter when deciding to create such paths.
Maria, St. Petersburg: On the dacha plot they laid just such a path. It has been holding up for a year without any special treatment, has not lost its appearance and has not rotted. I admit, I settled on this option not because of the advantages and useful properties, I didn’t even think about them. There were several logs - and we decided to decorate our dacha. Now I understand what it was correct solution, because the path made from saw cuts not only meets all my quality requirements, but also looks very cozy against the backdrop of trees and flowers. It turned out to be a very harmonious site, and the costs were low.
Nikolay, Lipetsk: I really love working with wood, so creating the original path was even satisfying: I quickly sawed the log into separate pieces, prepared the base, installed all the elements - and for six months now I can’t be happier with the result. It turned out very beautiful, harmonious and high quality, and also inexpensive. I have heard that the path can deteriorate and rot, but I have not yet noticed such shortcomings, so I will continue to watch. So far there are no complaints.
Olga, Tver: I was thinking about how to design a garden at the dacha with wooden house– and I couldn’t find anything better than saw cuts: such a path would fit perfectly into the design of my site. Since wood is a finicky material, I decided not to rely on my own strength, I called specialists who prepared the beams, treated them with protective agents, and laid them out, focusing on my ideas. Now my dacha has become even more comfortable! I plan to somehow modify the design using paint, but even so everything looks very original.
Every owner or housewife dreams of a cozy summer cottage where they can relax and enjoy nature. Therefore, it is not surprising that maximum attention is paid to landscape design. Decorate your dacha with paths made from wooden saw cuts - and you will be convinced of their beauty, strength and durability.
Eco-friendly garden path made of logs is not the most popular choice among owners summer cottages, but this option is ideal for landscaping in rustic style. Log paths are built from saw cuts (chocks, stumps) 10–50 cm long. This material can be obtained absolutely free - wood will do, remaining after thinning the garden, uprooting and pruning useless trees that interfere with the development of other plants.
Advantages of a garden path made from saw cuts
Using wood waste for paving paths provides a number of advantages:
- environmental friendliness. It's hard to think of something more environmentally friendly than wood;
- the possibility of building a path from logs with your own hands;
- absence of puddles during rain and snow melting;
- maintainability;
- absolute uniqueness appearance. All chocks have different diameters, shapes and can be placed relative to each other in different ways;
- Such paths fit perfectly into the design of the site in the “eco” style.

Appearance of log paths
All this explains the interest of owners of summer cottages in wood material when paving garden paths.
Technology of paving garden paths with log cuts
If a garden path made of logs has become the final decision when choosing an option for designing and beautifying a summer cottage, then special skills will not be needed to implement this idea. In addition, every amateur summer resident has a set of tools, well, maybe in addition to an electric or chainsaw.
Preparing chocks for paving
When starting to cut a tree trunk and its thick branches, or ordering them somewhere else, you need to understand what size and quality of material is needed.
The thickness of the chocks is determined by their diameter. The thicker and more massive the log, the bigger size The cuts need to be prepared. After all, they must be securely fixed at the base of the track. Usually the size does not exceed 30 cm. In this case, it is necessary to take into account the planned height of the pedestrian surface above the ground. In most cases, this parameter is 1–3 cm.

Range of cut diameters
After the hemp is prepared, it is necessary to peel off the bark from it. After all, it is she who first begins to rot; harmful insects. This operation will extend the life of the future path.
After cleaning the workpieces, you will definitely have to take a number of measures to protect them from moisture, rotting processes, increased interest from insects. The “old-fashioned” method is treatment with drying oil. To do this, heat it to boiling point and use a brush and, without being greedy, apply a protective layer to all open surfaces of the wooden block. After the drying oil is absorbed, you can begin installation.
More modern way protecting wood from destruction - a variety of antiseptic compounds. Before you start working with them, it is important to carefully read the instructions for use and processing times.
For additional protection, the lower part of the chock, which will be in the ground, can be treated bitumen mastic. This great way protect wood from the destructive effects of the soil.

Preparing logs for installation
Arrangement of a place for laying saw cuts
Begin preparation by marking the path. This stage is performed using metal or wooden pegs and a cord stretched over them.
Then they dig a pit for the future path made of logs. Its width should correspond to the width of the future planned path plus the curb. The depth depends on the size of the cuts plus 10–20 cm.
Start preparing seat follows with waterproofing the pillow. To do this, cover the bottom of the dug hole with plastic film. Although more can be used modern material– geotextiles. It protects the substrate and stumps from moisture and germinating roots of weeds.
5–10 cm of gravel of different fractions are poured on top of the waterproofing layer. The variety of particle sizes will ensure the density of the drainage layer. A layer of sand 3–5 cm thick is poured on top of the gravel. It is on this that the wooden chocks will be installed. To prevent the sand from sinking in the future, you can water it.

Border for paths made from saw cuts
Log laying technique
The next step is installing the border and the chocks themselves. As a border for a log path, some use saw cuts, split lengthwise into two halves, although whole logs are also suitable.
After installing the curb, you can begin laying the cuts. How exactly to place them depends on the tastes and preferences of the owners of the summer cottage. Some people prefer it when wooden round timber are located close, and some choose the option with large gaps. The main thing when installing is to lightly “tap” them with a mallet and press them into the sand substrate.

Fixing saw cuts at the installation site
After installing the cuts, you need to securely fix them. This can be done by filling the space between the chocks with sand and granot sieving. Some people prefer to concrete the gaps - in this case, reliable fixation of the cuts will be guaranteed.
If you follow all the nuances during construction, a log garden path can last long years. It will not only make it easier to move around the site, but will also become its decoration.
All buildings and structures (gazebo, terrace, swimming pool, greenhouse, vegetable garden and various elements landscape design) at the dacha or personal plot communicated through paths.
What kind of path to make, or rather, from what material, everyone decides for themselves; specifically, within the framework of this article, we will consider making a garden path from chopped tree rings.
Among all the options (from boards, timber, panels, garden parquet, branches and bamboo), one of the most accessible in terms of material and the most complex in terms of design is paths made from wood cuts. The material is structured according to the principle step-by-step instructions so that anyone can build such a path with their own hands.
A path made from wooden saw cuts can be called differently: from slices, stumps (die, block, stump, log, ends of logs), but the construction method will be identical.
Garden paths from cut wood - step by step guide
For work you will need materials and tools:
- Wood cuts (cuts)
- Rolled waterproofing or geotextile (geofabric)
- Sand, pebbles, gravel, water
- Level
- Hammer (preferably a mallet)
- Hand chainsaw
- Shovel, buckets, brushes
Step 1 - preparing wooden cuts
You need to start working with preliminary preparation cuts (sections) of wood. Then they will be ready just in time for installation.
When choosing wood, you need to take into account how long the path is expected to be used and what load it will bear. When arranging garden paths from wood cuts at the dacha, it is better to give preference durum varieties wood. So, for example, oak will last you about ten years, pine - no more than seven. And larch is practically indestructible and will delight you for more than a quarter of a century.
But, most often, blanks for the path are made from those species that are available. It all depends on the budget; saw cuts from poplar will cost much less than from oak or larch.
 To prepare the cut, you need to cut the log into pieces 150-200 mm high.
The rule that works here is larger diameter logs, the greater the cutting height should be. And of course, the height of all blanks should be approximately the same.
If the thickness of the cut is less than 100 mm, there is a high probability that it will not be fixed in the ground and may “pop out” when pressed.
To extend the life of the saw cut, it must be cleared of bark. Because it is the bark that will begin to peel off first.
In addition, it is better to avoid using saw cuts that have cracks. They will begin to deteriorate first and very quickly, and the crack may increase under the influence of loads on it.


The cut also needs to be pre-treated. The most common treatment is drying oil.
To do this, it is heated to a boiling point and the saw cut is coated completely. Please note that this work is dangerous, so it is better to buy special antiseptic solutions that will provide both moisture protection and biosecurity. The saw cut should remain in this solution from two hours to two days.
To further protect the wood from rotting, the bottom of the round timber must additionally be treated with bitumen. You can age wood using a solution of copper sulfate.
The processed saw cut must be dried thoroughly.
Step 2 - marking the path
The difficulty of this step is in determining optimal sizes tracks - 350 mm, sufficient width for one person to move freely. As well as its route - to ensure access to all required facilities.
Step 3 - preparing the base
In order for wooden garden paths to serve you as long as possible and be safe, they need to be securely fixed.
 To do this, you need to dig a trench along the marked route of the future path. Its depth depends on the length of the hemp (cut) plus 50-100 mm. (depending on the type of soil and the expected load on the path).
The width of the trench is equal to the desired width of the path.
 A waterproofing film is laid at the bottom of the trench (you can use polyethylene film used for greenhouses or geofabric).
Gravel or small crushed stone is poured on top of the film. This drainage is necessary to protect the wood from moisture. The height of the first layer of the pillow is equal to half the required height (25-50 mm). It is important to compact it well.
The sand and crushed stone bed must be leveled using building level. This will significantly save time and effort when laying cuts.
Step 4 - installing curbs for paths (edges)
 If a curb is provided, then they must be installed before installing the cuts.
Stones, bricks, sheet iron, wooden blocks or long logs.
But, in order not to disturb the harmony of the garden path, chibouks sawn lengthwise are used.
Step 5 - pouring the second layer of sand cushion
 Sand is used as the second layer. The total height of the pillow is 50-100 mm.
To compact the sand well, a technique such as pouring water on it is used.
Material prepared for the website www.site
Step 6 - diagram of laying wood cuts
The order in which the wood cuts are installed is not of fundamental importance. The formation of the pattern depends on the preferences of the owner.
It can be positioned so that there is as little space as possible between the cuts. Or, on the contrary, you can place them widely.
The main thing at this stage is to slightly “drown” the cut (compact) and also level them.


Step 7 - decorative design of a garden path from wood cuts
The space between the cuts can be filled with sand or soil mixed with seeds of ground cover plants.
Leave the saw cuts themselves in their original form or paint them with bright colors.

You can more clearly show how to make paths from wood cuts using a cross-sectional drawing of a path.

Caring for wooden paths
To ensure that a DIY garden path made from wood cuts does not lose its original appearance over time, it requires constant care.
To do this, you need to clean the cuts once a year with a metal scraper, treat them with an antiseptic and apply a special protective covering, drying oil or paint.

Advice
When you make a path, set aside a few cuts in reserve; in the future, you can replace individual elements during the repair process. In order to reduce the sliding effect after rain, do not heavily polish the ends of the logs before installation.
If you are interested in the process of making a path from wood cuts - a video illustrating how to make it yourself
Garden paths made from wood cuts - pros
- cheapness;
- high speed and ease of installation;
- the ability to carry out the entire process independently;
- do not accumulate moisture (do not create puddles);
- have a natural look;
- very repairable;
- environmentally friendly;
- the opportunity to make a unique garden path made of wood. After all, all cuts are different, which means that the design cannot be repeated;
- the ability to use end-of-life logs as mulch or chop them up and add them to compost.
Country paths made from wood cuts - the cons
- subject to rotting;
- react to temperature changes;
- require constant care;
- become smaller after rain (evened out through the use of a special treatment compound).
Conclusion
Based on the above, it becomes clear how to make a path from wood cuts with your own hands, without resorting to excessive costs and outside help. Although, you shouldn’t rely too much on cheapness, even with self-production you'll have to spend some money, but this path is worth it
A personal plot is not only a place for growing potatoes, cucumbers and tomatoes, although I have no complaints about gardeners. But a beautiful exterior can interest any owner country house or a summer house, so the question of how to make wood cuts with your own hands may interest you.
Exterior design - beautiful garden paths
Stages of constructing garden paths from saw cuts
There are many lumber materials that can be used to lay paths in the garden or in a flower garden near a country house, these are panels, boards, timber or decking boards (parquet), although this is not solid wood, but a composite - sawdust with plastic (wood plastic). But the most attractive material, of course, will be sections of logs, where the structure and tree rings. Below you will find step by step instructions for the production of fragments and their installation.

Harvested hemp
To implement such a plan, you will need a number of materials and tools, these are:
- Lumber - logs for cutting into stumps.
- Waterproofing is thick polyethylene, but geotextile is better.
- Bulk building materials - pebbles, gravel (crushed stone), screenings, sand.
- Level – preferably one meter or more.
- Cutting tool – chainsaw.
- Auxiliary tools - a large rubber or wooden mallet, buckets, bayonet and shovel, brushes.
Stage No. 1 – harvesting and processing of stumps

Harvesting stumps with a chainsaw
You should start the project by preparing the required amount of material, therefore, even before marking all the paths, you need to measure their total length and width in order to calculate the coverage area. This is very easy to do using the formula S=alength*bwidth, and then the average cut area S=π*r2, after which Stracks/Scut=xpieces - all you have to do is substitute digital values. In order to find the average radius (r) of the cut, you need to measure the diameter (D) of the largest and smallest sections of the logs, fold them, and then divide them into two. We also divide the resulting diameter by two and get the average radius. For example, we take two diameters ø0.4+ø0.25=0.65 and divide by two: 0.65/2=0.325, which means Daverage=0.325 m, and radius r=0.325/2=0.1625 m, which means , S=πr2=3.14*0.162= 0.5024 m2 or roughly half a square.
For the manufacture of blanks, it is advisable to choose hard wood species that will last a relatively long time, for example:
- pine - 7 years;
- hornbeam – 10 years;
- oak – 10 years;
- larch – 25 years or more.

The bark must be removed
In addition to taking into account the type of wood, you need to pay attention to its condition, for example, large longitudinal cracks and/or damage by mold, rot, and beetles will not contribute in any way to increasing the service life. When you select suitable logs, cut them into logs of 15-20 cm, but it is advisable to stick to the same size (shorter stumps are poorly secured during installation). If desired, you can also sand the cuts, although this is not necessary.

Soaking the cut in antiseptic

The ends of the saw cuts can be painted in any color you like
When you file required quantity stumps, remove the bark from them - there may be various pests such as wood-boring beetles, bark beetles, shashel, etc. After cleaning, the wood should be protected from moisture and best drug in this case, it is boiled oil drying oil (natural, combined “Oxol”). But working with boiling water, especially with oil, is quite dangerous, so many people prefer various antiseptics to drying oil - they also resist rot well and protect against pests.

After drying, painted saw cuts are treated with mining or bitumen

The impregnation and paint must dry
After drying the drying oil or antiseptic (this may take up to 2 days), treat the lower part of the hemp with bitumen, as in the photo above. For this purpose, solid construction bitumen, commonly known as resin, packaged in bags, is best suited. The resin is broken into pieces and melted over a fire (bonfire) in a metal container. The treated part of the block will dry in a few hours, and the cut will be ready for installation. You can also soak the stumps in oil, but it won’t dry out and you’ll have to install them.
Stage No. 2 - marking garden paths

Marking garden paths
Now about the sizes. In the case where a garden path made from wood cuts, made by yourself, is designed for one person, then a width of 35-40 cm will be sufficient. But in order for two people to walk there hand in hand, the comfortable width will increase to 100-120 cm, although such parameters are very rare.
It is very important to determine the route of all paths that should connect all buildings and recreation areas (, etc.). Laying lines, as a rule, have turns, zigzags and roundings. To display them on the surface, metal or wooden pegs are driven into the ground, along which a nylon thread is pulled for reference. A similar operation is performed on the other side of the track, indicating its width.
Stage No. 3 - preparation of the base on the ground

Preparing the base on the ground
Now you need to cut the turf separately - it can be used for a plot in another place, but if you don’t need it, then, of course, you can simply dig it up. So, according to the guidelines marked with threads, we dig a trench half a bayonet deep, not counting the turf, but we also need to take into account the length of the stumps - you will understand this in the process of describing the working actions. Try to ensure that the sides of the groove are smooth and strictly vertical - this can be easily achieved with a bayonet shovel.

Laying waterproofing film
In order to protect wood from groundwater, the bottom of the dug trench is covered with waterproofing and it is best if it is geotextile. But how a budget option You can also use dense polyethylene, this is 150-200 microns (microns). If the seller does not know the thickness of the material, then you can focus on its suitability for the device and. When you plan to install a wooden border (stumps spread along logs, thick boards, stones, etc.), then the waterproofing should be wrapped on the walls of the trench or even a little higher (the excess will be cut off).
A cushion of sand mixed with gravel or crushed stone (can be screened without sand) with a height of 2.5 to 5 cm is poured on top of the waterproofing film and leveled as a rule. This layer will absorb water that gets between the logs to the bottom of the trench. So what does this give? Everything is simple and logical - moisture falls down under the influence of gravity, but does not linger at the base of the chocks, penetrates into the absorbent layer and after a while diverges to the sides into the ground, and some evaporates.
Stage No. 4 – installation of stump borders

Installation of stump borders
In this case, a border made of stumps was chosen, although you can edge the path with other material, the main thing is that it is combined with the cuts and the exterior as a whole. But if you still decide to do this with stumps, then choose the thinnest of the cut pieces, but it is advisable that they all be approximately the same diameter.
To make a border from the selected cuts, you need to tightly align them in a vertical position on each side of the trench, as shown in the top photo. Waterproofing on the wall will protect them from ground moisture, and a sand-crushed stone cushion from water accumulating during precipitation. The height of the block of wood above the ground after it is laid should be about 3-4 cm.
Note. The border is not an integral accessory of a garden path made from saw cuts in a country house or country house. This element, so to speak, is voluntary.
Stage No. 5 – add another pillow

The second pillow consists of only sand
On top of the sand-crushed stone layer, another pillow of one sand 5-10 cm high is poured - the longer the hemp, the thinner the pillow. If you know what is under paving slabs and as it is done on the street, the real backfill is almost identical, only it is made from sand, and not from screenings and cement. Be sure to level the sand horizontally with a rule and level - this will make it easier to lay the cuts in the garden.
I want to make a small digression. The second pillow can be filled in before installing the border and then the edging will be at the same height as the rest of the stumps. There are no regulations or clear instructions here, since such sidewalks are not mentioned in any of the GOSTs or SNiPs, therefore, TU ( technical specifications), as such, do not exist here and everything depends on the imagination and desires of the installer.
Stage No. 6 – laying wood slices

You can leave gaps between the slices or adjust them closely to each other.
At this stage, you need to place all the cuttings in the dug trench so that they are 3-4 cm above the lawn. The order or arrangement of the logs does not matter at all - now the main thing is to create stability, and you can leave gaps between the cuts or adjust them close to each other.

Stumps are hammered into the sand with a rubber mallet
In order for the logs to stand tightly in relation to the surface, and their upper ends to be at the same level, the stumps are driven into the sand with a rubber or wooden mallet. In this case, it is better not to use a metalworker's (steel) hammer, since it will not only leave dents on the saw cut, but may also cause cracks. If you have nowhere to take a mallet, then, of course, use a hammer, just hammer the cuts through the spacer (a piece of board, bar or slats). Constantly level the surface of the installed fragments with a building level.
Stage No. 7 – the final stage of stump installation and path design

The space remaining between the stumps is filled with sand, screenings or fertile soil for grass
In any case, there will be space between the cuts of logs, even if you lay them very tightly - this is a feature of round timber. The cavities should be filled with bulk building materials such as sand, granite screenings or crushed stone, after which it must be compacted, otherwise it will sag under the influence of precipitation.

Design methods: 1) multi-colored ends; 2) grass between cuts; 3) coarse gravel between cuts
Let's move on to the finishing touch devices from wood cuts, which you have already made with your own hands. The selection of photographs above shows three design options, although in reality there are many more, but it depends on your imagination.
The gaps between the stumps here can be filled with sand or granite screening. But the highlight, as you can see, is the multi-colored ends of the cuts - water-repellent paints are used for this. This design of the path near the playground is just a gift for a child.
The second option involves low-growing () grass. To do this, after filling the cavity with sand or screening, leave 4-5 cm to the surface of the ends, tamp it down and fill the remaining volume with fertile soil mixed with seeds
Here, coarse gravel is poured between the stumps, as the distance allows. But in such cases, sometimes they go the other way - instead of gravel they fill in painted crushed stone, which looks very beautiful and original.
Below is a training video about installing a path from sawn logs:
Video: Care garden path from wood slices
A garden path made from wood cuts needs to be looked after, yes, exactly looked after, otherwise it can turn into a path that is laid through a swamp - trampled and dirty. Dirt will collect at the ends of the stumps, and it will appear there even if you very rarely use this route or don’t go there at all - there is always dust on the street. Therefore, sweep at least once a month garden paths brush and, if necessary, wash them running water from a hose.
If pieces of dirt appear (even animals can leave it), it is better to use a scraper, that is, an ordinary metal spatula with a blade trimmed to 3-4 centimeters. Metal brush It is not advisable to use it, as it will spoil the texture of the cut.
Once a year or once every few years (depending on the intensity of movement around the garden), the saw cuts should be coated with an antiseptic or moisture-repellent paint. As a rule, these are acrylic or latex paint and varnish compositions for exterior work - they are more expensive than usual, but the service life is well worth the money spent.
Pros and cons

Original design: saw cuts, ornamental plants and painted crushed stone
Positive feedback from optimists:
- the construction of such paths is inexpensive;
- speed and ease of installation;
- no need to hire someone to do the job;
- looks natural;
- endless design possibilities;
- You can use used logs after dismantling any structures.