Lining an iron stove with bricks. How to line an iron stove with bricks with your own hands: choosing tools and materials to line an iron stove with bricks
A small and compact cast iron stove in a country house, dacha building, in a bathhouse or steam room - an almost irreplaceable source of heat. It creates comfort and heats the room.
At the same time, an iron stove is always compact and easy to install, and quite quickly heats the room area. But there are also some disadvantages, which we will correct by learning how to line a cast-iron firebox with bricks on our own.
Photo - cast iron in brick
Why do you need to cover metal?
First of all, metal has its own physical characteristics, which influence the comfortable proximity to such a stove:
- It is quite difficult to maintain in a metal firebox stable temperature. At the same time, this will affect sharp fluctuations in room temperature.
- It is almost impossible to achieve the required air humidity in rooms where such heating equipment is located.
- Low degree of safety, in the sense that heated metal poses a serious danger of getting burns, and sometimes severe ones.
Precisely in order to eliminate the above properties of metal.
Moreover, using simple masonry using special material and simple building brick, we will immediately improve several important indicators:
- Let's increase the heat output of the furnace several times.
- We will reduce temperature fluctuations in the premises.
- We will increase the safety of the stove; now you can even lean against it.
- We will improve the design of the firebox itself and the entire room at once.
And the most important thing is that you can cover the heating equipment yourself!
Preparation
Before we attack a cast iron stove and cover it with bricks, we need to carry out at least a few works in preparation for the masonry itself.
The first step is to build a good, strong base for the stove. If we're talking about country house, a bathhouse where there is no, for example, solid foundation, you will have to dismantle the equipment and build a reinforced foundation, because the weight of a brick stove is quite large.

It doesn’t matter here whether the stove is brick or cast iron; the design still requires a strong base.
Foundation
We can use two types of base for the firebox:
- The foundation is in the form of pillars, the so-called “columnar” foundation.
- Just an ordinary foundation.
The first option involves complex preparatory work and precise calculations, so we will focus on the second option and simply pour a concrete base that will perfectly meet our requirements for installing the furnace.
We will need:
- Cement, grade 300, durable.
- Sand.
- Crushed stone of medium fraction.
- Fittings.
We dismantle part of the floor and dig a hole deep at the level 30-40 cm, and install several pieces of cut reinforcement into it.
Advice! Reinforcement is not particularly needed in such a simple and small foundation, but we still recommend its use. It reinforces and binds concrete, increasing its service life.
We make the solution in a ratio of 1 to 2, and try to keep it liquid and fill the entire hole. As soon as the concrete dries, lay out 1-2 rows of solid brickwork, you can use double sand-lime brick m 150 or - this will be our foundation.

Marking and fire safety
Naturally, before starting work, we will need to carefully and accurately mark the masonry. It is important to note here that there must be a gap of at least 10 cm between the surface of the metal and the wall that we are going to lay out of brick.

Distance has its own nuances. A small gap will allow the masonry to warm up quickly, but will reduce its service life. cast iron stove, and too large a distance, on the contrary, increases the heating time of the masonry.
And naturally, with cast iron, and with any kind, it is worth monitoring the fire safety aspect. If our stove is on wooden floor, place a sheet of metal on it, and place it on top asbestos cardboard.
Preparation of the solution
Before we line a cast-iron firebox with bricks, we will need to study the issue of mortar. Simple and familiar to everyone will not work here. cement mortar, but a special clay one mixed with sand.
Advice! We sift the mountain sand so that there are no stones or debris left in it. This technique will allow you to make the seam thin, which will affect the appearance of the masonry.
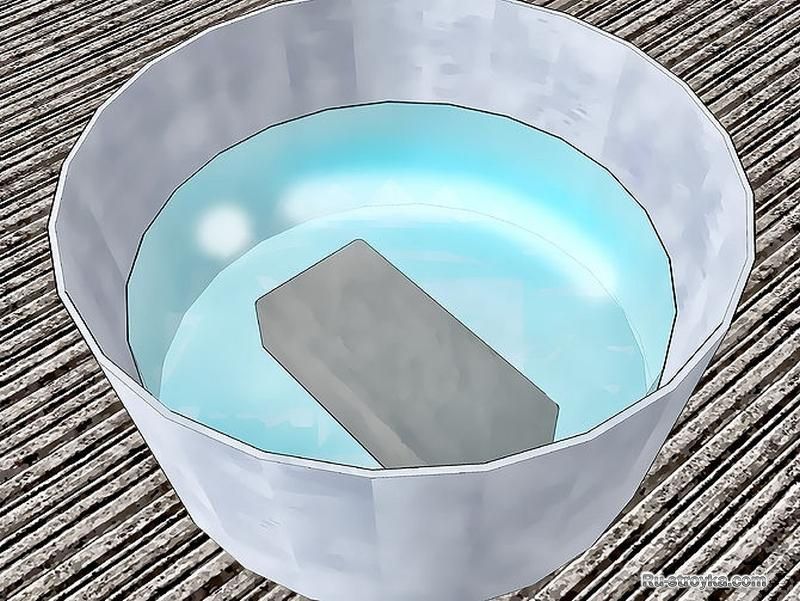
To find the ideal component of the solution, we will conduct several experiments with clay and sand, making several types of solution with different proportions. As soon as we bring them to the state of plasticine, we fashion them into small “cakes” and let them dry.
After two weeks, when our samples are completely dry, we throw them from a height of one meter onto a hard surface. The sample that does not crumble upon impact is an example of the correct proportion of sand and clay.

Such instructions for preparing the solution are necessary because there are no specific ratios; it all depends on the composition of the sand and clay.
Now we pour the clay into a container for the solution and leave it for several days, then gradually pour in water and mix until it becomes plasticine.
Let's start laying
Now that we have prepared a solution in the required proportion sand and clay, we can proceed directly to masonry.
Our cast iron stove should be located at least half a meter from wooden walls, if the walls are made of brick, this rule can be ignored.
Masonry should be done only with special bricks, quality material, which is designed to work with ovens.
The main types of hollow or sand-lime bricks are not entirely suitable for lining metal heating equipment, due to the low heating capacity of the material, and the temperature in the rooms will not be comfortable enough.
In this case the price kiln brick should not confuse us, otherwise we will simply do our work in vain.
We lay out the first fitting row without mortar. This is necessary in order to fit the bricks and see how tightly they fit together.

Important! A cast iron stove is lined with half a brick. This wall thickness is the most optimal and meets all the necessary needs for heating the room.
When starting the laying, be sure to leave at least two half-brick holes in the first row for additional ventilation, and besides, this will increase heat transfer into the room.
In order to correctly understand how to line a cast-iron stove with bricks, you need to learn a simple and at the same time, basic rule - masonry starts from the corners!
We start the first row with a solid brick, the second we start with a three-quarter brick, and we work according to this scheme throughout the entire length of the masonry.
For work we will need:
- Construction trowel.
- We'll use a grinder to cut bricks smoothly and without chips.
- Roulette.
- Plumb lines with a weight.
- Level.
Each row of masonry must be checked with a level on the horizontal plane and a plumb line on the vertical plane.

Before applying the mortar, we wet the brick in water, this always gives greater strength to the adhesion of the mortar to the material. Be sure to pay attention to ensuring that the seams between the bricks are completely filled. Remove excess solution immediately.
All elements in the form of fittings are installed during laying. It is also important to clarify that when doing the laying with our own hands, we must begin the next row only after the previous one has been completely laid out. This will allow you to avoid working in two even planes and prevent the wall from moving.
Completion of work
Having brought the wall to the desired height, we can cover it metal sheet and on top with an asbestos sheet or glass-magnesium panel. This will also increase heat transfer.
The finishing of the masonry can be anything from simple painting to decorative tiles.

Conclusion
Bricklaying work with cast iron stove requires care and compliance with technological requirements, but its result exceeds all expectations, and the level of comfort in the room immediately becomes an order of magnitude higher. In the video presented in this article you will find Additional information on this topic.
Of course, one of the most important elements in arranging a bathhouse is the stove. Before you begin to study the instructions for correct brick laying, should be answered main question: Why do you even need to line the stove in a bathhouse with bricks? Perhaps your particular stove model does not require this action?!
Metal stove lined with brick (in the steam room)

Compared to metal, brick retains heat much longer, which means the stove will cool down much longer.
The stove in the bath plays no less important role than in the house. The effectiveness of all depends on how quickly it heats up and retains heat. bath procedures and a comfortable atmosphere. It is unpleasant to be in a cold room, and in an excessively overheated one - dangerous for health.

Today, a metal stove in a bathhouse is already a standard equipment, without which it is difficult to imagine the wellness procedure beloved by many. Compared to other types of ovens, it has a number of advantages:
- Easy to install. It is easy to make with your own hands.
- Easy and simple operation.
- It melts quickly.
- Has good traction.
- High performance.
- Economical in fuel consumption and affordable in price.
But in order to really appreciate all these advantages to the maximum, you need to learn how to use it correctly!

No one, of course, would argue that a stone stove is ideal for a bathhouse. But it needs to be heated for at least 5 hours so that it really begins to give off its heat, imagine how much firewood will be consumed during this time. And this, in turn, does not suit everyone. Yes and the price brick structure will be many times more than that metal furnace, lined with stone.

Moreover, in order to fold brick stove for a bathhouse, you need to have basic skills and knowledge of a stove maker, since in this design you need to take into account many nuances that are invisible, but play a decisive role!

A metal stove can be bought at ready-made version, and the lining will not entail large financial expenses.
Even if the metal stove itself, purchased ready-made in a store, is already a decoration for the steam room, it is better to make a small stone apron around it. This will significantly increase the efficiency and productivity of the furnace. Yes, and people in close proximity to metal structure, it will be more comfortable, because metal “fries” more than stone or brick!

What necessary parameters should a metal sauna stove have?
- It should have small dimensions so as not to clutter up the space.
- You should not choose too high a power, since the sauna room is usually small. It will be difficult to control the optimal temperature.
- The characteristics of the stove must strictly comply with fire safety regulations.
In addition, it is necessary to take into account the location where the stove is located. According to SNiP standards, the metal unit must be located at a distance of at least 15 cm from wooden floors.

Most in the best possible way To fire a metal stove in a bathhouse, small but frequent additions of fuel are required.
Why is it necessary to line the stove in the steam room with bricks?
If you were still in doubt up to this point, check out this list:
- The metal structure heats up very quickly, which does not allow the body to adapt to the high temperature.
- A metal stove cools down as quickly as it heats up. You have to constantly monitor the temperature by adding logs, which is not very economical.
- The material lined with brick will not heat and dry the air so quickly, which means the atmosphere in the steam room will be more comfortable.
- There is a high probability of being burned on the walls of a metal structure. People sitting next to the stove will not feel comfortable.
All these small shortcomings can be easily eliminated with the help of cladding, which will increase the performance of the stove, improve its design and neutralize harm to health, because people go to the bathhouse to improve their health, and not vice versa!
This is the most optimal solution from the point of view of economy and labor costs– combine the advantages of a metal and stone stove.

Factory-made metal sauna stove “under the lining”
IN this moment factories produce such stoves that are initially designed for further lining with brick; this design is the golden mean that will allow you to profitably equip an excellent steam room.
For lining the furnace you need to use only these types of bricks:
- red ceramic brick;
- fireclay brick.
You don’t have to search on the forums, there’s no point in us deceiving you! If you take any other brick, it may crack on its own or peel off from the adhesive mixture, and you will need to reposition it over and over again!
Do not take sand-lime brick. It is great for cladding a house, but for cladding sauna stove no good. Lime-based bricks are simply not able to withstand constant temperature changes and high humidity in the steam room.
After just a few weeks of use, it will begin to deteriorate. And from a decorative point of view, it is not suitable and additional cladding will still be required.
A good option would be refractory fireclay bricks, which are specifically designed for sudden temperature changes.

Outwardly, it is, of course, inferior to red ceramic brick, but this issue can be resolved with decorative finishing cladding.
If there are no remaining bricks on the farm, it is better to buy a new one! Give preference to ceramic red brick. His specific gravity much lower than that of fireclay. He shows off beautiful technical properties, reliability and durability. And externally, the stove, lined with red ceramic bricks, will delight you long years with its stylish, authentic look.
The process of lining a sauna stove with bricks is not very complicated, and if you strictly follow the detailed instructions, even a beginner can handle it.

The most common methods of lining a metal stove in a bathhouse
Given the fact that stone cladding acts as a heat shield for a metal structure and does not absorb the main heat; there are several cladding options.

The cladding scheme largely depends on the functionality of the stove. If the lining has a purely decorative function, then it can be made as thick as a whole brick.
If the stove has the function of a water heater, then the lining is made into a brick floor.
The gap between the stone screen and the metal body of the stove is easy to calculate. For each kW of power, we add 2 cm to the standard 3 cm. If the furnace power exceeds 12 kW, then we add a maximum of 15-20 cm. Otherwise, the furnace lining will not fulfill its direct task.
Step-by-step operating instructions + photos
Before you begin construction work on lining a metal stove in a bathhouse with bricks, you need to stock up on everything necessary tool and materials.
Materials needed for laying the stove.
- Red solid ceramic brick (M-150.)
- Masonry mortar (sand, red oven clay).
- Foundation material (cement, crushed stone, sand).
- Ruberoid.
- Boards for creating formwork.
- Reinforcing mesh.
Tools needed for laying a stove.
- Building level.
- Shovel
- Construction marker.
- Measuring tape (roulette).
- Construction plumb.
- Trowel.
- Goniometer.
Before starting work, it is also necessary to decide on the location of the metal furnace.
It can be placed in the very corner of the bathhouse. This will reduce your brick consumption. Or you can install a metal stove on a brick base, raising it 50-60 cm above the floor.
If the stove is installed in a bathhouse from scratch, you need to take care not only of building the foundation, but also reliable protection wooden floors.
To increase the fire safety of the premises, it is necessary wooden floor(walls, floor) near which the stove is located, lay out basalt slabs. In this case, the height of the slabs should exceed the size of the structure by 40-50 cm.

For secure fastening, use self-tapping screws.
Step 1. We build a foundation for the stove.
The foundation for the stove is the most important stage construction work, on which the strength and durability of the entire structure depends. If, at the stage of building a bathhouse, you have already paid great attention to the construction of the foundation for the stove, then for cladding you will not need to additionally build another foundation.

If you are not sure of the strength of the old foundation, then it is better to spend time and build a new one, because the weight of the structure, after cladding, will increase significantly.
Important! Under no circumstances should the foundation for the stove be connected to the main foundation of the bathhouse. When the structure shrinks or other phenomena occur, the base of the furnace should not be deformed.
If the mass of the stove together with the brickwork does not exceed 700 kg, then a separate foundation need not be erected.
If a metal stove was already functioning in the bathhouse, then it must be dismantled before starting work.

- Once you have decided on the location of the stove, mark a rectangle on the floor with a construction marker along which you want to cut the boards. Keep in mind that the size of the foundation should exceed the size of the stove by 10-15 cm on each side.

- We cut out the boards and move them to the sides.
- Now dig a pit 40 cm deep. Use a bayonet shovel for this work.
- We are building wooden formwork, which serves as a skeleton that forms the foundation. For formwork, you can use plywood boards, old floors that you have on the farm. Measure the length and width of the hole you dug and cut the boards to this size. We connect the boards and lay them inside the hole.
- Now we proceed to waterproofing the foundation.

This is the most important component of the work when constructing a foundation. If frozen, saturated soil comes into direct contact with concrete base furnace, then the foundation may collapse over time.
- After the formwork is firmly installed and waterproofed, we add a cushion whose task is to retain moisture. At the bottom of the pit we pour medium-fraction crushed stone and sand (approximately 10-15 cm).
- We fill the foundation with cement mortar and lay the reinforcing mesh on top. Don't forget to check with a building level how level the foundation is. If necessary, correct the error.
- We take a technological break, waiting until the foundation completely hardens. This may take 2-3 weeks. Take your time and don’t start tiling work ahead of schedule, since a damp foundation will not provide adequate strength.
Step 2. Making the base for the stove.
- After you have made sure that the foundation has completely hardened, you need to lay out the base in one layer of brick.
- Check the levelness of the masonry with a building level.
- We create waterproofing of the base with roofing felt.
- We lay an iron sheet on top, which should exceed the size of the brickwork by 10 cm around the perimeter.
- We place a metal stove on top and once again carefully check the horizon with a level. So that after completing the work you do not have to clean the oven from the solution, wrap it in polyethylene.

Step 3. Prepare the solution.
The ideal solution for lining a metal furnace is a mixture of clay and cement. There is no exact proportion; the focus here is rather on consistency. She's appearance should resemble thick sour cream, without lumps or pebbles.
Stove makers advise taking equal amount clay and cement, adding approximately 30% river sand.
The solution for lining a sauna stove is prepared more simply than for conventional stove laying. The main condition is to achieve a homogeneous mass.


To test how good the masonry mortar is, take a small amount of the mixture and apply it to the brick with a trowel.

The mortar should not slip or flow from the brick. If the consistency is not enough, you can add a small amount of sand to the mixture.
Step 4. Preparing the brick for cladding.
Measure out the amount of brick you will need for the first stage of work. Take a portion of red ceramic bricks, clean it well and soak it in water for 12 hours.
This is necessary so that it does not absorb moisture and mortar during laying.
If you use old brick, then clean it well before laying.
Step 5. Furnace lining.
There are several masonry options: solid well or lattice. The lattice version looks more decorative, but at the expense large quantity holes, the effectiveness of the heat shield is significantly reduced.

If the stove body is round, then the masonry must be done in exact accordance with the shape of the stove. This, of course, will require much more effort and dexterity, but the ordering technique itself will not change.
The distance between the metal body of the stove and the stone should be at least 4-5 cm, and there is no need to make any jumpers or place spacers between the two materials. When heated, the metal will expand, which in turn will put pressure on the brick, or the stove body itself may be damaged.

It is very important to calculate here optimal distance between brick wall and the metal body of the furnace. If you make it too small, the brick will quickly deteriorate and crack. If you make it large, it will prevent the oven from heating properly and the steam room will not have the required temperature.
The average oven size is 13-15 rows. Better job divided into 2 stages. On the first day, lay 7-8 rows and leave overnight. On the second day, check the shrinkage of the structure and complete the remaining rows.
The thickness of the laying is made to the floor of a brick. This will be enough for the stove to accumulate heat and quickly warm up the room.

Laying bricks for the purpose of lining a metal stove is no different from laying a conventional stove.
- We start each row from a corner, and after laying it, we check it horizontally with a building level. To accurately maintain the angle of the masonry, use a protractor or plumb line.
- Using a trowel, carefully apply the mortar to the brick and immediately remove excess mixture. Make sure to inside the heat shield had no solution left. Otherwise, it will dry out, and this will reduce air circulation inside the structure.
- Lay reinforcing mesh on the second row to add rigidity to the structure. And tie the 2-1 and 3rd rows together with wire.
- The second row suggests air gaps, through which hot air will escape out. It will be enough to simply leave two gaps of ½ brick for this. Repeat this on rows 6 and 8. Too many of them ventilation holes This should not be done, as this may reduce the effectiveness of the heat shield. Two at the bottom and at the top will be enough.
- We lay out the third row in the same way as the first, but follow the checkerboard order. Maintain a 5 mm seam.
- Depending on which row you will have the hole for the firebox door and vent on, we lay the row on metal corner. To add rigidity to the structure, it would not be amiss to strengthen this row by tying it with metal wire. Take into account the movement of the firebox door, which in no case should touch the walls when opening.
- The last row can be made arbitrarily, decorated with a ladder or simply sprinkled with stones.
Some people prefer to finish the brickwork at the slab level where the coals are located. This allows you to admire the hot coals, and some cover the smoke exhaust pipe with masonry.
This does not change the order, so choose the most optimal option for yourself.
Step 6. First firing of the furnace.
After you have laid a stone well around a metal stove, it is very important to prepare it for further use.

Kindling the stove
No need to give right away maximum temperature. Perform 2-3 test fires using minimal amount firewood and not bringing the oven to maximum temperature.
This will allow the solution to dry well and the stove will serve you for a long time, and the bathhouse will delight you with a good temperature and a cozy atmosphere.
Video: how to properly cover a metal stove with your own hands - master class
A stove in a sauna is one of the irreplaceable things, and perhaps the most basic. It creates comfort in the steam room and heats the entire room. Metal and cast iron stoves have many advantages. But there is also significant drawback, although it can be corrected by reading about how to line an iron stove in a bathhouse with bricks. A brick “case” can also be made for chimney pipes in a bathhouse.
The metal heats up quickly, and if touched there is a risk of serious burns. Of course, these shortcomings can be eliminated. Nowadays, there are many materials for insulating stoves and chimney pipes in the house and in the bathhouse.
A brick stove in a bathhouse is often lined with tiles or tiles, and other materials are also used. You can simply cover an iron stove in a bathhouse with bricks with your own hands; a similar finish is suitable for chimney pipes. By using brickwork, you can improve the design of the bathhouse itself and increase the heat output of the stove. This article is devoted to the question of how to line a metal stove with bricks in a bathhouse. Moreover, it is possible to line not only an iron stove; lining of pipes is also often practiced.
Preparatory work
Before you line an iron stove in a bathhouse with bricks, you will need to do some preparatory work. A metal stove lined with bricks must have good foundation for installation. This is a fairly heavy structure and must be securely fastened.
- First, you need to make sure that the base of the installation can support the weight of the brick lining of the stove and chimney pipes. If not, you should make an additional foundation for the stove - columnar or solid. This work can be done with your own hands.
- Carefully mark the surface of the masonry of the stove and chimney pipes. Please note that between the wall and the metal surface there must be distance about 10 cm. A small distance will reduce the service life of the metal surface, but will speed up the heating of the brick. But the big one is the opposite.
- Monitor the fire safety of the stove structure in the bathhouse. If the floor in the bathhouse is made of wood, you should line it with a sheet of metal and put asbestos cardboard on top. If the mounting location consists of non-combustible materials, this is not worth doing.
Columnar foundation
A little later we will look in detail at how to line a metal stove with bricks in a bathhouse, doing the work with your own hands. For now, we need to make a base that will support the weight of the stove, chimney pipes and brick cladding. If it is not possible to install strip foundation, it is worth using a columnar design. This foundation provides for the installation of pillars at the intersection of walls or other points of increased load. It is economical, reliable, does not require additional waterproofing, and is used for installing lightweight structures. Building a columnar foundation with your own hands is quite simple.
This is a system of posts that are installed at the corners of the brickwork.
The procedure for doing the work yourself:
- We mark the corners for installing the stove (there will be posts here).
- Digging holes 50 cm deep.
- Let's fall asleep river sand layer 10 cm, it will be a sand cushion.
- Prepare the solution. We take cement grade 300 and sand in a ratio of 1:2. Stir until the sour cream thickens.
- Place 8-10 cm of sand mixed with crushed stone (you can use any stones and broken bricks).
- Let it harden, lay out the brick columns 5-10 cm above floor level, the figure shows a concrete column that is placed on a pillow. Both options are acceptable, only the finished column is concreted in the pit after installation.
- We install the beam of the lower trim. It would be best to lay the channel around the perimeter of the installation and weld the edges together. Or you can use concrete pillars that are laid on the brick.
After installation columnar foundation You can line a metal stove with bricks with your own hands.
Regular foundation
If you are not satisfied with the foundation described earlier, you can make a strip foundation with your own hands.
- Digging a hole depth 25-30 cm.
- We make the solution as described earlier, with the difference that we bring it to a liquid state.
- Place it in a hole and fill it with crushed stone or waste bricks.
- Let's ram it.
- We wait for it to dry and do it laying bricks in 1-2 rows.

Attention: when making any type of foundation with our own hands, we use building level. After completing the work, parallelism to the earth's axis should be achieved perfectly.
After preparatory work When installing the foundation, you should consider how to line the stove with bricks in the bathhouse.
Chimney sealing
Before starting work, you need to make sure that the chimney is completely sealed. To seal leaks, a special sealant is required. High temperature sealant can be purchased at a hardware store.
It is more convenient to buy sealant in a tube; it is applied using a special gun. It is less convenient to use sealant packaged in tubes. You can also find a two-component sealant; its components are mixed before application. A two-component sealant must be prepared with precise dosage; in addition, such a sealant has a limited shelf life. Therefore, to perform independent work, it is more convenient to use a one-component sealant. To seal chimney cracks, it is recommended to use a heat-resistant sealant that can withstand temperatures up to 1500 degrees.
We produce furnace lining
Let's start lining the stove and chimney pipes with bricks. But before that you need to do clay mortar, it is most suitable for this type of masonry. The durability of the structure will depend on the quality of its preparation. It should not be liquid, it should be made in plastic form. Masonry using such a solution can withstand up to 1000*. It is divided into two types: skinny and fat. In our case, we need a skinny one.
Making the solution correctly
To prepare such a solution, experts advise using fine mountain sand. To begin with, we pass the sand through a sieve with a mesh size of about 1.5 mm, clearing it of debris and small stones. This material allows you to make a fairly thin seam. Preparation:

- Take the clay and pour it into a solution container for 3 days. It “sours” and gains elasticity.
- Add water and mix the mixture until smooth. During the kneading process, we break up the lumps using a tamper. We go through the entire mixture with our hands, remove unnecessary stones and knead large pieces. The resulting mixture should fall freely from the surface of the trowel or shovel. Try placing a layer of mortar on the brick and then lifting it after 5 minutes. If the bottom brick does not detach from the masonry, this indicates that the mixture was prepared correctly. If in correct solution place wooden surface(shovel handle), it will remain covered with a slight layer of solution. A very greasy solution will leave a thin film, a thin film will come off without leaving a trace.
How to properly brick a stove
When we have it ready the right solution, you can line the stove with bricks, and also line the chimney pipes.
- Do not forget, the stove should be located at a distance of at least 30 cm from the walls of the bathhouse. This is what the norms require fire safety.
Attention: this distance can be reduced by gluing asbestos cardboard sheets to surfaces made of wood. Fire safety regulations allow this.
- Make masonry only with high-quality bricks. Do not use hollow, slotted or sand-lime bricks for lining the stove and chimney pipes. This type of product has low heating capacity; you will not be able to create the desired temperature in the bathhouse. You can use high-quality old brick, after cleaning it.
- It is advisable to select material with the same height.
- The stove is lined, the thickness of the masonry is half a brick, no more. This best option for warming up.
- When working on the first row, do not forget to leave two half-brick holes. They will provide free air ventilation and additionally increase the heating of the room.

- We start laying from the corner. We lay the first row with a whole brick. To start the second we use three quarters. So we change all the subsequent ones. This is required for high-quality fastening of the masonry.
- Wet the brick before working. A layer of mortar is applied to the masonry site. Laying a brick. Using a trowel and hands, we seat it. The seams must be filled completely. Excess solution is removed immediately.
- When working, be sure to use a plumb line to avoid bending corners.
- Check the parallelism of each row with a building level.
- You need to start laying out the next row after full implementation first.

- All additional elements for the stove and chimney pipes are installed immediately during laying.
- You should also leave a half-brick hole in front of the firebox door; it will be needed for servicing the stove.
Attention: to ensure the reliability of the masonry, corner cuttings should be placed along the edges of the holes; they will provide additional strength to the walls of the masonry and will be hidden by a seam.
- We lay out the walls to the level of the heater. Maintain a gap between the masonry and the stove; good ventilation must be ensured. If this is not possible, leave additional holes as in the first row.
We figured out how to line an iron stove with bricks. If desired, it is possible to decorate the structure with tiles or tiles, add decorative patterns, simply plaster or
What are the benefits of metal stoves (cast iron and steel)? The fact that they quickly warm up the room, are compact in size and are mobile units. But they also have one significant drawback - they heat up too much. metal surface. Therefore, the likelihood of getting burned upon contact is very high. What can be done to avoid these troubles? There are many options, but in this article we will answer this question - how to line a metal stove with bricks. Precisely with a brick, because this construction material has a number of advantages. At least the fact that its thermal conductivity is several times less than that of metal.
But metal stoves also have disadvantages - they heat the room unevenly, they emit harsh heat, and when it comes to a steam room, such heat is not beneficial. The heated metal does not maintain humidity, and it does not heat the stones well.
 Brick walls around the stove
Choosing a brick for the screen
You cannot use ordinary building bricks to line a metal furnace. It simply will not withstand the temperature and will begin to crack. You need red fire brick. Be sure to choose a full-bodied one. Today on the market you can find refractory bricks of different textures. If you want to create a beautiful structure in place of the stove, a design one that matches the style of the room, then we recommend looking for bricks with different convexities and relief. This material costs more, but you won’t regret it.
But for laying bricks you will need an unusual mortar. There are several options, because the lining of the stove is not the heating device, so I sent digressions, they may be here. Therefore we recommend:
- Clay mortar based on special clay and sand. Clay can be purchased today at a hardware store.
- Ordinary cement mortar, to which fireclay clay is added. It can also be purchased in stores today.
- Cement mortar can be mixed with glue, which is used for laying porcelain tiles.
This is how you can answer the question, what kind of brick is best to line a sauna stove, and what mortar to use when laying bricks?
 Was steel, became brick
Masonry technology
Attention! You should not save on lining a metal stove. Lay out the walls in half a brick. You can save money by laying bricks on edge, but this will reduce quality characteristics the screen itself. So, as said above, don't skimp.
Now to the question, what should be the distance between the brickwork and the walls of the heating unit itself? It is believed that the optimal distance is from 1.0 to 10 cm. What is the basis for this?
- A distance of up to 1.0 cm will create conditions under which the metal body of the stove will begin to overheat, which will affect its service life.
- A distance above 10 cm - the brick cladding will not warm up well, then the operation you have undertaken will lead to all your efforts being null and void.
That is, in order to properly line an iron stove with bricks, you need to choose the right location for the cladding. Therefore, 5 cm is the golden mean.
Attention! Before laying, it is best to moisten each brick in water. This will strengthen the adhesion of the brick to the mortar. We also recommend that you sand the seams immediately.
There is one more trick that will help you increase thermal output. To do this, you will have to install four windows on each side of the facing screen, two at the top and two at the bottom. This will ensure the passage of air between the walls of the cladding and the walls of the stove itself. Cold air will enter into the lower ones, and already heated air will exit through the upper ones. It turns out something like a convector. By the way, in these places, in the windows, two bricks are installed, laid on an edge. There will be a gap between them.
Some craftsmen, in order to increase the reliability of the brick structure, lay reinforcing mesh through one or two rows.
By the way, look at the photo below, you should end up with something similar. It clearly shows the stove itself, the brick lining of the sauna stove, and the holes in it.
 Brick finishing of a metal stove
In this state, the stove should stand for at least a day, the solution should stick. Now you can start cleaning its surfaces from the solution. There are several options for how to perform this operation.
- Use sandpaper, and carry out the process itself manually. It's long and difficult.
- You can use a drill with a special brush attachment installed on it. It's fast and convenient. Half an hour and your stove will be clean. Sometimes this brush leaves dark stains on the bricks. It's not a problem - you can wash the walls soap solution, using a stiff household brush. After which the cladding will shine with the newness of brickwork.
Many people wonder whether it is necessary to build a foundation under brick walls? There is no such need in this case. Certainly, floor base must be durable. It would be nice to put waterproofing under the bricks.
 Original version cladding
What are the advantages of brick cladding
- The brick first accumulates heat within itself and then begins to release it to the surrounding air. Therefore, the temperature inside the room is distributed evenly, without jumps.
- The sharp heat disappears and it becomes soft. Of course, the temperature still remains high, but you don’t feel it as much. Therefore, this building is perfect option for the steam room.
- If a stove with a heater is installed, the stones in it warm up quickly and for a long time. So the bathhouse will be provided with wet steam.
- Plus the safety of being indoors. Brickwork is a kind of protective screen, which provides excellent protection for a person from unexpected contact with a heated metal element.
- A brick-lined stove can be heated less often, since the finish accumulates heat and retains it for a long time. And this is already savings.
It should be noted that many users of metal stoves use this method today. They are installed not only in bathhouses and cottages. These are integral companions of garages, warehouses and other outbuildings.
 Extraordinary finishing
Conclusion on the topic
So, in this article we tried to answer the question of how to cover a stove (potbelly stove) with bricks, and do it yourself? As practice shows, there is nothing complicated in this process No. It is necessary to choose the right materials, determine the shape and dimensions brick screen, and accurately, following our recommendations, build a lining around the stove.
It will not only decorate the room, but will also create more comfortable conditions. In addition, we note that repairing brickwork is a fairly simple process. So, if something during operation confuses you, then without big problems you can make repairs or dismantle it and build something new.
Don't forget to rate the article.
Most important element baths are a stove, it gives heat and heats water. You can put inexpensive iron stove(“potbelly stove”) and then only one question remains - how to line the stove in the bathhouse with bricks so that it retained heat for a long time. Even a beginner can handle this kind of work if he follows the advice.
Installing a stone stove is quite difficult and expensive, the metal option is the cheapest and simplest, all that remains is to purchase all the building materials necessary for the work, read the recommendations on how to line an iron stove and get to work.
What you need for work

Quantity of bricks and mortar depends on the size of the metal furnace. You should definitely choose fireproof brick, although there is no direct contact with open fire, the durability of the masonry is important. No matter how good the building material is, during use the masonry will collapse due to temperature changes. The stability of the masonry is also very important so that the brick wall placed near the stove does not collapse during work.
Prepare the tools necessary for work:

- Master OK, with its help the solution is applied.
- Pick. It will not be possible to split a brick without this tool.
- Level. The most important thing in the construction process is to maintain accuracy. The stove wall must be absolutely flat and symmetrical.
- Metal corner. Without this final element, the wall will not stand.
Now let's see what kind of brick to line an iron stove in a bathhouse with. You can use the most inexpensive sand-lime brick in your work. You can choose the number of bricks yourself, brick sizes:
- Single brick 250x120x65.
- One and a half brick 250x120x88.
- Double brick 250x120x140.
By type of brick - you can take inexpensive construction brick, but facing and the most durable clinker bricks look good. It is best to use one-and-a-half bricks for masonry. You can cover the stove with it quite quickly, the masonry turns out beautiful and even. At the end of the article you can find master classes that include not only step-by-step instruction, how to properly line an iron stove with bricks, but also an accurate description of all stages of work.
Cover an iron stove with bricks

Let's start with the question of whether it is necessary to line an iron stove, because it heats up quite quickly, and the water will warm up in a matter of minutes, but An iron stove is unable to maintain heat in a bathhouse. While you are adding firewood to the firebox, the walls of the stove are hot, and to accumulate and retain heat, you need brickwork.
With help brick wall around the iron stove in the bathhouse it’s easy create comfortable temperature air, besides beautiful wall will protect you from accidental touches to overheated iron. The air in the bathhouse will be comfortable and warm. The stove gives off heat, which is accumulated and retained by the brickwork.

A frequently asked question is what solution should I use? The best thing use a mixture of clay and cement. The consistency of the solution should be uniform, eliminating the presence of lumps and pebbles. You need to knead the solution to a state where you can twist a flagellum, plastic and soft. When the flagellum is rolled into a ring, no cracks should appear on its surface. This is exactly the solution will withstand high temperatures and will last a long time. You can use a solution of clay and sand or buy ready-made mixtures for laying tiles, consisting of cement and glue. Such solutions have excellent adhesion and are able to hold the masonry for many years.
Check the foundation before work

If you have a round stove in your bathhouse and you are wondering whether it is possible to line it with bricks, then rest assured, you will find the same ones at the end of the article detailed master classes, which describes step by step how to line a round iron stove. The strength of the structure is important; only in this case will the masonry serve for many years.
Before starting work, make sure that the floor can support the load. If in the bath wooden floor, then it’s worth strengthening it. After all, it is important not to line the stove in the bathhouse with bricks, but to do it correctly and for a long time.

Herself iron stove not so heavy, but a brick wall will put a lot of pressure on the floor. So check the foundation and fill it additionally if necessary. The distance from the heating surface to the masonry must be accurately measured, when too large gap the wall between the stove and the masonry will take a long time to heat up. The ideal distance between the iron wall and the masonry is considered to be three to five centimeters. Too much short distance will lead to premature failure of the structure. The air cushion between the stove and the wall that you make will evenly warm the room.

Brick wall thickness

The thickness of the masonry is calculated to be half a standard brick. The first layer is placed very tightly on a well-dried foundation - this is the base of the masonry and it must be reliable. Correctly covering an iron stove with bricks means putting up a wall in which there are no cracks. The second row of bricks should have air holes for ventilation. Enough leave gaps of half a brick, there should not be too many such ventilation holes; two ventilation holes on each wall will be enough for you.
All subsequent rows are laid like the first. Try to lay the bricks so that they lie in a checkerboard pattern. The wall should be dense up to the level of the oven door. Further, the masonry will depend on the size of the door; here you will need a metal corner, because otherwise you will not be able to lay the masonry on top. The same condition applies to the blower so that the door opens freely; the corner is installed a couple of centimeters above the door. Both openings for the doors must be strictly parallel - this is where a level will come in handy.

When the wall is laid out, all that remains is to think about how to make the top. You can leave it open in the bathhouse, because it is possible to cover the stove and all the holes for filling water without masking it. This solution requires additional ventilation. If you decide to make the masonry higher than the stove itself, then you need a metal plate with precise slots for the chimney and pouring water into the tank. The stove is also good because it will protect you from accidentally touching the too hot surface of a heated stove.
Finished design must dry thoroughly, only then can you think about decor and coloring. If you rush and paint or varnish the brick too quickly, there will be a persistent chemical smell in the room when it heats up.
Material for decorating masonry
Now let’s decide what to cover the iron stove with. The brick has been chosen, but you can make a wall not only reliable, but also beautiful. To do this, you need to use a facing ceramic tiles, it is laid out on the finished wall in rows from bottom to top.
It is important to leave gaps between the tiles - special crosses will help you lay them out beautifully. finished wall facing tiles. In order for it to look beautiful as a result of the work, the seams need to be wiped before the solution hardens; an ordinary sponge is useful for this. When the masonry is dry, all seams need to be filled with a special grout to match the tile.

You can cover a metal stove with bricks with your own hands and then start decorating it. The masonry will seem unsightly to you, the first time working with brick and the inability to clean the seams correctly and beautifully is not a problem. If the work seems unfinished to you and you want to make your sauna stove several times more beautiful, use facing tiles . In this case you will need good tile cutter to carefully cut off the corner pieces.