How to cover walls with plasterboard in a wooden house. Interior decoration of a wooden house with plasterboard: warm walls - a cozy home Covering walls made of timber with plasterboard
Cured plaster is hard and brittle. In gypsum plasterboard it is reinforced with cardboard located outside. The smooth surface of the sheet is ideal for quick and cost-effective wall leveling. Drywall in wooden house started to be used recently. Previously, it was believed that flexible wood and durable gypsum were incompatible. Thanks to the metal profile and suspension systems Now plasterboard is widely used by builders and those who like to do their own repairs.
Lathing walls for installation with plasterboard
The metal profile allows you to sheathe the inside of a wooden house with plasterboard

Do-it-yourself wall lathing
Considering the ability of gypsum to absorb moisture even from the air, it is possible to sheathe walls from the inside with plasterboard only in houses with heating and year-round accommodation. Otherwise, after 3 - 4 winters, repairs will have to be done again and mold will be dealt with.
Wood is an ideal building material for a home. It retains heat well, absorbs noise, and purifies the air. The difficulty of finishing lies in the ability of wood to constantly change its size - to breathe. This must be taken into account when installing drywall in a wooden house. GKL are attached only to the sheathing. Even on walls made of laminated timber, plasterboard is not glued directly to the surface.
You can sheathe the inside of the ceiling and walls with plasterboard if they are level and do not shrink. This is a masonry of:
- aerated concrete;
- foam concrete;
- bricks;
- cinder block.
Artificial stone should have smooth corners without chips. The surface should be flat, the seams thin, without excess mortar.
Immediately after completion of construction, it is impossible to sheathe the inside of a wooden house with plasterboard. It must settle and shrink. For brick buildings, a year is enough. Wood requires more time. Small deformations will occur constantly. It is enough to cover the stone and plaster with a primer so that it does not crumble, then sheathe it. The tree goes through several stages of treatment with antipyrines and antifungal compounds.
Sheathing the outside of a house with plasterboard is not cost-effective. Special moisture-resistant sheets are required. They are much more expensive than regular ones. The facade of the house is treated with special compounds that protect the wood from moisture, mold, insects and fire. Finally, the entire façade must be puttyed and primed and painted.
First we cover the ceiling with plasterboard using hangers

Covering the ceiling with plasterboard
Leveling for plasterboard finishing begins with the ceiling of the house. It must be sheathed so that there is a gap between the sheets and the walls. The metal profile frame is mounted on the floor beams. The sequence of work is standard.
- Make markings along the entire ceiling.
- Fix the PP guide profile around the perimeter. It cannot be fixed rigidly to the ceiling. You need to use hangers. If the house was built more than 5 years ago and there are no living spaces upstairs, you can get by with black wood screws and do not tighten them tightly, leaving a gap under the cap. The hole in the profile must be larger so that the bolt shank can move. Best option– use of special spring plates.
- The strips on which the sheets will be attached are inserted into the guides. They are fixed to the ceiling using hangers or perforated strips.
- Wires are laid inside and communications are carried out, installation locations for lamps are marked, and fastenings are made for them.
- All that remains is to sheathe the ceiling. The holes for the lamps should be 2-3 mm larger. The same gap is around the entire perimeter of the ceiling and between the sheets of drywall. The sheets are attached to the profile with self-tapping screws.
Attention! With a frame made of wooden slats 50x50 timber and spring brackets should be used. A screw is screwed into the hole in the center of the arc, and the edges are fixed to the ceiling.
Sealing of seams and puttying is done after all surfaces inside the room and even the house have been covered.
Plasterboard covering of log walls inside the house

Lathing on wooden walls
Sanded and varnished or waxed wood has its own unique drawing. It goes well with most modern styles. Some harmoniously complement, others are emphasized by their contrast of smooth lines and shapes. Sheathing a house from the inside should be done in several cases:
- there is no opportunity to regularly care for the tree;
- the wood darkened over time and lost its attractive appearance;
- wall insulation;
- additional sound insulation;
- the need to hide communications;
- you need a solid, level base for tiles and other finishes.
Reasons for covering with plasterboard wooden house there may be others inside. This mainly concerns interior design and changing the environment. GCR is used to make partitions in houses during redevelopment.
When making sheathing for drywall in a wooden house, you should follow several rules:
- it is necessary to clearly maintain the horizontal and vertical position of the frame and cladding elements;
- When screwing the hangers, you should leave a gap;
- the distance between the vertical posts of the structure is equal to half the width of the plasterboard sheet - 60 cm;
- the length of the profile is fixed to the wall at a distance of no more than 50 cm;
- when joining sheets along the length, horizontal crossbars from the profile are placed at the joints;
- for wood, coated, black self-tapping screws are used;
- A gap of 2 - 3 mm should be left between the sheets.
Advice! Do not use nails. They do not stick well to the tree and soon begin to fall out. The screw connection is much stronger.
A starting profile is attached around the perimeter of the room, and vertical posts are inserted into it. The sheet is screwed along the edges and the center at a distance of 15 - 20 cm. The screw heads are recessed. They are hidden when leveling with putty.
After attaching the sheathing, the corners of the sheets should be slightly cut off. They can fluff up and protrude beyond the plane. It is advisable to immediately coat the entire wall with primer. Then a reinforcing painting mesh is glued to the joints and the gaps are smoothed with putty. The bolt heads are puttied crosswise with a narrow spatula.
Under the wallpaper, it is enough to clean out the uneven areas and cover everything with primer again. Painting requires a smoother surface. Finishing putty The entire wall is processed, sanded and, if necessary, several layers are applied.
The tiles are heavy. A base is made of a thick waterproof sheet of plasterboard under it. After sealing the joints, prime them twice with the compound deep penetration. Then the adhesive solution is applied and the tiles are laid. The starting profile for the first row does not touch the floor and is attached to the wall.
Lathing made of wooden beams for the internal lining of a house with plasterboard

Wooden sheathing
Sheathing the inside of a house with plasterboard can also be done using wooden sheathing. You should choose for racks and a transverse beam of 50x50 mm. Use a 70 mm wide strip as a starting one. The screws are installed with washers and are not tightened.
The disadvantage of a wooden frame is the difficult preparation of wood. It is necessary to treat with fire retardants and impregnate with antistatic agents. The service life of such cladding is much shorter than metal cladding and soon the inside of the house will have to be clad again. Even well-dried wood can behave during processing. The beams should be carefully checked for curvature.
Frameless plasterboard cladding inside the house

We cover the walls with plasterboard without sheathing
The frameless method of installing plasterboard sheets inside the house is possible on stable, flat surfaces. It's mostly plaster. The masonry must have unevenness within 5 mm. If the wall does not need to be aligned vertically, then the house can be sheathed from the inside with plasterboard without sheathing.
The surface of the walls of the house must be cleaned of dust and other contaminants. Coat with 2 layers of deep penetration primer. The starting profile is installed below. It serves as a support and helps to align the sheets horizontally. The glue is applied with a notched trowel. The advantage of this installation method:
- sheathing is done faster;
- saved effective area premises around the entire perimeter;
- finishing costs are significantly lower.
Disadvantages include the inability to hide communications under the casing and make internal insulation Houses.
Sheathing a house made of timber with plasterboard is quite enough practical solution. The use of this type of material allows you to reduce interior finishing time and costs. But an acceptable quality of repair can only be achieved by following the technology, taking into account the peculiarities of construction from wooden beams. Otherwise, the end result will not meet expectations.
 Finishing and interior of a house made of timber with plasterboard
 Wood is one of the first building materials used by mankind. It has not lost its relevance today. And application modern technology processing and construction allow you to quickly build a house according to all quality requirements. However, interior decoration has its own nuances, without which all the advantages of the building will simply turn into disadvantages:
- Firstly, it is worth remembering that when starting internal work in a wooden house it lasts for at least 6 months. During this time the house will “settle down” and progress load-bearing walls and ceilings will not spoil the interior decoration.
 Decorating a fireplace with plasterboard in a timber house
 - Secondly, despite the naturalness of wood finishing, in any case additional finishing of the external surfaces of the premises will be required: bathroom, toilet and kitchen. The walls of these rooms will be exposed to more high humidity, which will lead to damage to the material.
- And thirdly, it is difficult to lay communications in the walls and ceilings of a wooden house.
What are the advantages of finishing a house made of timber with plasterboard, taking into account these construction nuances?
Advantages of plasterboard finishing in a timber house
In addition to the simplicity, speed and low cost of installation of structures, interior finishing with plasterboard in this way provides an advantage taking into account the specifics of the building.
 Finishing option wooden attic sheets of drywall
 Pros of using drywall:

And, most importantly, that finishing material will not load bearing structures. With a large margin of safety, drywall has little weight compared to other materials. Yes and use it classic methods construction and finishing in a house made of timber is difficult.
How to choose the right materials
When selecting materials for finishing a house made of timber with plasterboard, several fair questions arise:

Frame or frameless methods
To the surface of the walls is simpler and faster, but requires compliance with many factors.
GKL can be mounted directly on the walls if the planes do not have significant differences. Perfectly straight walls in a wooden house are very rare, even in a new building. After all, wood dries out and shrinks along with movement.
And in this case, laying communications becomes much more difficult. For example, you will have to directly drill the supporting structures for the wiring.
 Scheme for frameless installation of drywall
The frame, on the contrary, makes it possible to level out any differences and unevenness of the walls to the ideal value, and laying utility lines under the plasterboard sheets will not be difficult at all. In addition, if planned, structures on a solid foundation can withstand the load much better.
Metal or wood
In timber houses, both wooden slats and metal profiles can be used as frame material. Moreover, in the first option it is permissible to build more simple design, attaching the beams under the gypsum board directly to the walls (again, taking into account differences). But the quality of lumber should be at high level. Use only well dried and processed protective compounds wood. The cross-section of the racks of such a frame must be exactly 50×25, the same criterion for the crossbars, but the guide bars are no less than 75×25!
 Mounted wooden frame under drywall in a timber house

 The process of attaching wooden frame posts
 Metal profile types are also suitable for use in wood construction. With their help you can build solid foundation, not susceptible to influences such as humidity and temperature changes.
 An example of fastening a metal frame in a timber house
  Metal carcass on the ceiling


For this you need ready-made elements and . In terms of cost, metal “parts” of the frame will be cheaper in comparison with high-quality wooden slats. The video shows how to install a metal frame on timber walls.
Which drywall to choose
The type of drywall for finishing a wooden house is selected depending on the purpose of the room. In the bathroom, toilet and kitchen there must be a moisture-resistant sheet, in living rooms quite suitable wall option, and fire-resistant is used for finishing structures that may be exposed to temperatures. In addition to the above-mentioned features of material selection, in a house made of timber, it is necessary to use a vapor barrier.
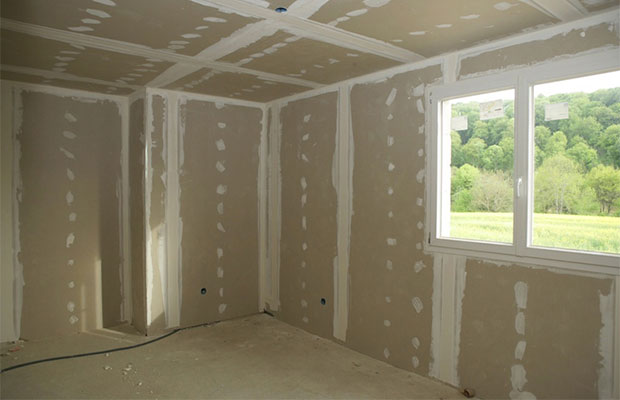
Wooden houses are environmentally friendly and very comfortable homes. IN last years their internal cladding is increasingly performed using plasterboard sheets (GKL).
We solve interior design problems using plasterboard finishing
Owners of wooden houses are rightfully proud of their homes built from natural material. The buildings turn out to be comfortable and beautiful. At the same time, many people are perplexed by the problem internal lining wooden house. After all, a number of its premises cannot be used without special finishing. For example, you cannot leave the walls in the bathroom without cladding. This is fraught with swelling of the wood and the appearance of mold over time. The kitchen also needs additional finishing. Under the influence high temperature the walls in this room begin to crack and lose their attractive appearance. Yes, and it is advisable to sheathe other rooms of the home practical material to create a truly homely atmosphere in them and protect the wood from premature wear.
It is almost impossible to mount on logs or beams ceramic tiles. This popular look cladding does not adhere well to wood. There is also a problem with wallpaper. And here plasterboard sheets come to the aid of home craftsmen. plasterboard - a simple and truly expedient way interior design premises in a wooden house. The advantages of such cladding:
- 1. Allows you to increase the level of thermal insulation of your home. GCRs themselves do not make the house warmer, but they make it possible to install insulation into the frame created for installing drywall.
- 2. Solves the problem of masking utility lines. You can also hide under the gypsum board electrical wiring, and water supply pipes, and any other systems without which life modern man will be uncomfortable.
- 3. Ideally levels ceiling and wall surfaces. After installing the drywall, it is easy to implement any room decoration options. Flat ceiling and the walls can be wallpapered, painted, tiled without the slightest difficulty.
- 4. Allows you to create original design in any room of the house. Made from plasterboard sheets beautiful arches, practical niches, and other interior delights that give the interior of your home a special chic and individuality.
Let us add that with the help of plasterboard sheets you can significantly increase the fire safety of a home made of logs and timber. To do this, finishing should be done not with simple gypsum plasterboards, but with special fire-resistant ones.
Wooden houses breathe. They absorb moisture, which causes the walls to expand, and then lose excess water and dry out. In addition, new buildings are prone to noticeable shrinkage within 1–2 years after construction. These facts determine the following prerequisites laying plasterboard sheets:
- It is necessary to create a frame for their installation. It is made from wooden slats or metal.
- GCR elements should not reach a distance of 10 mm from the floor surface, and 30–40 mm from the ceiling surface. Such gaps are necessary so that the logs normally perceive humidity and temperature fluctuations and do not violate the geometry of the skin. All gaps left after laying drywall are masked decorative items– special borders, baseboards. It is important to remember here that these parts are always fixed not to wall planes, but exclusively to horizontal planes.
- GCR can be used for interior decoration no earlier than a year after the construction of a wooden house. If the dwelling is being built from laminated veneer lumber, it is allowed to begin covering it earlier (after 6–9 months).
- Tight closure of drywall sheets is not allowed. Be sure to leave a 1-2 mm gap between them, which ensures the safety of the finish when the wood moves.
- Before laying gypsum boards from the walls of the house, you need to remove all tarred areas and also apply an antiseptic composition to them.
- It is advisable to install a high-quality vapor barrier layer under plasterboard construction. It will completely eliminate the risk of mold forming on the walls and ceiling.
Electrical wiring in houses from natural wood cannot be hidden in corrugated or plastic sleeves. This is prohibited by Sannorms and rules, and by ordinary logic. Such products are easy to pierce with a nail, which you want to hammer into the wall to hang a picture or other structure. The consequences of such a breakdown for wooden flammable surfaces will be, as you yourself understand, catastrophic. Instead of corrugation and plastic, you should use metal hoses and hide them under the plasterboard.
There is another gasket option electrical wires. He is now gaining popularity. Try installing external wiring. Specialized stores sell a lot of cables and electrical devices (toggle switches, switches, etc.) made in retro, high-tech, and modern styles. They fit perfectly into the interior design, making it unusual and memorable.
Sheathing options - what kind of skeleton can you make?
We have already said that installation of gypsum boards on wooden walls is carried out strictly on the frame. It can be wooden or metal. Wood lathing is recommended for old (in use for more than three years) and new houses. The skeleton is built quite simply. We take a beam with a cross-section of 7.5x2.5 cm. We treat it with an antiseptic composition and any fire retardant, and dry it well. Cut out the required number from the prepared timber support posts to create a frame. We make cross bars and guides from 5x2.5 cm slats.
The installation of supporting elements is carried out taking into account the width of a standard sheet of drywall (that is, in increments of 120 cm). Important! 1–3 guides should be placed between the supports. The more of them there are, the stronger the sheathing will be. In this case, the guides should be installed at the joints of the sheets, and the supports should be installed at the center of the plasterboard products. Cross bars are mounted in a special order. They should be located in areas where the narrow sides of the plasterboard boards touch.
In the process of arranging a wooden frame, you need to check building level correct installation of each element.
The reference point will be the maximum protrusion of the wall surface. In areas where there are depressions, wedges cut to the required thickness should be installed. All fastenings of slats and guides to wood are carried out using screws and washers. The pitch between individual hardware is maintained at 0.2–0.3 m. Pros do not advise over-tightening fasteners, as this may cause deformation of the plasterboard during natural movements of the house.
A metal frame is considered more reliable than a wooden one. But the financial costs of its arrangement are significantly more expensive. This is due to the fact that such a skeleton requires the use of special profiles (UD and CD). The construction of a metal frame is carried out according to the standard scheme. We mark the walls. Place marks in the corners of the room from ceiling surface before floor base using a plumb line. Using a cord we mark rectangles. They are placed around the perimeter of the ceiling and floor. Marked rectangles allow you to quickly and accurately determine installation points vertical racks. The distance between them is taken to be up to 0.6 m.

After installing the racks, we install the UD and CD profiles. We fix them to each other using self-tapping screws. We insert horizontal elements into special grooves (they have oval shape) bearing guide. When the wood moves, the crossbars move up and down, maintaining the geometry of the skin.
Cladding gypsum plasterboard walls - even a schoolboy can handle it
After installing the frame, we prepare plasterboard sheets. The procedure is as follows:
- 1. Cut with a sharp mounting knife upper layer GKL. We break the plasterboard product, bend it at an angle, and cut it with the same tool reverse side slabs
- 2. We apply markings to the cut gypsum boards 1 cm from the area of the planned joint.
- 3. Make a chamfer (angle - 45 degrees). We process its surface with sandpaper.
Let's start installing the sheets. Their installation is carried out in a checkerboard pattern. If the surface area is small, we lay plasterboard products with the maximum possible shift. Remember that two sheets must be fixed on one profile. We fasten the materials. We maintain a step between them of at least 0.25 m. It is advisable to screw in the fasteners more often to increase the strength of the structure.
GKL is completed. You can study finishing the resulting surface. It can be plastered, painted, painted decorative compositions, paste over with any wallpaper.
Last tip. Be sure to prime the drywall before finishing. Then the cladding you choose will stick to the sheets for a very long time and with high quality.
Covering walls with plasterboard in a wooden house is great way V short time carry out interior decoration of residential and utility rooms when minimum costs. But, as with any use building material, repair and decoration in this way has positive and negative aspects, as well as its own subtleties, without taking into account which the result may not be quite the expected result.
 Drywall in a wooden house
 How is the cladding of wooden gypsum board walls done correctly and what do you need to know about such work?
Plasterboard sheets- a universal finishing material. It allows you to create perfectly smooth wall surfaces in almost any room, but there are drawbacks to this method of finishing.
| Positive aspects of finishing with plasterboard | Negative aspects of finishing with plasterboard |
| Versatility. The material is suitable for all types of premises (residential/non-residential). You can sheathe the walls in a wooden house or any other (brick, concrete). | Low moisture resistance. If flooded, the finish will quickly deteriorate. |
| Allows the alignment of almost any differences in walls and ceilings (even with a significant difference of 80-100 mm). | Relatively fragile material. |
| The ability to create walls from plasterboard of any shape; the material bends perfectly and takes the desired shape. | When creating structures, it reduces the volume of the room. |
| Plasterboard structures allow you to hide all engineering communications in them. | |
| Installing drywall can significantly reduce the cost of interior finishing. For minimal decor you don't need a large number of plaster. | |
| Safe for health, non-flammable.
| |
| Easily combined with other finishing materials. |

Despite the shortcomings, finishing with plasterboard in a wooden house is an excellent option to quickly interior renovation in a newly built house or to restore an old one. It is only important to take into account some specifics of the room and purchase necessary materials .
 Scheme for using gypsum boards in the house
 How to level walls with plasterboard in a wooden house and what will be needed for this?
Stages of covering a wooden house with plasterboard
Before purchasing the required amount of materials, you need to determine what type of frame the interior will have: wood or metal.
Metal or wood
The walls of a wooden house are quite suitable for finishing with gypsum plasterboard, made from the same material. But, there are some nuances that need to be taken into account before attaching sheets to such a frame:

It is desirable that the slats or timber for the frame be free of knots and other defects. Special attention You need to pay attention to choosing even planks, otherwise they will make it difficult to install the sheathing, and the walls themselves in the home will be crooked.
 Metal carcass
 However, if there are no problems with the wood, then this is suitable for assembling a frame for plasterboard finishing.
With metal profiles there is no such problem, you just need to stock up required quantity. You should definitely pay attention to the quality of the protective zinc coating and the wall thickness of the products (standard 0.6 mm).
What is needed for finishing
The basic list of materials and tools is the same as when working with drywall in conventional buildings. will be needed.
- Drill and screwdriver with a set of drills and bits.
- Grinder and metal scissors (for cutting profiles). If a wooden frame is being built, then a hacksaw is quite sufficient.
- A knife for drywall or a regular stationery knife, but with a supply of blades.
- Plastering accessories: spatulas (300 mm and 50 mm wide), nozzle, mixer;
 Kit necessary tools and materials
 Materials you will need:
- Putty - starting and finishing.
- Serpyanka for joints.
- Primer.
- Drywall.
An important condition for finishing wooden walls with plasterboard is their initial treatment with antiseptics against rot and fungus!
 Types of GK sheets
 Drywall is purchased taking into account the room in which it will be installed.
The use of moisture-resistant sheets is highly recommended in bathrooms, bathrooms and kitchens. Furnaces and ventilation pipes trim the material. In other rooms, as cladding, a standard wall sheet is quite suitable.
Preparatory stage
At the preparatory stage, before covering the walls, you need to carefully inspect them for changes, and if an old building is being restored, you need to carefully check the wood.
It is worth knowing that in a new house, after construction is completed, you cannot immediately begin installing drywall on wooden walls. It takes time for the wood to shrink and dry out.
If there are places with rot or fungus, they are thoroughly cleaned and treated with antiseptics. Severely damaged areas need to be restored.
In a new wooden house, before covering the premises with plasterboard, it is necessary to treat all surfaces with an antiseptic, as well as with a special impregnation that preserves the wood.
 Antiseptic treatment
 If the surfaces are perfectly flat (which is extremely rare), you can fasten the drywall to the wall. In other cases, determine the difference in height differences and select optimal distance on which the frame will be mounted. After this, you can begin assembling the base and finishing the walls with plasterboard in a wooden house.
Installation of metal and wooden frames
As mentioned above, when smooth walls or with minor differences (a few millimeters) you can attach sheets without a profile directly to wooden walls. However, this happens extremely rarely, and before attaching drywall to a wooden wall, you need to build an appropriate frame. How this is done is shown in the video:
Wooden frame
The sheathing is assembled under from slats or timber of the appropriate section. Initially, elements are installed on the floor and ceiling that will act as guides. Fixation can be achieved with ordinary self-tapping screws.
The same slats are mounted on the walls on the left and right. Then they begin to install the main racks from the same timber. If the distance from the walls of a wooden house is significant, direct hangers are attached to them, with which the sheathing is connected to the load-bearing surface.
 Wooden frame for drywall
 With guides, the slats are attached with mounting angles or straight hangers bent at right angles. Wood screws are used as fasteners. To make the structure rigid and reliable, you need to install transverse slats made of timber on the wooden frame, which are installed on the base using mounting angles. The frame on the ceiling is assembled in a similar way.
When ready, insulation is placed in it (if necessary) and wiring is laid.
Metal carcass
Using the frame, it is assembled according to the same principle as in conventional brick buildings, finishing them with gypsum board.
 Frame made of metal profiles
 Finishing stages:
- Initially, guides from the UD profile are installed according to the markings.
- Next, you need to install direct hangers to the walls.
- The frame posts are inserted into the guides and connected, to which the hangers are bent and secured with “bugs”. The number of profiles is calculated based on 3 pieces per sheet of drywall. Moreover, adjacent sheets of sheathing are joined to the outer slats.
- Transverse jumpers made from a rack profile are also required.
When the frame is ready, insulation is placed in it and the wiring is pulled through.
 Wiring in a profile frame
 On the ceiling, the structure for plasterboard is assembled using PNP and PP profiles.
Base sheathing
Sheets of material are secured using self-tapping screws with a length of at least 20 mm. Fastening drywall is done using a screwdriver or drill with variable speed control.
The sheet is installed on the frame and one edge is mounted, and then the opposite. When screwing in a self-tapping screw, you need to control the pressing force so that the head does not damage the top layer of the material, while it is slightly recessed into the surface (1–1.5 mm).
The use of gypsum plasterboard in an old house in this video.
If you need to cut a sheet, first make markings on its surface with the front and back side. Then an incision is made. By cutting through the cardboard, you can easily break off the desired piece. Irregularities in the cut can be easily smoothed out with the same knife or a regular plane.
Attach drywall to wooden blocks necessary, as well as metal slats, using self-tapping screws and a screwdriver.
 Attaching drywall to the profile
Plasterboard sheets are deservedly popular in matters of repair. They solve several problems: leveling walls, hiding communications under the cladding, preparing the surface for further decoration.

In addition to its practical advantages, gypsum board has a relatively low cost, which makes it accessible to craftsmen with a small budget for transformations. How to sheathe log house plasterboard – detailed instructions Further.
Selection of gypsum board sheets
Retail chains offer a large number of types of panels for subsequent decoration. Isolated from total number acceptable in properties, such as resistance to fire and moisture - the most important qualities for a wooden house, you can opt for a sheet labeled as GKLO.
This is a combined material that can remain in its original form despite any aggressive manifestations. There are also reinforced sheets that can withstand the loads received when facing with tiles or other heavy materials.
How to do cladding correctly
Installing drywall in a log house yourself is not difficult. Important! The sheathing should begin from the ceiling, and only then on the walls. Any covering is carried out with the construction of sheathing on wooden or metal profiles.
Using aluminum is fraught with corrosion, but you don’t have to worry about the strength of the cladding during the shrinkage period. After weighing all the pros and cons, guides are selected and the surface is prepared for the sheathing.
This is necessary to create ventilation between the insulation and the cardboard. If it is not necessary to insulate a log house, then a smaller width will suffice, sufficient for convenient installation of electrical communications.
When the structure is ready, you should start preparing the sheets. They are cut into convenient squares or using a jigsaw, and the drywall is given the shape required by the project. Why are such actions needed?
GCR is a rather fragile material and if handled carelessly, or, as often happens, installed alone, big sizes are inconvenient, and the risk of breaking the sheet increases. Hence the forced overexpenditure of material and waste of funds.
There is one more important point in the casing. This is the so-called sliding fastener for fastening drywall in a log house.
It will not allow the flat area to be damaged by shrinkage, which occurs continuously over the course of its service life.
In this case, the installed sheets will move evenly without disturbing the smooth area of the mounted sheathing. Further:
- Prepared gypsum board forms are attached to the sheathing. Joining tightly is not allowed, again due to shrinkage. A gap of 2 mm will be enough to compensate.
Then, after the surface is finally brought into proper shape, the seams should be unstitched to 5 mm with outside and use plastic putty to grout the joints. Be sure to tape the joints with plasterboard serpyanka tape before applying putty.
- Correct covering of the ceiling and walls log house plasterboard is made using self-tapping screws, since the thread holds better heavy material, how smooth surface nail. In addition, the screws are initially treated with an anti-corrosion agent, and rust stains will not appear on the area intended for decoration.
This means finishing a log house with plasterboard different variants decoration. Moisture-resistant sheets can be used for laying tiles, plastering and applying liquid wallpaper.
Also, to simplify the work, you can use all kinds of paints, having first leveled the grout along the seams. Coating compositions should be applied in two layers to the primer composition - the new structure will absorb paint with terrible force.
In an effort to save money and at the same time make internal view wooden house is respectable, the craftsmen use proven material, which is also used in the notorious European-quality renovation.
Covering a log house with plasterboard is an excellent option that combines reasonable cost and a good basis for creating an individual interior. A independent work will make the savings very significant.