Brick heating wood stoves for summer cottages. Wood-burning stove for a brick house
A person who is just planning to build his own home already at this stage thinks about the heating system in it. This is correct, because the development of the project largely depends on the chosen heating system. If there is a heating main in the immediate vicinity of the site where the house will be built, and the future owner has received permission to connect to the centralized network, then you can get by with building a fireplace yourself.
You can use it during the period when the heating season has not yet arrived. If it is not possible to connect to a centralized heating system, then a reasonable solution would be to build a stove in the house with your own hands.
Since ancient times in Russia The stoves are laid from bricks V residential buildings. The craftsmen who skillfully erected these buildings were considered revered people. Today, thanks to the stove, a comfortable atmosphere is provided in the house, and besides this, the comfort in its interior spaces. These advantages of a traditional stove largely push many people to install a stove in their own home.
What types of stoves are there for brick houses?
If we talk about the types of brick stoves for individual houses, then we can distinguish the following types:
A modern-looking building in a house must have certain qualities:
- warm;
- do not smoke;
- have a high level of fire safety;
- create a cozy atmosphere.
Nowadays, if there is a need to build a brick oven, you can do this work with your own hands without outside help. Instructions can help with this, in which photos of the stages of work show that this process is not as complicated as it might seem at first glance. The main thing is to have free time and the desire to create this structure in your home.
In order for the wood-burning stove being constructed to be of sufficient quality, you need not only to prepare the necessary tools, but also to take into account a number of important nuances.
Tools
To carry out work The following tools are needed:
- plumb line;
- lacing;
- solution container;
- shovel or hammer drill;
- knitted wire;
- roulette.
Features of laying a brick stove for a home with your own hands
 Before starting work on laying a wood-burning brick stove, it is necessary to determine the place in which it will be located. Furnace specialists give the following recommendation: if this is your first time laying a wood-burning stove, you should not immediately proceed to its construction. First you need to practice - try to do it wood stove layout.
In the process of such work, the beginner will understand what masonry is, he will be able to take into account the mistakes made when creating the layout, and avoid them when laying a wood-burning brick stove. An important point when constructing stoves, this is the distance between the pipe and the roof slab. It must be at least 15 centimeters. If this requirement is met, you can mark the place where the foundation for the future wood-burning stove will be built.
Construction of a foundation for a future brick kiln made to size, slightly larger than the main furnace structure. When laying the foundation, do not forget about creating a waterproofing layer. There is one more rule that also needs to be recalled: when laying a stove, you need to constantly monitor the correctness of the actions.
The walls of the brick kiln must be made in a strictly vertical position. Particular attention should be paid to corners. The quality of all subsequent masonry largely depends on how correctly they are lined up.
Characteristics of the methods and order of laying the furnace
You should know that stove masonry can be of different types.
- undercut masonry;
- Also, when constructing stoves, masonry with empty bricks is often used. The difference between these two types is quite significant.
When used during work first masonry method, then the finished structure is not subject to plastering, since all the seams are filled with mortar. The wall laying is done with a whole brick or half of it.
Ordinary brick is not suitable for building a stove. To create it, you must use material that is specifically designed for these purposes. It is called red or full-bodied. Bricks that have been used for some purpose should not be used when laying the stove.
During the process of laying the furnace, the first row is created using only bricks. No solution is used. Then the bricks are leveled, the front wall is determined, and in addition to this, the location of all the doors of the structure is determined. When the estimate is made, perform laying bricks on mortar. Having finished with this, move on to another no less important matter- laying corners.
Next, following the recommendations of experienced stove makers, it is necessary to lay out the entire stove circuit. Using plumb lines from the stove corners, the string must be pulled to the ceiling surface. When working, these vertical lines will act as a guide for the novice master.
The location of the ash pan and the combustion chamber with the ash pan will largely depend on the model of the stove that the owner of the house decides to install. After the third row of masonry, it is necessary to install a blower door. A row after it there is an ash pan.
It is followed by a firebox. Burnt wire is used in masonry to secure doors. At the stage of laying the stove vault, the craftsman will have to cut the bricks. Here it is necessary to achieve high-quality joining of material. Laying the stove roof begins after the second row above the fire door.
To line the combustion chamber, special refractory bricks are used. For the reason that this brick and the furnace used for masonry have different temperatures, you need to make sure that there is no hard connection between them.
When it comes to installing a chimney pipe, a special valve must be provided. It must be equipped with an adjustment system.
Technological procedure for laying a furnace
 Creating a stove begins with laying out the first row without mortar, taking into account the seams and in full accordance with the order.
Next you need to determine position of bricks at corners. They must be laid on the solution, while their horizontal position is checked. To control, you must use a level. The settlement of bricks that protrude can be done using a mallet.
When the required horizontalness is achieved, it is necessary to lay out the first row using a solution. When laying it, you should not forget about the level used to check the correctness of installation.
Using a tape measure check the size of the oven in terms of its diagonal. Equal diagonal values in the rectangle are a prerequisite when laying a stove. If this is necessary, then the corner bricks must be knocked down to ensure the necessary equality. Now you can proceed to bricklaying the 1st row using mortar.
When the work on laying the first row is completed, we move on to the second. When laying it, we check the verticality of the corners. To do this, we use a level or plumb line. As in the case of the first row, we begin laying out the perimeter, and only then move on to the middle of the second row. When the second row is completed, it is necessary to hammer nails 80-100 mm long between the first and second rows into the seam of the corners.
Next, you need to lower the plumb line one by one at all corners and mark the points on the ceiling where the lowering was done. When this is done, it is necessary to hammer nails of the same length in these places, then secure the cord and tighten it.
 To check the vertical position of the cords a plumb line is used. If there are deviations, bending the upper nails is used to eliminate them. This creates the outline of the future stove in space. All rows laid further must be controlled for verticality using a stretched cord. In this case, much less time will be spent on control.
In a similar way it is done laying subsequent rows. Each new row must be checked against the order. During the laying process, it is necessary to clean the internal and external surfaces of excess mortar. To remove it, you should use a trowel. Wiping the chimney walls with a wet rag must be done every five rows.
The thickness of the seams of the stove masonry should be as thin as possible. If the seams are thick, this leads to coloration of the solution, which results in weakening of the masonry.
There is one more rule that must be observed - the rule of tying bricks. Each vertical seam should be covered with bricks from the next row.
In most cases, there is a vertical seam in the center of the next row of bricks. However, this is not achieved so successfully in all cases. Sometimes the overlap is not made in the center, but less than half the brick. In this case, it is desirable that this distance is not less than a quarter of the length of a brick.
If a brick cut from one side is used during masonry, then this side must be laid outside the chimney duct. This surface is weaker, so it quickly collapses under the influence of high temperature.
When laying out the combustion chamber of the furnace, fireclay brick is used as the main material. The main advantage of its use is its resistance to high temperatures. You should not bandage the joints of masonry made of fireclay bricks and ordinary bricks, since their coefficient of linear expansion is different. Fireclay brick used for laying out a whole row or for lining the firebox. There must be a distance of at least 5 millimeters between the lining and the brick.
 Before installing the door in its place, you should check for a tight fit to the door frame. It would be useful to find out whether the door rotates freely on the hinges, whether there are distortions and whether the door closes well enough. It is also necessary to check the holes that are used to secure the doors. If during the check defects were identified, then before installation they must be eliminated or the door must be replaced completely.
The door is installed using binding wire. It is necessary to use material 50 cm long. The wire is inserted into the holes located on the door and then twisted. The place where the door will be installed must be treated with brickwork mortar. During the installation of the door, it is necessary to control the vertical and horizontal position of its position. After this, fixation is carried out with bricks. At the end of the work, the ends of the wire are laid into the masonry joints. Combustion chamber door installed in the same way. The main difference is that it is wrapped in asbestos.
Conclusion
If the house does not have the opportunity to connect to a central heating system, then creating a brick stove is the most correct solution. By building it, you can get a good source of heat, thanks to which a comfortable atmosphere will be provided in the premises of the house, while heating costs will be low. You can build a brick oven with your own hands without the need to contact specialists. Enough see instructions with photos How professional stove builders build such structures. Having a strong desire and free time to acquire a brick stove in your home, you can build this structure with high quality without spending a penny. Your home will always be warm, and the constructed structure will last a long time.
Brick kilns for DIY houses


Heating a home is a primary factor in a person’s comfortable home in the autumn and winter. Despite other options for heating a house, there are no fewer people who want to make a brick fireplace.
Skillful home owners can easily lay a classic brick stove with their own hands; the masonry technology is described in articles and books. But if one part is not executed accurately, the operation of the fireplace becomes uncomfortable. There is smoke in the room or there is a fire hazard. It is better to invite a professional stove maker who will build the stove according to the rules.
The standard design consists of parts:
- foundation or concrete base of the house;
- housings with technological parts;
- chimney to remove combustion products.
Brick stoves for houses have become separated during centuries of use. by method of operation. Among them are:
Heating hearths are built only to heat the home; they do not perform other functions. It is impossible to heat water or use such a brick structure for cooking. The design scheme is simplified, the service life is measured in decades, but its use is rare. IN last years, after installing water circuits, such heating centers in a brick house do not occur.
Furnaces installed in the house for culinary purposes. Sometimes stoves are built in open areas, verandas or summer kitchens. The design is selected so that heat is released only in the area of the hob. Brick hobs are installed only in rooms with organized heating or in places where heating is not required.
Due to its increased functionality, the heating and cooking model of a brick hearth is in demand among owners. Smoke ducts in the furnace design receive combustion heat to heat the room. The housewife prepares food on the hob. Sometimes an oven is installed in a brick hearth for baking. The valves regulate the degree of heating, and in the summer the oven is used only for cooking. These dampers determine the degree of smoke emission during external pressure surges.
BBQ and grill They are arranged in summer in open natural areas in front of the house or under a canopy. Simple brickwork with a chimney in the form of a cap, the walls of the brazier simultaneously act as a support for the grate. The owners sometimes install a full-fledged kitchen in such a place, supply water and sewer drains.
A brick stove structure for a bathhouse is arranged as a heating array that produces dry steam. When laying, one should not neglect the little things; shortcomings and inaccuracies will lead to incomplete combustion of fuel. Incorrectly fitted bricks run the risk of releasing toxic, carbon monoxide or carcinogenic gases.
Russian stove becomes the soul of the house. It is impossible to argue with this concept. In the oven section of the hearth, ancient dishes are prepared that cannot be cooked in a metal oven. In addition to heating the rooms adjacent to it and cooking food on the stove, the Russian stove is equipped with a lounger for sleeping after the fire is finished. In ancient times, colds and diseases of the musculoskeletal system were treated on such a warm bed.
What does furnace breathing mean?
 As the walls warm up, they release moist vapors into the air space of the room, and when they cool down, they absorb them back. When talking about a healthy climate in a house with a brick stove, this property is implied. Comfort threshold in the house is reduced compared to other heating boilers to a temperature of 18ºC. Even with this, the relative humidity approaches standard value and, people feel comfort, which cannot be said about other heating centers.
Heating with water coolants increases the threshold comfortable temperature up to 20-22ºС, electric and gas heating make this figure even one degree higher. A brick stove for a home with a heat transfer coefficient of 50% is more cost-effective than metal hearths With useful work in 70%.
Requirements for the operation of a brick kiln
- economical heat transfer and complete thermal conductivity;
- operation for decades;
- stand-alone model;
- combining two or three functions;
- warming up the room to create a comfortable microclimate;
- simplified design;
- attractive appearance without spoiling the aesthetics of the room.
 Unlike the metal model, the red brick hearth accumulates heat and releases it slowly. The duration of intensive heating of the house continues within 15-20 hours. Smoke is removed through ceramic brick chimneys by natural draft. The air enters through the room where the stove is installed and ventilation is not neglected.
Heat transfer without residue is ensured by the complex structure of the smoke channels. To stop the draft after the heating process is completed, close the damper on the main pipe. Suitable firewood is dry logs made from hard wood. tree species. After combustion, ash is formed, which enters the receiving compartment for further cleaning.
So that the house is heated everywhere, the hearth is built in the center of the home, and the rooms are arranged in a cross pattern. Each of them contains a part of the furnace coarse for heating.
There are no difficulties when operating the oven. In addition to the exciting kindling, the owner’s mood is created by the smell of smoke escaping from the hearth or the contemplation of dancing flames on the wood.
Do not use household waste or leftover building materials for fuel. Decoration Materials release many substances harmful to the body. Decomposition products during combustion of materials are released by heating and accumulate on the walls of the stove and chimney, making periodic cleaning difficult.
The disadvantages of a brick fireplace include:
- the constant need to clean the chimney pipe twice a year;
- frequency of adding fuel manually.
Provisions for the furnace device
 Designing a stove according to the rules means following the principles of choosing a material and determining the design of the fireplace. Construction of a stove from materials of poor quality will lead to premature damage to the integrity and the need to remake the brick stove structure. An inexperienced owner of a stove maker whiles away the evenings with a taste of smoke, or even lives in an unheated room.
Construction of a heavy kiln with a number of bricks above 500 pieces or with a heavy red brick chimney is carried out on a separate foundation. The stove is placed on the base of the house if it is made in the form of a solid slab. A separate base of the hearth is built without connection with the strip foundation of the housing.
Construction of only a light hob is permitted on the floor, with pre-reinforced joists. Underneath it is reinforced thermal insulation and a heating panel. If a house is being built along with a stove, then the location is selected according to the construction plan. In a house that is already in use, the new stove is oriented to the location of the central chimney. The installation of a new chimney is done so that the beams of the roof structure are not sawed. Distance to nearest wooden rafters roof of at least one meter.
Small hearths placed on a wooden floor, laying insulating layers. But the decision is made only in exceptional cases, since the stove is built to last for decades, and the wooden base fails before the brick stove hearth.
Pipe stove chimney rises above the roof surface by 50 cm and above. This distance increases as the chimney approaches the roof ridge.
How to decide on materials
 Quarry sand is used for laying furnaces; the use of river and sea sand is limited due to the hewn edges of sand grains by water waves. And quarry sand consists of grains of sand with ragged edges that adhere to other materials in the solution. Before use, the sand must be sifted and washed with water.
The furnaces are being laid I'm made of ceramic red brick, silicate is not used due to its hygroscopicity. For laying the combustion chamber and chimney, choose the highest grade red brick, without cracks or inclusions with a ringing sound when tapped.
The laying of secondary partitions inside the body of the furnace is done with second-grade brick of a faded pink color and a dull echo. Burnt material Brown used for the construction of foundations, but the furnaces themselves are not built from it.
Stones are also used, obtained from the dismantling of buildings. The laying of the front surface is not carried out from specimens on which soot has adhered. After whitewashing, such a surface produces black streaks throughout the year. It is undesirable to use bricks after laying them on cement or lime mortar, even cleaned ones.
The solution is prepared using clay, which acts as a binding material. Clay is divided into lean, medium and fatty grades. For stove masonry, average material values are used that maintain critical temperatures during operation.
Preparation of mortar for masonry
Clay, which acts as a binding material, is not used independently in the solution. The oven is built on a clay composition with the addition of sand and cement. It does not crack and does not allow smoke to pass through in the heat of the oven. The seams are made up to three millimeters thick; for such masonry, thirty liters of mortar are consumed per hundred stones. For plasticity, one kilogram of cement and a glass of salt are added to a bucket of clay mortar.
Water carefully mixed with clay and leave to soak for two weeks, stirring the solution periodically. Sand and cement are added after the end of the period. The amount of sand is determined by the fat content of the resulting solution. The skinny one will flow off the shovel and will not leave a trace, but the fat one will stick in a lump and will not budge. Achieve average characteristics. Finishing with plaster is done with cement-sand mortar with the addition of lime.
Stores sell ready-made masonry mortars in the form of a dry composition for installing stoves. In terms of characteristics, they are not inferior to those prepared independently; they contain organically balanced components and additives. If there is no time for the complex preparation of clay mortar, they use improved dry construction mixtures.
Furnace foundation
By design, it is built as a monolithic solid, strip, prefabricated reinforced concrete or made of brick. Width exceeds oven base on the sides by 5-7 cm. The constructed base is insulated with two layers of roofing material or coated with two layers of bitumen mastic. Asbestos is laid on top, then a metal sheet, finished with a layer of cardboard or construction felt impregnated with liquid cement-sand mortar.
After this, they begin to build the furnace, checking each brick according to a pre-developed scheme.

Using a wood-burning brick stove to heat a private home justified by many advantages. The owners of such devices felt comfort and coziness in houses with stoves. Cost savings and an environmentally friendly atmosphere play a significant role. Such ovens are the future.
Stove heating of country houses today is gaining a second youth. And this is not surprising, given the special atmosphere and home warmth, which can be created by a simple brick stove, even made with your own hands. It is often installed even in the presence of more technologically advanced heating systems, in an attempt to obtain a stylish, original element of the interior. Today we will talk about the most popular models of brick stoves and share the secrets of the stove craft.
Features and secrets of the popularity of brick ovens

A brick stove is not only a functional heating device, but also a stylish element of the interior.
There is probably no such person who would not like a live hearth with crackling firewood and especially comfortable warmth. But a good old brick oven can please you not only with this, but also with its ability to create the most conducive to health atmosphere. It's all about the material from which this amazing unit is built. Being the closest relative of ceramics, brick releases water vapor into the air when heated, and absorbs it back when cooled. The stove seems to “breathe”, thanks to which the optimal humidity is established in the room. It is also important that the heat becomes narrower at a temperature of 18–19 °C, whereas when using other types of heating, the comfort level starts from 20–21 °C. In addition, being made from clay, brick is environmentally friendly pure material, which means that when operating the heating device you don’t have to worry about the release of compounds harmful to health.
Despite the fact that each type of brick heat generators has its own functional and design features, they are all similar to each other in terms of the arrangement of the combustion and heat exchange parts. So, any stationary oven of this type has:
- a foundation that serves as the base of the heating device and evenly distributes its weight over the entire area;
- a firebox that simultaneously serves as a firebox and combustion chamber;
- a grate that allows for lower air supply to the combustion zone. Due to this, the performance of the heating unit increases and it becomes possible to regulate the intensity of fuel combustion;
- ash chamber, which makes cleaning the oven easier;
- a chimney that creates the necessary draft and releases exhaust gases into the atmosphere.

Design of a channel-type brick kiln
In addition to their main purpose, wood heat generators are also used for cooking, as well as arranging an additional resting place. The structure itself can be installed both indoors and in the yard, for example, in a recreation area with a barbecue, grill or cauldron. If we talk about fireplace stoves, then their heat-generating function is completely relegated to the background, giving way to the visual and image component.
The advantages of brick kilns include:
- fast surface heating;
- possibility of using several types of fuel;
- low operating costs;
- eliminates the risk of burns when touching the walls of the heating device;
- especially soft, comfortable warmth;
- the air in the room is not dehydrated;
- wide possibilities in terms of interior decoration.
The units in question also have disadvantages. The most significant of them is the potential danger of carbon monoxide poisoning, which occurs if used incorrectly. Another one is large dimensions and weight. That's probably all. As you can see, equipment of this type has continuous advantages and an almost complete absence of negative aspects, which, incidentally, determines its high popularity.
Classification of heating devices. Criteria for choosing the optimal design
All existing models of brick kilns can be divided into several types:
- heating devices;
- cooking units;
- combination ovens;
Having decided on the required functionality, you need to choose the option that can be folded yourself. In order not to consider the entire variety of stationary units, we will focus on the most popular options:
- Dutch ovens. Thanks to the channel design, they have good heat dissipation and take up little space. Such heat generators operate in slow combustion or smoldering mode, which significantly reduces the requirements for the quality of building materials. And although the efficiency of the “Dutch” ones rarely exceeds 40%, they have found many fans, partly due to their low cost and ease of construction.

The classic “Dutch” is an extremely compact structure
- Swedish wood stoves have a chamber-channel arrangement, which allows increasing efficiency to 50%. Just like the “Dutch” ones, the “Swedish” ones take up little space, but require a more careful approach when choosing materials and are a little more difficult to manufacture. Nevertheless, the labor and financial costs are fully justified by the increased productivity and expanded functionality of heat generators of this type.

The Swedish stove will delight its owner with high efficiency and functionality
- have a unique layout, thanks to which they carry an indescribable flavor and originality. Their efficiency exceeds 60%, but not everyone will like the operating features. In addition, not every beginner will be able to fold the stove. Most likely, you will have to hire a professional stove-maker, and this will entail additional expenses, increasing the cost of what is already not the cheapest design.

A Russian stove can completely transform the interior, but will require a lot of space for installation
- Kuznetsov bell furnaces, famous for their thermal efficiency, have an efficiency of up to 90%. The secret of their success lies in a special device that promotes the most complete combustion of fuel and maximum heat transfer. A special feature of “blacksmiths” is their extremely clean exhaust and the absence of soot, which minimizes the time spent on maintaining the heating device. As for the disadvantages, these include the complexity of the design and high requirements for materials. However, the last drawback is compensated by the fact that the construction of a “hood” will require significantly less bricks than for any other furnace.

Unlike canonical bell-type stoves, modified units can have a hob and an oven
You will find step-by-step instructions for laying a Kuznetsov stove with orders in our next article:.
Having considered everything possible options, we have come to the most crucial moment - the choice of a heating device that can satisfy all the requirements placed on it. The main criteria in this case are functionality and installation location. And if the first does not present any difficulties, since it completely depends on the preferences and requirements of the owner, then the second point requires the closest attention. We will tell you in more detail how to choose a stove according to the type of structure.
- A house intended for permanent residence. If stove heating will be used as the main one, then best option, than “Swedish” or “cap” cannot be found. In addition to the fact that these units have excellent performance and do not take up much space, they are also easily complemented by other elements - a hob, water circuit, oven, drying niches or a stove bench. If functionality is relegated to the background, and the main requirement is compactness, then not a bad option is a “Dutch” heater that heats several adjacent rooms.
- Country house "weekend" or dacha. Since these buildings require irregular residence, it will be enough to install a small heating device equipped with a hob. Ideal option are fireplace stoves with an open hearth, since with their help you can heat the room in the shortest possible time. Similar advantage cannot be overstated in winter, when indoor temperatures drop to sub-zero temperatures.
- A stove in a country house with water or another type of heating. In this case, the heating device serves to create a special atmosphere. If the space of the room allows, then you can install a full-fledged Russian stove or unit with a firebox, fireplace and stove bench.
- Heating device for a bath. For this case, the simplest stove-heater is suitable, into which a container is built in to obtain hot water. If the bathhouse is attached to the house, then instead of a tank you can install a full-fledged boiler designed for a liquid heating system.
- Stoves for open areas. Most often, such heating devices are installed on open verandas, in summer kitchens or gazebos and are used for cooking. For these purposes, the structure is additionally equipped with a hob, barbecue, barbecue, cauldron, etc.

A barbecue oven will decorate the area and fill the relaxation area with functionality.
Having decided on the type and filling of the furnace, do not rush to start construction. In order for the heating device to meet all expectations, it is necessary to thoroughly understand the principles of its operation.
Calculation of basic parameters
Before choosing a working design for a heating device, it is necessary to make a preliminary calculation according to the parameters of a particular room. The most accurate method is to determine the dimensions based on the heat output of the furnace. In order not to go into complex calculations, for well-insulated houses they use a simplified calculation scheme proposed by I.V. Kuznetsov. This method uses the average thermal power, taken from one square meter surface of the unit (TMEP). For a conventional firebox, take the value 0.5 kW/sq. m, and if intensive heating is necessary, which occurs during severe cold weather - up to 0.76 kW/sq. m.
When determining the thermal power of a furnace, only those surfaces that participate in heat exchange processes are taken into account. For example, in “Dutch” systems, sections of walls located near the floor, below the horizontal sections of the gas duct, are not excluded from the calculations.
In principle, these values are enough to select a suitable project from those that can be found in the public domain. If the available options are not suitable for any reason, then you will need to calculate the parameters of the main elements of the furnace and design your own design.
Drawings and diagrams of brick kilns
Bath stove  Stove-fireplace Classic "Dutch" Bell stove
Firebox
The dimensions of the firebox are determined based on the maximum volume of the fuel fill. In this case, the amount of combustible materials is calculated using their calorific value and specific gravity, focusing on the required power. The volume of the firebox should be 2–3 times larger than the obtained value, which will allow the stove to be reheated at extremely low temperatures.
When calculating the size of the combustion chamber, it is necessary to take into account that the maximum filling should not exceed 2/3 of the volume of the combustion chamber. In addition, the dimensions of the firebox and all its components must be adjusted to the size of the bricks used for laying the stove. In your calculations, you can use special tables designed taking into account the need to heat rooms of various sizes.

Calculation table for the main elements of a brick kiln
Ash pan
The height of the ash pan depends on the type of fuel used. For low-ash combustible materials such as coal or peat briquettes, this value is taken equal to 1/3 of the height of the firebox. If the stove is heated with wood or pellets, then the height of the ash chamber must be reduced to 1/5.
Chimney

When calculating the chimney, it should be taken into account that the place of its installation must comply with SNiP
Unlike gas heating equipment, wood stoves do not require much draft, so best shape the smoke channel will be a rectangle. When calculating chimney take into account that the cross-section of the blower should not exceed the area of its flue, and all values are adjusted to the dimensions of a standard brick. Since accurate design requires operating with a lot of data and parameters, it is best to use one of the special programs. However, for the most common cases (no kinks in the smoke channel, vertical stroke, rectangular cross-section, height from 4 to 12 m), you can use average values for furnaces with a power of up to 14 kW:
- Less than 3.5 kW - 140x140 mm.
- 5 – 5.2 kW - 140x200 mm.
- From 5.2 to 7.2 kW - 140x270 mm.
- From 7.2 to 10.5 kW - 200x200 kW.
- 5 – 14 kW - 200x270 mm.
Recommended sizes are minimum. And yet there is no need to excessively increase the cross-section of the smoke channel, since cold air will descend into the stove through a chimney that is too wide. Counterflow, or “swish” in the language of professional stove-makers, threatens not only a deterioration in performance, but also more serious problems.
To calculate the quantity required material It is best to use special tables. Below is one of them.

Calculation of the number of bricks
You should not worry if the chimney calculated “offhand” occasionally starts to smoke. If necessary, it can be extended with a piece of asbestos-cement pipe 0.5–1 m long, or several more rows of bricks can be laid. Often such events are carried out when the aerodynamics of the terrain have changed. For example, after trees grow or taller buildings are erected in the neighborhood.
Preparatory activities
Preparation for construction includes several stages:
- selection of tools and necessary materials;
- definition optimal location for installation of a heating device;
- arrangement of the foundation and preparation of the construction site;
- manufacturing kiln brick(if necessary) and preparation of masonry mortar.
Required materials and tools

Stovemaker tools
To lay a brick oven you will need:
- Mason's hammer (with striker and pick).
- Broom for mopping laid rows.
- Angle, plumb line and level to control the geometric parameters of the masonry.
- Pliers.
- Rubber hammer (mallet).
- Trowel (trowel).
- Rule and tamper for arranging the foundation.
- Lead scriber.
- Spatula or mixer for mixing the solution.
- Joining.
- Buckets and other containers for bulk substances and liquids.
- Sieve.
- Grinder (angle grinder) with a stone circle.
Despite the fact that brick kilns differ significantly in design and size, the list of materials that will be needed for construction remains virtually unchanged. The standard list of everything you need looks like this:
- Brick - red, silicate, fireproof and facing (depending on the design of the solid fuel heat generator).
- Construction mixture for laying stoves. If it is necessary to reduce the cost of construction, it can be replaced with clay and sand.
- Furnace casting set - blower, combustion and cleaning doors, valves, stove, oven, etc.
- Grate.
- Wire for securing cast iron castings.
- Asbestos or basalt cord.
- Steel strips and angles for arranging ceilings and niches.
- Heat-resistant boards for protective thermal insulation.

Fireclay brick ШБ №22
Any brick oven is a unit with an impressive weight that requires a solid foundation. Therefore, it is necessary to prepare materials for building the foundation:
- Sand.
- Crushed stone.
- Reinforcement mesh.
- Boards and nails for formwork construction.
- Cement.
- Waterproofing.
In addition, if the project provides for external wall decoration, then prepare the tools and materials that will be needed for this work.
Features of choosing a place to install a heating device
Most often, a brick oven is installed near one of the walls or in the corner of the room - this will make it possible to use the available space in the most rational way. If the unit is planned to be used for heating several rooms, then it is placed in the center of the house, with the firebox and hob oriented towards the kitchen, and the other edges towards the bedroom, hall or living room. The diagram clearly shows the benefits of choosing the right location.

The right choice of location can solve the problem of heating all rooms of a country house
When installing a heating device, you should not be guided by convenience alone. It is important not to forget about the minimum permissible distances to other surfaces, as well as the optimal gaps and distances that are determined by the current SNiP:
- from a brick chimney to wooden elements The ceiling or roof must have at least 130 mm of free space. If an uninsulated ceramic or steel pipe is used, the gap is increased to 250 mm;
- a gap of at least 100 mm is left between the wooden floor and the outer walls of the stove;
- the distance from the heated side surface of the heat generator to the combustible wall of the building depends on whether thermal insulation will be used. With a protective screen the minimum gap is 130 mm, and without it - at least 380 mm;
- a gap of at least 0.35 m should be left from the ceiling to the stove ceiling. When installing compact units with low heat capacity, this distance can be increased to 0.7–1 m.
Construction of the foundation
It is best if the base of the brick kiln is formed simultaneously with the general building foundation. In this case, both structures are performed separately, otherwise subsidence of the building walls will inevitably lead to a violation of the geometry, or even damage to the heating device. If the furnace will be built in finished house, then the first thing people pay attention to is the distance of the chimney from the roof slab elements, which should be at least 15 cm. And only after that they begin marking and building the foundation.

Considering the weight of the stove, a solid foundation must be used.
If the house has wooden floors, then they are cut out at the place where the stove is installed, 10–15 cm away from the outer contour. After this, a pit is dug, the depth of which depends on the characteristics of the soil and the depth of its freezing. For middle zone It is enough to dig a hole 0.7–0.8 m deep. After this, its bottom is covered with a 15-centimeter layer of sand and compacted, periodically spilling water. Then a layer of crushed stone 10–15 cm thick is poured, which is also thoroughly compacted. After this, wooden pegs are driven into the corners of the structure, to which the sheathing boards are attached. To prevent the leakage of cement laitance through the cracks of the mold, its walls are covered with plastic film. At a distance of 5–10 cm from the floor, a reinforcing mesh is installed, for which both metal rods driven into the bottom of the pit and fragments of brick are used.

The foundation for a brick oven is made of reinforced concrete
By mixing M-400 cement, sand and crushed stone in a ratio of 1:3:4, concrete is prepared. Just enough water is added to obtain a solution of medium fluidity, otherwise the strength of the structure will be reduced. The mixture is poured into the formwork and compacted in any way, after which the surface of the foundation is leveled using the rule. Note that the upper level of the stove base should be 15–20 cm below the floor. After several hours necessary for the solution to pre-set, the structure is covered with film and left for several weeks until completely dry.
Before laying bricks, the foundation must be waterproofed using roofing material or a special film. If the width of the material is not enough, then its strips are laid with an overlap of at least 10 cm.
Preparation of the solution
Now that in trading network you can find ready-made building mixtures for laying fireplaces and stoves; there are practically no problems with preparing the working solution. All you need to do is mix the ingredients with water using a wooden spatula or a construction mixer. However, you can make masonry mortar yourself - this will allow you to save additional money. In addition, the owner will have complete confidence in the environmental friendliness of the structure.
Cook with your own hands mortar can be made from sand and clay, the ratio of which depends on the fat content of the latter component. To select the optimal composition, conduct a small experiment by mixing bulk materials in different proportions. After this, balls with a diameter of 5–6 cm are rolled from the solution, which, after preliminary drying, are squeezed between two planks. The best composition is considered to be one in which the sample begins to crack no earlier than it is deformed by one third.

There are several ways to check the quality of clay
Another way to determine the correct ratio of components is to lower a spatula into the prepared mixture. The adhesion of the solution to less than 1 mm indicates its low plasticity - it is necessary to add clay. If the layer thickness is more than 2 mm, then this indicates that the mixture is greasy, which can be corrected by adding sand. The norm is from 1 to 2 mm.
The clay must be soaked in water for a day before use. If you want to increase its fat content, then use the extraction method, which consists of settling the clay solution and removing its middle part.
How to properly build a brick oven. Instructions for the progress of work
Deciding on the type of heating device, making preliminary calculations and preparing everything to start construction is only half the battle. In order to correctly fold the stove, you need to find patterns for laying out the bricks in each row, the so-called orders. We have prepared several of the most popular options that can be used as working projects. If for some reason they do not suit you, then you can search ready-made solutions on the Internet or order an individual layout on one of the special sites.
Stove ordering diagrams in the photo
Orders of the Swedish stove Orders of the “Dutch” Orders of the Russian oven  Procedures for heating and cooking furnace
  Orders of a stove for a bath
  Orders bell furnace Kuznetsova
Today we propose to build a compact, but very productive and functional brick oven. Despite its apparent complexity, even a beginner can build it if he uses our instructions and follows all the recommendations. We, in turn, will share the secrets of experienced stove makers and give necessary recommendations during construction.

Arrangements of an oven with a hob and niches for drying
In the presented arrangement diagram you can see a heating unit equipped with a convenient hob and a drying niche, which gives a certain resemblance to a classic Swedish oven. We recommend that you first lay out the structure dry, without using mortar. This will allow you to study in detail the features of each row and prepare the necessary elements of the structure. Next, the work is done in this order:
- Up to the floor level, the bricks are laid out completely on cement-sand mortar. At this stage, you should be especially attentive to geometric accuracy, controlling the masonry by level and plumb. How smooth and stable the oven will be depends on the careful execution of the work.
- The first row of the furnace body begins to form the ash chamber.

Installing a blower door
- Before starting laying the second row, install the blower door. To do this, steel wire is threaded into specially cast ears on its body, which is laid in the masonry seams. To prevent the door from moving and tipping over, it is temporarily supported with bricks.
- In the fourth row, two channels are installed to clean the furnace from soot. Each of them has a separate door.

The grate is not secured in any way other than by very precise placement
- A grate is installed in the fifth row. The recesses made in the bricks of the bottom row will help to correctly lay the cast iron. Hereinafter, the combustion chamber is lined exclusively with refractory bricks.

In the oven, the grate is laid on a refractory brick
- Before laying the sixth row, a fire door is installed, which is temporarily fixed with a stack of bricks laid on the grate. If necessary, part with outside propped up with a metal corner or wooden slats.

Installation of the combustion door
- Starting from the seventh row, the furnace flues begin to be equipped. The vertical walls of the firebox are lined with fireclay bricks placed on edge.
To ensure the durability of the structure, the outer masonry is separated from the combustion chamber by a layer of basalt cardboard.

Laying vertical channels
- Before starting the laying of the ninth row, a quarter is selected from the bricks that will cover the fire door. Thanks to this, the structure will look smooth and aesthetically pleasing. Here the cast iron part is finally fastened, laying the wire in the seam of the ninth row.

To ensure an accurate fit of the brick to the door, its edges are cut in place
- In the 11th row, a hob is placed on the upper opening of the fuel chamber. The same basalt cardboard or asbestos cord is used as a seal. The front part of the cooking niche is framed with a steel corner.

The firebox is separated from external walls basalt cardboard or other fire-resistant material
- From the 12th to the 16th row, a chamber is built over a cast-iron stove.
- Before covering the cooking niche, steel strips are laid on its side walls, which will serve as support for the bricks of the 17th row. The front part of this row is decorated with a metal corner.
- The 18th and 19th rows are laid out almost completely, only three vertical heat exchangers are built up.
- In the 20th row, a horizontal channel and a door are installed to remove soot and deposits, and they also begin to form a drying chamber.
- The door is covered with masonry of the 22nd row.
- On the 23rd row, the horizontal flue is blocked. Only the openings of the vertical channels are left open.
- Before laying the 24th row, steel strips are laid above the drying chamber.
- From the 25th to the 28th row, another cleaning door is installed and the stove niche is blocked.
- In the 30th row, valves are installed on the two remaining vertical flues. To do this, first install their frames, and then insert the partitions themselves.

Installation of furnace valves
- From the 31st to the 35th row, lay out the transition section of the chimney.
- From the 36th to the 38th row a fluff is constructed.

In the place where the chimney pipe passes through the ceiling, it is isolated from the ceiling non-flammable materials. For this purpose, both mineral insulation and expanded clay are used. It is poured into a box, which is knocked down around the chimney.

You can make this beauty with your own hands
Briefly about the installation of the oven and heat exchange register
Previously, we looked at how oven doors are mounted and secured. It is equally important to correctly install other functional elements.

Oven installation features
If the design of the oven provides for the installation of an oven, then it is installed so that the flow of heated gases washes as large a surface area as possible. Most often, these conditions correspond to the transition area from the furnace to the heat exchanger. Previously, they are placed on the side walls of the horizontal flue. metal corners, and the points of contact between the cabinet and the outer wall of the furnace are sealed using basalt cardboard or asbestos cord.
A water heating boiler or liquid heat exchange register is installed in the hottest zone of the furnace. Depending on the type of heat generator, this place may be in the rear of the combustion chamber, at the beginning of the flue, or under the hood of non-revolving units. If you plan to use a hob and a water heater at the same time, then its upper part is made in the form of transversely arranged metal pipes, which are welded into side containers made of furnace steel. A compensation gap of 5–15 mm is left between the water heating boiler and the walls of the firebox. Of course, it is necessary to provide for how the surface of the heat exchanger will be cleaned of soot. For duct and chamber stoves this can be done through the firebox opening, while in other cases it may be necessary to install an additional cleaning door.
Features of operating and cleaning the oven
You cannot immediately test the oven at maximum settings; you must wait for its walls to dry. That is why it is recommended to build a heating device in the warm season. During this period, it is enough to open all the openings of the brick unit and wait one or two weeks. If there is a need to dry the stove in cold weather, then its doors are closed, and a fan heater or a powerful incandescent lamp is turned on in the combustion chamber.
After the specified period, the stove is heated for 5–7 days 2–3 times a day, each time using a small amount of firewood. The complete drying of the walls is indicated by the absence of condensation on metal surfaces, which appears a few minutes after kindling. And even after this, the stove is not heated “to the fullest.” Operation at maximum power is checked only after several days of regular use.
If the unit is heated exclusively with wood, then it is not necessary to clean it from ash every time. In the case of using peat briquettes and coal, the furnace is cleared of ash and ash at the beginning of each new cycle. As for cleaning internal channels and chimney from soot, then this procedure is carried out at least once a season. For these purposes, various scrapers and brushes are used to remove carbon deposits from vertical surfaces. After this, the soot is scooped out of the flues with a metal scoop and poker.

The correct choice of fuel will help reduce soot formation. The best firewood is considered to be hardwood - oak, hornbeam, beech, etc. Birch firewood and aspen leave virtually no soot. By the way, experienced stove makers recommend using aspen logs for every tenth fire, claiming that this helps remove soot from the ducts and chimney.
It is not recommended to clean the stove by burning using flammable liquids, black powder (yes, you can find such “helpful” tips), naphthalene, etc. It is unlikely that a good effect can be achieved from this, but it will benefit nearby buildings and your own health. cause significant damage.
It is often difficult to light a stove after a long period of cooling, for example, in a cottage or country house. This is due to the fact that cold air descends into the furnace channels, forming gas plugs that are difficult to remove. A proven method will help you regain cravings. To do this, take dry paper or rags moistened with kerosene or barbecue liquid, place it close to the vertical flue and set it on fire. Intense combustion will instantly push out stagnant air masses and restore the functionality of the heating device.
You will also find the material with instructions for cleaning and minor repairs of brick stoves useful:.
Video: Compact brick oven of original design
A brick oven can create a particularly warm atmosphere in a room, becoming the highlight of the interior and a gathering place for friends and acquaintances. Not only experienced craftsmen, but also green beginners can fold the unit. Of course, you have to be scrupulous and as attentive as possible. And then the heating device will repay not only cozy warmth and comfort, but also safe work during for long years operation.
Thanks to my varied hobbies, I write on different topics, but my favorite ones are machinery, technology and construction. Perhaps because I know many nuances in these areas, not only theoretically, due to my studies in technical university and graduate school, but also from the practical side, since I try to do everything with my own hands.
Today there are many options for heating a dacha: centralized gas, boilers, electric heaters.
But if it is not possible to implement all this due to the area’s remoteness from civilization, a do-it-yourself brick stove for a summer cottage will be an excellent solution.
Reliable and durable - it will gather around itself more than one generation of household members, providing the house with warmth and filling it with comfort.
The services of a good stove maker are not a cheap pleasure. Therefore, if you decide to implement a brick stove project at your dacha, it will be useful for you to read this article, in which we will tell you about the operating principle, features and layout of the stove structure.
A brick stove can become not only a functional device, but also the main highlight of the interior if it is used correctly. Today there are many ways to beautifully veneer and decorate a stone stove.
No matter how much time has passed since the appearance of the first stove designs and no matter how far home heating technologies have come, the stone stove still does not lose its relevance. Compared to other types of heating (electricity, gas), it is more economical. At the same time, thick stone walls allow you to retain heat for another day after the firewood burns out.
According to their purpose, furnaces are divided into the following types:
- heating;
- cooking;
- multifunctional;
- combined.

- combustion chamber, which is purchased ready-made or lined with fireclay bricks;
- an ash pit where ashes are collected;
- chimney.
This type of design also includes a fireplace with an open or closed firebox. It is used not only for decorative purposes, but also allows you to effectively heat a room of 15-20 square meters. meters.
Depending on the selected material, wall thickness, masonry scheme, heating stoves may have different heat output.
Most popular view The stove is a one-brick construction. This allows the walls to be heated to 60 0 C. The famous Dutch ovens are laid out according to this scheme.
In terms of dimensions, the heating stove can be wide and flat, or it can have an elongated rectangular shape. It all depends on the area of the room, the style of the interior and the personal preferences of the owners.
For cladding such a stove, tiles, decorative plaster, and decorative stone are usually used.
Brick heating stoves in the form of a three-sided prism look very stylish and original, but a beginner cannot implement this option, since it requires a lot of experience. Of great difficulty is the cutting of bricks and the requirements for maintaining an angle strictly at 60 0.
Round stoves, which are laid out according to the design of the famous Russian furnace engineer V.E. Grum-Grizhimailo, also look beautiful and unusual. The furnace operates on the principle of free movement of gases. To ensure tightness, the outside of the structure is lined sheet metal. Such a stove can heat a large country mansion and will become a real decoration for any home.

The design of the stove consists of a brick body, inside of which there is a combustion chamber, an ash pan, and a chimney. There is a metal plate on top (an oven can be built in).
- A heating and cooking stove is already a multifunctional design.
This is a more difficult project to implement, as it consists of:
- combustion chamber;
- chimney;
- ash pan;
- hob;
- oven.
The stove looks massive and is usually chosen for dachas where there is no other heating option.
In our country, heating and cooking stoves are most popular, allowing both the house to be heated and Tasty dinner Cook for the whole family.
It can be additionally equipped with a drying chamber, where you can make preparations for the summer: mushrooms, berries, fruits. In cold and damp weather, you can quickly and safely dry clothes and shoes in this chamber.

By the way, ovens with drying chambers was first invented in the countries of Northern Scandinavia, where hunters and fishermen needed to dry their clothes and boots in one night.
Many schemes of heating and cooking stoves have additional devices in the form of a comfortable bench, drying for firewood, an oven, and a water-heating tank.
Construction of a stove for a summer residence and its features
The main elements of any brick stove for a summer residence are:

10 basic rules for laying a country stove

Which brick stove to choose for your dacha?
The choice of stove design determines the size and type of room. For large cottages, you will need a massive stove structure with thick walls, which will take a long time to heat up, but at the same time can long time maintain temperature. Building such a stove is not an easy task. This will require some experience and knowledge.
But even a beginner can handle a small stove for heating a small dacha if you strictly follow the diagram and do not change the laying rules.

The first place in the popularity of heating and cooking stoves is worthily taken by the Swede, which enjoys well-deserved love and respect among Russian stove makers.
This design is a compact, ergonomic shape with a small cooking surface and a three-channel chamber. It is ideal for a small cottage, the length ranges from 880 to 1250 mm.
For the location of such a stove, the place most often chosen is between the kitchen and the living room. Thus, the stove performs a double function: it serves for cooking and decorates the living room with a fireplace.
Today you can find hundreds of different layouts for laying a Swedish stove with a hob on the Internet, so it won’t be difficult to implement it for your dacha. Many stove makers contributed to standard scheme masonry is an additional option, so each design is named after its creator: Buslaev’s, Kuznetsov’s stove, etc. But the principle of operation in them is the same.
Traditionally, a Russian stove can be called a bulky, massive structure, which is decorated not only with a hob with an oven, but also with a spacious bench.

This stove is not only a functional device for cooking, but also a place for relaxation. It allows you to warm up the room well, retaining heat for a long time, and has a beneficial effect on the human body, thanks to which the owners of such stoves are less susceptible to colds.
The building usually has two fireboxes (main and additional). Thanks to the special design of the oven, heating is carried out evenly, from bottom to top. Any kind of kindling is suitable solid fuel, and there are no particularly strict requirements for materials for laying a Russian stove.
A special place among small heating and cooking stoves is occupied by the little V.A. Potapova, created by a famous engineer at the beginning of the 20th century. To lay it, you need only 211 bricks, and the dimensions of the stove are only 630 * 510 mm.
Moreover, this little thing contains a single-burner stove, a small oven for baking and a hood. This type of stove would be an excellent solution for a small garden house or one-room cottage.
In this article, we invite you to study the rules and main points of laying a small heating and cooking stove.

Do-it-yourself stove laying
Step 1. Select a brick and prepare tools
Which brick to choose for laying a small country stove? We will need 2 types of bricks: fireclay (heat-resistant) for the construction of the firebox and red ceramic (at least M-150). You shouldn’t skimp on materials; further developments depend on it. operational properties, oven safety and efficiency.
Fireclay brick can be easily recognized by its yellowish color and porous surface. The composition of this material includes refractory clay and crumbs. This material, in addition to its heat-resistant properties, is also valued for its ability to accumulate heat for a long time. Even after the firewood has completely died out, such a stove is capable of giving off heat for a long time.

Heat-resistant fireclay bricks can withstand temperatures up to 1500 0 C, so the combustion chamber must be made exclusively of this material.
The smaller the mass of fireclay bricks, the greater the number of pores it contains, which are created by aluminum oxide. Such a brick will conduct heat very well. The cost of this material is almost 5 times higher than the price of red brick, but there is no need to save.
But it’s also not worth laying out the entire stove from fireclay bricks, outer part the design does not heat up much, and it looks red ceramic brick more attractive.
When choosing bricks for the stove, pay attention to color and shape.

You can test the material. If you throw a brick from a height of 1.5 meters and it doesn’t break, take this batch. But a bad, overexposed brick can split into several parts. Such a brick makes a dull sound when falling.
The brand of brick for lining the furnace should be M150 or M200. The number in this case means how much weight the brick can withstand per 1cm 3 .
Do not use sand-lime or hollow bricks. It's not even about the ability to withstand high temperature– they can handle this. Sand-lime brick does not conduct heat well and a room with such a stove will not be very comfortable.

For masonry mortar you will need sand, red oven clay and water. The appearance and durability of the oven directly depends on its quality and consistency. To prepare it, you should use red oven clay of medium liquid. When frozen, it should not fall off or crumble.
The masonry will be made with a thickness of 0.5 mm, in this case the precious heat will not escape quickly.
You can also use ready-made masonry mortar for construction, which is sold in stores. Usually it contains various impurities that add strength and heat resistance to the structure. In this case, it will be enough to dilute the dry mixture with water and bring it to a homogeneous state using a construction mixer.
The consistency of this solution should resemble thick sour cream. If the mortar rolls off the trowel, you need to add more dry mixture. If it turns out to be too thick, then it will be difficult to work with it and make thin seams. Add some cold water and stir again.
So, to build a furnace, we will need the following materials:

- Masonry mortar (sand, red oven clay).
- Red ceramic brick M150 – 120 pieces.
- Fireclay bricks – 40 pieces.
- Foundation material (cement, graphite, sand).
- Ruberoid.
- Asbestos cord, galvanized wire.
- Plywood or boards for creating formwork.
- Reinforcing mesh for foundation construction.
- Grate.
- Metal stove for one burner (cast iron).
- Ash pan and ash pan (blower) door.
- Cast iron firebox door.
- Chimney duct damper.
- Chimney view.
- Metal chimney cap.
Tools needed to build a furnace.
- Building level.
- Shovel
- Construction marker.
- Goniometer.
- Spatula, rule.
- Master OK.
- Measuring tape (roulette).
- Construction plumb.
Important! When laying a furnace, much depends on the quality of the clay. Ideally, use red river clay of medium fat content, which has been on outdoors at least 2 years. Make exactly as much solution as you can handle in “1 go”. The solution quickly becomes thick and difficult to work with.
Step 2. Preparing bricks for laying the stove
Before starting to lay the stove, it is necessary to lay out all the bricks in advance and prepare them according to the ordering scheme.
This stage includes dividing the brick into ½ or ¼ parts and cutting off the corners.

Study the diagram carefully and see which pieces of bricks you will need for each row.
If necessary, you can number the brick so that later it is easy to navigate which row to insert it into.
How to properly split a brick? Before “beating off” the required part of the brick, according to the diagram, you first need to make a groove. This can be done using a hacksaw or file.
To make ½ brick, make 1 groove.
For 1/6 or 1/8 brick, make a groove on all sides of the brick.
Step 3. Choosing a location for the oven
This is a very important stage in laying the stove, which is advisable to carry out at the stage of building a house.
But there are times when the decision to lay a stove arises among home owners already in the process of using the dacha. In this case, determine the place where it will be easiest to remove the chimney.

It is also important to evaluate the distance between the stove and windows and doors. After all, cold air blowing from the doors can interfere with the natural circulation of heat in the house, reducing the efficiency of the stove.
In addition, the stove should not interfere with free movement around the room. It should become one with the space without creating inconvenience. In many ways, the placement of the stove depends on the purpose.
The heating and cooking model is best placed in the kitchen, and the fireplace stove will look beautiful in the living room.
- The distance to the nearest wall should be at least 25 cm.
- The chimney must not pass through beams.
- The floor and wall will have to be lined with fire-resistant material.
- It is better to place the fireplace near the inner wall of the house. To increase efficiency, it makes sense to install a stove in the space between the kitchen and living room. Thus, one stove will heat two rooms at once.
An excellent place to place the stove is the corner of the room, unless there is an entrance door opposite the corner, from which cold air will blow out the flame.
Step 4. Construction of the foundation
To build a brick kiln, it is necessary to make a separate foundation. If it is laid during the same cycle as the construction of a house, completing it is not a difficult task.

If you decide to lay the stove after the completion of the general construction, then it will be necessary to remove part of the finished floor and go deep into the ground.
Why is it so important to perform a separate foundation? A brick oven, no matter what size it is, has a lot of weight, which will create a lot of pressure on the foundation. When shrinking, the house will sag. This should in no way affect the shape or design of the stove.
That is, the general foundation of the house should not pull the stove along with it, as this can lead to a violation of its sealing and deterioration of its technical properties.


Attention! Before laying bricks on the mortar, lay out all the bricks “dry”. First, it will allow you to see if you have enough material. And secondly, you can still draft stage see difficult moments that you will have to pay special attention to.
Step 5. Laying the stove
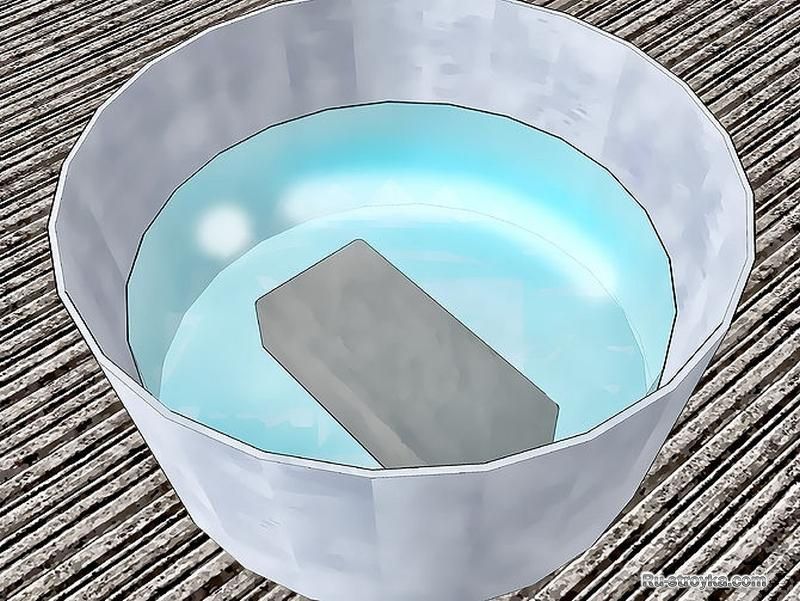
Attention! Before laying the stove, place the bricks in a bowl of cold water so that they absorb moisture. This way they will not draw water from the masonry mortar.

Fill this gap with sand. The entire area under the stove will be practically occupied by grates, which will ensure good and easy care of the stove, as well as complete burning of the wood.
We block the ash door with a brick.

Installation of the combustion door
We install the combustion door, having previously wrapped it with asbestos cord. To make it easier to install, place the door on a thick wire and support it with bricks on both sides. Then these bricks will need to be removed.

- 6th row. Closes the furnace door.
Here we begin to form a smoke channel pipe, creating overlaps for two vertical channels.
We lay the base of the firebox, which is made of fireclay bricks.
- From rows 7-9 we lay out the firebox with fireclay bricks according to the diagram.
In this row, two bricks covering the grate should be cut at an angle of 45 degrees.
- Row 10 - cover the oven. We create a partition from brick, raising it by 2 cm. Apply a clay-sand mortar to the oven, to the level of the partition. We are preparing a place for installing a hob.
It is necessary to make recesses in the bricks for reliable fixation with the slab and create thermal niches for the expansion of the metal. Immediately place the slab on a dry surface and number the bricks - this will make it easy for you to later lay the brick on the mortar and avoid making mistakes with the correct recesses for the slab.
We lay an asbestos strip on the brick (to expand the metal).


Step 6. Exit the chimney through the roof
This is a responsible step that should ensure complete safety of the furnace operation.
Follow the SNIP standards when installing a brick pipe through the roof. According to these standards, the gap between the roof and the chimney must be at least 13-25 cm.
Insulation is required around the pipe passage through the roof. thermal insulation materials. This will provide reliable protection from cold air blasts and ensure reliable fire safety.
If the stove is installed in an already residential building with finished roof, it will be necessary to remove part of the roof. After installing the pipe, you will need to completely ensure the integrity of the roof in this place so that during rain or snow, moisture does not get inside.
To waterproof a stone pipe, a special plate is used, which resembles a kind of pedestal around the chimney. The joining of slate and metal plate is done using sealant.

If you want to simplify the task, then the chimney will not be difficult to complete using steel pipes kind of sandwich. They have a stylish look and are easy to assemble. In addition, they have much less weight than brick and will not create as much pressure on the foundation.
When determining the required height of the chimney, be guided not only by the height of the roof, but also by the height of the ridge.
The efficiency of heating the room and the presence of draft directly depend on correctly calculated parameters.

The edge of the pipe must protrude above the “ridge” of the roof by at least 0.5 meters, otherwise the turbulence that forms around the roof can prevent good draft and will constantly blow cold air into the chimney.
We complete the construction of the chimney with a metal grate. It will prevent debris from entering the chimney.
We put a metal cap on top, which reliably protects the pipe from precipitation.
Step 7. Furnace lining
There are many ways to beautifully veneer a stove for a summer cottage.

As decorative material clinker tiles, tiles, decorative plaster, artificial stone, etc. can be used.
Or you can simply leave the stove in its original form, especially if you bought high-quality, beautiful brick.
Please note that any facing material reduces heat transfer. Therefore, if you do not want to lose thermal properties, you can cover the oven thin layer decorative plaster.
Step 8. Lighting the stove
After completely lining the furnace, you need to take a technological break for 10-14 days until the structure is completely dried. Leave the door wide open.

When you are sure that the masonry mortar is completely dry, you can carry out the first test firing of the stove. There is no need to rush and immediately, after laying, light the firewood.
Premature lighting of a damp stove can cause it to crack. For the first time, use ¼ of the firewood, add small logs. This will allow the structure to dry well from the inside. Do not exceed maximum temperature at 60-65 degrees in the first week of operation.
- Do not use trash for kindling.
- The firebox door must be closed when lighting.
- Warm up the oven gradually, do not immediately turn on high heat.
- Use high-quality, well-dried firewood.
For ease of use of a country stove, you can make a stylish one with your own hands, which will become decorative and functional element at home.
As you can see, if you follow a clear ordering scheme, it is not so difficult to build a beautiful and high-quality country stove.
Video: Laying a brick kiln “dry”
Below we provide detailed master class on laying a brick stove for a summer cottage.
Video. Master class on laying a stove for a summer residence
At a time when a stationary solid fuel stove was the only existing means of heating a home, the profession of a stove maker enjoyed great popularity and respect. Today, to arrange individual heating, you can use many different units operating on a wide variety of fuels, but brick stoves still remain in demand.
Nowadays, finding a truly competent stove maker is not an easy task. And you don’t need to do this, because you can build a full-fledged stove with your own hands.
Before you start self-masonry ovens, familiarize yourself with the features of existing varieties of such units. The stoves are:
- heating. Designed exclusively for heating. Such ovens have an extremely simple design and can be installed in the shortest possible time and with the least effort compared to other types of structures;
- heating and cooking systems. The most popular and sought after option. At the same time they heat the house and allow you to cook food;
There are also improved types of heating and cooking furnaces with built-in kitchen stove or even a full-fledged oven.

IN separate category include fireplace stoves. This is an excellent option for a modern private home. Such designs do an excellent job of heating rooms and have an attractive appearance. A properly laid out and finished fireplace stove will be a worthy addition to the interior of both a small country house and an expensive private villa.

Scheme modern stoves They are distinguished not only by their purpose, but also by their shape. Most often, rectangular and square-shaped units are installed in private homes. But if you wish, you can lay out a round oven. Select a specific option taking into account the characteristics of the room and your own preferences.

Of course, you can lay out the oven yourself, and numerous diagrams will help you do this in the shortest possible time. However, when performing such work, remember that any stove, regardless of its purpose, shape and other characteristics, must fully comply with current fire safety standards.
Choosing a location and type of foundation for the stove

Before starting to lay the stove, pay due attention to finding a place to place it. For example, if the unit is placed in the middle of the room, it will be able to give out much more heat, warming up from all sides and evenly heating the air around.
If you place the stove against the wall (and this option is used most often), cold air will constantly “walk” near the floor. Therefore in in this regard you need to make the decision yourself.
Preliminarily determine the installation location of the combustion door. This element must be installed so that in the future you can load fuel into the stove as conveniently and quickly as possible, without spreading debris from firewood or coal throughout the house. Usually the fire door is located on the side of the kitchen or some little-trafficked room.
The finished brick stove will have quite an impressive weight. In order for the device to stand as reliably and as long as possible, you need to prepare an individual concrete foundation for it.
Furnace design features
Traditional brick ovens have a fairly simple design. However, the apparent simplicity at first glance allows one to achieve very high levels of productivity and efficiency.

The main elements of the brick stove body are the firebox and chimney. Cooking stoves are additionally equipped with stoves and/or ovens; it is also possible to install a tank for heating water.

The firebox is the main part of the stove unit. It is into the firebox that firewood or other fuel used for heating is loaded. The firebox can have a wide variety of sizes. When determining suitable dimensions, several important factors need to be taken into account, such as:
- type of fuel used. If you will heat the stove with wood, make a firebox 50-100 cm high;
- required performance;
- required volume.
To arrange the firebox, use refractory bricks. The thickness of the walls of the structure in question cannot be less than half a brick.
The chimney is also one of the main elements of any heating stove. The chimney is designed to remove flue gases with various harmful inclusions formed during the operation of the stove.

At the chimney design stage, try to think through everything so that its design has a minimum number of bends and turns. Ideally, the chimney should be completely vertical. Any kind of bends will lead to deterioration of traction and a decrease in the efficiency of heating the room.
To the number important elements The design of a brick oven includes an ash pan chamber. Ash will collect in this compartment. Also, through the ash pan, air is supplied inside the unit to the fuel. The ash chamber is located under the grate and is equipped with its own door. Traditionally, the height of the ash pit is 3 bricks.
What mortar should I use for masonry?
The reliability and durability of the finished stove directly depends on the quality of the masonry mortar. The masonry will be carried out using a sand-clay based mortar.
There is nothing complicated in preparing the solution. Take clay, fill it with water and soak it. Sift the mixture through a sieve and then stir into “clay milk.” Finally, add some water to obtain a sufficiently viscous and plastic solution.

Remember, the reliability and strength of the stove directly depends on the correct preparation of the masonry mortar. If you do everything right, the stove will effectively heat your home for many years. Violate the technology or decide to save a lot on materials - the thermal unit is unlikely to be able to fully reveal its potential and stand for any length of time.

Main stages and important features of furnace laying
From the moment the foundation is poured to the start of construction, 3-4 weeks should pass. During this time, the base will gain the necessary strength and will be able to withstand the weight of the brick oven. The work in question requires maximum responsibility and concentration on the part of the performer. Any mistakes can lead to irreparable consequences, so get ready for work in advance and highlight sufficient quantity time to complete it.

The laying of the furnace is carried out in several stages.
First stage. Lay out the ash pan and the lower part of the first cap from brick. Carry out the laying using the previously discussed sand-clay mortar.
Second phase. Install the ash pan door into the masonry. Use galvanized wire to secure the door.

Third stage.

Fourth stage. Mount the firebox. Line the inside of this compartment with fire bricks. Place the bricks “on edge”. At this stage you need to use a special masonry mortar. It is prepared in the same way as the standard one, but instead of simple clay, refractory clay is used, i.e. fireclay. Secure the combustion chamber door using a steel plate and the wire you are already familiar with.
Fifth stage. Continue standard laying until you reach the 12th row. Having reached this row, close the combustion chamber and lay the tiles with burners evenly. This stove must be made of cast iron. Check the evenness of the installation using a building level.
Sixth stage. Lay out the first cap. It is erected at the left edge of the stove. At the same stage, a canal for the summer passage is being built.
Seventh stage. Install the stove and line the walls of the cooking compartment. Lay out the previously mentioned lower cap.
Eighth stage. Install the valve for the mentioned summer passage channel. This valve is located in inner corner cooking compartments.
Ninth stage. Lay the masonry up to the 20th row. When you reach this row, close the brewing compartment and the first hood. Be sure to leave the required number of holes in the solid masonry for the summer passage and lifting channel, as well as the vent for the cooking compartment. Place bricks on steel corners - this way you will ensure more high strength and reliability of the stove.
Tenth stage. Close the portal of the brewing compartment with hinged fireplace doors. It is better if the doors have heat-resistant glass inserts. This solution will allow you to monitor the fuel combustion process and admire the flame.
Eleventh stage. Install cleaning doors for easy soot removal. For installation, choose a location that is easiest for you to get to.
Twelfth stage. Lay out the walls of the hood almost to the top edge of the wall opening. Cover the top of the stove with a couple of rows of bricks. Fill the gap between the top of the stove and the jumper with mineral wool. Thanks to this, additional thermal insulation will be provided and heating efficiency will be slightly increased.
Thirteenth stage. Place a decorative band around the upper perimeter of the unit.
Fourteenth stage. Proceed with the installation of the chimney. It is better if the chimney is made of brick. This design will last much longer than the same metal or asbestos pipes.
At the end, all you have to do is lay out the entire chimney and, if desired, finish the exterior of the stove. The simplest option is plastering. For the rest, be guided by your own preferences and available budget.

Thus, although laying the stove is not a simple task, it can be done with your own hands. It is enough to simply understand the technology and follow the instructions in everything. Remember, the materials for work must be of the highest quality. And stove designs that have been tested over the years will allow you to independently build a unit that will efficiently heat your home for many years without any problems or complaints.
Good luck!
Video - Do-it-yourself stove laying diagrams