DIY dressing room drawing. Do-it-yourself dressing room: drawings and diagrams, photos, useful recommendations for arrangement
Whatever they do - offices, libraries, sports corners and original home cinemas. And owners of an impressive collection of shoes certainly want to have a dressing room in their apartment. It is worth admitting that this still makes sense. It’s easier to always know where and what the owners of an apartment or house have than to run around in a hurry and look for something. If the dimensions allow, then a dressing room may well appear in the open spaces of the home.
To begin with, it’s worth thinking about whether such a room is needed in principle?
Well, it has many advantages:
- Huge amount of storage space;
- Things will be in one place;
- A mountain of shoes in the hallway won’t get in the way;
- Space will be freed up in other rooms;
- You can expand the functionality if space allows - put a table with a mirror, and you will get a “women’s corner”.
.bmp_.jpg)
However, a good dressing room is not necessarily a separate room. Sometimes a part is already fenced off finished room, most often, bedrooms. This is very convenient, especially if everyone in the family stands in different time: no one makes noise and no one bothers anyone. But sometimes, when building a house, the project immediately includes the presence of a separate room for a wardrobe - this room should not be adjacent or a passage, so you will have to think carefully about the layout.
Another undoubted advantage of a dressing room is the ability to customize it to suit yourself. That is, representatives of the fair sex can leave themselves space not only for clothes and shoes, but also for various jewelry and accessories.
The most popular are hat holders, bag hangers and various devices, on which you can fit a large amount of jewelry and jewelry.
How to make a dressing room
Most often, there is a dressing room made from a storage room. True, sometimes the dressing room turns back into a storage room - there is enough space to store anything.
When planning a room, you need to consider:
- Personal needs and requirements;
- Room size;
- Comfortable furniture.
Interestingly, cabinet furniture is not suitable for a dressing room. They come to the rescue modular options– they allow you to rearrange and combine furniture, making the most efficient use of the allocated space. It is also important that the dressing room is separated from the rest of the apartment. Screens and fabric are often used, but this is not the most practical option - they deteriorate and get dirty too quickly. Another thing is ordinary doors. In fact, there are not many requirements: reliability, convenience and suitable for design styling. As a rule, wooden doors are chosen, but this does not mean that they are not made from other materials.
The transparent glass door looks quite interesting until you see the owners' underwear behind it. It is better to choose reinforced and durable frosted glass, perhaps even with a pattern or engraving.
Plastic doors are much less common, but they do exist. The imagination of designers is not limited by any boundaries. Doors are made with porthole windows, acidic shades, strange asymmetrical shapes, just give free rein. But still, adequate experts recommend wooden doors of traditional shapes.
What and how to make a dressing room in a room
Usually, in order to update the interior and have a dressing room in the room, they simply fence off part of the living room space.
They do this using:
- Furniture;
- Plasterboard structures;
- Textiles.

The construction of a full-fledged plasterboard wall will not only separate part of the room, but will turn the dressing room into separate room. In addition, a wide wardrobe can be used as a partition. This is no less functional, and will also reliably protect you from prying eyes.
The simplest option is fencing with textiles, in particular, we are talking about thick curtains. They can be selected in the same colors and with the same pattern as the textiles on the windows.
Making a dressing room with your own hands
Before you start building and arranging your wardrobe yourself, you need to take into account several nuances.
Namely:
- For outerwear for the autumn-spring season, the height of the compartment should be from 100 cm, and it is better to add about 10 cm to this height;
- The height of the compartments for warm outerwear is from 150 cm;
- For hats and shoes, the size should be selected according to the formula - the height of the largest item (for example, a hat or high boots), plus 15 cm;
- Linen shelves should be from 20 to 45 cm.

In addition, you need to take into account the depth of the shelves so that clothes and linen do not fall out, but are well placed in the chosen places.
You need to add 10 cm to the width of the hangers - the optimal depth is ready. And the width of the shelves is usually from 5 (for T-shirts) to 25 cm (for warm clothes) for each item.
Making a dressing room with your own hands
Typically, a homemade dressing room is divided into 4 conventional zones:
- For changing clothes;
- For outerwear;
- For short clothes;
- For shoes.
You can do without a place to change clothes if you need to save space. But if there is one, then it is recommended to equip the dressing room with a large mirror.
What material to make your own wardrobe from?
It's not always possible to choose the right furniture for a wardrobe in a store or to separate from an old one. The solution is simple - build this very furniture with your own hands, showing a master class.
Typically, you can make and assemble a wardrobe yourself from the following materials:
- Trees;
- Plastic;
- Metal.

Further finishing is done with glass wallpaper, ceramic tiles and many other materials at the request of the owners of the premises.
It is worth considering some nuances when finishing - it is advisable to equip the shelves with additional lighting, so it is necessary to make holes for recessed lamps.
Everything else depends on the layout of the dressing room itself, and that, in turn, depends on the architecture of the room. Most often, these are angular or straight structures, but there are also other options, for example, linear or parallel.
Options and diagrams for how to make a dressing room with your own hands
Interior arrangement the dressing room also has its own various options, ideas and schemes.
For example:
- Location along one wall;
- Shelves on the sides opposite each other for walk-through spaces;
- U-shaped;
- L-shaped;
- Retractable configurations.

Such options for placing shelves allow you to place all the necessary things as comfortably and conveniently as possible, and even a little more.
The main thing is not to forget about ventilation, since the dressing room must be dry. This way things will be stored longer, and also, the risk of fungus and mold is minimized.
Work plan
Of course, you can look for something ready-made or turn to the experts. However, nothing prevents you from trying to make such a dressing room yourself. The color scheme is selected in accordance with personal taste preferences and the style of the room. The main thing is that the dressing room is comfortable and versatile.
The work plan is almost the same:
- All work begins with marking and assembling the profile frame on which the wardrobe will be attached. The profiles must be securely fastened - it is even advisable to strengthen them with additional self-tapping screws.
- The structure is sheathed on both sides plasterboard sheets– communications and electrical wiring can be hidden in the niche resulting from the cladding.
- Tape all seams and putty well.
- Carry out further finishing touches - paint or wallpaper.
- Then it is laid flooring- at the choice of the owners. Usually this is tile, linoleum or parquet.
- Then shelves, cabinets, drawers, hangers are installed and arranged, that is, the dressing room is filled with contents.
- If there is a door to the room, and it suits the style, then there is absolutely no need to change it. But, if it is not there, but its presence is assumed, then the door needs to be installed.
- The next stage is lighting and ventilation. Wiring is installed, switches and sockets are installed, and good system ventilation so that clothes do not deteriorate.

Can add additional elements furniture - a comfortable banquette or a small sofa, a cabinet, poufs and, of course, a large mirror.
Additionally, you can add a small stool (ladder) so that you can easily get any things from the upper shelves.
There is no need for unnecessary accessories - you can dilute the shades with bright pillows or unusual upholstery colors. There is never too much lighting - not only should there be built-in lamps in the dressing room, but also wall sconces - a full-fledged chandelier, especially of an oversized design, will only get in the way.
Cozy do-it-yourself dressing room (video)
Of course, a good and spacious dressing room is every girl’s dream. You can create it with your own hands, just remember that responsible preparation and rational planning can provide an almost ideal result even if it’s not too experienced craftsmen. Go for it!
Don't know how to optimally use space? Where to put things that have already accumulated a lot? The perfect solution- make a dressing room from the pantry. Examples of design, secrets of arrangement, thanks to which your things will always be at hand.
It's great when you have your own dressing room, or at least a convenient nook for changing clothes. I currently only have a corner bedroom with an awkward niche, which I would like to adapt into a makeshift wardrobe. But faced with a large selection of frame furniture on the one hand, and inspiring DIY projects on the other, I began to doubt what to spend my energy on to realize what I already have in my head. How are things going for you? If you intend to make a wardrobe in minimum budget, using only blanks from Leroy Merlin (Amazon, Ikea, the list goes on), then this is your place.
Dressing room from a storage room in Khrushchev
Having a storage room in an apartment is a priceless treasure for those people who always lack space. Make it out of the pantry cozy place for dressing in several ways. For example, in a Khrushchev building, a pantry can be replaced with a closet.
To do this you need to follow these steps:
Advice
If the door opens inward or moves on rollers, then this design will save even more space; try making the door mirrored.
The dressing room will be no less attractive if it is done according to a different plan. To create a new functional space from a storage room, you need to make a drawing and update the design of the internal surfaces of the walls. The ceiling needs to be repaired. You can make the wardrobe illuminated and conduct electrical wiring inside.
If you are planning to add a light to a cabinet, find an electrical box that can provide the power source and plan the cable route. If you don't know how to do this, call a licensed electrician to help you wire and install the lights. Buy a large mirror that is installed on the door. Now we need to think about the different compartments.
More space should be allocated for long items; we must not forget about the hanger bar. In addition, you need to choose special shoe stands, on the top shelves of which hats will be stored. When DIY, the design can be modified to suit personal preferences.
The wardrobe should take into account women's comfort by providing boxes for small items. For example, they can store brushes, threads, needles and other devices.
How to make a cabinet from wooden slats?
Need more closet space? If you have enough floor space and some basic carpentry skills, you can build a closet in your bedroom, guest room, office, or hallway that will look like it's been there all along.
The first step is to build the cabinet frame and attach it to the surrounding walls. Next will be finishing the doorway and installing the door(s) to your liking. Finally the rod will be installed or you will customize the interior with rods, shelving, drawers and any other accessories you want.
Planning the construction of cabinet walls
Plan to build the frame of a 2-by-4-foot cabinet using 2/4-inch strips, making the depth at least 70 cm. You can build the frame one of two ways: build the walls on the floor and then lift them into place, or build them in place.
It is much easier to connect all the elements together on the floor if the room has a large free area to work with. But using this method, you will have to make a slight modification to the height of the cabinet walls because it is not possible to lift a 2m high wall into a 2m high space. So, build a wall 1cm shorter than the ceiling height and then install spacers or thin blocks between the top panel and the ceiling.
Beginning of work
First, mark the position of the top plate (in the picture “top plate”) and the bottom (sole plate). On the ceiling, mark both ends of the center line of the new cabinet wall. Measure 1 3/4 inches (half the width of the top 2-by-4) on both sides of each mark. Secure parallel lines between the corresponding marks using chalk to show the position of the top bar.
Main structural elements
Then, hang a plumb line from each end of the lines and mark these points on the floor. Tape these lines with chalk to connect the floor points, indicating the position of the sole. If the cabinet has a side wall, lay out its top and bottom strips as well.
Advice
Use a frame rectangle to make sure it will be perfectly perpendicular to the front wall. Trim the bottom and top strips to the desired length.
Mark the top bar and sole for pin locations using a square and pencil.
Place each edge of the top plank on the edge against the sole of the plank to edge at both ends. Starting from the end that will be attached to existing wall, measure 1 1/2 inches and then make lines on both planks as in the picture. Starting at this end, measure and draw lines at 15 1/4 and 16 3/4 inches. Next, starting at these marks, move 16 inches each time until you reach the far end of both slats.
DIY dressing room from the pantry
The wardrobe, regardless of whether it is built-in or classic, must have a functionally designed arrangement of shelves, drawers, clothes hangers, etc. Drawers must be placed in the lower zone, at a distance of up to 120 cm from the floor, in order to see what is in them. Wardrobe can be short or long, depending on the length of things. It is enough to install shirts, trousers, jackets, blouses in a closet 90-100 cm high, or create two floors with hangers - one above the other.
The long part of the closet includes coats and dresses, which require about 150 cm. Shelves can be placed in any part and at any height in the closet.
A small pantry room can easily be converted into a multifunctional wardrobe and will become excellent option from point of view small apartments who do not have enough space for comfort. You can store clothes, household items, small items and anything else that creates visual clutter in it. Now all this will be hidden from view in a convenient pantry, transformed into a closet with many shelves and niches that will be spacious enough for any needs.
Special systems consist of many elements:
- pipe products;
- brackets;
- shelves;
- door.
You can order this design in a furniture showroom, having previously indicated required size. Then all that remains is to assemble the pipes. In this way, not only sliding wardrobes are assembled, but also exhibition stands, racks for office premises and much more.
Advantage frame structure provides the ability to change the position of the shelves at any time.
Wardrobe options
A dressing room can be made using drywall. This option involves the execution of drawings at all stages of work. Before assembling and arranging the elements, it is necessary to accurately calculate the size of all parts and place the data on the drawing diagram.
Necessary steps
- apply the layout to the wall;
- make frames from wooden beams;
- to arrange the closet, you need to start with beams that will be placed horizontally next to the ceiling. They will serve as a guiding element;
- then do vertical beams. Their distance from each other is determined based on the size of the drywall sheets. It should be no more than 70 cm;
- the shelves will be attached using cross beams;
- cover the frame with plasterboard;
- it is very convenient to finish both sides, not forgetting about thermal insulation. Hide the wire inside to provide high quality lighting;
- on final stage it is necessary to trim the drywall from the outside and inside, secure the shelves.
In small pantries, you can make shelving yourself. Design the structure using adhesive film, varnish, paint, or cover it with veneer.
How to install a wardrobe system?
Cabinets come in all shapes and sizes, but they all have one thing... general property, is that they are all not big enough. No matter how small or large our closet is, we inevitably manage to fill every available inch. As a result, we will still not have enough space.
Nai The best decision The problem appears to be in the following steps:
- minimizing the good we have accumulated (good luck!);
- installing a storage organizer that will make better use of every available cubic centimeter;
- using a wardrobe system to improve storage.
Wardrobe systems make the most of space and ensure accessibility of things. Which, in turn, makes our life much easier.
They come in several types:
- modular;
- professional;
- hanging.
Modular systems can be installed by cabinet specialists, or you can go the do-it-yourself route and install your own ready-to-assemble melamine or wood panel kits.
Professionally installed systems can be extremely efficient, effective and expensive. DIY systems are more affordable, and most are relatively easy to assemble and install if you have a few basic DIY skills.
Wall hung wardrobe systems are also relatively easy to install and can be a great solution for some types of organizations. The best solution is often a combination of several types of system wardrobes, which allow you to use even non-standard or inconvenient space.
Planning
Develop a plan for your closet. When choosing the best types of organization, focus on what you want to store in it. Using a tape measure, check the hanging length of dresses, coats, shirts, blouses and trousers. Then figure out how much space you need for shoes, hanging rods, and clothing shelves to get to a point where they aren't overcrowded.
Advice
Plan to place items you use frequently on open shelves. Top shelves are great for bulky items, sweaters, hats and the like.
Make a rough drawing on graph paper, including basic dimensions. It will serve as a guide for working out your needs. To do this, you need to know the sizes of storage systems that you can use.
Hanging wardrobe systems: how to make it yourself?
In a simple hanging organization system, shelves are attached to the wall via hooks, and diagonal metal supports are attached to each end of the shelf to provide increased support.
Start with cleaning. If there are any items left in the wardrobe, remove them using a nail puller or similar tool. Before any installation, you need to seal the holes with putty and paint, since this step will be much more difficult if you start doing it after installing the shelves.
Often it is kits that save your time and money. If you buy a kit, make sure it has everything you need and comes with all the parts you need. If you are confident in your measurements, use a drill to drill holes for the shelves and brackets so you can simply hang the set you purchased on the wall. Otherwise, you will have to cut the parts using a hacksaw.
There are two main types of hanging shelving:
- some use a horizontal suspended track with vertical mounting with equal intervals between standard shelves that can be adjusted;
- the other type is a non-adjustable suspension system that uses brackets or brackets.
Installation of wardrobe racks
With a simple hanging organization system, shelves are attached to the wall via hooks, and diagonal metal supports are attached to each shelf to provide increased support.
Before installation, draw on the wall where you are going to place the structure. It is okay to attach shelves to drywall, but keep in mind that it is important to stud the shelves if they will be subject to heavy loads. Resize the shelves as needed using wire cutters or a hacksaw. Attach rubber plugs to the cut ends.
Drill holes along the mounting lines using a level.
- Place a level on the wall where you want to attach your first shelf. Draw a line along the level to mark this position.
- Use a drill bit to make a hole for an anchor hook that will attach the shelf to the wall. The shelving manufacturer must specify the size of this hole.
- Place the anchor hook into the hole. Tighten it firmly. Duplicate this step to insert another hook at the opposite end of the shelf. (Please note that you do not need to use anchor hooks if you are drilling directly into the wall with self-tapping screws).
- Anchor the shelf so that it sits on two anchor hooks.
- At the front edge of one end of the shelf, attach a diagonal support piece using a bracket. Make sure the shelf is level and then drill a hole for the anchor hook where indicated at the base of the diagonal support.
- Install the anchor hook into this hole and secure the screw to secure the wall support. Repeat this process for the opposite end of the shelf. (Again, anchor hooks won't be needed if you're drilling directly).
- Repeat these instructions to install the remaining shelves.
Installation of guide racks
For a wall cabinet, also start by drawing on the wall where you want the top track of the shelving system to be. Plan to attach the top shelf at an accessible height and the runner above it, horizontally, about 6 inches above.
- Use a level and pencil to draw a line 6 inches above where you want the top shelf. Using fastener, mark the location of each wall mount.
- On each wall, trim the hanging (horizontal) track to match the width of the closet storage area. Have a helper hold the track in place while you insert screws into each available opening. Make sure the track is securely installed.
- Place a standard shelf (the long vertical track that you attach shelves to) in position on the track. It is best to leave a distance of no more than 10 cm between the end of the shelf and the first holder (the same rule applies to the last holder) and, if possible, install the holders above the mounting location. Make sure the holder is vertical and then insert a screw through the center of the holder and into the pin (use extended anchor hooks if you can't attach to the pin, but keep in mind that they will support less weight).
- Place additional holders at a distance of 40 to 80 cm from each other, simply moving them along the path. If necessary, cut them to length using bolt cutters or a hacksaw and cover the cut ends with rubber end caps.

What girl doesn’t dream of more spacious storage for clothes and shoes. But opportunities do not always allow without loss of precious square meters X usable area solve these issues. Even if there is enough space, a walk-in closet is a very difficult project. It is possible to arrange such a room with your own hands - let's see how to organize everything.
Pros of a dressing room
In the majority small apartments A closet is used to store clothes; many people have it in private homes. But separate, even small room, allocated for such tasks, is much better.
A dressing room is very convenient and economical. In a separate room in the bedroom, hallway or in another room you can fit significantly more clothes than in the actual room. large closet, and everything that is stored there will always be at hand and in sight. No more rushing between the closet and bedside tables.
The dressing room will fit all your things: underwear, outerwear, bags, shoes and various accessories.

Another plus is that the wardrobe will allow you to remove bulky wardrobes from the apartment. This will facilitate the visual perception of space - only light furniture will remain. As a result, the whole room will only benefit from this; you can install a soft corner or other desired furniture in the living room in the place that was previously occupied by a closet. In the hallway you can remove hanging clothes from sight.

Arranging a wardrobe system with your own hands is also an opportunity to save money. It’s enough to sit down and calculate what will be more profitable: buy several cabinets, drawers for storing things, shelves to equip the space in the wardrobe, or spend money on a massive wardrobe, two or three chests of drawers and several cabinets.
A separate spacious room for clothes is multifunctional. Pillows, unnecessary blankets, and mattresses are placed here. There are always several shelves for a photo album and boxes with various little things. You can also store an ironing board here, and if the room is large, you can even arrange a laundry room.

In what cases is it not advisable to make a dressing room?
A separate room for storing outerwear, linen and shoes, and various small items is a necessary thing even for a small apartment. It’s another matter when the apartment is one-room – this is the economy segment. There is no place to steal precious space, and there is no storage room in such apartments. In this case, it is not advisable to build a wardrobe. In any other cases this functional room It will only be a plus.
 A dressing room can be arranged even in a small niche
 Materials
The modern construction market offers a lot various materials, which can be used to build a dressing room in an apartment. Drywall, wood, metal, and plastic are widely used. You can work with any materials yourself, the main thing is to purchase them in the right amount. When finishing, glass wallpaper, tiles, and paint are used as desired. Choice suitable material depends on the chosen scheme and layout of the dressing room, as well as the characteristics of the room in the apartment.
Drywall dressing room
It must be borne in mind that drywall is a material not intended for making furniture. It's still finishing construction material for leveling walls, ceilings, dry screeds for lightly loaded floors. And a wardrobe is something like furniture; drywall here will be too heavy and fragile.

Furniture solutions made from plasterboard are based on a frame that has a rather complex structure.

After the system is assembled, you will need to carefully engage in finishing work. To arrange a utility room, and the wardrobe is a kind of utility room, the labor intensity and total cost of the project along with construction work too high, and the capacity is reduced, since a durable plasterboard shelf will be at least 5 cm thick.

However, for a dressing room it is important to have a mass of blind cavities that are lined with vapor-permeable materials. Humidity will be regulated, and gypsum plaster will prevent sudden changes in the microclimate in the apartment. But neither clothes, nor shoes, nor any other things like this.
In the video: creating a dressing room from plasterboard.
Wooden wardrobe
There is no guarantee that clothes in the dressing room will be wet. Excess moisture will lead to mustiness. A wooden wardrobe will allow you to remove excess moisture - even painted wood has pores, it can pick up excess moisture vapor from the air.

Laminate has all the benefits of wood, but does not have the porosity. However, laminate has such advantages as affordable price, high strength and moisture resistance. There is just one more nuance - unlike wood, laminate is not able to breathe, and for a dressing room this is very, very important.
Laminate is a good substitute for wood, but you can use chipboard and laminated chipboard; you can often find wardrobes made of plywood.

How to make a comfortable dressing room yourself: step-by-step instructions
Start building yourself wardrobe space not difficult. There are a lot of interesting projects. It is important to choose the right the required diagram regarding the layout of the room. It is also necessary to have skills in working with wood or drywall. It is better to do the work step by step - detailed step-by-step instruction will help any home handyman.
Step No. 1 – Planning (diagrams and drawings with dimensions)
Developing the first part of the project will not be difficult and will not take much time. Now there are ready-made drawings and diagrams that only need to be adapted to a specific situation. Eat interesting ideas and for a small room, which is very important for many.
There are several popular schemes:
- Corner;
- Linear;
- L and U-shaped schemes;
- Parallel structures.

When looking at the drawings, pay attention to the dimensions. The design is developed based on how large the area is. Rooms with an area of 4 m2 are considered the most comfortable and standard. It is this kind of room that will perform its original functions of storing things.

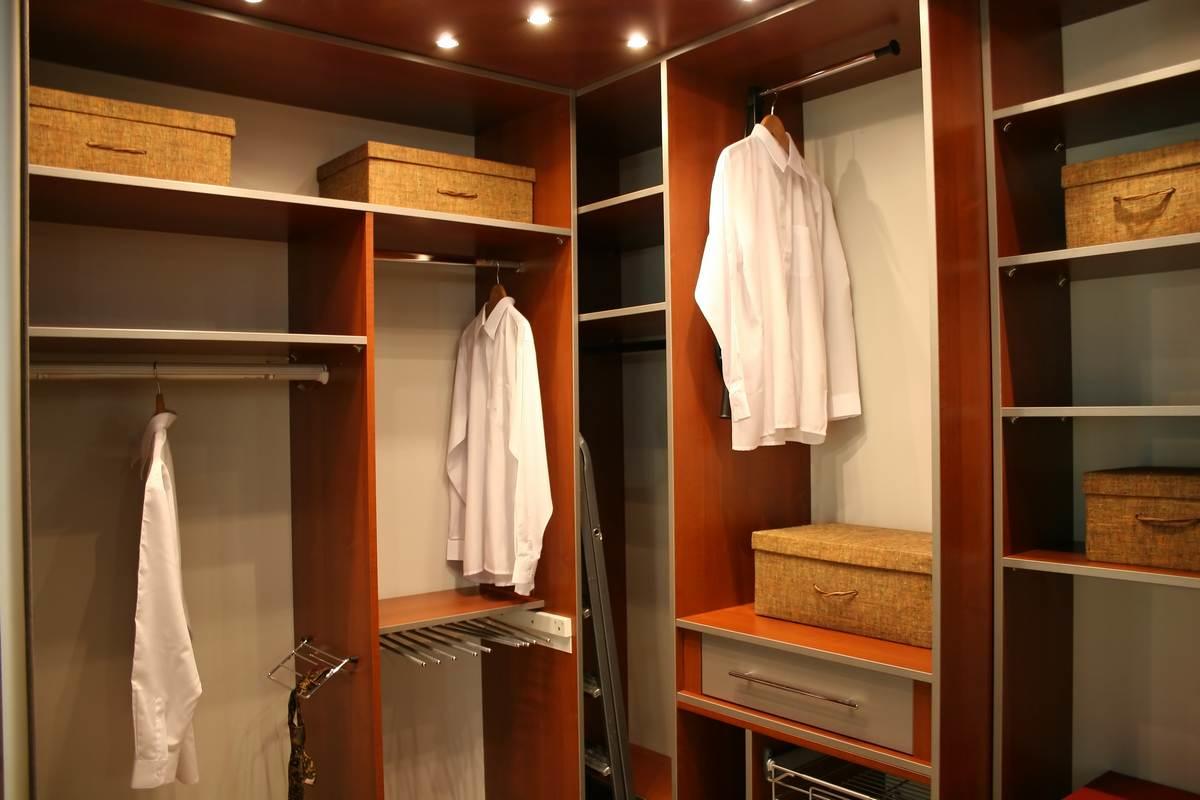
Corner dressing room
At the first stage we do the project - planning is very important. The corner design allows you to get away from optimal size 4 square meters and use less space. Even a size of 1.5x1.5 m will be sufficient for such a design.
- it is easy to work with even at home;
- after installation work no garbage remains;
- the overlap will provide minimal load on the surface;
- Plasterboard partitions are easy to finish.

You can place drawers and shelves different ways, but it is much more convenient to distribute them from both walls in the resulting room. If you use only one wall, it will be irrational. It is better to design the interior arrangement using open shelves– racks will make it easier to access clothes and also free up space. The door is chosen taking into account the limited space.


Linear design
This arrangement is convenient to use near walls. It’s easy to build such a room at home, but it’s most relevant in the bedroom. There are no beveled corners - this will facilitate the process of arranging furniture. It is easy to distribute internal elements in such rooms. You can arrange retractable hangers for clothing items. One movement of the hand is enough, and the necessary clothes will be in sight.

During the design process, you need to take into account that the optimal depth of the dressing room is 1.5 m. However, partitions inside will narrow the space - you should not install them. If the housing area allows, then narrow rooms will not be comfortable, and there will be little free space.


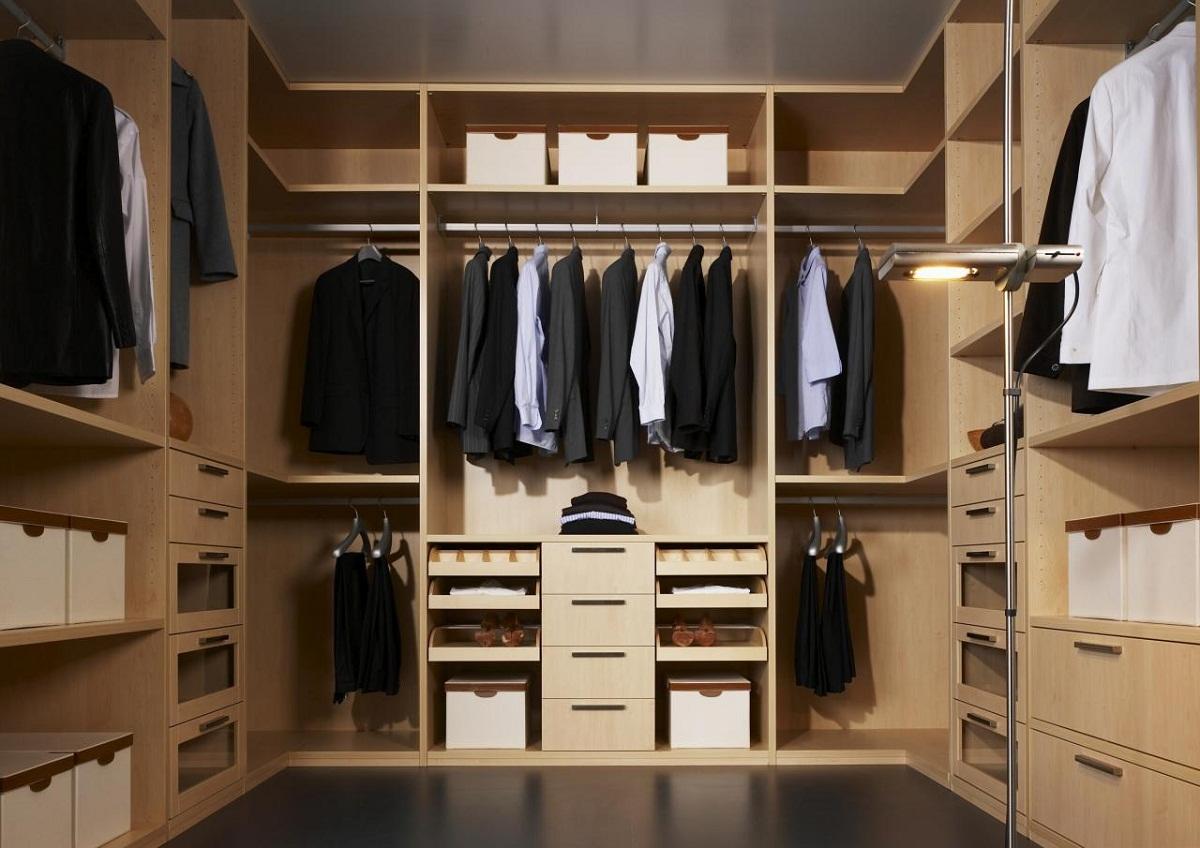
L- and U-shaped design
An L-shaped layout is when the dressing room is part of the room. The peculiarity is that it is not necessary to make a partition here. The instructions recommend using only racks open type, since the issue of saving precious space, as well as the issue of ergonomics, is very acute. The same instructions provide for the almost complete absence of any partitions in the design.
If you look at the sketch, you can clearly see that the method is very economical - to make the partition you need to purchase additional materials.


They also use designs with the letter P. They are good only for large and spacious rooms, but they allow you to place a lot of clothes and rationally fill the space.
What are the benefits of U-shaped walk-in closets:
- are highly practical and very interesting in terms of design;
- due to the unusual design, you can emphasize the interior;
- you can get optimal storage for clothes and more;
- such schemes involve a large number various boxes for small items, gloves, accessories.

If you choose the right color scheme, you will get a very simple, functional and visually attractive dressing room. Due to availability functional elements It will be very comfortable to use.


Parallel type
Designing and arranging a dressing room according to this scheme is the simplest solution. This is a popular example, often used at home by ordinary craftsmen. More often this design can be found in the hallway and storage rooms. To implement the design, it is necessary to organize only a few partitions. Separated furniture sets are also used.

This scheme is good if you arrange it in a passage room, but not in the corridor. If the room is deaf, you should choose a different project.


Step No. 2 – Installation work
Let's see how to make a dressing room. Required option chosen design work finished, location selected. All that remains is to implement the design in metal and drywall. Plywood is also suitable, you can make a structure from laminated chipboard.
Step-by-step instructions for installation work:
1. First we make markings according to the drawings and diagram.

2. A frame is assembled from a profile on which the entire structure will be attached. In these works the main thing is accuracy. Profiles should be fastened as securely as possible - they will withstand high loads.

3. When the frame is ready, you can cover it with sheets of plasterboard, plywood or chipboard on both sides. As a result, a niche is formed, into which the electrical wiring and lighting system are then hidden.

4. In the case of drywall, all the resulting seams are carefully taped with a special tape and then puttied.

In the video: DIY installation of a pantry (dressing room) made of plasterboard.
Step No. 3 – Finishing the dressing room
When the design is ready, you can move on to finishing works. There are several ways: finishing with plastic panels, regular painting or wallpaper. The last option is the simplest.
Wallpaper
Wallpaper is, of course, not the best solution, but one of the budget ones. You should first prepare the walls: clean them from dust and dirt, if necessary, fill up uneven areas and joints (in the case of drywall). The gluing technology is no different from the usual one. Wallpaper can be chosen to suit personal taste.

Ceiling
Here you can use plasterboard systems, pvc panels, lining - you can do whatever you want. But you shouldn’t complicate the ceiling design too much. It is enough for the ceiling to hide the wiring and lamps. It would be enough. The ceiling can be painted or wallpapered.

Doors
It is best to design the structure in such a way as to use sliding doors. Not only are they functional, but they can also add flair to a design. Even children can use such a door - it’s so easy. Install sliding systems also very simple.

A corner dressing room requires a slightly different approach. Here you need an appropriate door - a radius or accordion door.

Step No. 4 – Lighting and ventilation
This point should be taken Special attention. There should be enough lighting. If there is natural lighting, then this is good, but it is better to organize additional lighting - it can be any lighting. The number of lamps is determined by the size of the room. So, in a small dressing room, only two light sources are enough.

It would also be useful to illuminate the linen drawers internally using LED strips.

It is very important to choose the right ventilation system for the dressing room. It allows you to automatically ventilate the room and guarantees protection from unpleasant odors and dust. It is better to choose special ventilation solutions.

If you don’t want to buy an expensive option, then you can get by by installing a fan. It will also need an inlet hole. Power is calculated using the following formula - the volume of the room is multiplied by 1.5. This will be the final performance.

Step No. 5 – Arrangement: filling and storage systems
It is necessary not only to assemble the structure and install light there; the internal content is much more important. It also needs to be designed. The ergonomics and functionality of the dressing room depend on the correct filling.
Shelves
It is better to make the shelves retractable and place them so that there is 35-40 cm between them. The depth is made more than 40 cm. Wide shelves make it convenient to stack clothes. In cases with long shelves, one or more additional supports are required.

Shelving
When choosing the location of the shelving in the room, do not forget that they store linen, as well as various small items. You need to immediately think about what will be stored on open shelves. This practical solution, so they should be made in different sizes. It is important to identify the needs and you can confidently act.

Hangers
The filling of the dressing room should be modern. Innovation comes to the rescue. There are special hangers for trousers and skirts; clothes are fixed on them very gently, and there are no wrinkled marks left. The hangers themselves pull out from the niche. They have different sizes, which is very convenient.

You can also purchase a convenient device – a hanger organizer. The device is used to organize things.

You can install a pantograph - this is a kind of elevator. It will allow you to use the dressing room space right up to the ceiling and there will be no damage to comfort. The elevator is attached to the crossbars on the sides and to the rear wall. The only drawback is that it can only be used with light clothing.

Shoe storage systems
You'll have to buy a special module. It is a compact retractable system. There are also hanging organizers and stands. A specific solution is selected based on their needs and the size of the room.

By using sliding doors In the bedroom, the dressing room is separated from the rest of the area. The door facade must be made in such a way that it fits into the design. But such ideas are only relevant for spacious rooms. Look how it looks in the photo.

In one of the cottages, the attic was used as a dressing room. The walls are high enough to accommodate hangers for coats, fur coats, and jackets. Shoes and accessories are stored in narrow spaces. But this is true for a private home.

If there is a staircase at home, there is always free space under it. Here you can arrange a dressing room - it will be hidden from view and will not hide the space. It's perfect. You can assemble special retractable structures and a body made of wood and plywood, which will be hidden in the space under the stairs.
Take a look at what the dressing room looks like in the photo. Although the staircase is at an angle, this did not prevent us from using the space.

In order to create a comfortable environment in the interior of a house or apartment, it is important to properly organize the space.
Today, special areas are created for storing wardrobe items or separate rooms are allocated, equipping them with the necessary things: shelves, racks, racks and modules.
Some people think that allocating space for such a purpose with a comfortable layout and fashionable design is an excess, bordering on luxury.
But if you study examples of ready-made dressing rooms, you can see that this is possible in any residential room, and even from an ordinary storage room you can create a full-fledged dressing room with your own hands.
The main task is to decide what dimensions and layout the dressing room will have, and think through the remaining details.

DIY dressing room from a storage room of 4 sq. m, photo
Subtleties of location
When choosing the location of the area intended for storing wardrobe items, be guided by the size of the room allocated for these purposes.
Small wardrobe storage large quantity things can be equipped even in a modest-sized room. The smallest dressing rooms have dimensions of 1x1.5 and 1x2 m. In such a space of 2-3 square meters. meter you can fit drawers, hangers and a rack, and decorate the free wall with a mirror.

Small dressing room, photo
Important! The space allocated for the dressing room should be well lit: hang small light sources on the ceiling or walls in this area. It is best to opt for built-in lamp models.In the event that space is allocated for placing clothes in a living room, it is advisable to give preference modular system. This option will make it possible to change the position of the modules. In most cases, such systems are placed in the corner of the room or along the wall, so as not to take up space in the center of the room.
The second type of dressing room involves the allocation of a separate room - 12, 16 and even 18 square meters. meters, although most often it is a small storage room.
The photo shows an example of a dressing room from a small closet:

Small dressing rooms from the pantry, photo
If the layout and size of your home allows you to allocate a separate room for storing wardrobe items, then you will gain much more advantages from creating a full-fledged wardrobe system for storing things.
Main advantage similar layout lies in the possibility of dividing space into functional zones and allocating separate sections for all residents of the house.
When choosing the type of storage system and place for its location, take into account that shelves and racks should be in a convenient accessible location. If there is not enough space, install only the most necessary sections, and place elements of secondary importance, for example, a dressing table, an ironing board outside the wardrobe.

Advantages of wardrobe equipment
If you are in doubt whether it is worth equipping a dressing room in your apartment or private house and where it is better to arrange such an area, consider the advantages of having such a system:

The photo shows a sample of a built-in dressing room:

Built-in dressing rooms, photo
Before you start arranging your wardrobe, familiarize yourself with its layout options to ensure maximum comfort, functionality and ergonomics.
Layout options
There are several options for planning your wardrobe. The simplest is a linear one, similar to a long wardrobe, with monolithic walls and sliding doors.
If such a wardrobe does not occupy the entire room, they are used for delimitation. plasterboard partitions. If there is no need for a reliable space divider, then use a beautiful curtain for this purpose.

Small wardrobe rooms, photo
It should be noted that the linear type layout is also suitable for wardrobes located in passage areas. If a separate room is allocated for storing things, install the racks along the wall or parallel to each other, and hang a mirror on the wall perpendicular to them.
The wardrobe can also be arranged in the corner. Dressing rooms with corner layout, allow you to save space. To allocate more space for storage, you can use unusual radius doors, having a hemispherical configuration.

Doors for a dressing room, photo
If the room is spacious, an excellent solution would be to organize a storage system in the shape of the letter P. As filling, as structural elements; such a wardrobe should be equipped with traditional shelving; special laundry baskets, convenient hangers, hooks, and an ironing compartment are also suitable.

How to equip a dressing room, photo
Small wardrobe systems can accommodate a limited number of modules, so you need to choose only those that are needed most.
The main areas that make up the dressing room include:
- a high section designed for outerwear (coats, jackets, raincoats) with a bar located at a 1.5-meter height;
- section 1 meter high - for shortened clothes;
- shoe compartment;
- shelves for hats and things that you will not need at certain times of the year.
The minimum width of the dressing room is 1-1.2 m.
For example, in a dressing room of 4 sq.m in the bedroom, as in the photo, these sections will be enough:

Photos of small dressing rooms 4 sq. meters
When thinking about wardrobe equipment, be guided by the needs of all residents. Women need an area with a mirror, for men it is more important to quickly find the necessary items for everyday wear, so the practicality of storage compartments is brought to the fore.
The system for storing children's clothing also needs increased attention: the shelves are located at a lower height, differ in shape and have a smaller volume.
Recommendation: the wardrobe, which will be used by the fairer sex, can be equipped with small chests, drawers for accessories and others useful devices, created to organize order and demonstrate original design.IN Lately Products with the ability to transform have come into fashion: pieces of furniture - transformers, customized to the required parameters. A similar system is appropriate for both a small dressing area and a separate room.

How to make a dressing room in a small room, photo
It is more rational to place a rod for attaching hangers in the middle of a modern dressing room, and place racks and small shelves on the sides. In reality, closet organization ideas are varied, and before you start organizing your own closet, explore several layout options.
Corner wardrobe
For small rooms Wardrobe systems with a corner configuration are perfect. They can be placed in any free corner of the room and used in rooms with an area of 20 square meters. m. A space of 4 square meters is enough to place things. m.
Taking into account the layout and other features of the room, sketch out the wardrobe.
Such systems can have different configurations:

Based on the chosen option, you can place various equipment in the wardrobe. For corner systems with a modest area, simple models are preferred.
Walk-through wardrobe option
Sometimes there is a need to organize a storage system in a room that is a walk-through room. In such a situation, the racks are positioned in such a way as not to block the passage to the adjacent room. For example, this is possible in apartments with a layout in which the bathroom and bedroom are located next to each other.

Narrow dressing room, photo
What should you take into account when organizing your space in this way? First of all, carefully plan the location of shelves and other sections. Place them so that they do not interfere, but do not lose capacity. Ordinary doors that open away from you or, conversely, towards you, are not ergonomic; they take up a lot of space. In such a situation, compartment doors (based on the principle of a wardrobe) are more suitable.
A convenient option is to locate adjacent rooms in the same axial plane, and not diagonally. This allows you to install the racks in such a way that they do not interfere with movement and create an attractive appearance of the entire area.
In the attic
Arranging a dressing room with your own hands will give you the opportunity to adapt to the features of the room and its layout. You can easily arrange your wardrobe even in the attic.
Select parts for wardrobe systems taking into account their fit into sloping spaces and attic areas with low ceilings.
Important! It is not recommended to equip a system for storing things in the attic space if its height is less than two meters.Do not forget about convenience, if when entering the attic you cannot straighten up to your full height - this is not the best option for the dressing room. If you have enough space, you can start planning.

Wardrobe room in the attic
In those parts of the attic where the ceilings are low, place shelves for shoes, in those that are higher - sections for outerwear.
Design nuances
When decorating a dressing room located in a bedroom or other room, you can easily decide on the design. The color scheme of materials used for finishing should be combined with the palette that prevails in the interior of the room itself.
It is optimal that the pieces of furniture, including those in the dressing room, have a similar texture or belong to the collection of the same designer.

Design of a small dressing room, photo
The doors of the dressing room are decorated with inserts of frosted, transparent glass, carved patterns, and mirrors. The decor option is chosen based on the style direction in which the room is decorated. For example, plastic photo panels are suitable for a modern style.
The decor of a dressing room located in a separate room, in most cases, needs good level lighting, since there are rarely windows in such rooms. For this reason, it is preferable to decorate walls in light colors(can be painted or wallpapered).
Concerning color range furniture facades, then it can be different; Be guided by personal preferences and the size of the room, but it is advisable that it be a muted, easily perceived range.

Bedroom design with dressing room, photo
If there is internal lighting in the dressing room, you can use non-standard sections. For example, glass racks or shelves on which will be placed stylish accessories or designer shoes.
A large wardrobe can be decorated with soft carpeting with fluffy pile, and the walls can be decorated with mirrors in beautiful frames.
Look at the photo to see how you can properly and competently arrange a dressing room:

Options for planning and decorating wardrobe areas and rooms are varied. Study photos of finished and already completed projects and implement the option you like in your home. Arrange a comfortable, beautiful and functional area or a room for placing things is not so difficult, if there is a desire.
The photo shows diagrams and samples of the layout and arrangement of dressing rooms with dimensions (pictures are clickable):
Having your own dressing room is not a luxury, but a necessity, providing convenient, organized storage of things.
Ready-made sketches will help you create a cozy and presentable wardrobe in a room with any layout, even the smallest and most modest in size.
 For some modern styles (modern, minimalism, hi-tech) it is appropriate to use for wall decoration: look at examples and evaluate their properties to find out whether such a material is suitable for you.
Options interior arches from plasterboard in the apartment you can see in the photo.
Photos of chic bedrooms in a modern style are in the article at:
Video
Video on how to arrange a dressing room with your own hands: