How to glue wallpaper and baseboards to the ceiling. What to glue first: wallpaper or ceiling plinth - expert opinion and tips on arrangement
Ceiling plinths for wallpaper can be soft or hard, depending on the material from which they are made. The material can be wood, gypsum, plastic and even stone, it all depends on the flight designer's imagination and financial capabilities.
Only light elements can be glued on top of the wallpaper, since they will not create unnecessary load. When using heavy ones, you should first attach them to the wall, and then glue the wallpaper.
Due to the different curvature of the wall and baseboard, a gap may arise between them. If ceiling plinth soft, it can be pressed to the wallpaper. When using hard, putty is carried out first. It is impossible to perform this operation well on top of the wallpaper, since the putty will ruin appearance, will not adhere securely to the wall and will create additional stress on the wallpaper.
Types of ceiling plinths
Usually finishing ends with wallpapering and installation of ceiling plinths. After this, the premises are considered fully suitable for habitation.
Ceiling plinths are divided according to the materials used for their manufacture, and are:

Before installation, you need to carefully mark the corner elements and make cuts. It is better to cut corner elements using a miter box, which will ensure perfect joining. In this case, it is worth leaving a small margin of length of 2-3 cm, which will allow you to make the most accurate adjustment of the joints during installation. After installation in place, you can carefully trim off the excess. Depending on the material, you can cut the parts with a stationery knife, a hacksaw with fine teeth, or a hacksaw for metal. In this way, the heavy elements are attached first, and then the wallpaper will be glued.

The method of fastening the plinth also depends on the material.
- fastening of wooden plinths is carried out with glue and nails, in some cases they are glued without the use of nails;
- plaster glued to gypsum mortar, containing from 1 to 3% PVC glue. For the most durable fastening, dowels and nails are additionally used. The holes for them are pre-drilled in the parts, and upon completion of the work, the mounting holes are hidden using gypsum putty.
- plastic and foam baseboards sit on glue. This method of fastening is sufficient for reliable fixation, since the weight of the elements is relatively small.
In some cases, ceiling plinths are sold with corner elements, which greatly simplify the fastening and fitting of elements and hide the edges.

You can glue the wallpaper first or after installing the baguette. Each method has its own advantages and disadvantages. With any method, installation should begin from the most clearly visible corner.
Installation before wallpapering
When installing a ceiling plinth on a wall before wallpapering, you must first level the surface. If it was not possible to perfectly level the wall, but the plinth is already being installed, you just need to carefully fill all the gaps between the wall and the plinth.
This method is most often used when installing heavy fillets with low ductility, made of gypsum, stone or wood.
Gluing wallpaper after installing the plinth is more difficult, since it requires careful marking of the sheets, but at the same time, the plinth fits tightly to the wall, which eliminates gaps that spoil the appearance.

It is advisable to prepare sheets of wallpaper in advance and leave a length margin of 2-3 cm in order to better fit the pattern. Excess length that ends up on the baguette can be carefully trimmed using a spatula and a utility knife. To do this, you need to press the sheet with a spatula close to the ceiling plinth and cut along it. This method allows you to trim the edges of the wallpaper very evenly close to the baseboard.

Another advantage of this method is that if it is necessary to replace the wallpaper, the baguette can be left in its place.
Installation over wallpaper
The use of light and flexible ceiling plinths, after gluing, allows you to hide uneven cuts of wallpaper sheets. The main disadvantage of this method is the need to remove the baguette when replacing wallpaper, which most often leads to their damage and replacement. In addition, you should be extremely careful to apply glue to two planes at once, adhesive to the ceiling and wall. When installing, you need to hold each element pressed until the glue sets.
If glue is squeezed onto the wall or ceiling, it must be removed immediately with a dry cloth.
When painting, first apply mounting tape next to the ceiling plinth, and only after that painting is done. Masking tape allows you to avoid loss of the decorative qualities of the wallpaper.
Installation with suspended ceilings
If available in the room suspended ceilings The technology for gluing wallpaper and baseboards is changing slightly. The latter should only be used specially designed for such ceilings. They have more wide shelf so that they can be securely glued to the wall. Under no circumstances should they be glued to the ceiling, as this may cause damage to the canvas.

Below is a video that will tell you how to install the ceiling plinth - first or after wallpapering:
Wallpaper should be glued after the ceiling plinth. In order to make a choice on what to do in this situation, you need to know all the advantages and disadvantages of work processes. If you glue skirting boards, it will be easier to treat the joints with putty or paint, and gluing wallpaper will not be so scary. But in this case, a problem arises with selecting the edge of the wallpaper to ceiling fillets. Looking from the other side, you can understand that if you glue the wallpaper first, there will be problems with installing the baseboard, because after gluing you will have to wait a certain period of time until the glue dries. So what should we do?
Ceiling plinth for wallpaper, how to glue: selection of material
Upper skirting boards are used to hide all visible boundaries of the wallpaper and ceiling decoration with whitewash. In addition to this necessary function, they bring decorative value to the ceiling, because fillets decorate the interior and give general appearance completeness.
There are several types of fillets for organizing work with the upper part of the room. Their main difference lies in the materials and manufacturing method. It is with these points that their physical properties are associated.

Ceiling plinth adds completeness to the overall look
In order to make baguettes, the following 4 materials are used:
- Wood. Wooden skirting boards can look great in any interior. It doesn’t matter at all what style, folk or classical. In order to make wood fillets, mahogany, oak, walnut or larch are mainly used.
- Stone. Sometimes in special retail outlets you can find ceiling plinths made of artificial stone. They are able to fit perfectly into classic interior, and goes well with modern types finishing. The cost of such material is high, due to the fact that it is very difficult to extract the material.
- Gypsum fillets. Thanks to gypsum, you can create skirting boards of various types and shapes. They are much lighter than the previous material, and also much cheaper. However, before purchasing this material, you need to be sure that the surface of your walls, polystyrene foam, foamed polyvinyl chloride and other types of plastic are perfectly flat.
- Plastic panels. On this moment Modern manufacturers increasingly prefer the production of plastic products. Ceiling plinths are no exception. In special construction stores you can purchase polyethylene panels.
If we talk about soft and flexible materials, then these include plastic and some wooden baguettes. Already, based on this, we can answer that it sticks first. If the product is flexible and belongs to the budget category, then you can try installing ceiling skirting boards on the wallpaper, but you should take into account what is ideal smooth walls they don’t exist, this does not apply to baguettes, therefore, you cannot avoid working with putty. If the fillets are soft and can adapt to the curvature of the walls, then putty may not be needed.
Is it possible to glue ceiling plinth to wallpaper?
If speak about this method, then at first glance it may seem quite simple. However, only experienced specialists use it, because they immediately treat all cracks and irregularities with putty, and the wallpaper undergoes a leveling process. All you need is a little practice and you will be able to do the job just as well.
Skirting boards for the ceiling can create the impression of a complete absence of unevenness on the walls, but in order to achieve this, you need to carry out proper installation.
Based on this, you can understand what exactly is being done first, installing the baseboard or gluing the wallpaper.

You can glue the ceiling plinth with your own hands, without the help of specialists
In any case, prepare for work following materials and tools:
- Polymer glue;
- Assembly adhesive;
- Putty;
- PVA glue;
- Construction knife;
- Hacksaw;
- Miter box;
- Putty knife;
- Ruler;
- Pencil;
- Sandpaper;
- Colorless sealant;
- Paint (if necessary).
Despite the fact that at the moment you can purchase any material for installation, it is better to use the glue recommended by the manufacturer.
How to glue ceiling plinth to wallpaper
After you decide exactly how you will attach the baguettes to the ceiling, the question remains open, what kind of material can be used to glue the baguette to the wallpaper.
For this purpose, the following are most often used:
- Assembly adhesive;
- Polymer glue;
- Putty, which contains PVA.
There is no significant difference in the use of the adhesive solution, the main thing is that its drying speed is maximum.

You can glue the ceiling plinth to the wallpaper with glue or putty
You can proceed to the process of gluing skirting boards only when everything preparatory work were finished. Namely, removing dirt and dust, as well as pruning.
In order to glue the prepared skirting boards, you need to turn them over back side and apply a small amount of glue, it is desirable that the strip is even and does not go beyond the contours. After the solution has been applied, the fillet is set aside to allow the glue to settle.
If you see that the glue has come out over the edge, remove it dry soft cloth. After this, the first baguette is leaned against the desired place on the ceiling and pressed without strong pressure. You should not remove your hands for about a minute so that the baguette sticks well to the base.
Basic rules: how to trim wallpaper to fit a ceiling plinth
In order to get a good and high-quality result, all procedures must be performed correctly and with the right approach. There are no small details in this installation, and the owner who neglects trimming wallpaper at the edges of the walls will become irresponsible.
In fact, not every craftsman knows how to properly cut or paste wallpaper around baseboards.

In order for the result to please you, all procedures must be carried out very competently.
In fact, every homeowner has baseboards under the ceiling. You need to know that each layer of coating on the wall must be glued in such a way that the edges protrude onto the fillets. After this, take a spatula small size and carry out along the lower edges of the contact between the panels and wallpaper. The result should be a fold.
After performing these steps, use a spatula to press on the bend and sharp construction knife Carefully remove the protruding edges of the paper. The trimming process is complete. If you notice that glue has released, it can be removed with a damp cloth or sponge. As a result, you will get a neatly decorated room with smooth edges.
How to properly glue ceiling plinths (video)
Based on our article described above, we can conclude that ceiling skirting boards can be glued both before and after wallpapering; the main thing is to approach this issue responsibly and correctly. All the main steps have been described above, after familiarizing yourself with them, you will not only easily make a choice, but also carry out the installation quickly, accurately and correctly.
The mood now is ...my tiger cub will arrive soon, I need to put everything in order in his mansion...
On the question of what to glue first: wallpaper or ceiling plinth, opinions differ. Fillets - ceiling plinths - are needed to hide the gaps between the ceiling and wallpaper or other finishing materials on the wall. Yes, and they look very impressive. But there are some nuances to their installation.
Usually used for gluing to ceilings vinyl wallpapers and wallpaper for painting.
In order to decide what to do in this situation, it is necessary to consider the advantages and disadvantages of the options.
If you glue the fillets before the wallpaper, it will be easier to putty the joints of the baseboard and paint it, and you won’t be afraid to stain the wallpaper. But then it becomes difficult to fit the top edge of the wallpaper to the ceiling plinth. This must be done very carefully so that there are no gaps left.
On the other hand, if the wallpaper is already pasted, difficulties will arise with installing the baseboard. At least a day should pass after the wallpaper glue dries. Then the wallpaper will need to be sealed masking tape and glue and then paint the baseboard.
For gluing, a special glue is used, which is applied in a strip to the sides of the plinth adjacent to the wall and ceiling.
Nowadays there is a wide variety of ceiling plinths; you can buy narrow ones, they are more flexible and follow the topography of the walls. In the finished version, this will not be very noticeable, of course, if the wall defects are small.
Theoretically, the corners of the rooms should be 90 degrees, but in practice this is not always the case. Therefore, we first cut the corners of the plinth at 45 degrees using a miter box, and then adjust it on site. Ceiling plinth made of foam plastic can be cut very well with a stationery knife. You can join one plinth to another on the spot and cut it off.
After cutting, you need to adjust the ceiling plinth, and then just glue it.
The joints need to be sanded with fine-grained sandpaper. The glued plinth can be left as is, or it can be painted water-based paint in the same shade as the ceiling.
How to wallpaper
Wallpapering walls, like any other endeavor, requires certain skills. As a rule, professionals are not involved in this process, but are handled on our own. The final result – how the walls will look – depends on how the walls are prepared for pasting, what wallpaper is chosen, and what glue will be used.
Oh comrade, you should have heard how I admired that club-footed landscape designer on a bulldozer who sculpted my walls and tents...
On the question of what to glue first: wallpaper or ceiling plinth, opinions differ. Fillet - - are needed to hide the gaps between the ceiling and wallpaper or other finishing materials on the wall. Yes, and they look very impressive. But there are some nuances to their installation.
Vinyl wallpaper and paintable wallpaper are usually used for gluing to the ceiling.
In order to decide what to do in this situation, it is necessary to consider the advantages and disadvantages of the options.
If you glue the fillets before the wallpaper, it will be easier to putty the joints of the baseboard and paint it, and you won’t be afraid to stain the wallpaper. But then it becomes difficult to fit the top edge of the wallpaper to the ceiling plinth. This must be done very carefully so that there are no gaps left.
On the other hand, if the wallpaper is already pasted, difficulties will arise with installing the baseboard. At least a day should pass after the wallpaper glue dries. Then the wallpaper will need to be covered with masking tape and glued, and then the baseboard will need to be painted.
First, the ceiling plinth is glued

The cut angles on both plinths, right and left, must be the same, i.e. their profiles must be identical.
As with any type of repair, you first need to take measurements and calculate the number of strips needed. The length of these planks is 2 meters. We round the perimeter of the room up and divide by 2.
The width of the skirting boards varies, so the choice should depend on the area of the room. If the room is small, then you need to take narrow ones, since wide ones will look bulky.
Tools and materials for installation:
- ceiling plinth;
- liquid Nails;
- putty or sealant for filling seams;
- pencil;
- roulette;
- rubber spatula;
- miter box and stationery knife for trimming;
- glue gun.
To the wall with putty or liquid nails. If you glue it on putty, it will fill the existing cracks and you will only need to remove its remnants.
Before gluing the fillets, it is necessary to carry out preparatory work, namely the walls in the place where the baseboard will be glued, then putty it.

For gluing, a special glue is used, which is applied in a strip to the sides of the plinth adjacent to the wall and ceiling.
Nowadays there is a wide variety of ceiling plinths; you can buy narrow ones, they are more flexible and follow the topography of the walls. In the finished version, this will not be very noticeable, of course, if the wall defects are small.
Theoretically, the corners of the rooms should be 90 degrees, but in practice this is not always the case. Therefore, we first cut the corners of the plinth at 45 degrees using a miter box, and then adjust it on site. Ceiling plinth made of foam plastic can be cut very well with a stationery knife. You can join one plinth to another on the spot and cut it off.
After cutting it, you need to, and then just glue it.
The joints need to be sanded with fine-grained sandpaper. The glued plinth can be left as is, or it can be painted with water-based paint in the same shade as the ceiling.
Return to contents
How to wallpaper
Wallpapering walls, like any other endeavor, requires certain skills. As a rule, professionals are not involved in this process, but are handled on their own. The final result – how the walls will look – depends on how the walls are prepared for pasting, what wallpaper is chosen, and what glue will be used.
Wallpapering tools:

For gluing, you can use two stepladders, which will be connected by a board at least 40-50 cm wide, or tables lined up in a row of the same height.
- pencil;
- scissors;
- roulette;
- painting spatula and knife;
- roller for joints and fleecy;
- glue tray;
- a bucket for diluting glue;
- soft cloth;
- plumb line with thread;
- table, stool or stepladder.
Before starting work, you must carefully study the instructions, since different types Wallpaper has its own rules.
The first thing you need to do is calculate the number of rolls. Now there are calculation tables, but they have large errors, so it is better to use the old method. Take an old roll of wallpaper with the width at which you plan to glue new wallpaper, and a tape measure. Then a measurement is taken along the perimeter from corner to corner, for walls with doors and window openings similarly. From one roll 10.05 m long you will get 4 strips with a wall height of up to 2.5 m. This calculation is applicable for wallpaper without joining the pattern, and with joining you will get 3 whole strips, the rest will be used over doors and windows.

A sponge or soft cloth will help smooth the wallpaper and remove air bubbles.
If necessary, the walls are leveled with putty, then a primer is applied. It is needed so that the glue is not absorbed by the walls and it is possible to easily combine the pattern on the canvases by moving the strips. Instead of a special primer, wallpaper glue diluted to a more liquid consistency can be used.
When cutting wallpaper, make a small reserve; they are carefully cut with a stationery knife on the floor. If adjustment of the drawing is required, then you need to look at the instructions, where the offset step is indicated, but it happens when this step does not correspond. So you need to test it on the floor first.
Wallpaper glue is selected according to the type of wallpaper. For areas near windows and doors, you can use a PVA-based composition. Dilute glue in a bucket with cold water according to the instructions, stirring quickly with a brush or stick. Let the glue sit.

Excess wallpaper is pressed with a spatula and trimmed with a sharp knife.
When wallpapering, the windows should be closed and the sockets should be de-energized. You can start gluing wallpaper pasted at the joint from any wall. For training, it is better to start with the one that will be covered with furniture.
The vertical is marked when gluing the first strip with a rope and a weight. This strip is glued from the corner with a 1.5-2 centimeter approach to the other wall. After the strip is coated with glue, it must be folded in half for impregnation. At this time, the wall is coated with glue and the strip is attached to it. The collected air is dispersed with a clean cloth or rubber roller.
Ceiling plinths should not be glued directly onto pasted wallpaper, as they need time to dry and are easily damaged. The fillets are glued using the technology described above.
What to glue first - wallpaper or ceiling plinth: features of using soft and hard baguettes, installation
Many people are interested in: “What comes first – the ceiling plinth or the wallpaper?”, although, at first glance, the answer is obvious. But not everything is so simple and unambiguous, and we want to consider this issue in detail, and at the same time we will tell you how to glue the ceiling plinth to the wallpaper and to the wall.
Before gluing the ceiling plinth to the wallpaper, you should think carefully.
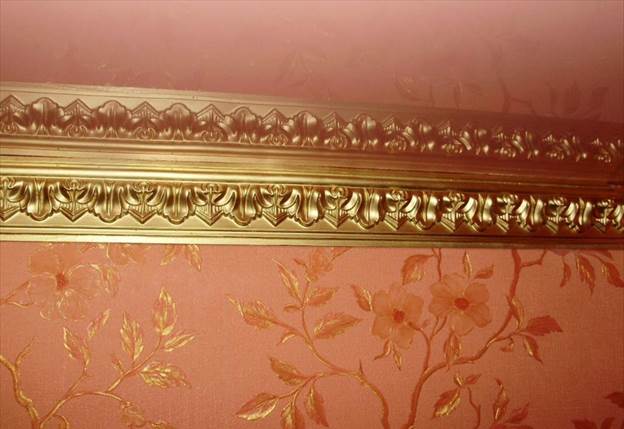
Soft

The photo shows how flexible the fillet can be.
Top fillets are used to hide the visible border of the roll and the junction between the finish and the whitewash. In addition, these elements themselves have a certain decorative value and can decorate the interior and give completeness to the finish.
There are different types of fillets for finishing the top of the wall. Their main difference is the materials used to manufacture the panels and the associated physical properties.
The following materials are used to make baguettes:
- Wood. Wooden fillets look great in any interior, from folk and classical styles to modern interior solutions. For the manufacture of good models use wood valuable species: oak, mahogany, walnut, larch and others;
- Gypsum. This material allows you to easily create products of the most complex shapes and profiles, which are much lighter natural stone, and also cheaper. However, it should be understood that gypsum is a hard material, and it is mounted on the walls as smooth as possible;
- Stone. Sometimes you can find fillets made of natural and artificial stone that fit perfectly into classic styles interior, and can also go well with modern finishing. The price of the products is high due to the complexity of mining, processing and delivery of stone blanks;
- Plastic. Modern production is increasingly moving towards the use of polymers for the manufacture of a wide variety of products and products. Baguettes were no exception: models made of polyethylene, polyurethane, expanded polystyrene, foamed polyvinyl chloride and other types of plastic are widely represented on the market. (See also the article Types of finishes: features.)

There are many varieties of baguettes.
Soft or flexible varieties of baguettes include only plastic products and, with some reservations, wooden ones. Here we can partially answer the question: “Is it possible to glue ceiling plinth to wallpaper?” If this product is flexible, inexpensive and light enough, then it’s possible.
The fact is that walls are not perfectly smooth, but baguette panels are, or rather, they are curved differently, and after installation there will be gaps between the part and the wall. It is customary to putty these gaps, and paper is a poor base for putty. If the products are flexible or soft, they will be able to follow the curvature of the walls, and putty will not be needed.
Flexible baguettes follow the curvature of the walls.
Important!
Only a light piece can be glued to the paper, otherwise it will fall off along with the glue, tearing off the wall finishing layer.
If you don’t know when to glue the ceiling plinth - before or after the wallpaper - check its flexibility and estimate its weight.
Since the flexibility and softness of the wood remains under big question, there is only one 100% baseboard for wallpaper - plastic.
Solid
Gypsum is the most common material for making solid fillets.
Hard varieties include stone, gypsum, wooden crafts and products made from other materials that do not bend and act as fairly rigid parts. In this case, the question is: “What comes first – the ceiling plinth or the wallpaper?” receives the opposite answer, that is, first we glue the baguette.

The heavy, solid fillet is attached first.
This is due to the fact that the solid part will not be able to follow the curvature of the walls, and cracks and gaps will remain between it and the surface. After fixing the part, these gaps are puttied, then the product is painted or whitened.
What to glue first - wallpaper or ceiling plinth: the right finish
You should also remember that stone and plaster moldings are quite heavy and most likely simply will not hold up on paper.

Gaps and cracks are covered with putty.
Important!
Before gluing the ceiling plinth to the wallpaper, make sure that it is not made of stone or plaster and has sufficient flexibility.
Otherwise, fillets must be installed first.
Installation

Now a few words about the installation rules.
For those who are not against working with their own hands, we have compiled instructions:
- After the glue on which the wallpaper is glued has completely dried, you can begin installing the ceiling moldings.
For this top part We clean the walls and the ceiling adjacent to it from dust with a dry cloth or brush. We trim off excess pieces of rolls;

Preparing the gluing area.
- We take measurements and cut according to them required quantity panels. We cut the corner parts at an angle of 45 degrees using a miter box;

We use a miter box to cut corners.
- Now for those who don’t know how to glue the ceiling plinth to the wallpaper: you can use silicone sealant or glue for the type of plastic from which the fillet is made. Apply glue to reverse side panels and press the part tightly against the wall, wait for a while and release;

We press the baguette to the wall and ceiling with our hands.
- We coat the joints between parts, especially at the corners, with acrylic-silicone sealant. You can also mix a little gypsum putty Fill large cracks with PVC glue and the resulting solution.

Important!
To avoid staining the walls, you can stick masking tape under the installation level.
Conclusion
The order of gluing wallpaper and upper fillets depends on the properties and density of the material of the fillets themselves. Flexible and light parts can be glued to wallpaper, while heavy and hard parts can only be glued to the wall. This article supplements the instructions and demonstrates the process of installing skirting boards under the ceiling.
http://nashaotdelka.ru
What to glue first, baguette or wallpaper?
What to glue first, baguette or wallpaper?
There are several options here:
If you don’t use a plinth, then of course it would be better to first glue the wallpaper, just not on the entire surface, but calculate it in such a way that it goes under the baguette by 5 millimeters, and then glue the baguette, but so that most of the gluing surface was on the wall...
When using a plinth, of course, it is best to glue the baguette right away, then the wallpaper, and then hide the imperfections with the plinth...
But it’s still more correct to glue the baguette first, and then glue the wallpaper...
Hello.
Of course, first it is better to glue the molding/cornice/baguette (whichever is more convenient for you) or simply the baseboard. I'll explain why.
If you buy a good quality, and frankly speaking, not a cheap cornice (even a Chinese one now costs quite a lot of money, I mean a wide, hard (not soft) cornice), then you can glue it on for many, many years until you get tired of it, and change the wallpaper without touching it. If you stick it on the wallpaper, then the next time you change the wallpaper you will have to change the cornice. This time.
Further, joints cornices are always always glued special glue, and after drying, they are sanded (because one way or another, cornices often vary in thickness and even height, especially if this is China), putty, and after that they are painted, in fact, just like the entire cornice is painted. That is, by gluing it to the wallpaper, you will significantly complicate your further work. That's two
In the lower part of the cornice, which is adjacent to the wall, after its installation, there is always a small gap left (maybe, of course, I’m being picky, but I’m used to doing everything carefully so that the customer doesn’t spit in the back later), it’s better to cover it with the same glue that and will use it to install the molding. It’s convenient to do this with a cotton swab; excess glue will be removed without a trace, and just enough of it will get into the crack as needed.
In what order do repairs begin?
Now imagine how you will do this if you start gluing the cornice onto the wallpaper. That's three
If you are afraid that it will be difficult to bring the wallpaper to the cornice, then there is nothing complicated. Just make a small overlap of wallpaper onto the baseboard, bend it with a wallpaper smoothing gun, place a spatula, and cut off the wallpaper using the spatula and a utility knife. You will get a perfect joint (maybe, of course, not right away)) but it will definitely work out, so it’s better to first practice on the walls where the furniture will be, or on window wall, there will still be a curtain))
Well, that seems to be all. If I wrote something unclear, write, I will answer. By the way, I’ll be hanging wallpaper soon, I might even make a short training video :)
Of course, it is better to stick on the baguette (molding) first if it is needed to divide the wall into separate zones or to create special paintings. The baguette is glued with special glue. And only then between the moldings and cornices (baguettes) wallpaper, frescoes are usually glued or plaster is applied. You just need to seal the moldings (baguettes) with a special adhesive tape so as not to stain them.

It’s better to stick on the baguette first, we did this in a recently renovated bedroom and everything looks just great.
But in the kitchen, we first glued the wallpaper, and then the ceiling plinth on top, it turned out well too, but in some places there are gaps visible due to the unevenness of the wall.
These cracks, when you first glue the baguette, are very easy to cover up and the slight curvature of the walls will not be so noticeable.