Heating temperature regulators
In order to more rationally use resources and, accordingly, reduce the cost of heating a room, heating systems are equipped with a special device known as a heating temperature controller. The design of such a device is extremely simple, and installation can be done with your own hands, even without special skills.
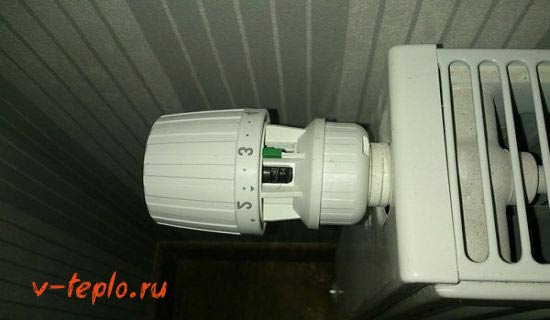
Heating temperature controller
Heating temperature regulators - model range and prices
Let’s say right away that there are a lot of manufacturers and we do not intend to consider each of them. Let's talk only about the most popular models.
Teplolux MCS 300
- Remote control and control of underfloor heating via the Internet
- Control from one mobile device all heated floors in an apartment, country house or country house. Replace classic wall thermostats with MCS 300 - and control your comfort from your smartphone screen.
- separate operating mode for each thermostat
- programming events for each room during the day, days of the week

Price 4800 rub.

Specifications

Thermo TI 970 thermostat

Specifications
Electronic thermostat Terneo PRO
So, Terneo PRO electronic devices, the temperature range of which ranges from +5 to +95C.

Specifications
Price 1950-2900
Computherm Q7
The Computherm Q7 model, also an electronic type, with a temperature range of +5 – +35 C, costs about 1400-1800 rubles.

Price 1400-1800 rubles.
Temperature controller – Veria Control T45
A more expensive regulator is the Veria Control T45, its range is the same as the previous model.

Price 4300-4400 rubles.
Mechanical heating temperature controller Terneo RTP
Mechanical regulators are cheaper. For example, the Terneo RTP model with a temperature range of +10 – +40 C.

Price 1050-1100 rubles.
Specifications
Although there are more expensive mechanical devices. So, Legrand Etika 672630 costs as much as 7750-10600 rubles.
As you can see, you always have to pay more for quality, and our case is no exception. But we note that mechanical models are still simpler and, accordingly, cheaper. Now let’s find out how to properly install the heating temperature regulator.
Classification of thermostats
Regulators used in heating can be:
- electronic;
- mechanical;
- electromechanical.
Each option has its own strengths and weaknesses, let's look at them in more detail.
Electronic devices

In this case, the regulator consists of three main parts:
- temperature sensor;
- microprocessor;
- key

A temperature sensor is needed to measure air temperature, the processor receives and converts the signal, and the key creates control communication. The advantages of electronic models include:
- high accuracy;
- ease of settings and control of heating systems.
They are used not only to control the heating system or regulate the operation of air conditioners, but also in other equipment designed to create a comfortable microclimate. What’s remarkable is that they can even be integrated into a “smart home” system.

Mechanical devices
A heating temperature regulator of this type consists of:
- thermal head;
- valve

Both parts function smoothly and no extraneous energy is used. In turn, the head includes:
- drive unit;
- gas or liquid element;
- and finally the regulator.

The scheme of its operation is extremely simple: by means of manual control, a small wheel with temperature is set to the required level. It is typical that instead of such a wheel, an off/on key can be used, but in any case, the devices are controlled manually.

Electromechanical type devices
They are rightfully considered the simplest temperature regulators. Their main structural element - the relay - can be of several types, but in heating the one in which some elements expand when heated occurs.
Can be used in water heaters and oil coolers in which the relay is shaped like a cylinder filled with a sensitive substance. The tube itself is placed in a small container with heated water.
Installing a heating temperature controller - step-by-step instructions
First, prepare everything you need for your work:
- grinder or electric jigsaw;
- sanitary paste;
- spanners;
- clamps for pipes.
All this needs to be prepared in advance so as not to be distracted during the installation process. The installation itself is extremely simple - the procedure consists of four main stages.
First, prepare the battery for installation work. Turn it off and drain all the working fluid. If there is a valve, remove it.

Note that in single-pipe systems there is a mandatory bypass - a special jumper, thanks to which the liquid will circulate through the main line even when one of the devices is turned off. In this case, you will not be able to disrupt the heating of other rooms in the house.
Installation of thermostat. In this case, you will use a threaded connection, and the thread itself must be sealed with plumbing flax, having previously impregnated the latter with paint. First, screw the device into the radiator hole, which is intended for introducing working fluid. Do not apply too much pressure, otherwise you may damage the device.
![]()
Note! On the valve you will be able to see a marking in the form of an arrow. Make sure it points in the direction in which the coolant will move.
Install a thermostatic element - a device that determines the air temperature in the room. Its other function is to control the operation of the locking mechanism. Fix it only horizontally! Also make sure that the heat generated by the battery does not directly affect the temperature sensor.
But if, for one reason or another, horizontal installation is impossible, then we advise you not to do it “haphazardly”, but to purchase a special device with a remote temperature sensor. Such a device can be installed two meters from the heating radiator, and sometimes even more.

There are a number of requirements regarding the installation of a temperature sensor. Here they are.
- The device should be installed at least 80 centimeters from the floor surface, since cold air, as we remember from physics lessons, accumulates from below. And if the sensor comes into contact with this air, its readings may be inaccurate.
- Do not cover the temperature sensor with curtains, furniture or other interior items.
- Avoid exposing it to direct sunlight.
- Finally, do not allow the device to be exposed to direct flows of heated air, which, it is worth noting, can come not only from the battery, but also from various types of household appliances.
Note! If the sensor is remote, then it is secured with brackets. It is also important that the installation location is selected correctly.
If all these requirements are met, the heating temperature controller will work properly and efficiently.

Set up the thermostat and prepare it for use. After turning on the heating system for the first time, configure and calibrate the device. Do this in full accordance with the manufacturer's instructions for your specific model, as this process may differ for different devices. Although there is a general rule: you can start tuning only after each of the heating devices in the system has warmed up thoroughly.
As you can see, there is nothing complicated in installing a temperature controller. Having understood its structure and done everything as stated in the instructions, in the future you will be able to control the intensity of heating the room, thanks to which energy resources will be spent extremely rationally. And this, in turn, will help to significantly save on heating costs.
Video - Installation of a heating thermostat
And now - in more detail about the setup.
How to set the temperature controller
First, you need to make sure that heat loss in the room is minimal - close every door and window in your home. Place a thermometer in the place where you plan to get a constant temperature.
Open the valve - turn the device head to the left until it stops. The fact is that it is in this position that the heat transfer of the heating devices will be at its limit, and the air in the room, accordingly, will begin to warm up.
As soon as the temperature rises by about 5 degrees, turn the valve to the right, also all the way. After this, the temperature will drop and, as soon as it reaches the desired level, open the valve again, but this time slowly. As soon as you hear the water making noise in the regulator and feel that the valve itself is already hot, stop rotating the head and put its location in memory. That's it, now you have configured the heating temperature controller!

Note! If you are interested in how the device is removed from the battery, then the answer is: you need to turn the nut located behind the plastic head counterclockwise, and then replace it with a new one. Extremely simple.
Operating principle of the temperature controller
The thermostat for heating radiators consists of a thermostatic head and a valve, the latter playing the role of a so-called actuator. The head, in turn, consists of a cylinder filled with a working substance that is sensitive to temperature fluctuations. Actually, thanks to this, the thermostat performs its function.
When the temperature rises, the volume of the working fluid increases, and if it decreases, then vice versa. During this, the pressure rod, which is connected to the cylinder, moves. The thermostatic head is installed on the valve. When expansion/compression occurs, the rod releases or compresses the locking cone located under the spring (this cone is necessary to close/open the hole through which the coolant is supplied).

The regulator can operate on a liquid or gaseous working substance; according to this parameter, in fact, all devices are divided into two large groups. Gas-filled thermostats are more sensitive to temperature changes, but liquid thermostats respond more accurately to pressure surges in the device, so the temperature can be adjusted with maximum accuracy.
Note! The principle of operation of the regulator is the same for all heating systems - both single- and double-pipe. The only difference is the resistance of the valves: in the first case it is significantly lower than in the second.
Main advantages
Modern models of thermostats have many advantages, the main one of which is extreme ease of operation. The devices are quite easy to install and just as easy to use, and all the nuances can be quickly understood. A modern heating temperature regulator creates a cozy and favorable environment in the home, and also makes it possible to significantly save on heating and use energy resources more efficiently.

But creating a comfortable microclimate is not the main thing, because heat savings also occur. For example, in an apartment heated through a centralized system, you need to install not only a thermostat, but also a heat meter, but in private houses with autonomous heating, all savings come down to reducing the amount of energy consumed (not without the help of regulators, of course).
Note! If you are just designing a heating system, it is better to buy radiators with built-in thermostats. Although installing a thermostat in a finished system, as we have already noted, is also not difficult.
We will talk about the installation a little later, but now we will look at the main types of devices.
Features of choosing a temperature controller
In order not to regret your purchase in the future, we advise you to approach the choice of device with full responsibility and take into account a number of important nuances.

Video - Heating temperature regulators
In conclusion, we note that any heating system is designed to create a comfortable microclimate in the home. And each room requires a different temperature - it all depends on their purpose. Moreover, it must be permanent.
Warm winters and good luck at work!