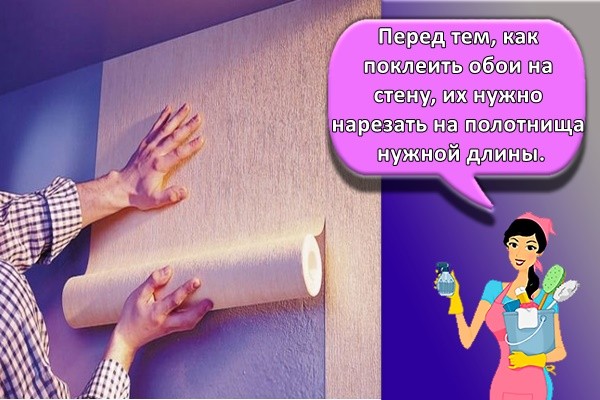
How to hang wallpaper correctly. Wallpapering: step-by-step instructions and technology for applying glue and different types of wallpaper (90 photos) How to evenly glue the first strip of wallpaper
In this article, you will learn how to glue wallpaper on a wall with your own hands. Before wallpapering, you need to thoroughly clean the room. The quality of future walls depends on the cleanliness of the room;
The outer parts of the switch, sockets (telephone wires, cables) must be removed in advance;
Dissolve the glue.
- Measure from the corner a distance equal to the width of the wallpaper minus 1.5 cm and place a dot here. Mark where the seams will go and move them slightly if necessary.
![]()
- Using a level and ruler, draw a vertical line through this point. On the wall where the pattern of the wall wallpaper should be combined with the wallpaper on the ceiling, draw a vertical line from the first seam of the wallpaper pasted on the ceiling.
- Paper wallpapering read

- Trim and prepare the first piece of wallpaper. First straighten top part accordion folded wallpaper. Paste the wallpaper along a vertical line so that the panel has an allowance of about 5 cm on the ceiling. Make sure that the pattern is not cut off at the ceiling line.

- Make a cut top corner wallpaper so that the wallpaper in the corner does not wrinkle. Use your palms to move the wallpaper so that it is in place and its edge is in a vertical line. Smooth out the wallpaper with a smoothing brush.

- Straighten the bottom of the wallpaper and use your palms to move the wallpaper so that its edge runs along a vertical line. Smooth out the wallpaper with a smoothing brush. Check carefully to see if there are any bubbles left.

- Use a sharp wallpaper knife with replaceable blades to cut off the excess. If the ceiling is already covered, bend back the edge of the wallpaper with a wide spatula, and then cut off the bent part with scissors so as not to damage the wallpaper pasted on the ceiling. Wash off all the glue from the surface of the wallpaper.

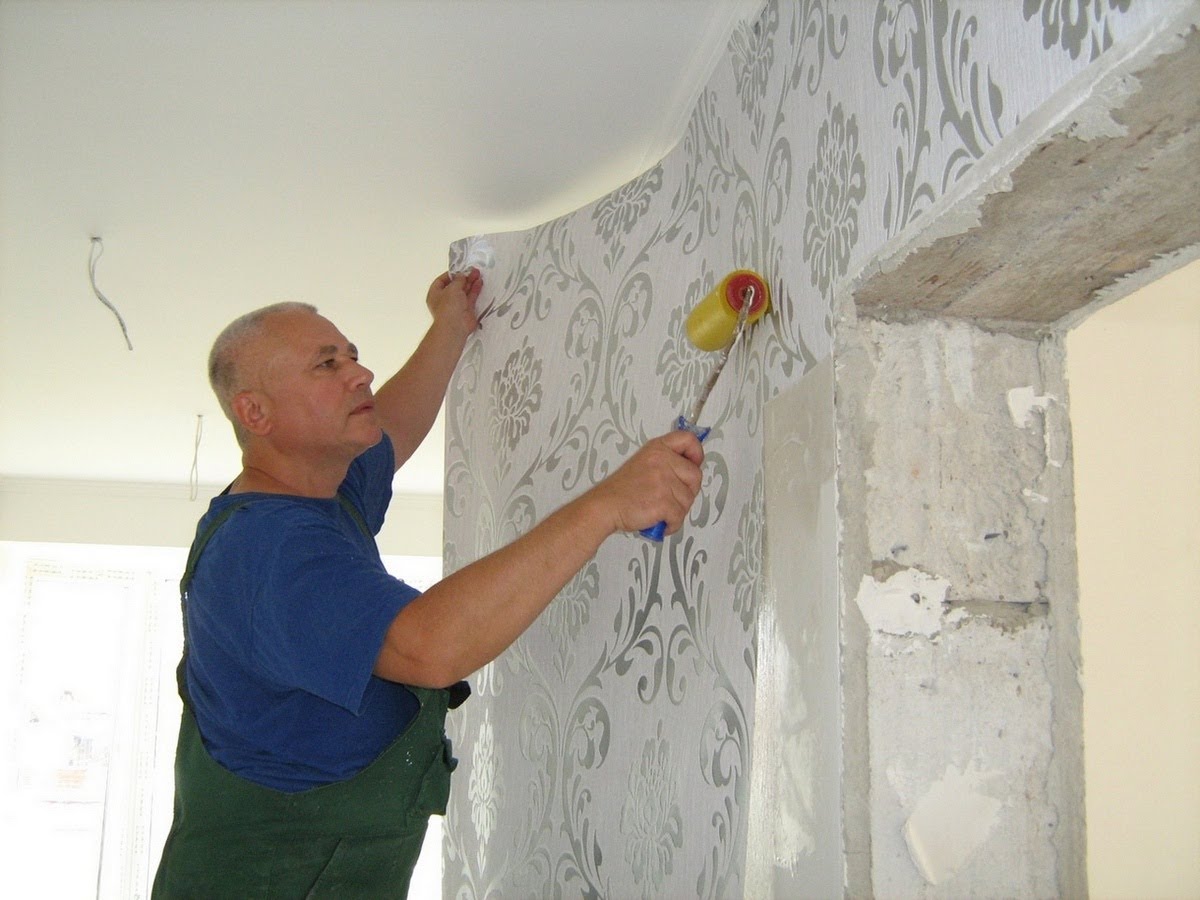
- Hang the next panels of wallpaper edge-to-edge so that the pattern matches. Leave the wallpaper hanging like this for about half an hour, and then lightly roll the seams with a roller. On embossed or textile fabrics, lightly tap the seams with a smoothing brush.

- Turn off the power and hang wallpaper over outlets and switches. Make small diagonal cuts to expose the rosette. Along the edges of the electrical panel, trim the wallpaper using a knife with interchangeable blades.
- Trim and prepare a whole strip of wallpaper. While the wallpaper is soaking in glue, measure the distance from the edge of the previous pasted panel to the corner at the top, middle and bottom of the wall. Add 1.5 cm to the largest measured value.

- Align the edges of the folded wallpaper. Measure from the edge at two points a distance equal to the value obtained in step 1. Place a ruler at these two points and cut the wallpaper with a sharp wallpaper knife.

- Place the wallpaper on the wall so that the pattern matches the pattern on the previously hung wallpaper. There should be an allowance of approximately 5 cm on the ceiling. Use your palms to carefully butt the edges of the wallpaper panels end to end. The wallpaper panel should slightly extend onto the unpainted wall.

- Make small narrow cuts in the corners at the top and bottom of the panel so that you can glue the wallpaper in the corner without wrinkles appearing on it. Smooth out the wallpaper with a brush, and then trim off any excess near the ceiling and baseboard.

- On an unpasted wall, measure from the corner and mark with a dot a distance equal to the width of the remaining strip of wallpaper plus 1.5 cm. Draw a vertical line from the ceiling to the floor in this place. Using the same method, cut a new strip of wallpaper this width, starting at the leading edge of the new piece, so that the patterns meet at the corner.

- Place the new cut strip on the wall with the cut edge in the corner and the uncut edge along the vertical line. Press the panel against the wall and smooth it with a brush, and then cut off the excess at the ceiling and at the baseboard.

- If you are gluing vinyl wallpaper, then bend the edge in the corner and apply vinyl glue along the seam. Press the overlapping panel evenly, wait half an hour, then roll the seams with a roller and wipe the area with a damp sponge.

Option. Projecting corners, as a rule, can be pasted over without cutting the wallpaper. If the corner is not vertical, follow the taping directions. internal corners, but not 1.5 cm, but 2.5 cm is added to the measured value obtained in step 1.
Many people primarily associate renovations with wallpapering. Many people mistakenly believe that there are no tricks in this matter and that it is enough to simply stick it more or less evenly and that will be enough. The basis Have a good mood in the future - non-peeling wallpaper. To prevent this from happening, it is necessary to prepare the walls for gluing.
Preparing the wall for pasting
How to remove old wallpaper from walls?
Pasting wallpaper onto old wallpaper is the biggest mistake you can make during the renovation process. If for some reason you pasted new wallpaper on old ones, then be prepared that soon this entire structure will soon collapse. Therefore, first of all, you need to remove the old wallpaper. Wallpaper labels usually indicate lung method removal, but if the label is not preserved, then it’s okay, you can use it in the following ways For various types wallpaper:
- Vinyl wallpapers. To remove vinyl wallpaper, you need to make cuts on the surface and then moisten the wallpaper with water. After the water is absorbed, a horizontal cut is made at the top of the wallpaper and the wallpaper is removed in whole pieces;
— Non-woven wallpaper. In such wallpaper it is necessary to make cuts and holes, and then apply water to the surface using a sprayer. After 20 minutes, the wallpaper itself will begin to peel off from the wall;
— Washable wallpaper. This is a two-layer wallpaper, the first layer is wetted quite easily: notches are made on the wallpaper, the surface is wetted. Then upper layer comes off quite easily. It is best to remove the second layer with a steam generator; you can use a regular steam iron.
— Regular paper wallpaper. There are fewer problems with this wallpaper; just wet the wallpaper and after a few minutes start removing it with a spatula. In this way, you can even remove multi-layer wallpaper structures.
Wall putty
After removing the old layer of wallpaper, you need to prepare the wall. The first stage is leveling the wall using putty. High-quality wall putty takes place in three stages:
1) Covering the wall with a primer composition. This is done to improve the adhesion of the putty to the wall. It is best to apply the primer composition with a roller - this ensures uniform distribution of the primer composition over the entire surface of the wall;
2) Starting putty. After the primer has completely dried, you can begin to putty the wall; this is done to level the walls. Layer starting putty should not exceed one and a half centimeters. If the differences in wall level are greater, then it is necessary to apply the putty in several layers; for this, a paint mesh is used; in this case, it is necessary to let the first layer of putty dry, let it dry and apply a primer solution to it.
It is worth paying attention that the packaging of the putty should indicate that this is a starting putty.
Layers of putty are applied with a spatula in small, even portions. To avoid the appearance of bumps and irregularities, it is necessary to apply the putty diagonally overlapping. To putty corners, you must use a special corner spatula. If your walls are even on their own or high-quality putty was done during a previous renovation, then you can safely skip this stage. Starting putty is only needed to level the walls;

3) Finishing putty. After the starting putty has dried, apply finishing layer putties. It deletes everything small cracks and irregularities, making the wall perfectly smooth. The composition used to perform this operation has the same name as finishing putty. Layer finishing putty should not exceed two millimeters. If you did not level the walls with the starting putty, then the finishing putty is applied immediately to the primer after drying;
Primer of walls
The final stage of wall preparation is priming the walls. Priming the walls is a mandatory step, but many people skip it, which is not recommended. The main purpose of wall priming is to improve the adhesion of wallpaper to the wall, but in addition to this, wall priming is necessary for the following:
- Removing dust and small debris from walls;
- Increasing the moisture resistance of the wall;
- Reduced glue consumption.
The priming process is quite simple and does not contain any tricks. It is best to apply the primer using a roller - this ensures an even distribution of the layer over the surface. The primer must be applied in two layers, the second layer is applied after the first has dried.

Where to start gluing wallpaper?
The first strip of wallpaper is the most important; everything will depend on how well it is pasted. It is necessary to glue the first strip strictly perpendicularly; you should not focus on the corners of the room - often they are far from the value of 90 degrees, and in this case, the drawing will be crooked and the result will disappoint you. You need to focus on either the window or doorway. They are always strictly perpendicular to the floor, and in this case there will be no problems with gluing. It is worth remembering that when gluing strips, you must move strictly in one direction.
Features of gluing different types of wallpaper
Paper
The technology for pasting paper wallpaper is quite simple and is divided into the following stages:
1) The roll is cut into sheets, equal to height walls. But it is necessary to leave a small margin of 10-15 centimeters, depending on the pattern. If the pattern is solid, then it is necessary to adjust the stripes to each other in advance. Some wallpaper has an edge on one or both sides that needs to be cut off;
2) Applying glue. Glue is applied with a brush thin layer. If the wallpaper is made using duplex technology, then the glue is applied in two layers. After applying the first one, the surface will become wavy. The second layer of glue smoothes the surface;
3) The process of pasting itself has no tricks. Better wallpaper Glue together, holding the strip on both sides. This way you can safely stick the strips strictly vertically. There is no need to rush, and you should pay a lot of attention to the first page, because the final result depends on it. When gluing corners, it is necessary to make a slight overlap;
4) It is necessary to smooth out the wallpaper soft cloth from the middle to the edges. This way, air bubbles will not form on the surface of the wallpaper. For smoothing light wallpaper You need to place a sheet of white paper under the fabric;
5) The glue must be removed carefully with a damp sponge. Do not forget that paper wallpaper can be easily damaged.
If there are sockets and switches on the wall, you must first turn them off, then remove the housings. The wallpaper is pasted over the rosettes, a cross-shaped cut is made with a sharp knife, then a hole is cut out.
Vinyl
Vinyl is known for its durability and the gluing technology differs from paper:
1) The roll is cut into strips according to the height of the wall. The stripes are adjusted to each other according to the pattern. Vinyl wallpapers are thick and they are glued only end-to-end. It is necessary to leave a small margin, the room may have height differences;
2) Be sure to read the instructions. Usually the adhesive is applied only to the wall, but some vinyl wallpaper requires the adhesive to be applied to a strip;
3) The sticker process is quite simple. The strip is applied to the wall, after which it is smoothed from the center to the edges with a special rubber roller; the glue can be removed with a damp sponge or cloth. Special attention it is necessary to pay attention to the joint, if necessary, glue it with a brush. When gluing the corners, you definitely need an allowance of 3-4 cm. The excess is cut off with a sharp stationery knife.
When gluing vinyl wallpaper, it is necessary that all rolls come from the same batch. Lots may vary in thickness and color tones. This will not be noticeable in rolls, but on the wall the difference will be striking.
Non-woven
Non-woven wallpaper is very specific in the gluing process; if you decide to cover your walls with this type of wallpaper, here’s what you need to know:
1) Before marking the roll and cutting it into strips, it is necessary to lay a film on the floor surface. You need to cut non-woven wallpaper with a very sharp knife. Having cut off the strip, it is rolled into a roll with the front side inward, starting from the bottom. It is also necessary to mark the wall for each strip;
2) The adhesive must be applied to the wall in sufficient quantity. The strip should slide freely over the surface of the wall, but it is necessary to prevent the formation of smudges;
3) Each strip is rolled out from top to bottom, according to the applied markings. After which the strip is carefully smoothed from the center to the edges;
4) Excess glue is removed with a damp sponge, allowances are cut off with a sharp stationery knife.
- Cutting wallpaper is best kitchen knife, it is much easier to manage, and trimmed with clerical work;
- Trim wallpaper on windows and door slopes it’s much easier the next day when the wallpaper is dry;
- It happens that the eyes get tired and the gaze becomes blurred and air bubbles can be missed. To prevent this from happening. Just run your fingers along the strip; a characteristic rustling sound will immediately reveal the location of the bubbles;
- If a little wallpaper is missing. You can use scraps, but this is quite difficult to do with composite drawings;
- Draft is the enemy of fresh wallpaper, so you can’t create a draft in the room immediately after pasting the walls;
- To ensure that the glue is uniform and without lumps, it can be stirred with a drill with a mixer-type attachment.
- Vinyl wallpaper on a non-woven basis is glued in the same way as non-woven wallpaper.
Wall decoration is one of the final tasks, but no less important. Choice suitable covering is a headache in itself, but applying it can be just as troublesome. To obtain beautiful walls With a minimum of effort, use our advice. In this article we will tell you how to glue wallpaper with your own hands.
Preparing the walls
It is very important to properly prepare the walls before wallpapering. In other words, clean the surface, putty and primer.
Wallpaper is very capricious in relation to the surface being pasted: it must be perfectly smooth and even. Cracks, roughness and other imperfections will certainly affect appearance walls.

Remove a layer of old wallpaper using hot water(in special cases - soap solution) and brushes. Clean the surface from dirt, grease, paint and loose plaster.


Now you can start puttingty, which will get rid of unevenness and cracks. It is performed in two stages.

The starting putty is applied in a layer of no more than 1.5 cm and is necessary if the walls are in a “dead” state: holes, big differences, deep cracks. If one layer is not enough, use paint mesh to increase the strength of subsequent layers.

The finishing putty mixture finally completes the preparation of the walls: it makes the surface perfectly smooth, removing the most minor defects. Use special lighting to avoid missing them.

After this, start priming. Use a primer deep penetration. Apply with a roller and let dry according to package instructions. If the wall is in good condition, you can skip this step, but experts advise against doing this. It will allow you to remove dust from the walls and finally prepare them for wallpapering.


How to glue paper wallpaper
After the walls are ready, you can start gluing paper wallpaper with your own hands.
Before starting work, they also need to be prepared - cut off the edges and cut out strips of the required length. Follow the pattern so that it matches at the joints. The length of the stripes is determined by the formula “room height + 10 cm for wallpaper with a small pattern or +20 for a large pattern.”


By the way, the reserve will allow you to avoid getting into trouble if the ceiling height in the room is different. When finished, cut off the excess or hide it behind the border.

Get rid of the edges: remove the right edge from the strips intended to be glued to the right of the window opening, and the left edge from the rest.


If the wallpaper is thin, spread cold liquid glue from the middle to the edges and immediately glue the strip to the wall. Glue the first one especially carefully: it should be positioned strictly vertically.

Smooth it with a soft cloth (if the wallpaper is light, place a piece of paper under the cloth), avoiding the appearance of bubbles. Remove excess glue quickly and carefully with damp foam rubber.
Thick wallpaper is glued with warm glue, applied in two passes: first let the strip soak and become wavy, and then apply a second layer. After this, the wallpaper should smooth out again - which means it is ready for gluing.
The strip inscribed in the corner should overlap the adjacent wall by 3-4 cm.


How to glue non-woven wallpaper
When gluing non-woven wallpaper, no matter how unexpected it may sound, it is better to start from the corner. Cut the roll into strips with a margin.

Following the instructions, prepare the glue and, generously, apply it to the wall with a roller. The strip should slide along the wall, but do not allow strong drips to form.

Non-woven wallpaper can only be glued end-to-end: even a small seam will be clearly visible. Roll out the strip from top to bottom and smooth from the middle to the edges. Take your time and let all wrinkles disappear. Remove excess glue with a sponge.


How to glue vinyl wallpaper
Let's consider gluing vinyl wallpaper. Cut the roll into strips with a margin according to the already familiar formula. Apply glue according to the instructions on the roll. Usually it is applied to the wall, but sometimes it is necessary to lubricate the strip itself.

Paste them end to end, as the wallpaper is quite thick and the overlap will be obvious. Applying the strip to the wall, smooth the surface with a rubber roller from the middle to the edges. Use a cloth to remove excess glue.


We hope our instructions for correct gluing wallpaper will help you cope with wall decoration.

Photo of the wallpapering process


Wallpaper today is one of the most popular types decorative finishing. This is a relatively inexpensive and beautiful type of finish. You can choose the texture and shade to suit your taste. Gluing wallpaper is quite easy. Even a novice master can handle this work. How to glue wallpaper will be discussed further. Advice from experienced specialists will help you understand this issue.
How to glue wallpaper? This question often arises among the owners of a house or apartment who decide to carry out the repairs themselves. There are many varieties of this type of finish. The technology for pasting the room largely depends on the choice of material. However, there are many general stages, which the master is obliged to carry out during the process of finishing walls or ceilings. They should definitely be considered in detail before starting work.
If you follow the recommendations of experienced repairmen, you can achieve High Quality finishing. At the same time, you can hide imperfections that have appeared on the walls or ceiling over time. You don't need to be a professional to do this. Experienced repairmen claim that, using imagination and advice from designers, you can stick wallpaper on the walls or ceiling yourself. All the necessary skills can be learned quickly.
It is important to properly prepare the walls before pasting. The old layer of finishing needs to be removed. Some inexperienced craftsmen claim that you can glue wallpaper onto old wallpaper. However, this is only true in very rare cases. Old wallpaper can show through new material. Wherein new finish may puff up.
It is important to choose the right color and texture of wallpaper. The final result largely depends on this. The lighter the walls, the more spacious the room seems. However, you should not choose one color for the ceiling and walls. You can do several bright accents. One wall can be one color, and the rest - another. In this case, the shades must be combined.
The larger the room, the larger the pattern can be. For small rooms It is better to give preference to wallpaper with small patterns. If you need to visually increase the height of the ceiling, you should choose a pattern with vertical lines. If the room is narrow, it is better to give preference to the horizontal direction of the pattern.
It is also worth considering safety requirements. Before starting work, you must turn off the power supply to the room. If dusty work will be carried out (for example, removing paint from a wall mechanically), you need to use a respirator. When choosing a stepladder, you should check its strength. The ladder should not wobble. Only stable structures are used in the work. Otherwise, you may fall off it and lose your balance.
First of all, you need to decide which wallpaper is best to glue. There are many types of materials for decorative finishing. They differ in cost and performance characteristics.
The most inexpensive view are paper wallpapers. They can have different densities. It's environmentally friendly pure material. However, paper wallpaper cannot be washed. It also prevents water or dirt from getting on them. It is almost impossible to clean the surface. This is the most short-lived type of finish.

Non-woven wallpaper is more popular today. They are quite tough and resistant to various adverse influences. If the master does not have sufficient experience in wallpapering walls, it is best to choose the non-woven variety. Making a mistake in this case is much more difficult. Such wallpaper can hide small defects and unevenness of the base.
Another common type of finish is vinyl wallpaper. Their surface is covered with a dense polymer layer. It does not allow moisture and steam to pass through. This surface can be washed. There are vinyl wallpapers on paper or non-woven backing. The cost of the second option will be higher. How to properly glue wallpaper on vinyl based, depends on what material the bottom layer is made of. This type of material is not recommended for use when decorating a children's room or bedroom.
The varieties listed are the most popular. Other types of wallpaper are also on sale. They can be made of fabric, fiberglass, natural materials(for example, bamboo). A huge selection of similar products allows everyone to choose suitable type finishing for almost any room.
Preparing the base
There are a number of recommendations on how to glue paper wallpaper, vinyl or non-woven varieties. Regardless of the type of finish, you first need to prepare the base. This must be done if there are chips, cracks or other defects on the wall surface. Otherwise, the result of the work may be unsatisfactory. You may need to repeat the pasting again soon.

You will definitely need to get rid of old wallpaper, if there is any on the wall or ceiling. The old layer may come off. In this case, the new wallpaper will also sag. Blisters will appear on them. In order not to redo the work twice, it is better to properly prepare the base.
To remove old wallpaper, you will need to prepare warm water, spray bottle or rag. First you need to thoroughly soak the wall covering. Next, use a spatula to remove the old layer. If the wallpaper is very difficult to remove from the base, you need to add soap to the water. It will act as a glue solvent.
If the walls have been painted, this layer will also need to be removed. To do this, use a solvent and a spatula. To make the work progress faster, you need to use a grinder with a special attachment. However, in this case a lot of dust is generated. You will need to wear a respirator.
When studying or other types of materials, you need to pay attention to proper preparation grounds. If there are small defects, they are treated with a special mixture. Most often, the wall has to be completely covered with two layers. gypsum plaster. Before applying wallpaper, you need to prime the sanded surface. Next you can start gluing.
Glue selection
How to glue paper-based or non-woven wallpaper? Different methods are used. You need to follow the advice of experts. It is important not only to properly prepare the base, but also to choose the appropriate type of glue. A number of factors are taken into account. The most important of them is the type of wallpaper. A special adhesive is available for sale for each material.
You also need to consider indoor conditions. If the apartment is damp, fungus may appear. To prevent this, you should choose glue with antibacterial and antifungal additives.

It is worth considering that the glue base may be different. In this case, it should be written on the packaging what wallpaper this composition is intended for. Some of them add special components that increase the adhesion strength of the materials to the base. For example, learning how to glue meter wallpaper, special attention should be paid to such types of compositions.
Wallpaper glue can be different types. There are varieties designed for light (paper) or heavy (fiberglass) materials. If you are going to glue vinyl, non-woven varieties of wallpaper, you also need to use special glue. Should not be used universal options or use a composition intended for another type of material.
Only when making the right choice Wallpaper glue can be obtained good result work. The material will be firmly fixed to the base. In this case, it will be possible to avoid its deformation and detachment.
Before you begin the process of covering walls, you need to consider a number of professional tips. A number of nuances will need to be taken into account. If the wallpaper has a small pattern, it does not need to be combined. Simply cut strips 5-10 cm longer than the height of the walls. However, quite often the drawing requires correct alignment. In this case, there will be more material waste.

For example, when learning how to glue meter-long non-woven wallpaper that has an offset pattern, you need to consider the procedure for this process. You will need to clear the floor of unnecessary things in order to prepare enough free space. The base needs to be laid plastic film. Next, a roll is rolled out onto it. The height of the wall is measured and a reserve of 10 cm is made. Next, you need to combine the drawing and make markings. Only after this the second sheet is cut.
If the wallpaper is 50 cm wide, then you can glue the first sheet to the wall. The second is combined with it during the pasting process. To do this, you need to take into account the amount of rapport. It is indicated on the roll packaging. A margin of 10 cm is also added to the length of the report.
It is also worth considering that some types of wallpaper are glued end-to-end, while others are overlapped. This information is provided by the manufacturer on the packaging. In order not to violate the integrity of the drawing, this must be taken into account. Most often, paper wallpapers are glued overlapping, and non-woven or vinyl wallpapers are glued end-to-end. However, there are exceptions.
How to glue correctly?
You should also find out where to start gluing wallpaper. If the material is applied to the wall, you need to start from the window. This will make the joints less visible. In this case, the sheet is applied to the ceiling, and then lowered smoothly down. You need to align the first sheet along the line that was marked using building level. The second canvas is not aligned with the ceiling, but with the first strip. Therefore, it is important to stick it very evenly.

Also, experts do not advise starting pasting in the place where the wallpaper hits the corner. It is better to stick the first sheet on a flat surface. It is measured using a building level. After this you can glue the corner. If the walls are uneven, it is better to glue the corners separately. To do this, cut out pieces of wallpaper separately.
It is also worth considering the method for gluing wallpaper on the ceiling. Pasting is carried out starting from the wall on which there is a window. You need to move towards the opposite wall. This way there will be no noticeable joints or overlaps between pieces of wallpaper.
Experts also recommend starting pasting from the center. Gradually moving towards the edges. This way the finish will look neat and symmetrical. If you start from the corners, the strip may go crooked. This will also disrupt the solidity of the finish. The direction of the pattern will be skewed.
By following these requirements, even a beginner will be able to complete the pasting correctly and accurately. At the same time, less effort and time will be spent on work.
Paper wallpaper
How to glue paper wallpaper? There is a certain technology. This classic version, which is relatively low cost. Such wallpapers are breathable. At the same time, there are no special difficulties when pasting. You need to stick to simple technology.

First you need to roll out the roll on the floor. Make a mark on the wrong side. Measure the length of the wall and make a margin of 10 cm. After this, make a cut along the drawn line. If you don’t need to select a pattern, cut several more sheets of the same length (depending on the length of the roll). If you need to adjust the pattern, turn the wallpaper over to the front side. Next, the two canvases are compared and the corresponding cutting is performed.
So, let's glue the wallpaper. Starting this process is a particularly important task. If the first sheet is glued incorrectly, the remaining sheets will also be skewed. Glue is applied to the sheet. It needs to be evenly distributed over the surface. It is especially worth paying attention to the edges. After this, the canvas is left for several minutes. During this time, the material will be saturated with glue.
If you start gluing wallpaper right away, it will swell from the glue. Air bubbles will appear under the material, which will be difficult to remove. Impregnation for too long will make the material soft. Wallpaper can be easily damaged. Therefore, the impregnation time is chosen in accordance with the thickness of the paper. It will take from 3 to 8 minutes.
Apply the sheet to the ceiling. Then, using a roller, it is straightened, removing air from under the canvas.
Vinyl wallpapers
You should consider in detail how to properly glue vinyl wallpaper. This is quite hard material. It does not let water through. The adhesive must be designed specifically for vinyl wallpaper.
First you need to correctly mark the canvases. This process is completely identical to the procedure with paper wallpaper. The pattern will need to be selected for each subsequent strip.
First you need to prime the wall. It must dry. Next, the glue is applied to the back surface of the canvas. Wallpaper should be attached to the wall near the ceiling. Next, they are straightened using a roller. The second sheet will be glued end to end. It is very important to coat the edges of the sheets with high-quality glue. Otherwise, the wallpaper here may lag. Using a roller, the joint is further pressed.
It is also worth considering that vinyl wallpaper can be made on a paper or non-woven basis. In the first case, you need to wait 5 minutes after applying the glue. During this time the composition will be absorbed into the wallpaper. Vinyl wallpaper on a non-woven base can be glued immediately.
If excess glue appears, it must be removed immediately using a clean, dry cloth. Smooth the wallpaper from the center to the edges. In this case, the glue layer should not be thick. This will prevent it from getting on the finishing surface.
The bottom and top edges must be trimmed using a sharp stationery knife. A baguette is glued on top. A plinth is installed at the bottom of the wall.
Non-woven wallpaper
Considering how to glue non-woven wallpaper, it is worth saying that this is the most undemanding material. Even a beginner can easily apply such wallpaper. They are not deformed. At the same time, such sheets are quite simple to join.
First you need to do the cutting. At the same time, rapport, if any, is taken into account. The drawing is combined before the sheet is pasted on the wall. This is especially important if the wallpaper is meter wide. Non-woven wallpaper also requires the use of special glue.
First in a bucket of warm water pour dry glue slowly. It needs to be stirred constantly. You must adhere to the proportions established by the manufacturer. When the glue is ready, it is left to sit for 15 minutes. Next, you will need to mix it again.
In this case, the glue should be applied not to the wallpaper, but to the wall. The material will glide well over the surface. This will allow you to correctly position it on the wall. The second sheet is usually glued end-to-end. Therefore, it will be easy to match one strip of wallpaper to another. The material slides along the surface of the wall. Align its position with a roller. Then the bottom and top edges are trimmed with a sharp knife.
Ceiling pasting
The technology for gluing the ceiling requires that the work be done by two people. The ceiling is prepared in the same way as the walls. After this you need to draw a control line. The location of the first stripe sticker will be guided by it. First, wallpaper is glued in the center of the ceiling. This process begins from the wall on which there is a window.
If the wallpaper is not non-woven, glue is applied to the canvas. It needs to be folded in the form of a snake in sections of approximately 35 cm. Gradually, the material can be unrolled without fear of getting your head and clothes dirty. The canvas is smoothed with a roller, expelling bubbles from under it. Movements are performed from the center to the edge. After this, the excess needs to be trimmed with a stationery knife.
Having considered how to glue wallpaper, you can complete the entire procedure yourself. The result will exceed all expectations if you take into account the advice of the masters in your work.
Deciding to make repairs on their own, many do not know how to glue wallpaper to the wall. Usually the roll is cut into sheets of equal length, taking into account the height of the room, and coated with glue. The adhesive solution is also applied to the wall. It’s easier to hang non-woven wallpaper: apply glue only to the wall surface. You can completely forget about the adhesive mixture if you buy self-adhesive photo wallpaper.
Before you start renovating, you need to buy wallpaper, Building tools and glue. Before gluing, the wall surface is cleaned of old materials, leveled, and strengthened with a primer.
How to calculate the quantity yourself
Wallpaper is sold in rolls indicating the footage. In order to find out how much roll sheeting is required for repairs, you need to measure the length (a) and width (b) of the room. Then calculate the perimeter: P = (a+b)*2. Then you need to measure the height of the room (h) and find out its area: S = h*P. From this value you need to subtract the area (S1) of windows and doors, since wallpaper is not glued there. The resulting value is S2 = S – S1, equal to area walls that will be covered with wallpaper.
Then you need to take the roll and see what its length (a3) and width (b3) are. These two values must be multiplied to find the area (S3 = a3*b3) of the rolled web. Now the area of the walls for wallpapering (S2) needs to be divided by the area of the rolled fabric (S3): S2:S3=N. The result is N; it needs to be rounded to a whole number to find out the number of rolls for renovating the room.
Necessary tool
Before starting repairs, you need to buy everything at a hardware store necessary tools. Is it true, renovation work are divided into several stages: preparing walls, applying markings, cutting strips, gluing, smoothing sheets. In the store you need to buy tools for removing old coating, putty and leveling the walls, and applying glue.
What tools will you need to paste the walls:
- fleecy paint roller for applying glue;
- roller, rubber spatula, brush for smoothing the glued fabric;
- a tray that allows you to distribute the glue over the surface of the roller;
- plastic bucket (10 liters) for diluting the adhesive solution;
- drill or construction mixer for stirring glue;
- a wide and narrow brush for applying glue to joints and corners;
- stationery knife or scissors for cutting sheets;
- a screwdriver and electrical tape for dismantling sockets and switches;
- plumb line and level for applying even vertical markings;
- construction tape for measuring length and width;
- a wide metal spatula for cutting sheets at the joints;
- stepladder to reach the required height.
Blackout of the premises
The room must be disconnected from electricity before renovation. After all, while gluing the walls you will have to remove switches and sockets. To turn off the power supply, you need to unscrew the plugs on the panel or move the machine lever to the “off” position.
After a power outage, you need to check the voltage in the outlet using indicator screwdriver: The indicator should not be lit.
Removing old coating
Before covering the walls with new wallpaper, it is necessary to remove the old covering. Cleaning the wall is considered the most time-consuming and dirty process. However, there is no way to do without it. Regardless of the finishing option, the surface must be cleaned to the ground.
Water
The easiest way to get rid of old paper-based vinyl wallpaper. All you need is a bucket of warm water, detergent and a wide spatula. In order to peel off the wallpaper, you need to first soak it in soapy water using a sponge, and after 20 minutes, pry it off with a spatula and remove it from the wall.
Chemistry
Special chemicals will help remove wallpaper tightly glued to the wall. Any of the drugs is diluted with water in the required proportion and apply the solution to the wall surface.
Kleo
This is a liquid for removing old wallpaper. The product diluted with water is applied to the surface, and after 15 minutes the wall is cleaned of the old coating. However, if you used wood glue, you will have to take a drill with a brush attachment and remove the paper along with the plaster.
Metylan
This chemical peels off any type of light or heavy wallpaper. The drug contains no solvent and is odorless.
The product is pre-diluted with water and then applied with a roller to the tattered wire brush coating.
Prospector
This is a primer that is diluted with water and the surface is impregnated with the solution. Helps remove any type of wallpaper (even liquid) from the wall.
Quelud
Removes lightweight paper or vinyl wallpaper. The liquid is mixed with water in the required proportion, and the surface is wetted with a sponge. The paper becomes saturated with moisture and chemical agent and then easily removed with a spatula.
Leveling walls with your own hands
The wall under the wallpaper should be flat and smooth. Putty will help remove small holes, cracks, and pits. It is applied to a cleaned and primed surface. Uneven wall leveled with plaster. The mixture is applied to a surface cleaned of old coating. The wall is first primed. You can level the surface using drywall. First, a sheathing is installed on the wall, and plasterboard sheets are mounted to it.
Padding
The walls are primed before applying putty or plaster. The primer is also used before wallpapering. This product strengthens the crumbling surface, increases adhesion, and protects against mold and mildew. The primer dries quickly, strengthens the base well, and prevents the plaster from becoming damp and peeling. The liquid is applied using a roller to the cleaned surface.
How to measure and cut
Before you hang wallpaper on the wall, you need to cut it into panels of the required length. The rolls are rolled out on the floor; the floor must first be cleared of furniture and covered with film. The length of the panel should be equal to the height of the wall. If the height is 2.5 meters and the length of the roll is 10 meters, then one roll will produce 4 strips.
True, wallpaper is cut taking into account the pattern, so you will have to shift the cutting line a little so that each canvas starts with the same pattern. The markings of patterned panels are done on the front side. From a roll of 10 meters you can get only 3 strips, starting at the top with the same pattern.
Basic gluing techniques
Pasting walls is a labor-intensive process. True, knowing some of the intricacies of this matter, you can cope with the repair yourself.
How to start right
Before pasting the walls, you need to ventilate the room and close the windows tightly. Wallpaper does not like drafts. If you plan to paste over not only the walls, but also the ceiling, then you need to start there. Panels without a pattern are usually glued on top. The ceiling is covered starting from the wall. Wallpaper with a pattern is glued from the center of the ceiling in opposite directions. In this case, the first strip should lie in the middle. The second and third panels are glued on the sides of the central strip.
Wallpaper is applied to the wall from a corner, window, door or from the middle of the wall. A marking is made on the wall surface - a vertical line, and a strip cut from the roll is glued along it. The first panel is glued according to the guideline, the subsequent panels are joined side by side. Pasting the wall is carried out counterclockwise. Before pasting the surfaces are cut required quantity stripes and number them. The numbering is repeated on the wall.
Types of prints
Wallpaper comes in different patterns. The process of pasting walls depends on the print applied to the panel. Plain panels can be glued overlapping; stripes with a pattern can be glued end-to-end.
Plain
Plain wallpaper can be cut into strips of the desired length and glued to the wall. There will be no waste in the roll; the entire panel will be used for gluing the wall surface. The room can be covered with such wallpaper from any place.
Abstraction
An abstract drawing with a non-standard pattern affects the emotional and psychological state of a person. Such wallpaper can be pasted on one of the walls of the room. The roll is cut into strips of the required length, which should start with the same pattern.
Glue sheets with abstraction, starting from the middle of the wall.
Geometry
Geometric print can consist of various figures. When cutting the cloth into strips, you need to remember that each of them should start with the same pattern. These wallpapers are glued starting from the middle of the wall in order to maintain clear symmetry in the design.
Stripes
Usually a room is covered with wallpaper not with horizontal, but with vertical stripes. Along the entire length of the panel the pattern is the same - long lines. The roll is cut into pieces, taking into account only the height of the room. Begin pasting from any place.
Vegetable
When covering a room with wallpaper with a floral pattern, it may be difficult to match the pattern. First of all, you need to cut strips that will start the same. When pasting the area above the door or window, adjustments are made. Begin gluing from the middle of the wall.
Ornament
Wallpaper with repeating small patterns can be glued starting from the corner or doors. A large drawing should look symmetrical. Pasting begins from the middle of the wall.
How to glue on flat areas
All types of wallpaper are glued the same way: the rolls are cut into pieces of the required length and glued to the wall. True, each type of material needs its own glue. Manufacturers produce adhesive mixtures, naming them in accordance with the names of the wallpaper (paper glue, vinyl glue, non-woven glue).
Step-by-step instructions for self-gluing flat areas:
- dilute the glue with water to the desired consistency;
- apply the adhesive solution to the underside of the sheet or only to the wall to be pasted;
- the panel coated with glue is folded in half, avoiding bending;
- wait 5 or 10 minutes for the sheet to become saturated with glue;
- bring the panel to the upper edge of the wall, press it tightly and smooth it out, displacing the remaining glue;
- the strip is glued, focusing on the markings on the wall;
- the lower part of the sheet remains tucked, it is unfolded gradually;
- the glued panel is smoothed with a roller from top to bottom, from the middle to the edges;
- Any glue protruding beyond the edge of the sheet is removed with a dry cloth.
How to glue in corners
Usually wallpaper starts to be glued from the corner. True, even corners are rare, so panels are not glued end-to-end in this place. It is better to first draw a vertical line and stick the sheets from it. The corner itself is pasted over like this: on one side, the edge of the canvas should extend onto the adjacent wall by 4 centimeters, and on the other side, the edge of the cloth should be glued overlapping by these 4 centimeters. In the very corner, the sheet is not placed in the middle, since after drying, folds may appear on it.
Sticking near windows, doors and behind the battery
There should be a symmetrical pattern on both sides of the doors. Wallpaper with large patterns should begin to be glued from the door, and not from the corner of the wall. The top of the pattern above the window should match the top of the joining sheet. On both sides of the window the pattern should be symmetrical. Behind the battery you can glue the sheet remaining after cutting the strips.
How to stick around sockets
Before gluing, you need to remove the socket body and wrap the wires with electrical tape. Electricity must be turned off.
Wallpaper is glued over the socket. Right size The holes are cut when the glue is completely dry.
Invisible joints
Typically, sheets are glued next to each other end-to-end, rather than overlapping. True, after drying, the panels shrink, and gaps appear between them. These places can be disguised using glue and wallpaper remnants. From the sheet sandpaper clean off the top layer and prepare grout for the gaps.
Correction of defects
Scratches or bare joints can be masked. To do this, you need to take a pencil of a suitable color and crumble the lead. They lubricate gaps or scratches on the panel.
Technology for gluing different types of wallpaper
The room is pasted over different wallpapers: heavy (vinyl, non-woven) and light (paper). Each type requires its own glue, a certain time for impregnation and its own gluing technology.
The roll is cut into strips of the required length, turned over with the front side facing the floor and coated with glue. Glue mixture Apply to the sheet from the middle to the edges and leave for 5-10 minutes to soak. The walls are also coated with glue. True, the adhesive solution for the wall surface is made more liquid and left to soak for 10-15 minutes. You can buy glue with a color indicator that will help you apply it evenly to the sheet.
If you glue vinyl wallpaper on a non-woven backing, then the panel itself is not coated with glue. The adhesive mixture is applied only to the wall and left for 10-15 minutes. Self-adhesive photo wallpapers are glued to the surface without using glue.
Subtleties and nuances
Wallpaper is selected for each room based on its characteristics and design. The panels are glued to the wall using glue.
Paper
Paper wallpaper allows the room to “breathe”. They fit perfectly on any surface. True, paper cannot be glued in a room with high humidity. Moreover, she has short term services. Paper sheets are produced in 1 or 2 layers.
Two-layer materials almost do not deform when wet. For paper wallpaper, paper glue is suitable; it is applied to the wall and to the cut strips not very thickly, for only 5 minutes, otherwise the panels will get wet.
Vinyl, non-woven backing
Beautiful and durable wallpaper with smooth or relief surface. They perfectly hide any unevenness on the wall. Can be used for rooms with high humidity. They do not stretch, do not shrink after drying, and do not deform when wet. Before gluing with non-woven glue, only the walls are coated, and then dry sheets are applied to the wall surface.
Photo wallpaper
They are glued in the same way as ordinary paper wallpaper. Paper glue Apply to the wall for 10 minutes and to the sheet for 5 minutes. Then the photo wallpaper is brought to the wall and pressed tightly. By using rubber spatula the surface is smoothed, displacing the remaining glue.
Wallpaper on the ceiling
It’s better to hang the wallpaper above with two people; you can’t handle the repairs alone. Markings are made on the ceiling and coated with glue. The sheets are glued, depending on the pattern, from the wall (from the window) or from the center. The panel is pressed tightly to the surface and smoothed with a rubber spatula.
Wallpaper on wallpaper
New wallpaper can be pasted over old ones. After all, paper sheets are not so easy to remove from the wall; they literally grow into it. Non-woven ones come off easily; it is better to remove them before gluing new material. You can leave the paper ones and grease them well with glue. New wallpaper also needs to be soaked in the adhesive mixture.
Self-adhesive
Such wallpaper sticks perfectly to smooth surface, any irregularities in the wall underneath are clearly visible. They have an adhesive backing and protective layer from the wrong side. Protective film remove gradually, pressing the adhesive base tightly against the wall.
Common mistakes when labeling
Before pasting, the wall must be cleaned of the old coating, leveled with plaster or holes and cracks filled with putty. The base will not fall off if the surface is well primed before using the leveling solution. The primer is applied to the layer of finishing plaster, after which they begin to wallpaper the wall.
It is better to glue wallpaper in summer. After all, the glue must dry when room temperature, and in winter the radiator may be turned on in the room, which is undesirable, otherwise the wallpaper will warp. There should be no drafts in the room where renovations are taking place: all windows and doors must be tightly closed. Before pasting the walls, be sure to go over the surface with a primer, otherwise the wallpaper will begin to fall off along with the putty.