Finishing the log house: the order of work after shrinkage. Interior decoration of a log house: design ideas Wall cladding in a log house
Many people associate a log house with a traditional Russian hut. However, the abundance of wood in the interior decoration can create a heavy atmosphere. To prevent this, you can consider interior finishing techniques for buildings of this type.


General provisions
A house made of rounded logs looks original. In some cases, coat internal surfaces wooden walls not at all necessary. However, logs do not always look aesthetically pleasing - you want to cover them with a more interesting type of cladding. And here it is important to take into account that the technology for installing the coating will differ from facing walls made of concrete or brick. This is due to the properties of wood.


Depending on this general provisions look like this:
- finishing of internal surfaces is carried out only after active shrinkage of the house;
- the process of caulking before finishing work is mandatory;
- to avoid the appearance of mold, you need to use materials with throughput for finishing;
- when using sealed raw materials, forced ventilation is performed;
- it is important to use lightweight materials so as not to create additional load on the foundation and walls;
- if there is an attic, then carefully consider the type of finishing raw materials, taking into account convenient installation on the walls of the roof, which is also the walls of the house.


If the building has already been erected, then the condition of the floors is assessed before finishing. If necessary, pay attention to places that differ in color, density and texture. For example, crumbling indicates the destruction of the massif by beetles. In this case, you need to eliminate the cause of the damage and treat the wood with special impregnations.

When can I start?
Immediately after the construction of the house, compaction of the joints of the building begins under the influence of the weight of the logs, roofing and windows. The structure becomes stronger, the voids between the logs or timber are reduced. You cannot begin finishing at this time: in the best case, the cladding will tear (wallpaper), in the worst case, it will begin to break off from the base of the floors. If it is floor or wall tiles, it will be difficult to replace it, since you will also have to remove the glue.
The log house is shrinking all the time. Wherein shrinkage is divided into active and permanent. The active period lasts the first few months after the construction of the structure. The period depends on the type of wood, its thickness, type and time of year of construction.
Usually, during the active phase, a house with a height of 3 m shrinks by 10 cm in six months. If laminated timber was used in the work, then active shrinkage will take 3-4 months. When the building is made of ordinary logs or beams, interior finishing can begin only after a year. The end of active shrinkage is determined with a tape measure: if the height of the walls does not change within 2-3 months, you can begin internal cladding.


Preparatory activities
The walls are caulked, eliminating the gaps between the beams. This is the stage of insulating the structure and protecting it from moisture. This process is carried out regardless of whether it has been used or not. interventional insulation at the stage of building the house box. In addition to caulking, insulation of the building is carried out using the “warm seam” technology.
In the first case, rolls or loops are rolled out of the insulation, then driven into the cracks. You can roll out the strips and push them into the cracks all the way, doing the work from the bottom up. The second technology is used by fans of modern know-how and synthetic materials. In this case, special acrylic or rubber sealants are used. When preparing, you cannot do without taking protective measures - this will increase the service life of a log house and protect it from rapid destruction.
The tree attracts the attention of insects and rots if the climate in the region is rainy. In this case, it is treated with special impregnations. In addition, the array has to be sanded and primers used to strengthen the structure, and sometimes painted with special compounds. Since wood burns, it is treated with fire-retardant impregnations.


Materials used
Usually in such buildings they try to use coatings that are easy to replace if necessary, with the exception of tiles and stone.
- For sealing jute cord is used, as well as tow, felt, moss, linen, and sisal. Of these, jute is considered the best raw material - it does not rot, is durable and does not attract insects, although craftsmen believe that it is more of a decorative rope than insulation. Sisal is good, but costs more than its analogues. Compaction is carried out twice. To avoid distortion, the crown is processed on both sides.
- For interior decoration walls you can use lining, wall panels, slats, drywall. For finishing a fireplace or wall ledges, imitation brick or torn stone is suitable. Design the floors natural stone undesirable due to its heavy weight.
- For the ceiling You can use stretch film, ceiling tiles and panels with lock connection. For the floor you can use laminate, parquet, tongue and groove boards, and cork. Linoleum, carpet and tiles are used less frequently.


Fastening finishing materials on the frame is carried out with a gap - this is necessary in case of deformation of the structure and its seasonal movements. To prevent rodents or insects from growing in the voids, the space is filled with glass wool. Electrical wiring is protected with metal pipes. They protect themselves from ants with a fine net, which is packed into the first crown of the log house.


Interior: how can it be decorated?
To prevent the house from looking like a wooden box from the inside, you need to limit the amount of wood. The wood will look expressive, and the furniture will look beautiful against the background of the ceilings. However, the lining around the entire perimeter of the rooms will not be harmonious with the overall interior. You need to choose one style for the whole house, but the materials for the cladding should be different.
For example, for a hallway or attic, you can choose slats from kiln drying lining. Such material will not shrink over time. You can choose wall panels for the bathroom, toilet and kitchen, which will relieve wall coverings from boredom and allow you to arrange the furnishing elements more harmoniously. At the same time, the texture wall panels may be different - it depends on the possibility of simulating various materials.


For example, you can decorate the living room wall with imitation brick or stonework. A marble or marble finish would look good in the bathroom. tiles, as well as mosaics on the grid.
If there is natural ventilation, then panels made of derived wood, as well as bamboo and leather boards, can be used for cladding. It will look beautiful and moisture resistant drywall. It can be painted, wallpapered, or combined with stretch film.


Styles
It is difficult to create an atmosphere of modernity in a wooden house, emphasizing the achievements of technology in every material used. However, the possibilities of such a structure allow you to choose different stylistic directions, including some modern design trends. A log house is an excellent basis for the styles of the French countryside. Provence and country are the best solutions for such buildings.


In addition, you can issue interior decoration in the spirit alpine chalet. The hunting lodge is one of the fashionable trends today. In addition, such houses are a good basis for implementing environmental stylistic trends. If you start from the landscape, you can perform different design projects. Arrangement in a boho style would look good.


Classicism with its craving for palace solemnity, columns, gold decor and stucco molding cannot be created here, but art deco and modernism are quite possible. The house can look elegant with the right approach for covering walls, floors and ceilings. For example, wood looks beautiful with imitation stone and metal. This allows you to decorate the interior of a wooden building inside in the spirit of hi-tech and minimalism.
In addition, you can take ethnic trends as a basis. For example, inside the house you can recreate the atmosphere English style by installing a fireplace in the living room. Walls can be covered with materials that realistically imitate natural materials.
It will look good and Scandinavian style with his desire for space and lightness, which is achieved by light tones in the design of the planes and a minimum of furnishing elements.


Design options
The first thing you should pay attention to is the severity of the ceilings. If logs are visible inside the house, this can eventually cause internal discomfort. The inside should not give the impression of an unfinished house - comfort is especially important for every member of the household.


The ceiling, walls, floor and furniture together should not be visually pressing. Of course, you can leave some surfaces made of logs. However, it is better to combine them with other cladding.


For example, wooden walls will look better if they are covered with light paint. The design of a ceiling with beams can be played up with contrast: use a white or light color for the base, mark the beams with dark paint and choose a lamp of the same shade. In this case, you should not purchase massive chandeliers with candles and pendants - laconic forms will look better and more harmonious here.


It is worth mixing wood tones with white. For wood finishing The walls are well suited with white plumbing and furniture. You can choose ensembles with colored modules (for example, a kitchen set white with olive details). The right accessories will bring harmony to the interior. It could be a small panel, a painting, a photo in a frame.


A glossy metal hood looks beautiful in the kitchen. In this case, the furniture can be decorated with leather inserts. In some cases, forging in furniture and lamps also looks appropriate. It would be useful to perform kitchen apron in contrast to the wall material. However, moderation must be observed here:
- if the walls are smooth and plain, then you can tiling them with patchwork design;
- with relief and the presence of stone or brick masonry in the design, the apron can only be the same.


For the bathroom, on the contrary, panels are needed. Wall materials are thicker than their ceiling counterparts and have two installation systems: suture and seamless. The difference is visually different in the width of the seam: with a seamless one it is neater and smaller. With log walls, decorating the ceiling with wood-like material is undesirable. In other words, to diversify the design, you will have to reduce the number of logs inside the home - this will make it easier to choose any decor for the floors and furnishings of the rooms.
After construction wooden house next step is to carry out work on its interior decoration. The quality of their implementation should be given special attention, since the quality of the work performed will determine the comfort of a person’s stay, the heat and sound insulation characteristics of the room, as well as the aesthetic appeal of the house.
The need for interior decoration is due to the following reasons:
- as a result of finishing work, the house acquires a more attractive appearance;
- the lack of finishing significantly reduces the service life of the building. If there is insulation, there is significantly less load on the main material from which the house is built, which as a result contributes to the safety of the structure;
- finishing improves thermal insulation properties at home, so performing this work will not only contribute to the creation comfortable temperature indoors, but will also allow you to significantly save money on heating.
Finishing of the log house cannot be started immediately upon completion of construction. It is necessary to wait a certain period of time - from 1 to 1.5 years until the house shrinks. Upon completion of this process, the building will be ready for indoor work.
However, among the finishing options, there is a way to reduce expectations and carry out the corresponding work after construction is completed. This method involves treating a sanded log frame with paints and varnishes. This makes it possible to save significant time. Finishing in this way is advisable if the log house is warm enough and there is no need for additional insulation, as well as if there are smooth walls.
The advantages of this process are:
- it becomes possible to start work immediately after building the house;
- ease of operation;
- no significant expenses.
The disadvantages include:
- difficulty in finishing a completely flat wall surface;
- fragility of the coating.
This finish needs updating every 5 years. By this time, it will be possible to use other materials, since the shrinkage of the log house has already been completed. Let's consider everything available materials, with which you can perform finishing.
Features of working with lining
This type of material consists of boards up to 220 mm thick, which are made from hardwood and pine wood. Installation of the lining can be done horizontally and vertically. To determine the most suitable method, you should proceed from the size of the building:
- For small houses suitable option there will be vertical laying.
- If the building has large parameters, in this case it is better to stop at horizontal installation. This condition is explained by the size of the material. The length of the lining is 2.5 m. If the installation method is inappropriate, joints are formed.
The features of finishing a log house with clapboard also include the following factors:
- Before starting work, it is recommended to treat the lining with special preparations that protect the material from fire, as well as the negative effects of insects and moisture.
- It is recommended to attach the lining to the sheathing. Thus, the installation will be as smooth as possible, and communications can be hidden behind the lathing frame. The presence of sheathing is not necessary if the house is built from glued or profiled timber, since such walls themselves are quite smooth.
- For the lathing, bars are used, which are placed horizontally along the entire perimeter, while maintaining a distance of 50 cm.
The interior decoration of the log house should begin from the corner of the room. Thanks to the tongue-and-groove coupling, installation will be done smoothly and will not require much labor. There are three methods of attaching boards to battens:
- The highest quality method is considered to be fixation using a special clamp called a clamp. One part of this product is fixed inside the groove, the second part must be connected to the rail using a self-tapping screw.
- Fastening is also done using galvanized nails. At an appropriate angle of 45°, the nail is inserted into the “groove” and driven in.
- The last third method involves using a self-tapping screw. It is necessary to make a hole in the board, the diameter of which should correspond to the head of the screw, and the depth should be equal to half the thickness of the board. Then a screw should be screwed into this hole and closed with a font. After this, you need to align the font with the board by sanding.
The use of lining has both advantages and disadvantages. This material is easy to install, environmentally friendly, creates additional insulation and has natural look. But at the same time, lining is a rather expensive material and the boards must be treated with special preparations before work.
Finishing of log houses. Photo:


Rules for finishing using rope
This option can only be used for a log house built from rounded logs. The presented finishing method is performed using jute decorative rope and requires compliance with certain rules:
- You should start working only after treating the timber with antiseptic agents.
- The rope is laid in the crowns of the building. This finish helps retain heat inside the room and also prevents wind and moisture from entering the building.
- The rope is attached in several ways:
- through staples;
- using glue;
- due to special nails.
The internal cladding process occurs in the following sequence of actions:
- Before installation, the rope should be treated with an antiseptic. Next you need to cut a fragment of the required length.
- The edges should be wrapped with thread and treated with varnish or glue to prevent them from unraveling.
- For fastening, a special thermal adhesive is used, which is applied using a gun. Glue should be applied to the beams at the places where the rope is attached.
- Afterwards you need to lay the rope on the adhesive.
- At the same time, it is necessary to drive small nails into it - 15 cm - 20 cm.
- After finishing the work, the rope and logs must be varnished.

The rope has the following advantages:
- reasonable cost;
- reliable protection of log seams from cold penetration;
- originality and decorativeness.
However, the disadvantages of this material are the following factors:
- labor-intensive installation process;
- inability to hide communications;
- difficulties in insulating with other materials.

Features of the block house application
Installation of this material is similar to laying lining and involves the following sequence of actions:
- The finishing of the log house inside is carried out on a lathing frame.
- You need to start working from the bottom and move towards the top.
- The last board will need to be cut, at the top of the wall it will be less noticeable.
- It is worth noting that the house block is laid exclusively horizontally.
The advantages of this material are such features as:
- a reliable imitation of a real hut;
- ease of installation;
- the ability to insulate walls and hide communications.
The disadvantages of a block house include:
- high cost;
- unnatural appearance if improperly installed.

Finishing method using putty
Despite the fact that this option is used in most cases for walls made of brick, this method can also be used for finishing log buildings. In this case, you should use plaster composition on mineral or acrylic base. Putty creates a coating that protects the frame from the effects of destructive factors. Also, using special components, the composition can be given the desired color.
The finishing process is simple: first, you need to attach a mesh to the frame using self-tapping screws, and plaster should be applied to it. This method makes it possible to level the surface of the walls.
The obvious advantages of putty are low cost, big choice colors. The process of applying the composition does not require special skills and knowledge; a non-professional can easily handle the job, and in the shortest possible time. But such finishing will last a relatively short time - about 5 years. It will also not be possible to completely hide the pipes, and the finish as a whole will not have a distinct aesthetic appearance. 
Application of drywall
This material is used quite rarely as a finishing for a log house, since in this case the characteristic impression of a wooden house disappears. But in some cases this move justifies itself. The cladding process has the following features:
- Drywall is mounted on a sheathing made in the form of a U-shaped profile.
- It is recommended to lay insulation, for example, glass wool, between the log house and the drywall.
- The material is then attached to the profile using screws.
- After graduation installation work The joints need to be puttied, this will ensure a smooth surface.
How are the benefits plasterboard material The following factors can be identified:
- the ability to make recesses and protrusions in the wall at will. This will make it possible to hide pipes and wires and implement any design solutions;
- This material is also characterized by its low cost and ease of installation.
Among the disadvantages, one should highlight the comparative fragility, because the material will last from 15 to 20 years. In addition, the need to use additional insulation materials, instability to damage and the elimination of the characteristic atmosphere inherent in houses made of wood. 
Finishing with plastic
This material is suitable for finishing individual zones of a log house, however, not for its complete cladding. The plastic is mounted horizontally and vertical way. The most common is the last option:
- At the initial stage of work, you need to assemble the frame. Panel products will be attached to it.
- Profiles must be attached to the top and bottom of the frame.
- Installation must begin from the corner. The panel must first be inserted into the profile, after which the clutch occurs.
- The panels are attached to the profile using screws and nails. To improve the connection plastic panels use liquid nails or glue.
The advantages of plastic as a finishing material are the following features:
- ease of installation;
- affordable price;
- the ability to hide communications;
- sufficient choice of colors.
But at the same time plastic material It also has disadvantages:
- easy flammability;
- insufficient resistance to mechanical stress.

Conclusion
Interior decoration is essential for the subsequent operation of the log house. First of all, with the help of finishing materials you can solve aesthetic problems and decorate the house according to your preferences. In addition, finishing has practical significance for the log house. It will create an additional insulating layer and help maintain a comfortable temperature in the room.
Interior finishing of the log house. Video:
October 4, 2016Specialization: facade finishing, interior finishing, construction of summer houses, garages. Experience of an amateur gardener and gardener. We also have experience in repairing cars and motorcycles. Hobbies: playing the guitar and many other things that I don’t have time for :)
Recently, log houses have found a “second life”, as a fashion for environmentally friendly housing has emerged among the residents of our country. Of course, modern wooden buildings very different from the old log houses. In particular, it is customary to insulate and decorate them; in fact, this article is devoted to this topic.
Below I will try to acquaint you in as much detail as possible with the nuances and optimal options for finishing a log house.
Finishing requirements
Decorating a house made of wood contains a number of features that beginners often miss. This leads to dampening of the wood, the appearance of fungus and other negative consequences. Therefore, before we begin to describe the finishing technology, I will give some requirements that you need to know in order to avoid these negative consequences:
- You can begin all finishing work only after the house has settled. The shrinkage period depends on the type of material and wood; for example, a house made of rounded logs shrinks the fastest. Buildings made from debarked logs take the longest to settle.
On average, the shrinkage period is one and a half years; - it is necessary to properly ensure steam and heat insulation of the walls so that moisture does not accumulate on their surface;
- All wooden elements before finishing it is necessary to treat with protective impregnations, preventing wood from rotting and protecting it from other biological influences.
In addition, we should not forget about the aesthetic side of the issue. Therefore, you need to decide in advance what you want the house to look like - you can keep it natural appearance or hide the logs under finishing materials.

Exterior finishing by hanging method
The finishing of any house, including a wooden one, includes two stages - exterior and interior decoration. First of all, let's look at how to finish the facade.
As a rule, such an operation is required to insulate the house, and also if the building is dilapidated and requires updating its appearance. The best option finishing the facade of a log house is the “curtain facade” technology.
Among its advantages, several important advantages can be identified:
- no wet work is required, which is contraindicated for wood;
- allows you to maintain the vapor permeability of the house, due to which a favorable microclimate for humans is formed inside the home;
- imitation logs for exterior finishing or lining under the timber will allow you to preserve the natural appearance of the timber structure.
The process of finishing a facade using this technology consists of several stages:

Below I will look at each of them.
Preparing the walls
Preparation is a very important stage that cannot be neglected, since the durability of the walls, thermal insulation and some other operational qualities of the housing depend on it. The preparation is as follows:
- First of all, you need to dismantle with your own hands all the hanging elements of the facade that may interfere with further work. These include antennas, visors, ebbs, etc.;
- Next, the walls need to be covered with protective impregnation. This can be done using a paint brush, or even a sprayer. detailed instructions information on the use of impregnation is on its packaging;

- then you need to insulate the gaps that usually appear between the crowns after the log structure shrinks. For these purposes, you can use tow or more modern materials, for example, polyurethane cords. The space between the crowns can be filled with construction sealant, which is applied on top of the insulation.
This completes the façade preparation process.

Frame installation
Now you need to make the frame. As a rule, beams or boards are used for this, which are attached to wooden walls using metal corners or brackets.
If the house will be insulated, in addition to wooden beams, the following materials will be needed:
- insulation – mineral mats that do not burn, are environmentally friendly and have vapor permeability are perfect;
- vapor barrier film.
The instructions for installing the frame look like this:
- installation of the frame should begin by fixing the vapor barrier film on the walls. For these purposes, you can use a construction stapler;
- then you need to secure the vertical posts using metal corners or brackets. At the same time, it is very important to arrange them correctly - in one vertical plane so that the walls of the facade are smooth.
To do this, during the installation process you must use building level. In addition, threads can be stretched between the two outermost posts from the corner, which will help align the intermediate posts.
It should be noted that the distance between the posts should be a couple of centimeters less than the width of the mineral mats. This is necessary so that the latter fit tightly into the space of the frame;

- When the frame is mounted on all external walls, you can begin to insulate them. To do this, you need to lay the mats in the space between the posts. In this case, you need to ensure that there are no gaps between the mats, which will subsequently serve as cold bridges;
- Now you need to secure another layer of vapor barrier film on top of the frame using a stapler. It should be noted that the second layer of film, like the first, must be overlapped, and the joints can even be taped. This is necessary so that moisture from the outside cannot penetrate into the insulation;
- A counter-lattice is attached to the posts on top of the film, which can be positioned either vertically or horizontally, depending on the type of material with which the frame will be sheathed.
This completes the frame installation process.

Sheathing
Decorating the outside of a log house can be done with different materials:
- wooden finishing materials - these include lining, blockhouse, imitation timber, etc.;
- vinyl siding;
- metal siding imitating timber or logs.
Finishing a house with log-like metal siding or a vinyl analogue is carried out as follows:
- From below, along the perimeter of the house, the starting profile is installed using self-tapping screws. During this work, it is necessary to ensure that the profile is positioned strictly horizontally;
- then corner profiles should be fixed to the corners of the house, which are also adjusted using a level;

- Next, the siding itself is installed. To do this, its lower part is inserted into the starting profile, and the upper part is attached to the counter-lattice using self-tapping screws. If necessary, the panels outermost from the corners can be cut with a hacksaw;
- The second row of panels is installed using the same principle, with the only difference being that the lower part of the siding is connected not to the starting profile, but to top part top siding;
- Before installing the last row of siding, the finishing profile should be secured around the perimeter of the walls.
When installing siding, the screws should be placed in the center of the oblong holes. Moreover, the caps need to be underturned by a few millimeters so that the panels can move freely under the influence of thermal expansion.
Wooden lining is installed in approximately the same way. The only thing is that when installing it, starting profiles are not used, and the panels themselves are connected using a tongue-and-groove lock. In this case, the lining is attached to the sheathing with self-tapping screws or special fasteners - clamps, which in turn are fixed with self-tapping screws.

Brick cladding
Cladding walls with brick is a more complex and expensive way of finishing the facade of a log house, which radically changes its appearance. Therefore, it is most often used for finishing old houses that have lost their geometry and attractive appearance.
The cladding process begins with preparing the walls of the house according to the scheme described above. Further work is carried out in the following sequence:
- First of all, it is necessary to prepare the foundation for the facing walls. As a rule, a shallow depth is sufficient strip foundation. On our portal you can find separate articles devoted to the arrangement of strip foundations;
- After the foundation concrete has hardened, its surface must be waterproofed. For these purposes, as a rule, roofing felt is used, which is laid in several layers;

- then the masonry is erected. It must be said that facing masonry requires a highly qualified mason, so it is better to entrust this work to specialists. The price of this service starts on average from 10-13 rubles per brick.
Keep in mind that every three rows of masonry must be connected to the main wall with flexible ties. The latter should be located in increments of no more than 250 mm in one row.
In addition, ventilation must be provided from below in the wall and from above under the canopy. To do this, the ends between the bricks are not filled with mortar. Ventilators will provide ventilation of the space between the walls.
Here, in fact, are all the main nuances of facing a wooden house with brick. The only thing I’ll finally note is that with this type of finishing, the walls can also be insulated with mineral mats. The latter are fixed with umbrella dowels and flexible ties.
A vapor barrier film must be attached over the thermal insulation. In this case, an air gap must be left between the thermal insulation and the facing wall.

Finishing from the inside
Interior decoration involves work on the ceiling, floor and walls. True, the process of finishing the floor and ceiling does not contain any special features. Therefore, further we will consider only the technology of wall finishing, which raises the most questions among home craftsmen.
It must be said that in the process of finishing walls, their insulation is carried out very rarely. This is due to the following reasons:
- After thermal insulation, walls stop heating from the inside;
- condensation appears between the wall and the thermal insulation;
- insulation reduces the space of the room.
However, in some cases it still makes sense to perform thermal insulation, for example, if external insulation was not enough or if a log steam room is being finished. Therefore, next we will consider how to finish the walls and at the same time insulate them.
I’ll say right away that it is better to refuse to use plaster, since the plastering process is quite labor-intensive and “wet”. In addition, the plastered surface is not durable.
Thus, it is best to finish a wooden house using a dry method. This work includes the same stages as exterior finishing:
- wall preparation;
- frame installation;
- sheathing

The process of preparing walls includes caulking and treatment with a protective composition according to the scheme described above. Further work is carried out in the following sequence:
- If you plan to insulate the walls, then you must make a ventilation gap, which will ensure removal. To create such a gap, it should be mounted on the wall. wooden slats, arranging them with horizontal belts in increments of about 50 cm;
- Next, a vapor barrier film must be secured over the slats. The latter must be positioned stretched so that a ventilation space is formed between the wall and the film;
- Now you can fix vertical racks on the walls. It is best to use wooden beams for this. They are installed in the same way as for exterior wall decoration;
- Then the wiring is laid in the space of the frame, the wires are brought out for sockets and switches. After this, mineral mats are laid in the space between the racks;
- then another layer of vapor barrier film is attached to the frame on top of the insulation.

Further work depends on the type of material that will be used to cover the frame. For example, if imitation logs for interior decoration or lining are used, then the boards are positioned horizontally and fixed to the frame with self-tapping screws.
The boards are connected to each other using a tongue/groove joint. After covering the frame, the lining or imitation log should be coated with protective impregnation or varnish. At the same time, the walls will retain their natural attractiveness.
Log baths are insulated using the same principle. The only thing is that instead of a vapor barrier film, you can use penofol under the lining.

If you want to give the walls a more traditional look, for example, cover them with wallpaper, the frame should be covered with plasterboard. In this case, the finishing is more complex and time-consuming:
- The fastening of plasterboard sheets to the frame is carried out with self-tapping screws, which are located in increments of no more than 25 cm. The sheets should be placed so that the joints fall on the frame beams. The caps of the screws must be recessed, otherwise they will interfere with further finishing;

- then chamfers about 5 mm wide should be cut from the ends of the sheets;
- then reinforcing self-adhesive tape is glued to all sheet joints;
- After this, two layers of primer are applied to the surface of the drywall using a paint roller or brush. The primer should lie in a thin, uniform film without drips;

- Next, you need to cover the joints of the sheets and the heads of the screws with starting putty;
- then you need to cover the entire surface of the walls with starting putty, using a wide spatula or small trowel. Try to apply the composition in a uniform, even layer, several millimeters thick.
During the filling process, perforated aluminum corners must be glued to the outer corners;

- after the putty has dried, the surface must be sanded with coarse sandpaper or a special mesh;
- then the surface of the walls must be wiped with a damp cloth and primed again;
- then apply the finishing putty in a thin layer;
- at the end of the work finishing layer need to be thoroughly sanded with fine sandpaper, eliminating all flaws on the surface of the walls.
After such a rough finish, you can use almost any finishing materials, be it paint, wallpaper or even tiles.
Conclusion
Finish a log house, be it a facade or interior walls, preferably using “dry” methods. The only thing is that this work requires strict adherence to technology. Otherwise, the durability of the walls can be significantly reduced.
See the video in this article for more information. If you have any questions regarding the finishing of the log house, ask them in the comments, and I will be happy to answer you.
October 4, 2016If you want to express gratitude, add a clarification or objection, or ask the author something - add a comment or say thank you!
It is obvious that interest in suburban housing, in general, and wooden houses in particular, has grown. We can say that wooden houses are experiencing a rebirth. If previously people bought houses built many years ago and then remodeled them to suit themselves, now many houses are built from scratch and made of wood. And this fact cannot but rejoice. Where else if not in Russia would you like to see beautiful wooden houses, in which you can immediately recognize the famous traditions of Russian architects, and not the meaningless and ugly pile of bricks with which we were “clogged” in the 90s. Where else if not in Russia is it nice to see modern and - regular and rounded, as well as from timber, which have preserved traditions and are made using new technologies.
Observers are interested in seeing the external beauty of a wooden house, and their owners also want to see the internal beauty of their home. And at the same time, you don’t want to give up the benefits of civilization, and why? Therefore, finishing the inside of a wooden house is a complex and multi-level process, which is intended to become a kind of bridge in time. A bridge between centuries-old folk traditions and modern benefits of civilizations. In this case, neither one nor the other party should be disadvantaged. Is it possible? Practice shows that yes!
Requirements for the interior decoration of a wooden house
Wood is a unique natural material that will never surpass any artificial one, which they try to impart the properties of what Mother Nature created. It’s not for nothing that so many floor and wall coverings are made to look like wood. Wood-look laminate, wood-look MDF panels, wood-look ceramic tiles and many other things made to look like this material. Why is this being done? Is it really not possible to just use this same tree and not do anything at all? Of course you can! People will always build wooden houses, but one must understand that in addition to the obvious advantages, wooden houses also have weaknesses.
The fact is that we are not the only people who love trees. It is also loved by other inhabitants of our planet, who perceive it as food or as a home for themselves. We cannot ignore their needs, so we are forced to take this into account. For this purpose, certain barriers are made in the form of chemicals that will repel unwanted living creatures. And measures for the biological protection of a wooden house are taken precisely at the stage of interior finishing.

Wood is loved by another one of the most beautiful and powerful elements of our world - the element of Fire. And there is no escape from this either. We, as humans, cannot make Fire stop loving the tree. We can only take measures to ensure that there are no conditions for its uncontrolled occurrence in our home. That is, we can also “agree” with Fire if we take certain measures. The first measure is to reduce the likelihood of its development, and the second is that even when it appears, you need to resist to the last, you need to prevent it from burning unhindered. Fire protection measures are also carried out at the stage of interior finishing of a wooden house.

A modern wooden house is very different from its “distant ancestors”, where the only engineering systems were a stove and lamps. The energy supply of housing in our time is very high. This includes electrical wiring, a heating system, a water supply system, a sewerage system, computer networks, a telephone, video surveillance, and television. All these engineering systems require space for their placement; they must be designed and made in such a way as to perform their functions and be safe for the house and the people living in it. And all these activities are also done at the stage of interior finishing of a wooden house.
If previously wood was the most common and affordable building material, now it has become elite and building a wooden house is far from a cheap pleasure. For all the undoubted advantages in the form of environmental friendliness, hygiene, and aesthetics, you have to pay a lot of money. And, of course, when decorating the inside of a wooden house, you should use only those materials that will only highlight all its advantages.
Taking into account all of the above, we can present a set of requirements for the interior decoration of a wooden house:
- Firstly, the interior decoration of a wooden house should include measures for biosecurity and fire protection of the house. This is done with the help of special compounds, which, in addition to the protective function, can also perform a decorative function.
- Secondly, the feature wooden houses is that it is impossible to make walls or make concrete screeds, how in stone houses. It turns out that all engineering communications have to be hidden behind the interior decoration.
- Thirdly, at the stage of finishing a wooden house, the walls are also caulked and additional insulation is carried out, if required.
- And finally, when finishing a wooden house inside, most natural materials should be used for completely understandable reasons. Very often it is justified not to cover the walls or ceiling with anything at all, but to leave them open, having previously treated them with protective and decorative compounds.
The peculiarity of wooden houses is that they shrink, and this process can last for several years. This cannot be ignored during interior decoration, so it is done in stages. Let's call these stages:
- Treatment with bioprotective and fire retardant compounds.
- Caulking (caulking) of walls.
- Laying utility lines.
- Interior wall decoration.
- Ceiling arrangement.
- Floor covering.
- Staining and painting.
Treating a wooden house with antiseptics and fire retardants
As mentioned earlier, wood needs protection both from adverse factors environment, so from various representatives of the world of plants, fungi and animals. Of the natural influences, wood least of all likes the effects of ultraviolet rays, which are present in the solar spectrum and destroy lignin - a compound that is the main one in the structure of woody wood cells. It is this that determines the ability of wood to withstand static and dynamic loads. When it is destroyed, we can observe how the surface of the logs or timber becomes dry, rough and loses its natural color.

The worst thing for wood is fungal infection, and it can be wood-staining or wood-destroying. If the first only creates stains on the surface, but does not affect physical and chemical properties, then the second leads to destruction of the structure. This process is known to us as putrefaction. And if someone claims that it is possible only at high humidity, they will be wrong, since already at a level of 18-20% destructive fungi can develop quite successfully. Primary humidification and lack of air exchange will only promote their growth, since further moisture will be obtained from rotting products.

Some fungi are capable of infecting a tree only during its life, while others, more dangerous for us, develop already in cut down trees. Therefore on good production The wood is protected immediately in order to ensure protection during storage, transportation and construction. But such protection is short-lived and lasts from 2 to 6 months, which, in principle, is enough for construction. But only then should you use a longer-acting composition. What to pay attention to when choosing.
- Firstly, you should take into account the validity period of the composition; the longer it is, the better, but also more expensive.
- Secondly, each composition has its own purpose: for external or internal processing, special compositions for baths, for terraces and railings, for processing the ends of logs, etc.
- Thirdly, it is necessary to take into account the composition of the antiseptic. Preferred materials on water based.
- Fourthly, it is imperative to take into account the effect of the composition on the human and animal body. Some products are strictly not recommended for indoor use.
- Fifthly, some protective compounds are recommended to be used together with protective coatings: wear-resistant varnishes or paints.
- Sixthly, you need to take into account the area to be treated and the number of layers required.
- And, finally, it is advisable to familiarize yourself with the experience of using a specific composition, and not read it on the manufacturer’s website or on a thematic forum, but personally verify the effectiveness using the example of a specific treated structure. This way you can be sure of the optimal price-quality ratio.
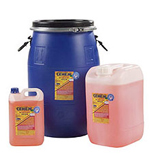
Let us give a brief overview of some of the most common antiseptics in Russia, produced by the Senezh Preparations company, which are known under the Senezh brand. These drugs have proven themselves well in Russian conditions.
| Image | Name | Description |
|---|---|---|
 | "Senezh Aquadecor" | Designed for long-term protection against precipitation, UV radiation, wood-boring insects and various fungi. It has a toning effect and is made on an acrylate base. |
 | "Senezh Ecobio" | Designed for indoor use. Protects against insects and all types of fungi. The protection period is up to 25 years. Water-based composition. |
 | "Senezh Ultra" | A universal water-based protective composition that can be used both inside and outside. Validity period – up to 30-35 years. Gives the treated wood a pistachio tint. |
 | "Senezh Bio" | Universal preservative water-based, hard-to-rinse antiseptic for severe operating conditions. Validity period is 30-35 years. Gives the tree a greenish tint. |
 | "Senezh Ognebio Prof" | Created for comprehensive protection indoors and outdoors under a canopy from insects, mushrooms, as well as from fire and the spread of fire. Water-based composition. |
 | "Senezh Tor" | Designed to protect the ends of large logs from uneven drying, cracking and biological damage. Can be used to protect the ends inside structures. Composition on a water-borne polymer base. |
The table shows only some protective drugs from the Senezh Preparations range, which, in principle, show areas of application. In addition to this manufacturer, there are other well-known world brands Tikkurila, Belinka, Pinotex and others. For each home, depending on the operating conditions, specialists select those that will complete their task. Water-based compositions can be used as primers before finishing varnish or paint, which increases their protective properties and service life.
The compositions are applied to dry wood, cleaned of dirt and dust. Application methods are standard: brush, roller or spray. Autoclave processing is carried out only in industrial conditions. Typically, any composition is applied in at least two layers. The consumption of a particular preparation depends on its specific brand and the condition of the wood. In any case, you must use the instructions for use included with each product.
 One of the best ways to apply protective compounds- this is spraying
 Video: How to choose an antiseptic for wood - fire protection, bioprotection, bleaching agents and impregnations
Caulking the walls of a wooden house
With all their advantages, wooden houses have significant drawback– they shrink, and over a fairly long period of time, and also experience seasonal fluctuations in geometric dimensions. This can lead to cracking of solid wood, and also leads to the fact that the seams between logs or beams also change in size and there is no way to do without compaction.
Natural materials for caulking
Since time immemorial, architects naturally knew about this problem and took measures to seal the seams, which was called caulking or caulking. For these activities, three main materials were used:
- Caulk with moss. This method is the oldest and most time-tested. The material used was cuckoo flax, a moss that grows in abundance in forests and also in marshy meadows. Most people probably know the tufts of this moss in the form of soft, bright green cushions. Another type of moss that has been used and is still used is sphagnum, which grows in abundance in swamps; you can get it in required quantity is not difficult.

- Sealing seams with tow. This material, based on coarse linen, is still used today, especially at the stage of building a log house. Excellent insulating properties, centuries-old traditions and low price determine the widespread use of tow.

- Hemp caulking is done with special ropes made from jute or hemp fiber. These natural materials They are now widely used to give the seams an aesthetic appearance, which only emphasizes the natural naturalness of the house.

Primary caulking is always done during the construction of the log house or immediately after. The secondary one is done after the final one after its shrinkage, that is, after 18-24 months. Although these works seem simple, they require special care, since caulking is done first from the outside, and then from the inside, and you need to move one crown after another from bottom to top and nothing else. In no case should you seal the seams on a single wall, since the log house can greatly change its geometry - it can become skewed.
For these works, a very simple tool has been used, proven over the centuries. This is a set of special caulking blades and a wooden mallet. Caulks are often made of wood so as not to damage logs or beams during insulation. Dried natural insulation twisted into bundles and neatly driven into the inter-crown gaps. You can watch the caulking technology in the video.

Natural materials for caulking, of course, have advantages precisely in the form of their naturalness. But it would be stupid in the 21st century not to consider other options for sealing crown joints, especially since science and production technology have come a long way since our distant ancestors had no choice but moss or hemp. Weak points natural insulation materials are:
- Any natural insulation in inter-crown gaps is still a foreign material that reacts differently to the effects of temperature and humidity than wood. As a result, gaps will inevitably appear and repairs will need to be made periodically.
- Natural fibers are not only attractive to humans, so rodents and birds will want to steal some of the valuable fiber for their nests whenever possible. For insects, this is generally an ideal habitat.
 Filming from the crime scene. Theft of oakum by birds on an especially large scale
 - If the humidity in the joints reaches critical values, then it is natural materials that will contribute to the development of fungal infections of the tree. Poorly executed caulking, on the contrary, contributes to the rotting of the log house precisely at the joints.
Video: Caulking a bathhouse log
Synthetic materials for caulking a wooden house
Acrylic ones are rightfully considered to be the first among synthetic sealants for wooden houses. And this happens for obvious reasons:
interventional sealant
- Acrylic compositions have thermal conductivity and coefficient of thermal expansion very close to wood, which allows them to respond equally to temperature changes.
- Acrylic primers have very good adhesion to wood, they penetrate deep into the wood, forming an almost monolithic structure, they also have good elasticity and long term services.
- Acrylic-based compositions have excellent bactericidal and antiseptic properties. There will be no living creatures in seams treated with acrylic sealants.
- Acrylic primers are available in a wide range of colors, which allows you to realize any design idea. In addition, they can easily be painted after drying.

- Acrylic based sealants intended for interior works, absolutely harmless to humans and animals.
- Acrylic sealants are very easy to apply. The main condition is a temperature above +5°C and relative dryness indoors or outdoors.
The high price of acrylic sealants is more than offset by their undoubted operational advantages.
Polyurethane-based sealants have also found use in caulking joints with synthetic compounds. Although they have good adhesion to wood, their thermal conductivity and thermal expansion are different from wood. That is why it is better to use acrylic sealants.
On our portal, the process of selecting an interventional sealant and its correct application described in sufficient detail in the corresponding . We will simply give a few examples of acrylic-based sealants, and also provide readers with the opportunity to calculate their approximate quantity depending on the width and depth of the seam.
| Image | Name | Brief description of the sealant |
|---|---|---|
 | Acrylic sealant Energy Seal, packaging – cartridges 325, 840 ml, bucket 19 l. Country of origin - USA. | Designed for sealing narrow and normal seams, as well as cracks up to 2.5 cm wide. Can be used both indoors and outdoors. Available in 12 colors. |
 | Acrylic sealant Perma-Chink, packaging – cartridges 325, 840 ml, bucket 19 l. Country of origin - USA. | Designed for sealing wide joints - from 2.5 to 15 cm. for indoor and outdoor use. Available in 8 colors. |
 | Acrylic sealant Therma Chink, packaging 600 ml, 7 kg, 15 kg. Country of origin: Russia. | For sealing the seams of wooden houses both outside and inside the house. Available in 5 colors. |
 | Acrylic sealant Eurotex, packaging 600 ml, 3 kg, 6 kg, 25 kg. Country of origin: Russia. | For sealing the seams of wooden houses both outside and inside the house. Available in 4 colors. |
The table intentionally shows two impeccable quality sealants made in the USA and two sealants Russian production also very good quality. For comparison, we present the order of prices for imported goods and import-substituted ones and make sure that the domestic manufacturer should still be trusted. For example, a bucket of 19 liters of Energy Seal sealant will cost 33,000 rubles as of the summer of 2016, and 15 kilograms of Russian Therma Chink will cost 7,500 rubles. If converted to kilograms, then 1 kg of imported sealant will cost 1089 rubles, and 1 kg of Russian sealant will cost 500 rubles. Therefore, the choice is yours, our dear readers.
For an approximate calculation of the quantity, we present a calculator with which you can calculate the approximate amount of sealant. It is very difficult to accurately calculate the quantity, since the seam between logs or beams rarely has strict geometry, and the consumption is very dependent on the qualifications of the craftsman.
Calculator: Calculation of the amount of acrylic interventional sealant
Any professionally made building made of wood in the form of a log house always attracts attention; properly tinted and sanded wood amazes with the beauty of the natural texture of the material. But few outside observers know how much work and effort is required to maintain the structure in all its glory. Folding a chopped wooden box is only half the battle; after construction is completed and the shrinkage processes are completed, finishing operations to protect the wood and interior finishing of the log house must be carried out. The decoration of the house will have to be updated every 3-4 years.
Initial and ongoing finishing work
The initial finishing of the log house is carried out at the stage of laying rounded logs or profiled timber. During shrinkage processes, tow made of flax and jute fiber laid between the crowns fills and seals the cracks, thereby preventing warping of the crown joints. After shrinkage is completed, after 15-18 months, only individual fragments will remain of the jute seal laid in the cracks, so the finishing of the log house after shrinkage is done practically from scratch in the following sequence:
- The protective antiseptic coating of wood is restored;
- Using jute rope, flax tow, or even certain varieties of dried sphagnum moss, “wet” caulking of the sealing material is carried out in cracks larger than 1 mm;
- Finishing work of external wall surfaces;
- Subfloors inside the house are removed and insulation is restored underground space ground floor, a finished plank floor or parquet is laid.

In this case, not only the inter-crown joints are caulked, but also the gaps and cracks between the door and window boxes, corner locks and all places where timber or logs are joined. The cracks are sealed with tow or fiber, generously moistened with an antiseptic composition. Sometimes, to increase the durability of jute rope, it can be additionally impregnated with paraffin or linseed oil.

For your information! Most The primary post-shrinkage finishing of log houses is best done a couple of months before the end of shrinkage and rough acceptance of the building. In this case, with slight shrinkage, the quality of filling cracks on the internal surfaces only increases due to the pressing of the laid material with the crowns.
As soon as the cracks are dealt with, the floors, door and window openings are restored, and thus waterproofing and conditional tightness of the internal space is ensured, it will be necessary to apply a protective coating on the external surface of the walls of the building, and only after this the decorative finishing of the log house inside the room is carried out.
The outer walls of the log house are traditionally tinted to match expensive types of wood and covered with protective varnishes or non-drying linseed oils. Under the influence of solar ultraviolet rays, oil or varnish coating turns into dense and resistant to water and air oxygen protective layer. Log wood left to itself without protective coating inevitably fades and acquires a grayish-whitish tint. Sometimes this happens due to an error in the technology of building a log house, and then the walls of a beautiful and warm building have to be closed exterior decoration from clapboard or even siding.

Decorative finishing inside the log house
Exactly how the interior of the premises inside the log house should look is developed and planned by the designer at the stage of drawing up the preliminary design. There are not so many options for interior decoration for rooms whose walls are made of rounded logs:
- Natural style with minimal interference in the texture and pattern of the walls. In this case, to finish the log house, technological techniques can be used that reveal the texture of the surface of the log or timber and at the same time mask interventional seal on the walls;
- Wall decoration with additional panel boards made of lining or decorative strips. In the simplest case, the inner surface of the walls is sewn to match the color and texture of the timber or log from which the frame is assembled;
- The use of standard plasterboard boards or decorative plasters, facing with natural stone or ceramic tiles.
For your information! Despite the seemingly unusual idea of decorating wooden walls using modern finishing materials, the popularity of decorative plasters, ceramic tiles and photo wallpapers with 3D images is only growing.
Owners of wooden houses are increasingly impressed by the situation when the kitchen, bathroom and toilet, and sometimes the entire set of premises in the log building, are finished in modern style providing the maximum level of comfort. Therefore, in most cases, companies involved in the construction and finishing of wooden houses are increasingly offering customers log houses with the most neutral option of wall cladding with wooden lining, which can be easily converted into any of the modern interiors.
Decorating the walls of a log house in a natural style
When finishing a log house in its natural form, three finishing operations are assumed:
- Sanding, tinting the surface of log walls;
- Laying jute rope along the lines of inter-crown joints of walls;
- Finishing wood with a protective coating of water-soluble resins.
Grinding and polishing a rounded log or beam makes it possible to level and organize the surface of the wood during the finishing process, making it slightly matte. Often the surface of a timber or log is polished by machine or manually using special furniture polishes. The application of a protective coating to the internal walls of a log house is recommended by experts to enhance the color and texture of the wood.

This coating absorbs less moisture and collects house dust.
Finishing a log house with jute rope is, in fact, a necessary measure. Firstly, a jute rope can give a log house a more refined “marine” look, secondly, with the help of ropes the inter-crown joints are masked, and thirdly, a rope for finishing walls closes the gap and the draft blowing through the split joint.

The ropes are laid on the walls of the log house using special brackets or hot glue gun. Often, the joints between the crowns of a log house diverge so much due to temperature changes and under load that moisture begins to enter the room. In this case jute rope can play the role of an improvised wick that collects condensation, so the material must be impregnated with water-repellent and antiseptic compounds.

Options for wall finishing using lining and plasterboard
Most often, the owners of log buildings, when developing a project, immediately order wall decoration with a more practical decorative strip or coniferous lining. Flat walls made of tinted wood is much more practical and convenient to use Everyday life, and a wall shield assembled using tongue-and-groove technology allows you to successfully hide communication lines or wiring.
For small rooms Most often, direct lining of the lining is used on the wall of the log house, for large rooms for installation decorative panel a frame made of metal profiles can be used, similar to what is used for finishing walls with plasterboard sheets. Decorative finishing The plank allows you to form full-fledged walls and ceiling space, which can be covered with wallpaper, plastered or used any other type of finishing materials.

Conclusion
If the home owners initially planned to abandon wooden interior premises, then a better solution would be to use plasterboard sheets to finish the walls and ceiling. As a rule, this kind of scheme for cladding the walls of a log house is resorted to when the structure of the house “breathes”. In this case, the cladding of plasterboard slabs is assembled on a frame made of galvanized metal profiles. The frame itself is not attached to the log walls, but is suspended from the ceiling, leaving a small gap in the ceiling part, which allows you to preserve the plasterboard lining as the walls settle.